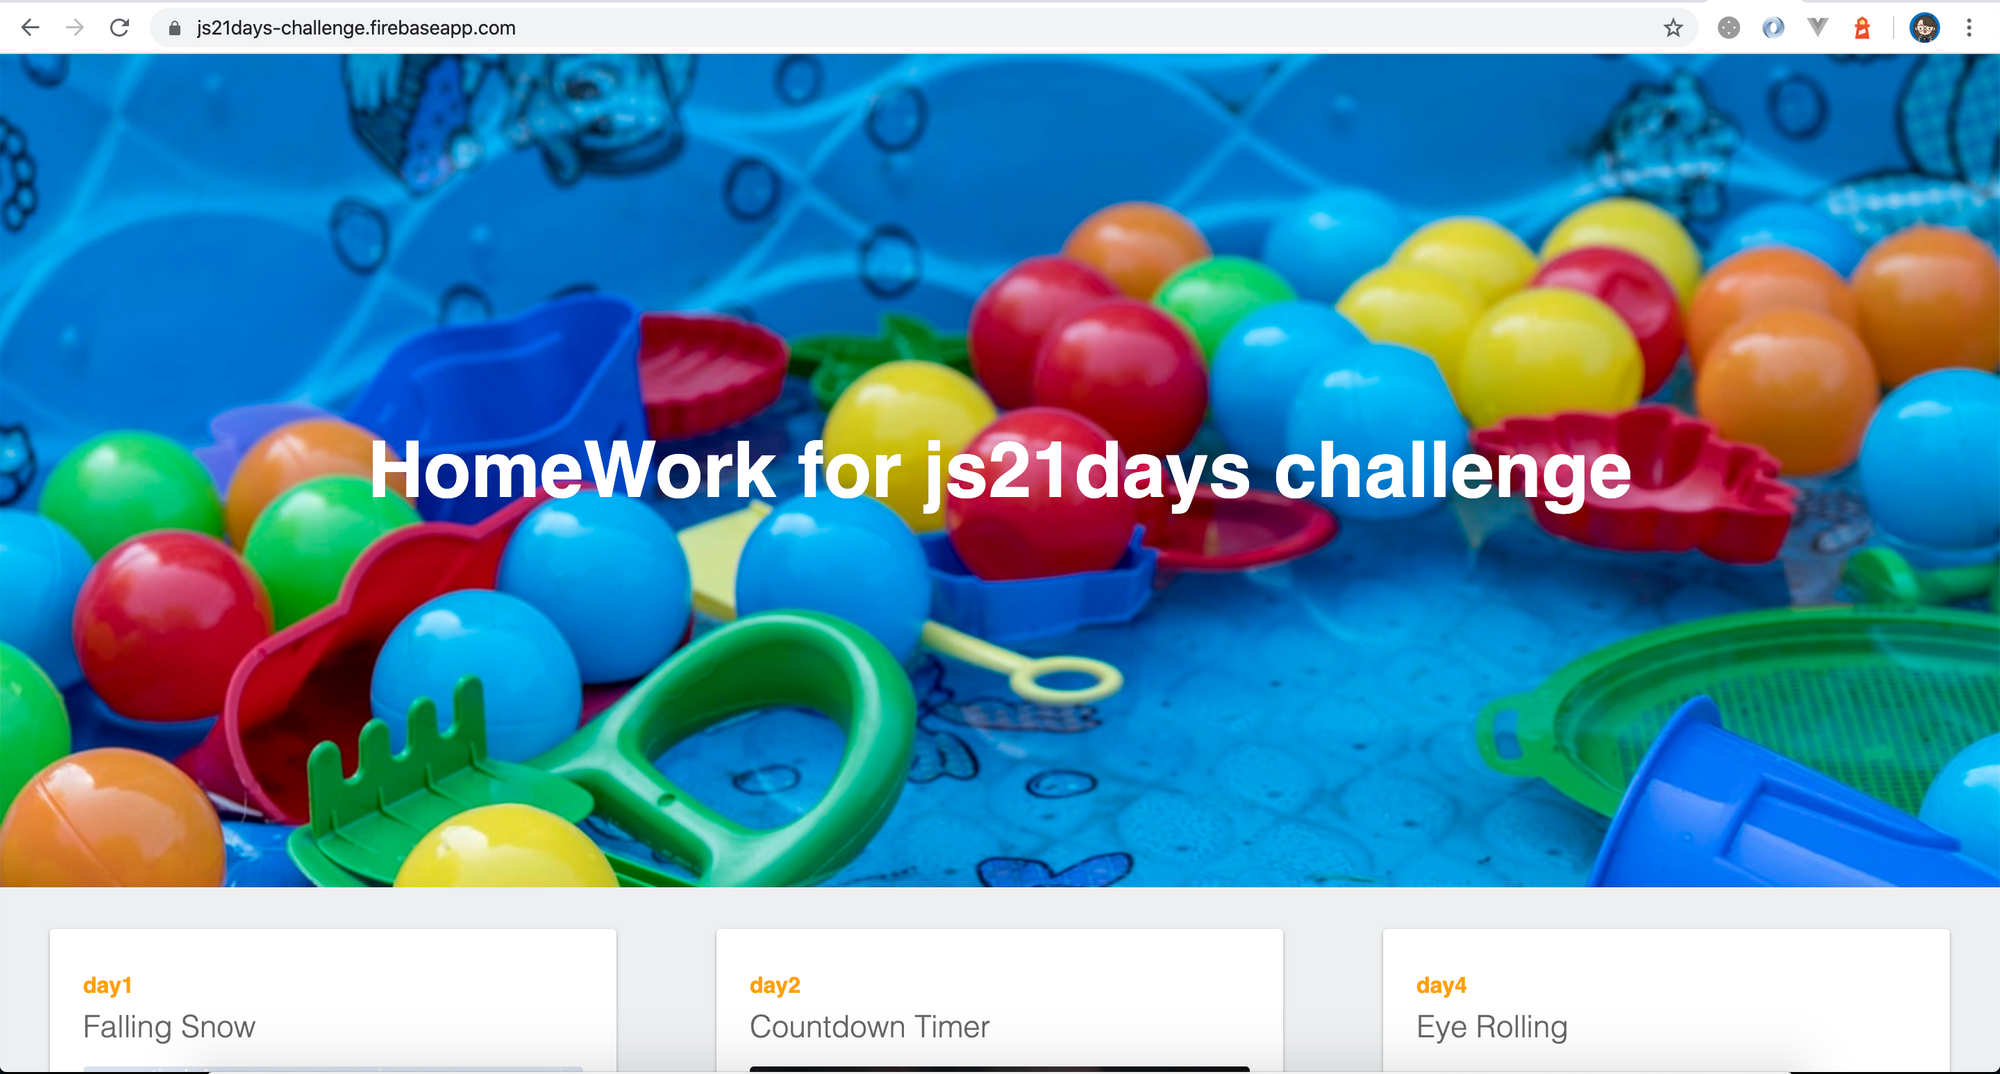
มาสรุปสิ่งที่ได้จาก js21days challenge [week3]
มาถึงช่วงโค้งสุดท้ายของคอร์สนี้กันแล้วนะจ๊ะ เลยมาเล่าเรื่องของการทำเว็บส่งการบ้านแบบสั้นๆด้วยจ้า เราจะใช้ Firebase Hosting เพื่อเพิ่ม site ใหม่ในโปรเจก Firebase ส่วนตัวของเรา จะได้เว็บส่งการบ้านนี้มา
การ deploy ขึ้นไม่มีอะไรมากมาย จะประมาณนี้
firebase deploy --only hosting:{your-site-name}
สำหรับบทเรียนก่อนหน้านี้
 Minseo Chayabanjonglerd
 Minseo Chayabanjonglerd
หน้าเว็บไซต์ของคอร์สนี้จ้า

ไม่รอช้า ลุยต่อให้จบเลยดีกว่าเนอะ
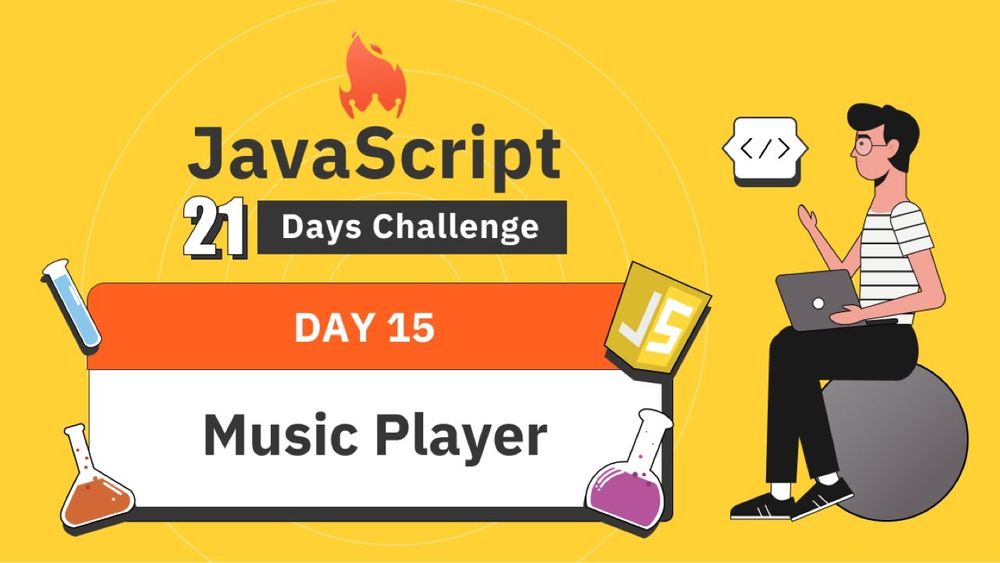
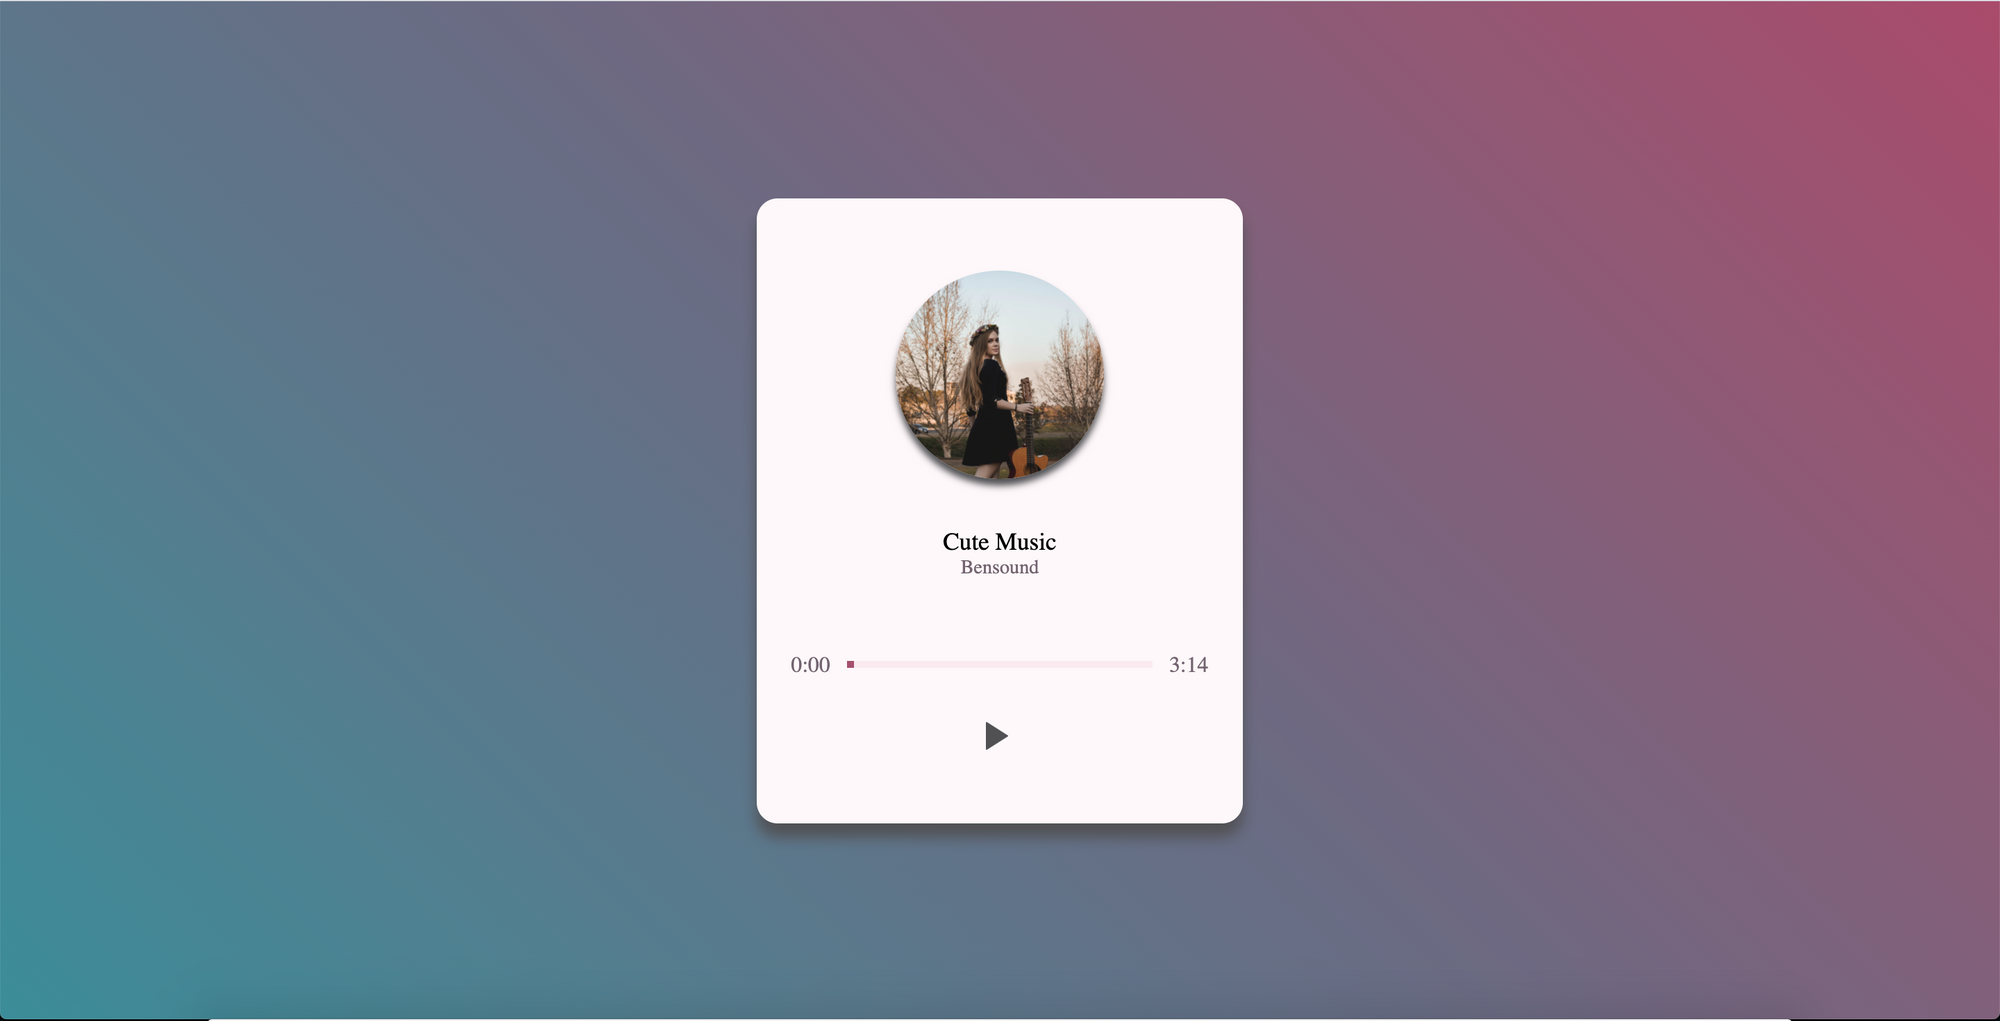
Day15: Music Player
มาเล่นเพลงในเว็บของเรากันเถอะ
- ใน
index.htmlจะมีหน้าตาของเจ้า player ทั้งตัว cover ชื่อเพลง progress bar ปุ่มเล่นปุ่มหยุดเพลง style.cssมี class.pauseและ.play- ใน
start.jsเราแตก element ต่างๆออกมาเพื่อนำไปใช้งานเนอะ - เพิ่ม event ให้กับปุ่มเล่นสักหน่อยจ้า
playButtonElement.addEventListener('click', onClick);
- แน่นอนว่า implement function นี้ไป เพลงเล่น แต่ ไม่สลับปุ่มเป็น pause ให้ กดไปเพลงก็ไม่หยุดเล่น และตัว progress bar ไม่ขยับ
function onClick() {
  audioElement.play();
}
- ต่อมาเพิ่ม condition ด้วยว่า ถ้ามันเป็น
pausedให้เล่น ถ้าไม่ก็หยุดเล่น และเปลี่ยนปุ่มด้วยนะ
if (audioElement.paused) {
  audioElement.play();
  playButtonElement.className = 'pause';
} else {
  audioElement.pause();
  playButtonElement.className = 'play';
}
- เพิ่ม event ในส่วนของ audio เพิ่ม
audioElement.addEventListener('timeupdate', onTimeUpdate);
- เรานำ current time ก็คือตอนกำลังเล่นเพลง
audioElement.currentTimeมีค่าเป็นวินาที มาแปลงเป็น mm:ss และนำไปแสดงในstartTimeElementส่วนเจ้าprogressBarElementใส่ value ไปเป็นaudioElement.currentTimeทำให้ตัว start time แสดงวินาทีที่กำลังเล่นเพลง พร้อมขยับ progressBar ไปด้วย
function getDuration(time) {
  const minutes = Math.floor(time / 60 % 60).toString();
  const seconds = Math.floor(time % 60).toString().padStart(2, '0');

  return `${minutes}:${seconds}`;
}

function onTimeUpdate() {
  startTimeElement.innerHTML = getDuration(audioElement.currentTime);
  progressBarElement.value = audioElement.currentTime;
}
- เพิ่ม event listener อีกตัวนึง คือ ดูว่าตัว audio ของเรานั้น โหลดเสร็จหรือยัง ถ้าเสร็จแล้ว แสดง duration และ set ค่า max ของ progressBar ด้วย
function onLoadedData() {
  endTimeElement.innerHTML = getDuration(audioElement.duration);
  progressBarElement.max = audioElement.duration;
}

function run() {
  audioElement.addEventListener('loadeddata', onLoadedData);
}
- ท้ายสุด มันต้อง seek ได้ด้วยเนอะ เพิ่ม event listener ที่ชื่อว่า
inputเกิดเมื่อตอนที่เราลากหรือเปลี่ยน progressBar จะทำให้เกิด event นี้ขึ้น ถ้าเรา seek ไปถึงจุดนึง จะเข้าonTimeUpdate()ทันทีเลยหล่ะ
function onInput() {
  audioElement.currentTime = progressBarElement.value;
}

function run() {
  progressBarElement.addEventListener('input', onInput);
}
- ช่วงเก็บงาน เล่นจบแล้ว ไปไหนต่อ ให้เปลี่ยนปุ่มกลับเป็นปุ่ม play และย้อน progressBar เป็น 0
function onEnded() {
  playButtonElement.className = 'play';
  audioElement.currentTime = 0;
}

function run() {
  audioElement.addEventListener('ended', onEnded);
}
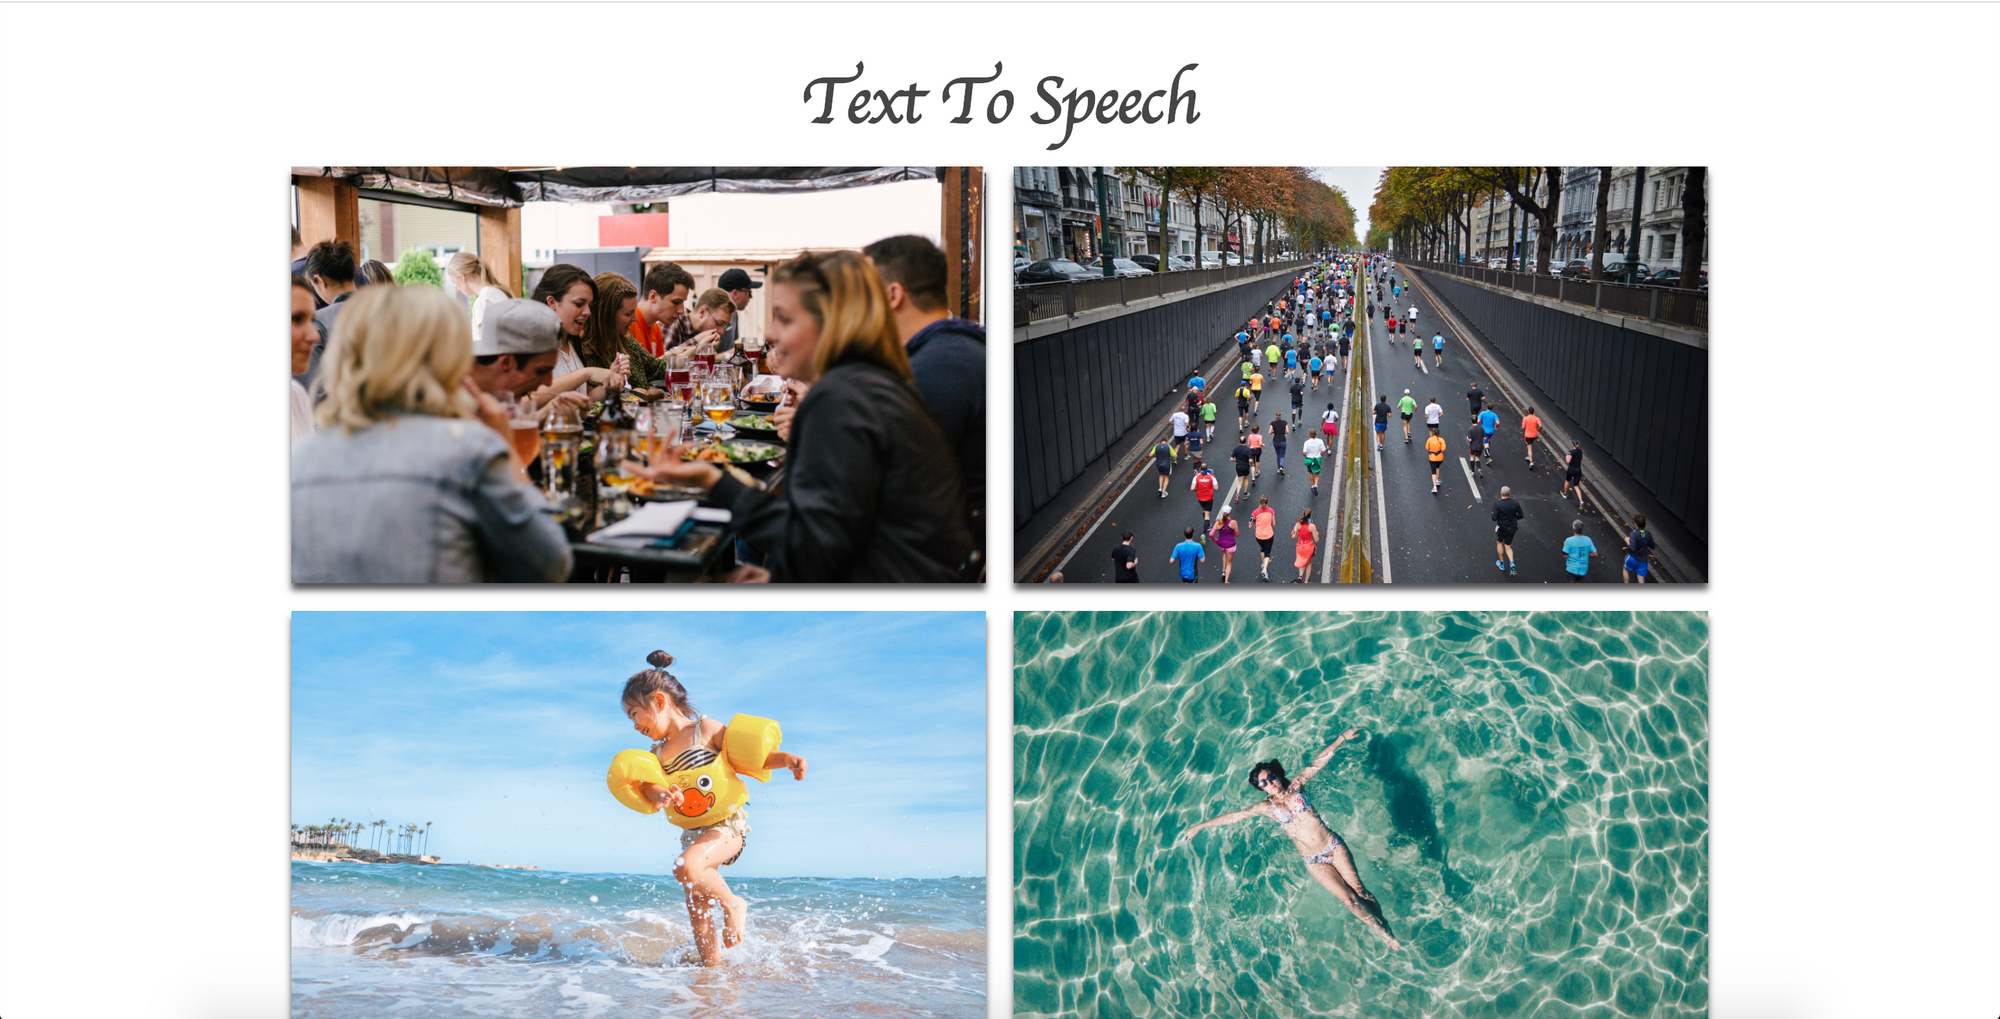
Day16: Text to Speech
เขาบอกว่าทำง่ายมากๆเลย อ่ะงั้นมาลองทำดูกันเถอะ
- ใน
index.htmlจะมีรูป ซึ่งจะมีaltเพื่อบอกคำบรรยายของรูป - สร้าง object
SpeechSynthesisUtterance()ขึ้นมาหนึ่งตัว เป็น Web Speech API เนอะ speechSynthesisเป็น object ที่ใน browser จะสร้างให้เราอัตโนมัติ และเราทำการเพิ่ม event เพื่อ set เสียงว่าเป็นภาษาอะไร
speechSynthesis.addEventListener('voiceschanged', onVoicesChanged);
- ใน
onVoicesChanged()ลองดึงเสียงออกมาทั้งหมดซิ ว่ามีเสียงอะไรบ้างspeechSynthesis.getVoices()
- จากนั้นเราจะ
findหาภาษาไทย เพื่อ set เสียงเป็นภาษาไทย
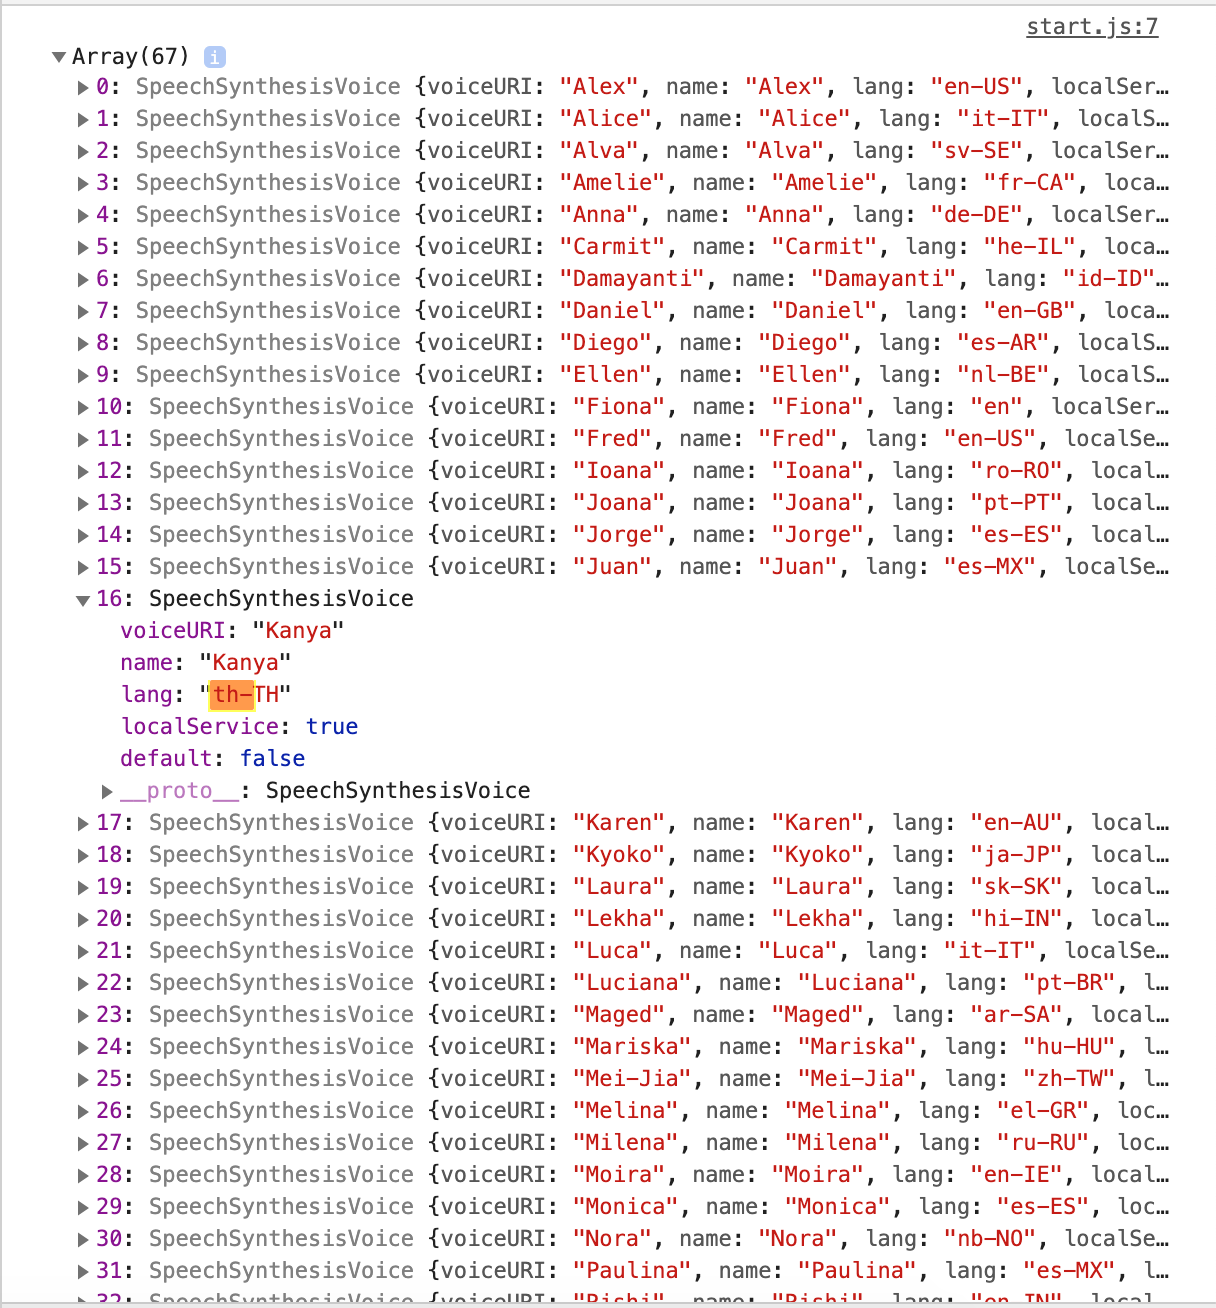
function onVoicesChanged() {
  const voices = speechSynthesis.getVoices();
  const thVoice = voices.find(voice => voice.lang === 'th-TH');
  message.voice = thVoice;
}
- get attribute ของรูปทั้งหมด และใส่ event listener ว่าให้คลิกแล้วพูดเสียง
const imageElements = Array.from(document.querySelectorAll('img'));
imageElements.forEach(
  imageElement => imageElement.addEventListener('click', onclick)
);
- จากนั้นเพิ่มให้อ่าน text ที่อยู่ใน
altเป็นอันจบพิธีกรรม
function onclick(event) {
  message.text = (event.target).getAttribute('alt');
  speechSynthesis.speak(message);
}
Day17: Speech to Text
- ตัว speak recognition ต้องการให้เปิด
index.htmlเป็น server ดังนั้นเราจึง install plug-in ที่ชื่อว่า "Live Server" ใน VS Code เนอะ
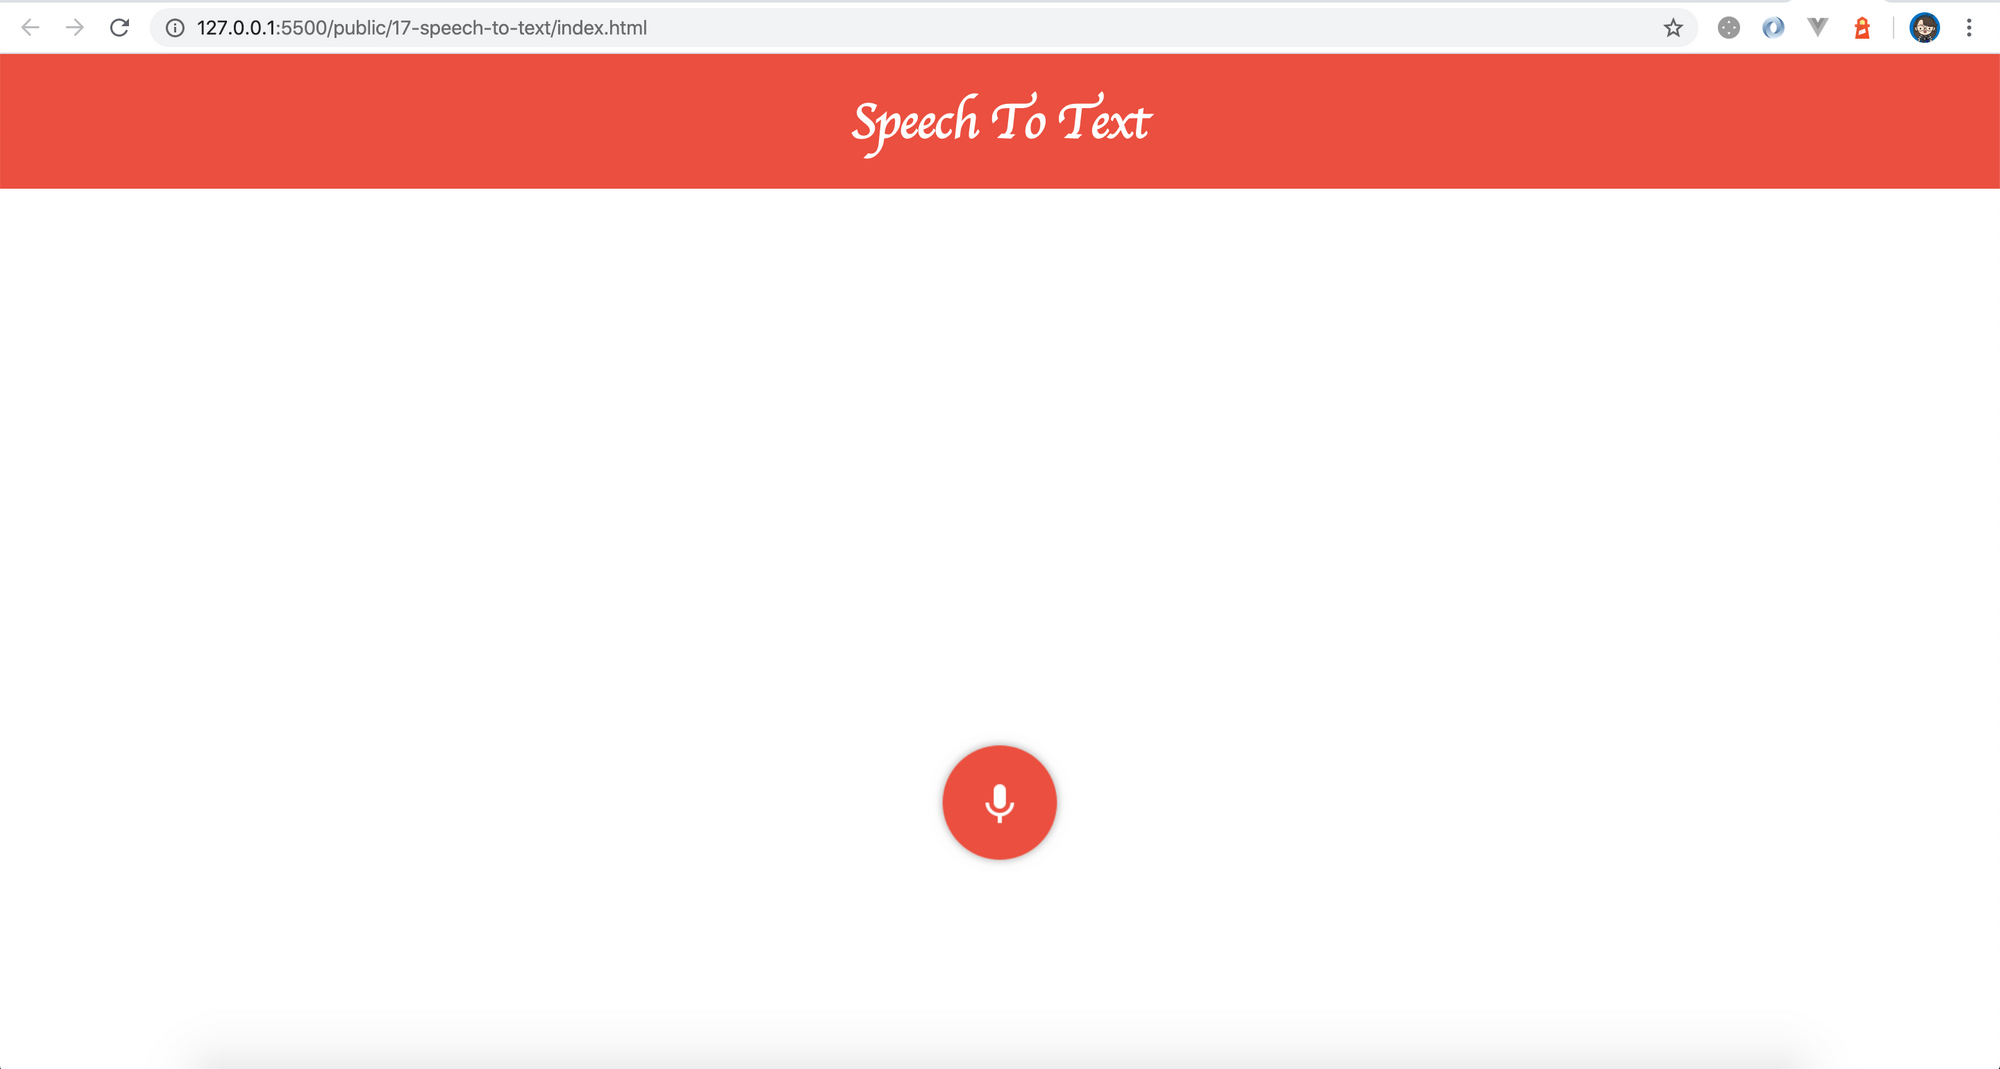
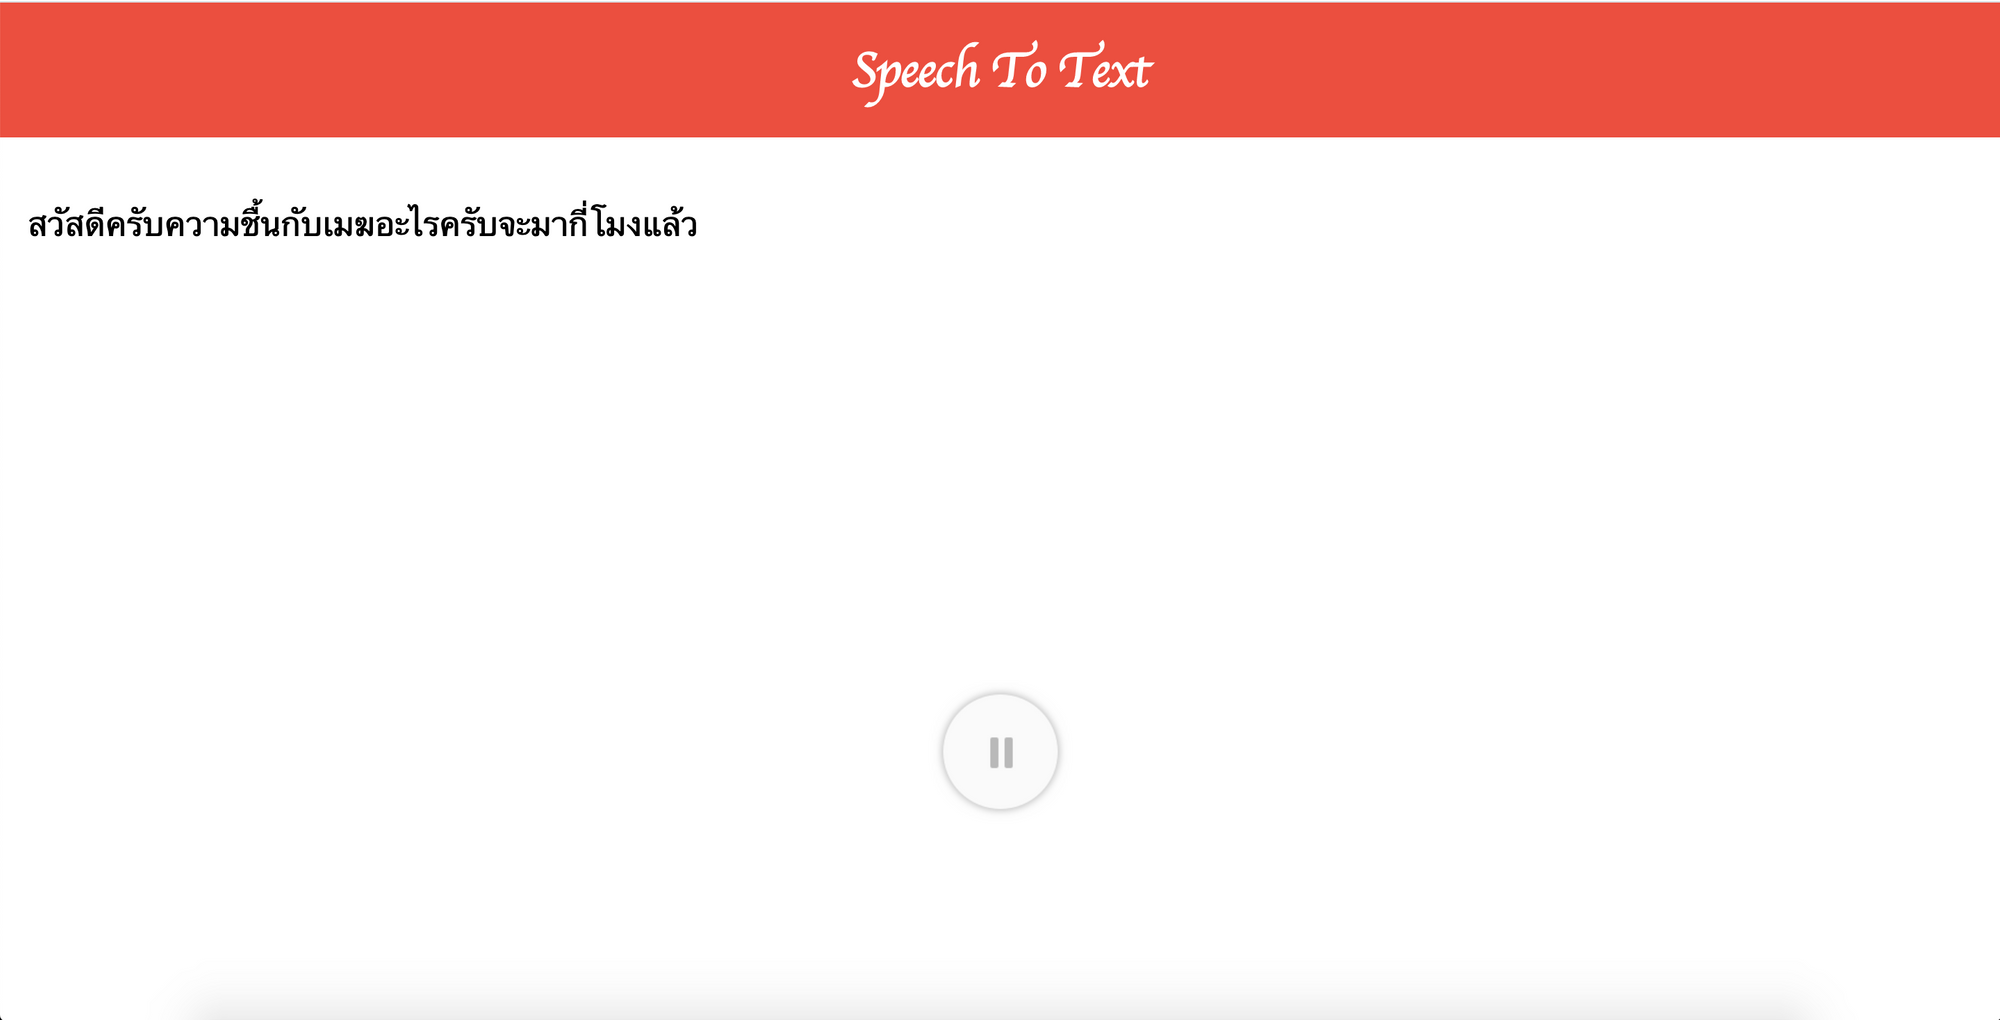
วิธีการใช้ คลิกขวาที่ index.html เลือก "Open with Live Server" จ้า

ผลที่ได้จะเปิดหน้าต่างให้เราเป็นแบบนี้
- ชื่อ class นี้ที่ใช้ในโปรเจกของเรา จะแตกต่างกันในแต่ละ browser ดังนั้นเราจะทำการ check ว่า ถ้าตัวไหน available อยู่ จะนำไปใช้จ้า ถ้าตัวซ้ายมี ใช้ตัวซ้าย ถ้าตัวซ้ายไม่มี ใช้ตัวขวา
window.SpeechRecognition = window.SpeechRecognition || window.webkitSpeechRecognition;
- ทำปุ่ม toggle record กับ pause โดยเพิ่ม event
clickเข้าไป จะคล้ายตอนทำ music player เนอะ
function onClick() {
  const ifPausing = buttonElement.classList.contains('record');

  if (ifPausing) {
    recognition.start();
    buttonElement.classList.remove('record');
    buttonElement.classList.add('pause');
  } else {
    recognition.stop();
    buttonElement.classList.remove('pause');
    buttonElement.classList.add('record');
  }
}

function run() {
  buttonElement.addEventListener('click', onClick);
}
- ทำส่วน recognition สร้าง object
window.SpeechRecognition()set เป็นภาษาไทย และเพิ่ม event ตัวนึง
recognition.lang = 'th-TH';
recognition.addEventListener('result', onResult);
ใน onResult เราจะรับ event มา แล้ว event ที่ได้มีอะไรบ้างนะ? เราจะได้ transcript ว่ามะกี้เราพูดอะไรไปเนอะ
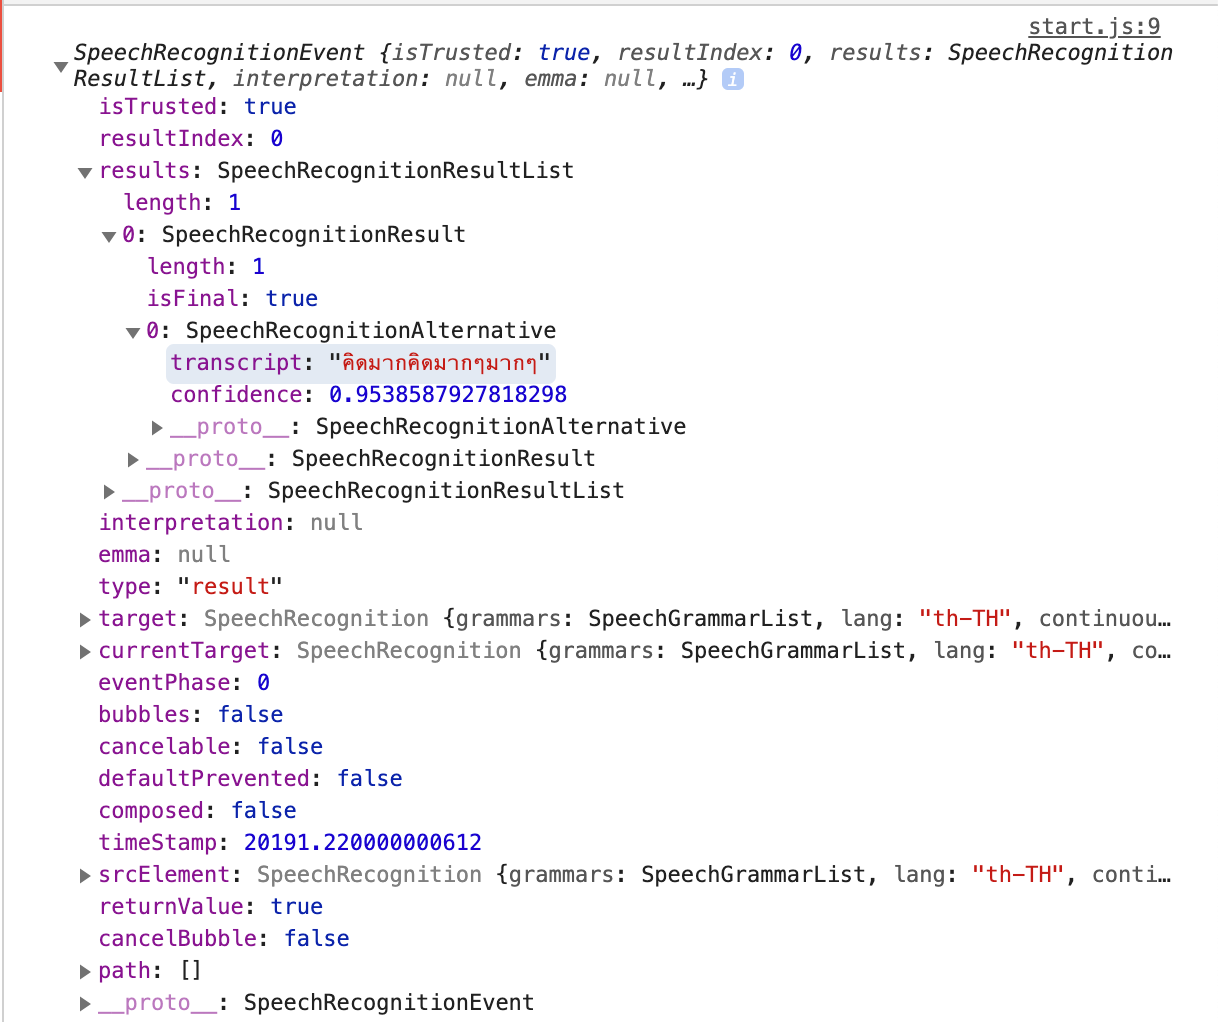
function onResult(event) {
  const textElement = document.querySelector('.text');
  const { transcript } = event.results[0][0];
  textElement.innerText = transcript;
}
ผลที่ได้คือสิ่งที่เราพูดมาแสดงบนหน้าเว็บแล้ว แต่พูดครบจบหนึ่งประโยคมันไม่ทำต่อหล่ะ เพราะตัว record หยุดนั่นเอง ทำยังไงให้ต่อเนี่องหล่ะ

- ดังนั้น เราจะทำให้มันฟังเราใหม่หลังจากหยุด ดังนั้นเพิ่ม event listener ในตัว
recognitionเมื่อปุ่มอยู่ใน state ที่กำลังฟังให้มัน start ใหม่ แต่ผลคือ มันจะทับตัวเดิม เนื่องจากเราแทนที่ตัวหนังสือทุกครั้งที่อ่าน
function onEnd() {
  const isRecording = buttonElement.classList.contains('pause');

  if (isRecording) {
    recognition.start();
  }
}
function run() {
  recognition.addEventListener('end', onEnd);
}
ดังนั้นต้องไปแก้ใน onResult นิดนึง ว่าให้เขียน text ต่อๆกันนะ เป็นอันจบจ้า
textElement.innerText += transcript;
Day18: What is "prototype"?
มาเรียนรู้อีก 1 concept ของ javascript กันนั่นคือ prototype ซึ่งคิดว่าน่าจะคนละ prototype ที่เรารู้จักแน่ๆเลย
1. Class vs Prototype : class กับ prototype ต่างกันอย่างไร
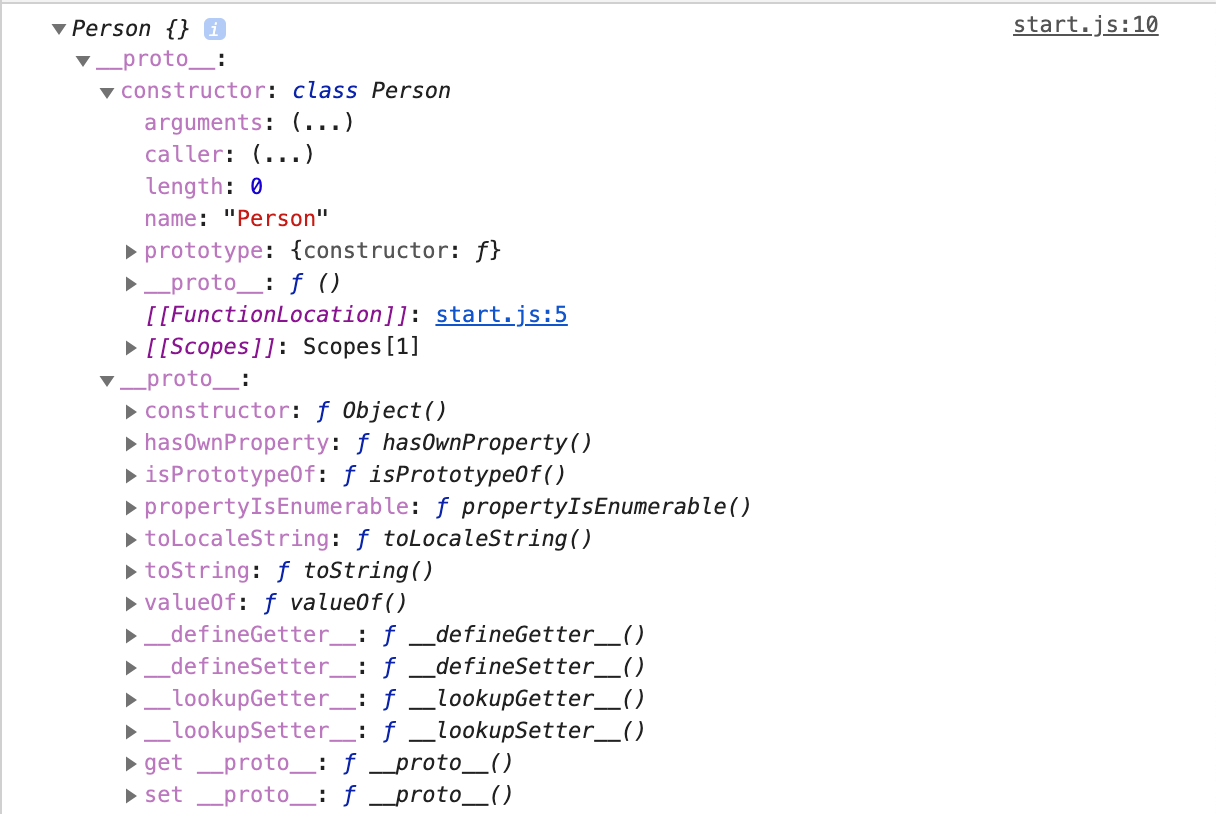
สมมุติสร้าง class เปล่าๆมาอันนี้ สร้าง object ใหม่ แล้วลอง console.log() ดู
class Person {
    //empty class
  }

const kotlin = new Person();
console.log(kotlin);
ผลที่ได้ก็คืออออ ได้ class Person() ที่มีไส้ในชื่อว่า __proto__ มันคือ object ของ prototype นั่นเอง โดยในสมัยก่อน ES6 นั้นใช้ในการสร้าง object ต่างๆ ดังนั้นในตอนนี้ class ใน javascript ถูกสร้างขึ้นเพื่อทำให้สร้าง prototype ได้ง่ายขึ้นนั่นเอง
2. What's prototype? : แล้ว prototype คืออะไรกันนะ?
สร้าง variable ขึ้นมา และทำการ console.log() ออกมาดู
const name = 'kotlin';
console.log(name.__proto__);
ตัว __proto__ ก็คือ object แสนจะธรรมดาตัวนึง ที่มี method ต่างๆภายใน object จึงทำให้เราเรียกใช้งาน method ต่างๆเหล่านี้ได้ เช่น เรียก toString ก็คือ method ใน proto นั่นเอง
แต่ถ้า print name เฉยๆหล่ะ?
const name = 'kotlin';
console.log(name);
name เป็น PrimitiveValue ไม่มี method ที่ให้เราสามารถเรียกใช้ได้ ดังนั้นพวก method ต่างๆจะอยู่ใน __proto__
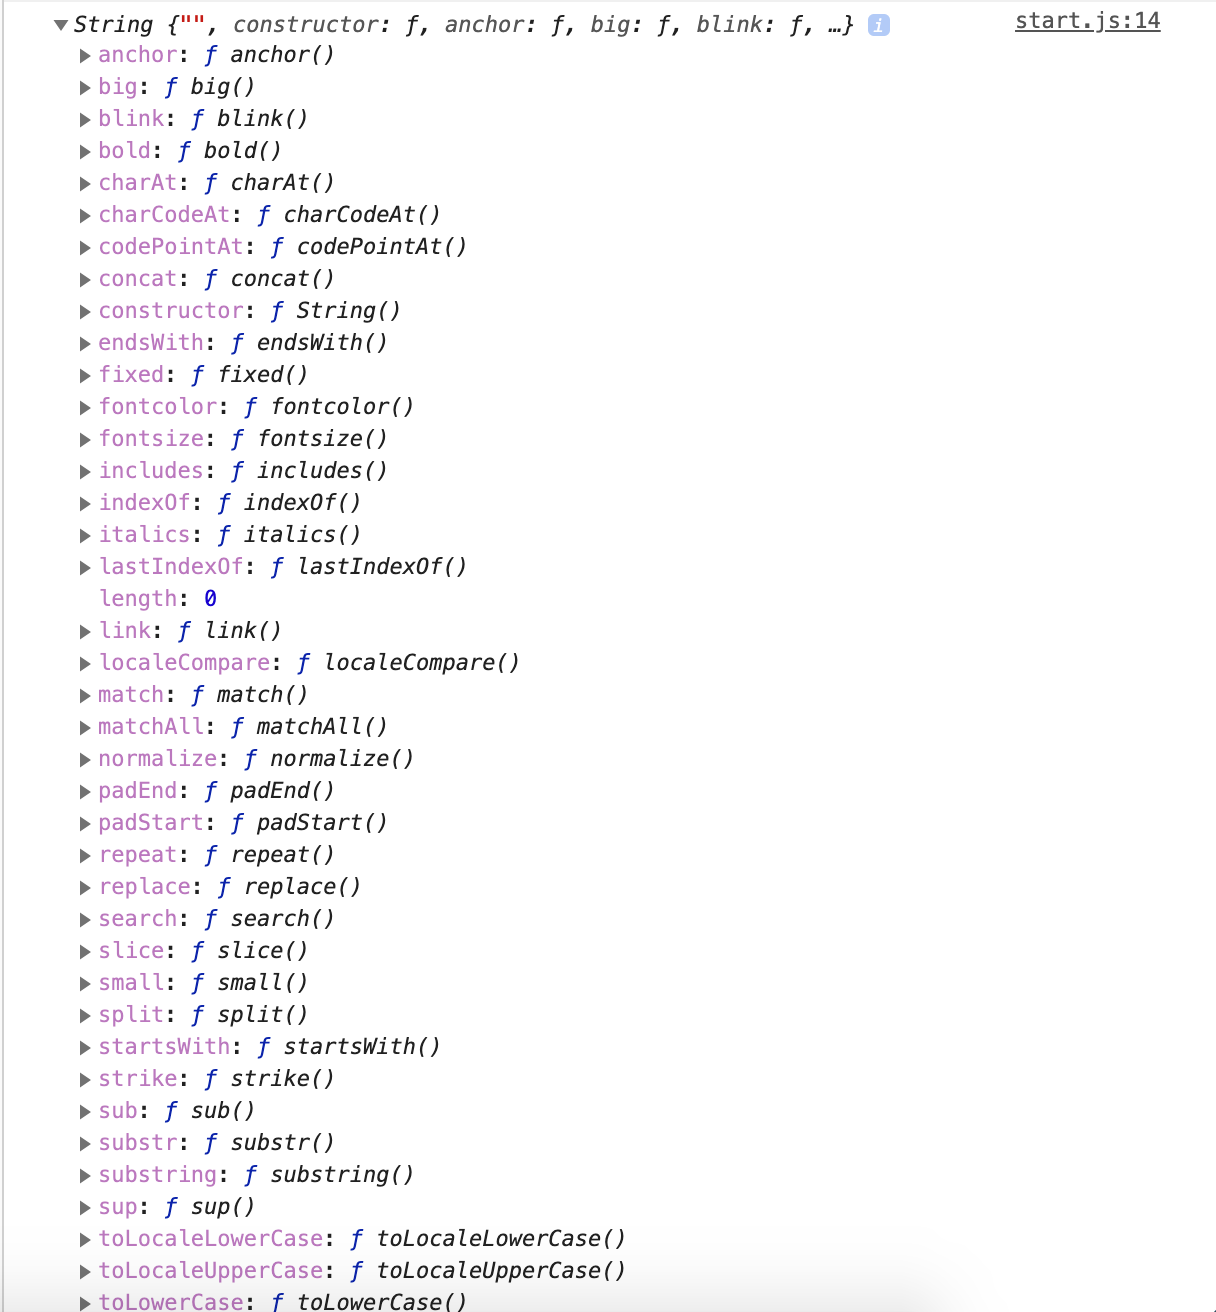
และ type อื่นๆหล่ะ?
const arr = [];
console.log(arr.__proto__);
ใน __proto__ จะมี method ต่างๆของ array ที่เราใช้กัน เช่น find, forEach, map
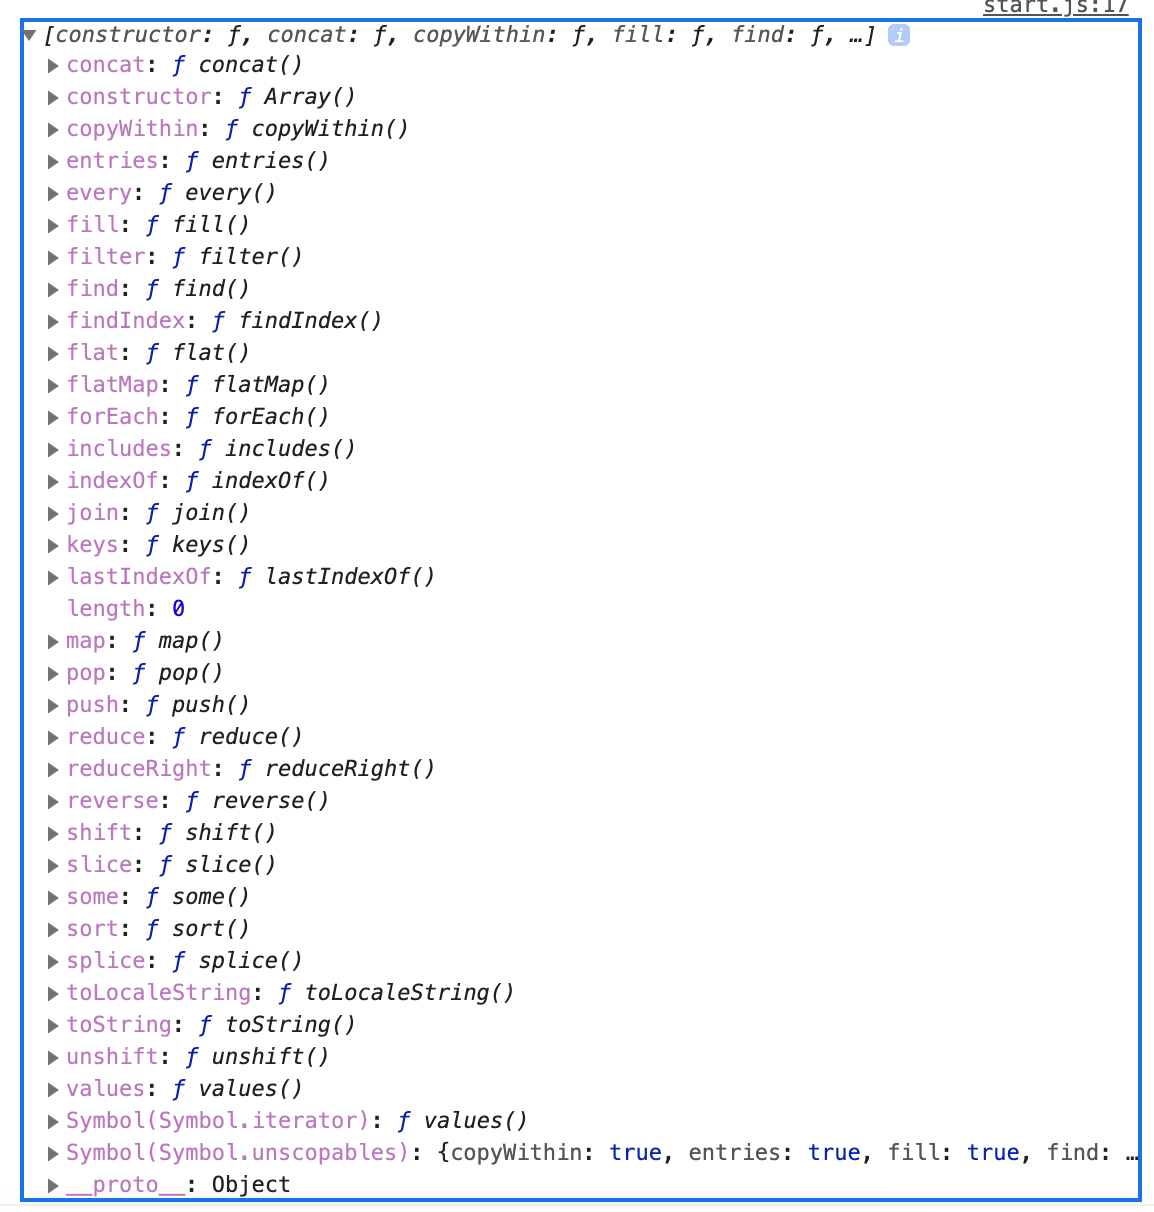
สรุป prototype คือ object ธรรมดาตัวหนึ่งที่เก็บ method ต่างๆไว้ให้เราสามารถเรียกใช้ method เหล่านั้นได้
แล้วมีกระบวนการอย่างไรในการเรียกใช้ method เหล่านี้หล่ะ?
ทำไมไม่เอา method พวกนี้ไปเก็บไว้ใน object ของ type นั้นๆ เลยหล่ะ เช่น string และ array เมื่อกี้?
ทำไมแยกมาใส่ใน object ของ prototype หล่ะ?
ก็เพราะเพื่อให้ประหยัด memory หล่ะสิ และทำให้ performance ดีขึ้นด้วย ไม่ต้องก้อป method ต่างๆ ใส่ใน object และทำให้เราประกาศ method พวกนี้เพียงครั้งเดียว แล้วสามารถ reuse ได้ในหลายๆ object
3. Prototype chain
แล้วตอนเรียกใช้ method เหล่านี้ มีกระบวนการทำงานอย่างไรนะ?
const name = 'kotlin';
console.log(name.__proto__);
เลื่อนไปล่างสุด เราจะพบคุณ __proto__ ซ้อนอีกชั้นนึง จะ link ไป __proto__ ของ class Object() ซึ่งเป็น class สูงสุดใน javascript นั่นเอง ส่วน .. เป็น class ลูกของ object
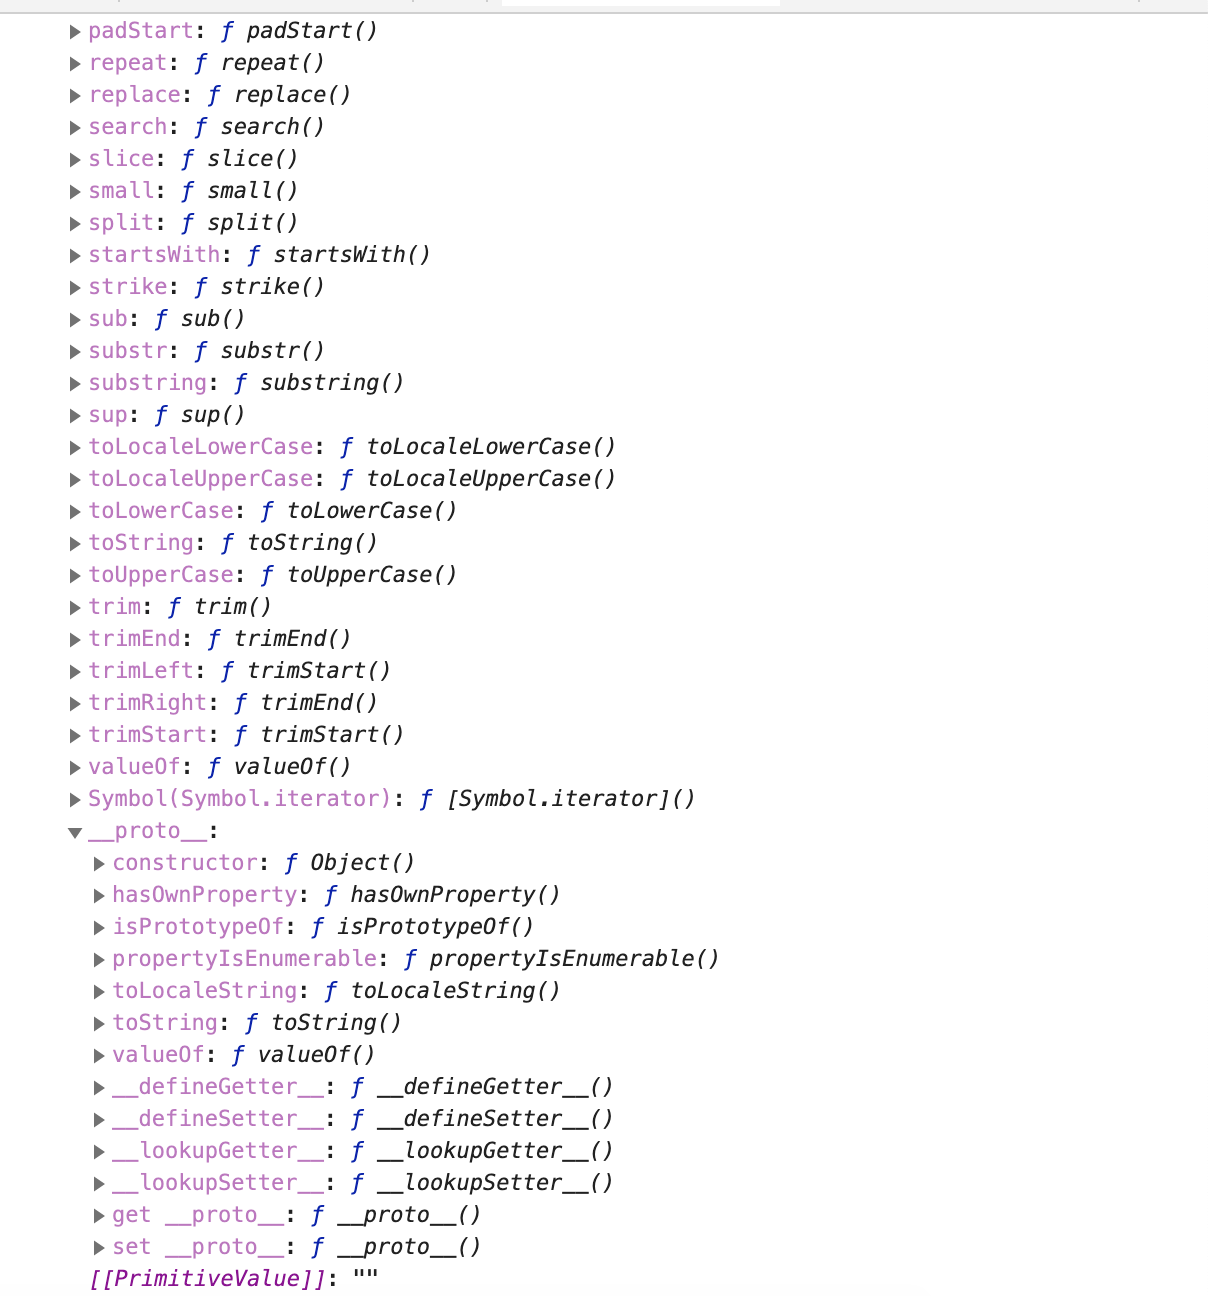
ถ้าเราเรียกใช้งาน method ที่ไม่อยู่ใน prototype ของตัวมันเอง มันจะไปหาใน prototype ของตัวแม่ของมัน ว่ามี method ที่เราประกาศอยู่หรือไม่ ถ้ามี จะเรียกใช้ method จาก class แม่
โดยการเรียกใช้ method ของ class แม่ เรียกว่า Prototype chain นั่นเอง
เช่น การเรียกใช้ toLocaleString ซึ่งไม่มีอยู่ใน prototype ของ string จะไปเรียกใช้ prototype ของ class แม่ นั่นเอง
console.log(name.toLocaleString);

4. Extend a prototype
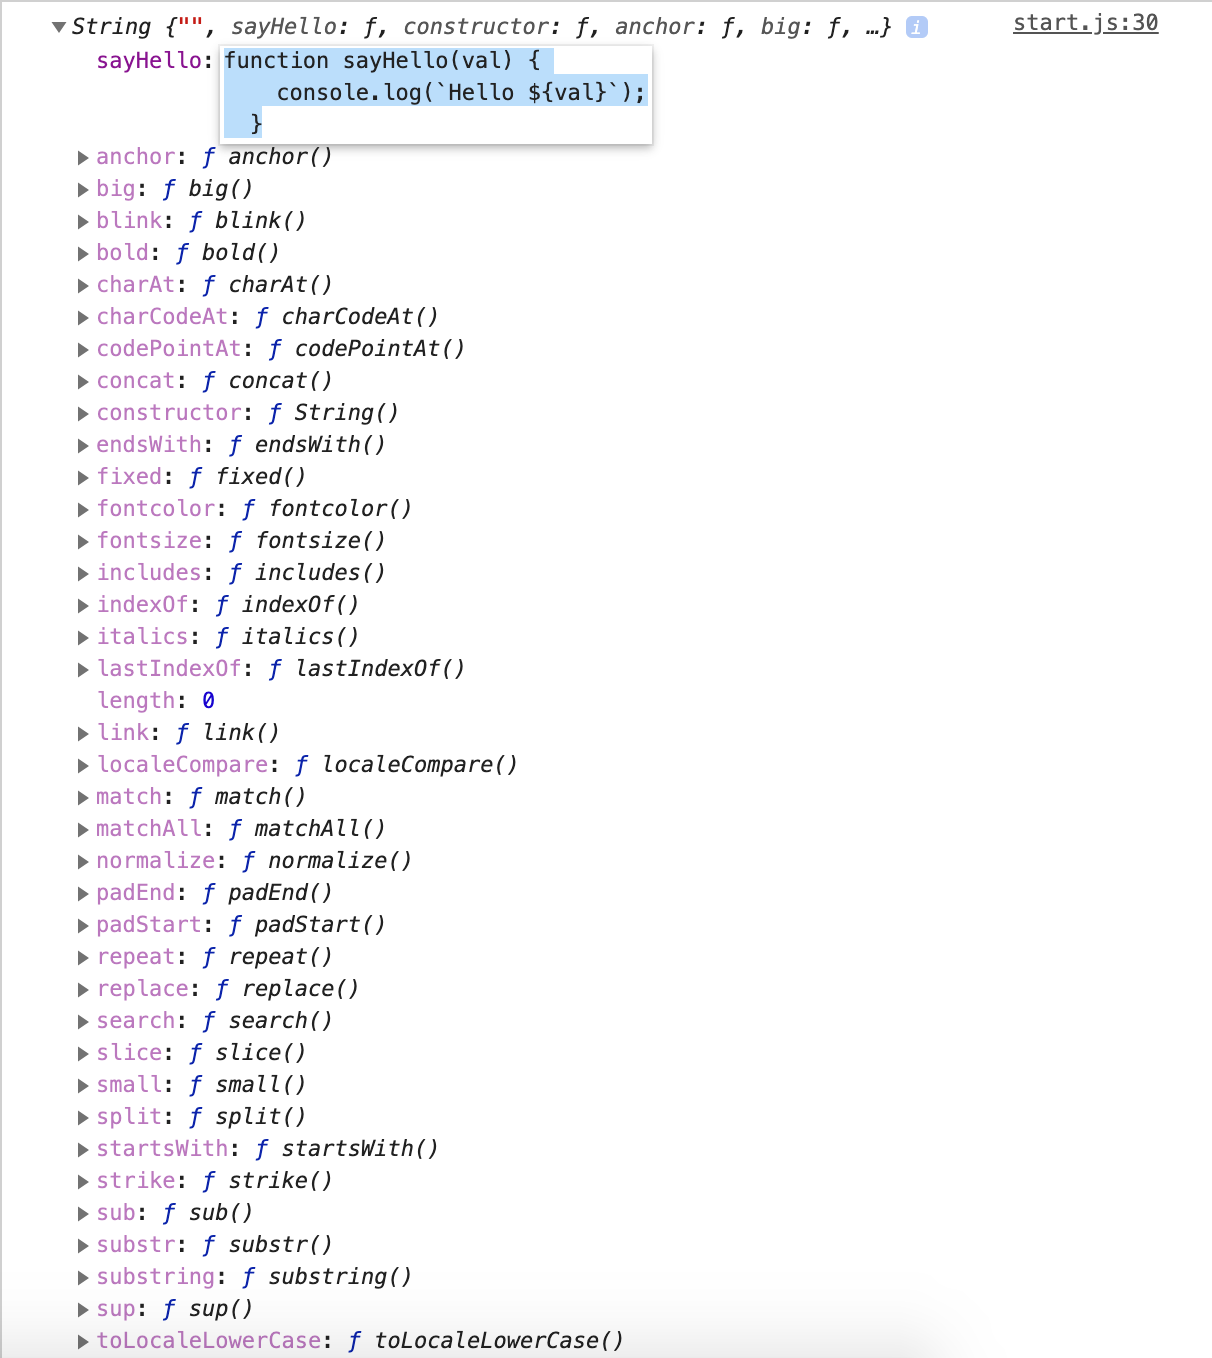
ว่าแต่มัน extend ได้ไหมนะ? มาทดลองกันเลข โดยการสร้าง constain name และ สร้าง function sayHello() โดยรับค่าเป็น val เข้าไป จากนั้น add function นี้ให้กลายเป็น method ใน prototype ของ string
const name = 'kotlin';
function sayHello(val) {
  console.log(`Hello ${val}`);
}
String.prototype.sayHello = sayHello;
console.log(name.__proto__);
พบว่ามี sayHello() เมื่อกี้ ถูก add ไปยัง method ของ string เรียบร้อยแล้ว
ซึ่งเราก็สามารถเรียกใช้งานได้ด้วยนะ
name.sayHello('World');
ผลที่ได้

และสามารถ extend prototype ได้ด้วยนะ แต่คนไม่นิยมทำ เช่น เรา add method อันนึงลงไป และคนอื่นมา add method ทับของเรา จะทำให้โค้ดที่เราเขียนนั้นทำงานผิดพลาด หรือหนักสุดคือ code ของเราใช้ไม่ได้นั่นเอง
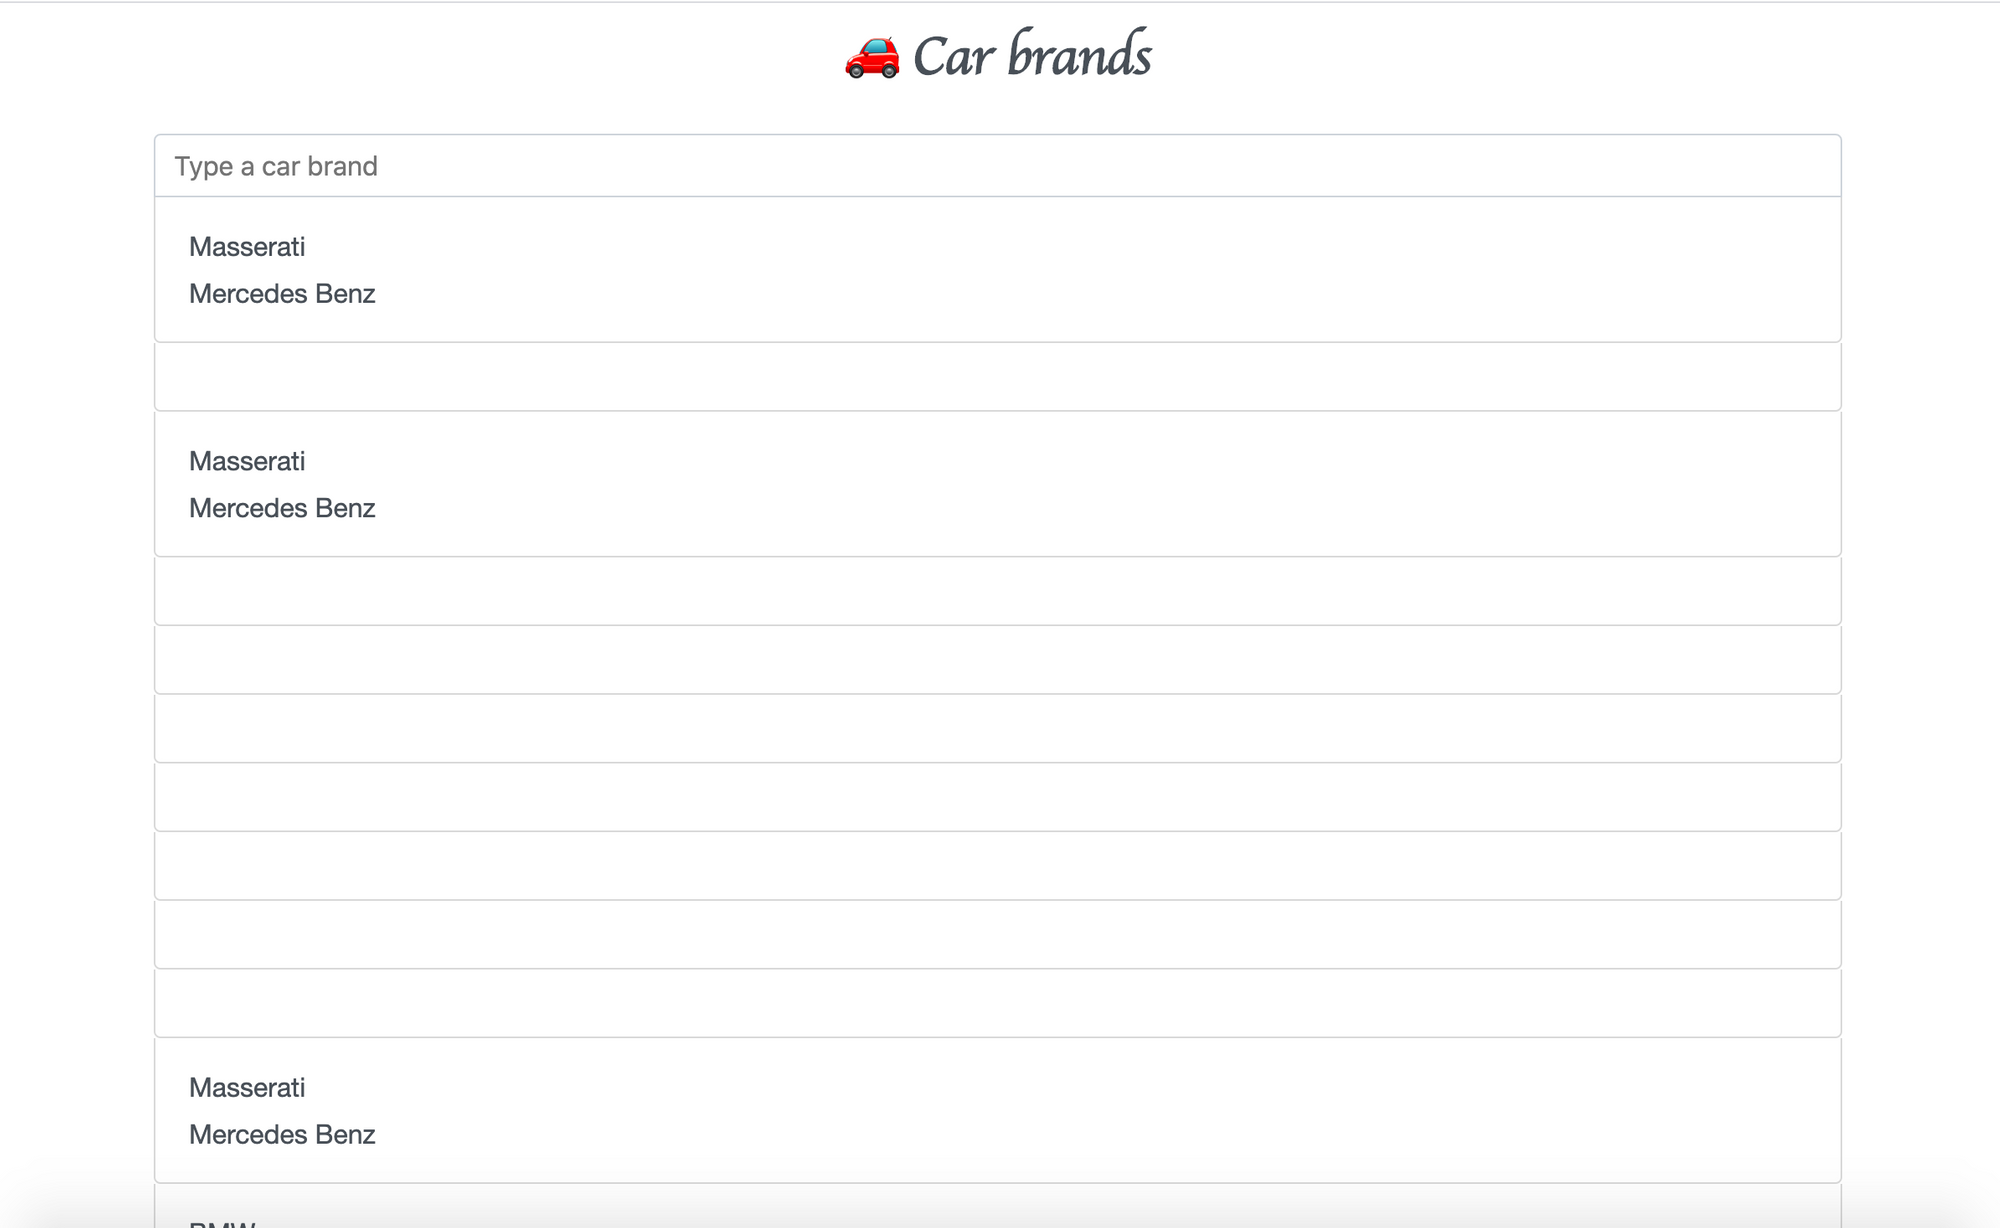
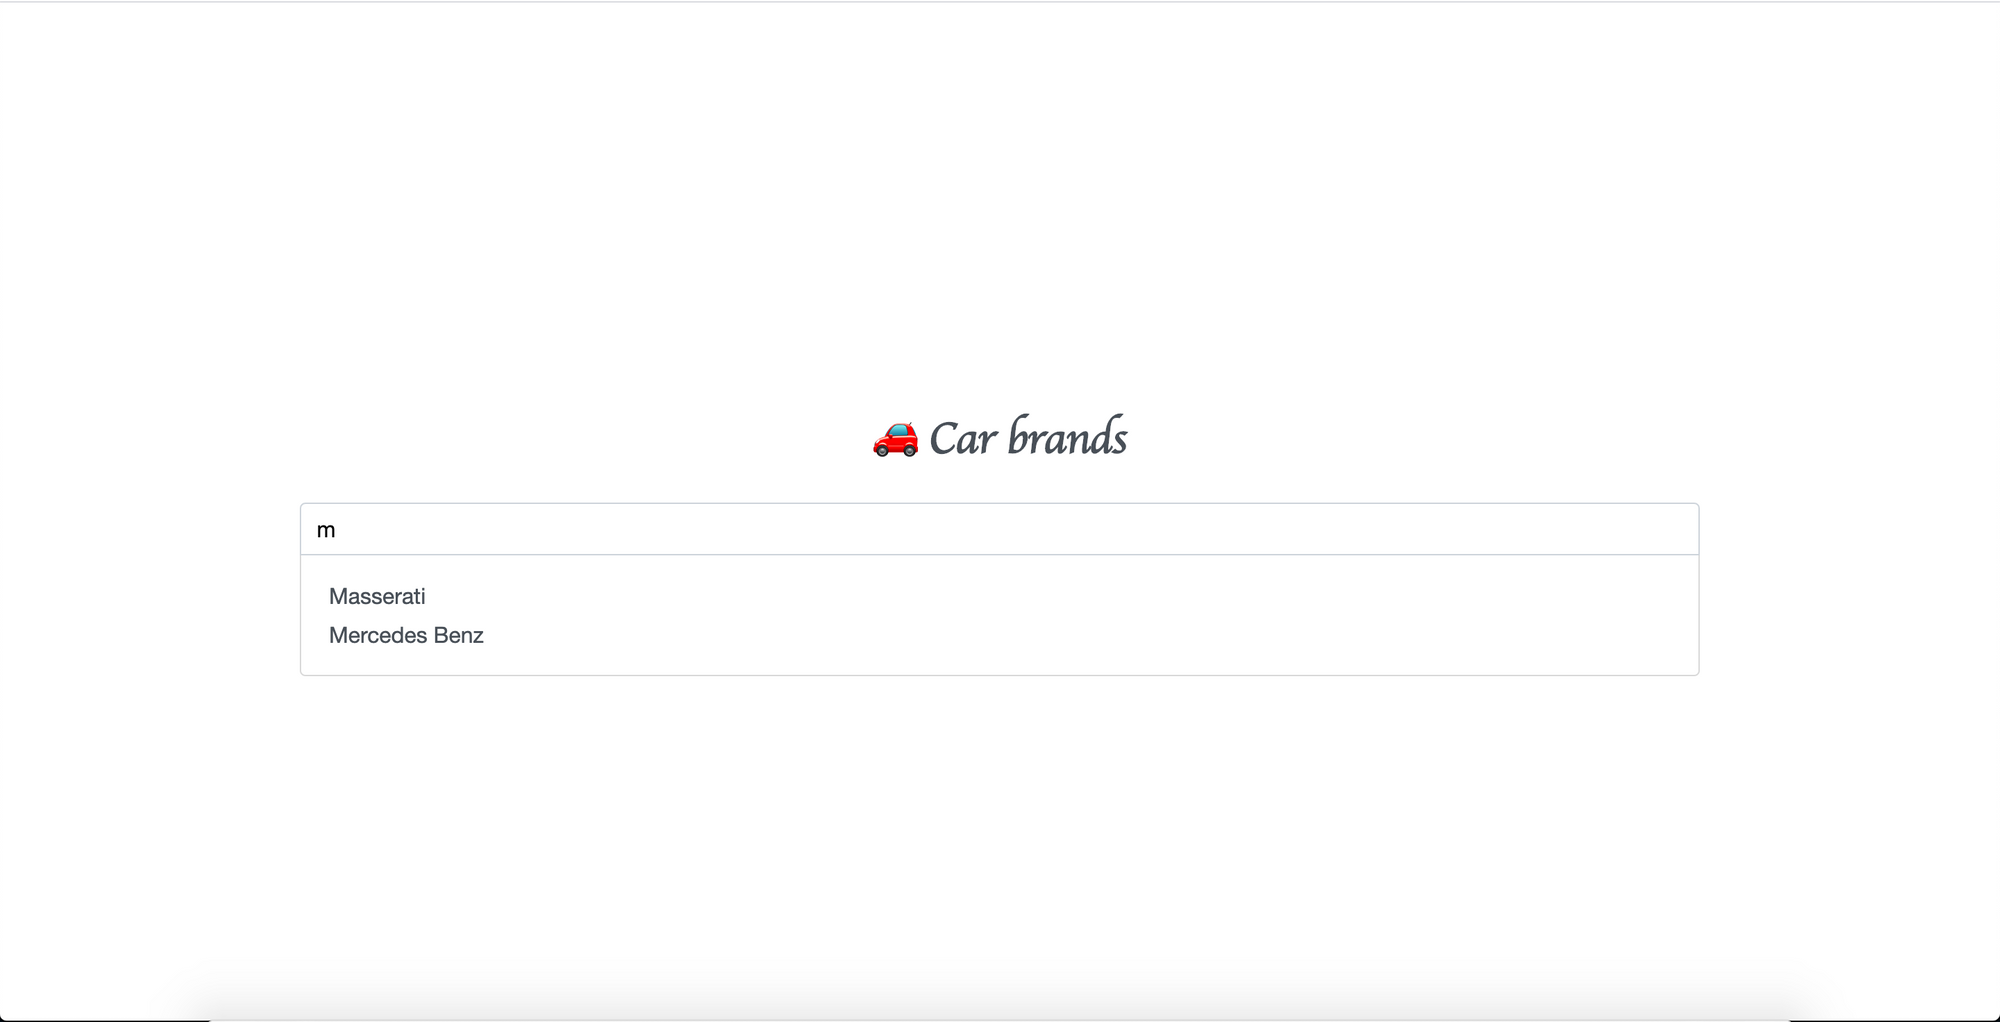
Day19: Autocomplete
มาทำแบบคล้ายๆ Google กันเถอะ ในที่นี้เป็นยี่ห้อรถยนต์เนอะ แต่เราขอเปลี่ยนเป็นอย่างอื่นดีกว่า อะไรดีน้าา เปลี่ยนทีหลังแล้วกันเนอะ 555
- สร้าง array ชื่อยี่ห้อรถมาก่อน
- เพิ่ม event listener เพื่อรับ input
searchElement.addEventListener('input', onInput);
- การรับคำที่เราพิมพ์มา รับจาก
event.target.valueและใส่toLowerCase()เพื่อเอามาเปรียบเทียบกับ array ยี่ห้อรถที่สร้างไปเมื่อกี้ และทำการtoLowerCase()ด้วยเช่นกัน แล้วทำการ match ว่าตรงกับที่เรามีอยู่ไหม จะได้เป็น array ออกมา
function onInput(event) {
  const inputText = event.target.value.toLowerCase();
  const matchedCarBrands = carBrands.filter(carBrand => carBrand.toLowerCase().startsWith(inputText));
}
- จากนั้นสร้าง dropdown ด้านล่างกันต่อจ้า โดยเพิ่ม element นามว่า
ulและliเพื่อทำการสร้าง dropdown จาก array ผลลัพธ์เมื่อกี้ขึ้นมาแสดง
const ulElement = document.createElement('ul');
ulElement.classList.add('results');

matchedCarBrands.forEach(carBrand => {
  const liElement = document.createElement('li');
  liElement.innerText = carBrand
  ulElement.appendChild(liElement);
});
document.body.appendChild(ulElement);
ผลที่ได้ก็คือ ได้ผลลัพธ์แล้ว แต่พอพิมพ์ไปพิมพ์มา มันสร้างใหม่ มันซ้อน ดังนั้นควรจะ clear view ออกด้วยเมื่อ input เปลี่ยนไป
- จากนั้นให้มันสามารถคลิกเพื่อเอาไปแปะใน
searchElementอะเนอะ เพิ่มonclickที่liElementและนำinnerTextที่ได้ ไปใส่ไว้ในsearchElement
liElement.onclick = selectCarBrand;

function selectCarBrand(event) {
  searchElement.value = event.target.innerText;
}
- แต่คลิกแล้ว dropdown ไม่หาย คือต้อง clear view ออกด้วยเช่นกัน โดยการสร้าง function นี้เพื่อเอาไปใช้หลังจากคลิกเมื่อกี้ และก็ตอน input เปลี่ยนด้วยนะ เห็นมีคนบอกในกรุ๊ปว่า dropdown ค้างเง้
function onInput(event) {
  clearResults();

  //..
}

function selectCarBrand(event) {
  searchElement.value = event.target.innerText;
  clearResults();
}

function clearResults() {
  const ulElement = document.querySelector('.results');
  if (ulElement) {
    document.body.removeChild(ulElement);
  }
}
- สุดท้าย กดคลิกข้างนอกและน้อง dropdown ต้องหายไป โดยการเพิ่ม event listener ของ document แล้วให้
clearResults()ทิ้งจ้า เป็นอันจบบบ
document.addEventListener('click', clearResults);
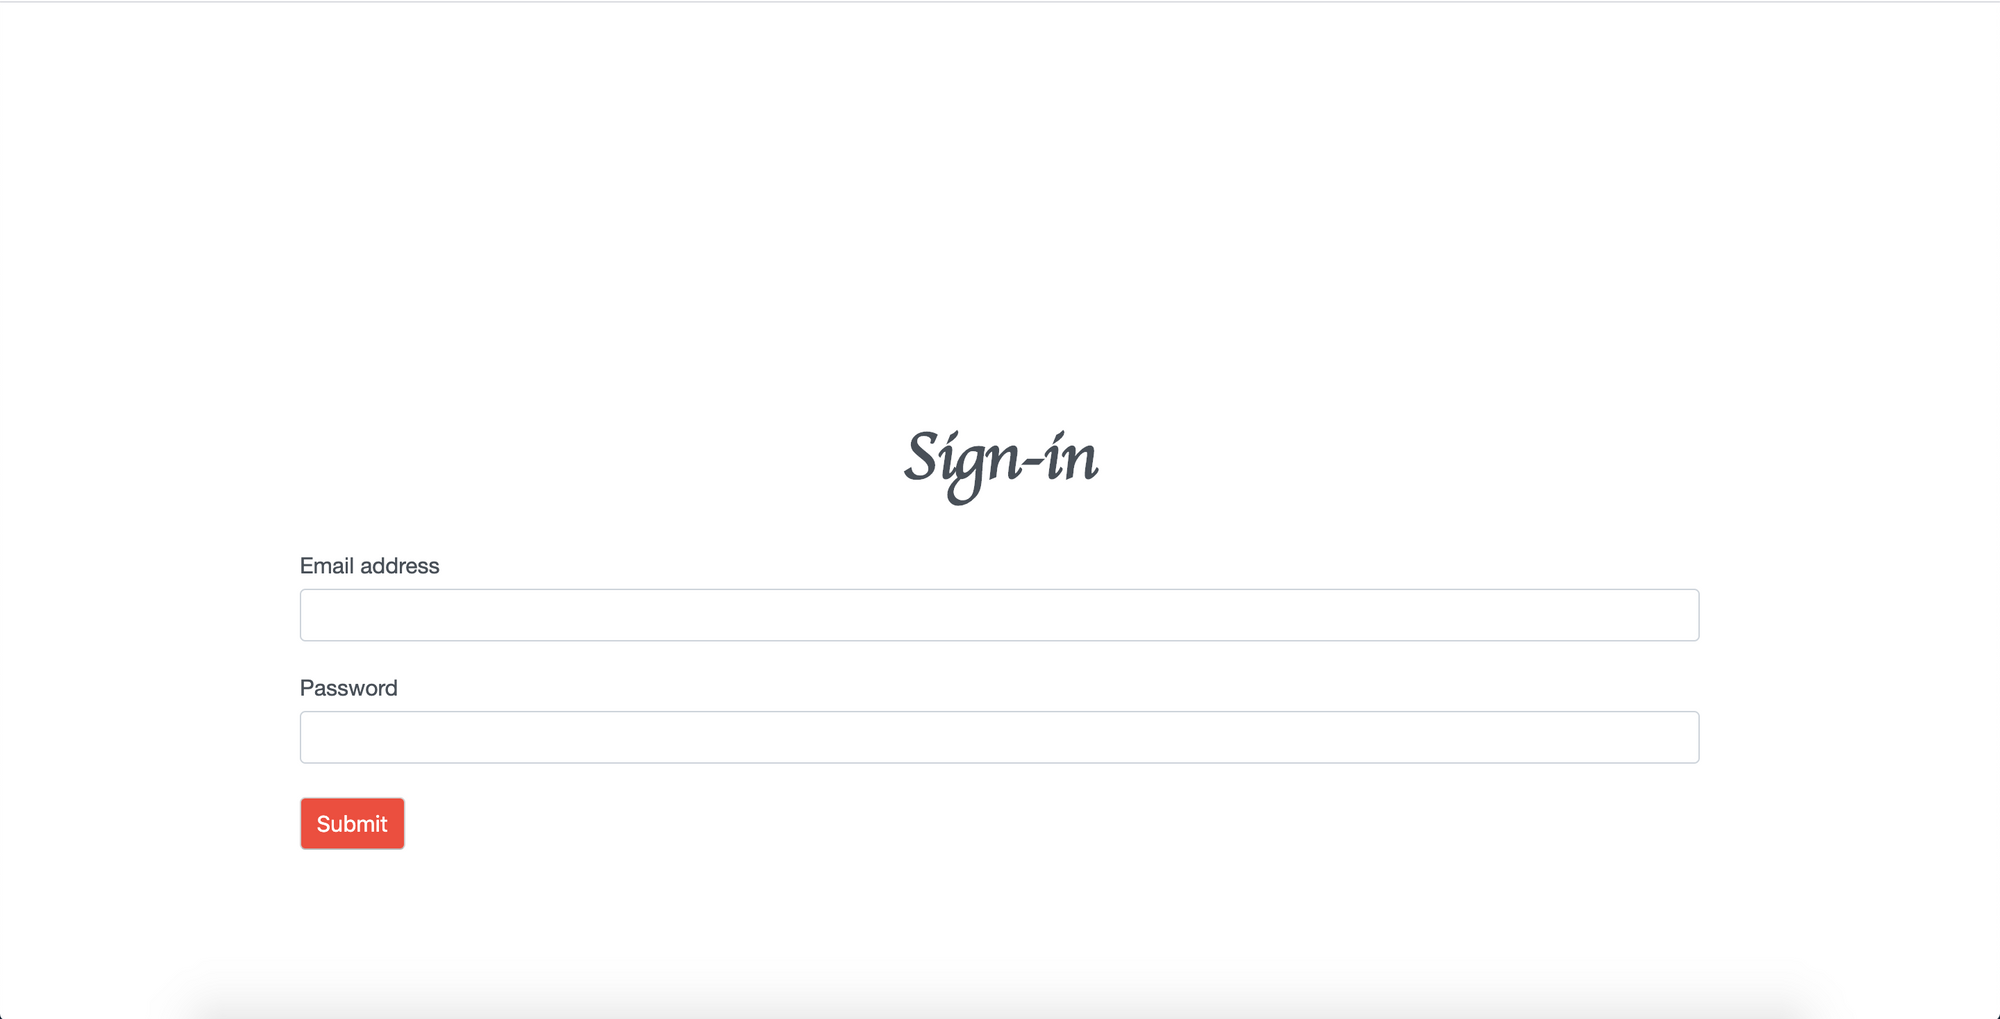
Day20: Form Validation
ให้นึกถึงหน้า login ที่บอกว่าใส่ email รูปแบบไม่ถูกต้อง ตั้ง password สั้นไป ไม่มีตัวโน้นนี่นั่น
- ตัวหน้าเว็บก็จะมีพวก form สำหรับหน้า login เนอะ
- ดึง element
formออกมา พร้อมทั้งใส่ event listener ตอน submit
const formElement = document.querySelector('form');
formElement.addEventListener('submit', validateForm)
- หลังจากเกิด event submit ตัวหน้าเว็บมีการ refresh นิดนึง ซึ่งเป็นเรื่องปกติของ event submit ให้ prevent event ออกไป โดยใส่
event.preventDefault();ในvalidateForm() - get element ของ
emailและpasswordในvalidateForm()และสร้างvalidateLength(element, min, max)มาเพื่อ check ความยาวของ email และ password เมื่อความยาวไม่ตรงเงื่อนไขที่เราวางไว้ ให้แสดง error ออกมาที่ element ที่ชื่อว่าsmall
function displayError(element, message) {
  const smallElement = element.parentElement.querySelector('small');
  smallElement.innerText = message;
  element.classList.add('invalid');
  form.classList.add('invalid');
}

function validateLength(element, min, max) {
  const val = element.value;

  if (val.length < min || val.length > max) {
    const elementName = element.getAttribute('name');
    displayError(element, `${elementName} length must be between ${min} and ${max}`)
  }
}
- แต่แล้วก็จะเจอบัคเพิ่ม คือ เมื่อเราใส่ความยาวตรงตามเงื่อนไข แต่ error message ยังคงอยู่ ดังนั้นอย่าลืม reset มันด้วยเน้อ ก่อนจะใช้
validateLength()
function resetState(element) {
  const smallElement = element.parentElement.querySelector('small');
  smallElement.innerText = '';
  element.classList.remove('invalid');
  form.classList.remove('invalid');
}
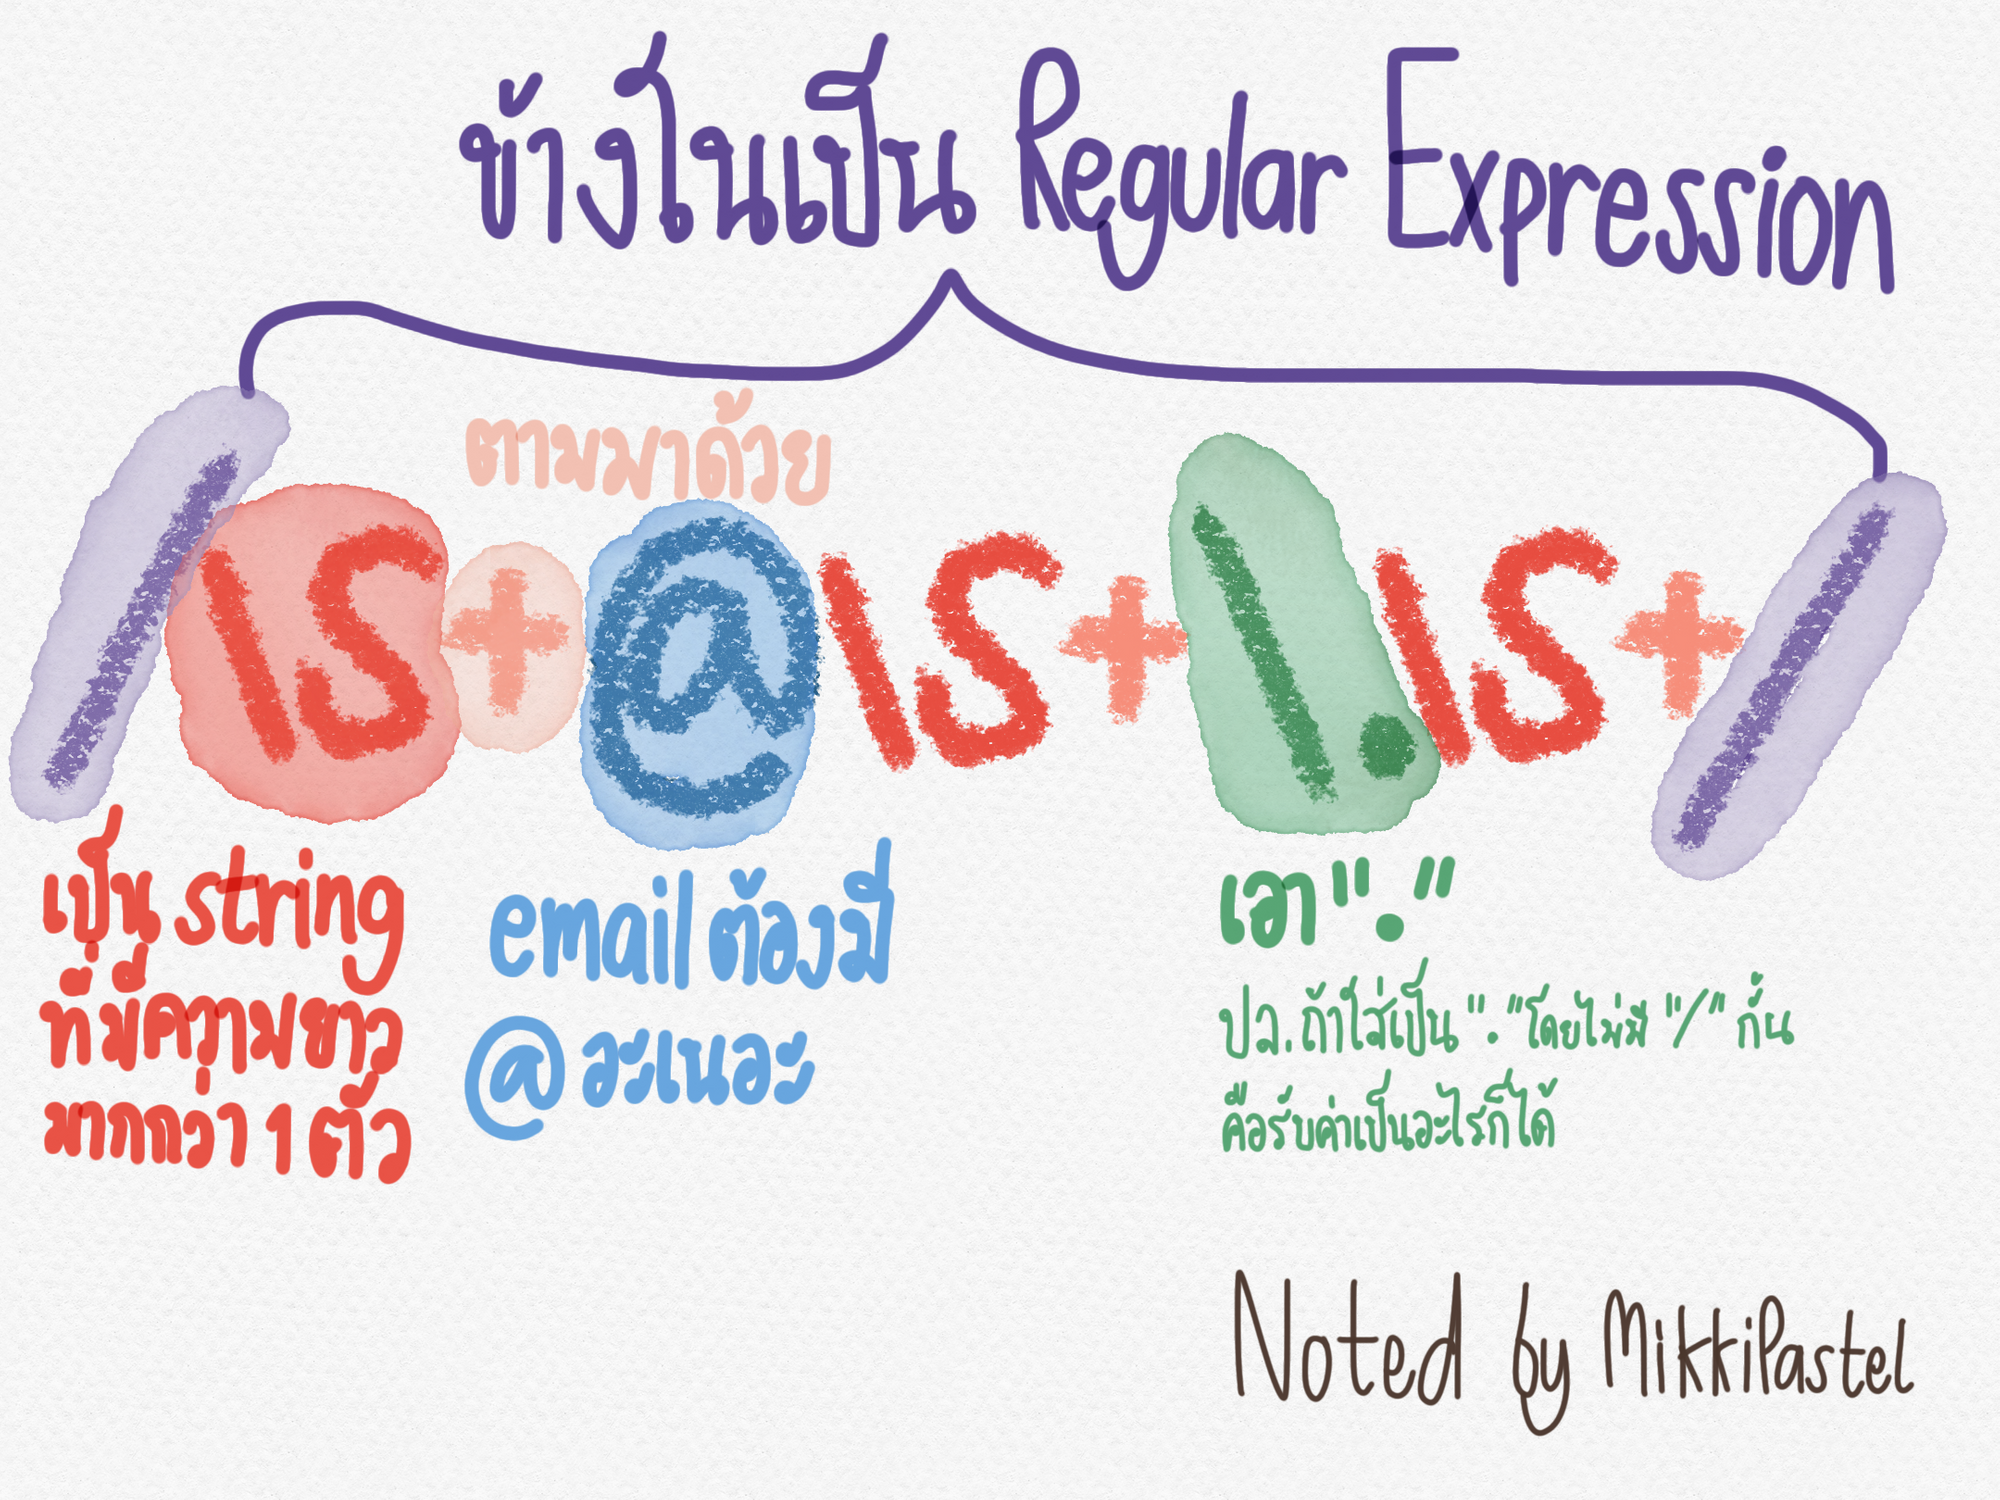
- จากนั้นก็ทำการ validate email กันต่อโดยใช้ regular expression เข้ามาช่วย สร้างตัวแปรที่ชื่อว่า regex มี
/หัวท้ายเพื่อบอกว่าข้างในเป็น regular expression นะ
function validateEmail(emailElement) {
  const regex = /\S+@\S+\.\S+/;
  if (regex.text(emailElement.value)) {
    displayError(emailElement, 'Email must be valid');
  }
}
โดยคำอธิบายก็คือ
- สุดท้าย เมื่อกรอกครบทุก condition เรียบร้อย หน้าตาเปลี่ยนไปว่าเข้ามาแล้วเรียบร้อยนะ ก่อนอื่นใส่สิ่งนี้ไว้ด้านท้ายของ
validateForm(event)
const isValidForm = !form.classList.contains('invalid');
  if (isValidForm) {
    displaySuccess();
  }
การทำงาน ลบ element ทั้งหมด และเพิ่ม element ใหม่ที่เป็น text ที่บอกว่า logged in แล้วนะ
function displaySuccess() {
  document.body.innerHTML = ''

  const pElement = document.createElement('p');
  pElement.innerText = 'You have been logged in successfully';
  pElement.className.add('success');
  document.body.appendChild(pElement);
}
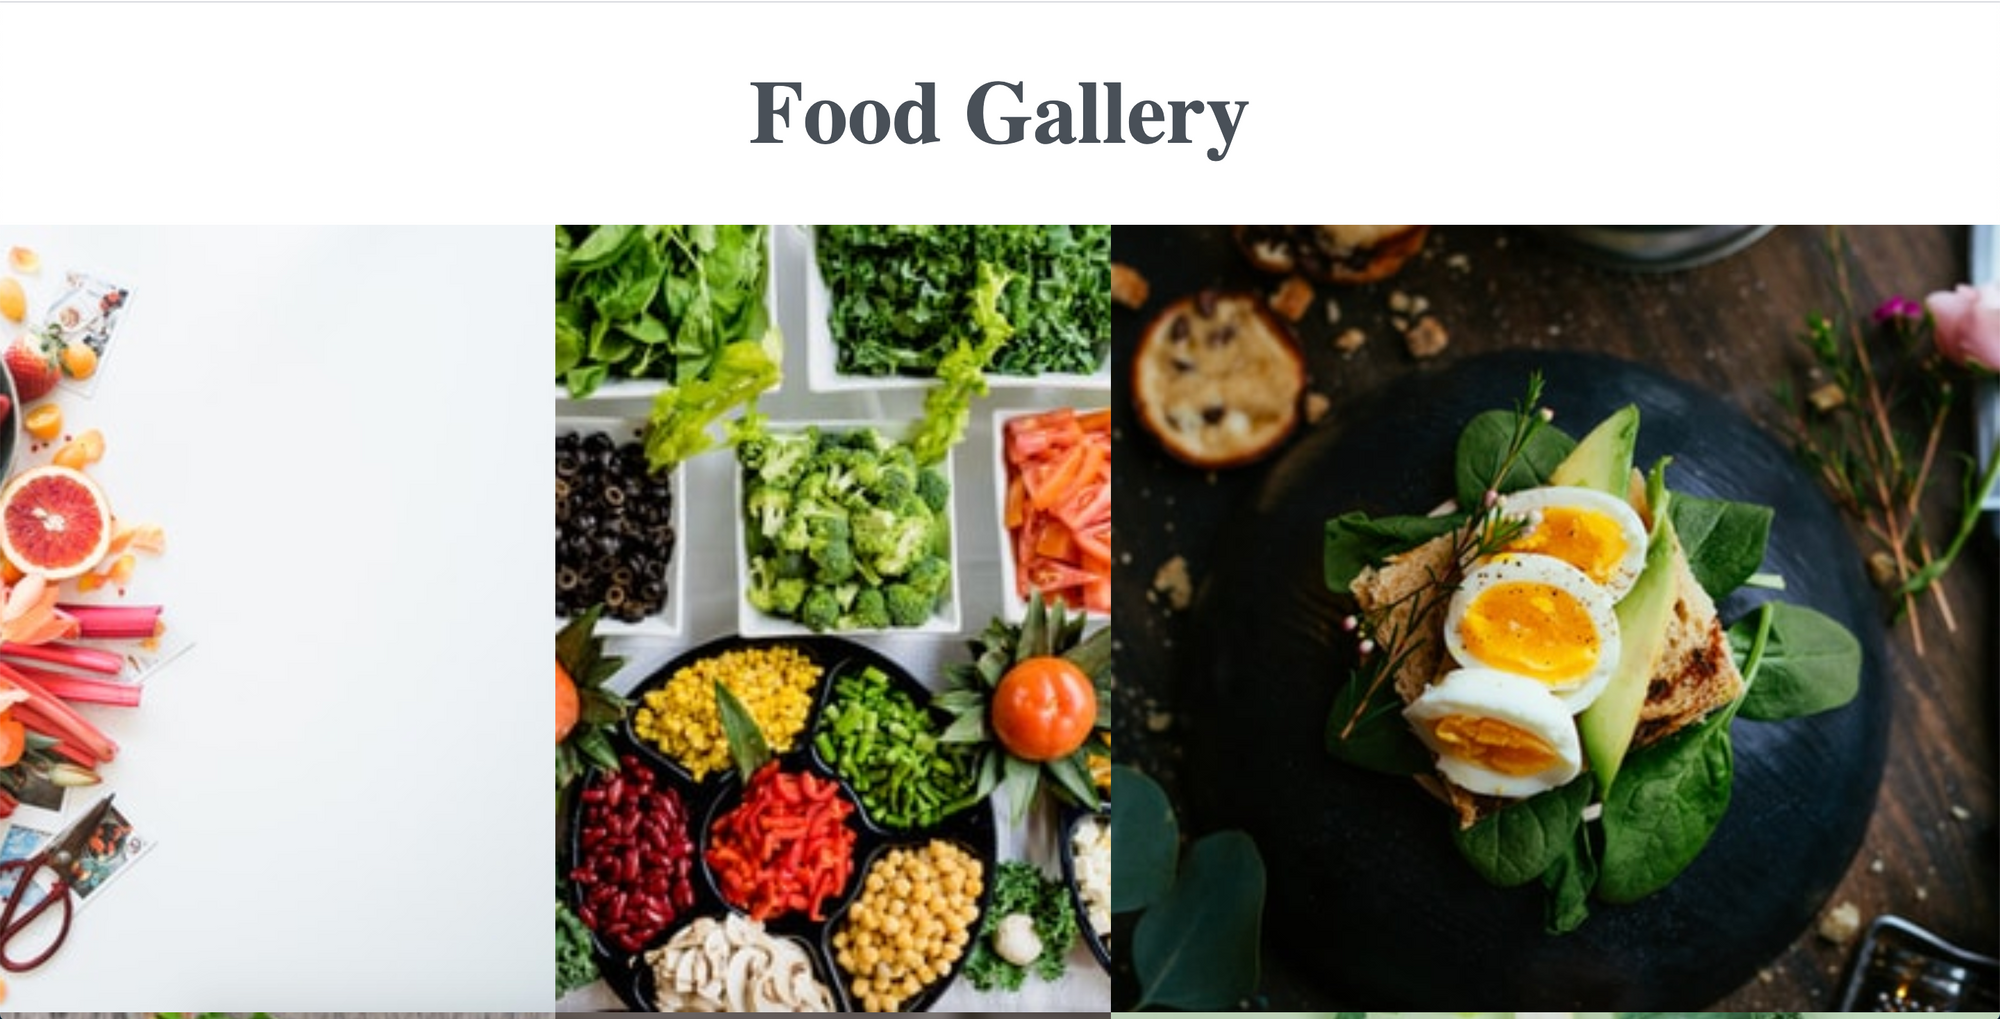
Day21: Infinite Scroll Gallery
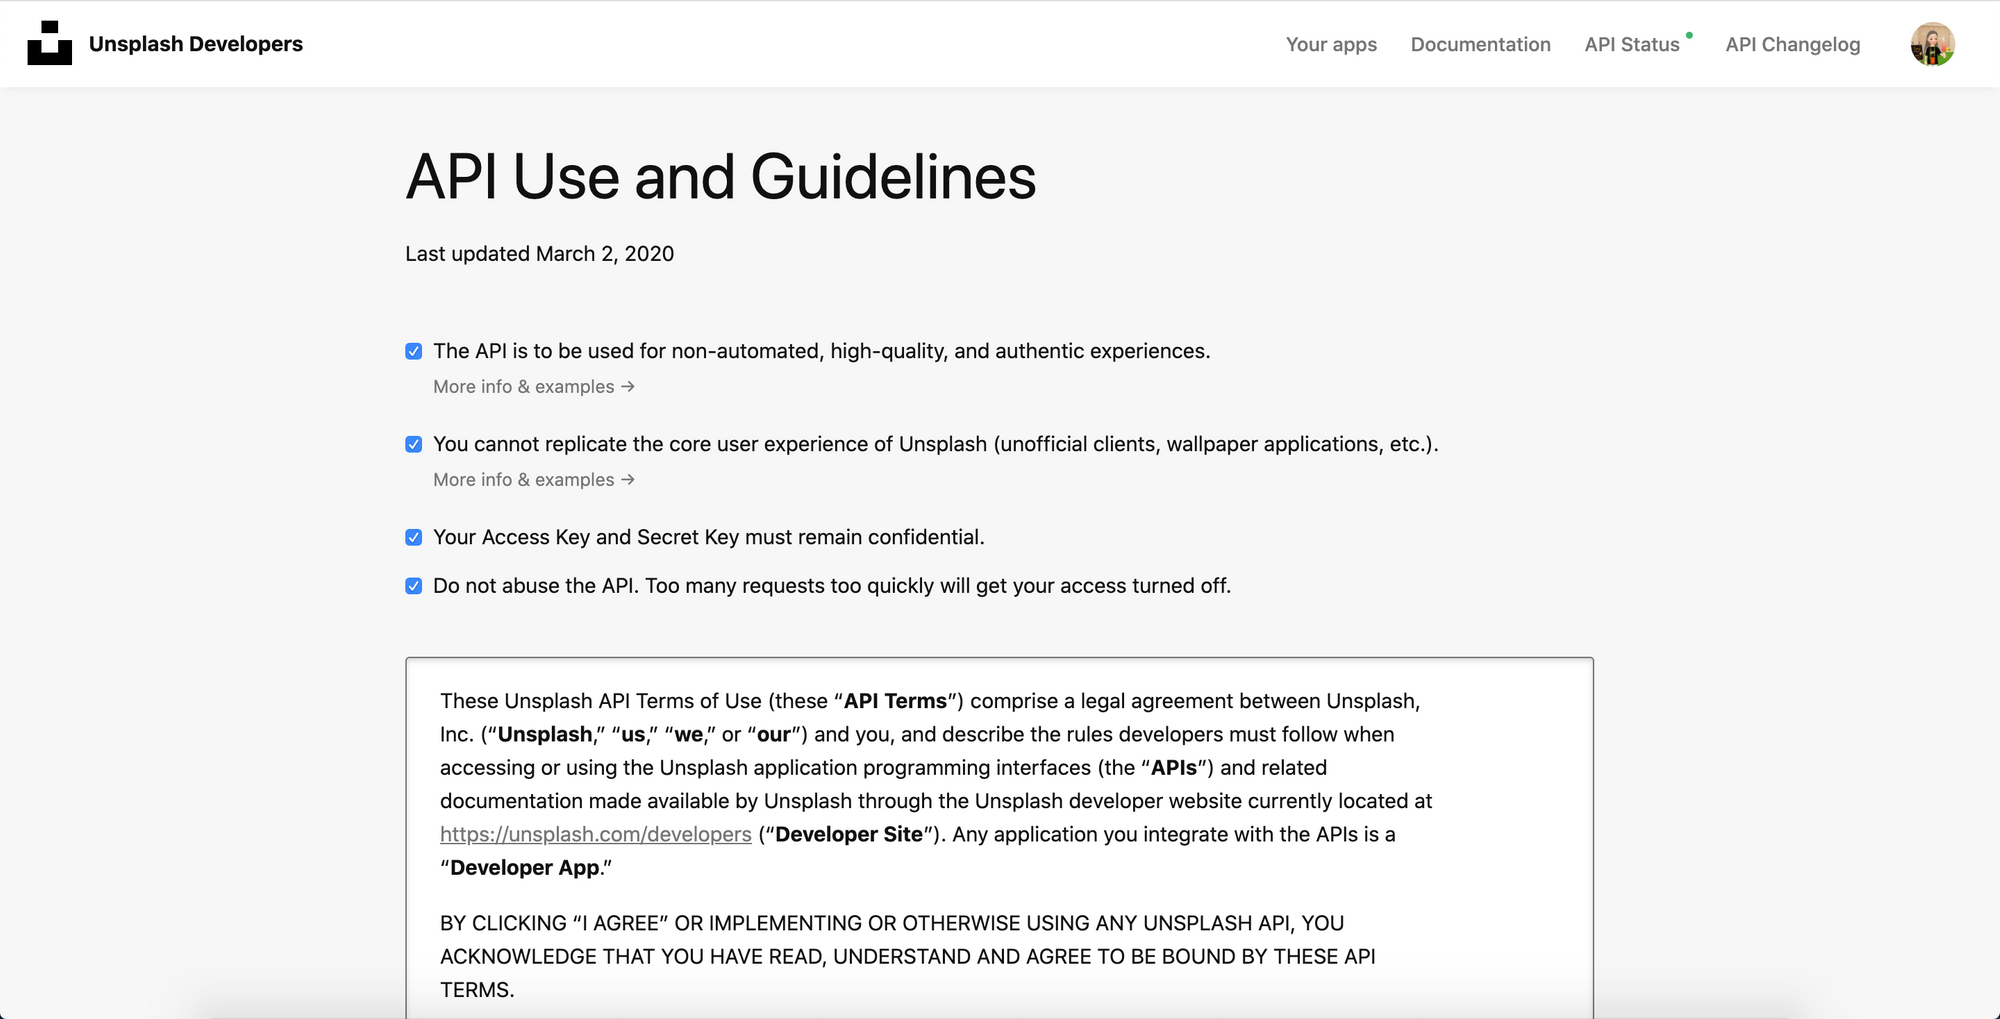
ดึงรูปสวยๆจาก unsplash API ได้ฟรีเลย โดยไป register และสร้างโปรเจกแอพในลิ้งด้านล่างนี้ โดย accept ทุกตัวและเป็นแบบ demo ก่อนนะ
- เราจะดึง element
galleryเพื่อใส่รูปและนำไปแสดงผล และloaderก็เป็นตัว loader จุดสามจุด - มาเริ่มทำกันเลย โดยเราสร้าง
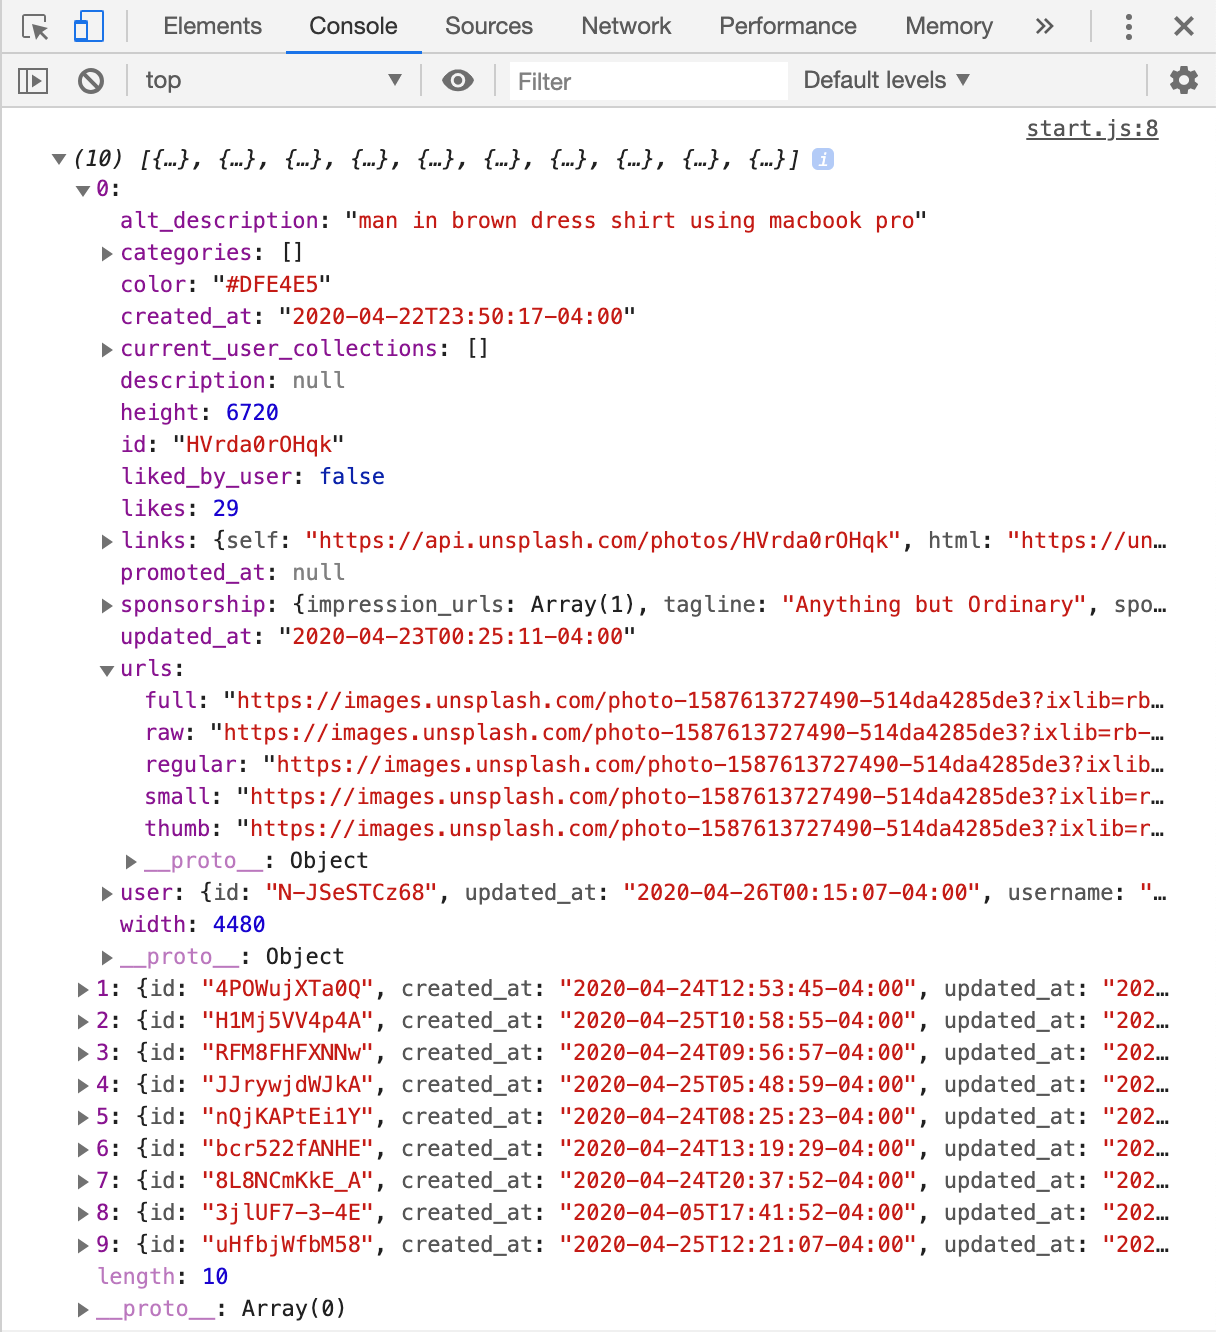
displayImages()ในrun()ที่เป็นขาประจำ การทำงานคือใช้fetch()เพื่อ call API แบบนี้
https://api.unsplash.com/photos/?client_id=${KEY}&page=${page}
โดย key ก็มาจากการสร้าง project app ใน unsplash ก้อปจากใน Access Key มา assign ค่า KEY และสร้างตัวแปร page โดยตอนนี้ค่าเป็น 1 ก่อนนะ
และใช้ของตามรูปด้านล่างนี้ .....
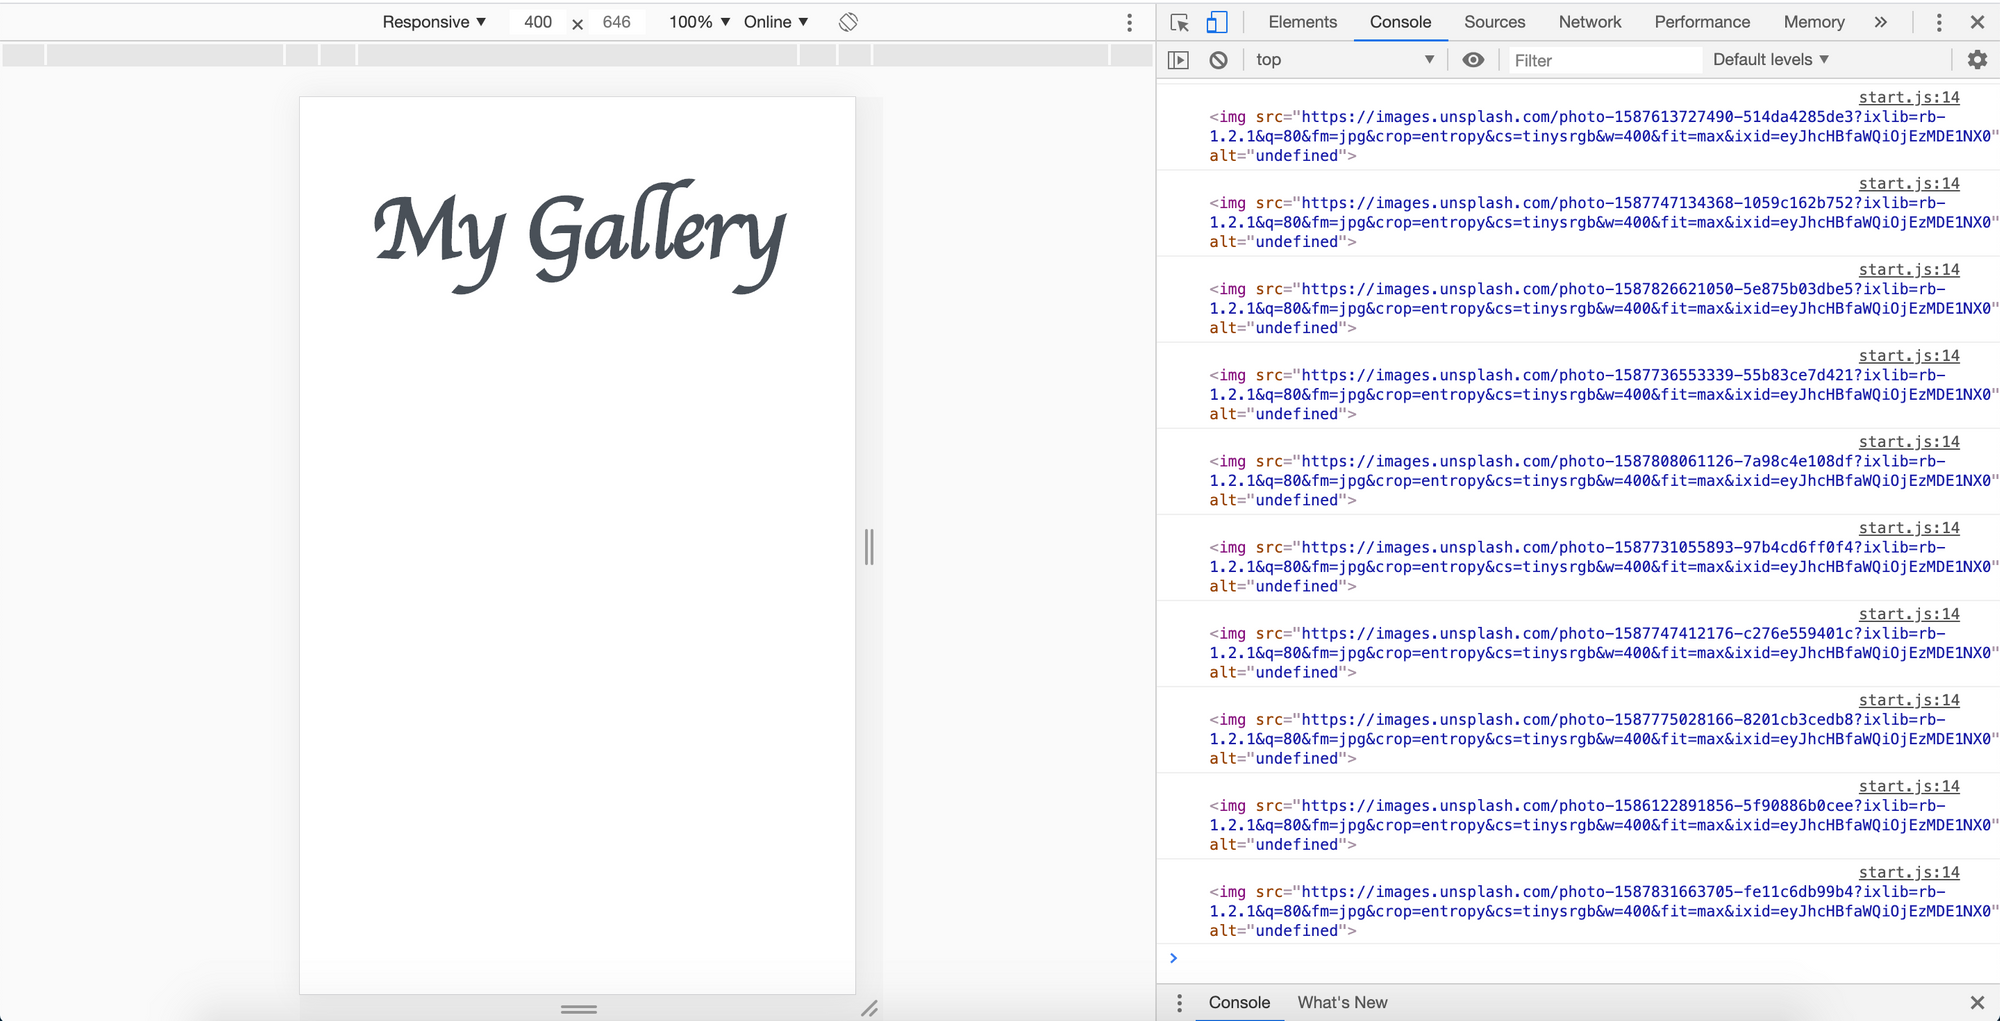
นั่นคือ async และ await นั่นเอง ก็คือ call API เสร็จแล้ว นำ result.json() ที่ได้เอาไปแสดงผลต่อโดยใช้รูปเล็กสุดพอ แต่เราจะเพิ่ม alt ในรูปด้วยเนอะ
จากนั้นสร้าง element image ขึ้นมาเพื่อเอารูปที่ได้ไปแสดง ดังนี้
let page = 1;

async function displayImages() {
  const result = await fetch(
      `https://api.unsplash.com/photos/?client_id=${KEY}&page=${page}`
  );
  const images = await result.json();

  const galleryElement = document.querySelector('.gallery');

  images.forEach(image => {
    const imageElement = document.createElement('img');
    imageElement.src = image.urls.small;
    imageElement.alt = image.alt_description;

    galleryElement.appendChild(imageElement);
  });
}
ผลที่ได้แบบรวบตึง

- แต่พอเลื่อนลงไปแล้วมันไม่โหลดต่อ เราจะต้องเพิ่มเนอะ เพราะได้ตัดสินใจแล้วว่าจะทำเป็นแบบ lazy loading ดังนั้นเราจะต้อง set เจ้า
loaderก่อน ว่าตอนกำลัง loading ให้ show และพอโหลดเสร็จค่อยหายไป
function showLoader() {
  loaderElement.classList.add('visible');
}

function hideLoader() {
  loaderElement.classList.remove('visible');
}

async function displayImages() {
  showLoader();

  // ...

  hideLoader();
}
- เพิ่ม event listener ที่
documentและสร้างonScroll()ขึ้นมา
document.addEventListener('scroll', onScroll);
- ใน
onScroll()ทำการ destructuring ค่า 3 ตัวนี้ออกมา
const { scrollTop, clientHeight, scrollHeight } = document.documentElement;
scrollTop ตำแหน่งที่เรา scroll ด้านบนปัจจุบัน, clientHeight ความสูงของหน้าจอในปัจจุบัน ค่าจะยังไม่รวม scrollbar และ scrollHeight ความสูงของ document จากด้านบนสุดไปยังสุดจอ ซึ่งเจ้า scrollHeight มีความสูงเท่ากับ scrollTop + clientHeight ดังนั้นเพิ่ม condition เข้าไปว่าถ้าสองตัวนี้บวกกันแล้วมากกว่านิดหน่อย ให้ load รูปมาเพิ่ม
function onScroll() {
  const { scrollTop, clientHeight, scrollHeight } = document.documentElement;
  if (scrollTop + clientHeight >= scrollHeight - 10) {
    displayImages();
  }
}
และอย่าลืมเพิ่ม page หลังจากโหลดเสร็จด้วยน้าาาาา
async function displayImages() {
  // ...
  page += 1;
  hideLoader();
}
เราเพิ่มเติมส่วนของ document ของ unsplash API กันสักนิดเนอะ สามารถเข้าไปส่องได้ในนี้นะ เพื่อเพิ่มลูกเล่นได้นะ
ก็จบไปแล้วทั้ง 21 วันเนอะ ได้เรียนรู้เกี่ยวกับ javascript ไปมากมายพอสมควรเลย ทำให้เราเข้าใจหลายๆอย่างมากขึ้น เพราะเราเองก็ใช้ javascript ในการเขียน chatbot แล้วก็พวกหลังบ้านที่เราลองทำเองอ่ะเนอะ เลยคิดว่าน่าจะลองทำอะไรสักอย่างเพื่อทบทวน + หาความรู้เพิ่มเติม แล้วจะไปดูเรื่อง PWA ต่อด้วย ฮ่าๆ ส่วนสรุปแบบ infographic อาจจะมาช้าหน่อย เนื่องจากมีหลายๆ online course ต่อคิวอยู่จ้า ช่วง WFH คือเยอะมากจริงๆ ฮืออออ
จบ 21 วันกันไปแล้ว ทางเรามีเซอร์ไพร์สนิดหน่อยๆ ติดตามในเพจได้จ้า
อย่าลืมกด like กด share บทความกันด้วยนะคะ :)
Posted by MikkiPastel on Sunday, 10 December 2017