How to collaboration Chips from Material Design in your life?
This blog is a path in my session, Recommend Material Components for your app, in Android Bangkok 2019.

About Chips, everyone think about potato chip, chocolate chip and something like that but Chips for Android Developer is small block view to represent an input, attribute, or action in your application.
In your life, Chip is found at Google Assistance, Gmail, Google Play, and in some application.
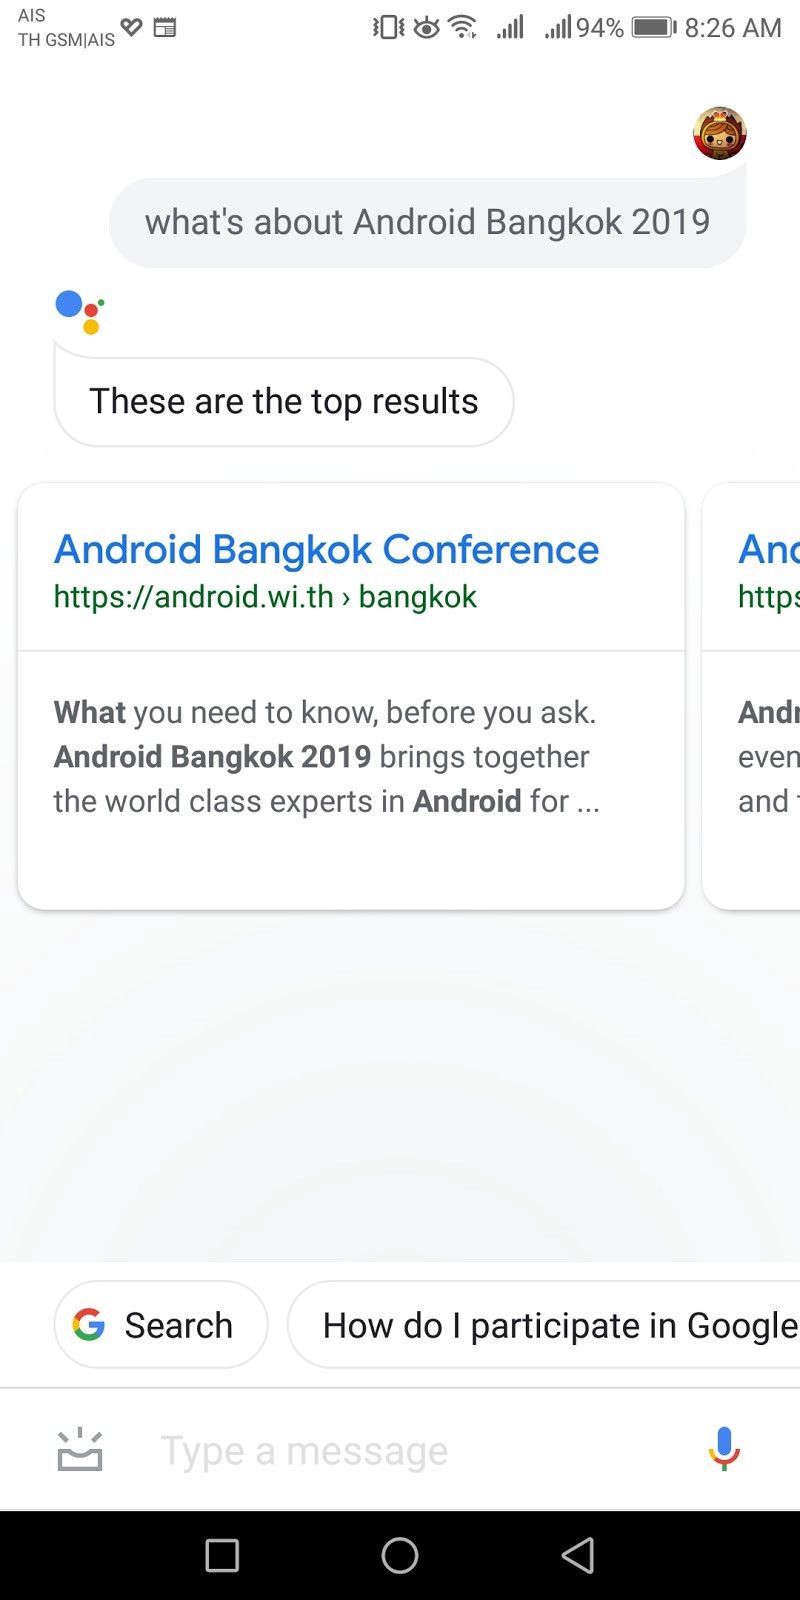
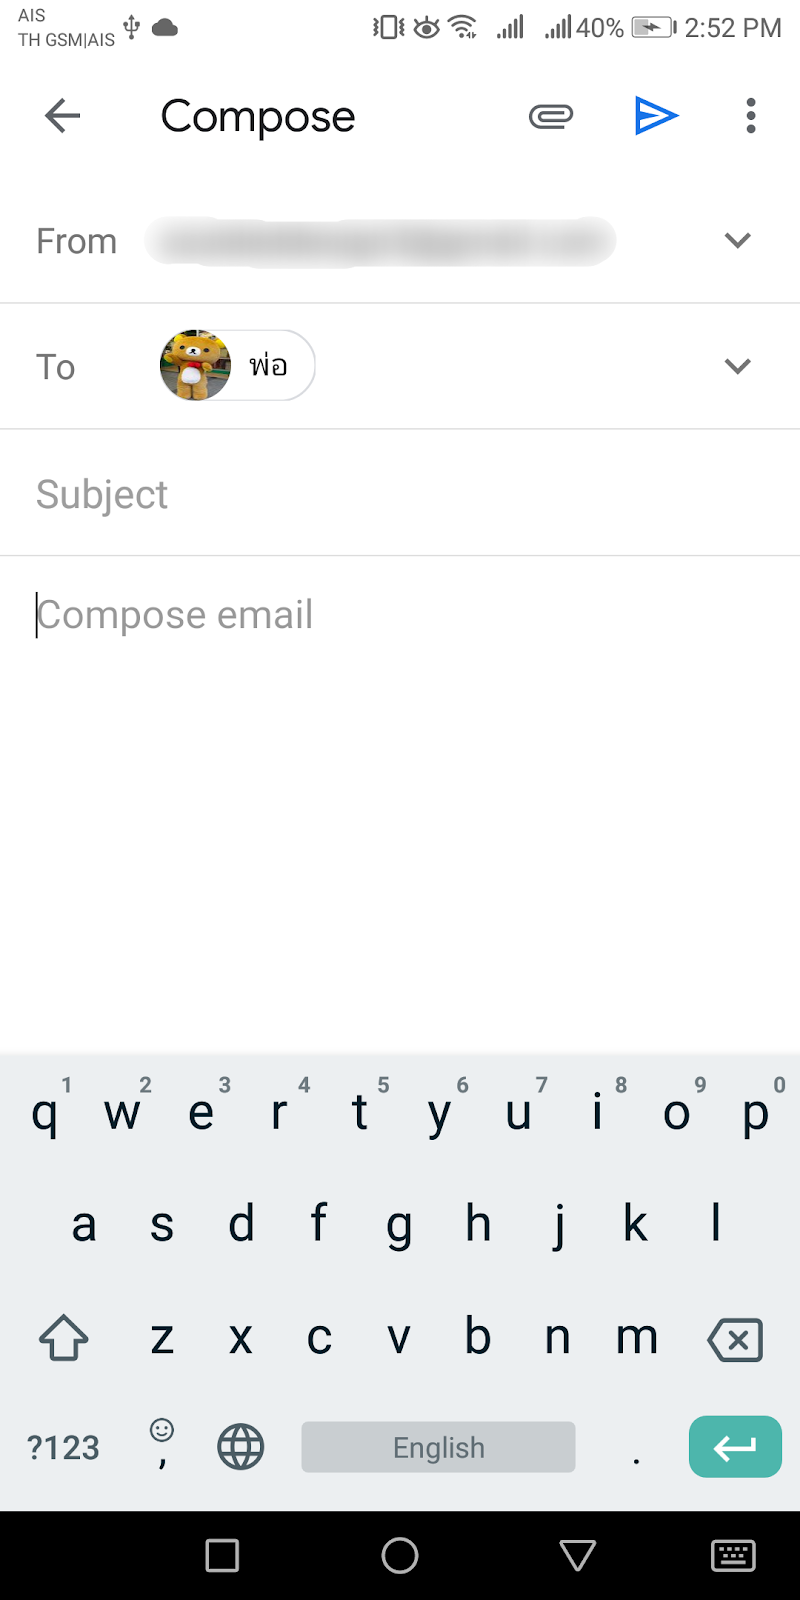
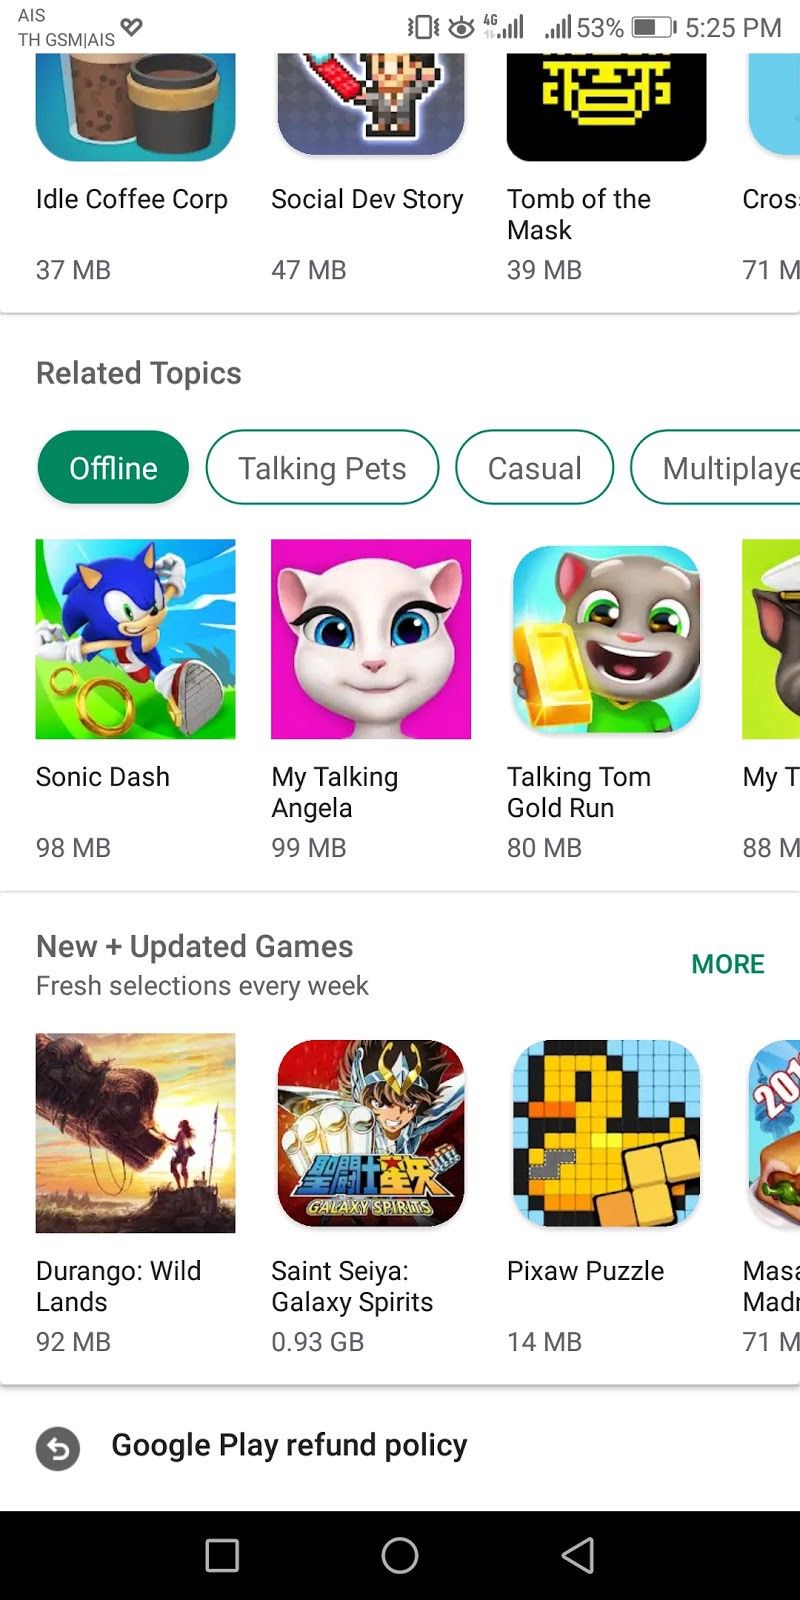
For getting start
Style
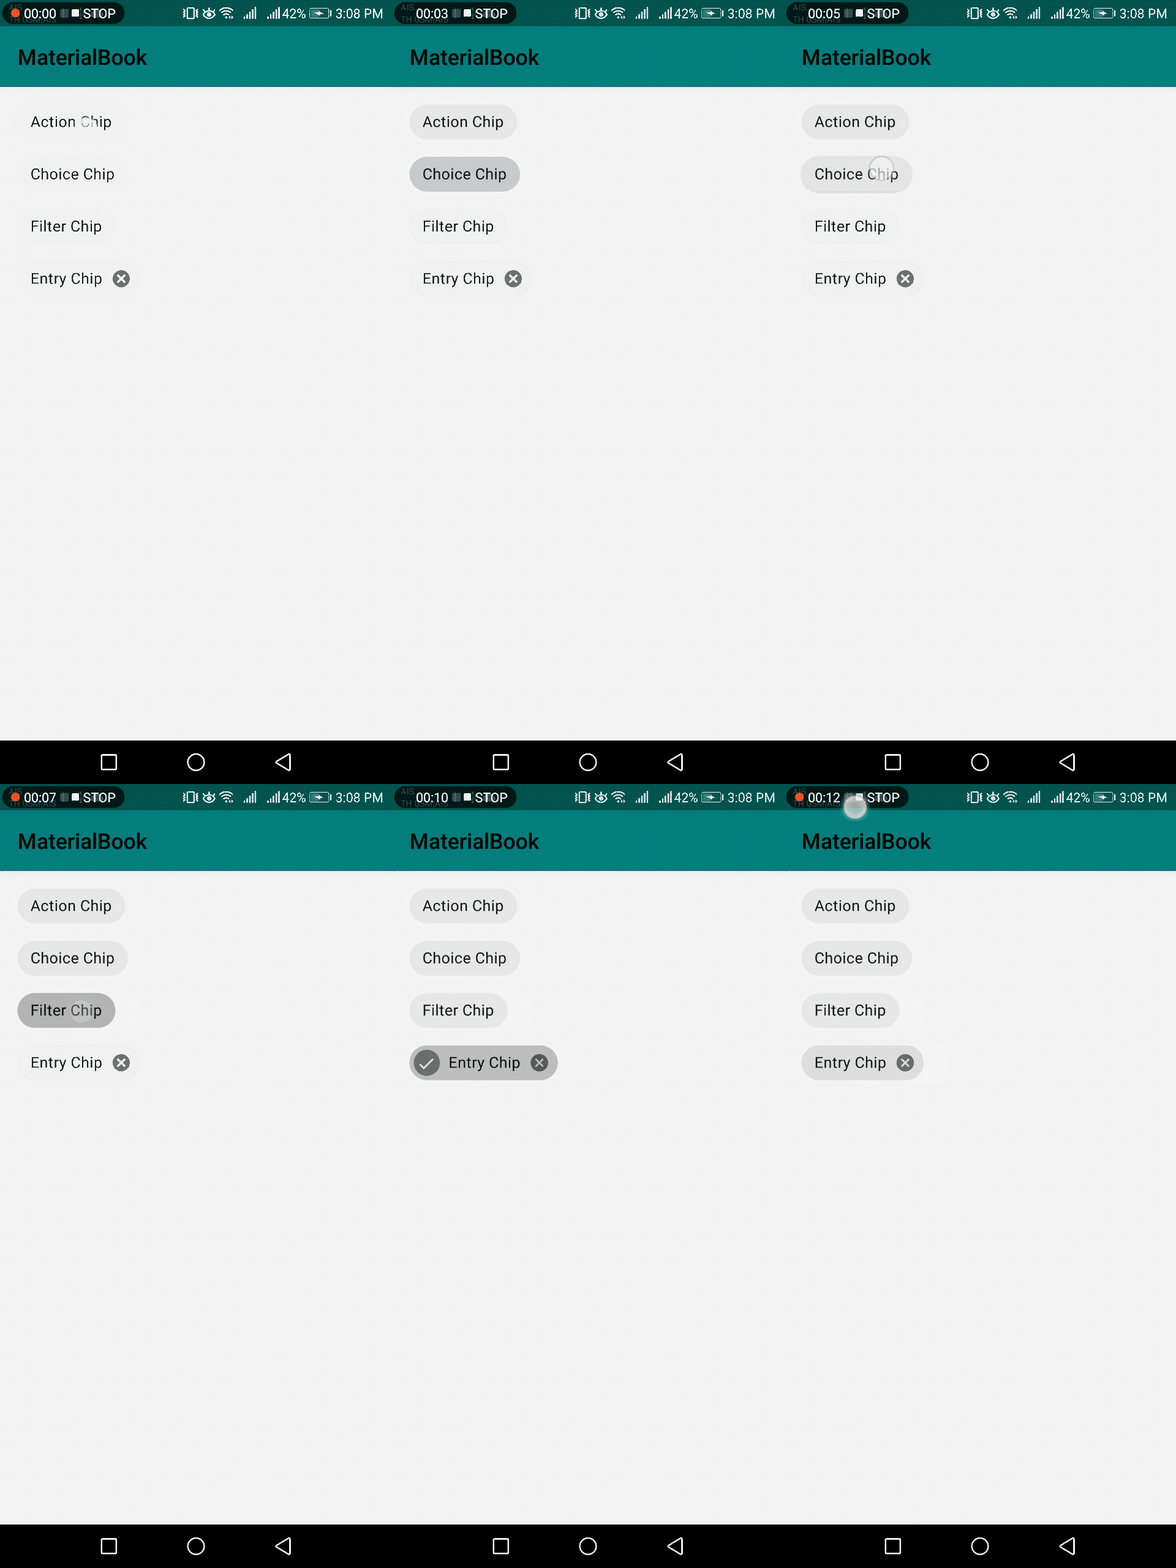
Chips have 4 styles are action chip, filter chip, choice chip, and entry chip.
Action Chips
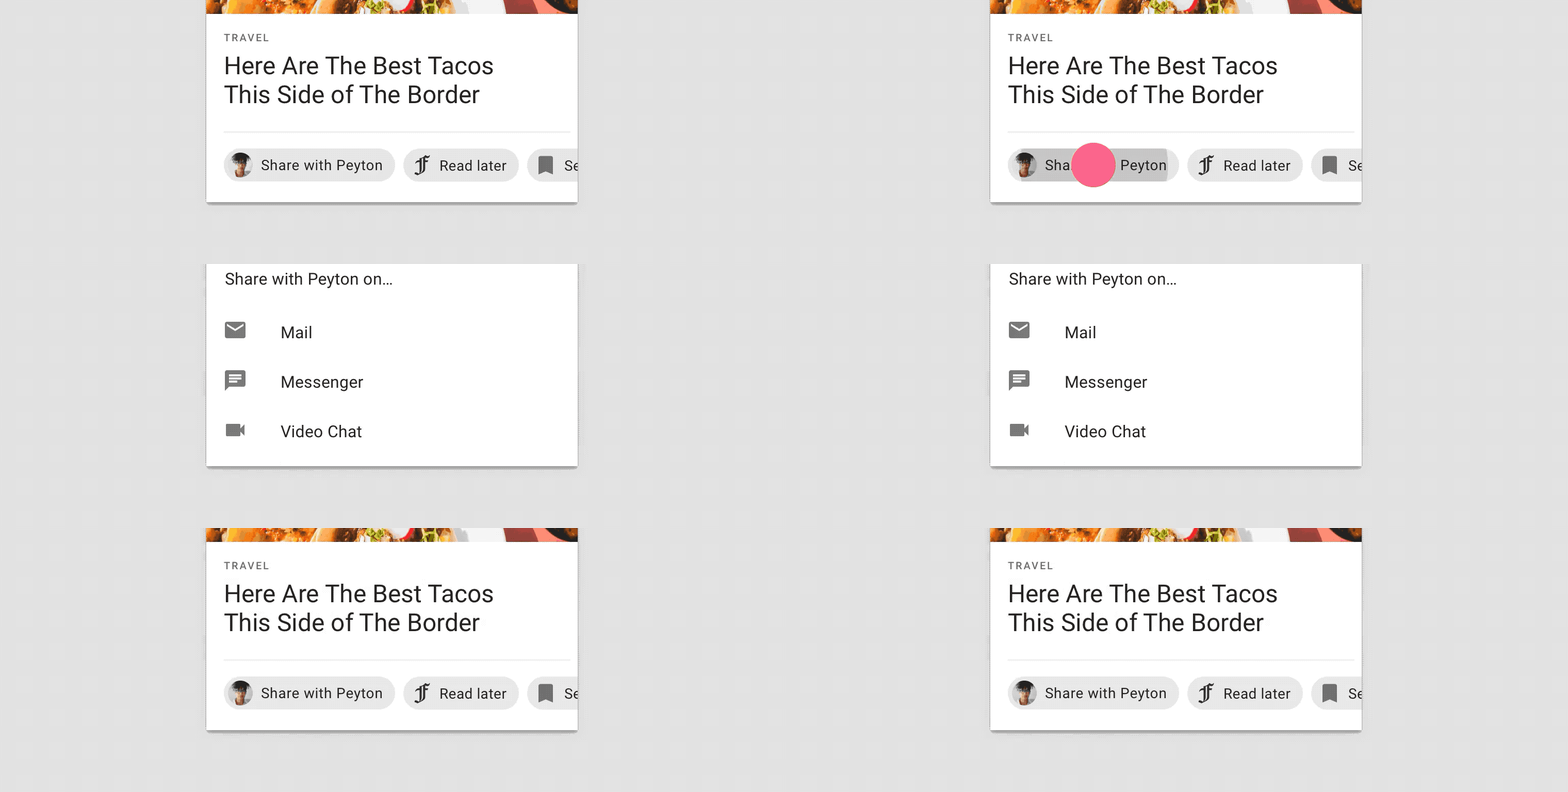
are default style of chips and used with action related to primary content which displayed after them.
If action chips use in Material Card, they are below divider line.

It can trigger an action or show progress and confirmation.
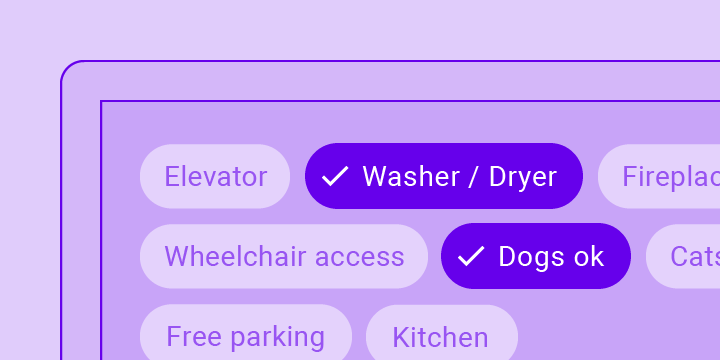
Filter Chips
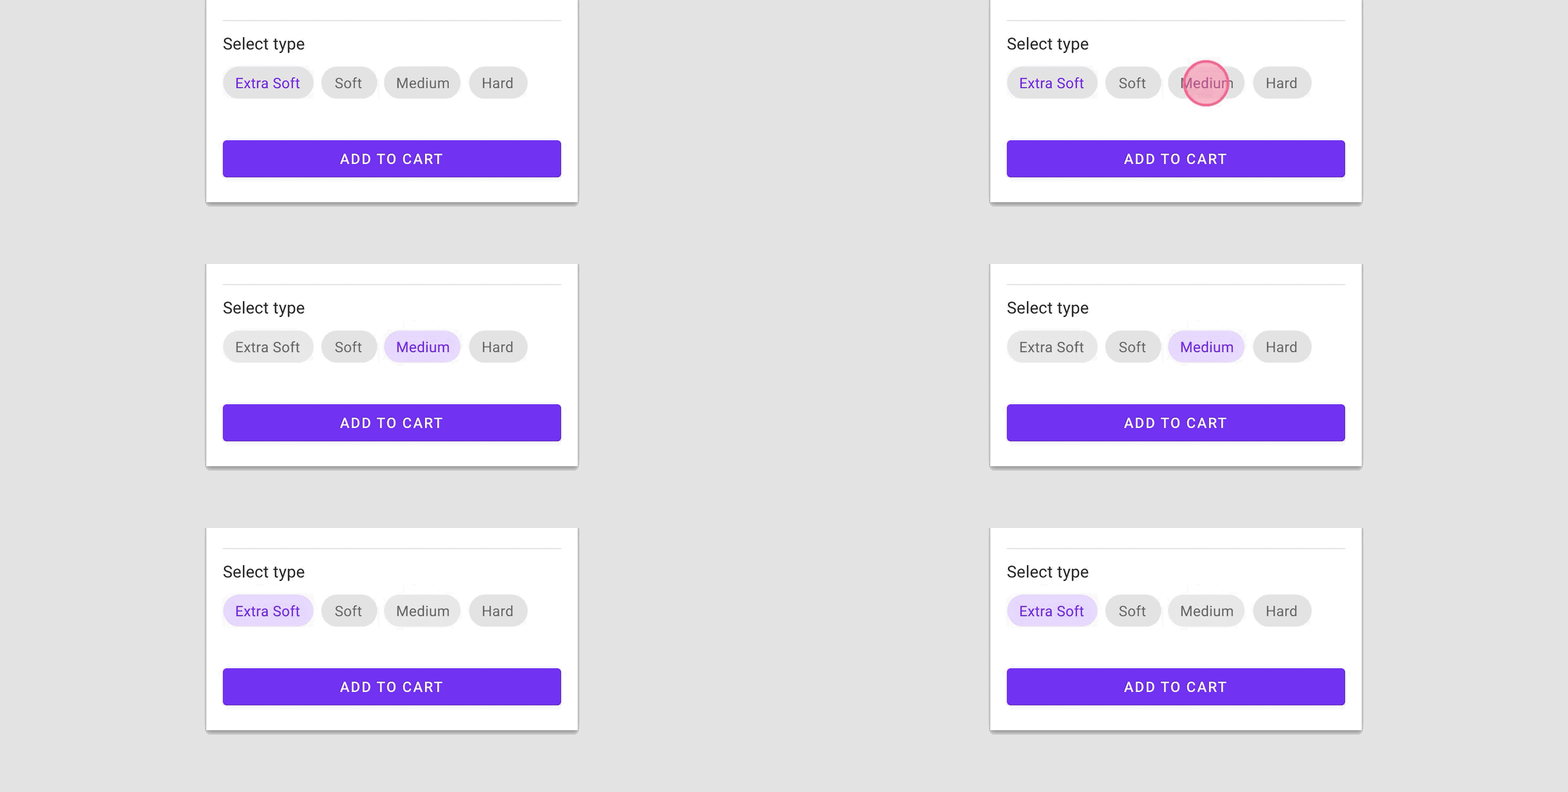
use tags or descriptive words to filter content.

They are a good alternative to toggle buttons or checkboxes with multiple chips can be selected or unselected.
style="@style/Widget.MaterialComponents.Chip.Filter"Choice Chip
allows selection of a single chip from a set of options and a good alternative to toggle buttons, radio buttons, and single select menus.

When you selecting a single choice chip automatically deselects all other chips in the set.
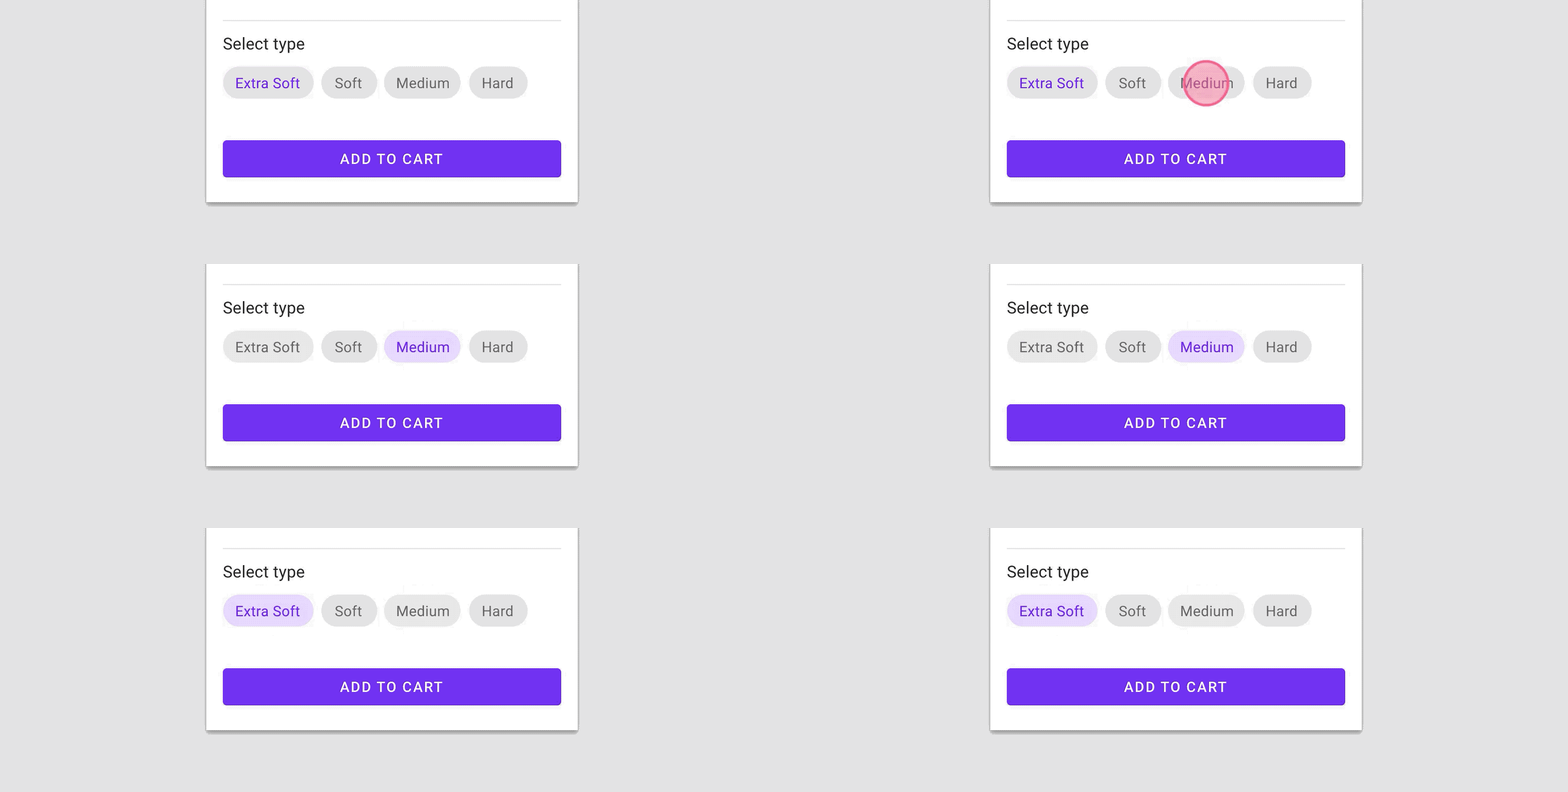
style="@style/Widget.MaterialComponents.Chip.Choice"Entry Chip
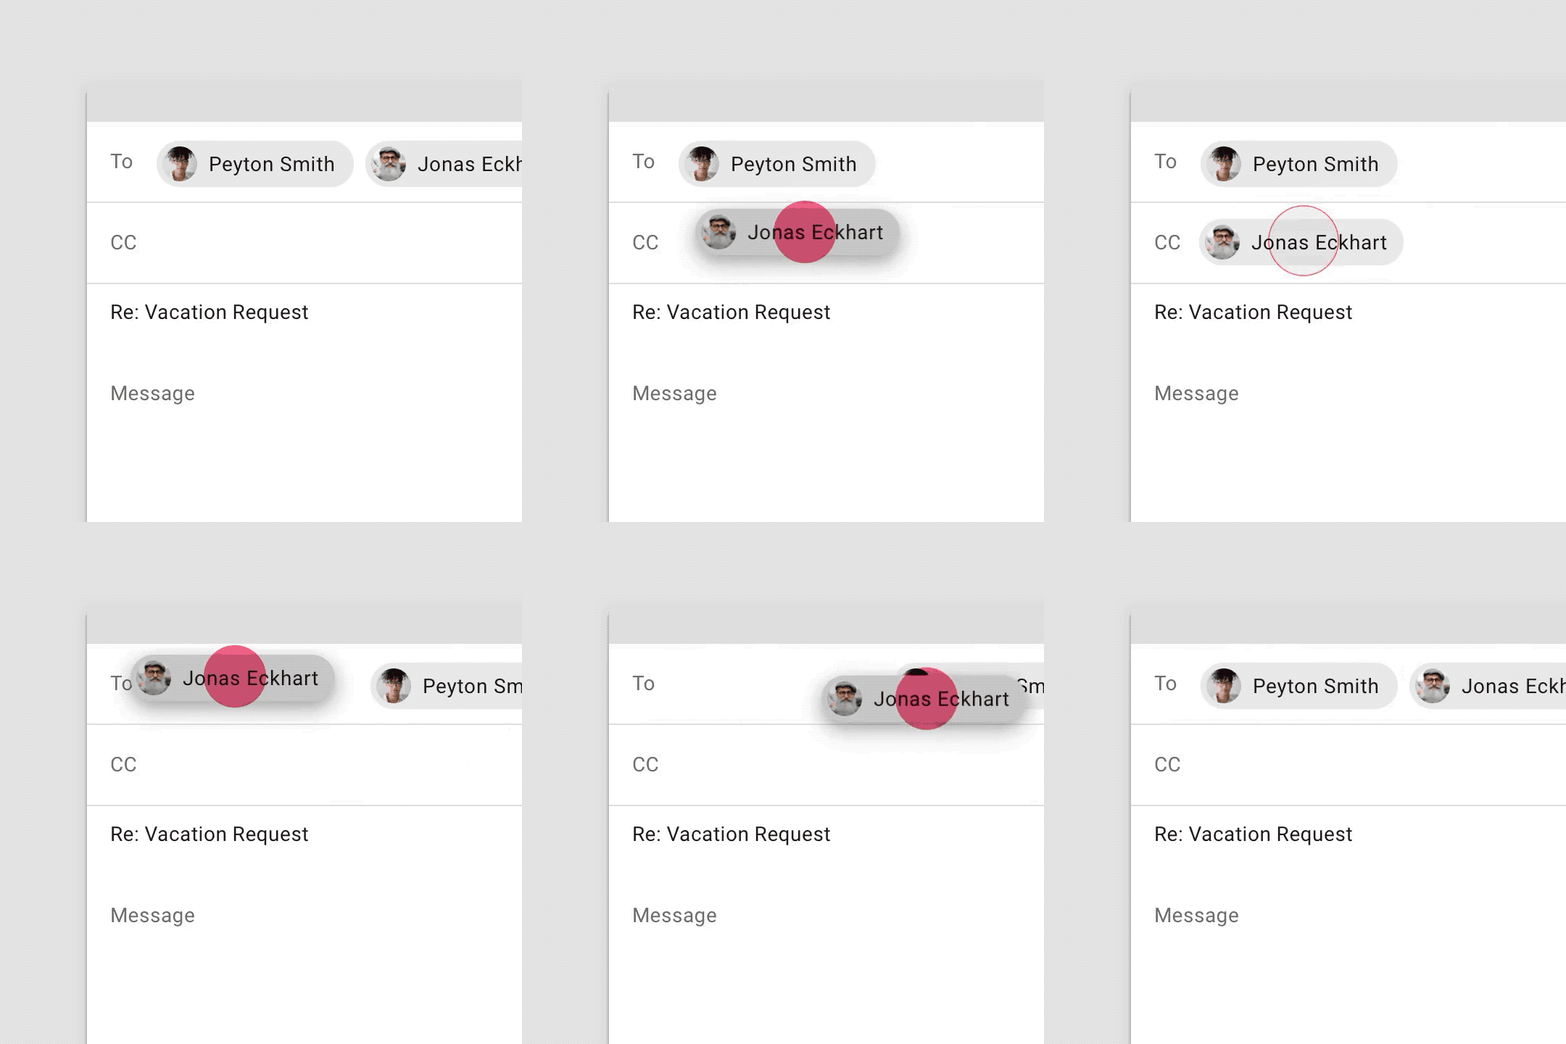
represents a complex piece of information in a compact form. It usually contains an optional chip icon, optional close icon, and is optionally checkable.

Behaviors are transform text based on user input, can be editable util user take action, display error state, can be reordered or moved into other fields and expend to show more information.
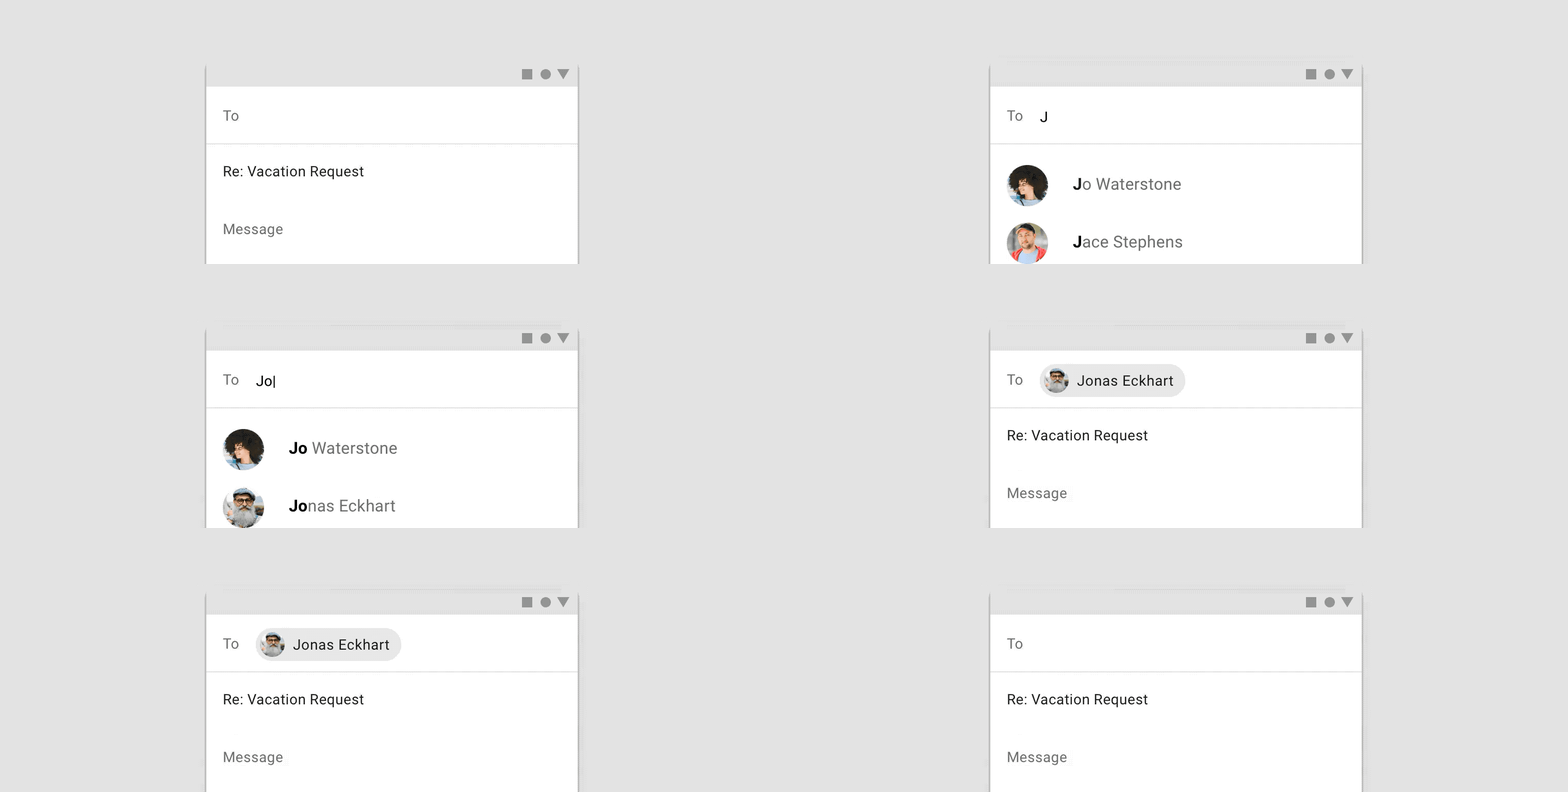
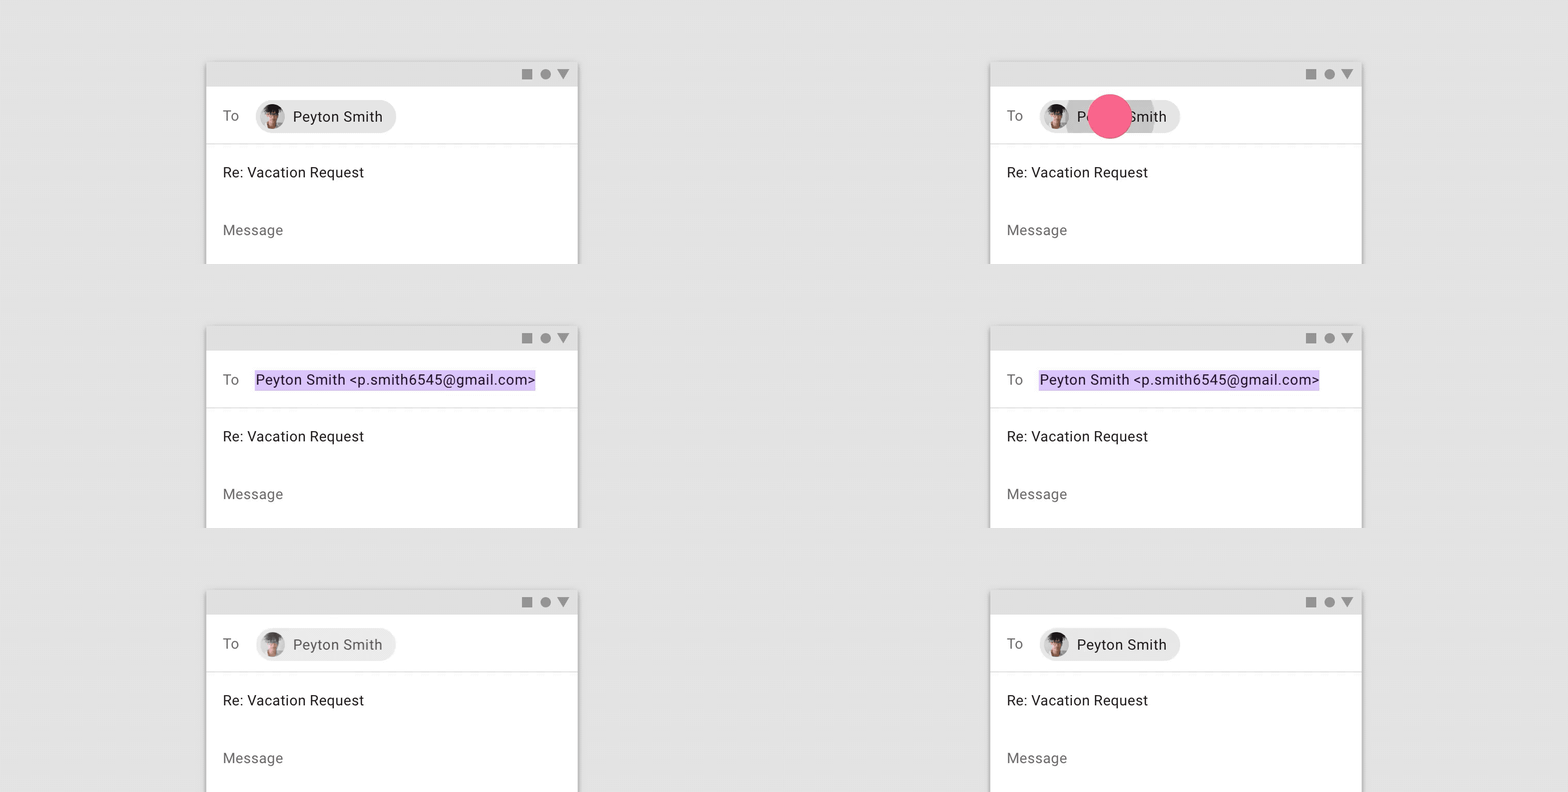
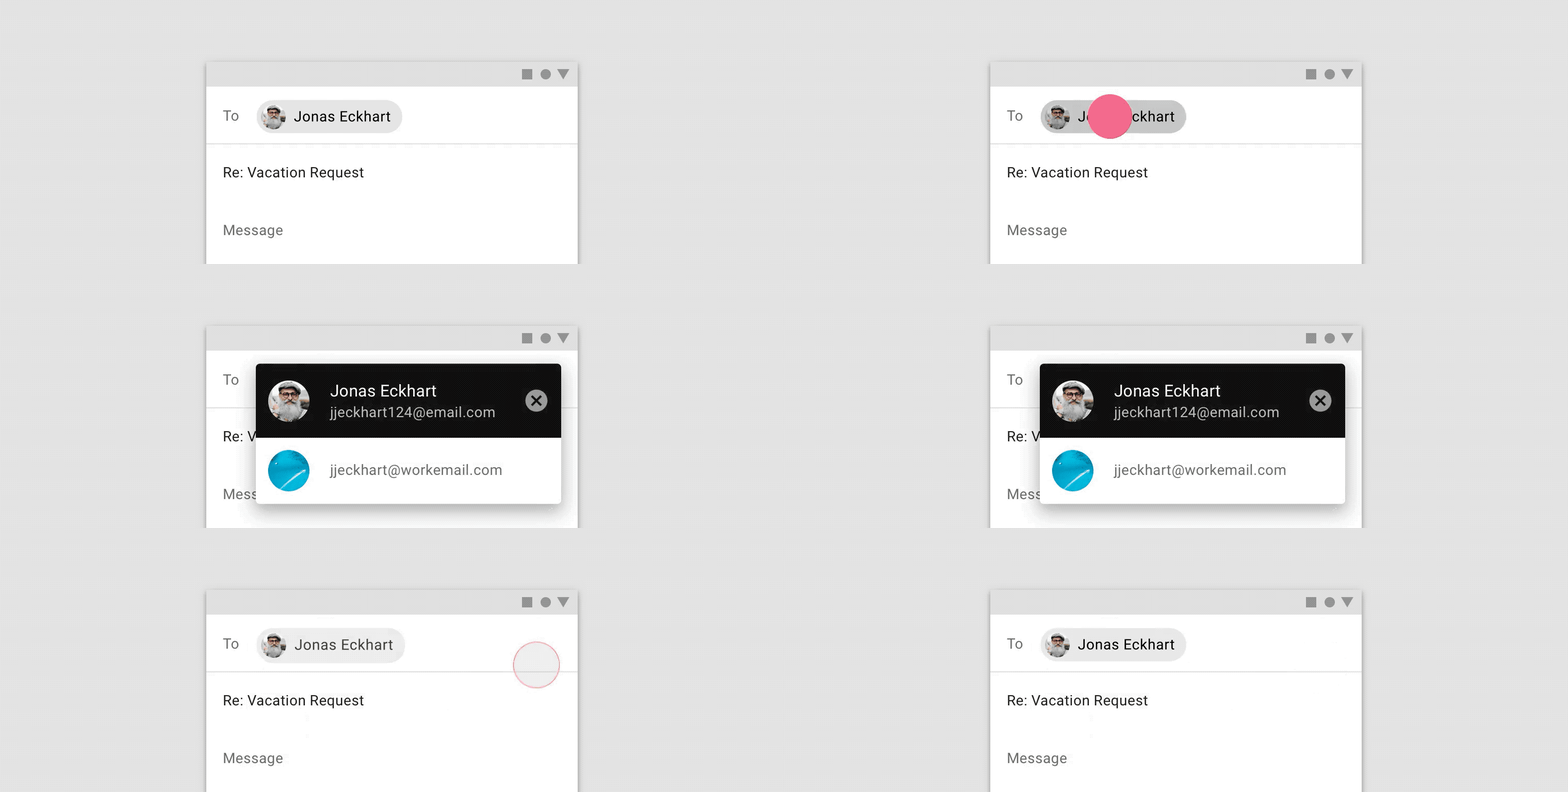
style="@style/Widget.MaterialComponents.Chip.Entry"Handling Clicks
In Material Design Document said about 3 callback function for used in Chips.
- Call
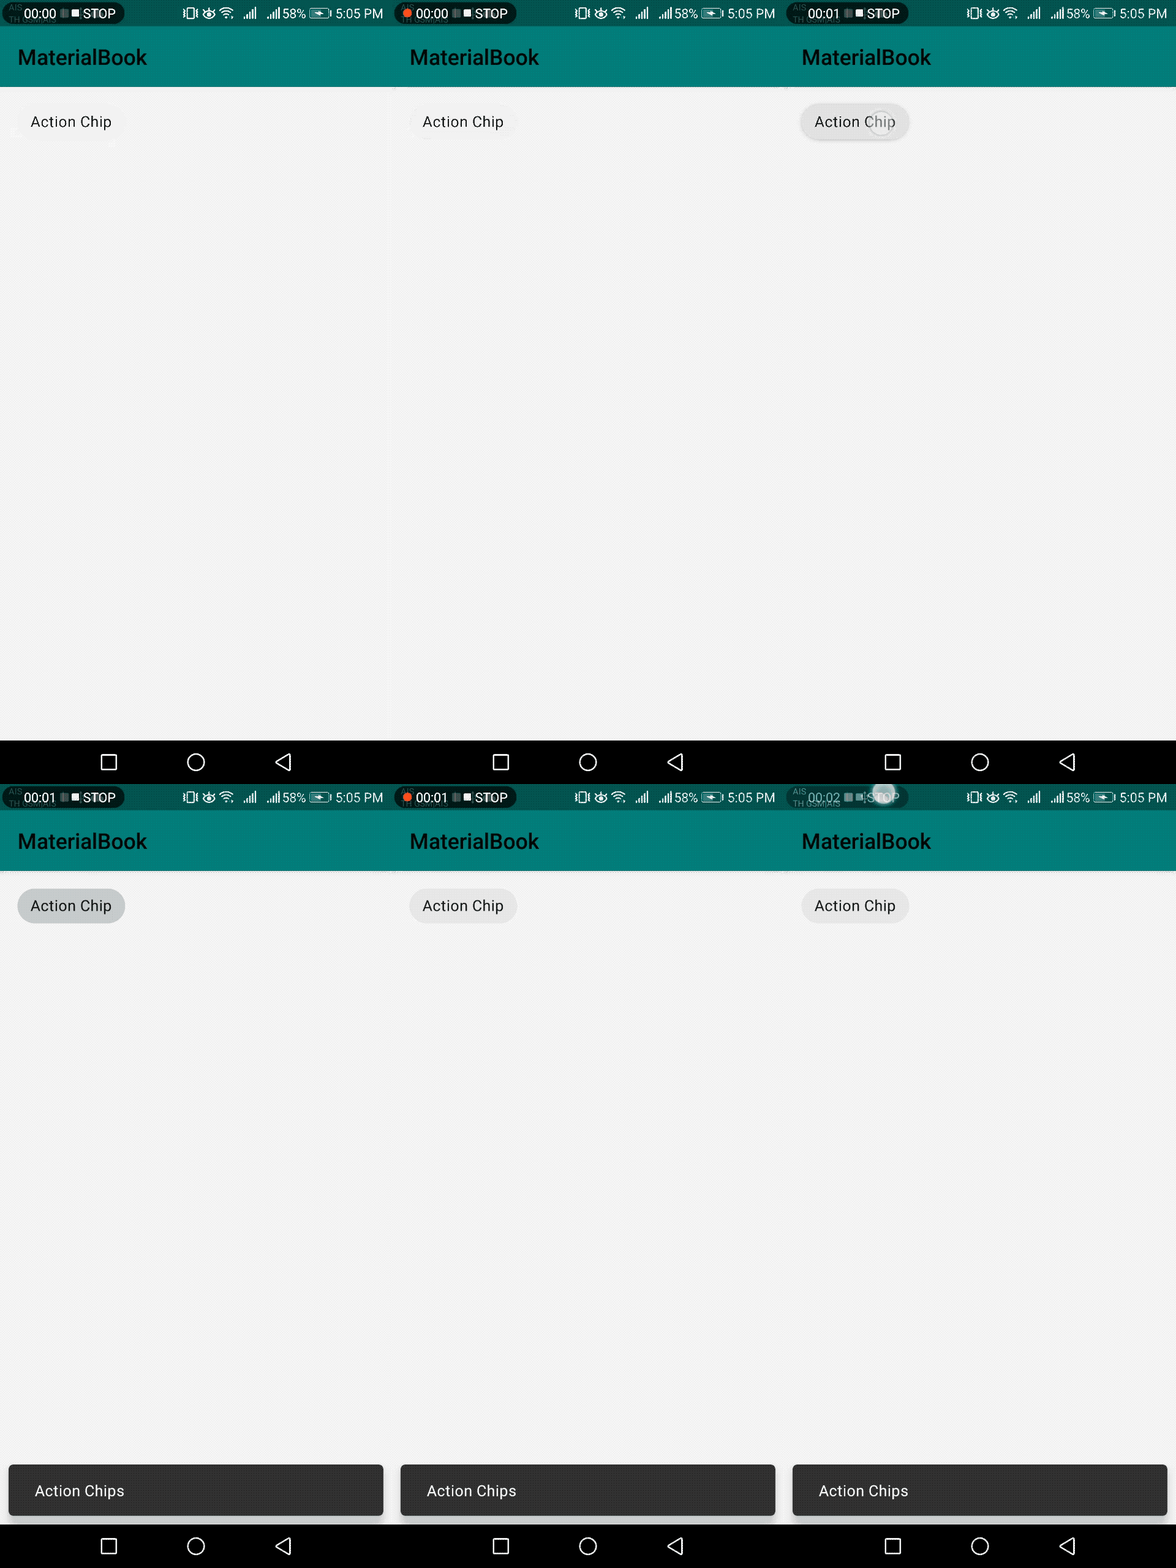
setOnClickListenerto do something after click at chip for example show Snackbar after click it.
chipAction.setOnClickListener {
    Snackbar.make(
       rootview,
       "Action Chips",
       Snackbar.LENGTH_SHORT
   ).show()
}
- call
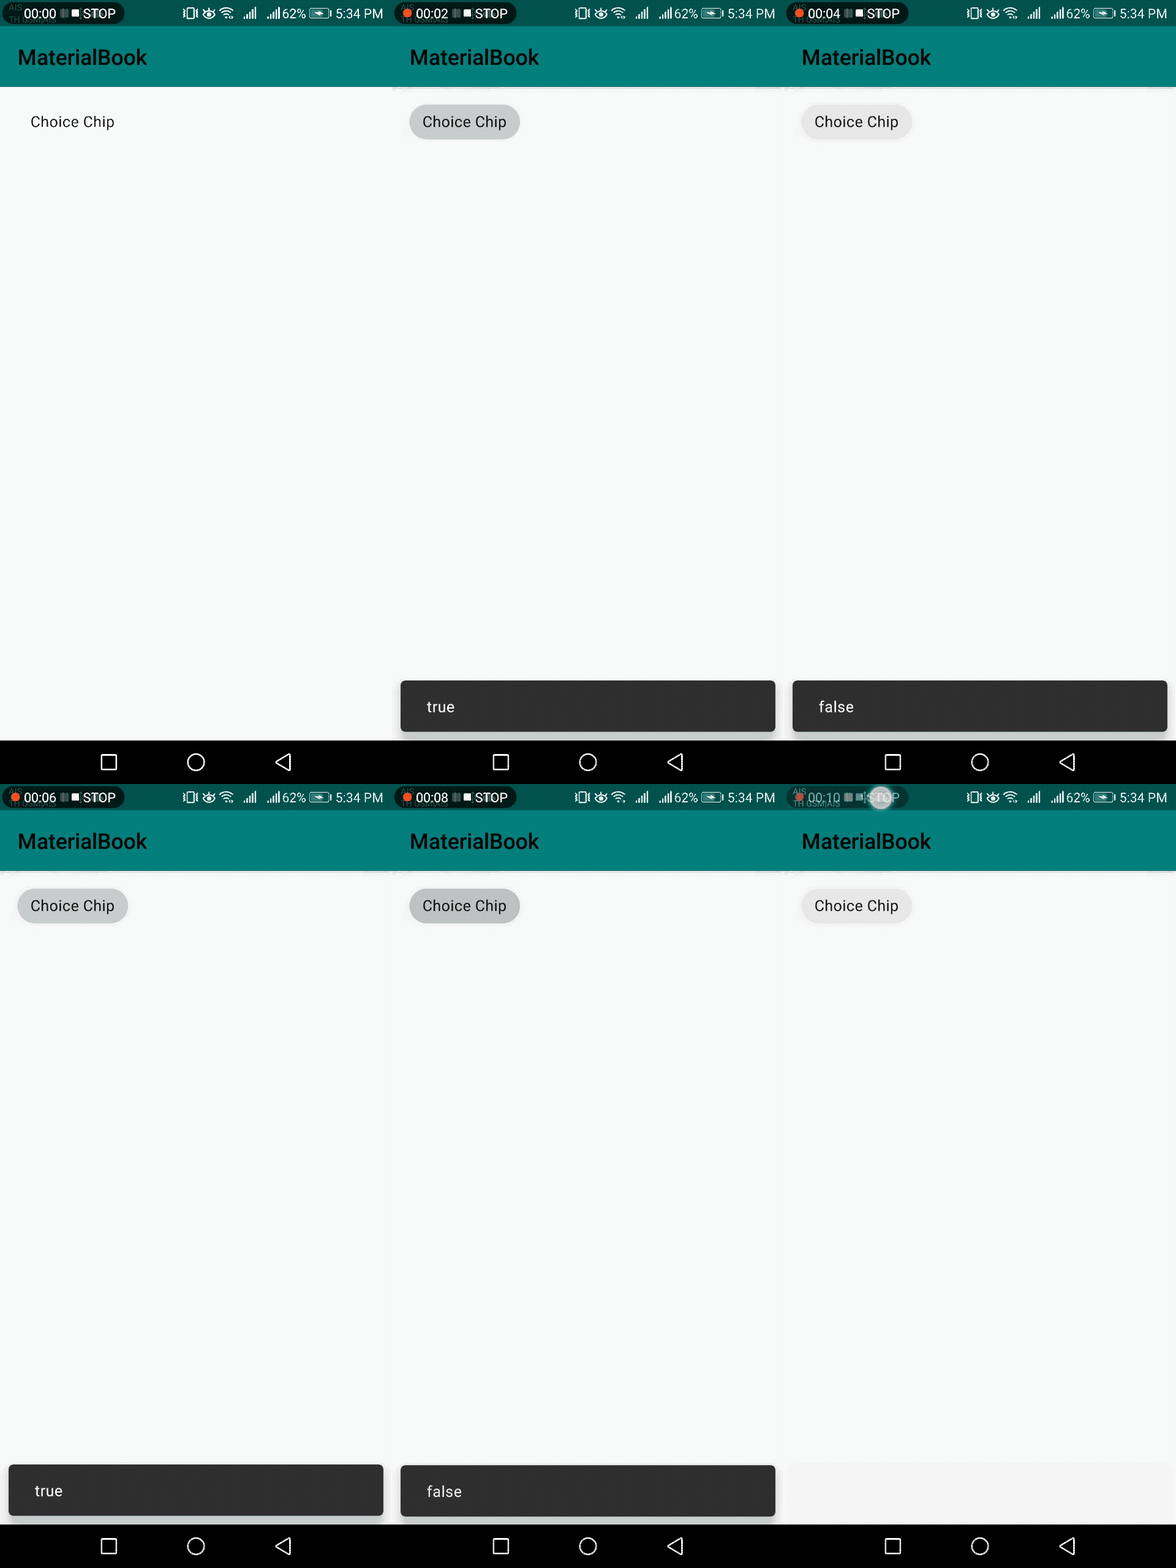
setOnCheckedChangeListenerto register a callback when chip is toggled for example show Snackbar text forisCheckvalue after click it.
chipChoice.setOnCheckedChangeListener { buttonView, isChecked ->
    Snackbar.make(
       rootview,
       isChecked.toString(),
       Snackbar.LENGTH_SHORT
    ).show()
}
- Call
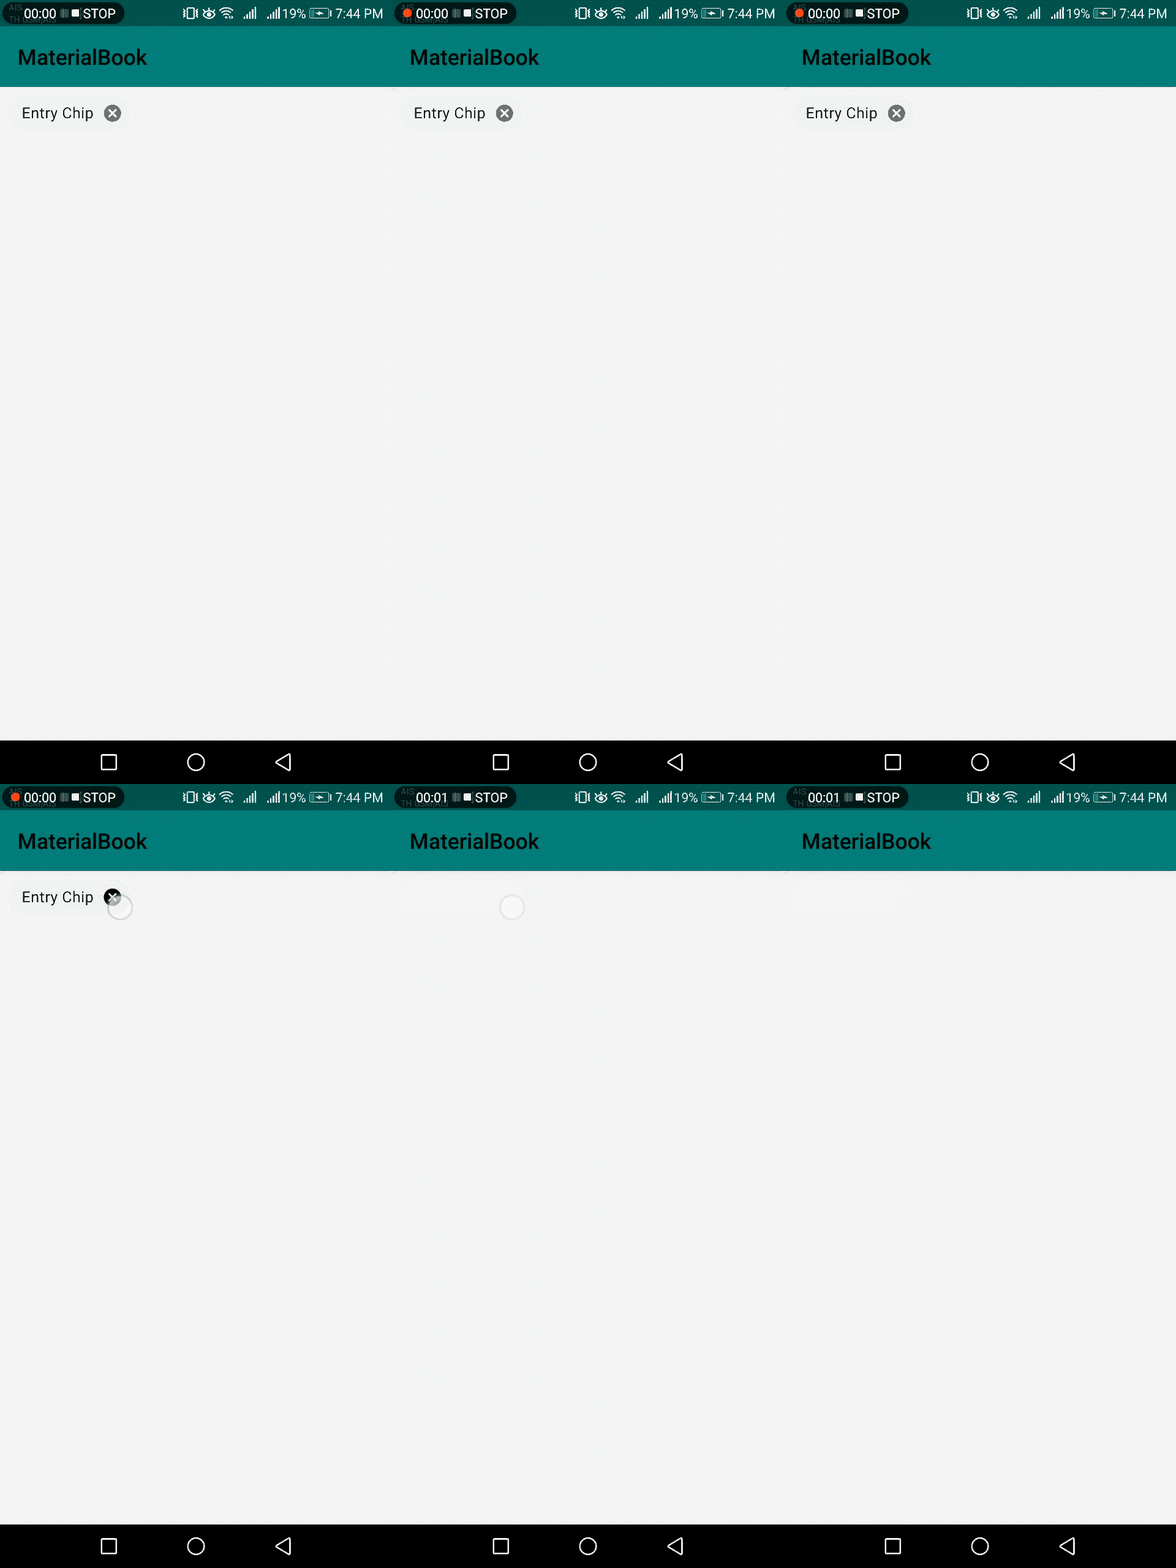
setOnCloseIconClickListenerto do something with click close icon in entry chip for example click at close icon to hide it.
chipEntry.setOnCloseIconClickListener {
    it.visibility = View.GONE
}
Example
I have some sample to use Chips for some situation in your application.
#1 Add hashtag for your menu.
What’re hashtag relate about Tonkatsu?
Tonkatsu is a Japanese food containing deep-fried pork with breadcrumbs, cabbage, Japanese rice, miso soup, and side dish. I took this dish when I have lunch with my colleagues at Katsushin which recommended by Wongnai Users’ Choice 2019.
Then hashtag about this photo are tonkatsu, Japanese food, pork, meat, lunch, bangkok, and silom.

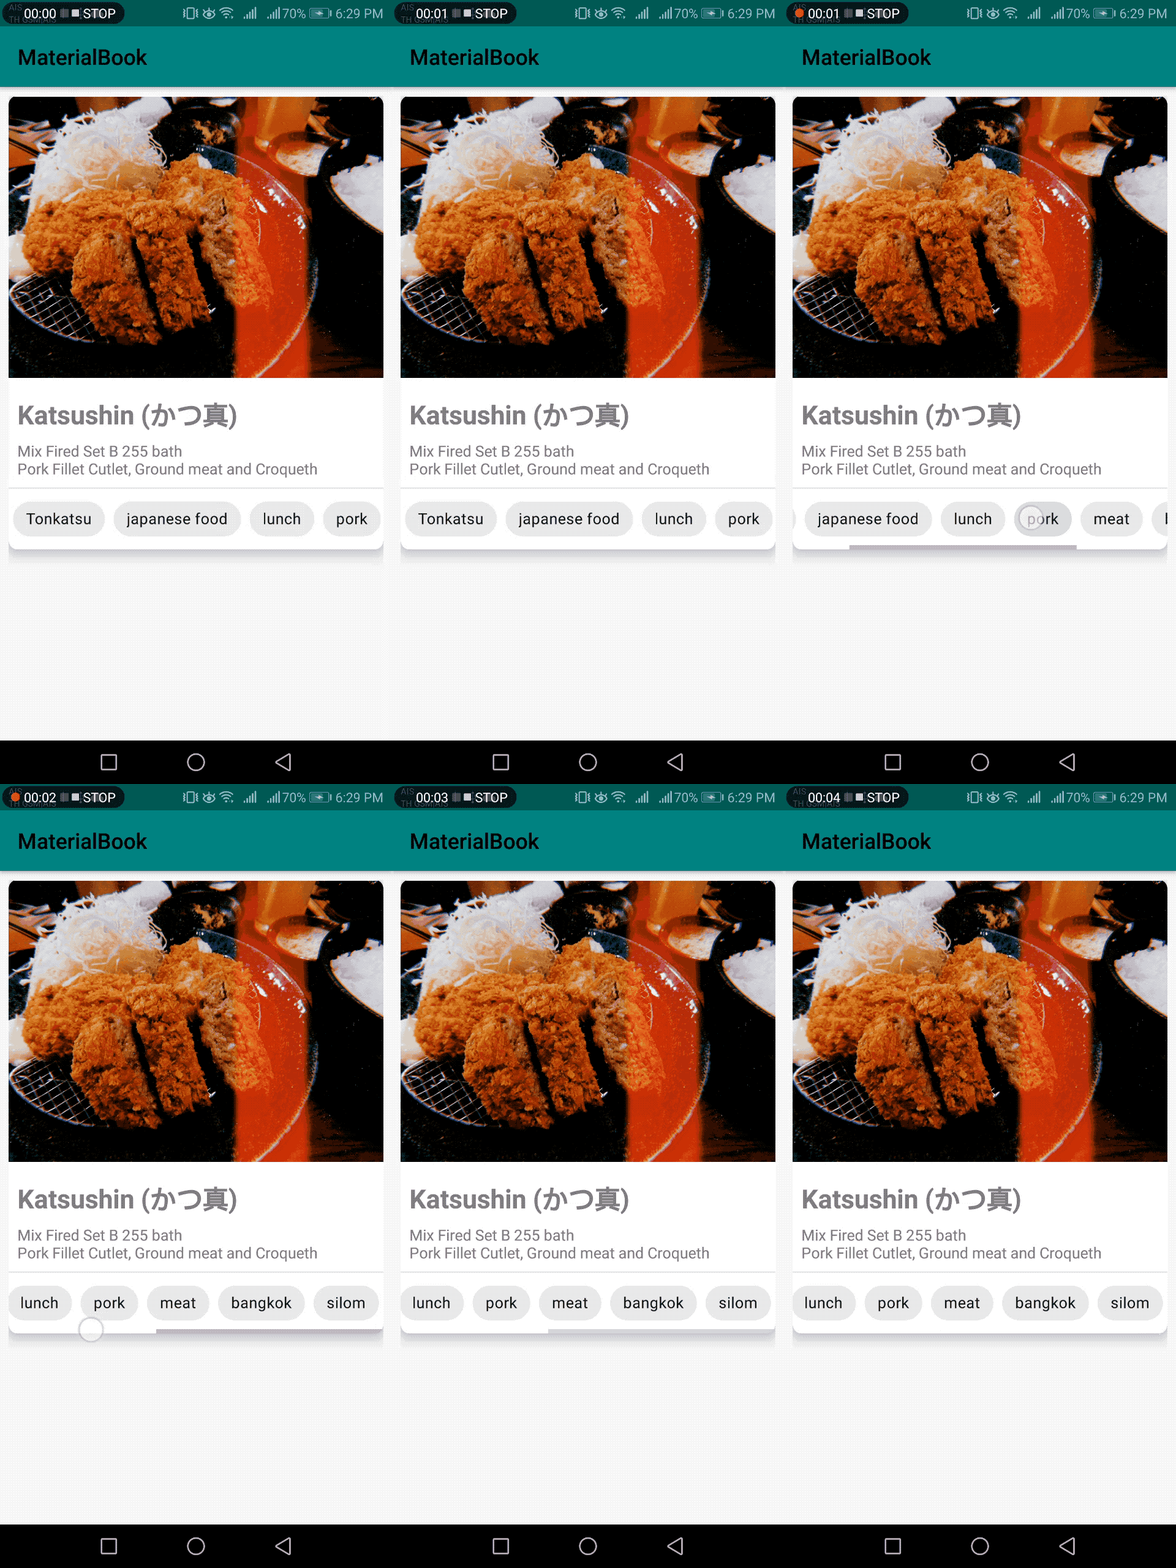
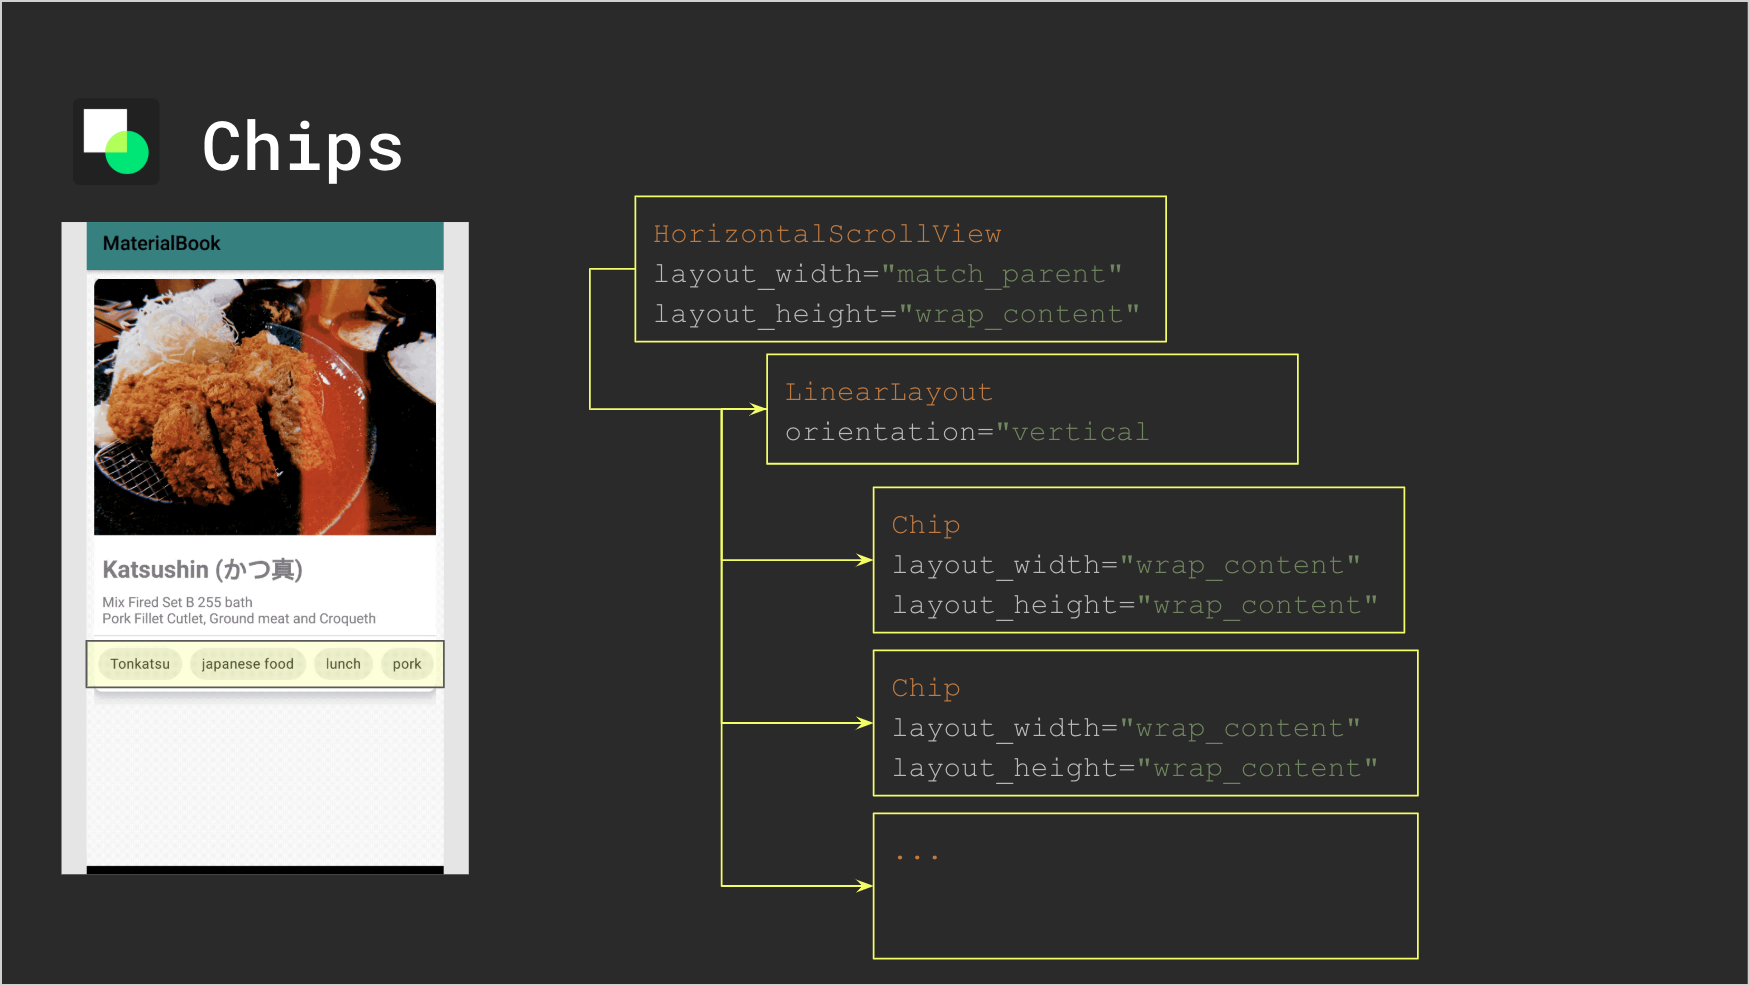
I mockup hashtag list by chips in my Material Card with LinearLayout is parent view but have problem about cannot show all hashtag

OK, It can solve them by add horizontalScrollView to parent view then can scroll to see all hashtag.
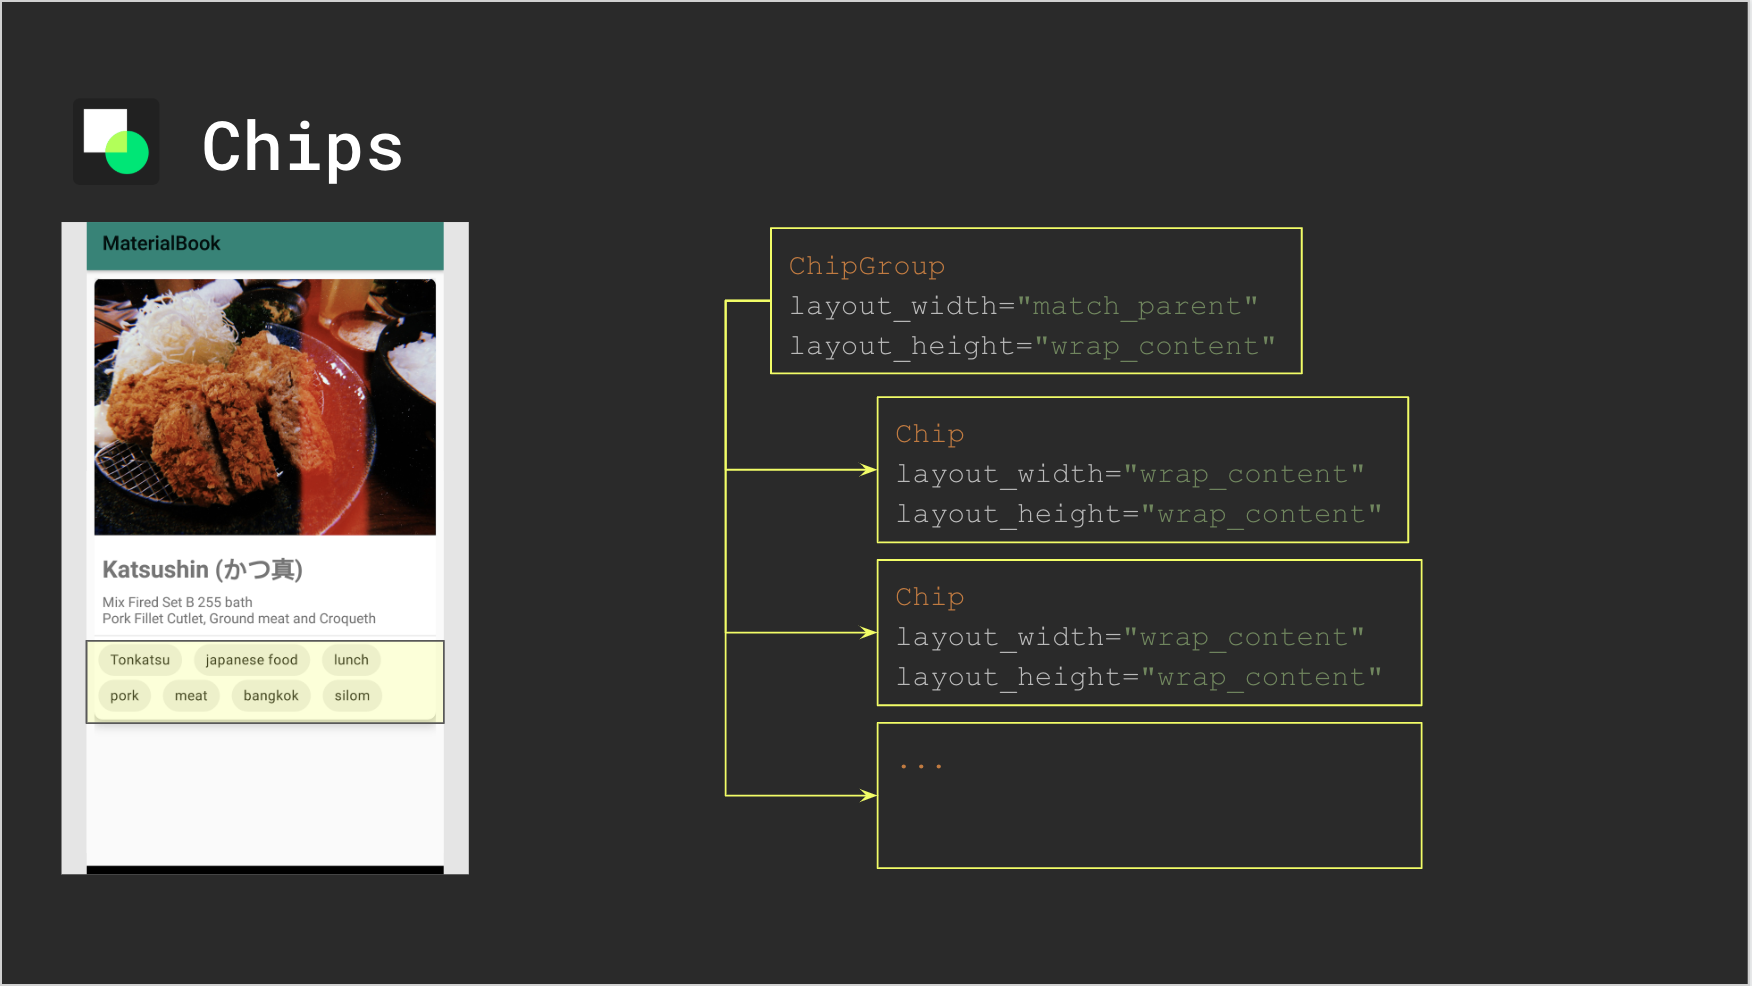
If a designer in your team need to show all hashtag in Material Card without scroll view. How do you solve this?
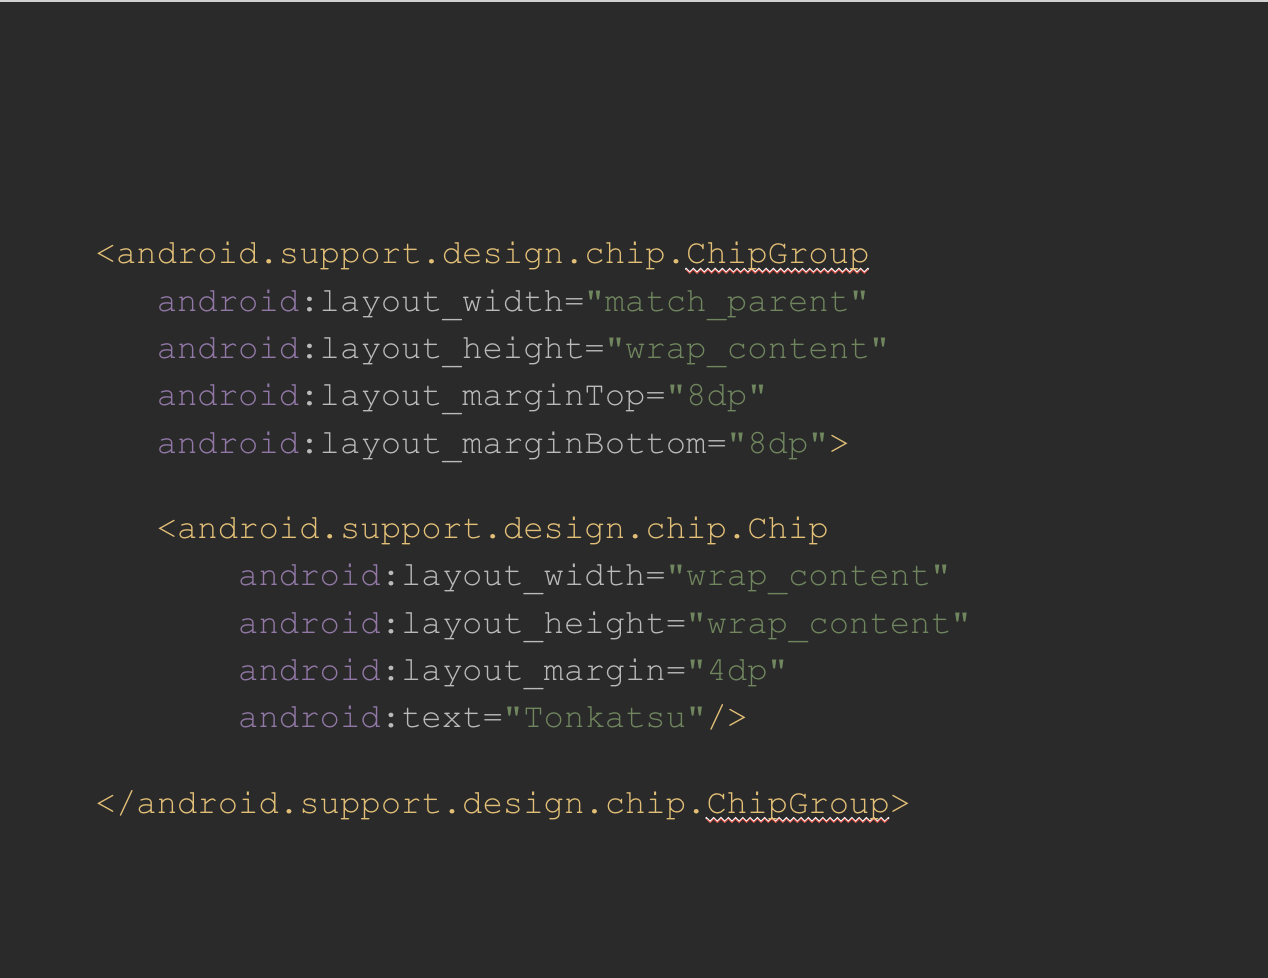
This question solved by ChipGroup which contains a chip set and manage layout similar to RadioGroup.
If you get all hashtag from dynamic such as API. You should use RecyclerView to render chips.
#2 Hashtag in RecyclerView with dynamic data
If you get all hashtag from dynamic data such as API. You should use RecyclerView to render chips.
This application for the example is my blog application and redesign it to Material Design. User can get all blogs and read it in my application. Each blog has tag related to content of blog such as I write for doing Firestore Codelab from Android Bangkok last year at home, tags are Android Application, firebase, and programming.
For scroll view to see all hashtag,

You add RecyclerView in ChipGroup at your item view for use in your adapter.
<android.support.design.chip.ChipGroup
   android:id="@+id/chipGroup"
   android:layout_width="match_parent"
   android:layout_height="wrap_content">

<android.support.v7.widget.RecyclerView
       android:id="@+id/recyclerViewHashtag"
       android:layout_width="match_parent"
       android:layout_height="wrap_content"/>

</android.support.design.chip.ChipGroup>
and add new adapter class in HashtagChipAdapter file.
then add adapter in your RecyclerView in main adapter class.
recyclerViewHashtag.apply {

layoutManager = LinearLayoutManager(
           containerView.context,
           LinearLayoutManager.HORIZONTAL,
           False
   )

this.adapter = HashtagChipAdapter(
       Item.labels,
       this@PostListItemViewHolder
   )
}
For ChipGroup,

You add ChipGroup at your item view for use in your adapter layout.
<android.support.design.chip.ChipGroup
   android:id="@+id/chipGroup"
   android:layout_width="match_parent"
   android:layout_height="wrap_content"/>
and create Chip view at adapter class and add it to ChipGroup.
You don’t forget for removeAllViews at ChipGroup because they have bug with show tag with scroll up-down which view reused old view to show tags item.
chipGroup.removeAllViews()
if (item.labels!!.isNotEmpty()) {
    item.labels.forEach {
        val chip = Chip(containerView.context)
        chip.apply {
            layoutParams = ViewGroup.LayoutParams(
                    ViewGroup.LayoutParams.WRAP_CONTENT,
                    ViewGroup.LayoutParams.WRAP_CONTENT)
            text = it
        }
        chipGroup.addView(chip)
    }
}
#3 ChipGroup Selected
Last example for chip. If you select something in your app, you think of RadioButton, Checkbox, and something like that. Chip can do similar to select one thing and multiple thing in the list.

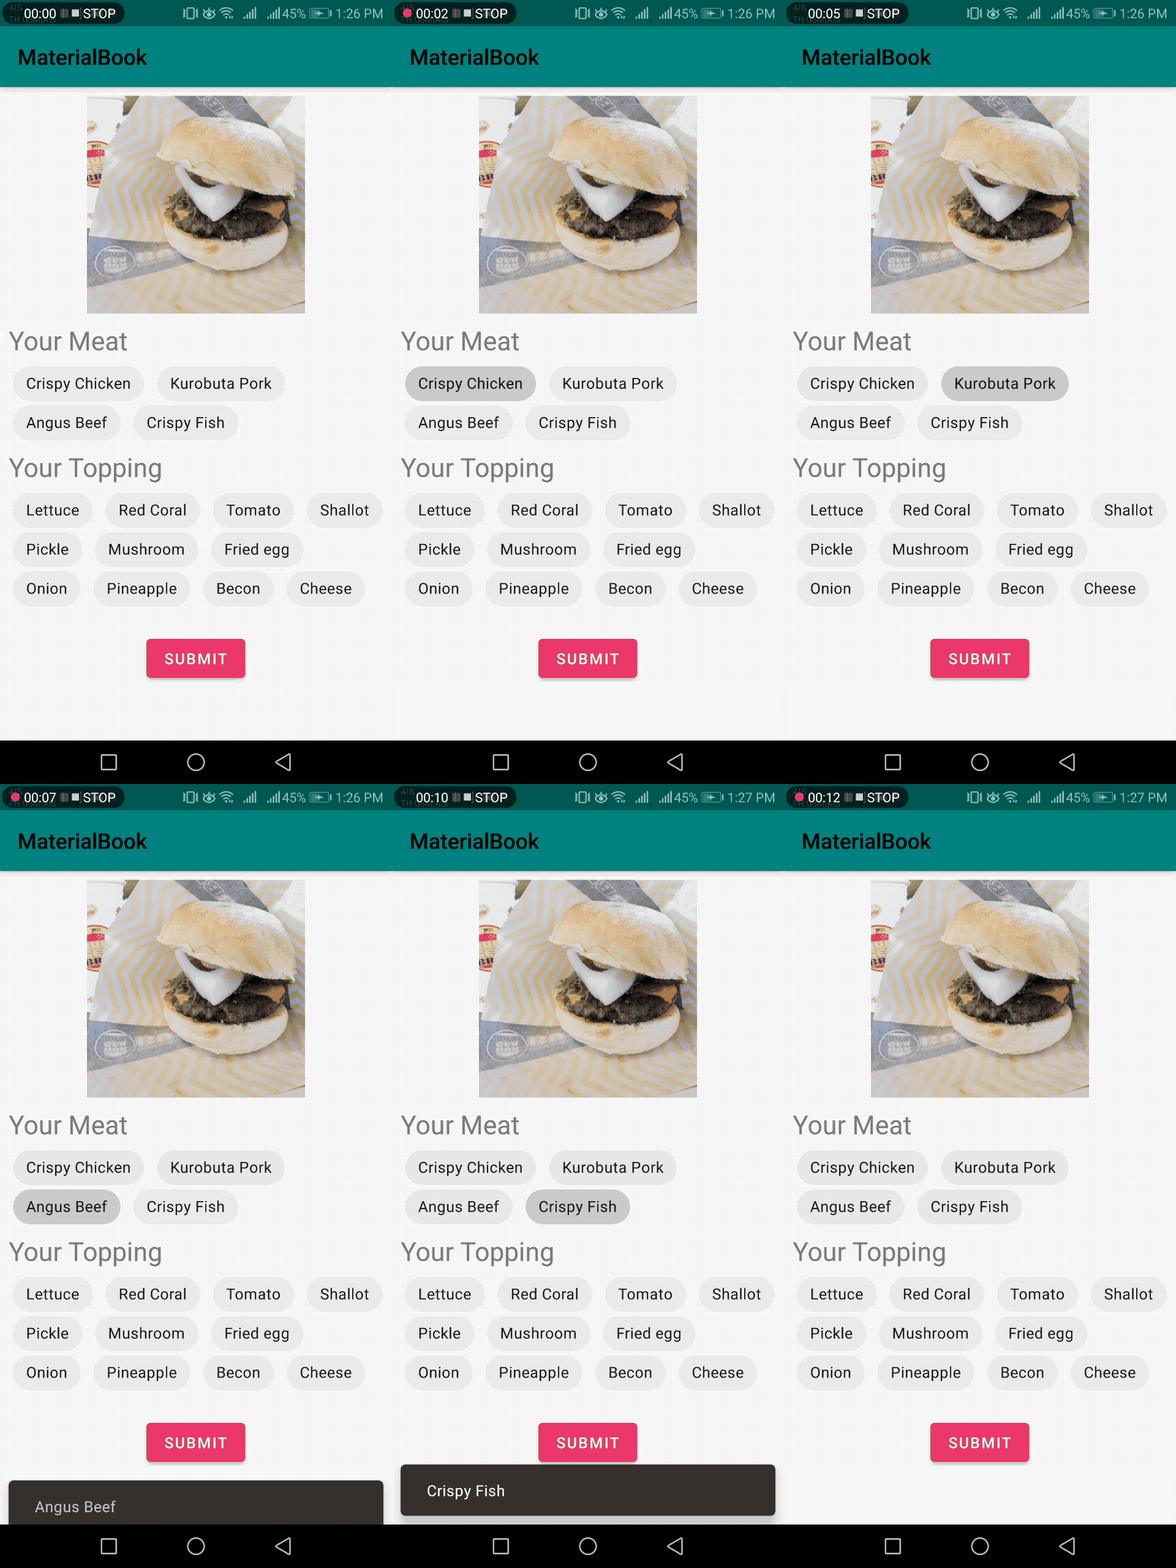
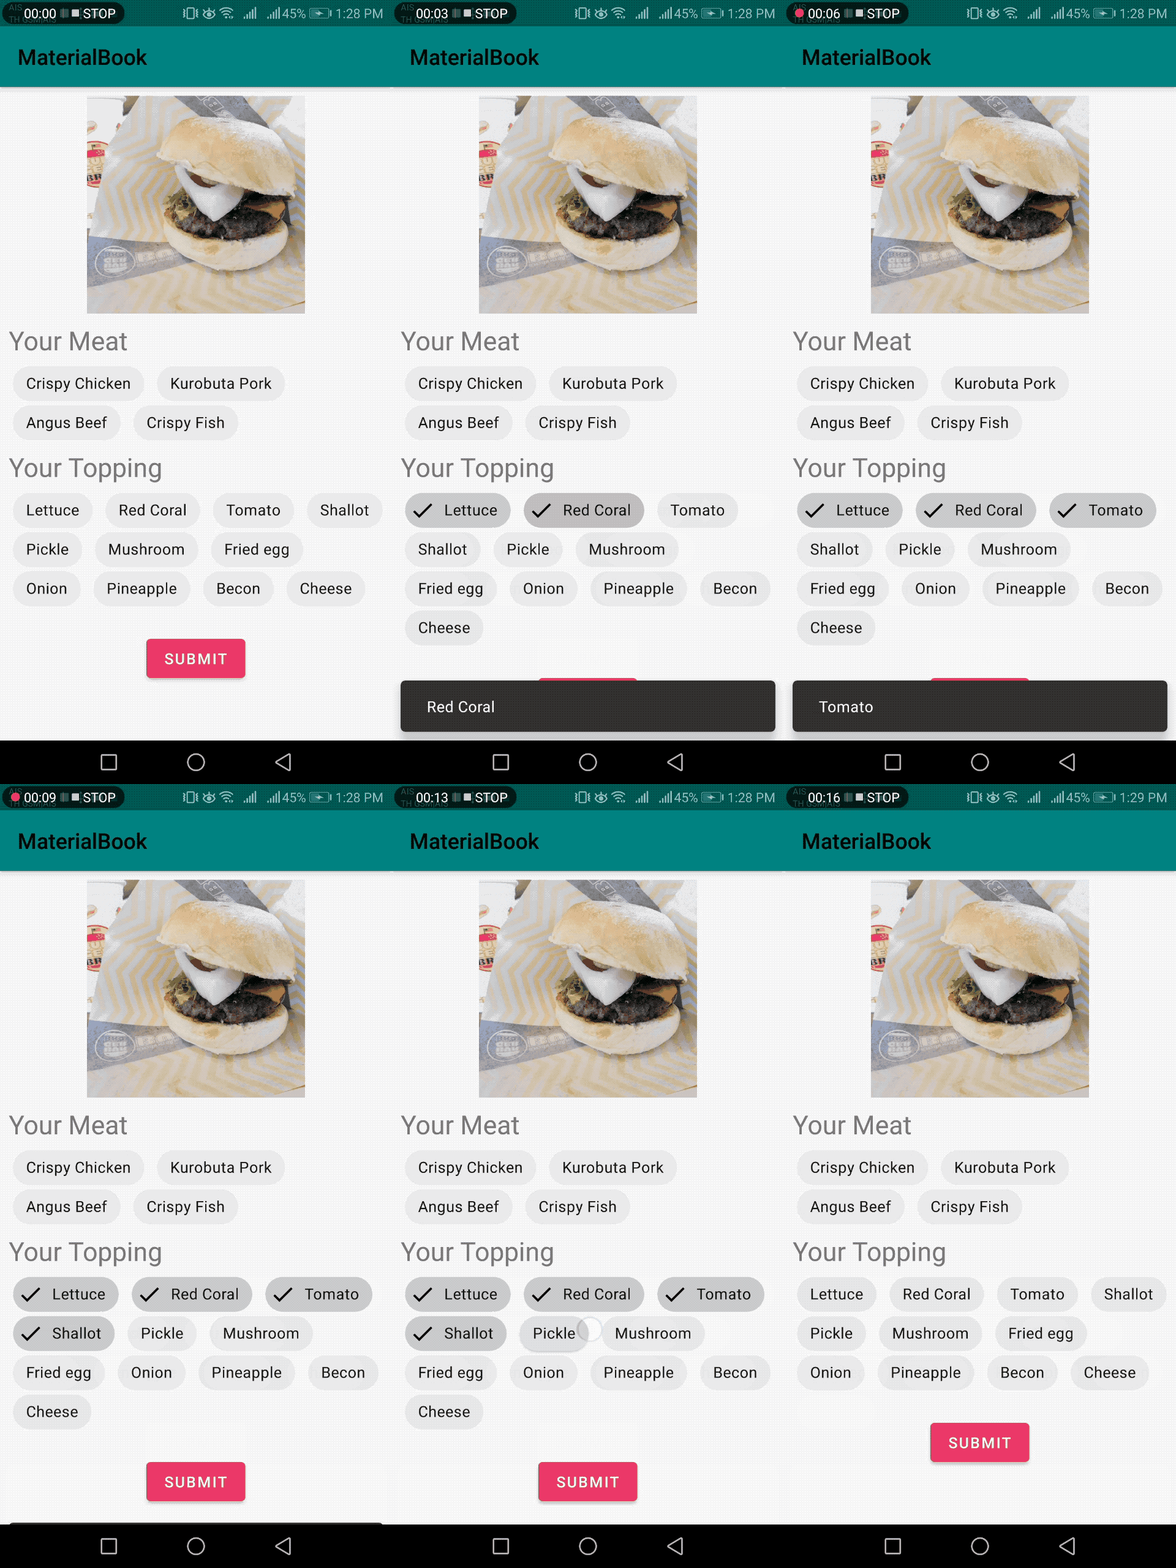
This example is make your burger, you can choose 1 meat with Choice Chips and many topping in your burger with Filter Chips.
For choose your meat with Choice Chips, add 1 ChipGroup which set singleSelection is true.
<android.support.design.chip.ChipGroup
    android:id="@+id/chipGroupMeat"
    android:layout_width="match_parent"
    android:layout_height="wrap_content"
    app:singleSelection="true">
Call setOnCheckedChangeListener for get Chips id fromChipGroup to get text of meat.
chipGroupMeat.setOnCheckedChangeListener { chipGroup, id ->
    if (chipGroup.findViewById<Chip>(id) != null) {
        val meat = chipGroup.findViewById<Chip>(id).text
        Snackbar.make(rootview, meat, Snackbar.LENGTH_SHORT).show()
    }
}
For Filter Chips to choose your topping, call setOnCheckChangeListener in each Chip which is a child of ChipGroups to get text for item selected.
for (i in 0 until chipGroupTopping.childCount) {
    val chip = chipGroupTopping.getChildAt(i) as Chip
    chip.setOnCheckedChangeListener { buttonView, isChecked ->
        if (isChecked) {
            Snackbar.make(rootview, chip.text, Snackbar.LENGTH_SHORT).show()
        }
    }
}
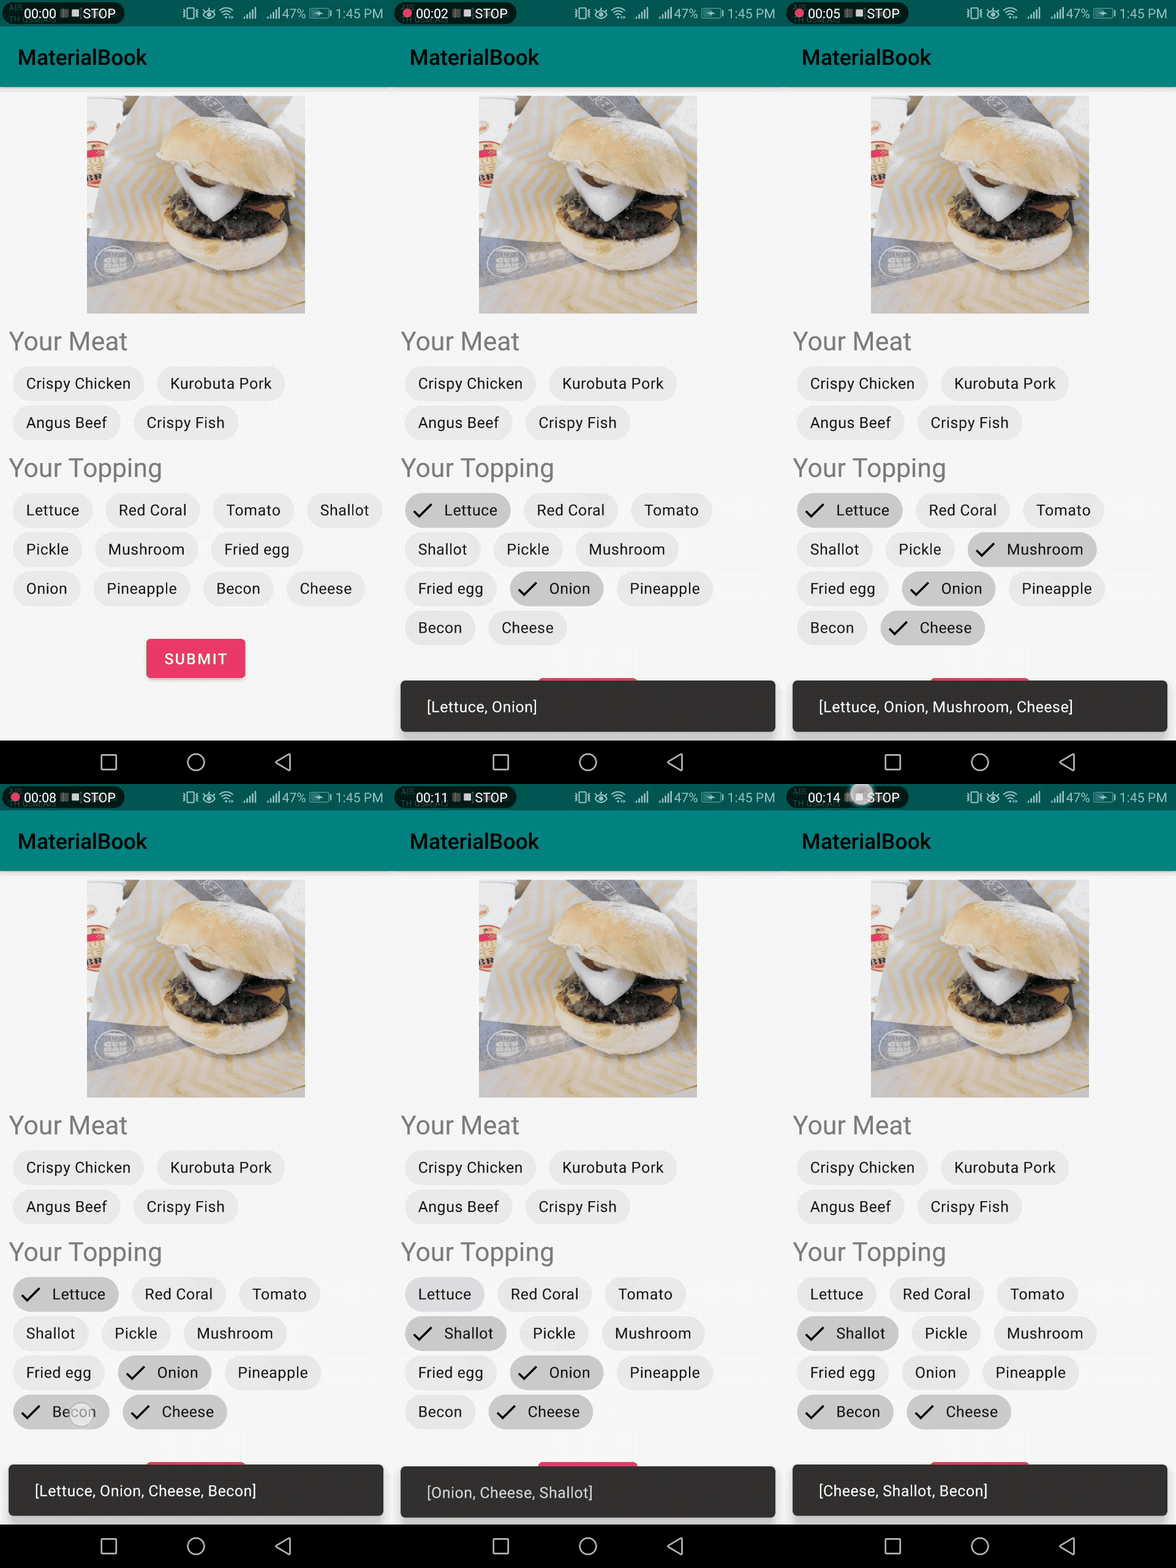
Final result in this example is get your meat and topping in your burger then you create global variable for meat and topping.
For topping, you create arrayList global variable and add it when checked and remove when unchecked.
for (i in 0 until chipGroupTopping.childCount) {
    val chip = chipGroupTopping.getChildAt(i) as Chip
    chip.setOnCheckedChangeListener { buttonView, isChecked ->
        if (isChecked) {
            toppingList.add(chip.text)
        } else {
            toppingList.remove(chip.text)
        }
        Snackbar.make(rootview, toppingList.toString(), Snackbar.LENGTH_SHORT).show()
    }
}
Finally setOnClickListener in your button to get meat and topping to show in next fragment.
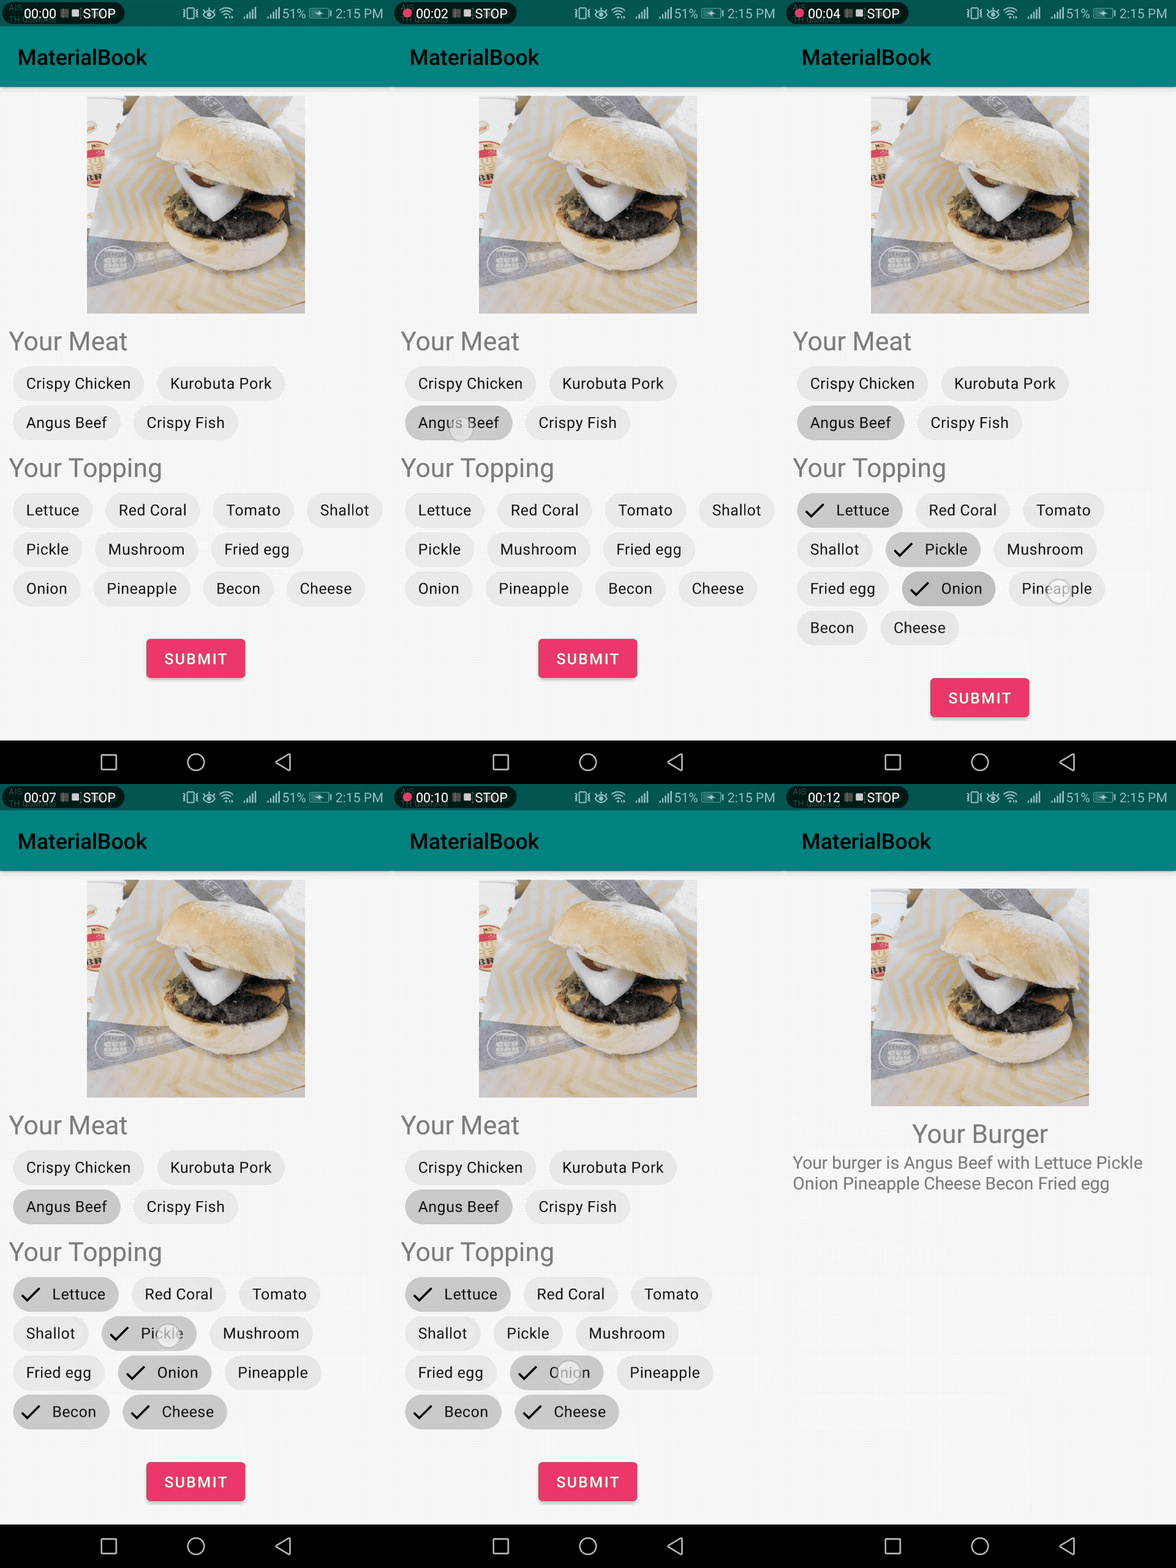
Reference

Follow my page and stay up-to-date.
อย่าลืมกด like กด share บทความกันด้วยนะคะ :)
Posted by MikkiPastel on Sunday, December 10, 2017


