อัพเดตข่าวสารอาชีพประจำปี กับงาน Android Bangkok Conference 2023
ปีนี้เป็นชาวบ้านหนึ่ง ไม่ใช่ speaker นั่งฟังเนื้อหาสาระต่าง ๆ เทรนในปีนี้ แน่น๊อนน Jetpaack Compose กำลังเริ่มมาแล้วแหละ

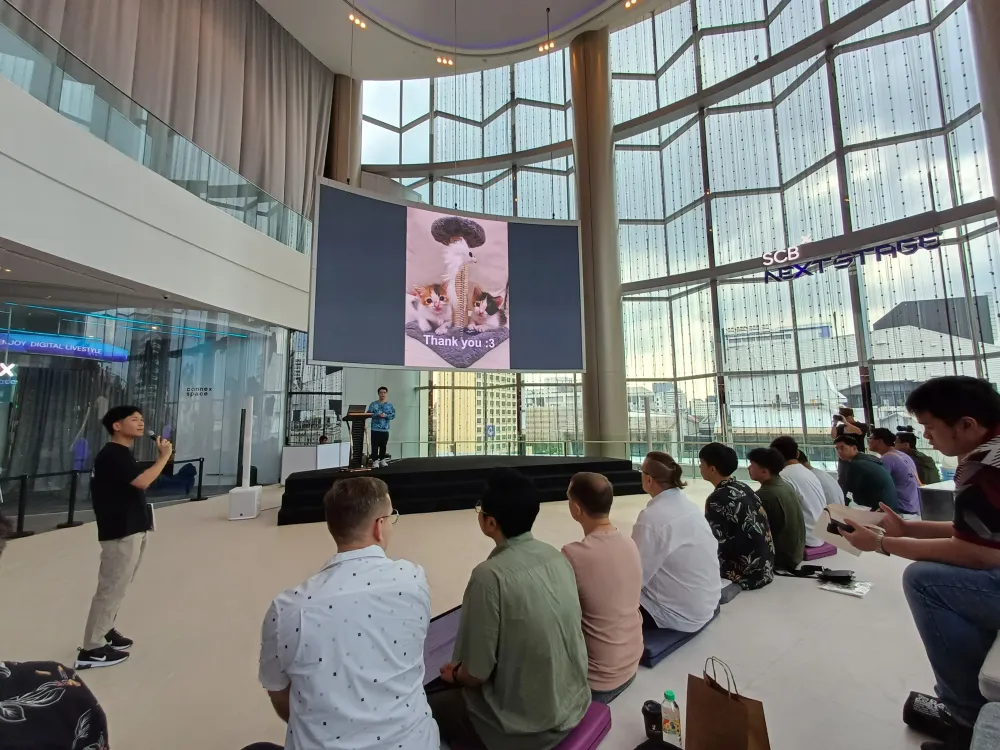
งาน Android Bangkok Conference 2023 จัดขึ้นวันอาทิตย์ที่ 5 พฤศจิกายน ที่ SCB NEXT TECH
รายละเอียดงานจ้า

อันนี้ session วันก่อนหน้า DevFest Bangkok 2023 สามารถอ่านที่บล็อกนี้เลย
 Minseo Chayabanjonglerd
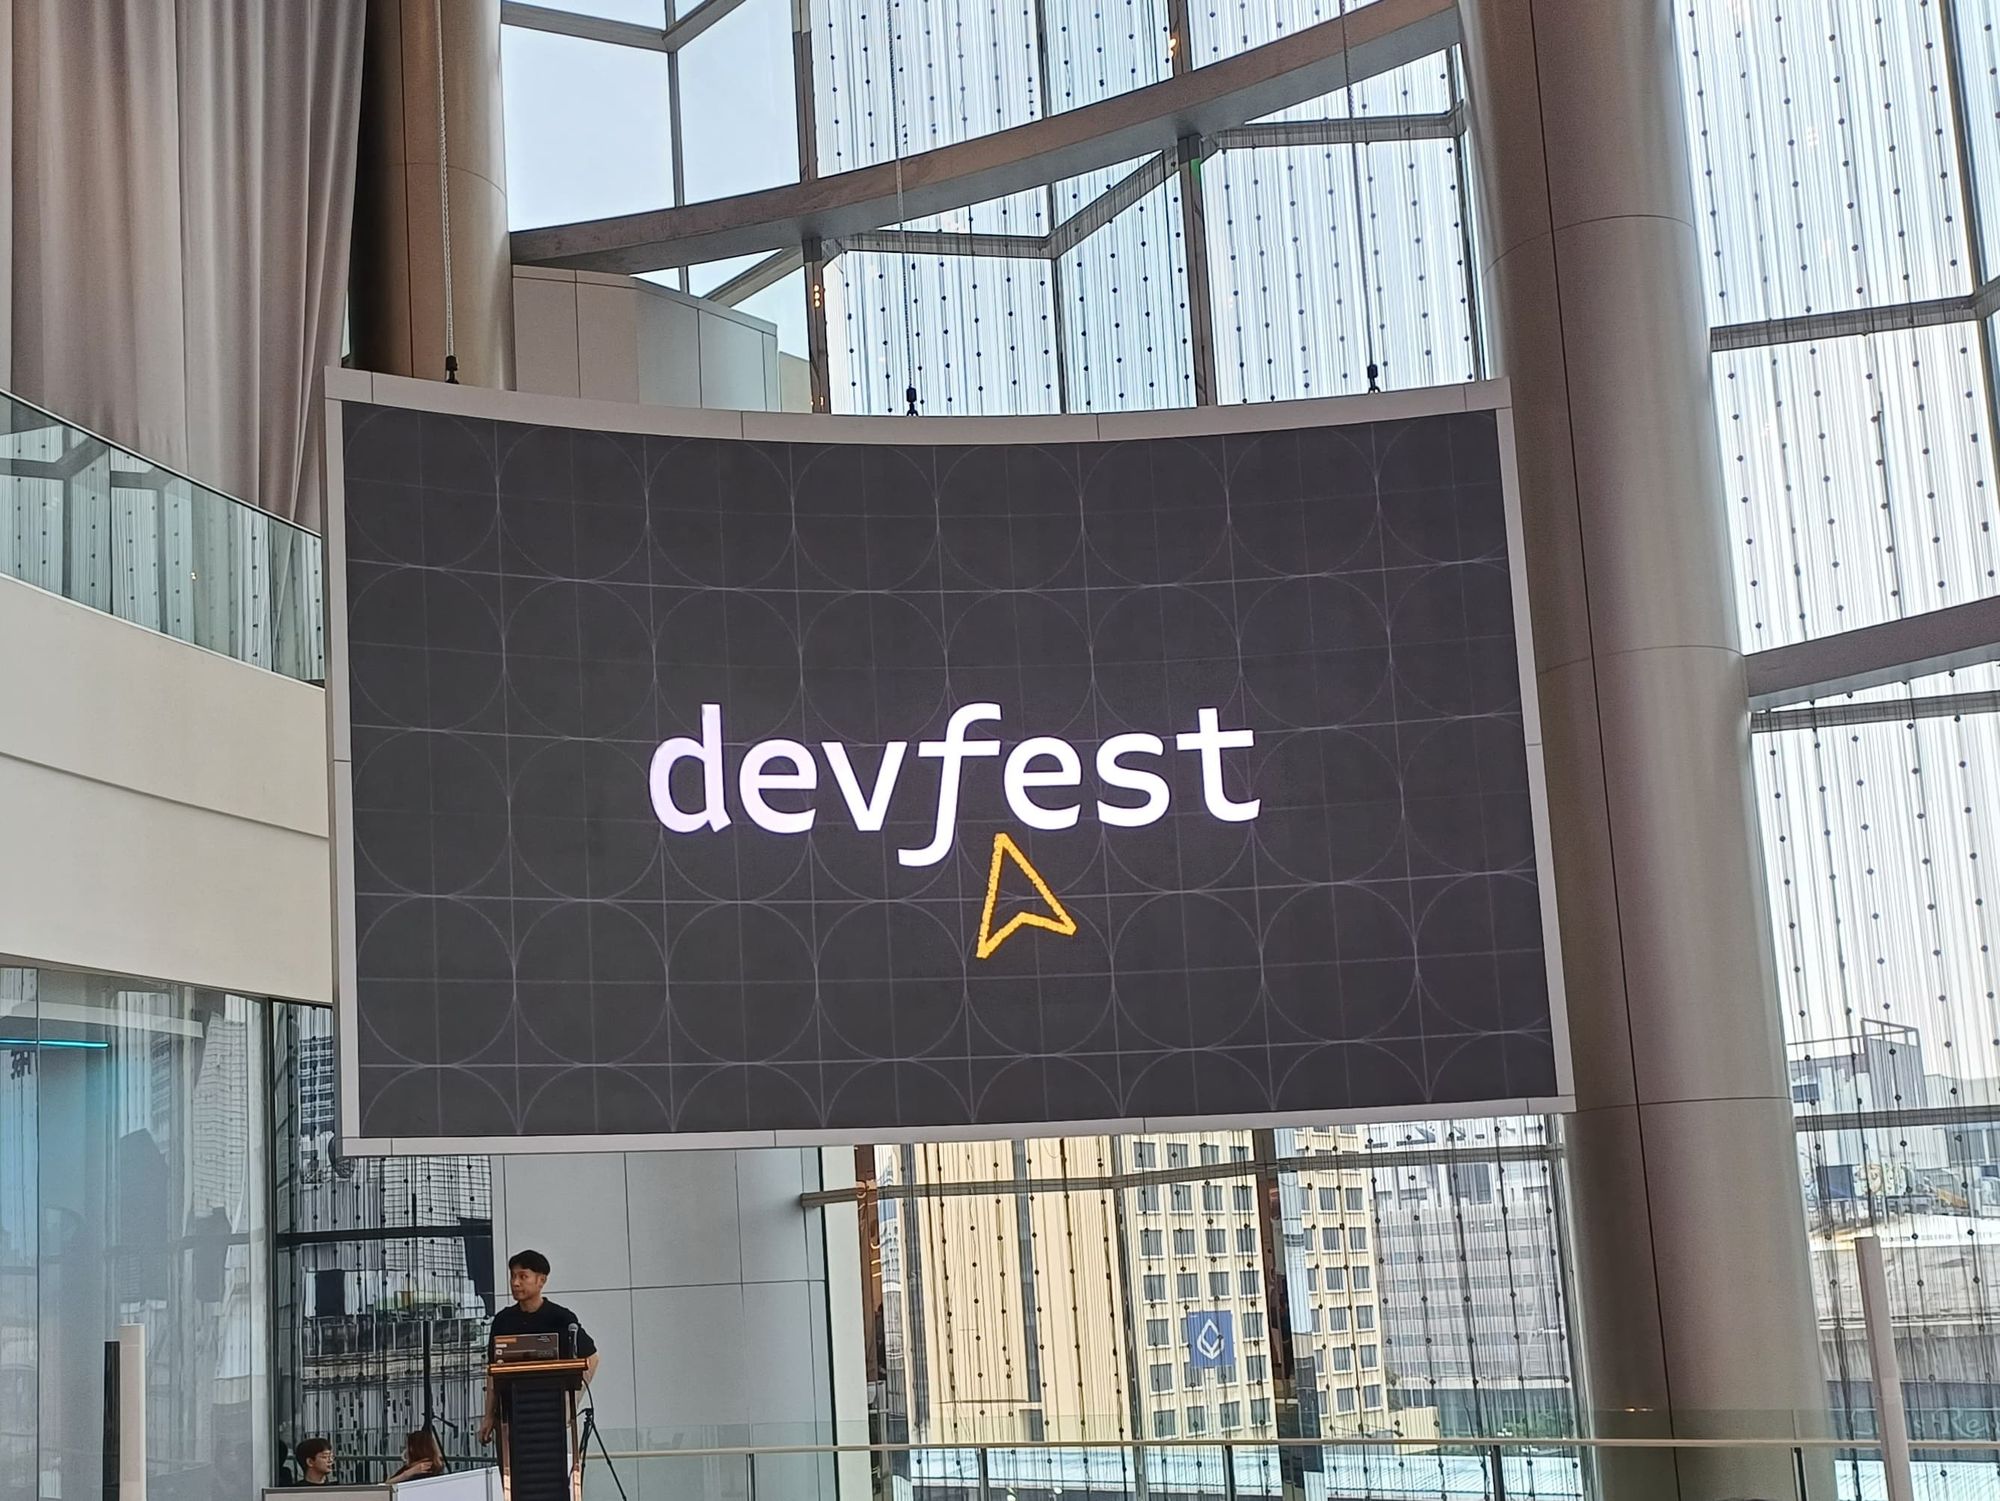
เพิ่มกำลังด้วยชาเขียวสักหน่อย สั่งจากแอพไปรับที่สาขา
มาถึงปุ๊ป อ้าวว session แรกแล้วหรอ ม่ายยยยย
ปล. ตัวสไลด์ทั้งหมดเราเอามาจากโพสนี้น้า
.
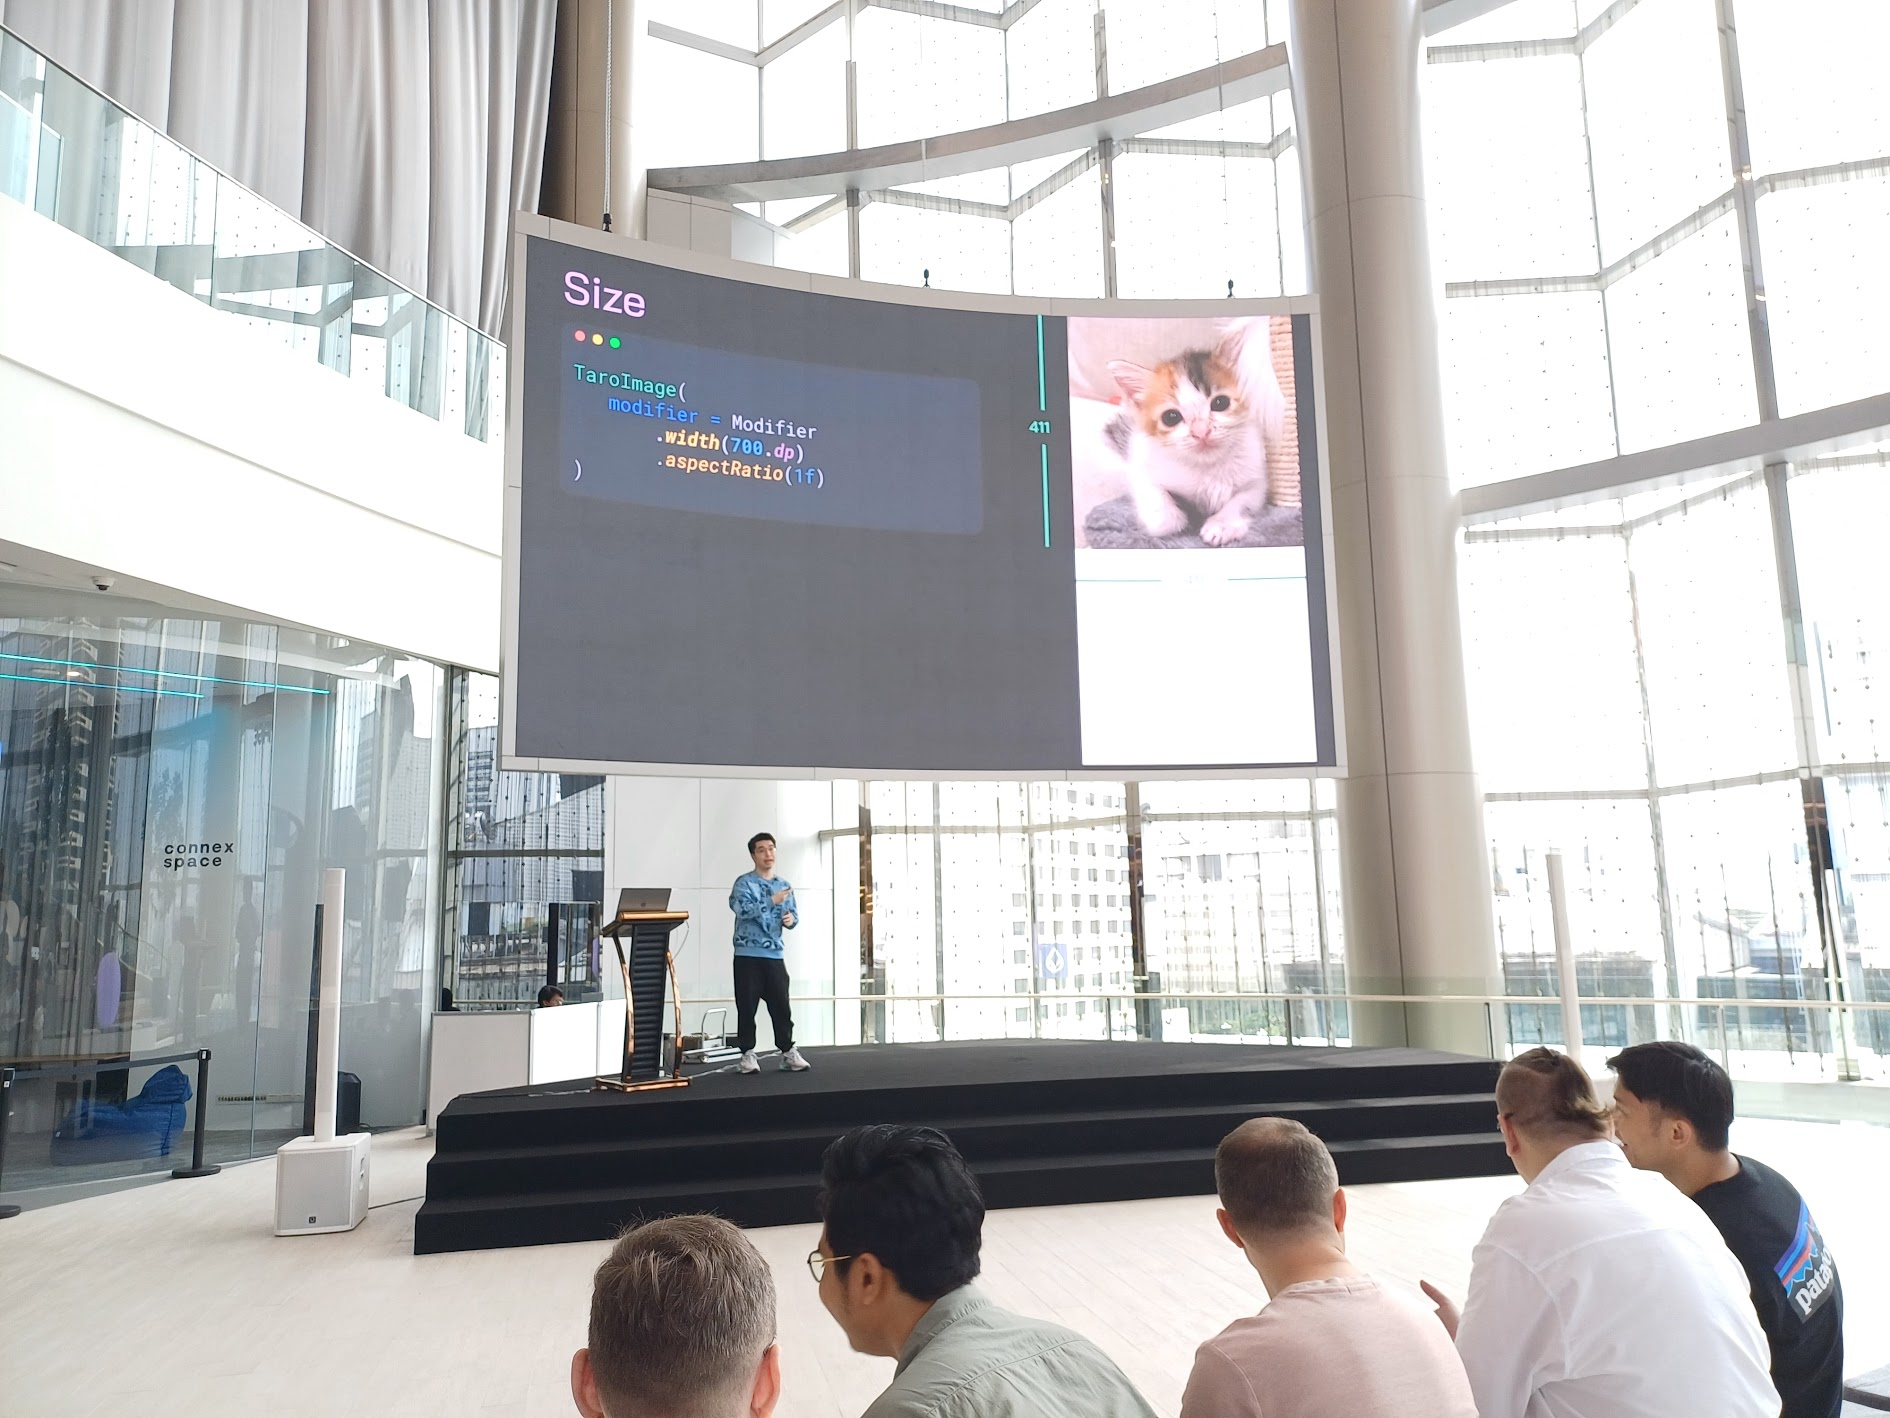
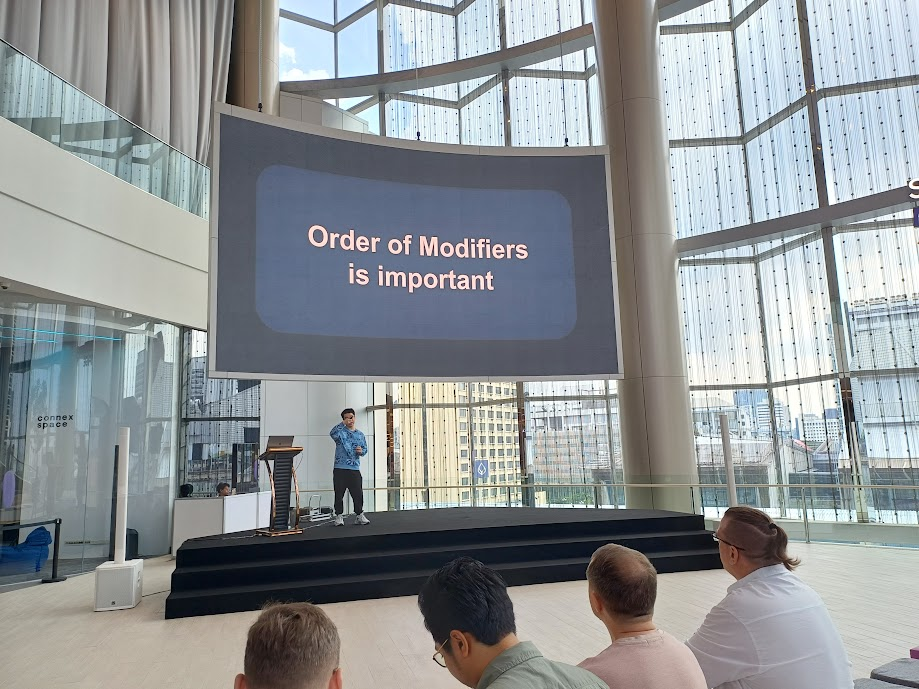
Compose Modifiers Made Easy - Tipatai Puthanukunkit
มาถึงก็เริ่ม session ไปแล้ว แต่ตามทันอยู่น้า เพราะช่วงนี้ลองทำแอพ Jetpack Compose เล่นอยู่
Order of Modifiers is important
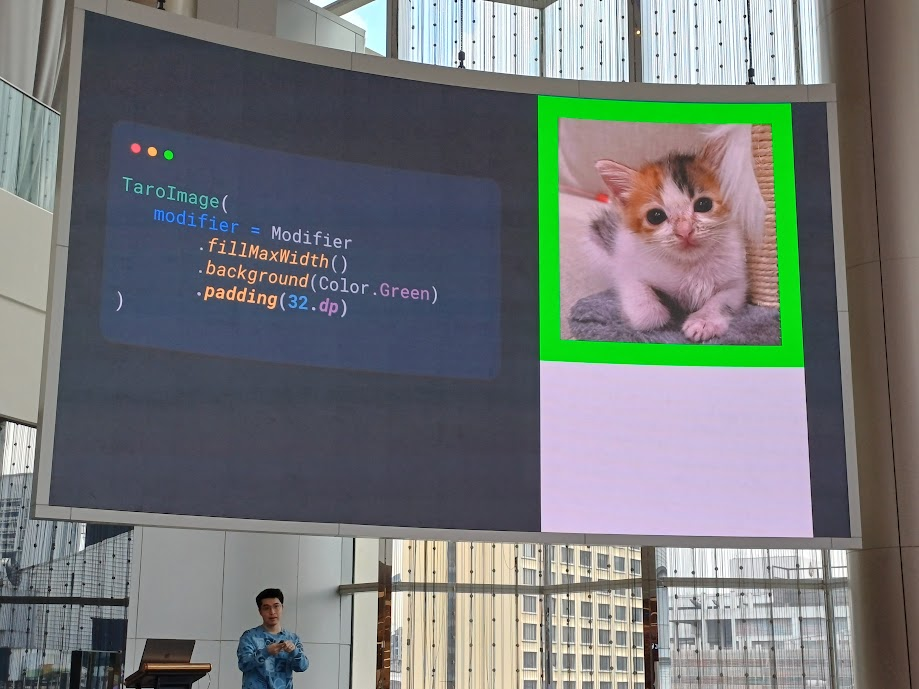
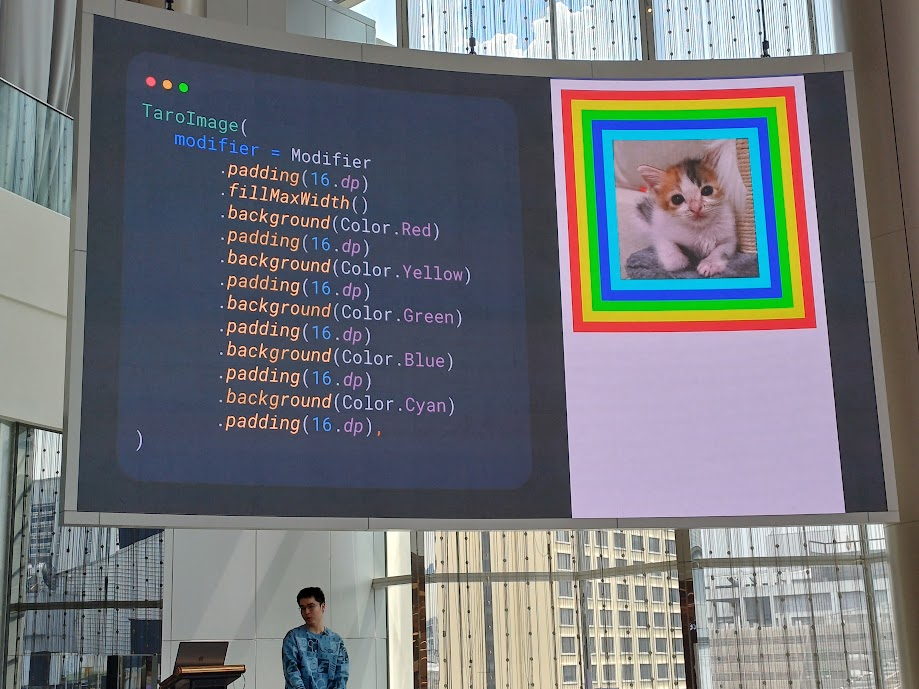
order สำหรับ Jetpack Compose เป็นเรื่องสำคัญ มันทำงานจากบนลงล่าง
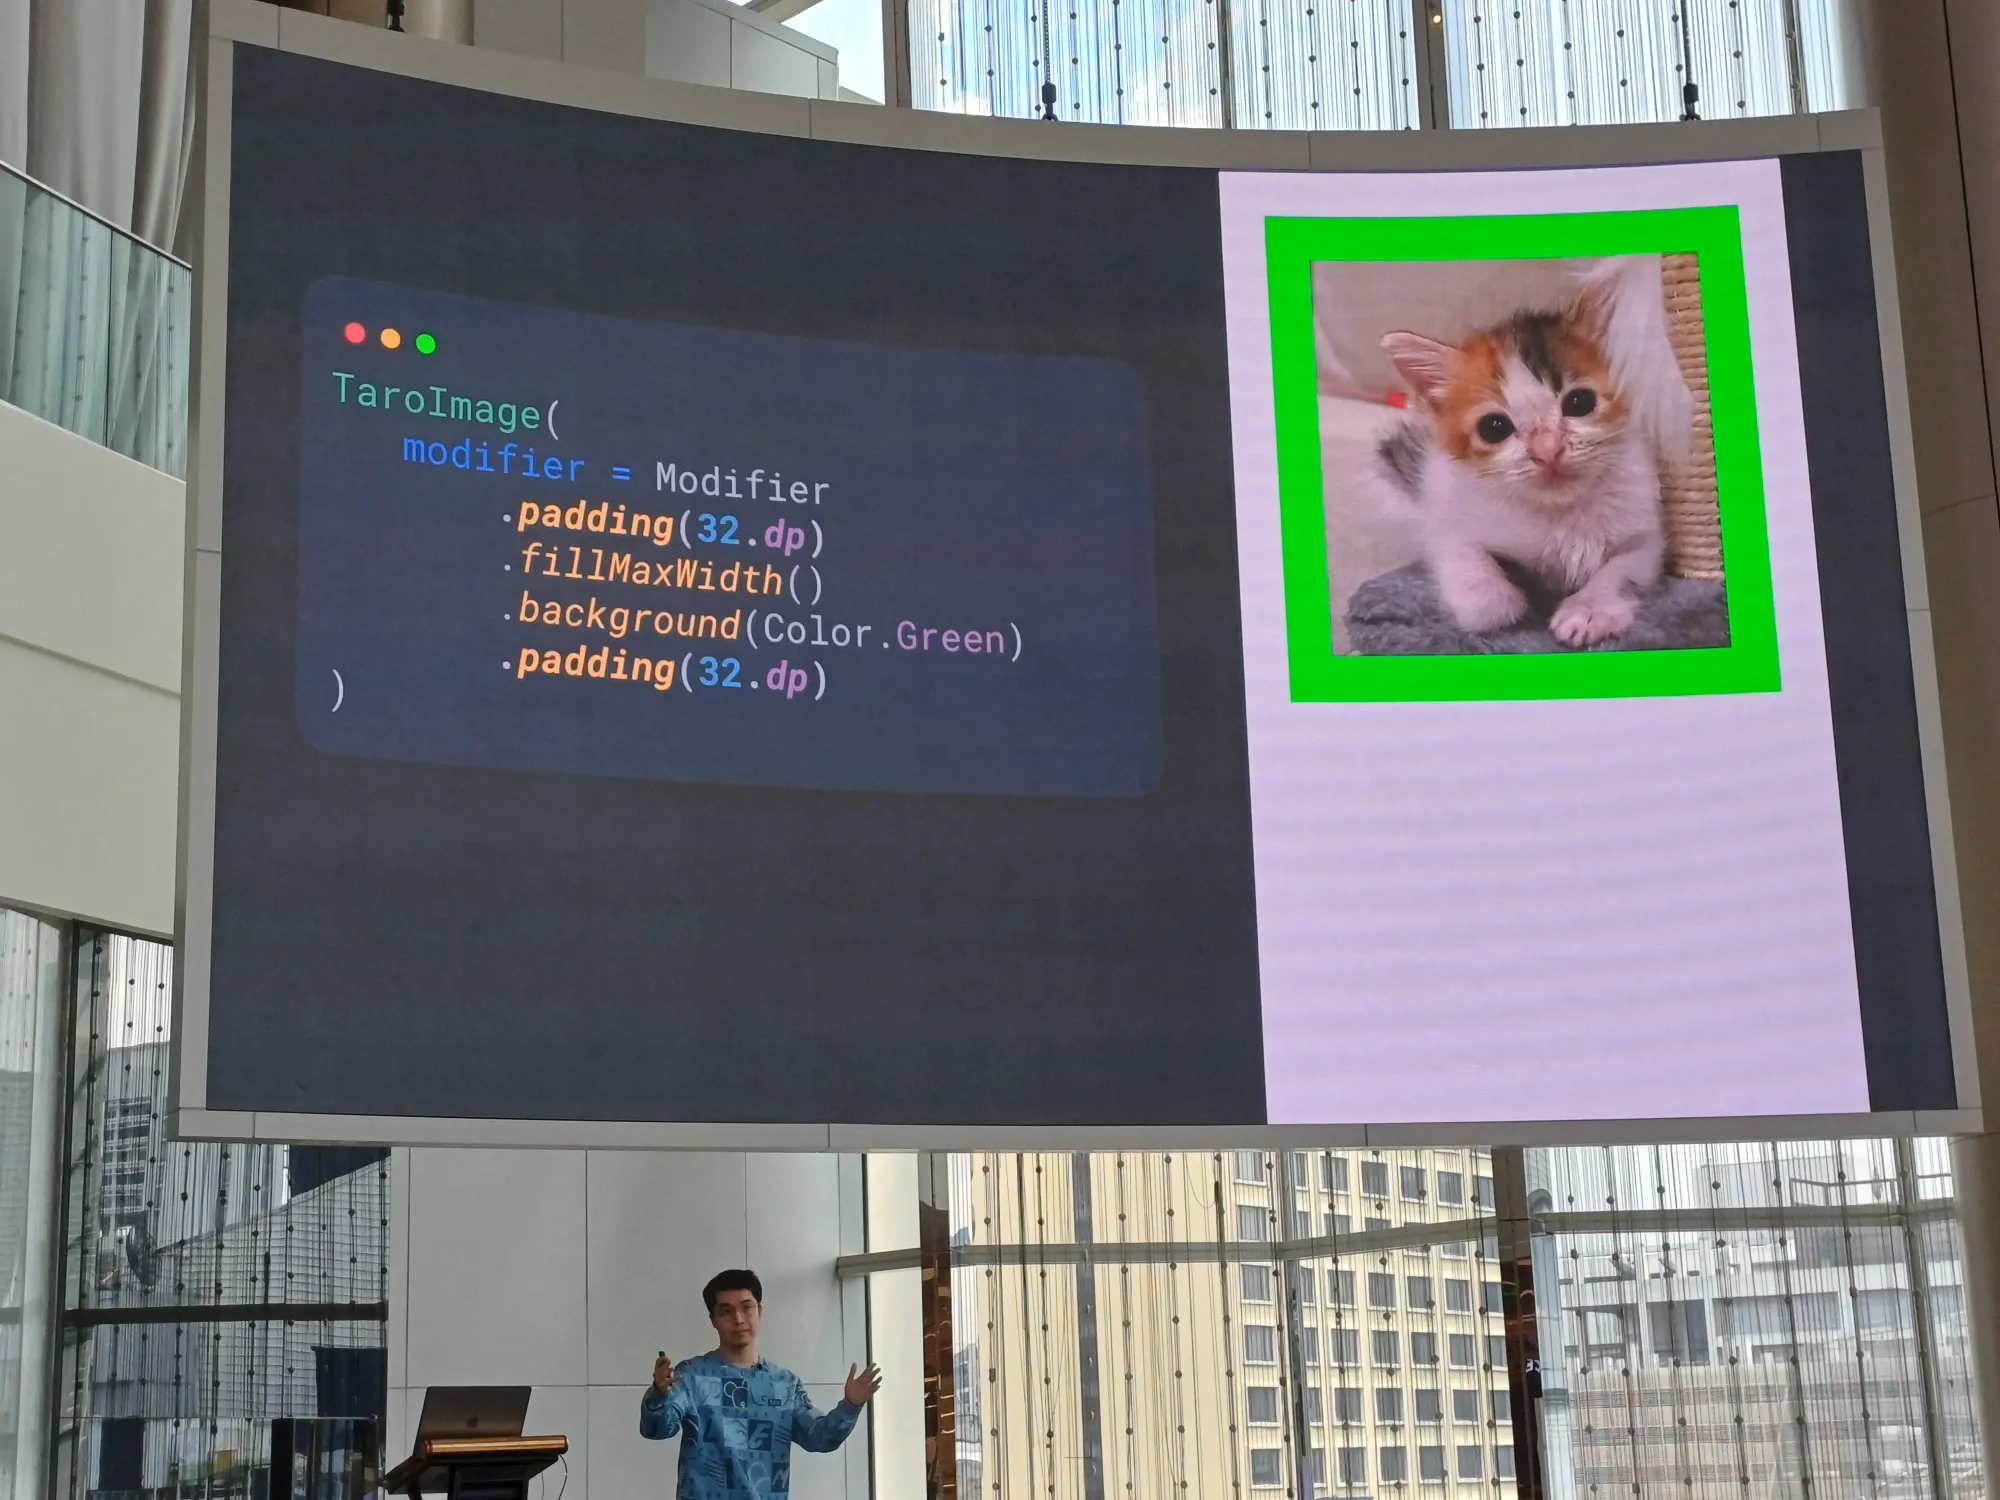
เช่น อันนี้จะ set ให้เต็มความกว้างก่อน แล้วเท bacckground สีเขียวลงไป แล้วก็ทำ padding ให้รูปห่างจากขอบ 32dp
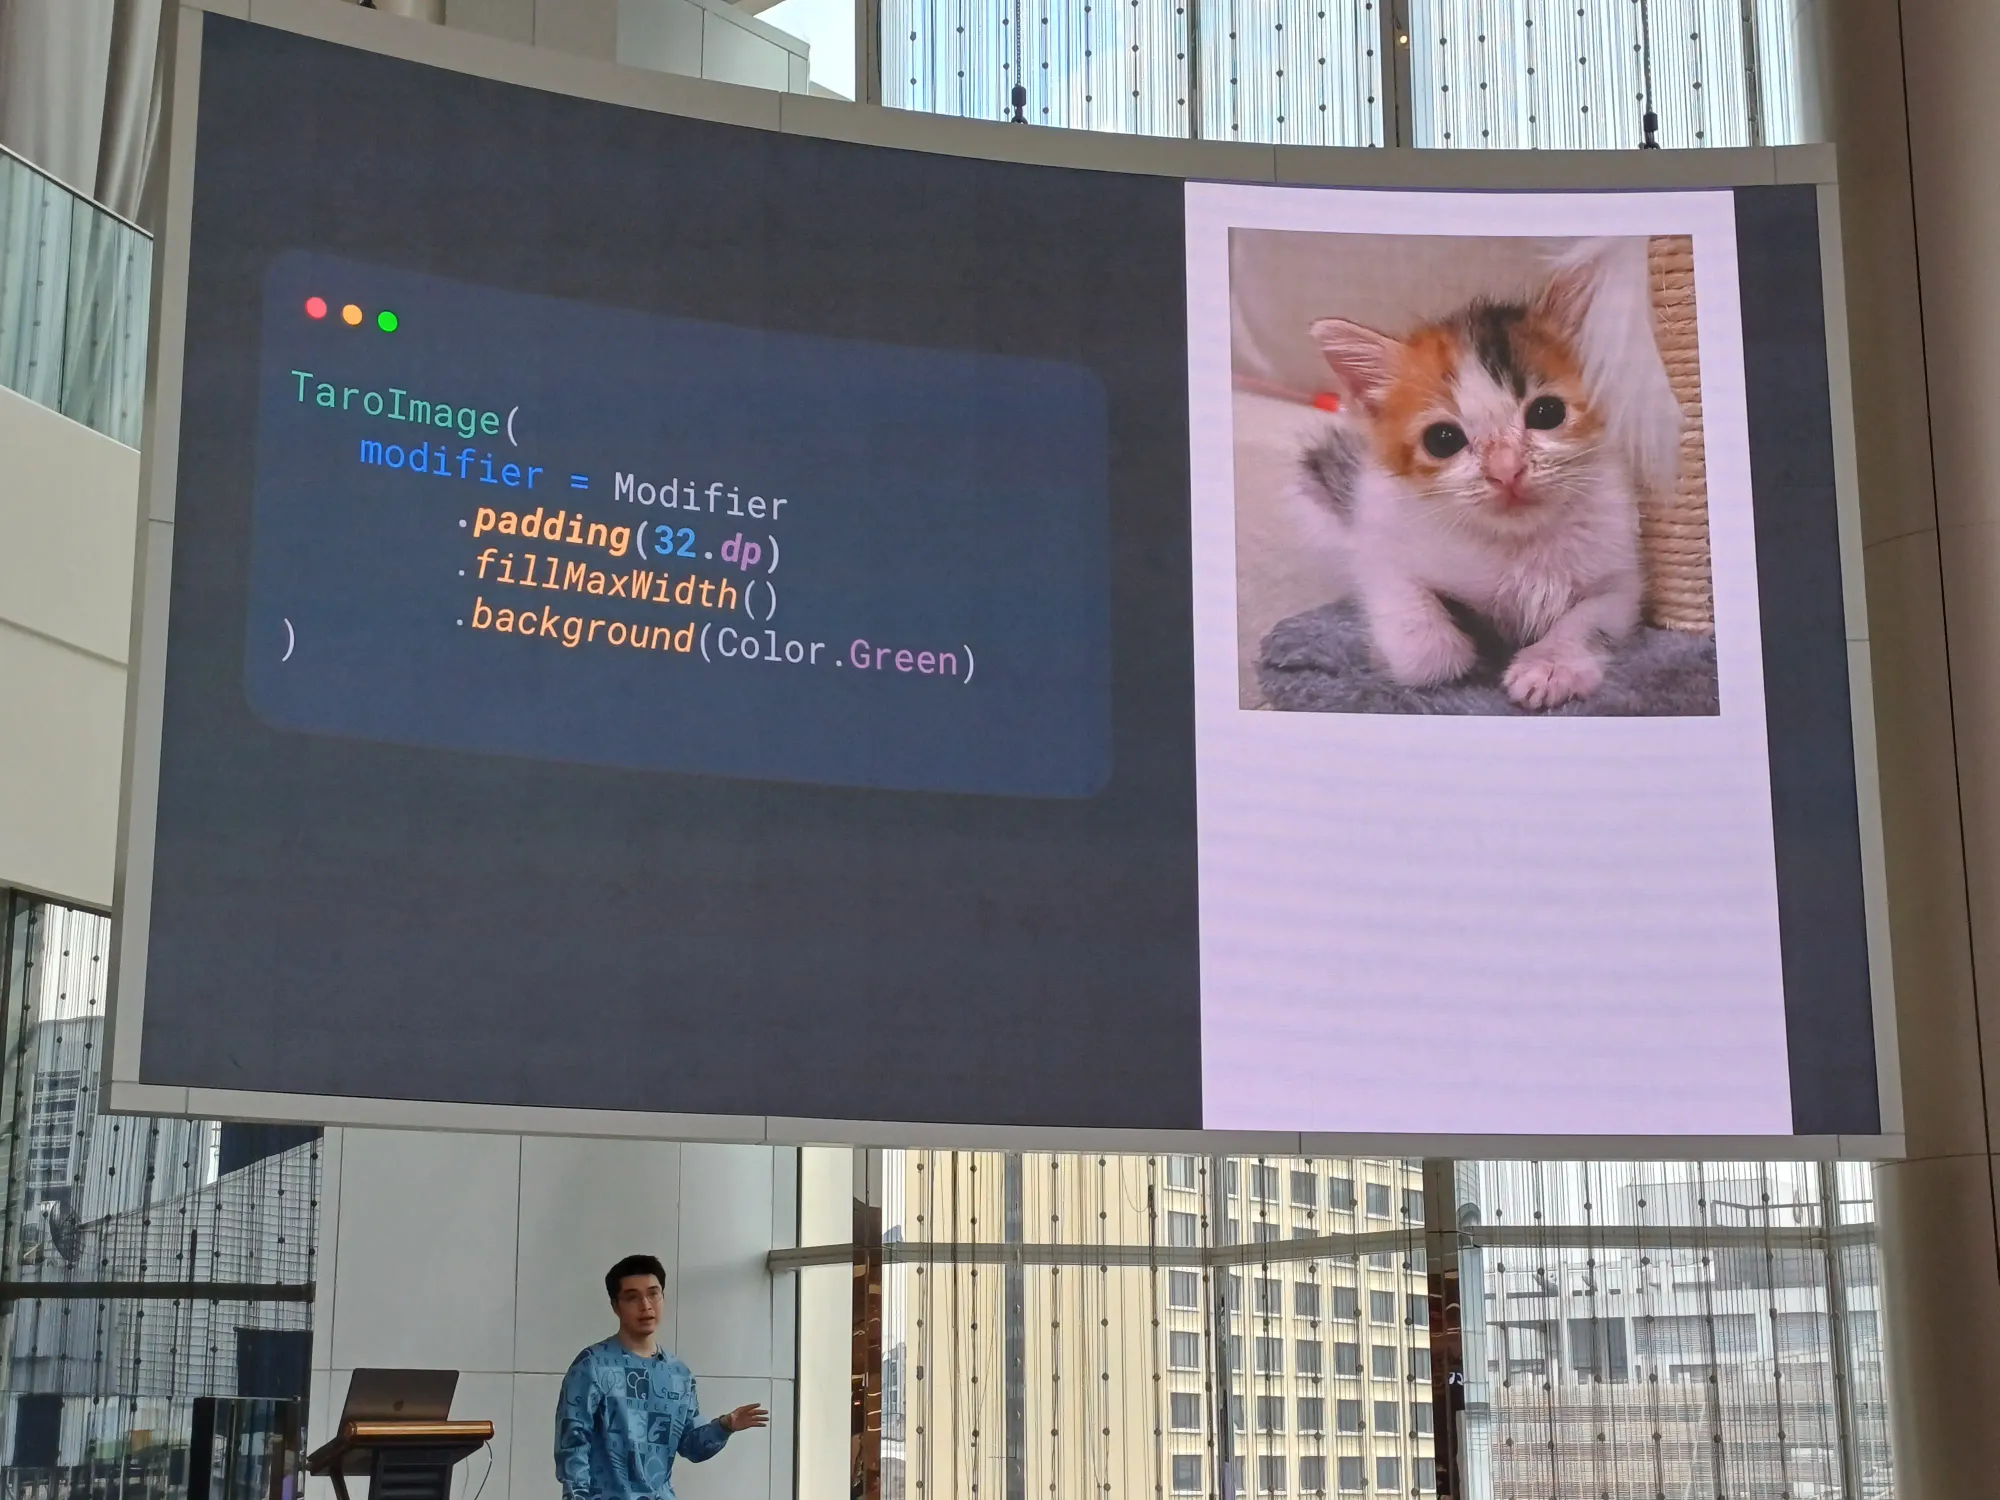
หรืออันนี้ทำ paadding ก่อน ซึ่งถ้า padding ถูกกำหนดก่อน ก็เหมือน set margin บน xml แล้วแหละ
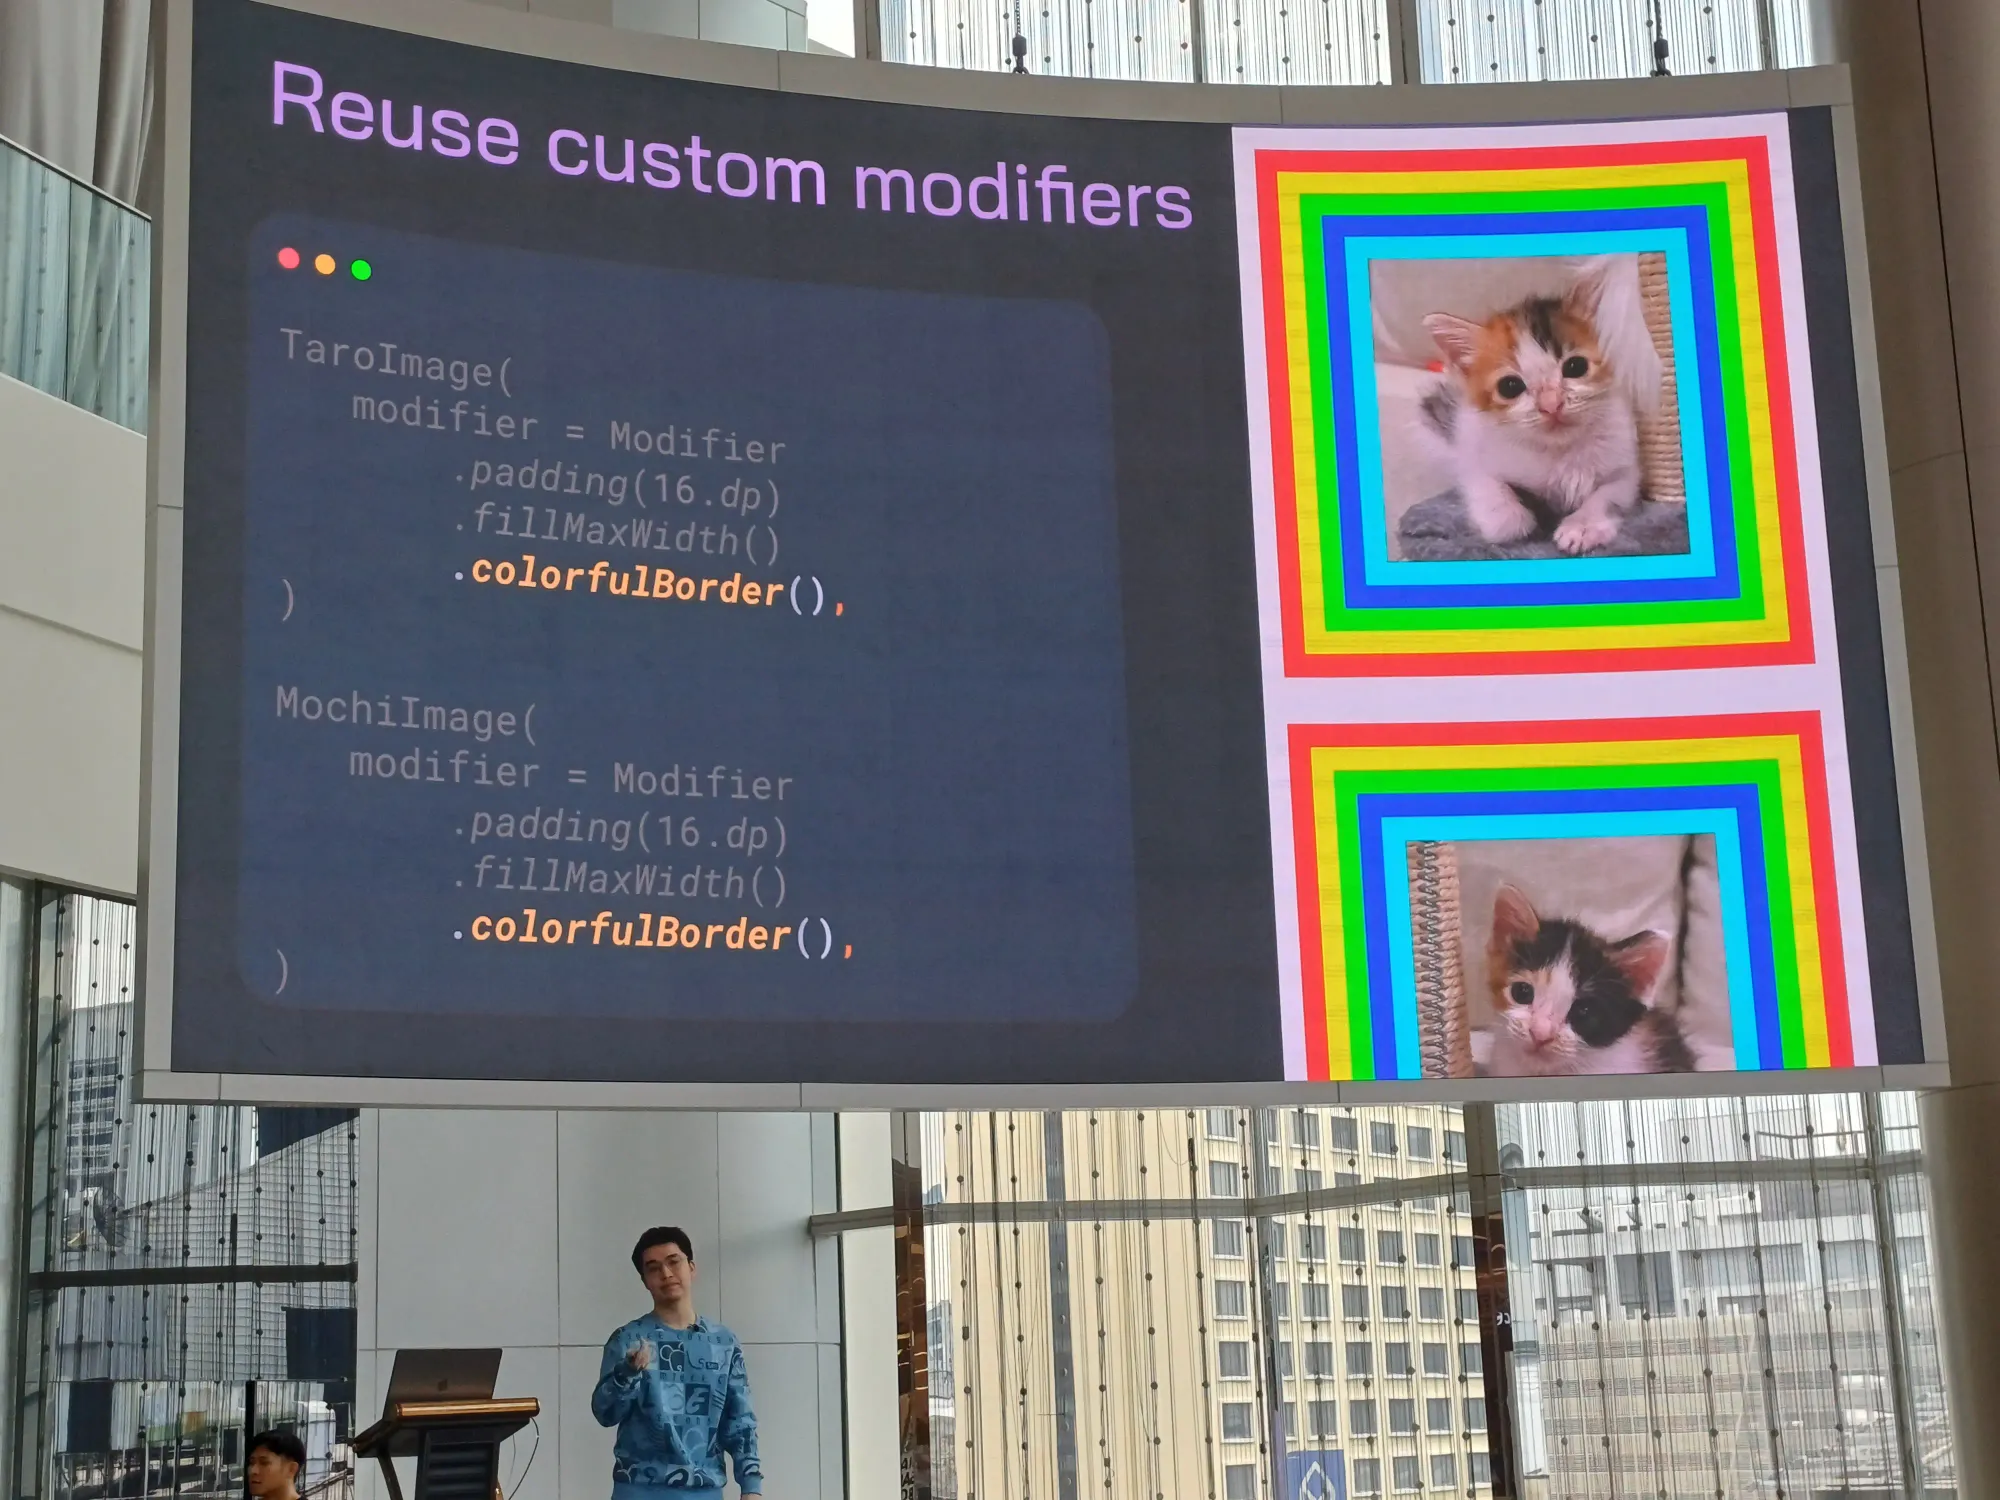
การทำ View ซ้อนกันเป็นเรื่องง่ายขึ้น และบางครั้งก็ง่ายกว่า xml ด้วย
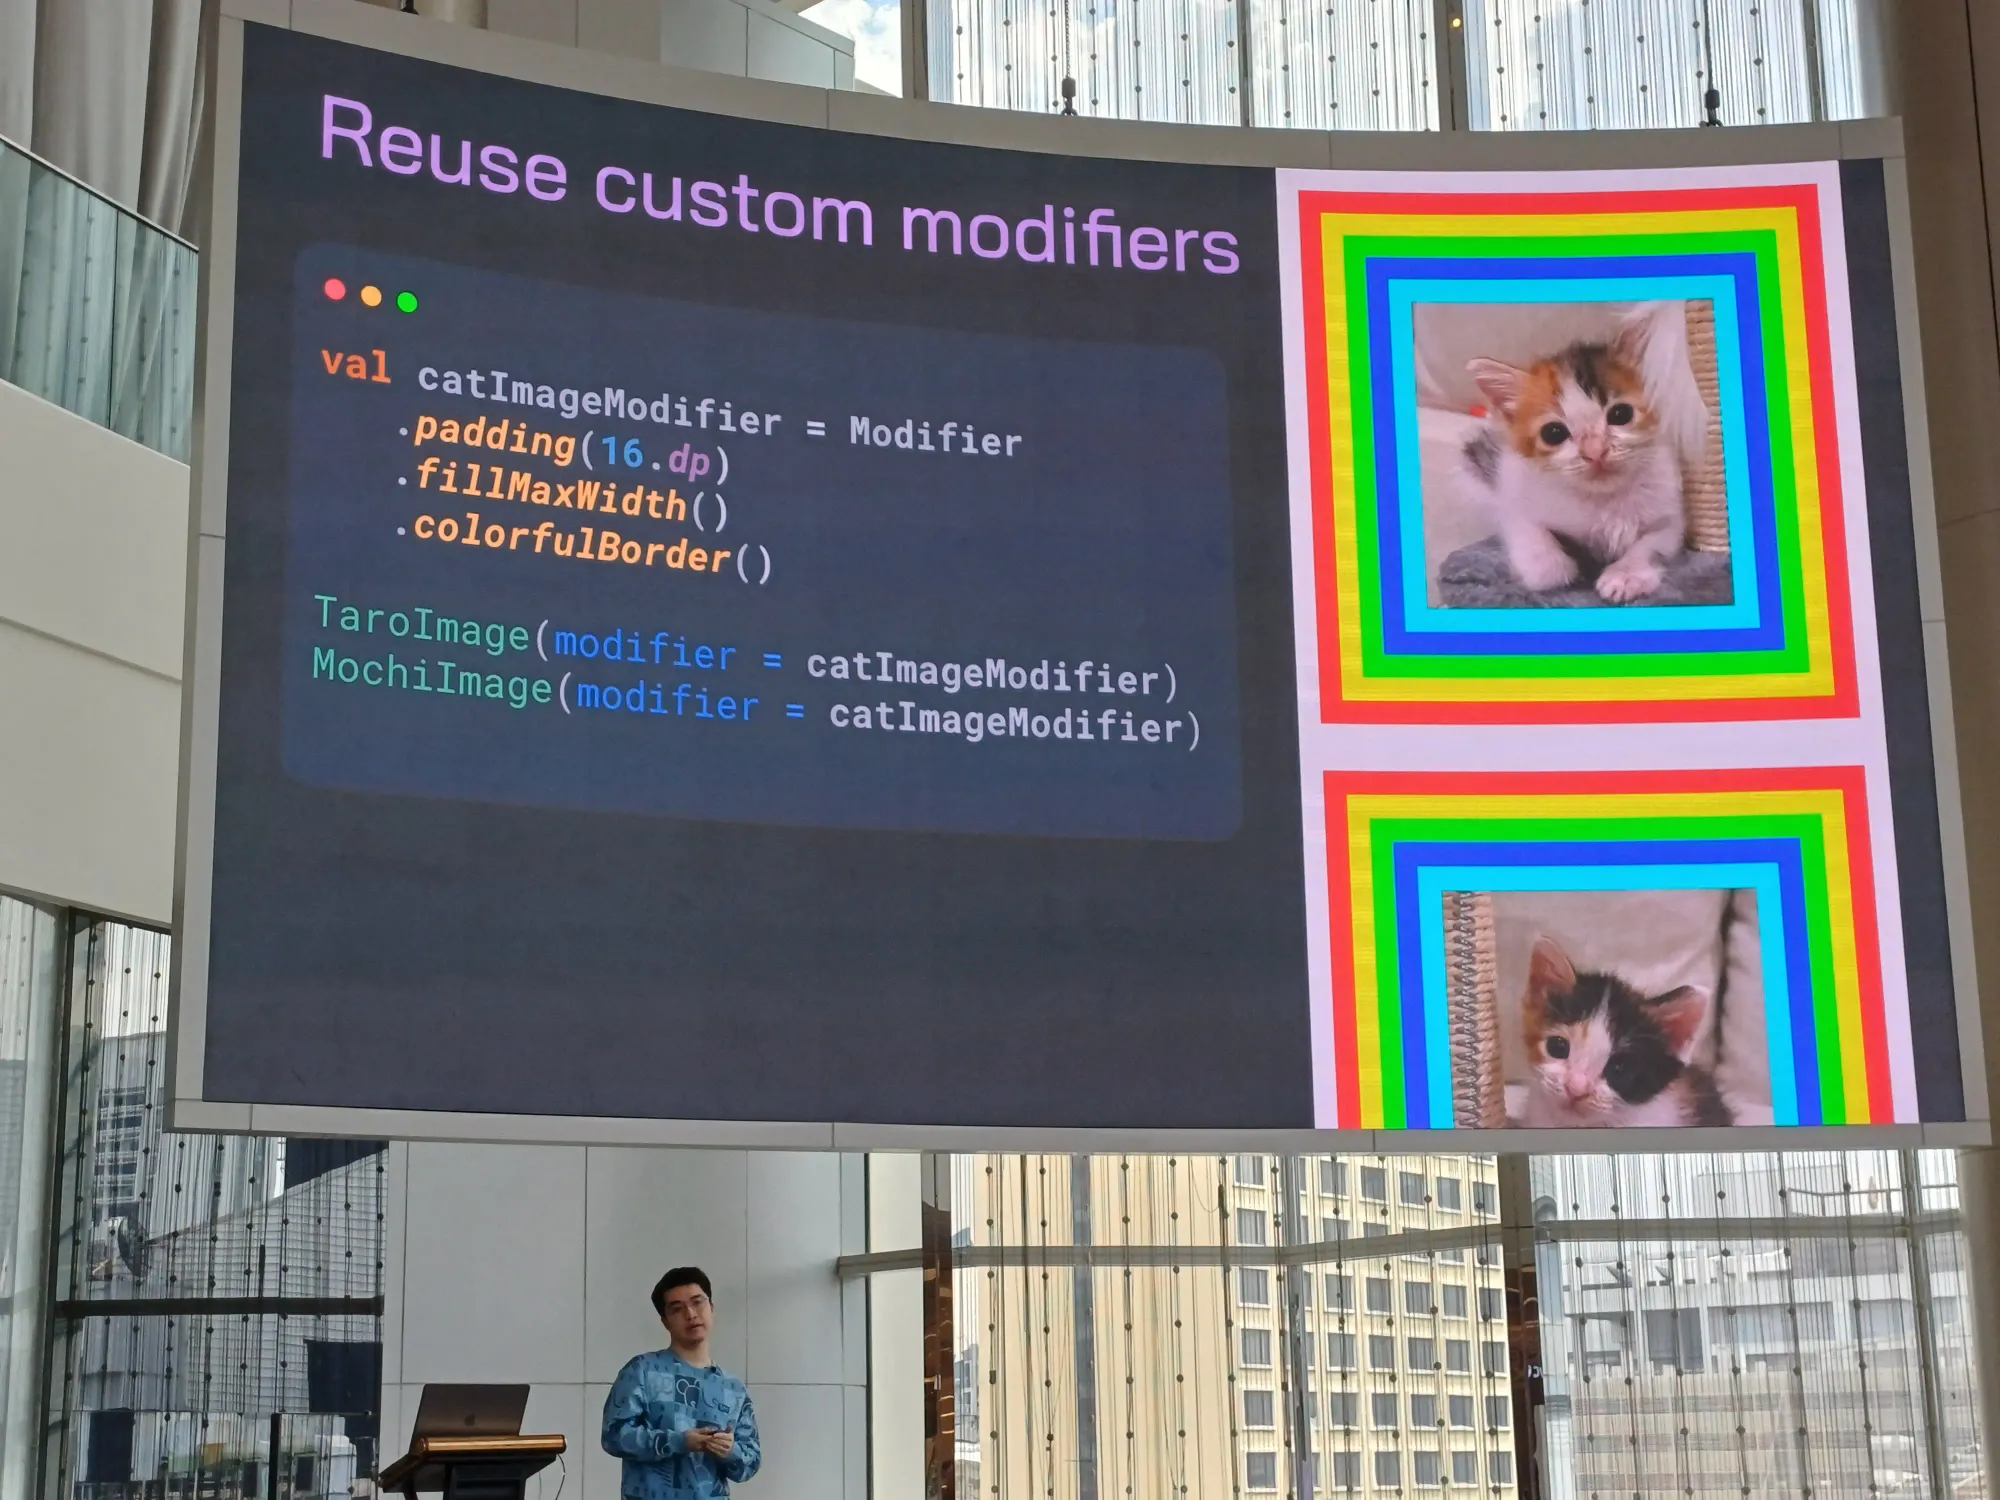
เลยทำให้มัน reuse ได้ เป็น extension function แล้วใส่ Modifier เป็นตัวแปรได้
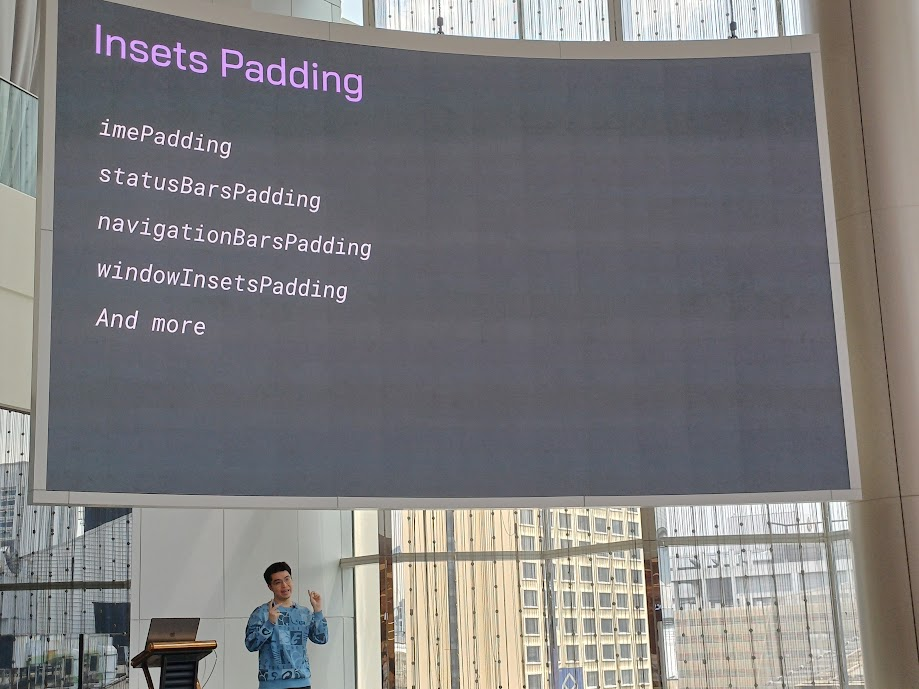
insets padding สำหรับ Jetpack Compose มีให้เราจัดการตรงนี้ได้
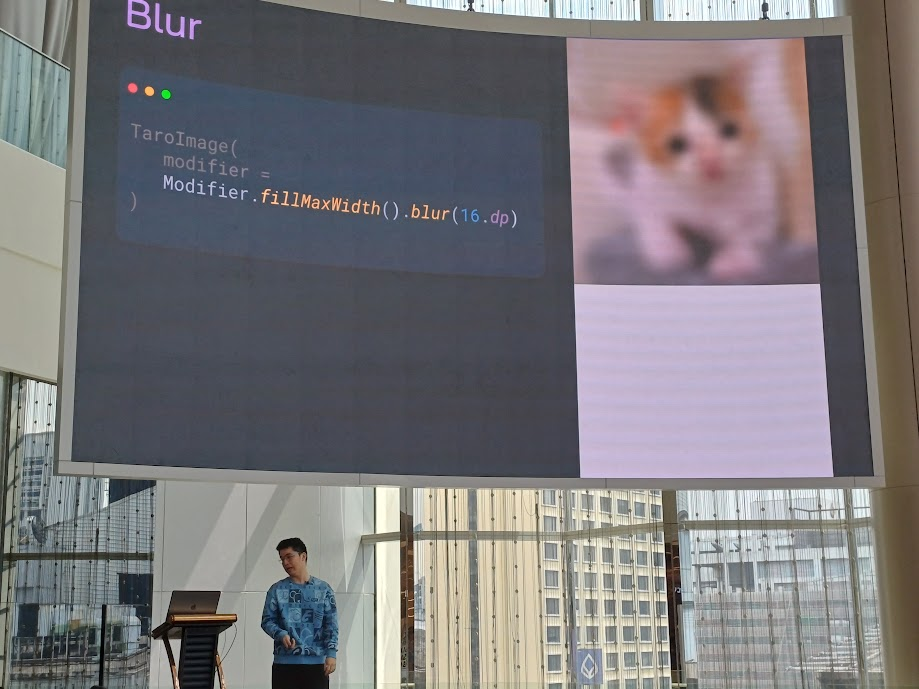
แล้วสามารถทำ blur ได้ด้วยนะ แบบไม่ต้องไปลง library เพิ่ม
Clip
เป็นการตัดรูป เช่น ครอปเป็นวงกลมให้หน่อย clip(CircleShape)
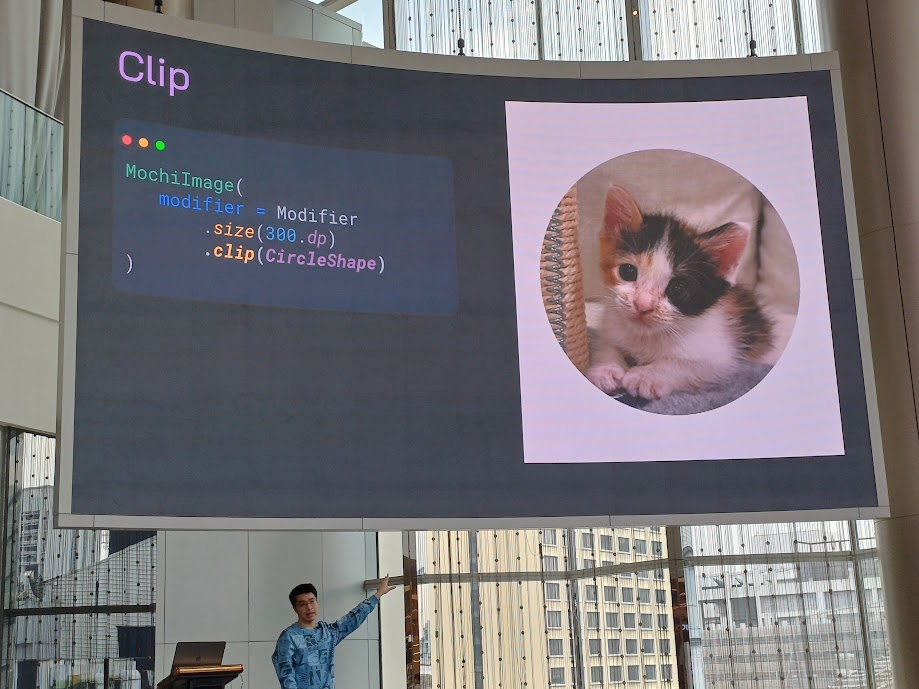
หรือจะสี่เหลี่ยมขอบมนก็ได้เช่นกัน โดยใช้ RoundedCornerShape โดยจะ ใส่ parameter ตัวเดียว เช่น RoundedCornerShape(64.dp) หรือจะใส่เป็นแบบเลือกขอบมนเฉพาะมุมก็ได้ RoundedCornerShape(topStart = 64.dp, bottomEnd = 64.dp)

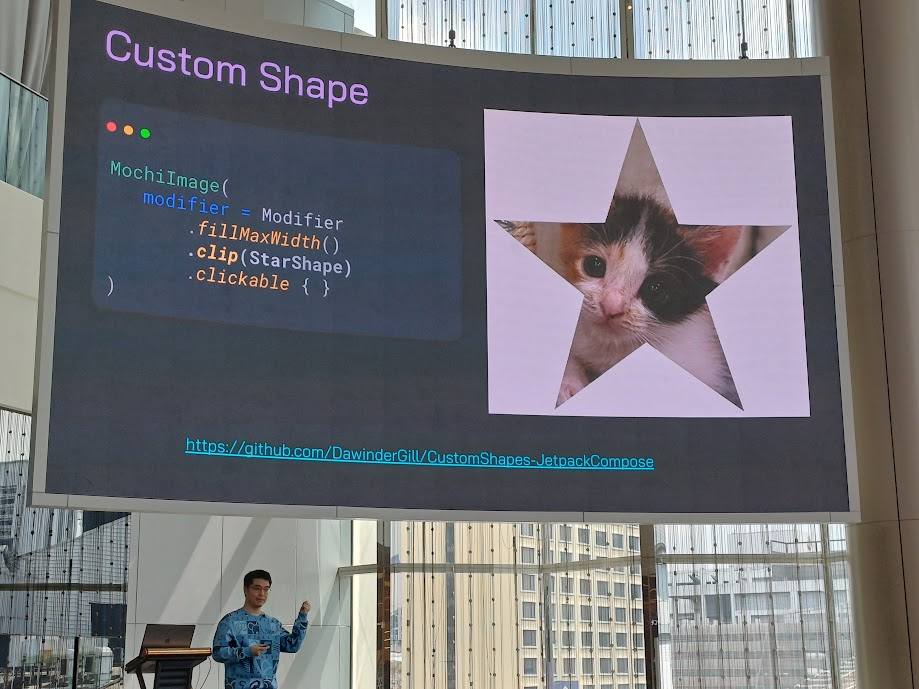
custom shape สามารถทำแบบแปลก ๆ ซึ่งอันนี้มีเป็น library แยกเนอะ
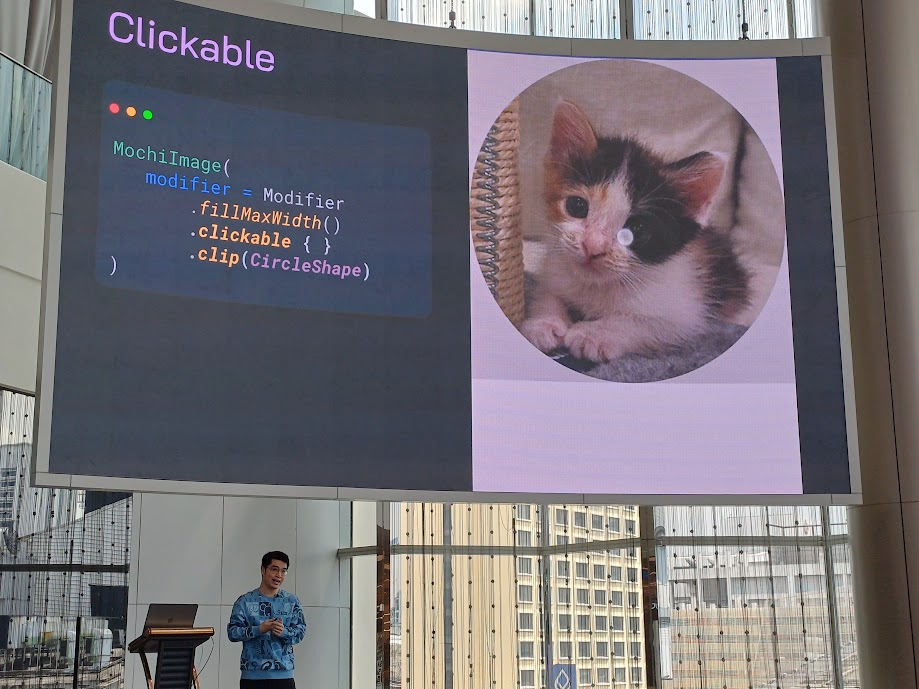
Clickable
แล้วเราจะให้มันคลิกได้ยังไง ใช้ clickable ใส่ใน Modifer ได้เลย มันจะทำ auto ripple ให้ ยํ้าอีกรอบนึง order สำคัญมาก ตอนคลิกเห็นเป็นสี่เหลี่ยม เพราะเราให้ clip เป็นวงกลมทีหลัง แก้โดยให้ clip(CircleShape) ก่อน แล้วสั่ง clickable ทีหลัง
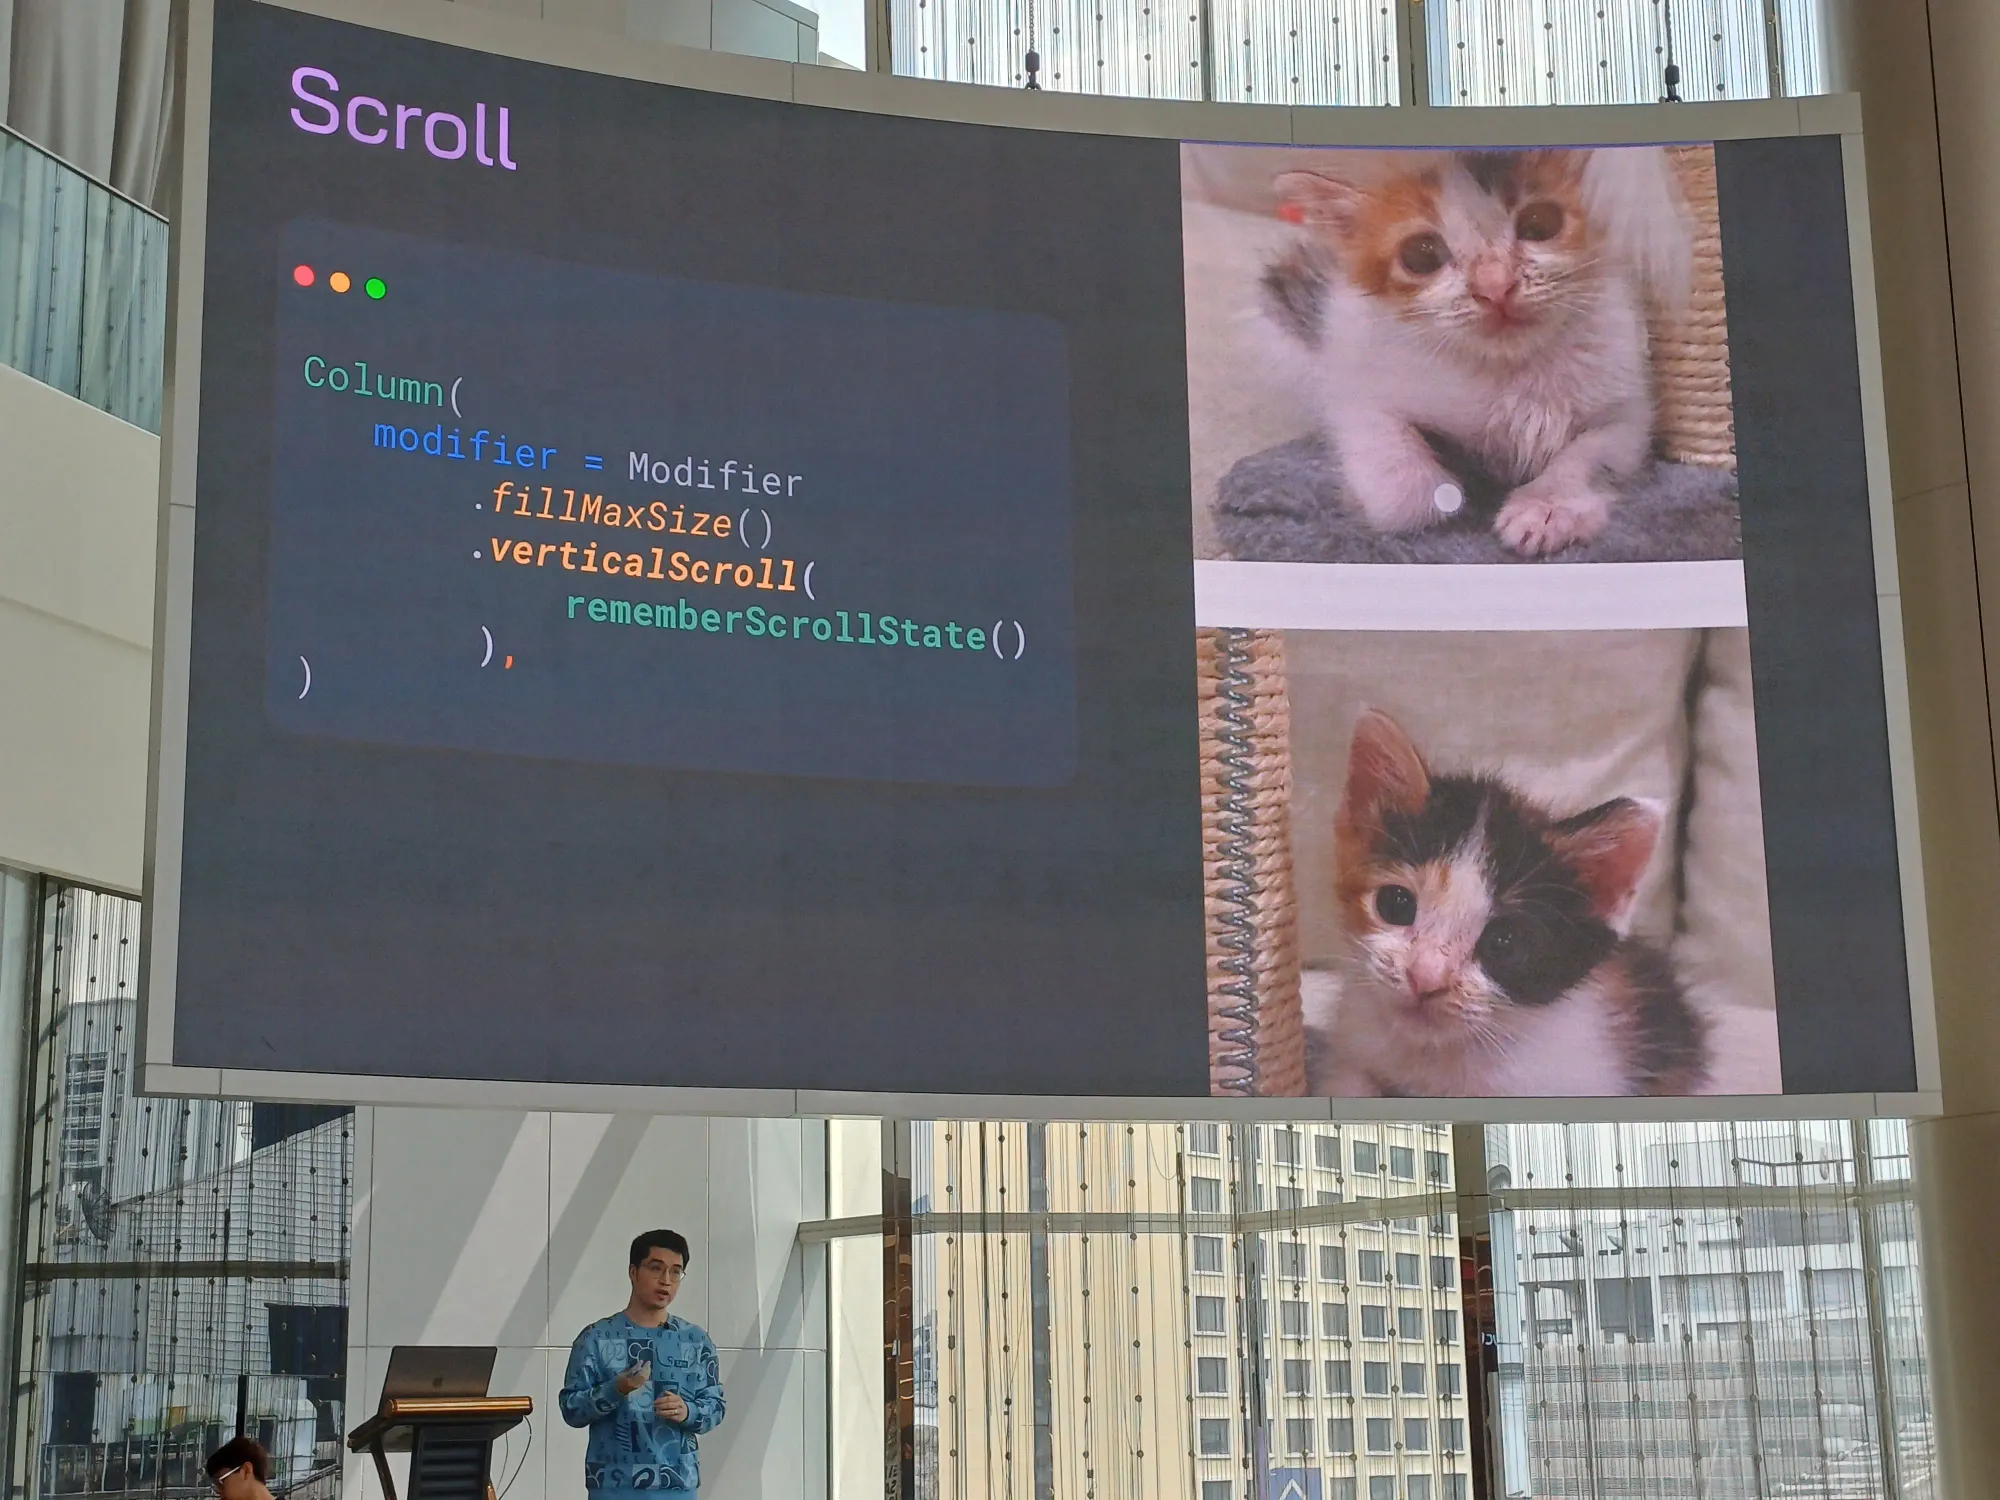
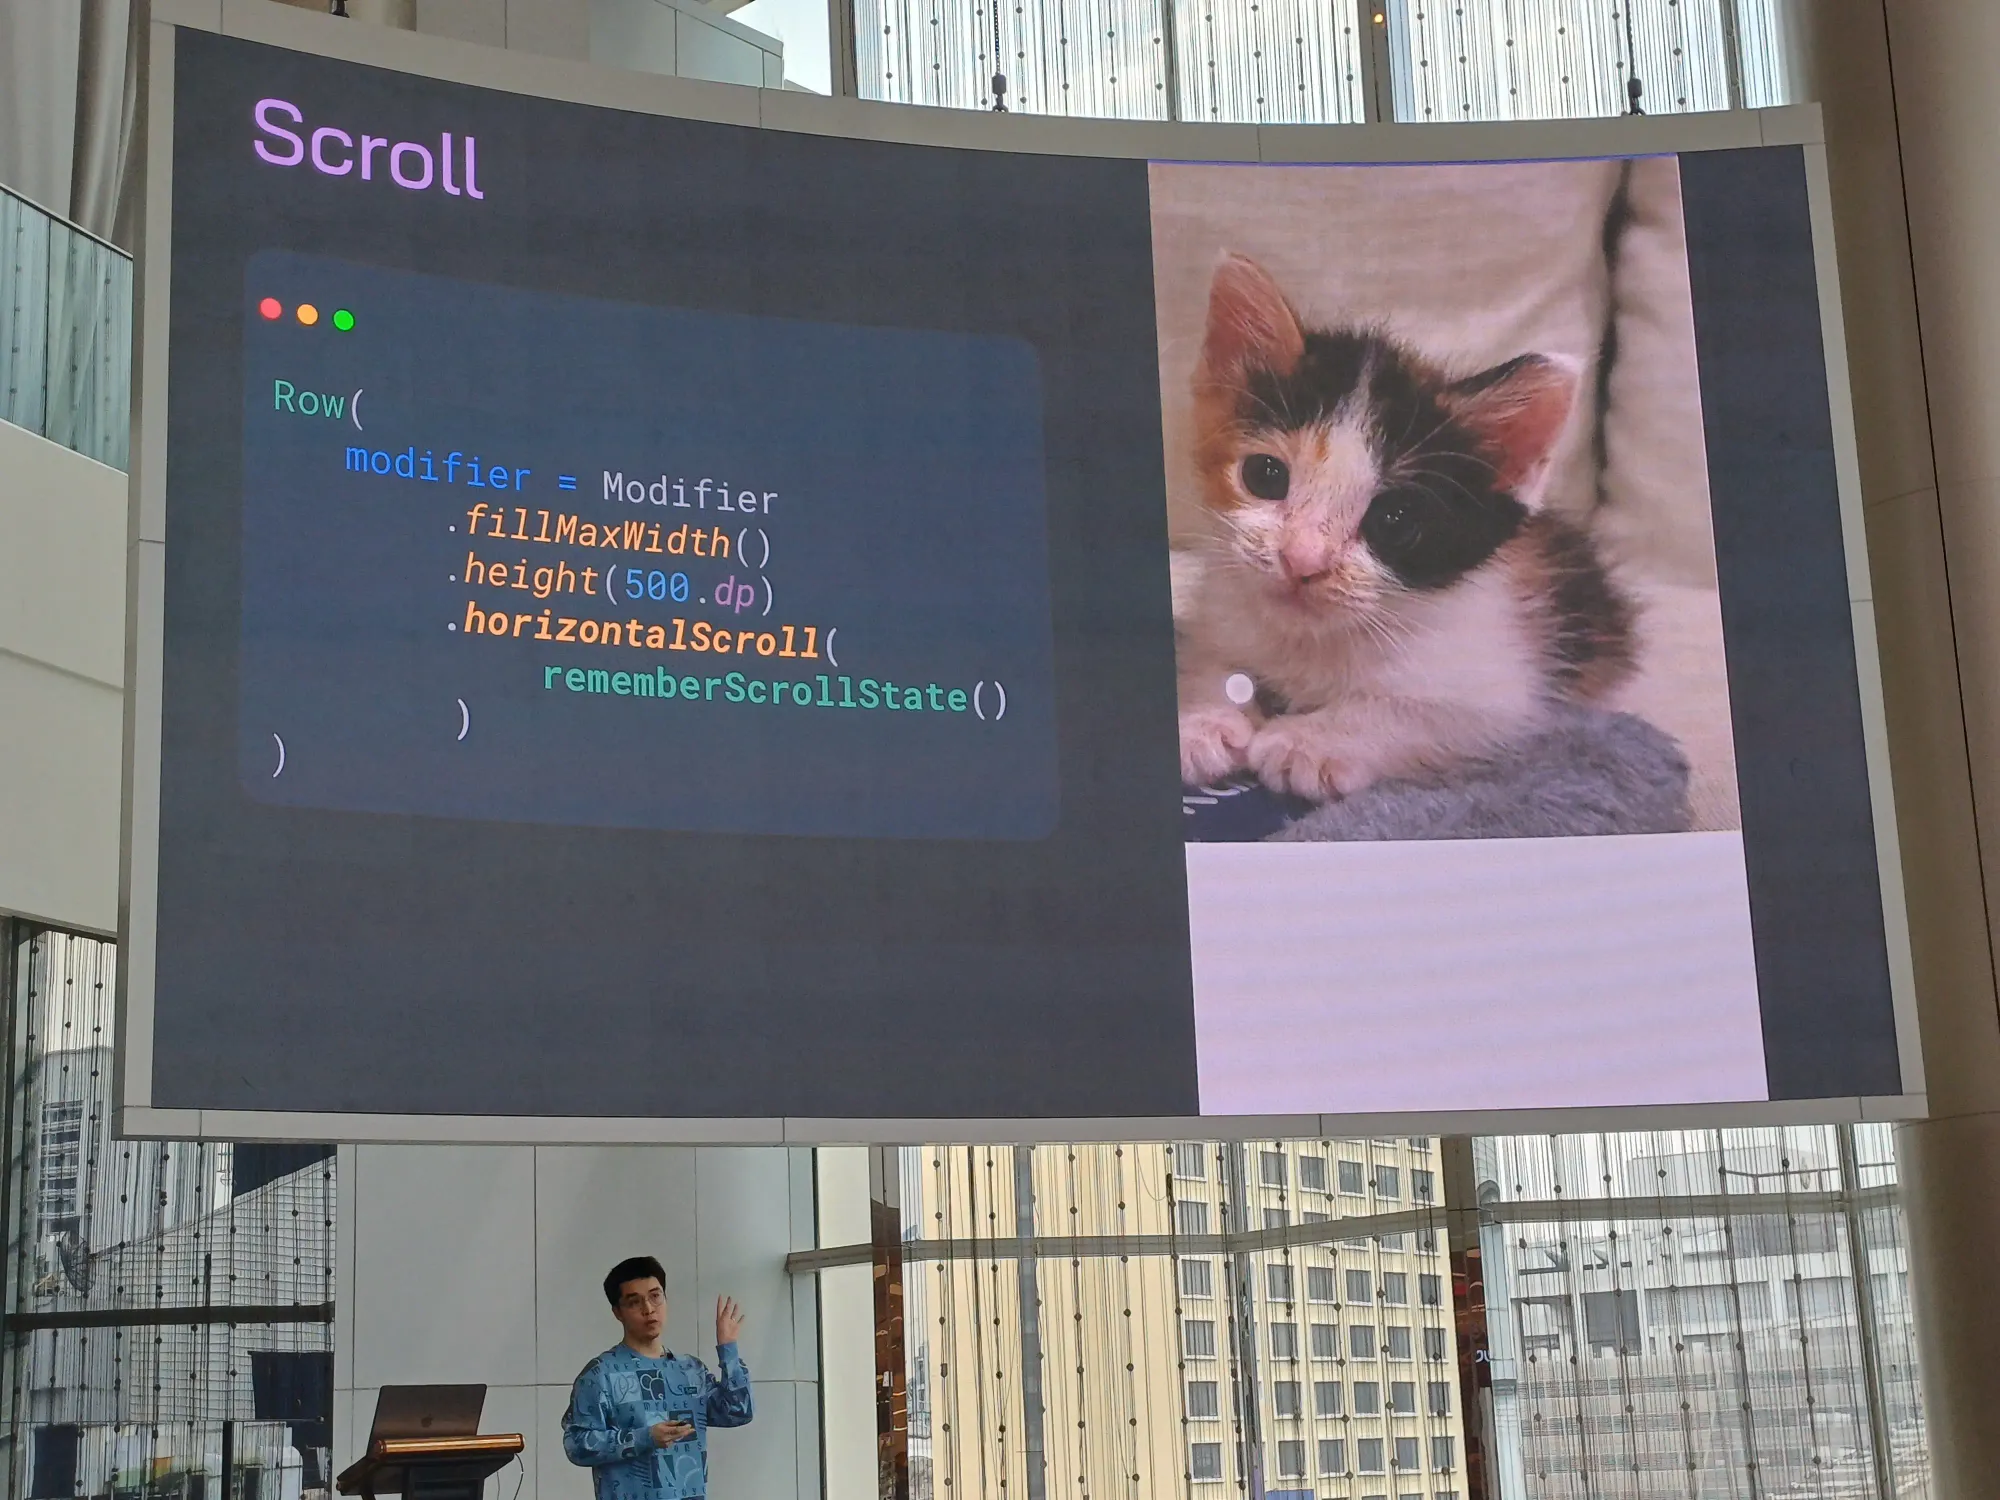
Scroll
ใช้สำหรับตัวที่ไม่มี list item เยอะจนเกินไป สามารถใช้ได้ทั้งแนวนอนและแนวตั้ง มี rememberScrollState() ด้วย
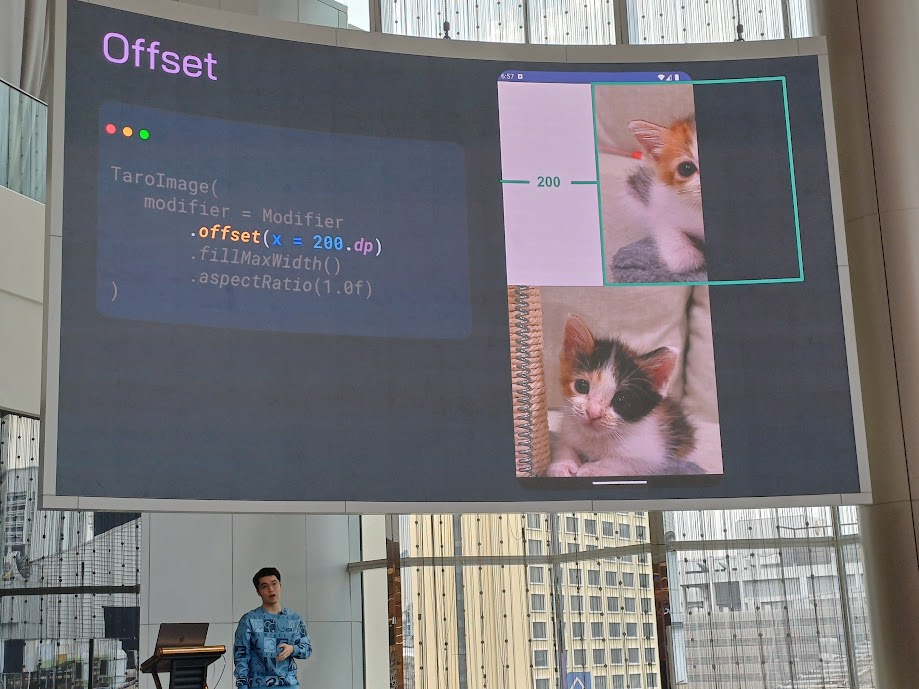
Offset
เลื่อน UI โดยยึดจากจุดตั้งต้นไปเท่าไหร่ เอาไว้ทำพวก animation ซ้ายขวา
offset(x = 200.dp)เลื่อนรูปไปด้านซ้าย 200dpoffset(x = (-200).dp)เลื่อนรูปไปด้านขวา 200dpoffset(y = (-200).dp)เลื่อนรูปขึ้นไป 200dpoffset(y = 100.dp)เลื่อนรูปลงมา 100dp
ตัวอย่างการนำไปใช้ในการทำ animation
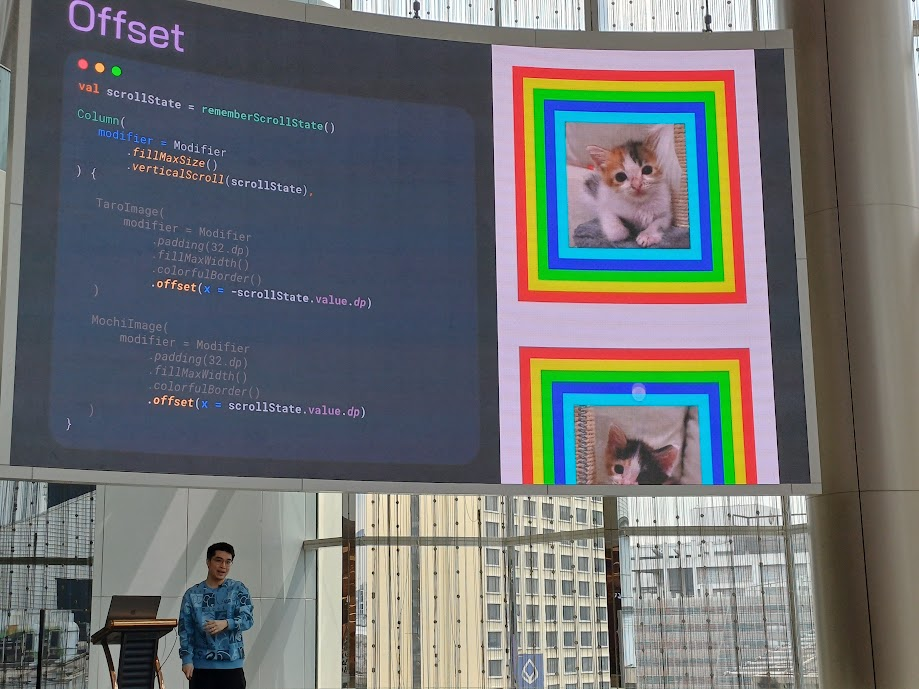
อันนี้แบบ video มีเคลื่อนที่ปกติ และหมุนไปด้วย
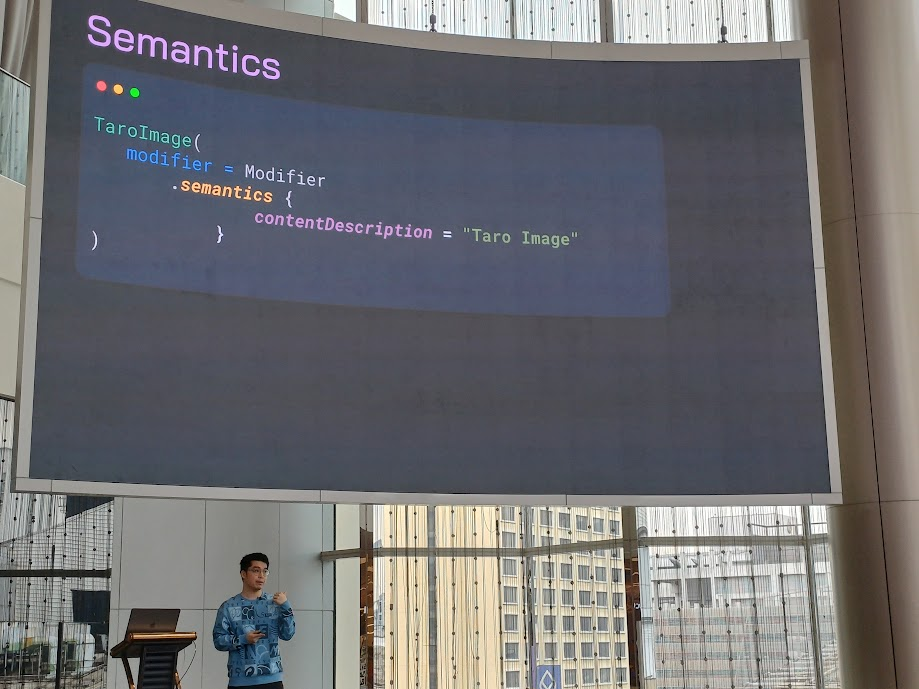
Semantics
sementics ทำเมื่อผู้บกพร่องทำด้านต่าง ๆ อย่างการใส่ contentDescription บอกว่าสิ่งนี้คือรูปน้องทาโร่นะ
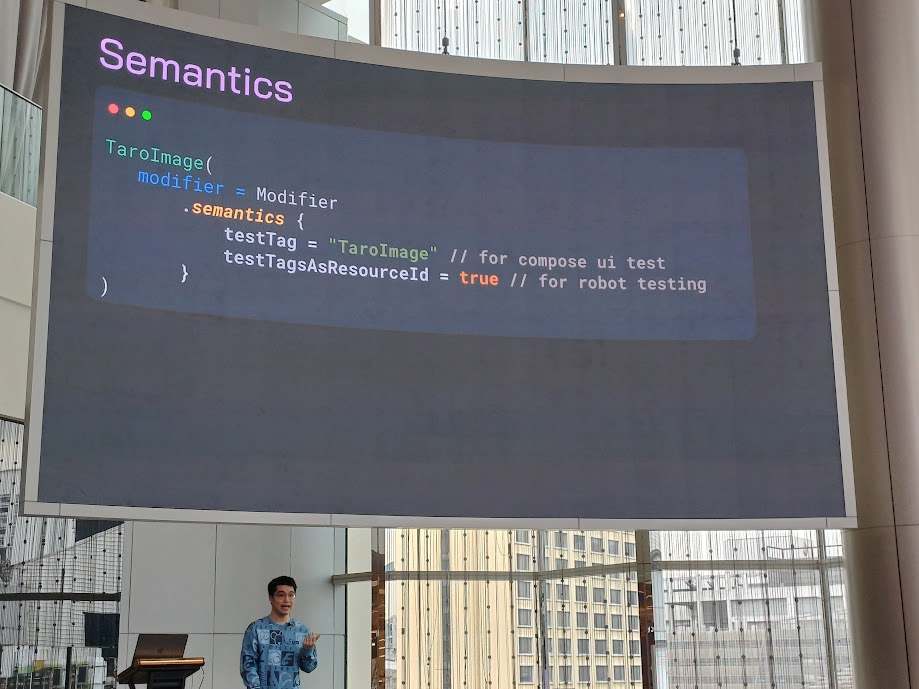
สามารถนำไปใส่เป็น flag เพื่อระบุตอน test ได้ง่าย
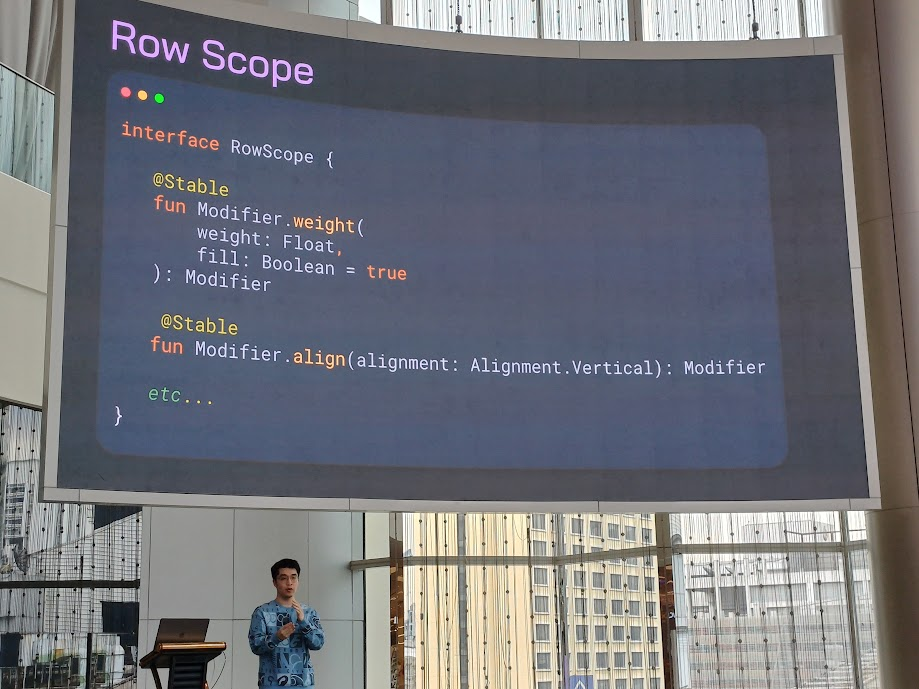
Scoped Modifier
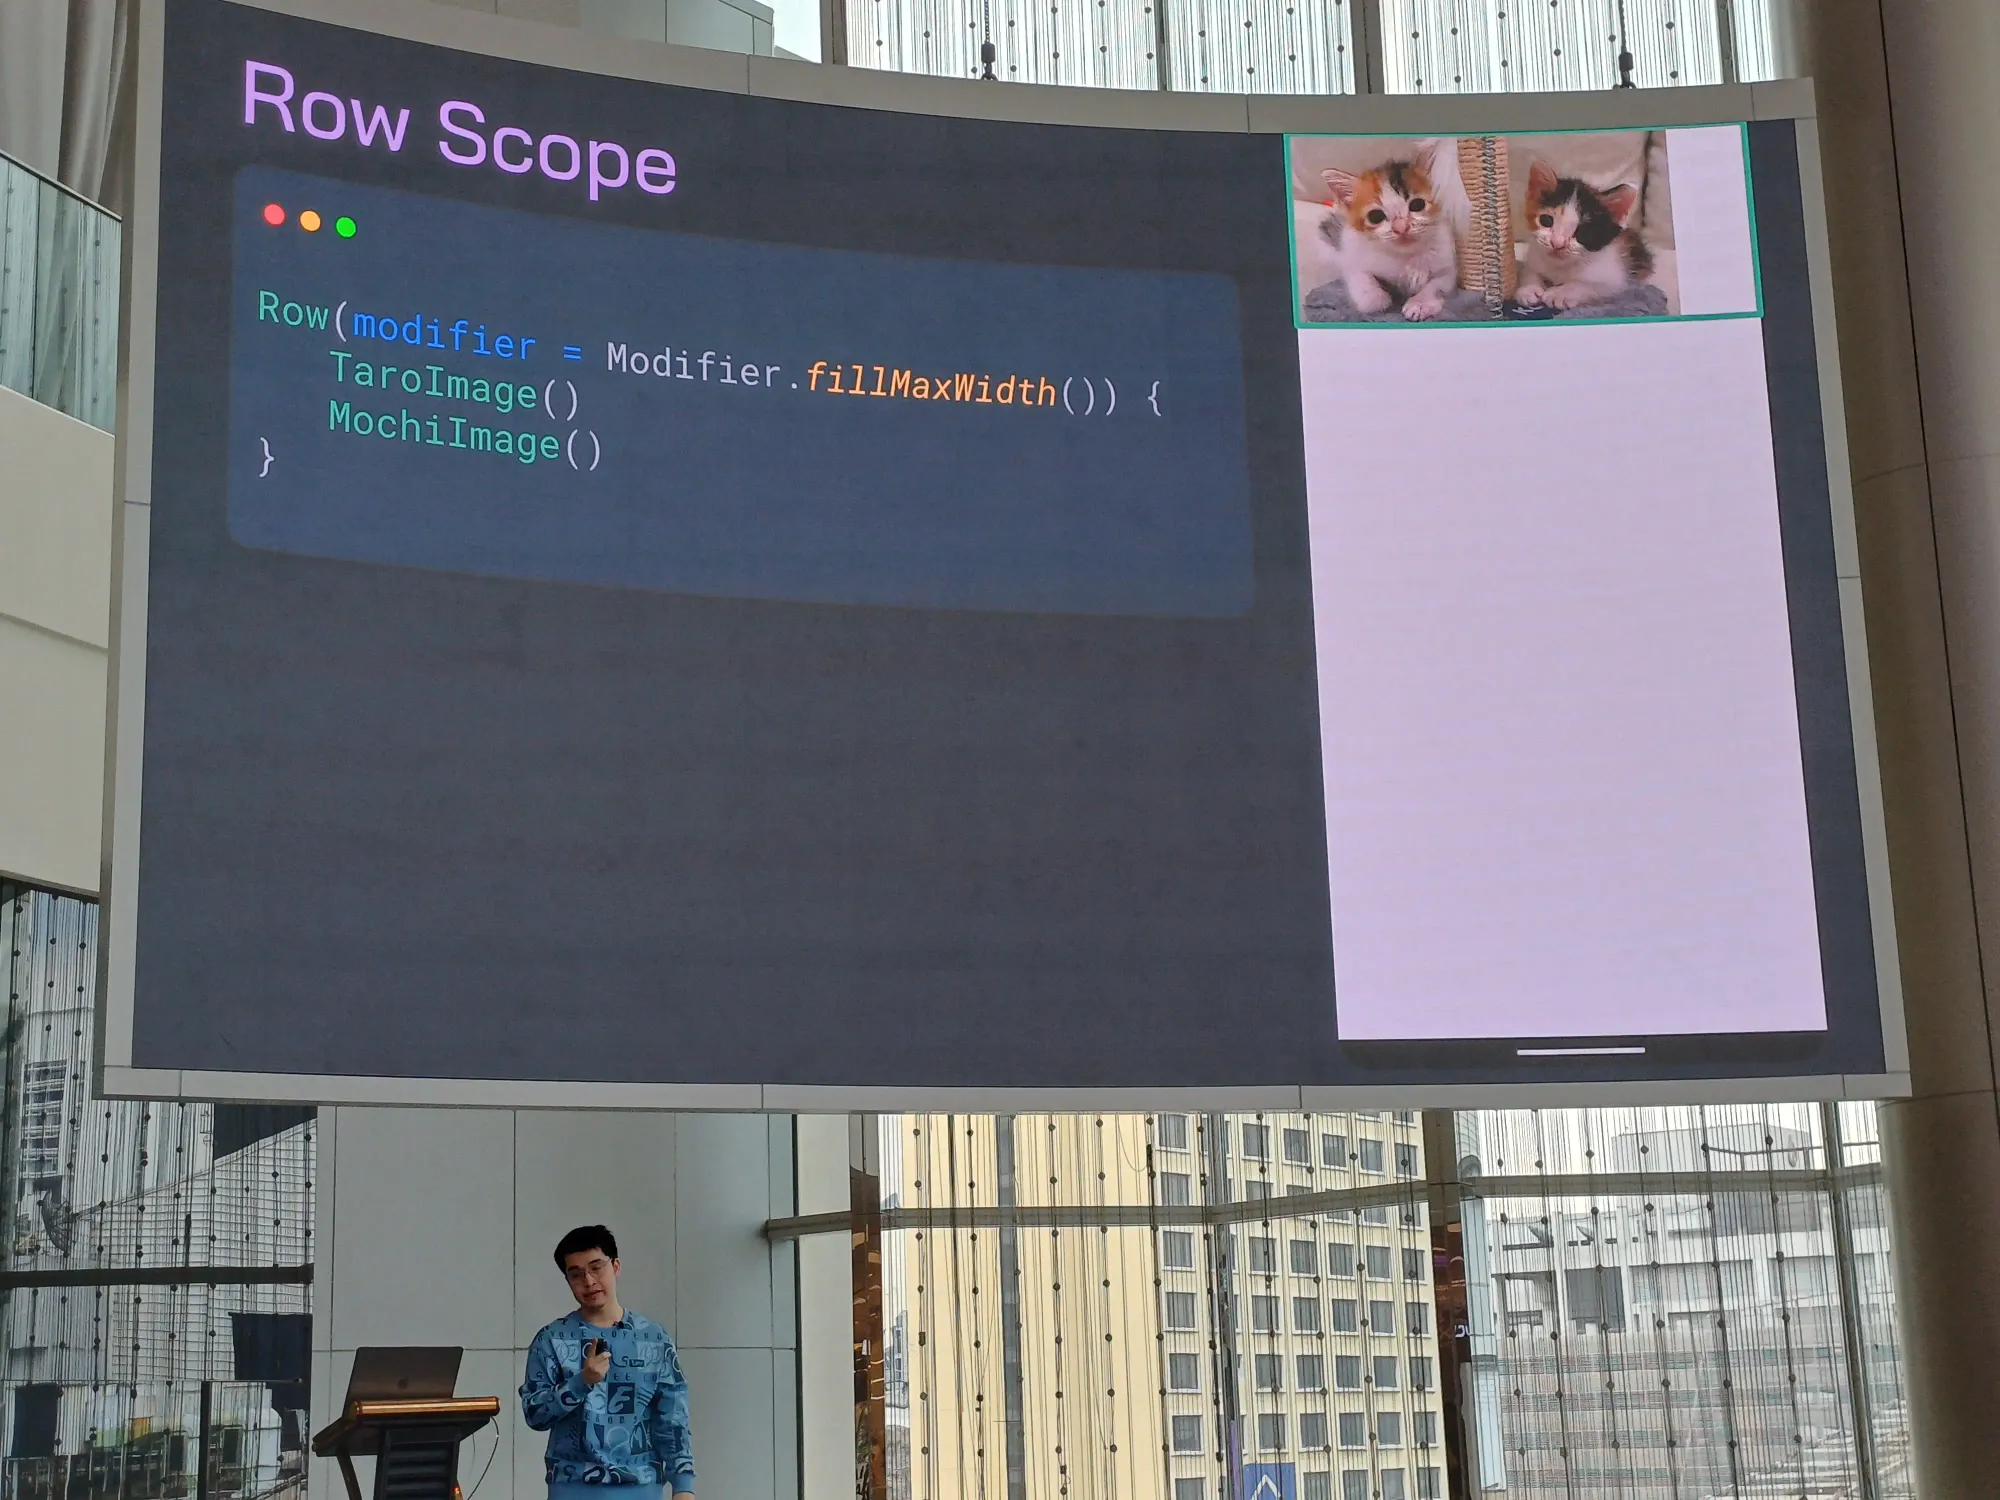
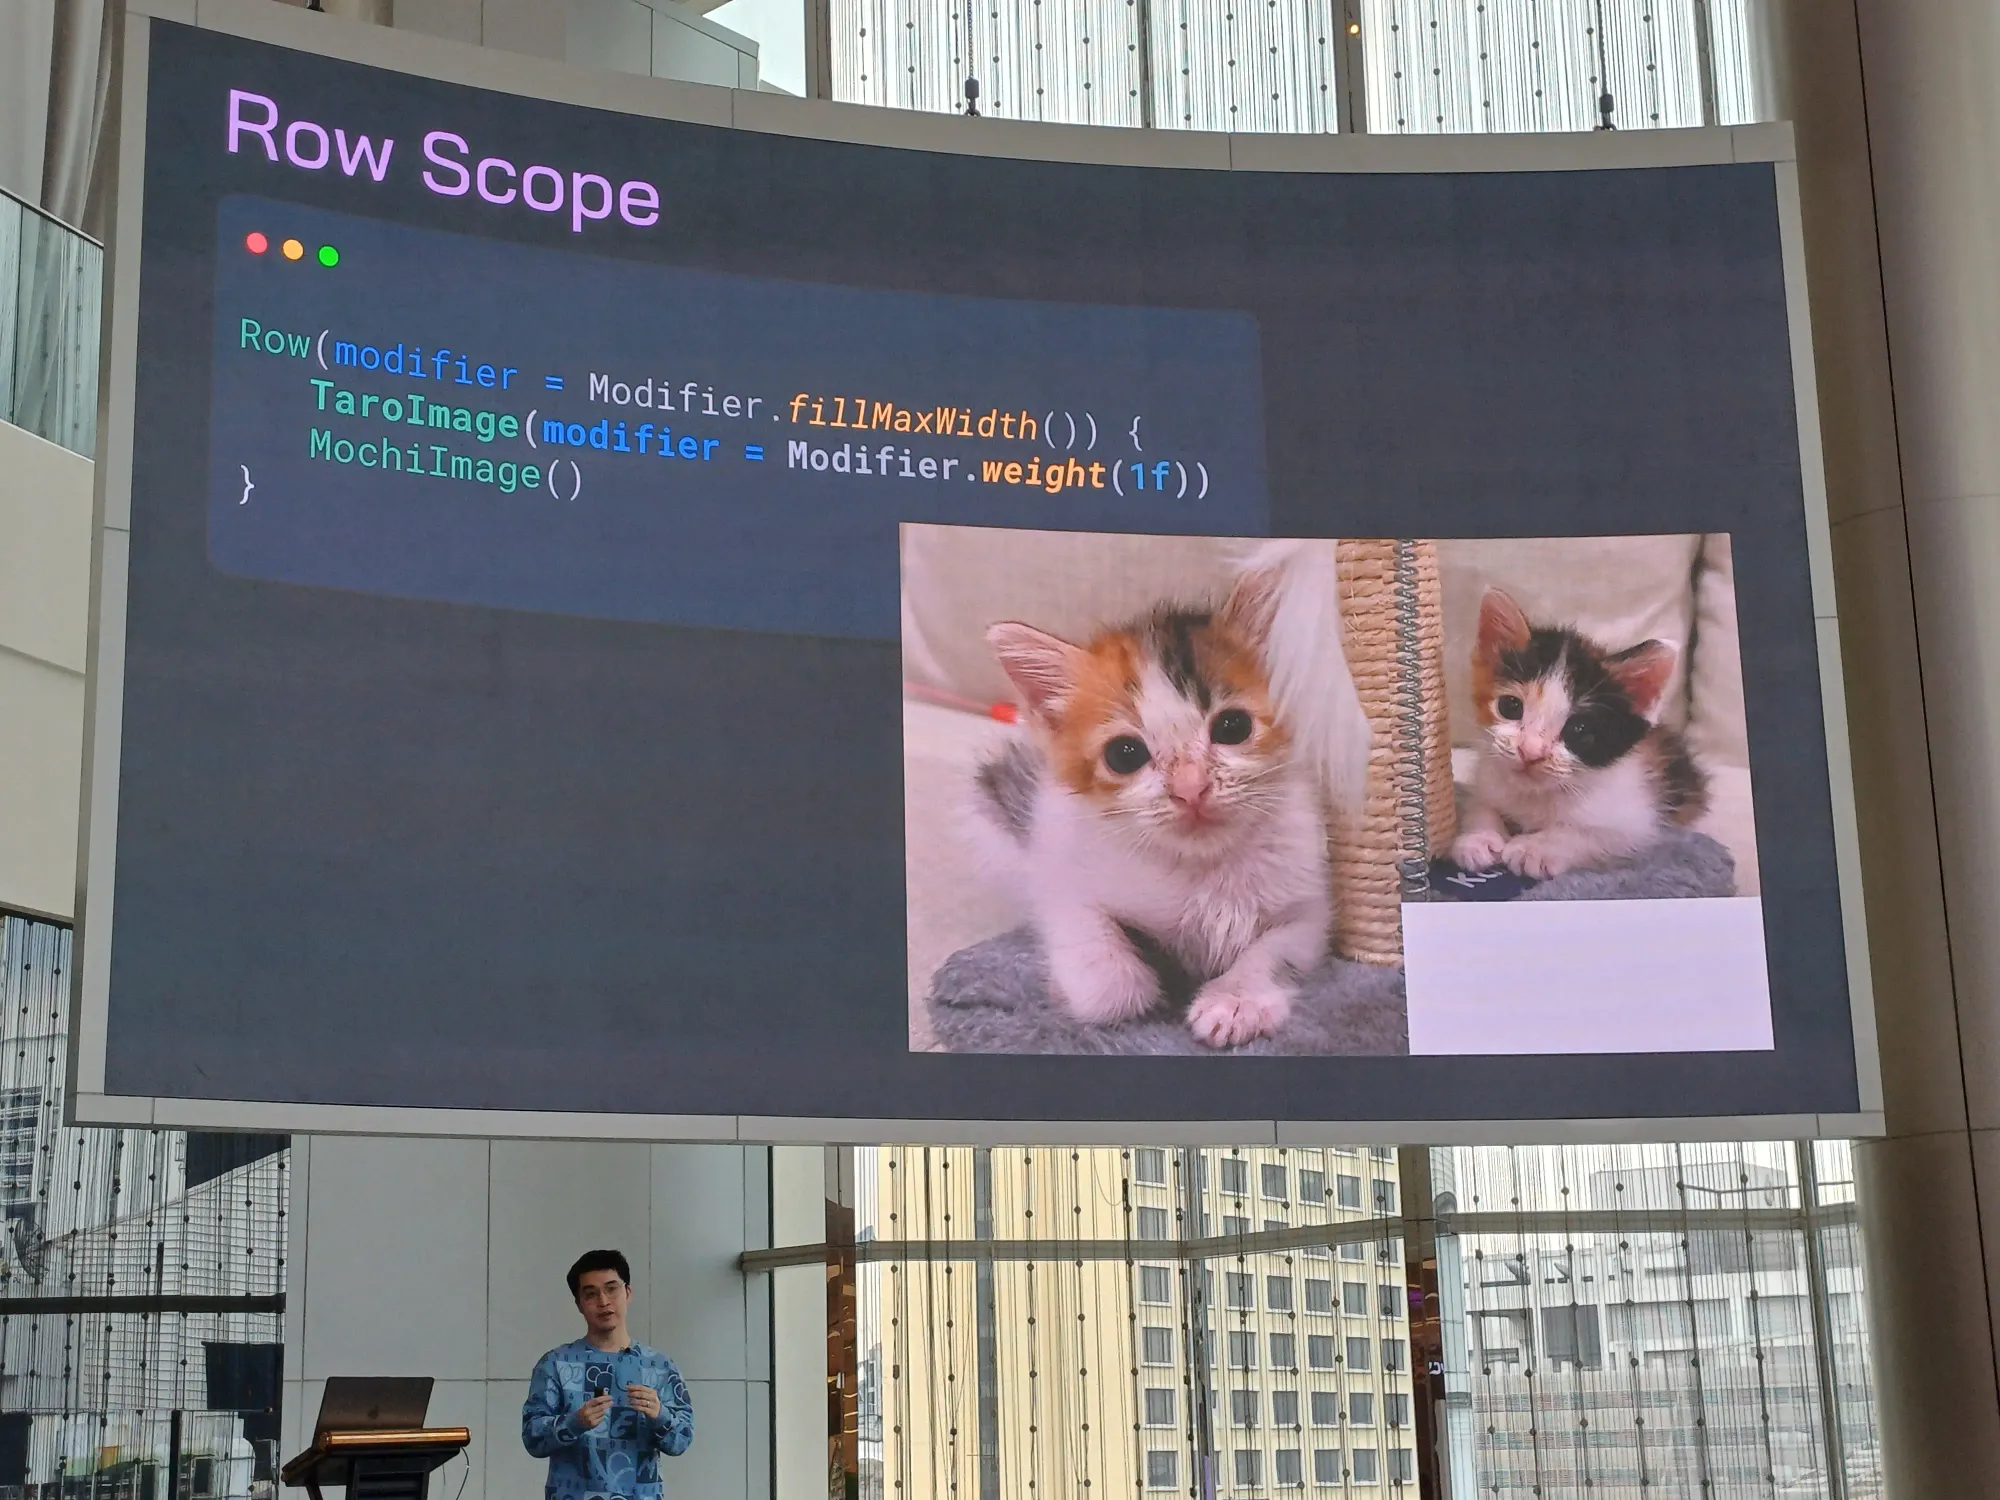
สามารถใช้ได้ครบทุก composable แต่อันที่ใช้ได้มีบางอันเท่านั้น เช่น ใช้ weight กับ RowScope, align column เรียงแนวนอน
ตัวอย่างการใช้ weight จะคล้าย ๆ ที่เรา set ที่ LinearLayout เลย
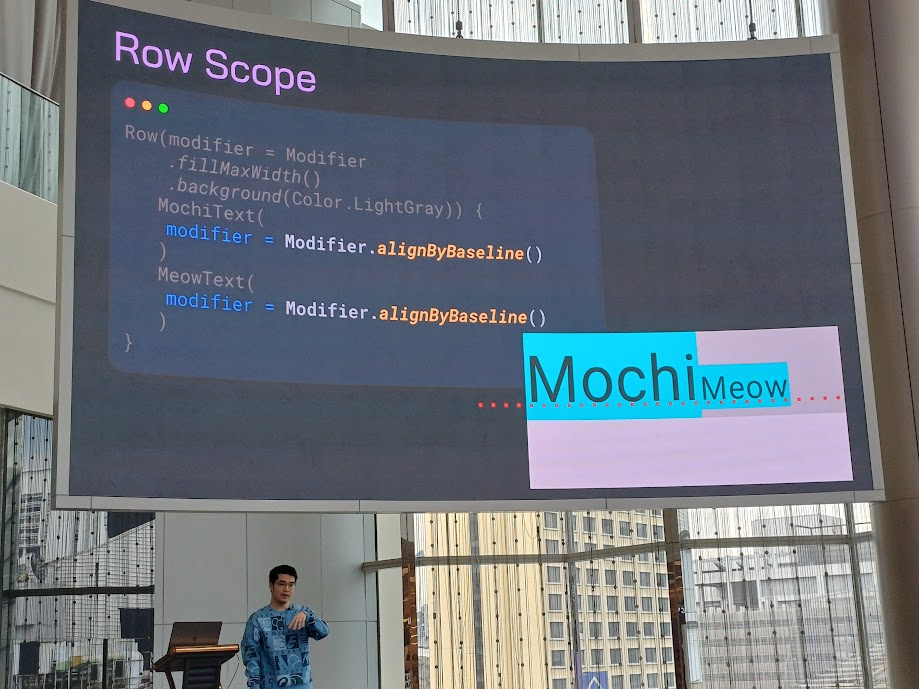
alignByBaseline() ตรงบรรทัด
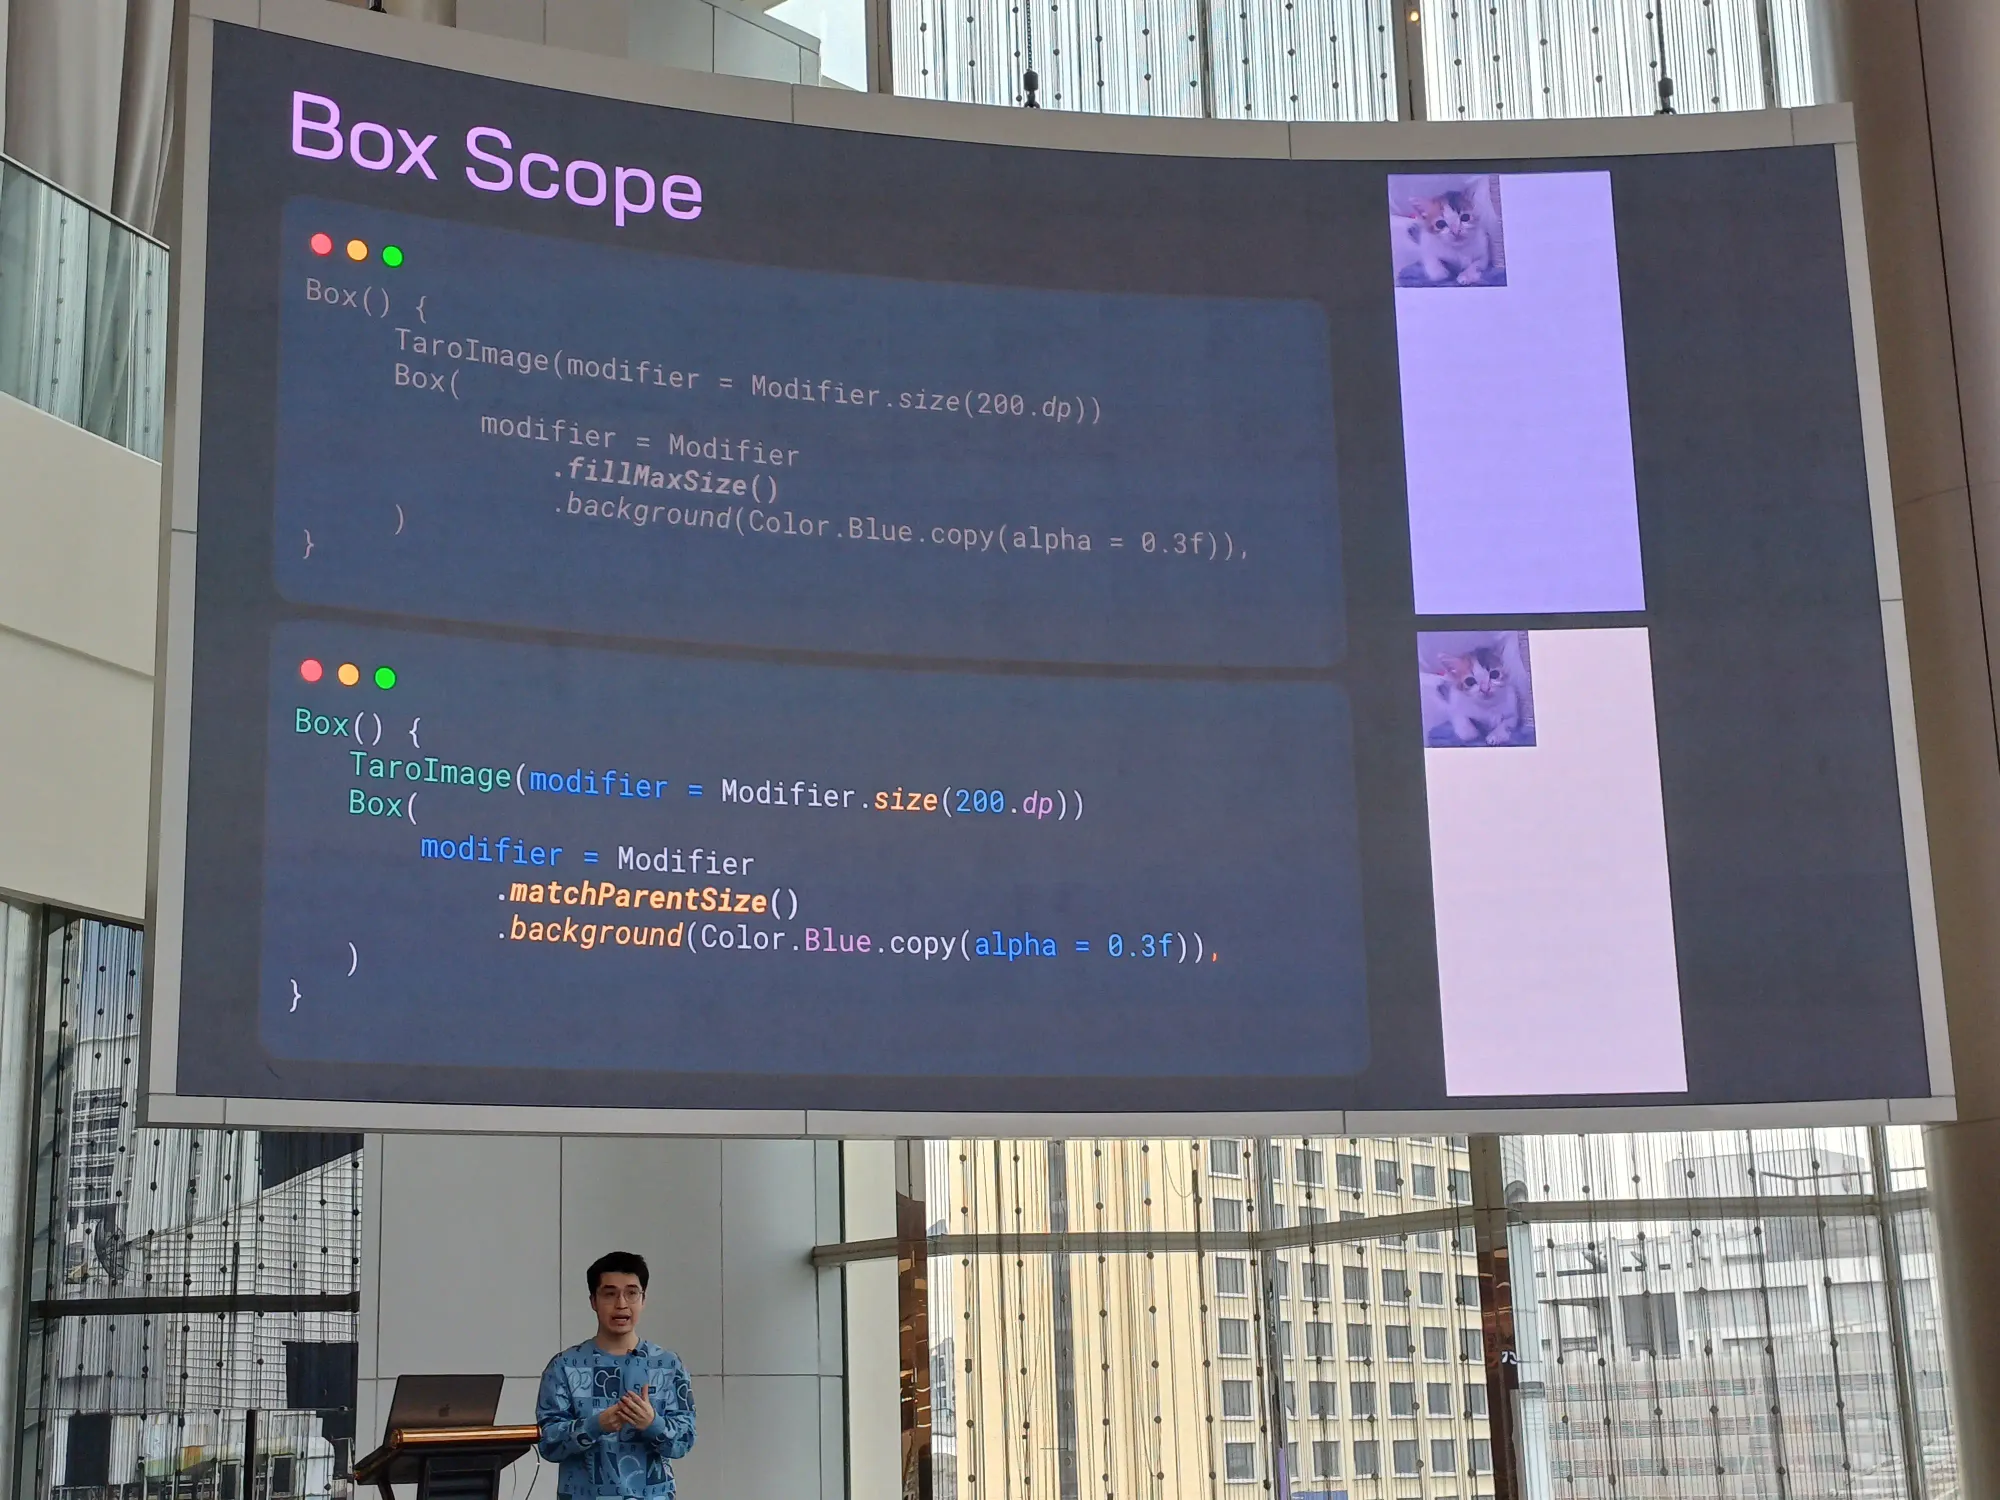
Box Scope จะคล้าย ๆ FrameLayout
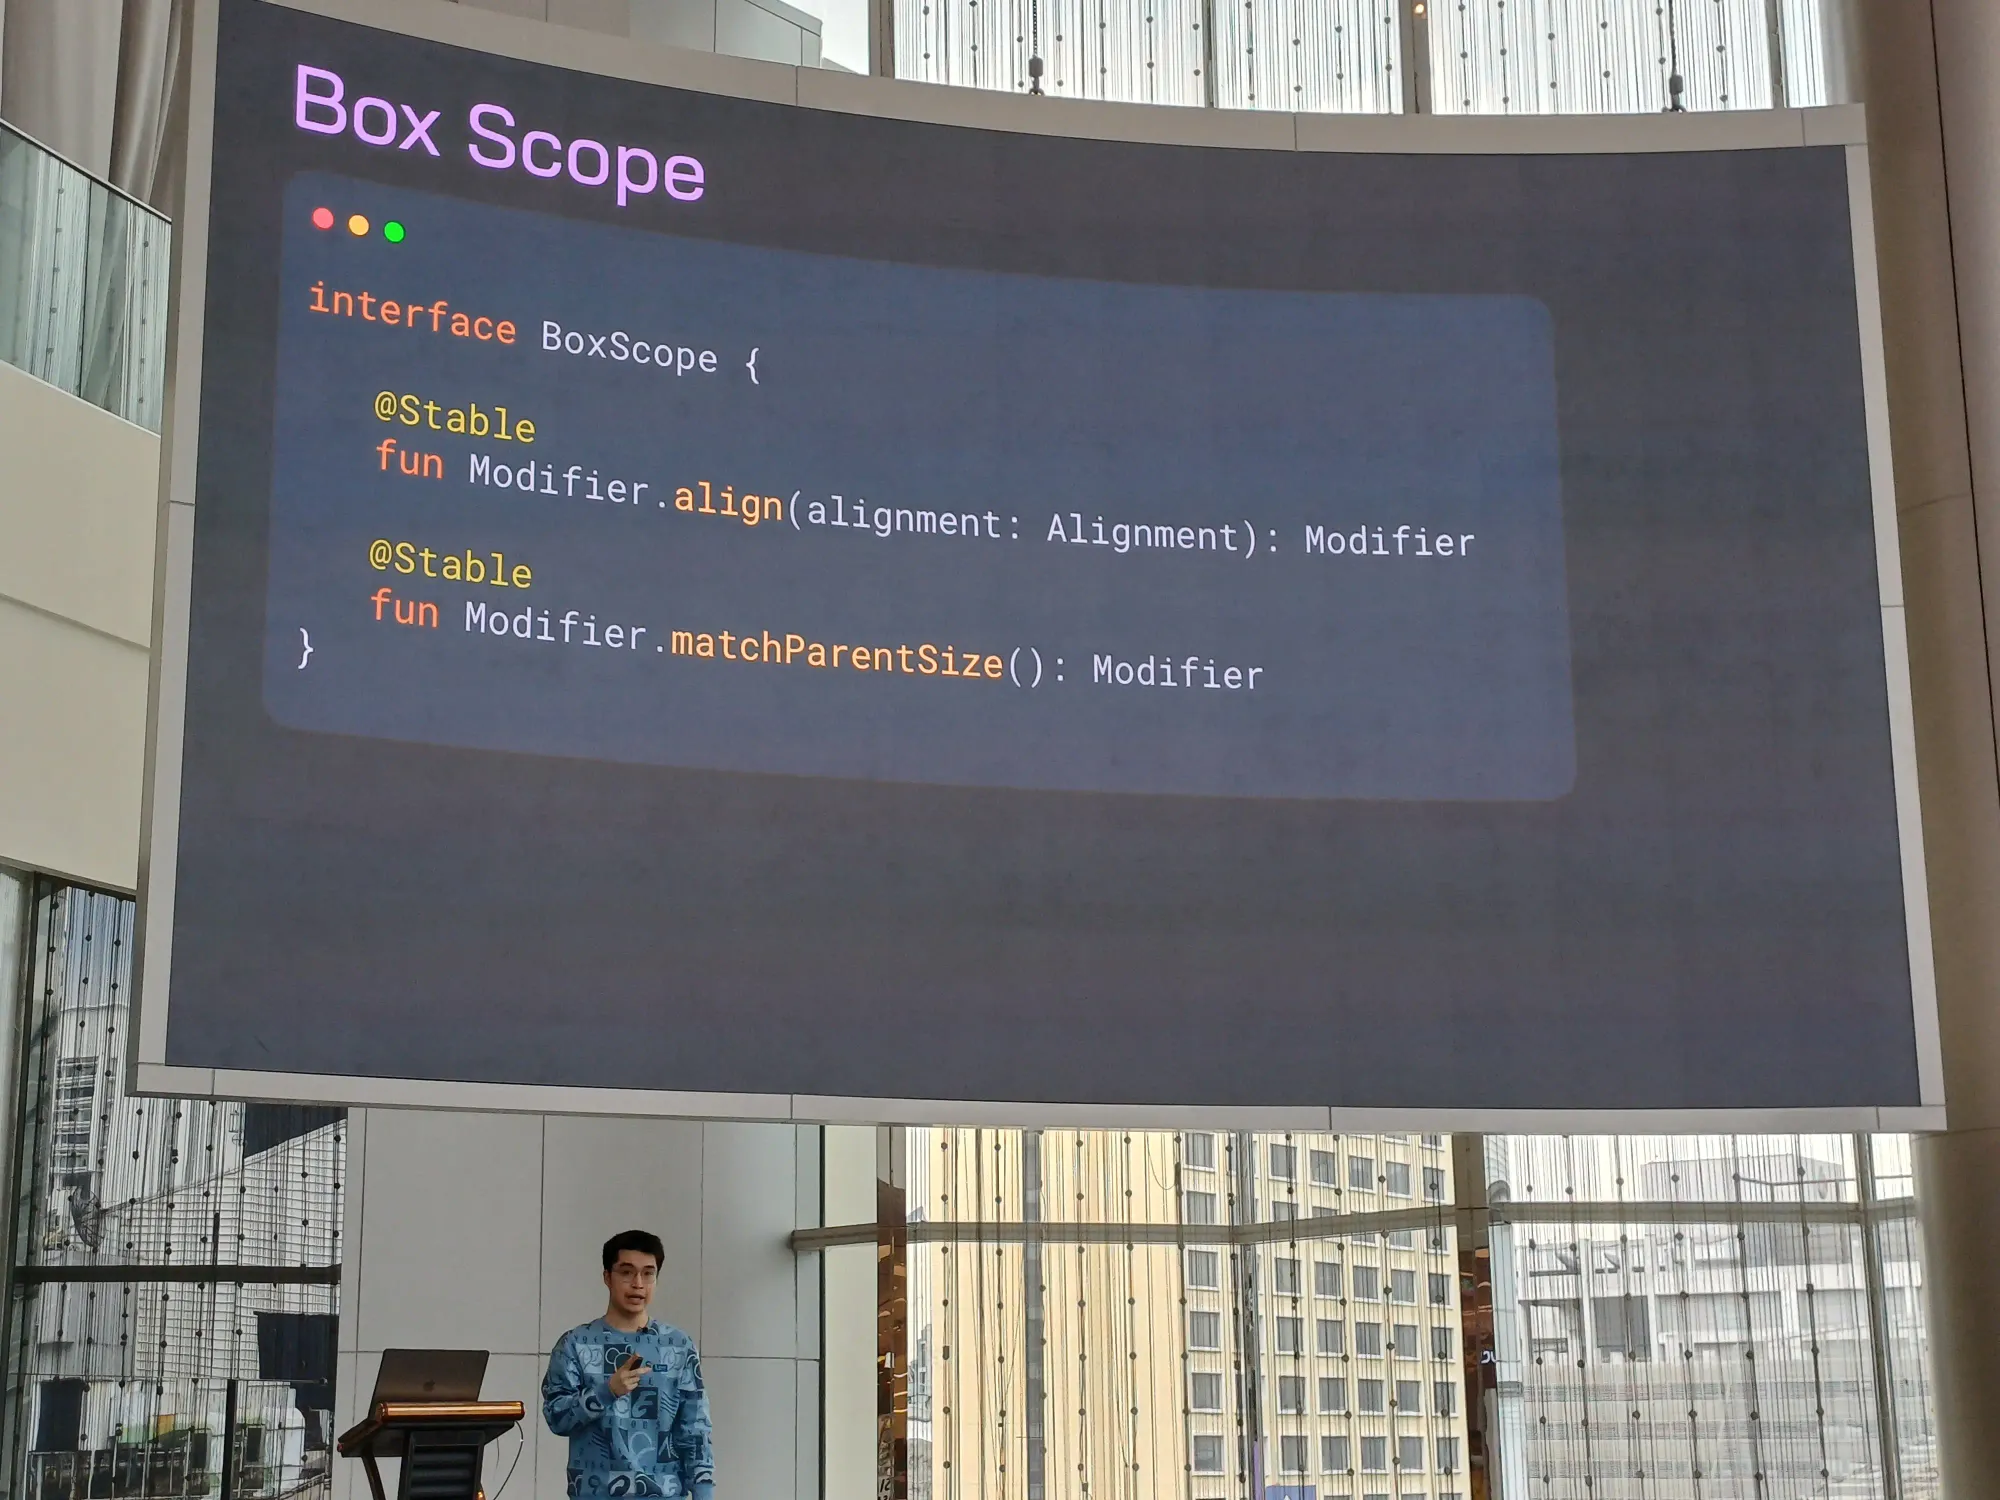
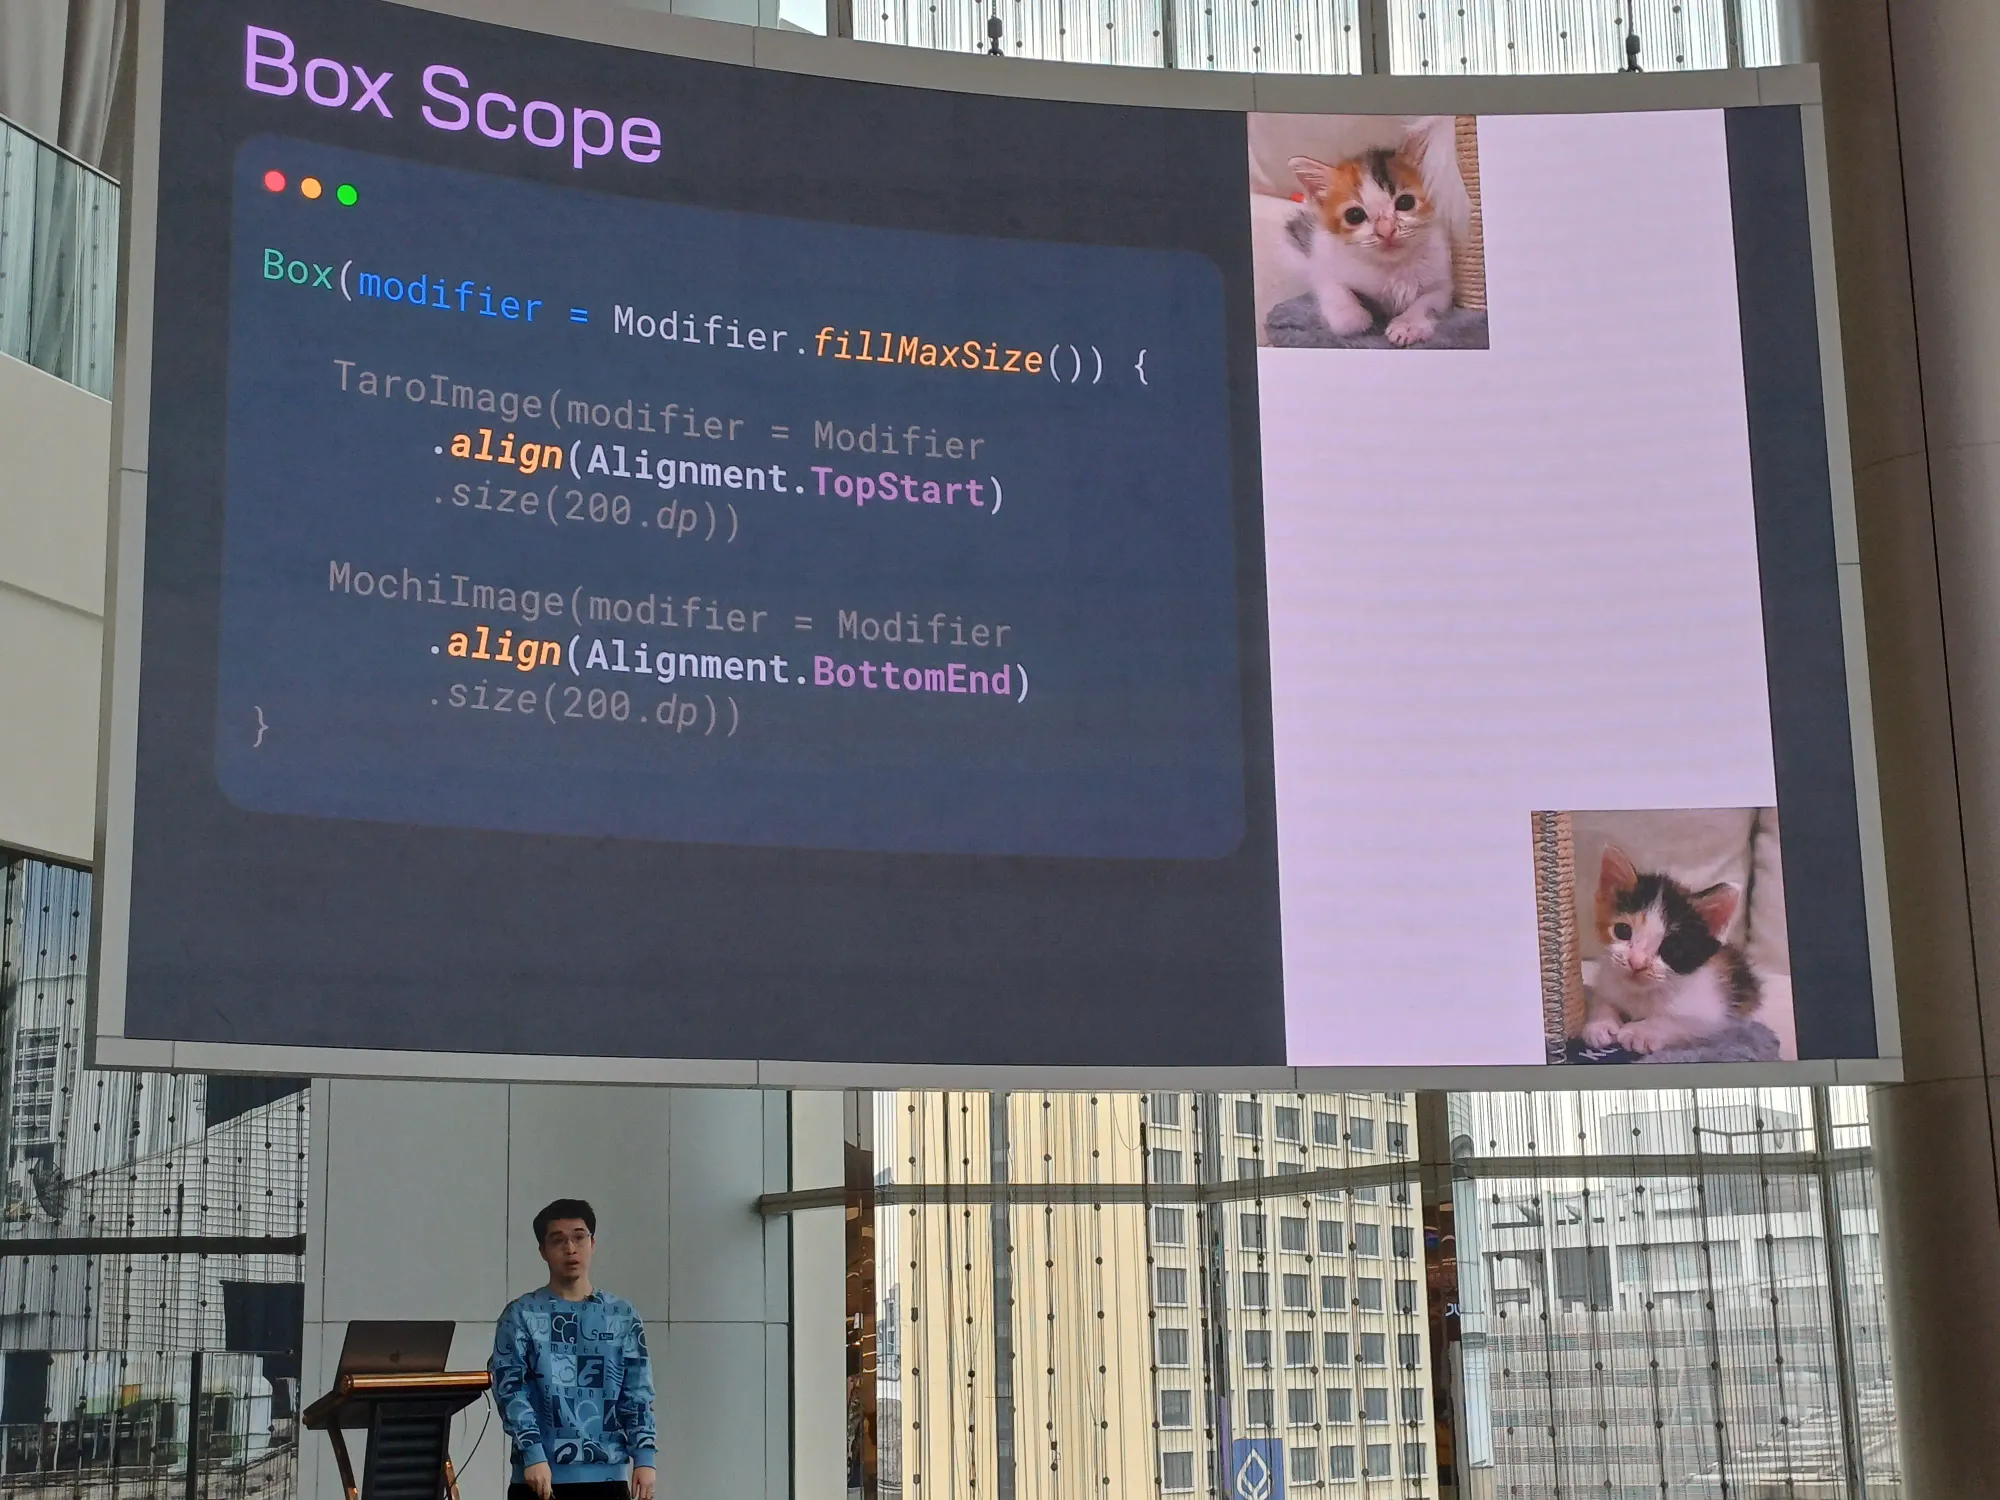
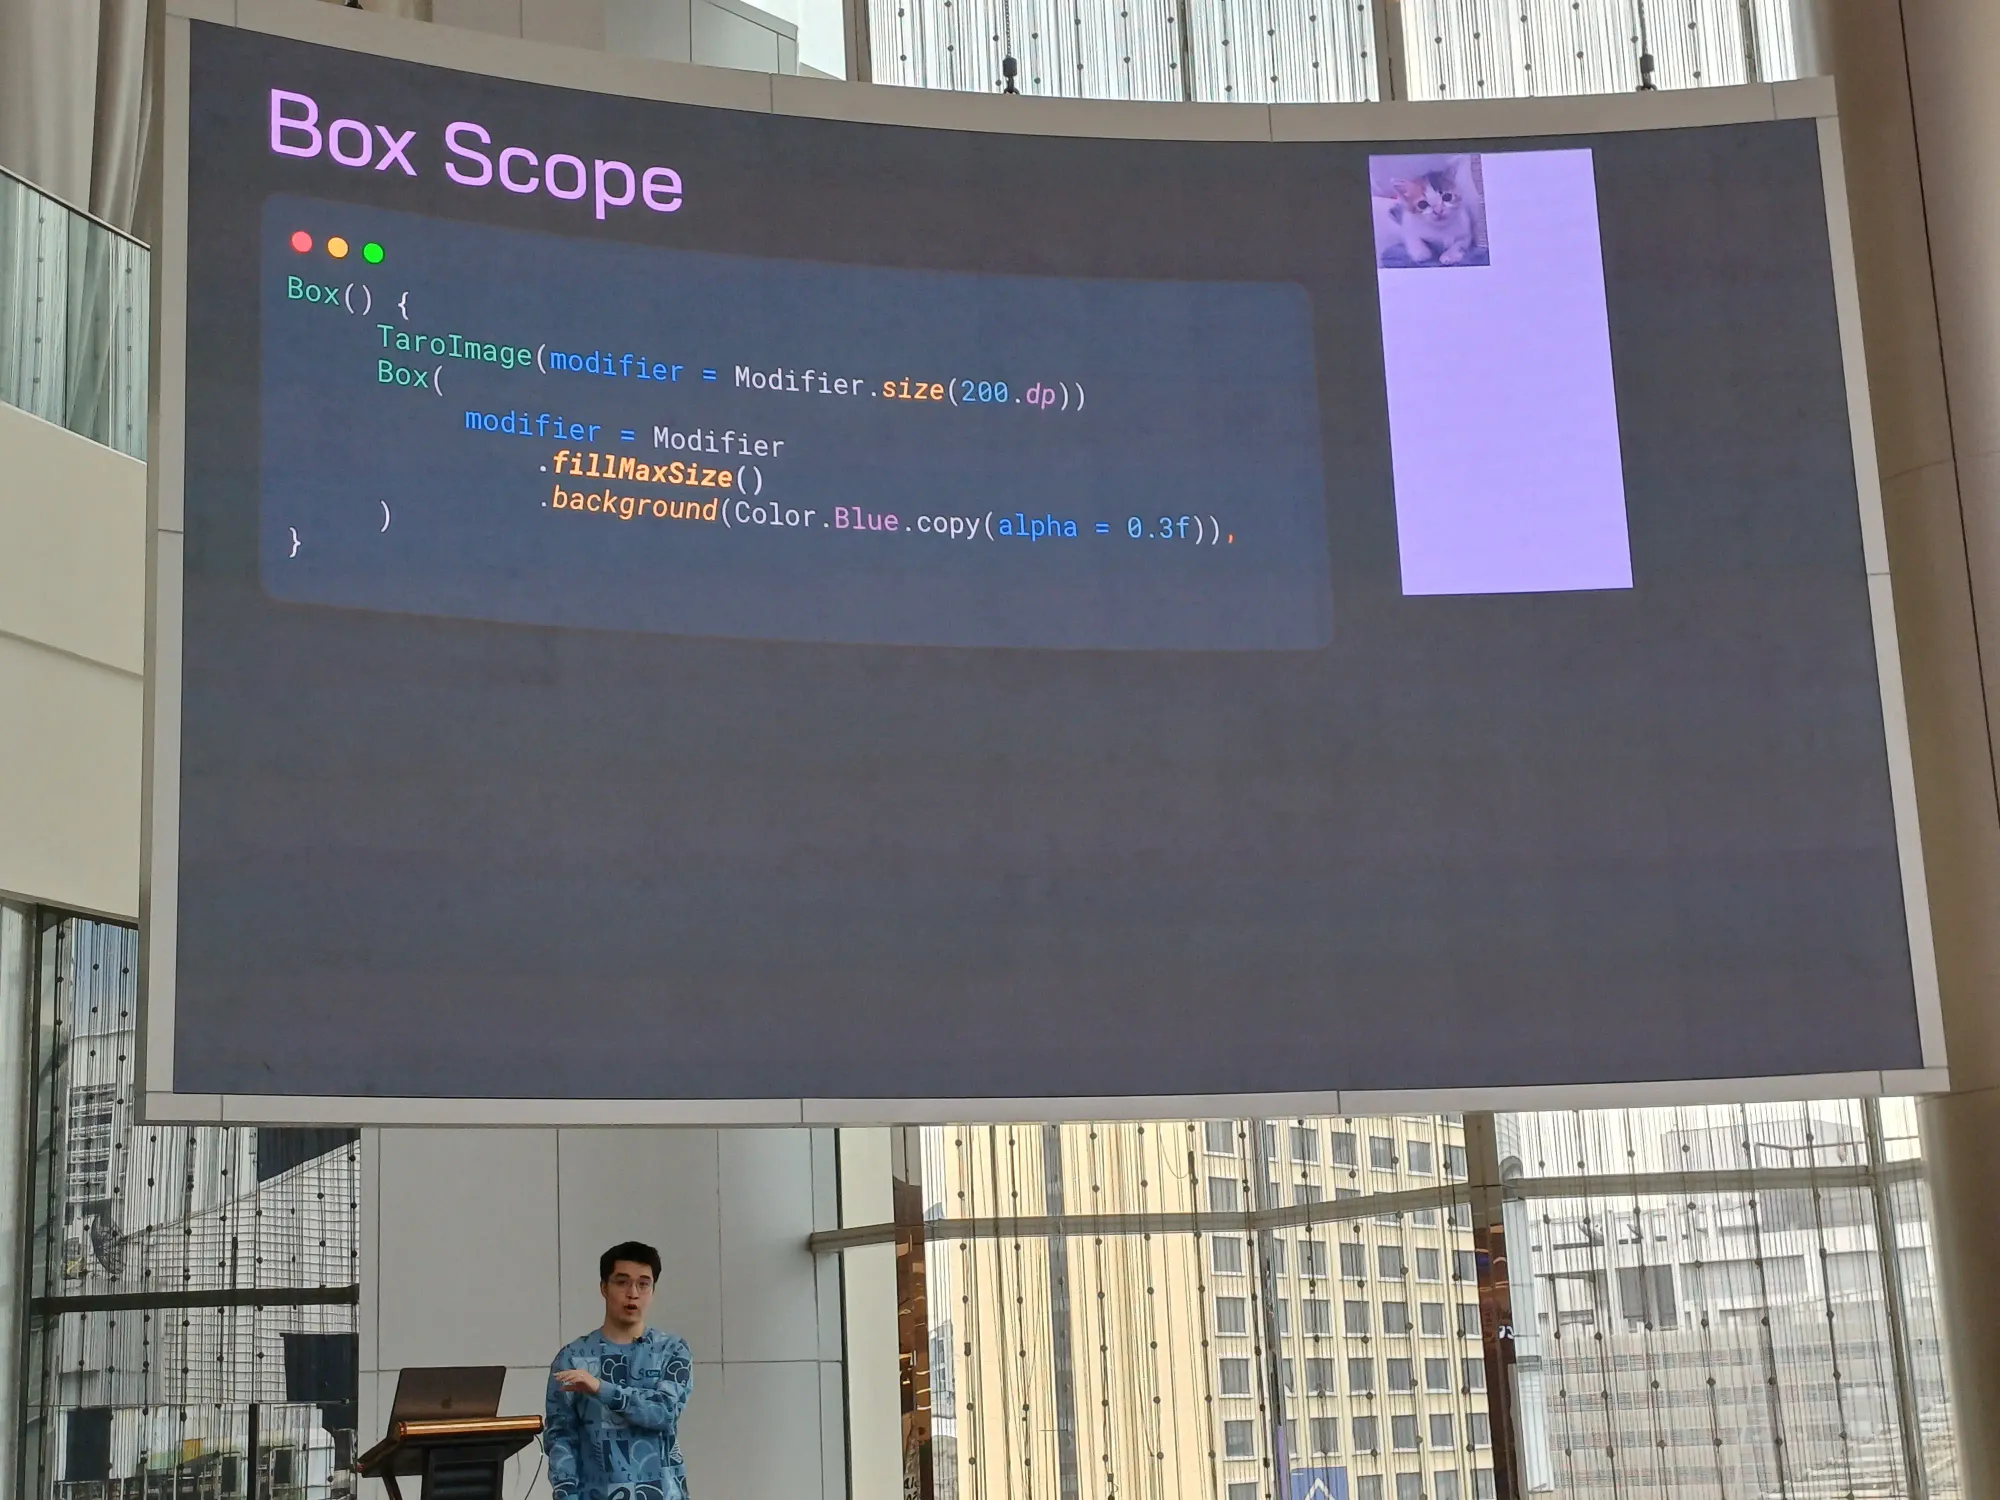
เท color background ทับแมว ใช้ matchParentSize()
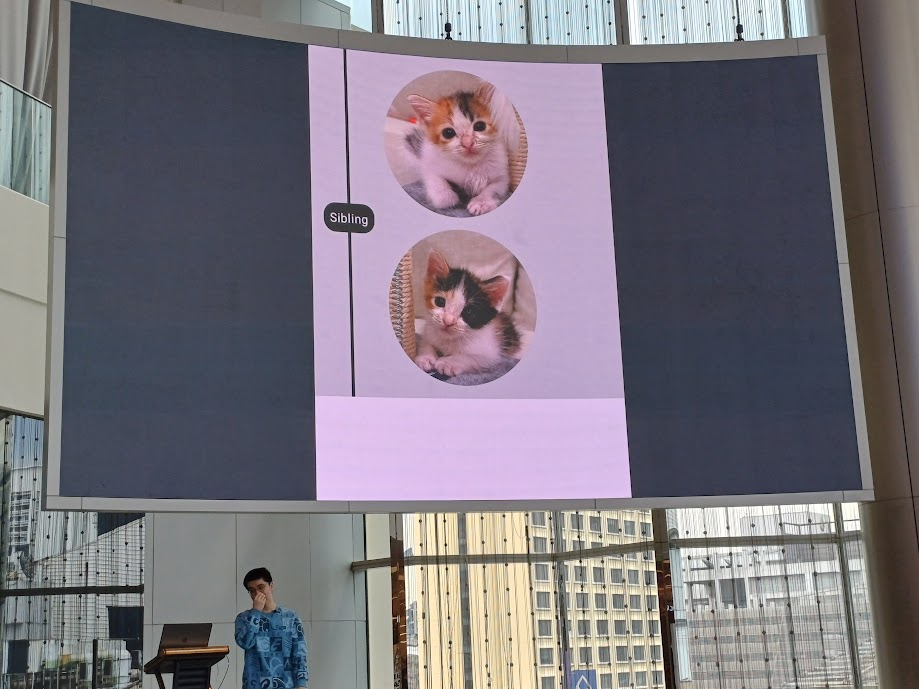
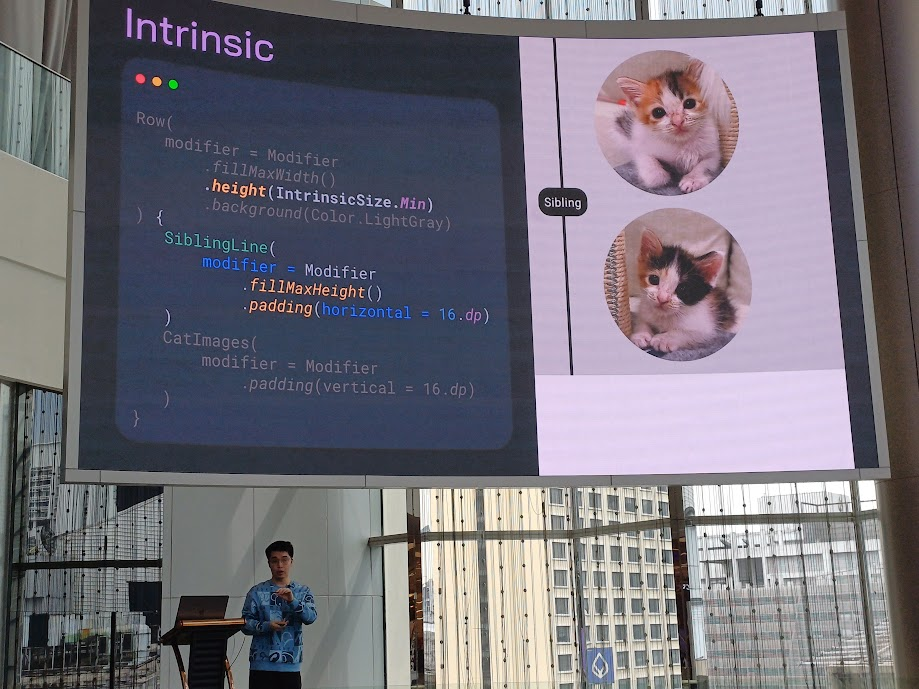
Intrinsic
ปกติใช้ ContrainLayout ในการทำ view อะไรแบบนี้เนอะ
สำหรับ Jetpack Compose ใช้ Intrinsic มาช่วย อันนี้คือก่อนหน้า
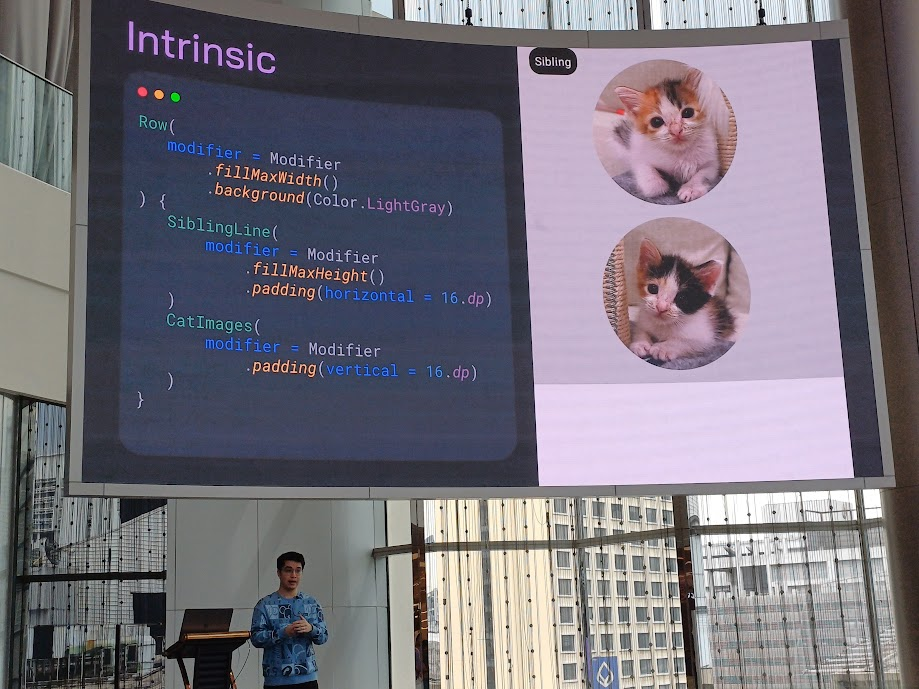
ที่ไม่เป็นไปตามนั้นเพราะตัว View ไม่รู้ความสูง ดังนั้นจะต้องรู้ความสูงก่อน โดยใส่ height(IntrinsicSize.Min) ลงไปที่ Modifier
สรุปทั้งหมดใน session
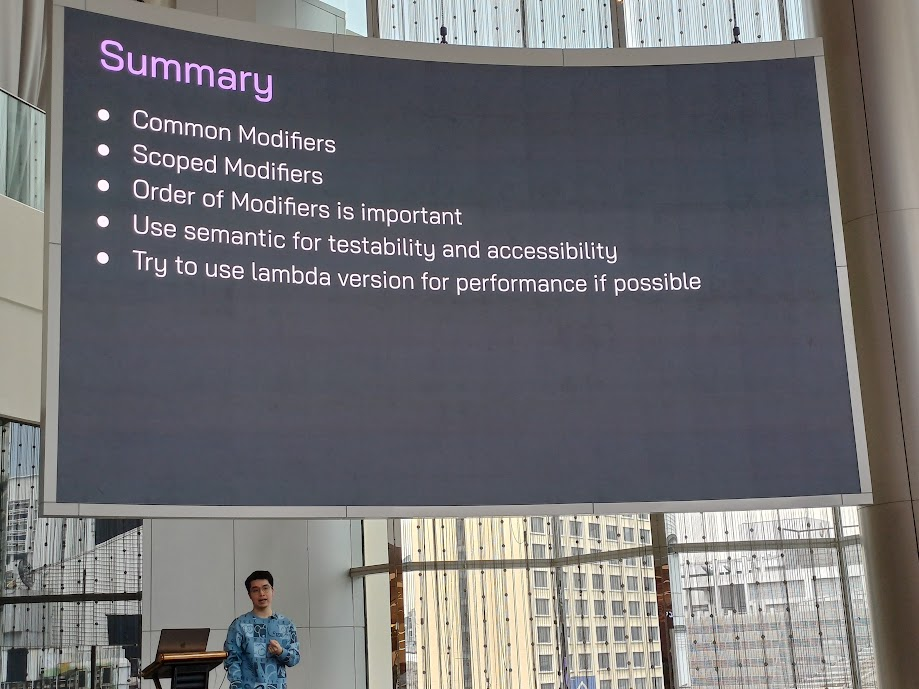
สไลด์ของ session แรกจ้า


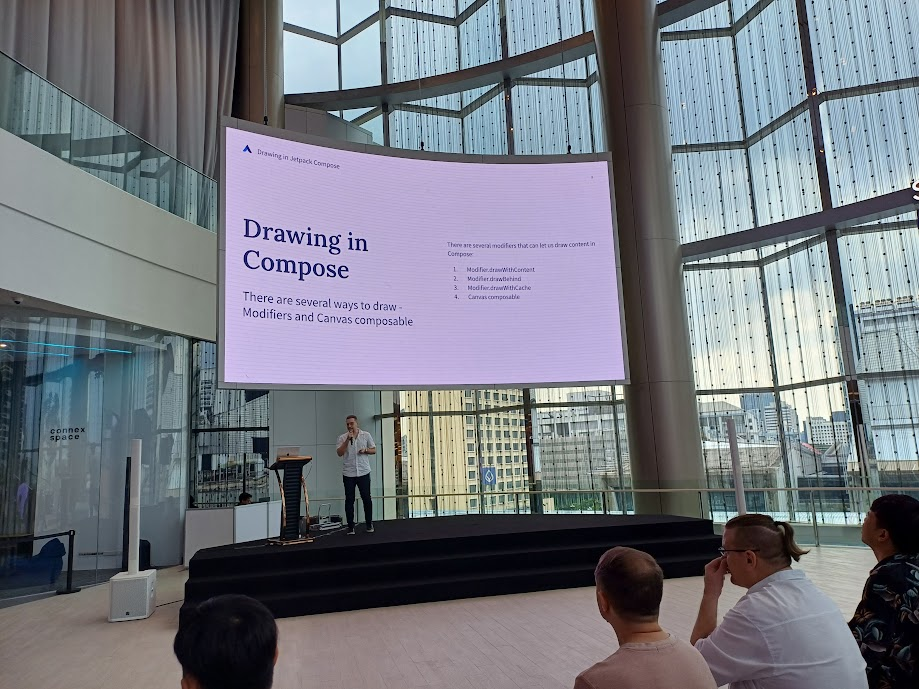
Hidden powers of Compose Canvas - Fedor Erofeev
อันนี้ตอนเขายกตัวอย่างแต่ละ view อาจจะตามไม่ค่อยทัน คิดว่าอ่านสไลด์เขาด้วยน่าจะเข้าใจได้ง่ายกว่าที่เราสรุปนะ 555
จริง ๆ ก็มีหลาย ๆ Modifier ที่ใช้วาดนะ
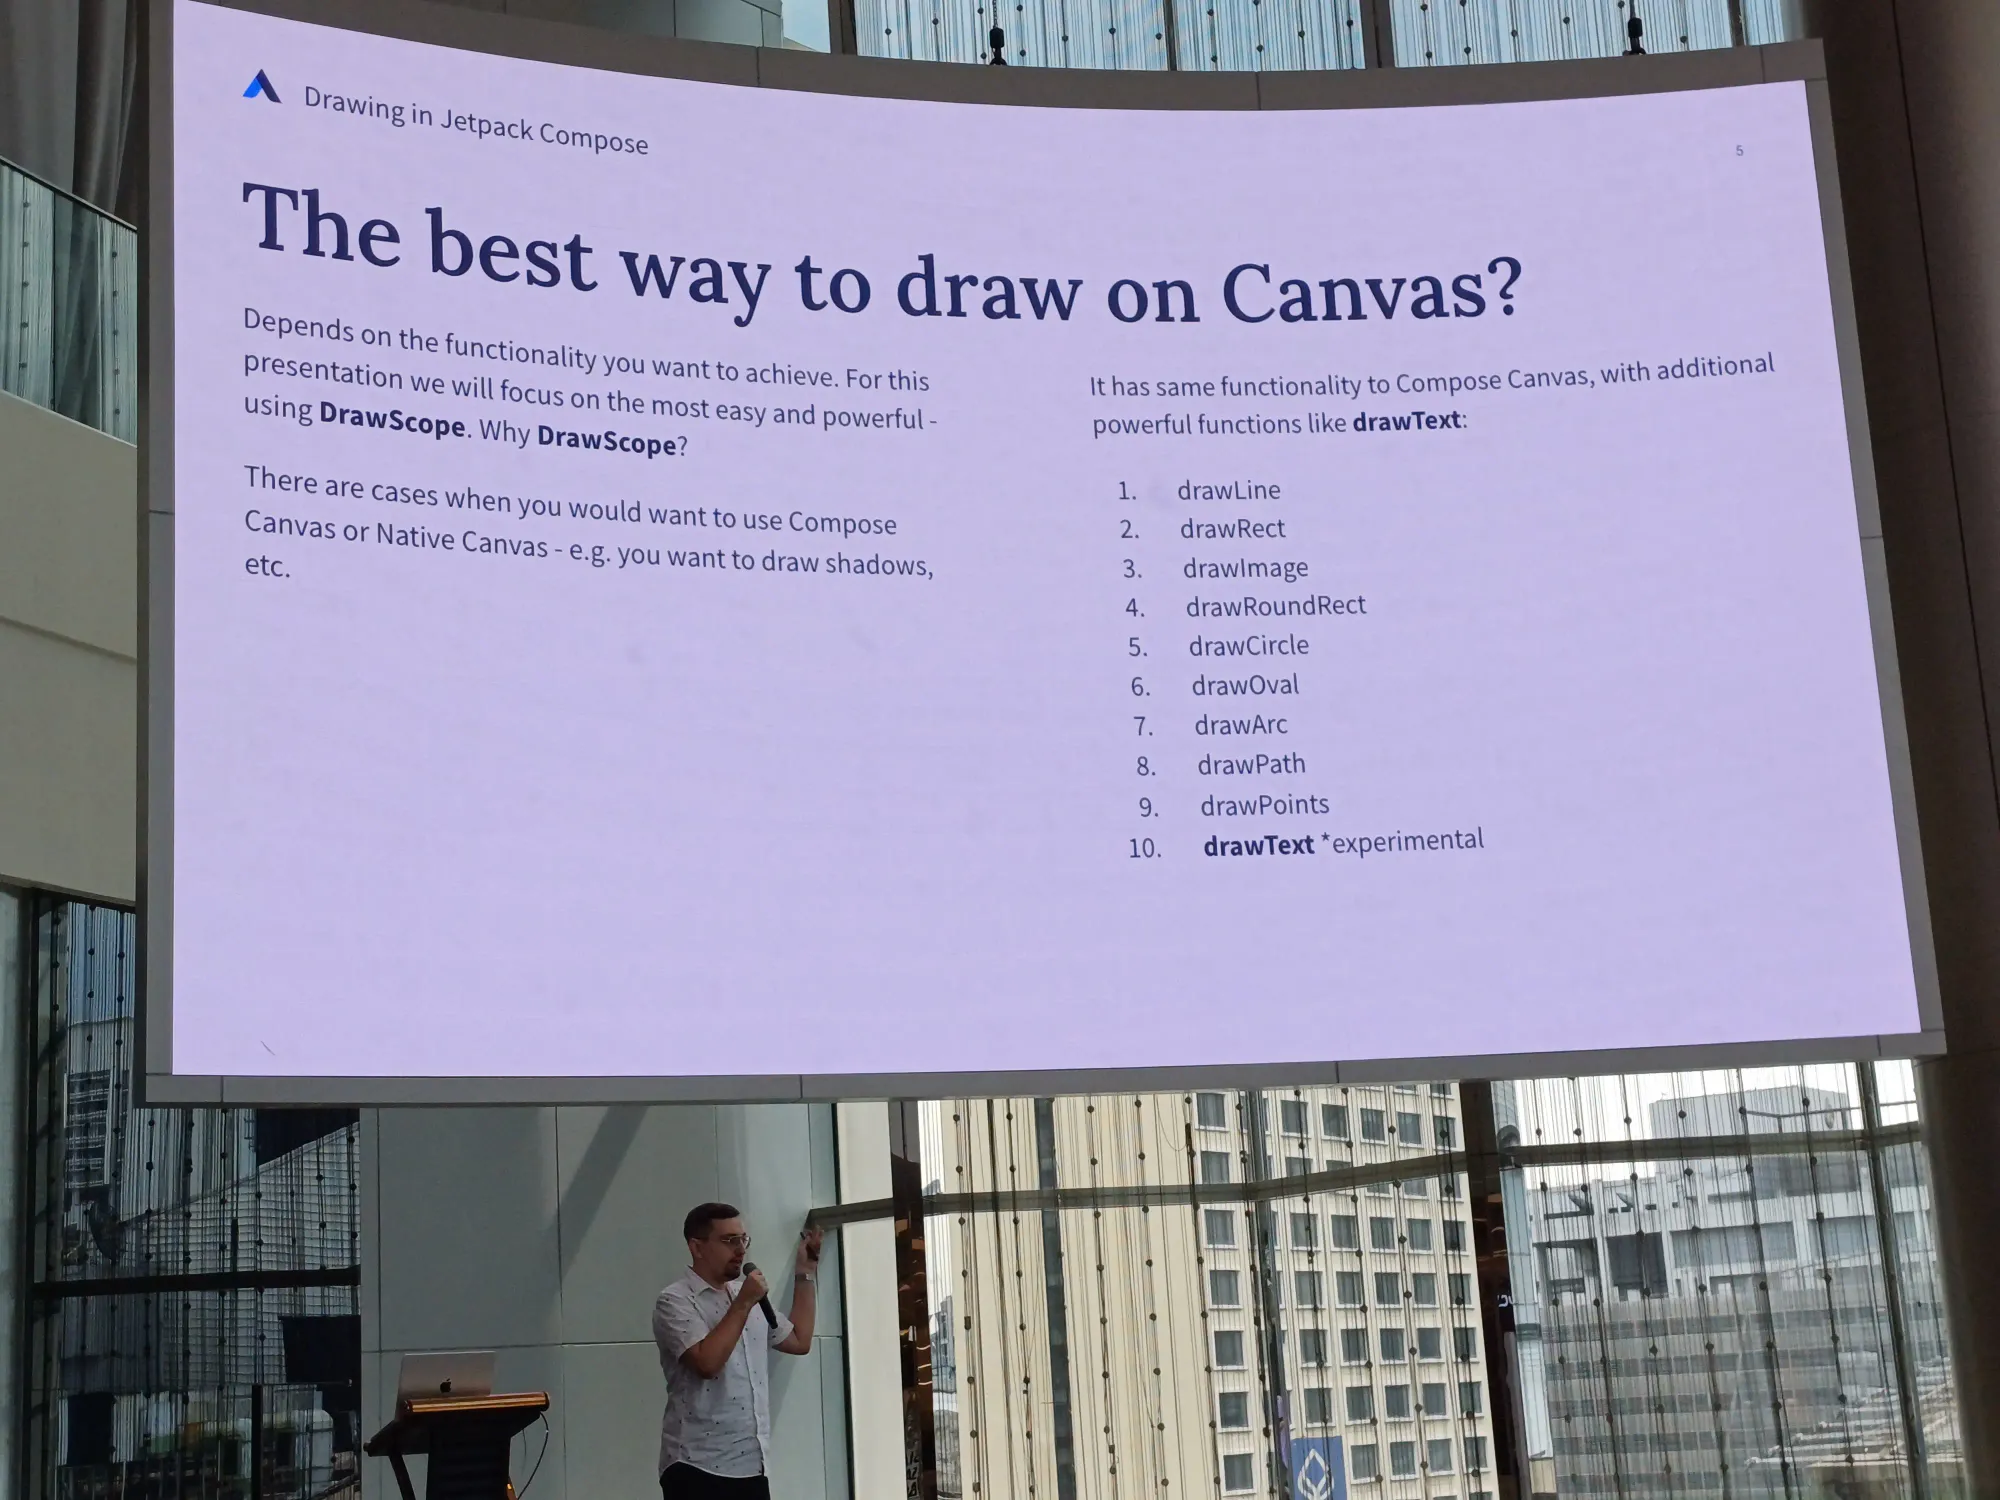
แล้วทางอื่น ๆ ล่ะ ความแตกต่างของแต่ละอัน ไม่ว่าจะเป็น
- DrawScope: สร้าง scope ในการสาดรูป มีการ provide ตัว stateless API เพื่อวาด shape และ path โดยไม่มีต้อง maintain state ของ Canvas
- Compose Canvas: เราสามารถวาดได้โดยตรงโดยใช้
drawIntoCanvas()ในการควบคุมการวาดต่าง ๆ - Native Canvas: เราสามารถเข้าถึง Native Canvas ได้จาก Compose Canvas ในกรณีที่อยากทำให้ Canvas สมบูรณ์ขึ้น เช่น การเพิ่มเงา
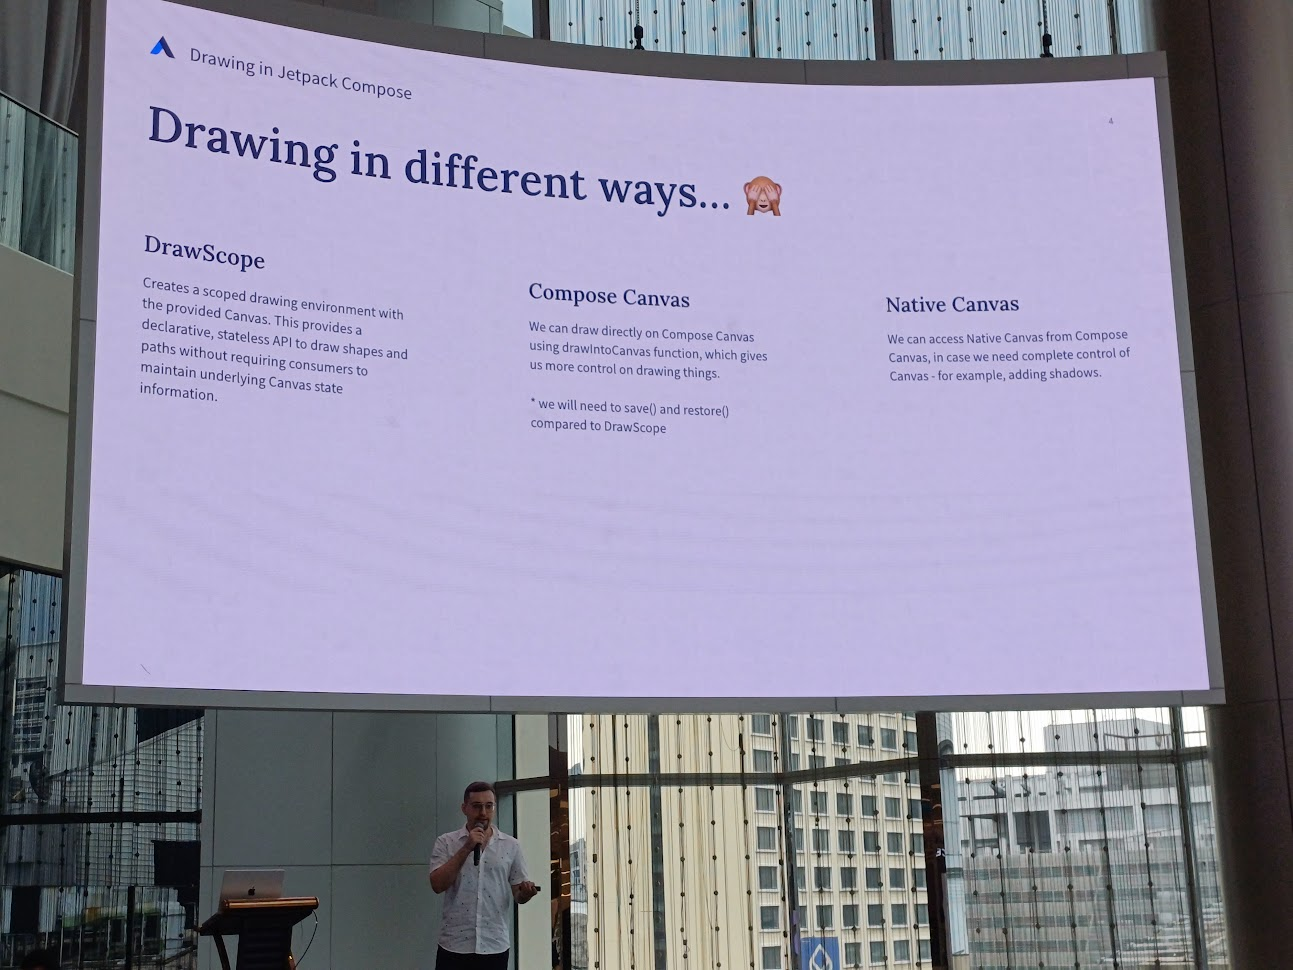
ทางที่ดีที่สุดคือใช้ DrawScope แล้วทำไมต้อง DrawScope เอาไว้วาดรูปร่างต่าง ๆ ได้ง่าย และมีประสิทธิภาพมากที่สุด และมีบาง function ที่เหมือนกับ Compose Canvas ด้วย
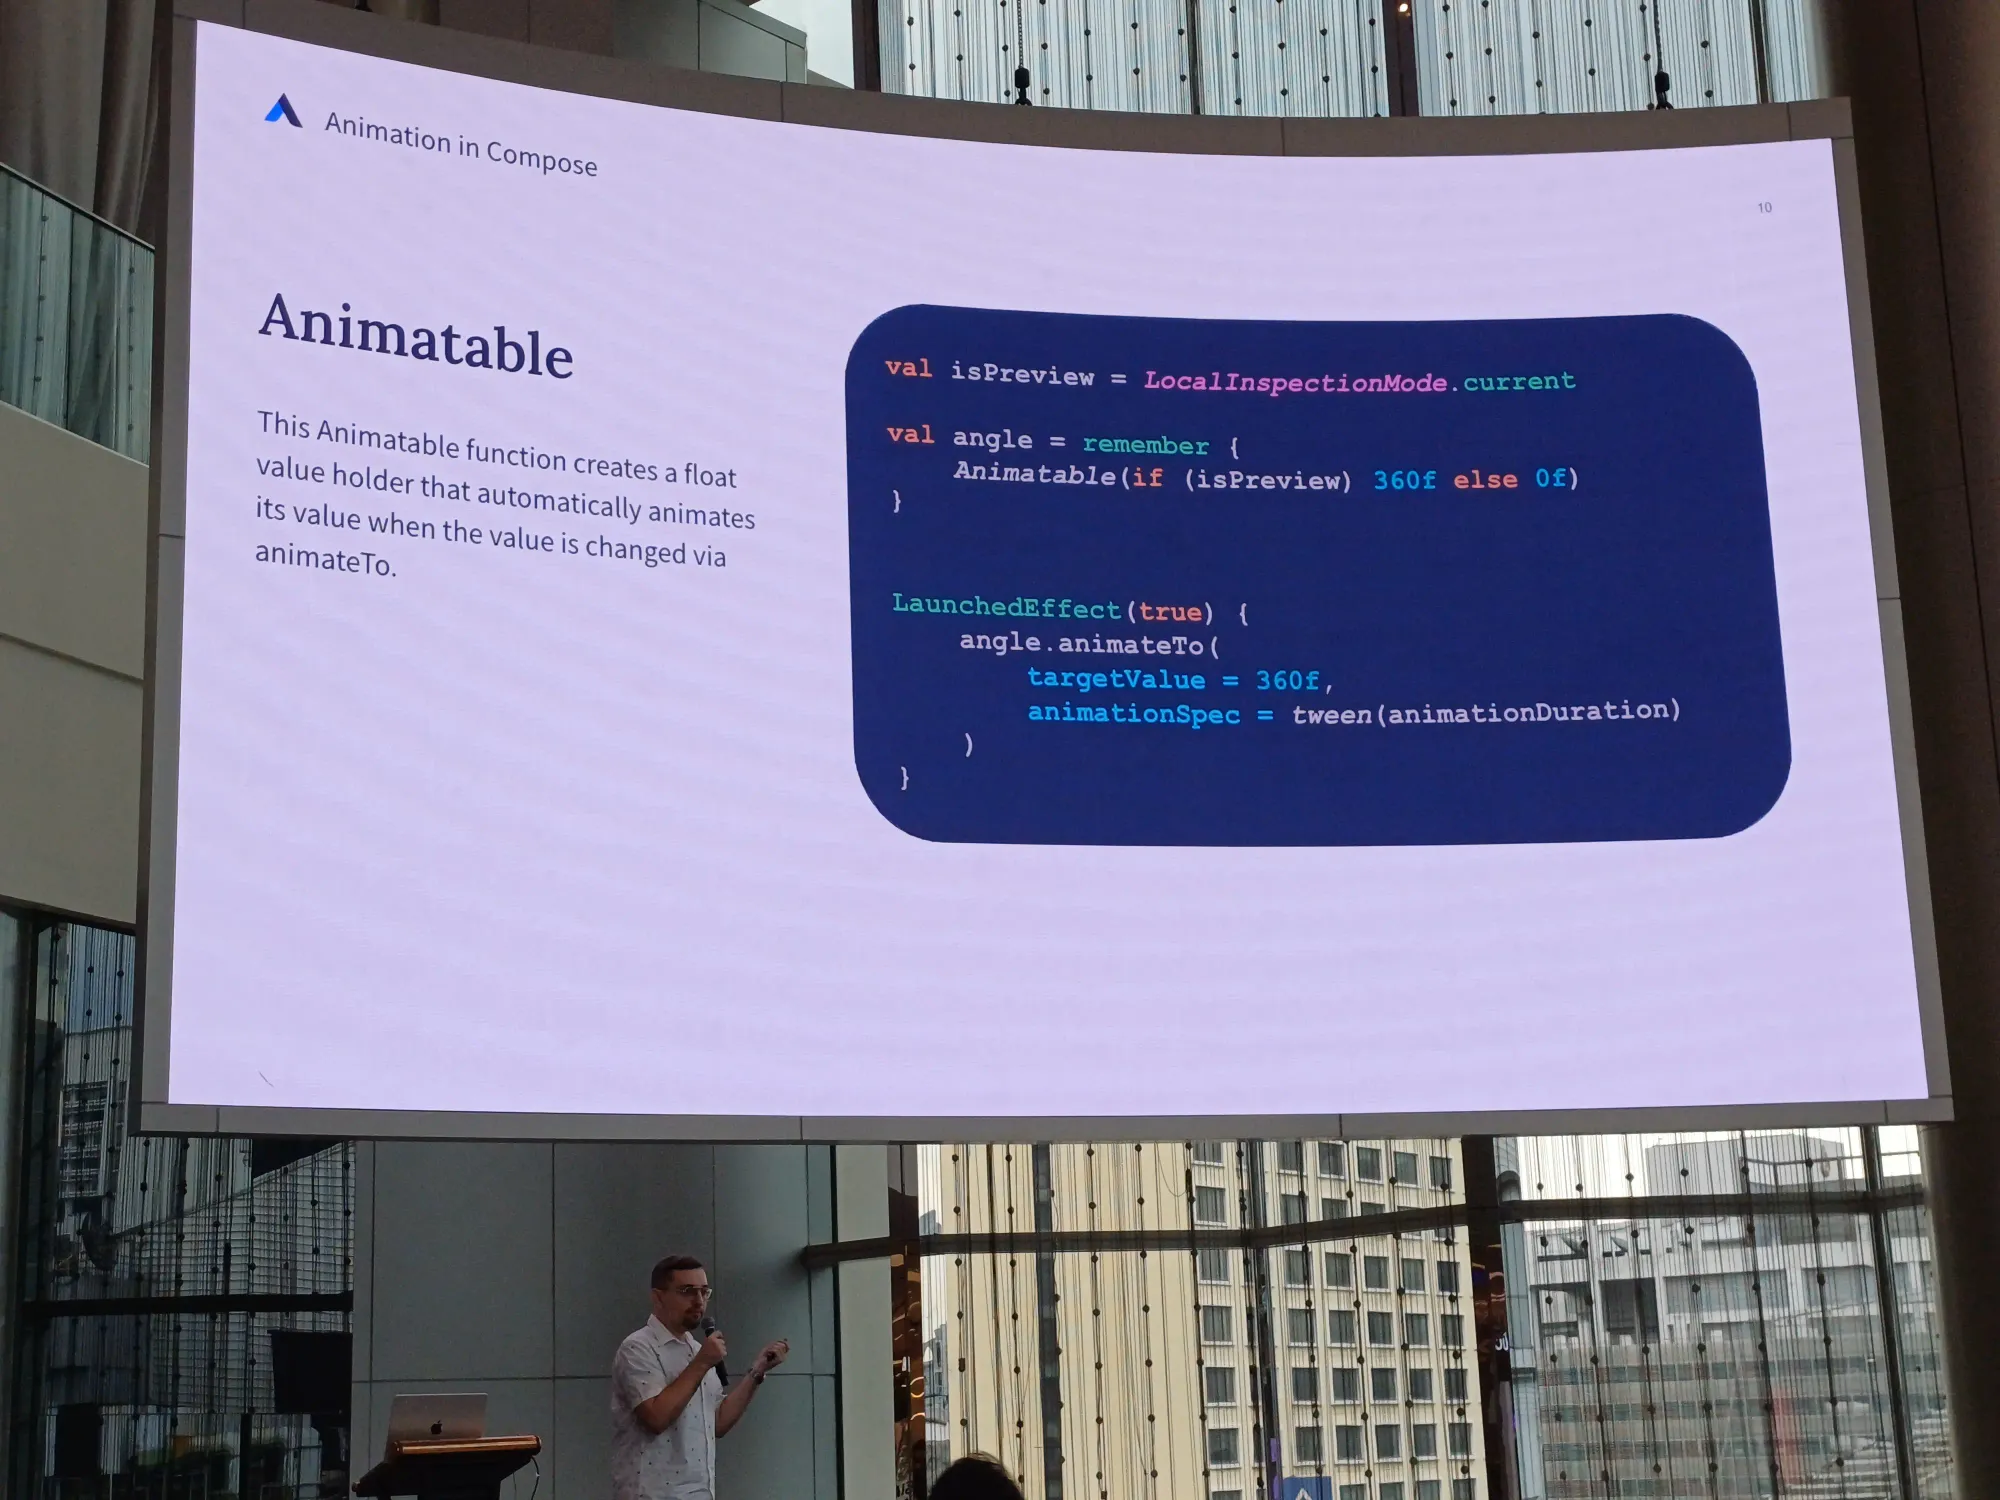
Animation in Compose
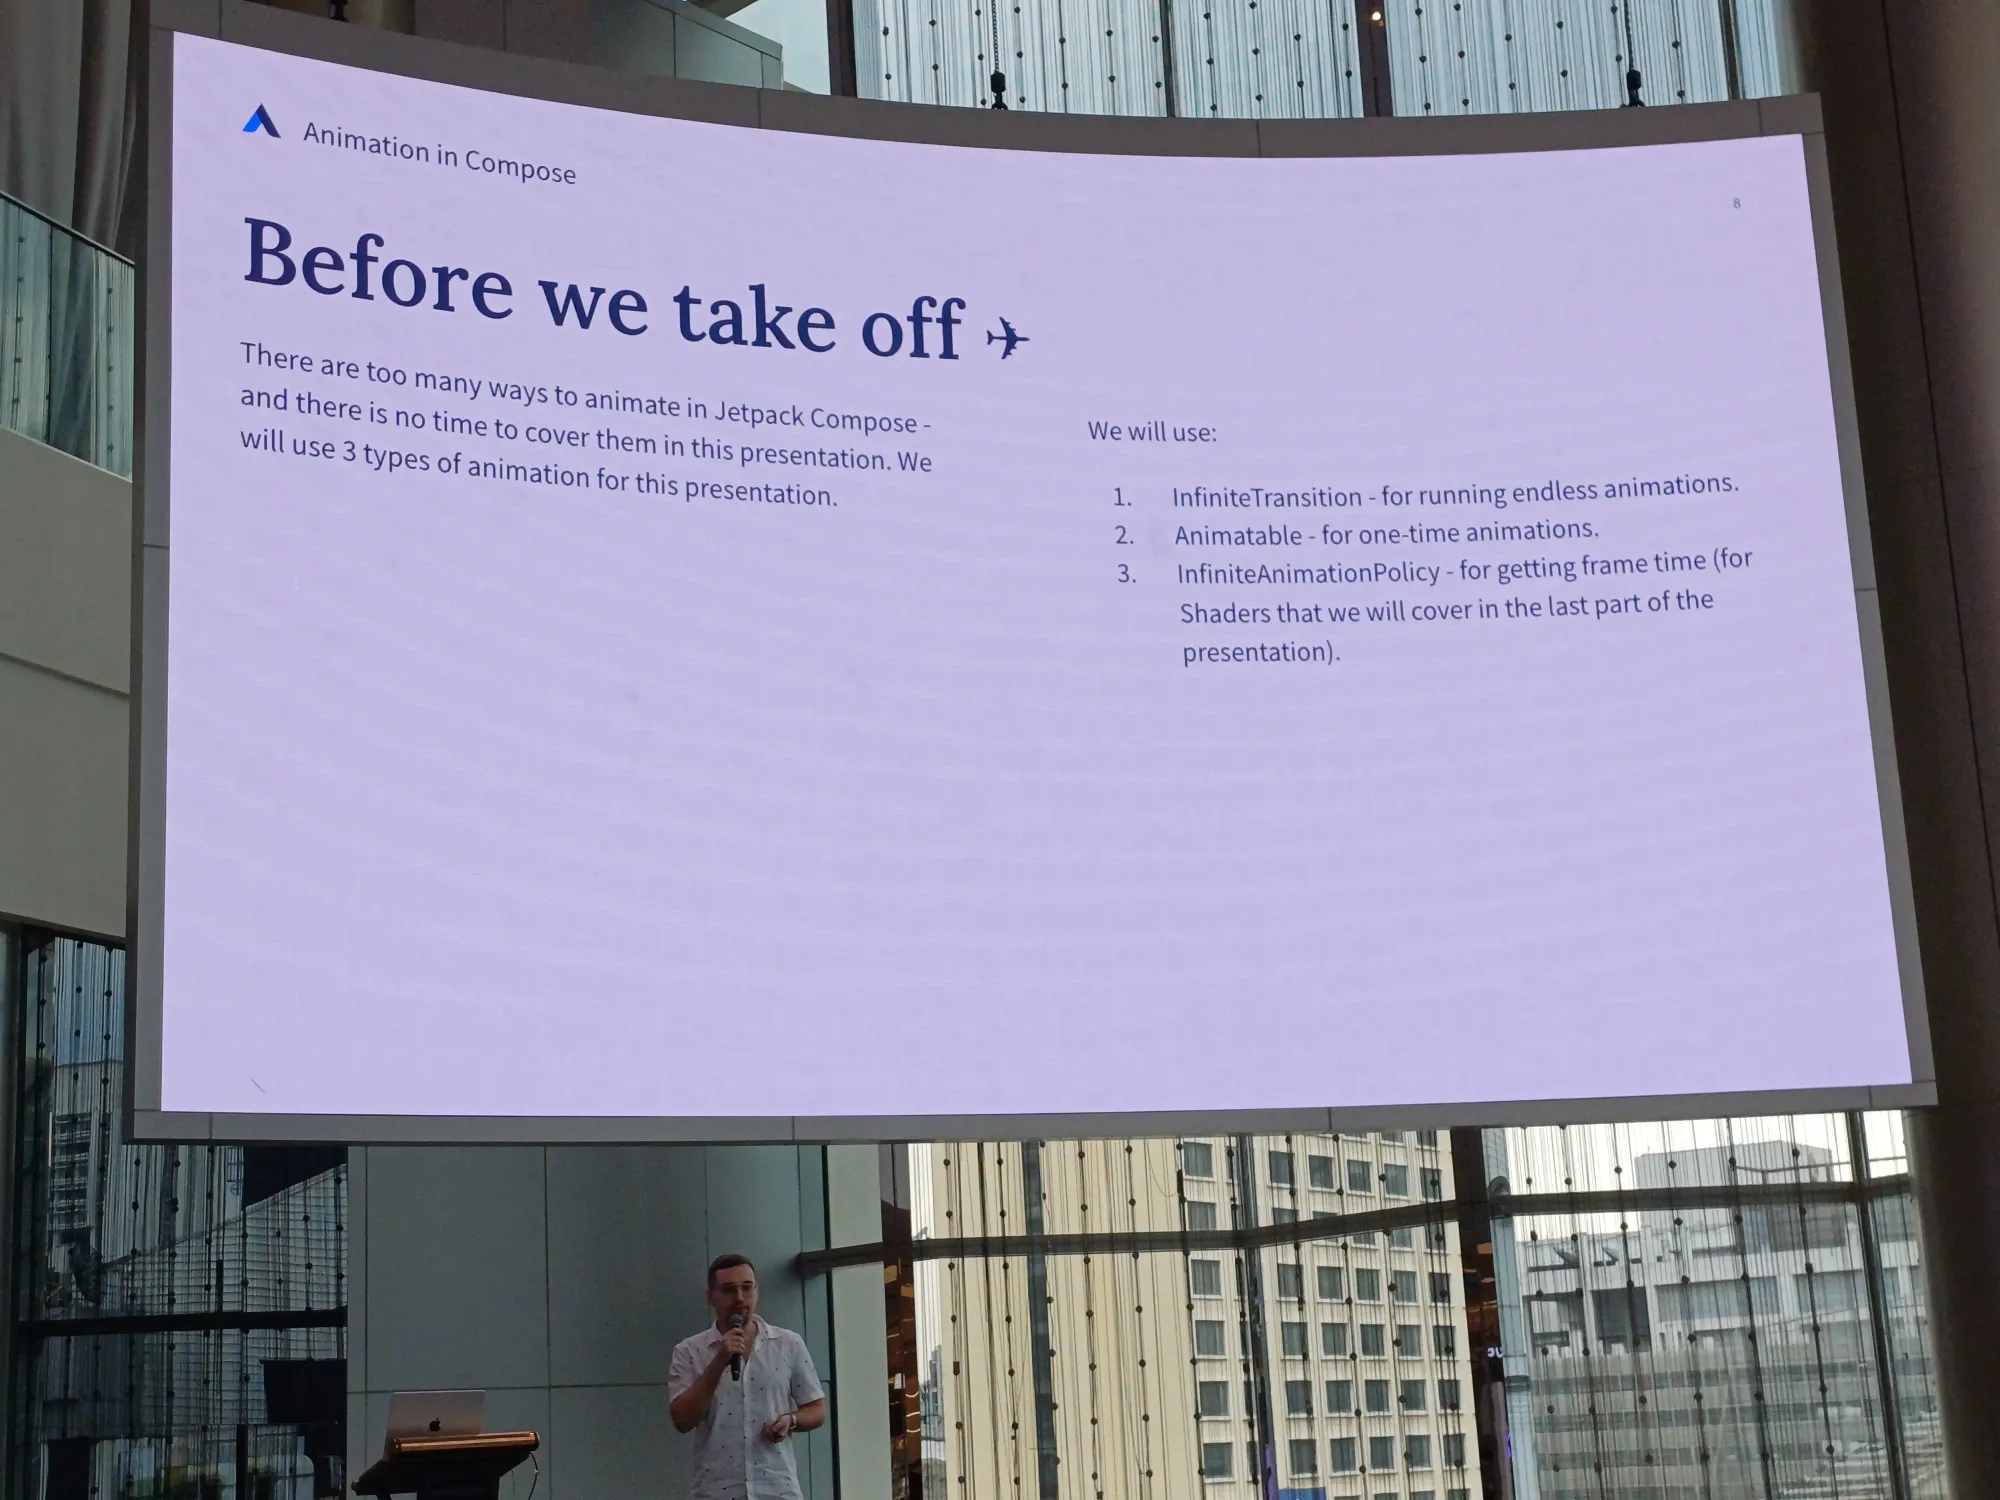
ใน session นี้กล่าวถึง animation 3 ชนิด คือ
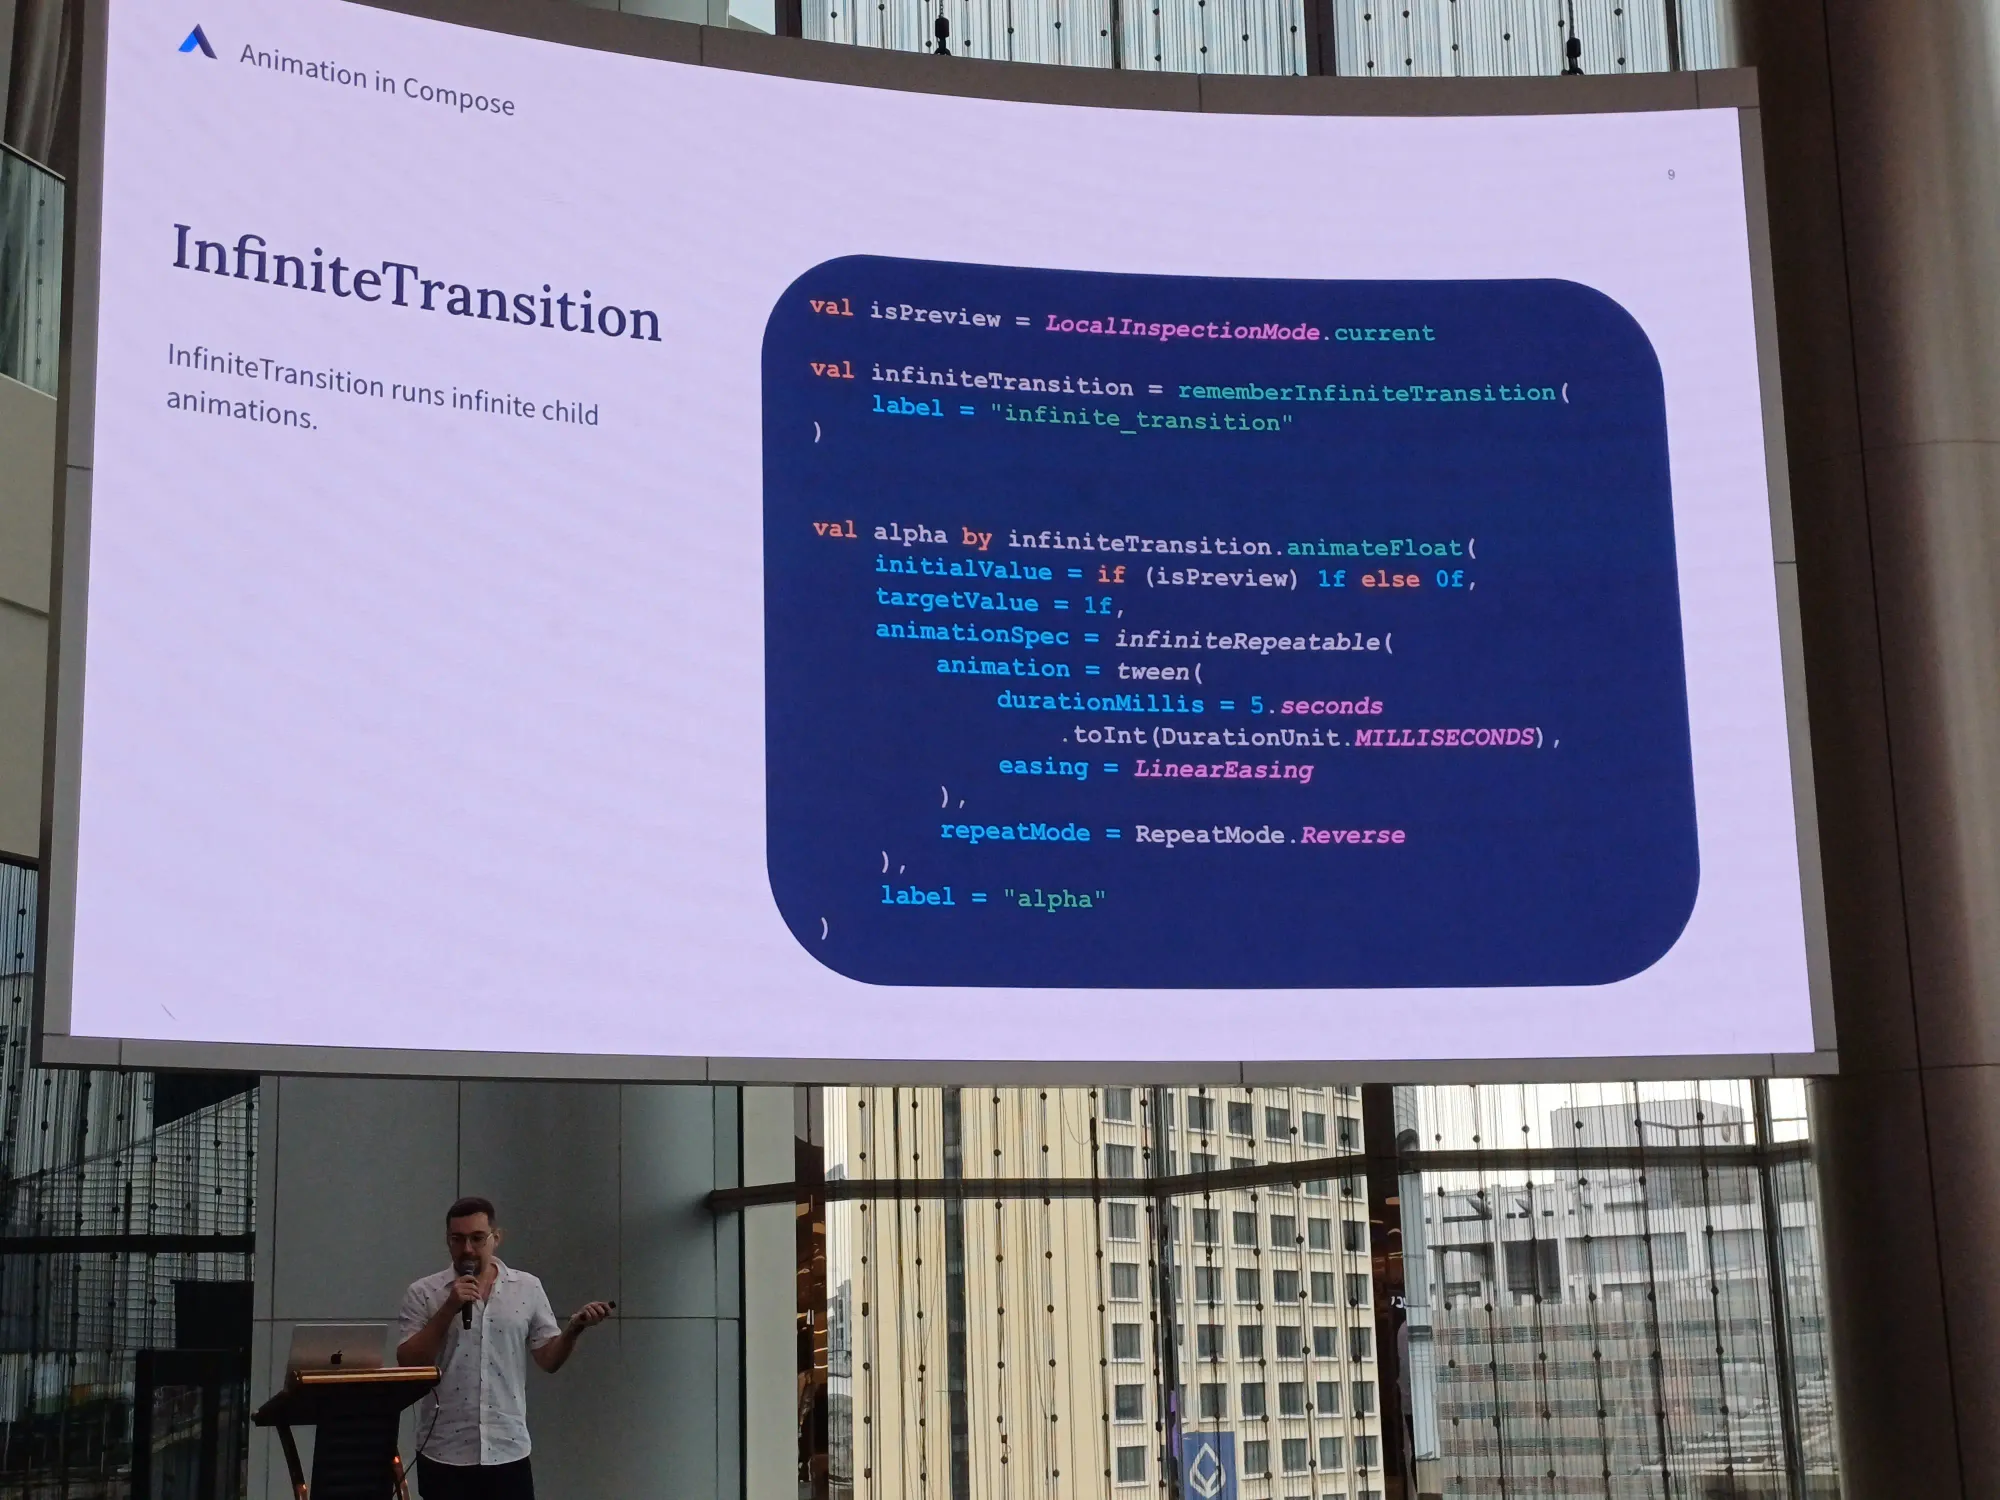
- InfiniteTransition: วิ่งตลอด
- Animatable: วิ่งครั้งเดียวจบ
- InfiniteAnimationPolicy: วิ่งตาม frame time
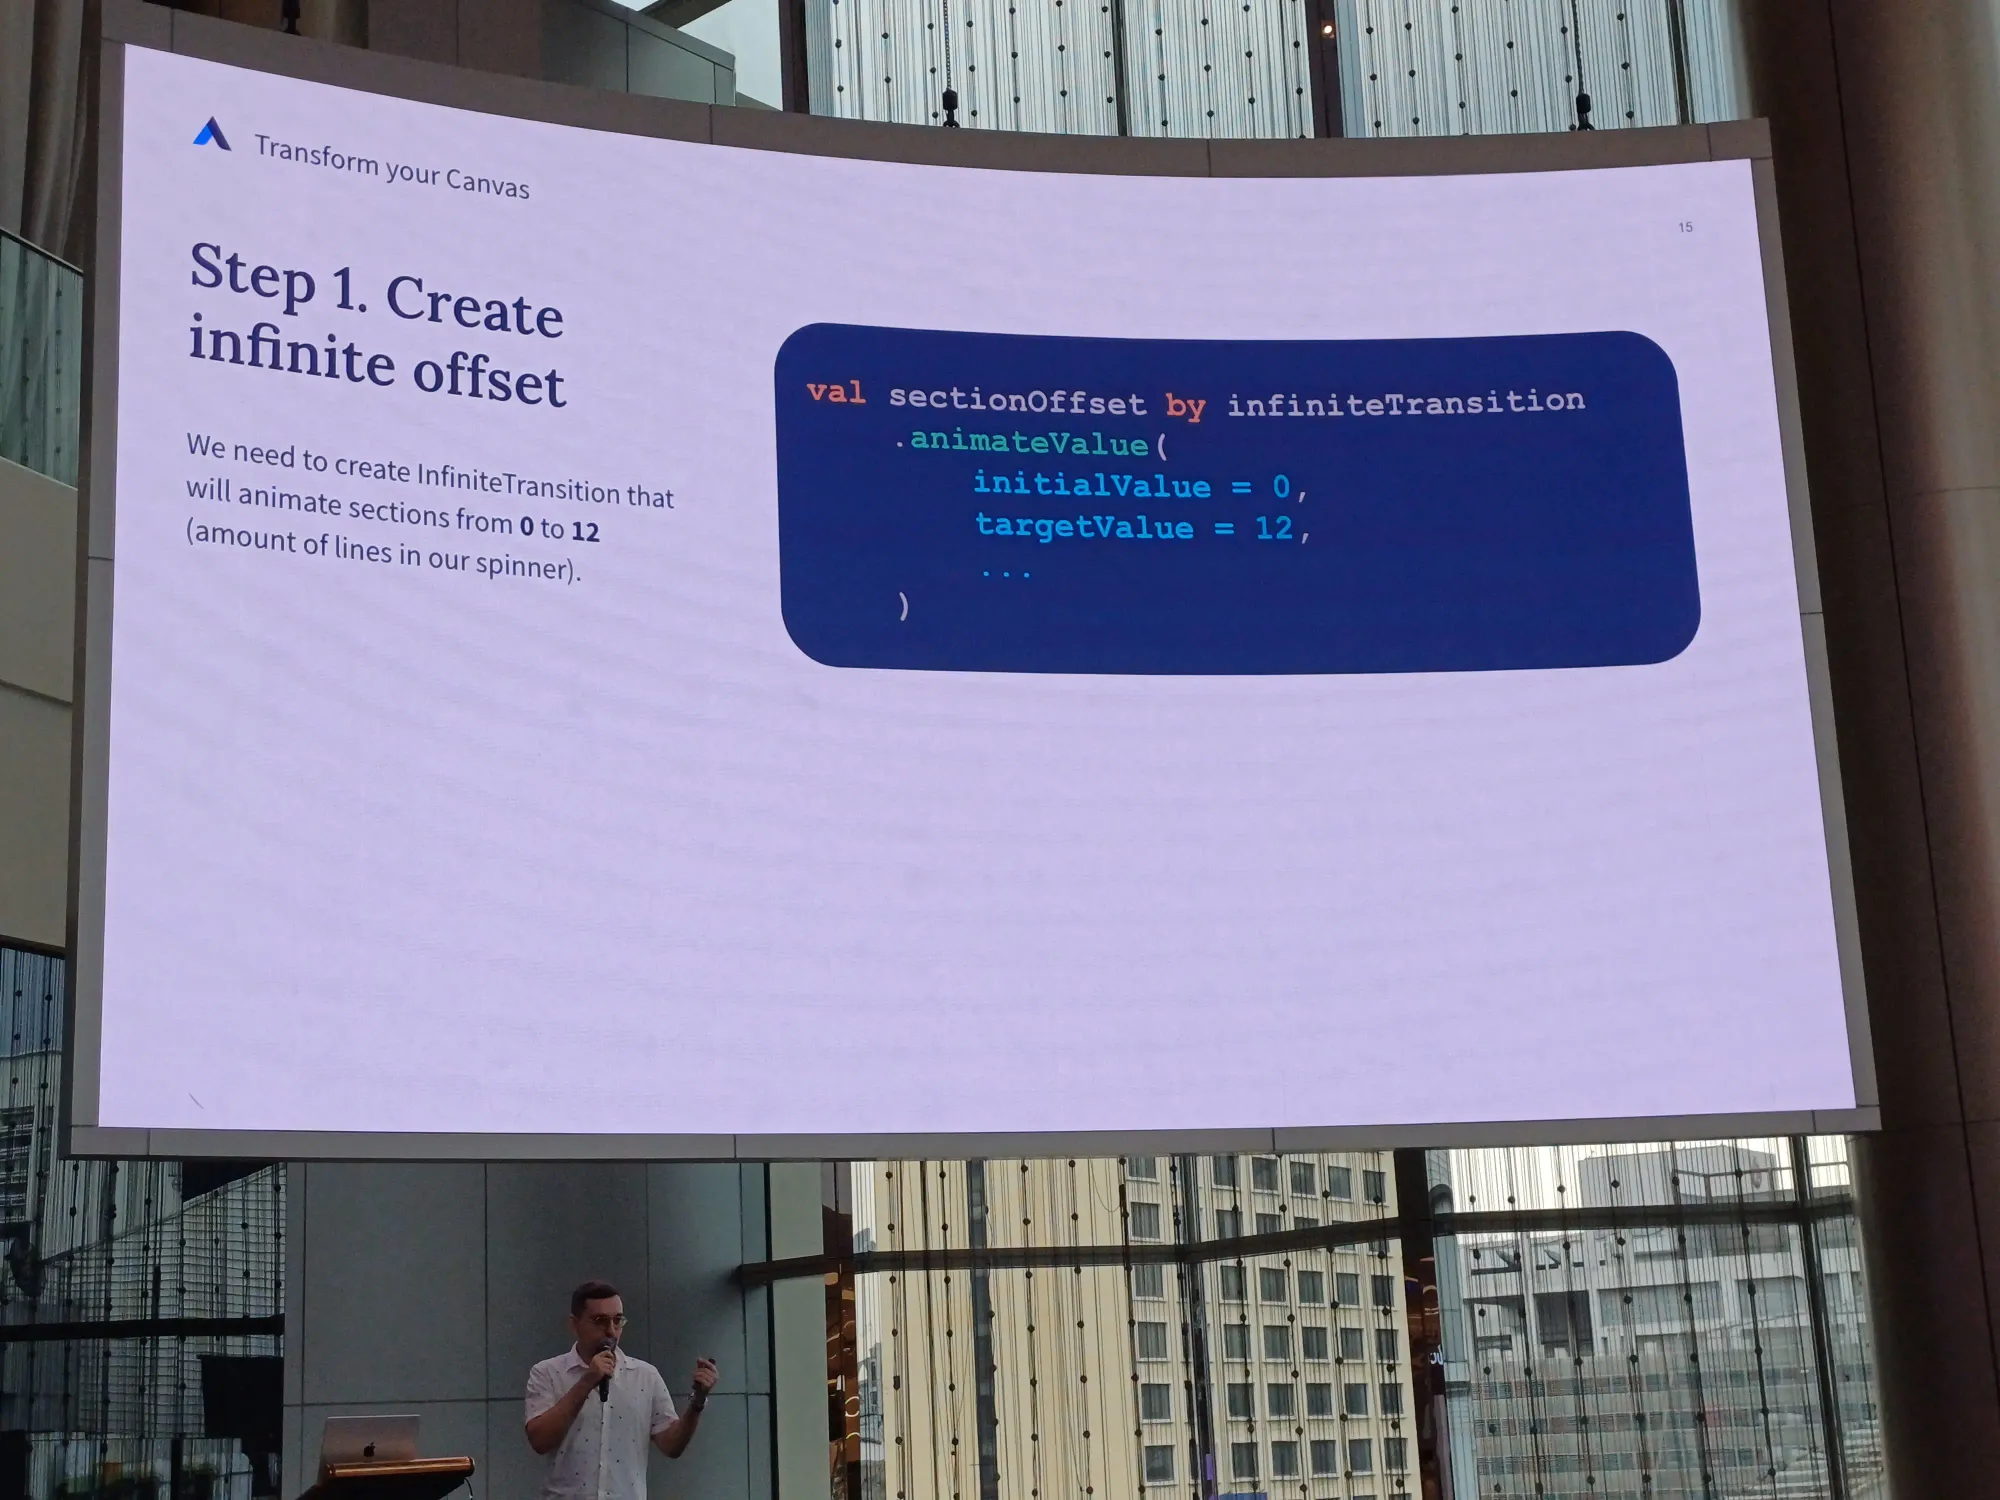
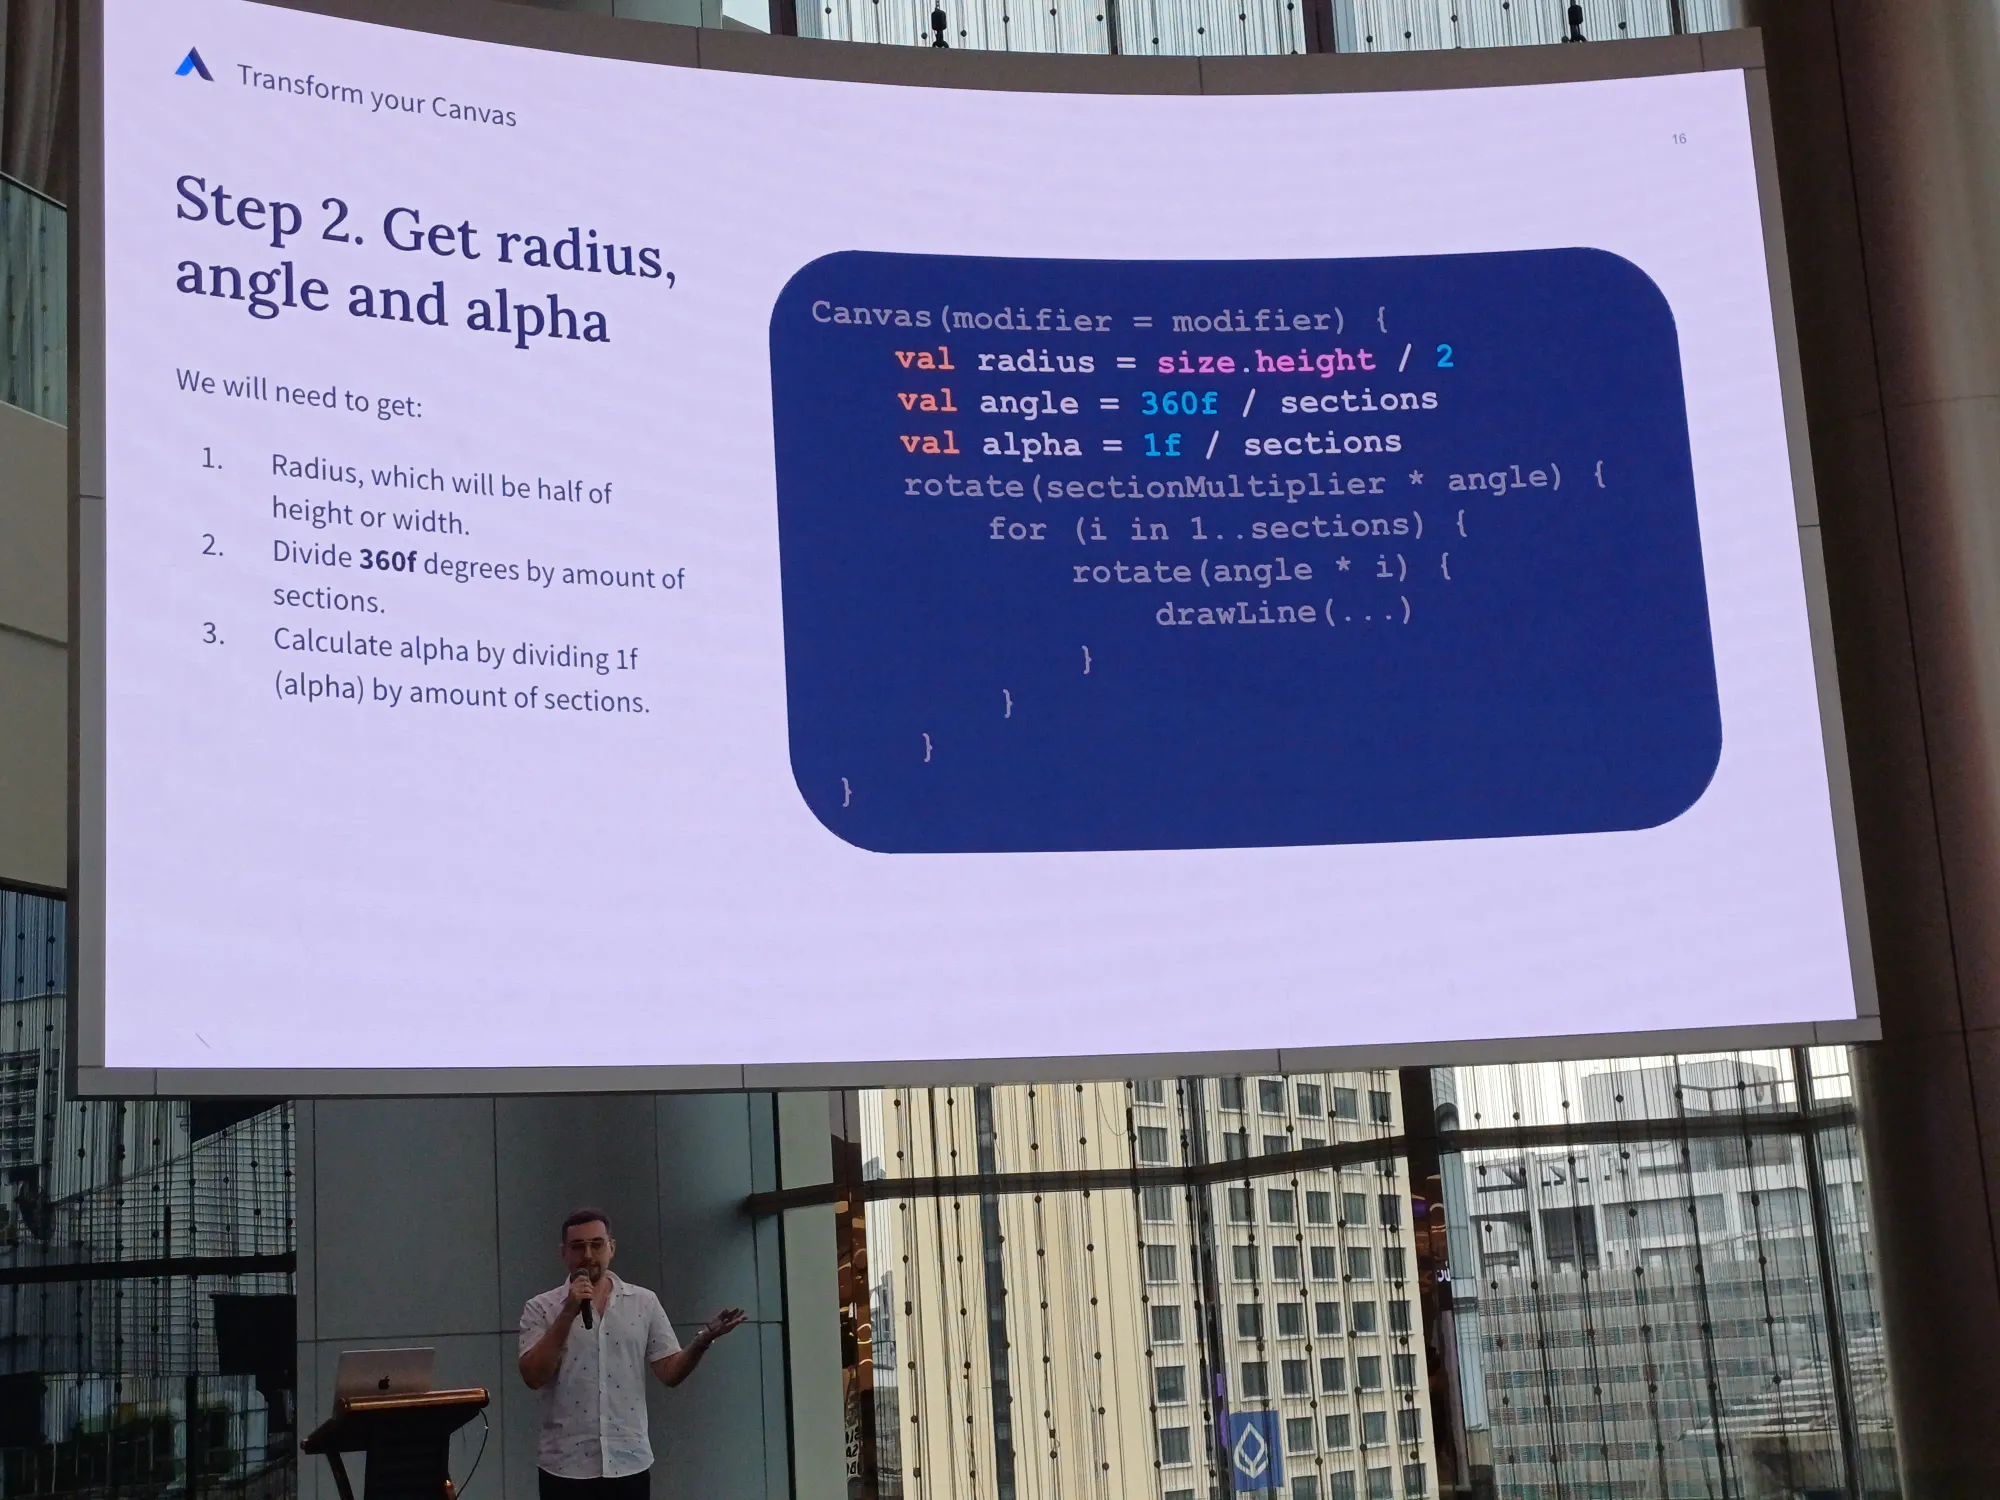
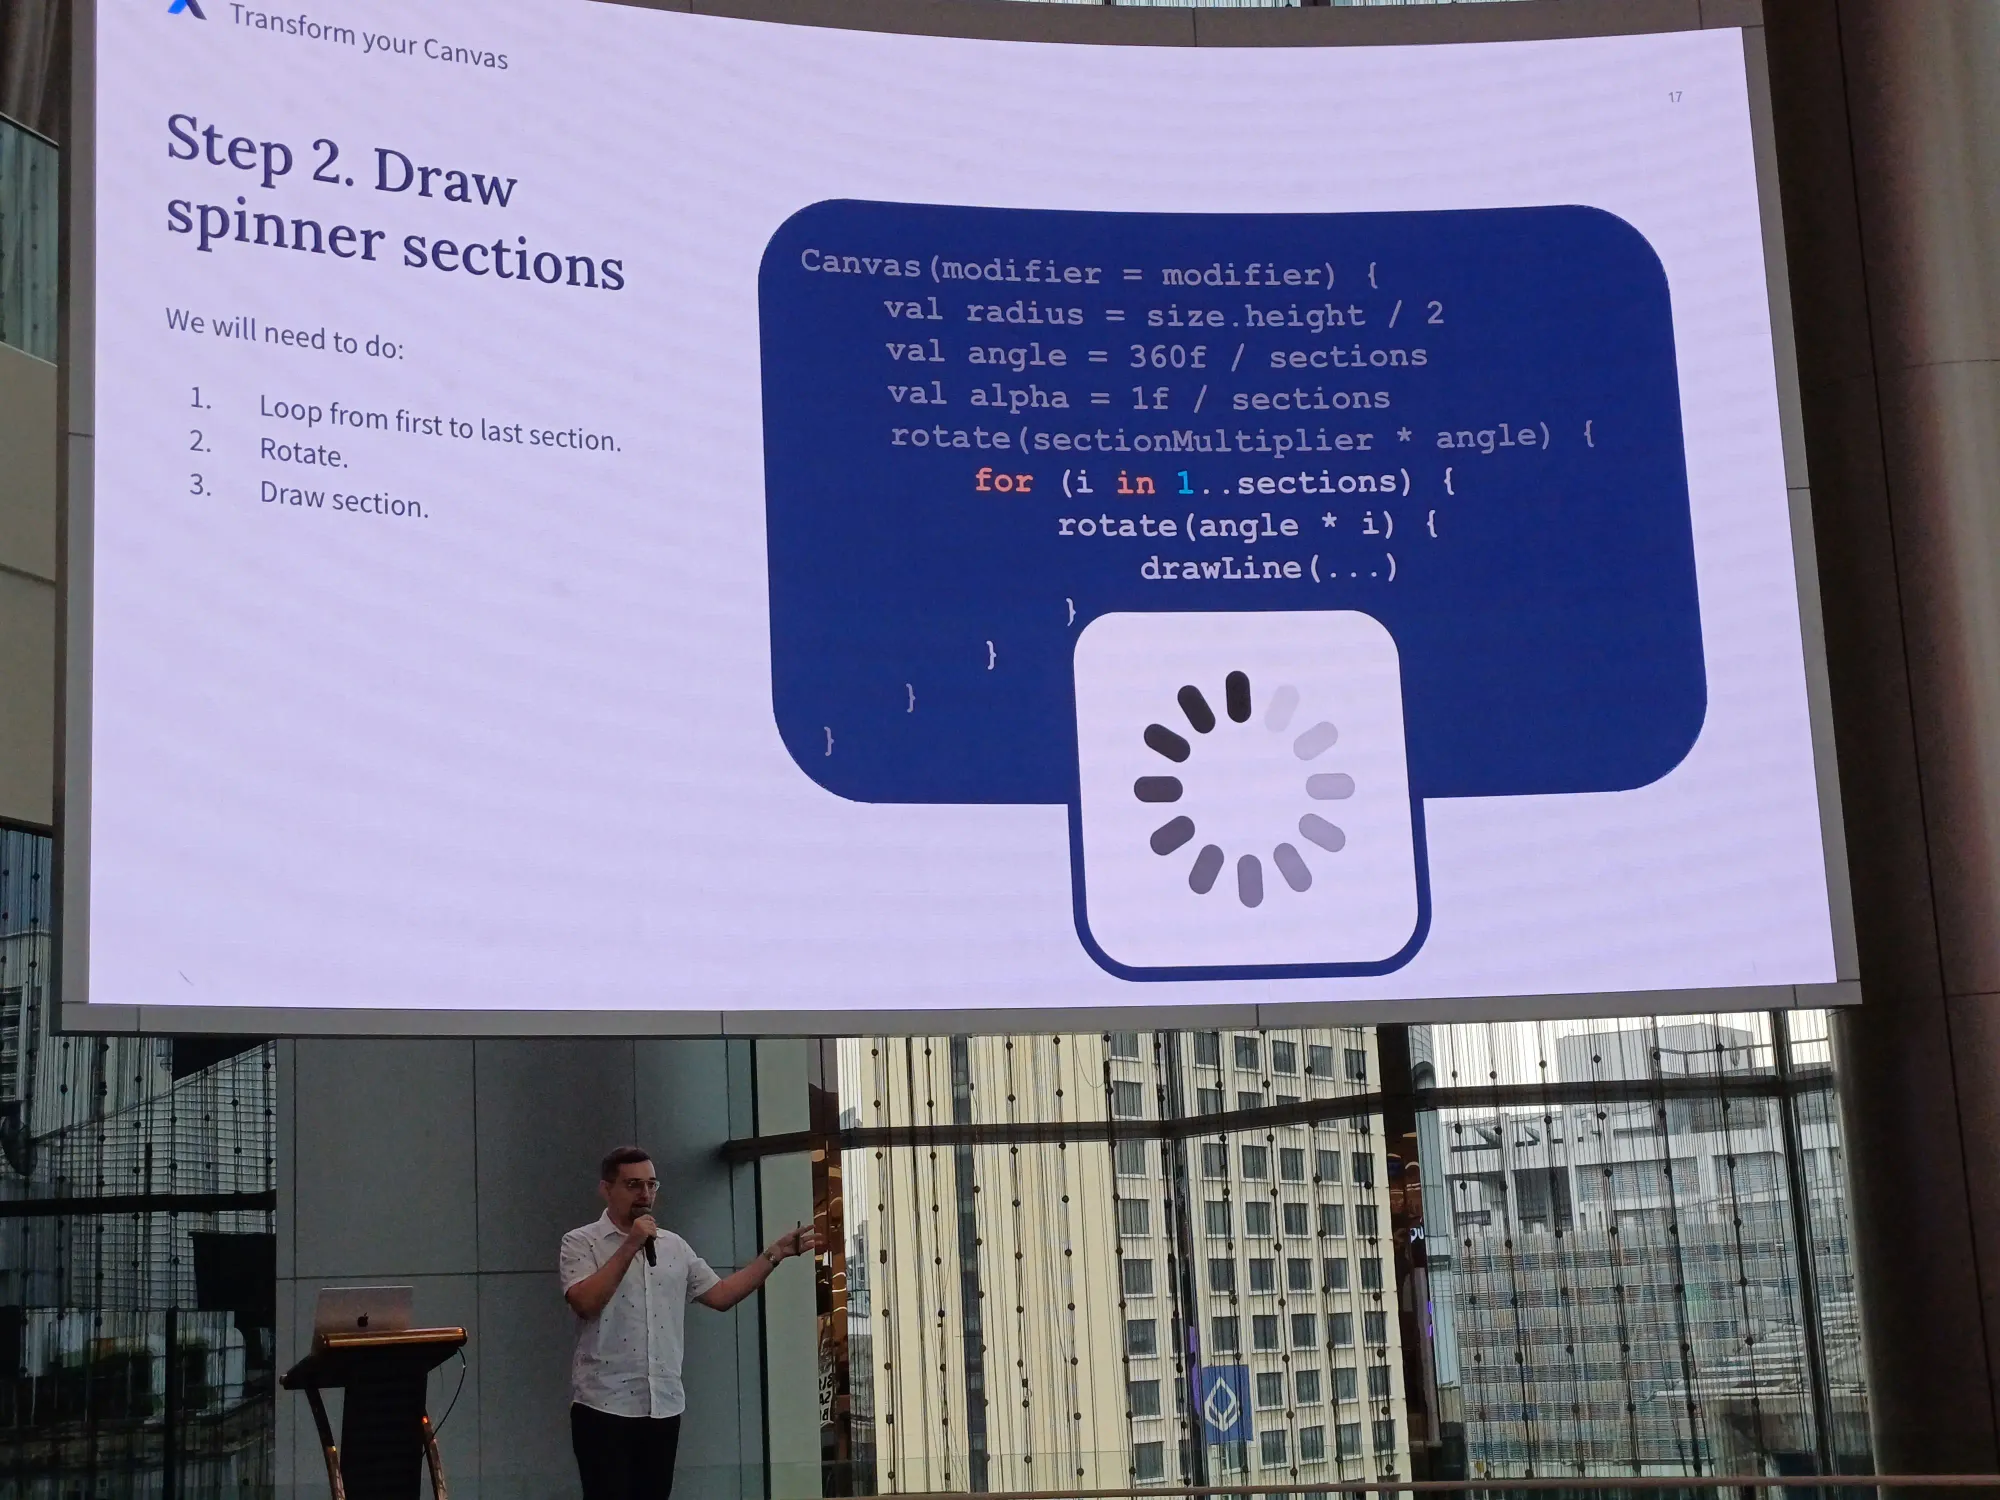
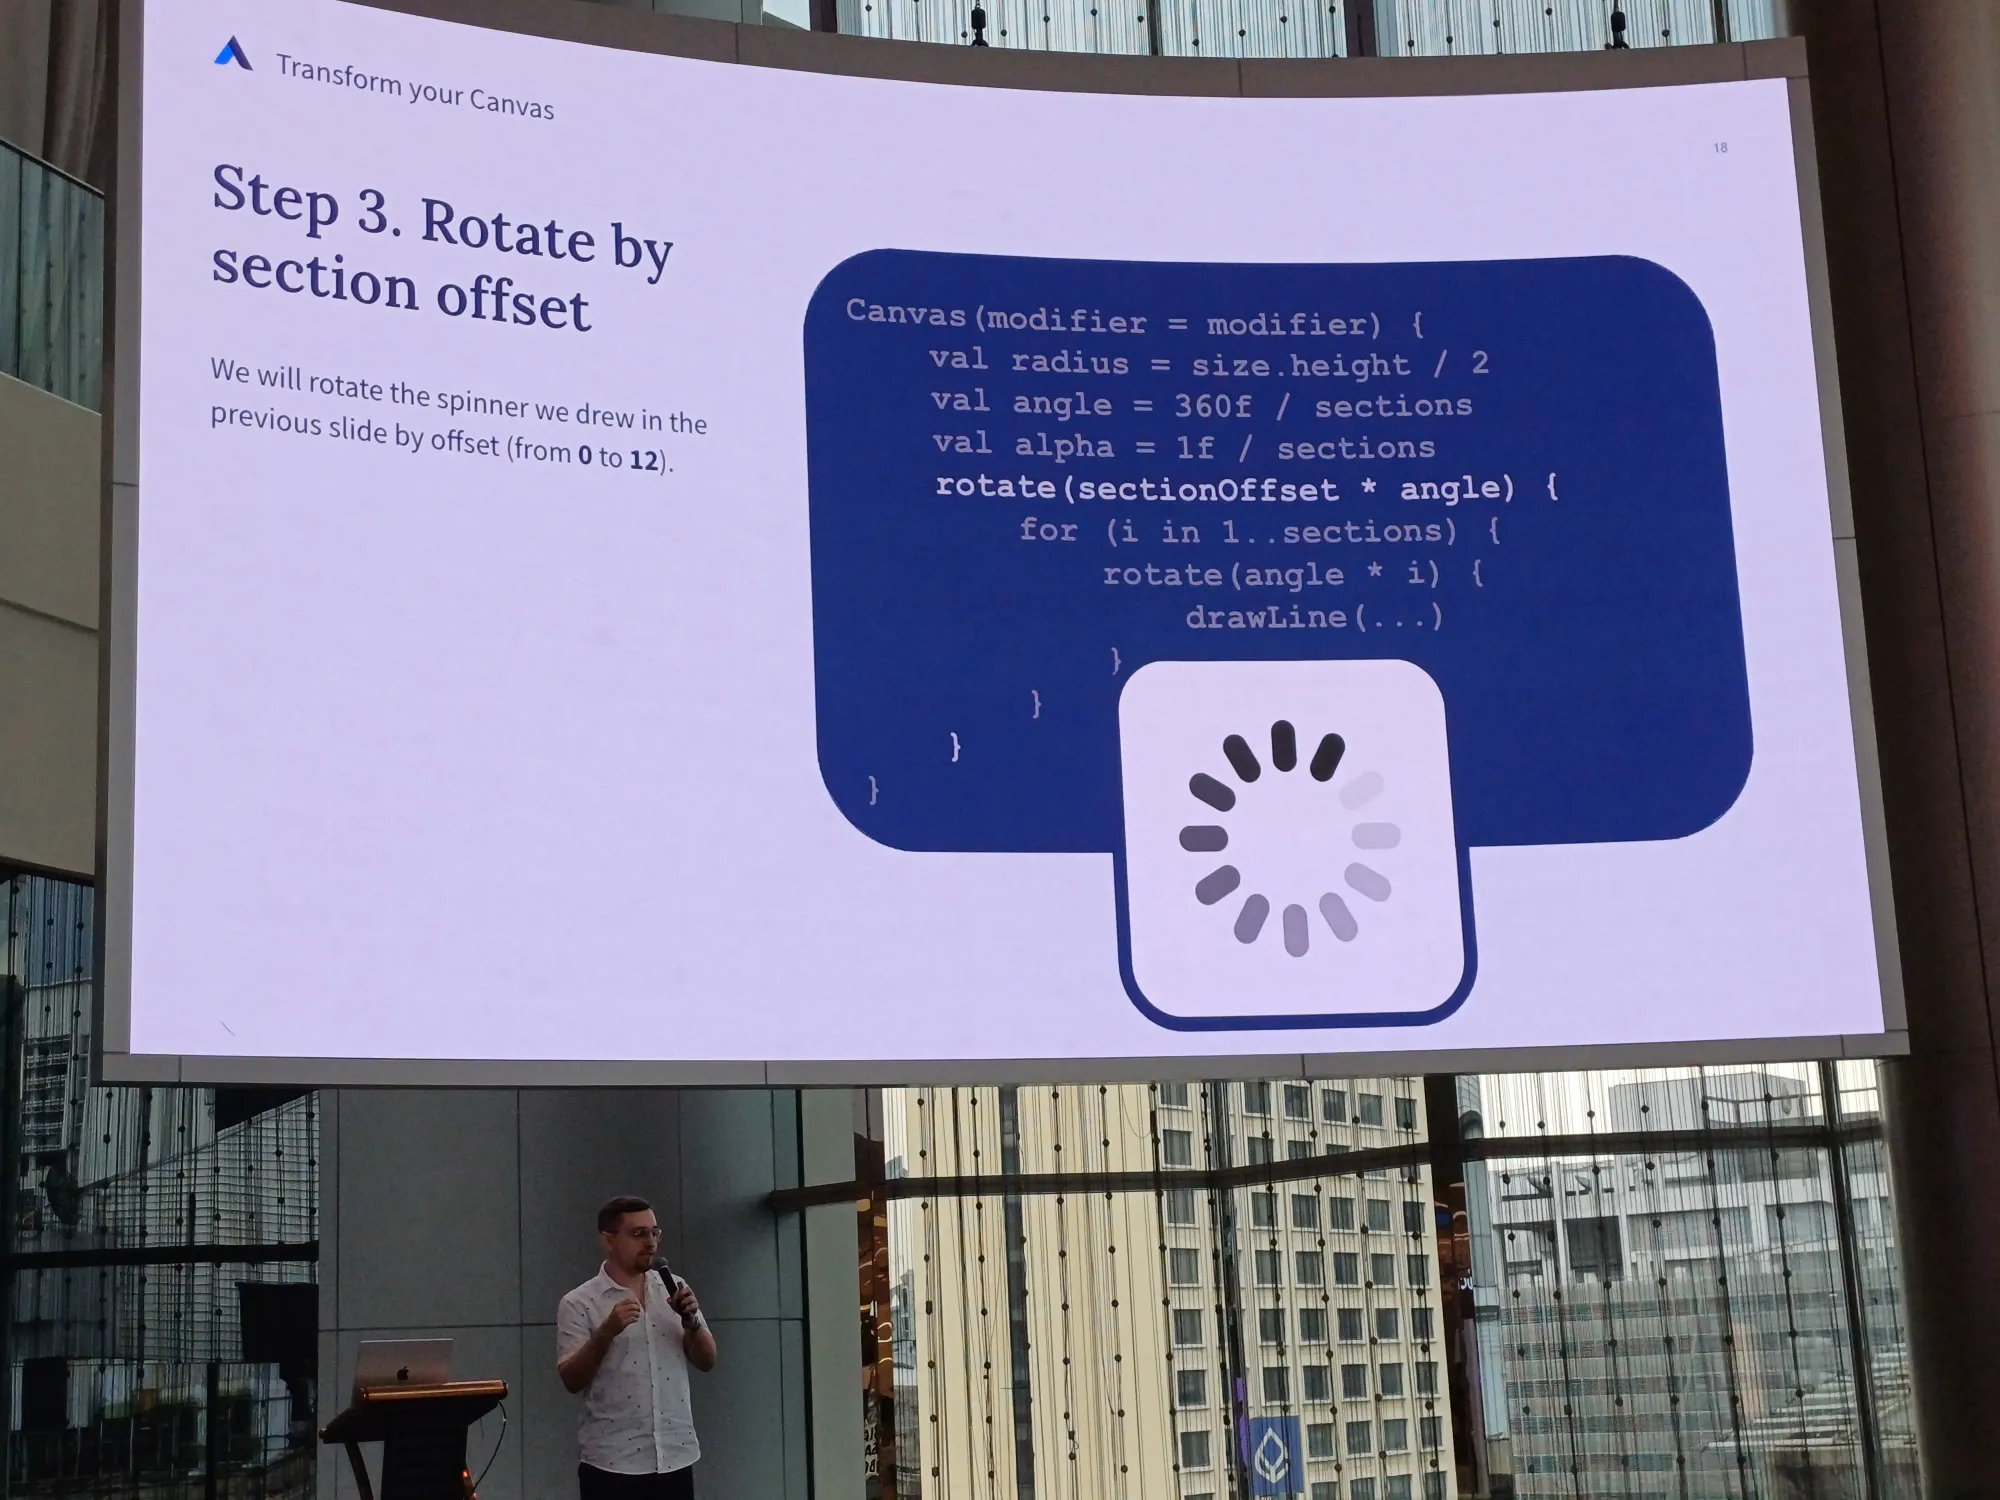
Moving Thing Round
พูดถึงการ transform กับ canvas ของเรา เช่น ทำ loading spinner
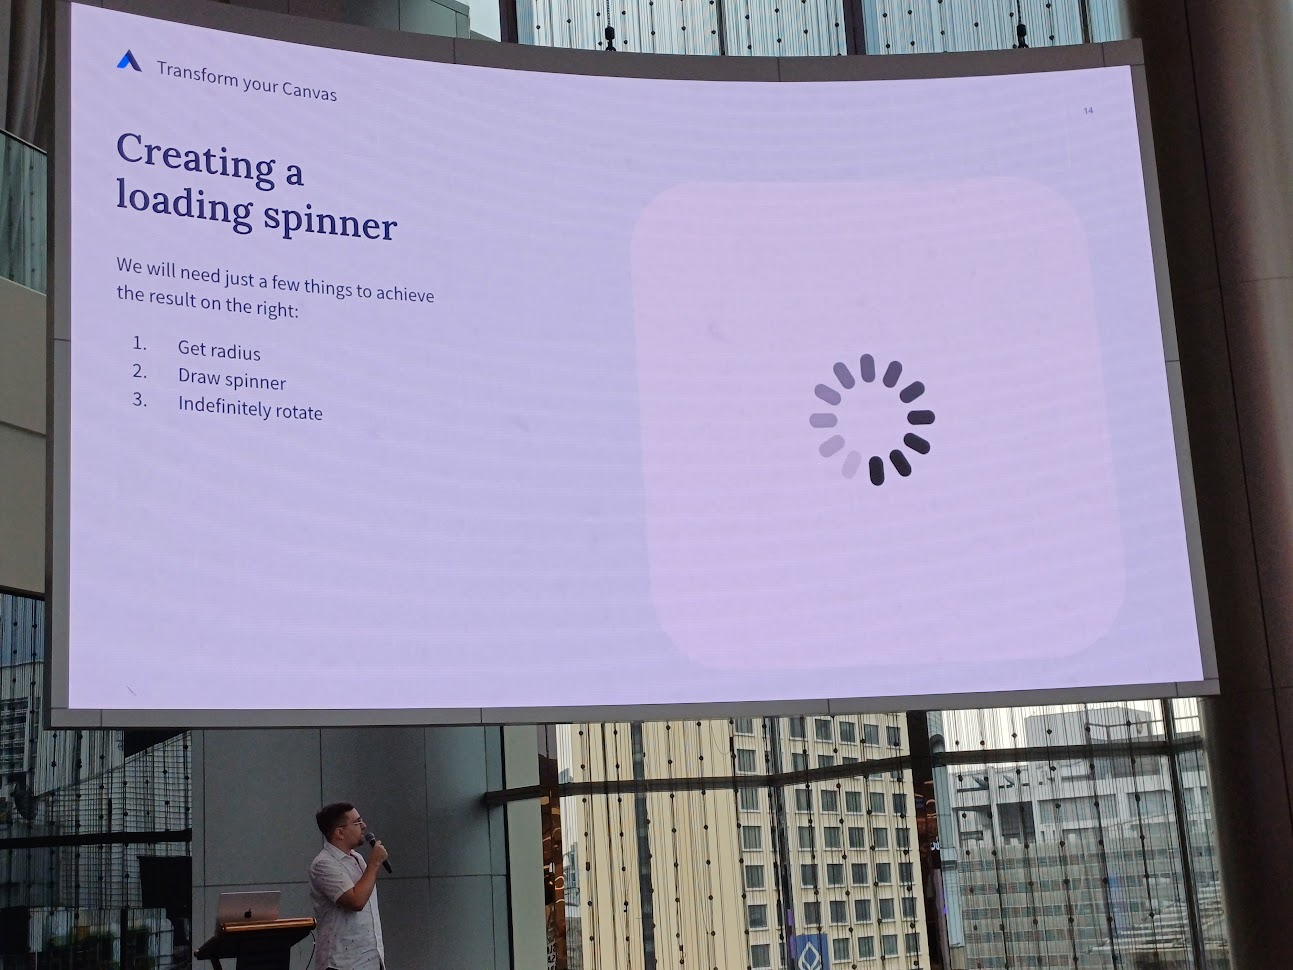
วิธีการคร่าว ๆ คือ วาด 12 เส้น แล้วหามุม แล้ว alpha ของแต่ละอัน มาวาด และ rotate ให้มันเป็นวงกลมอ่ะ
Blending things together
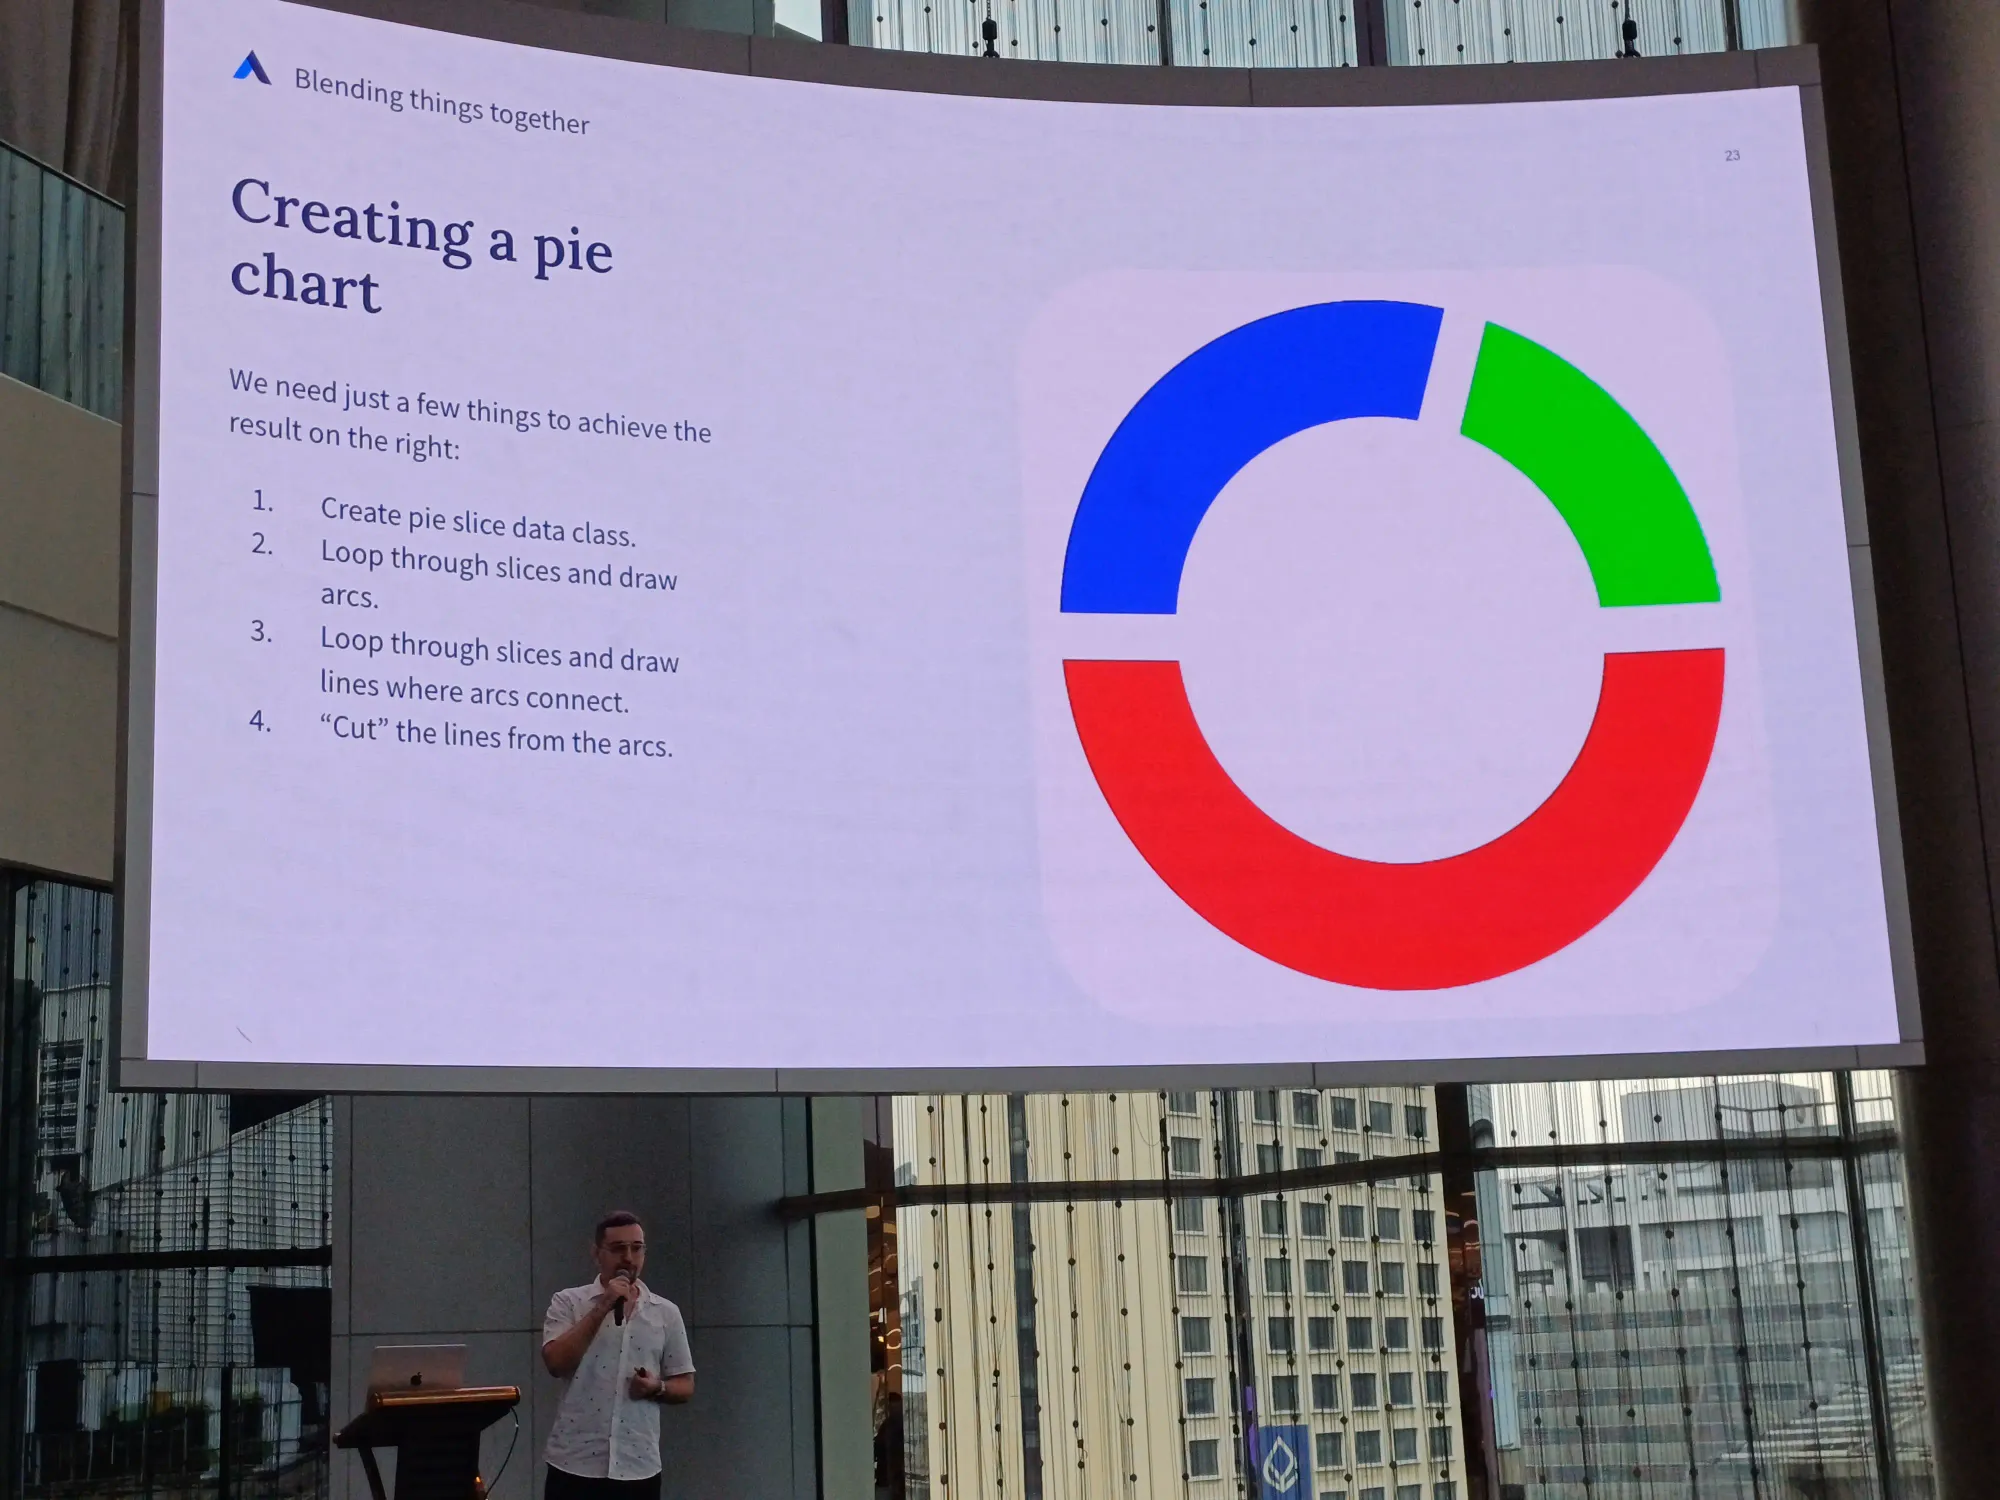
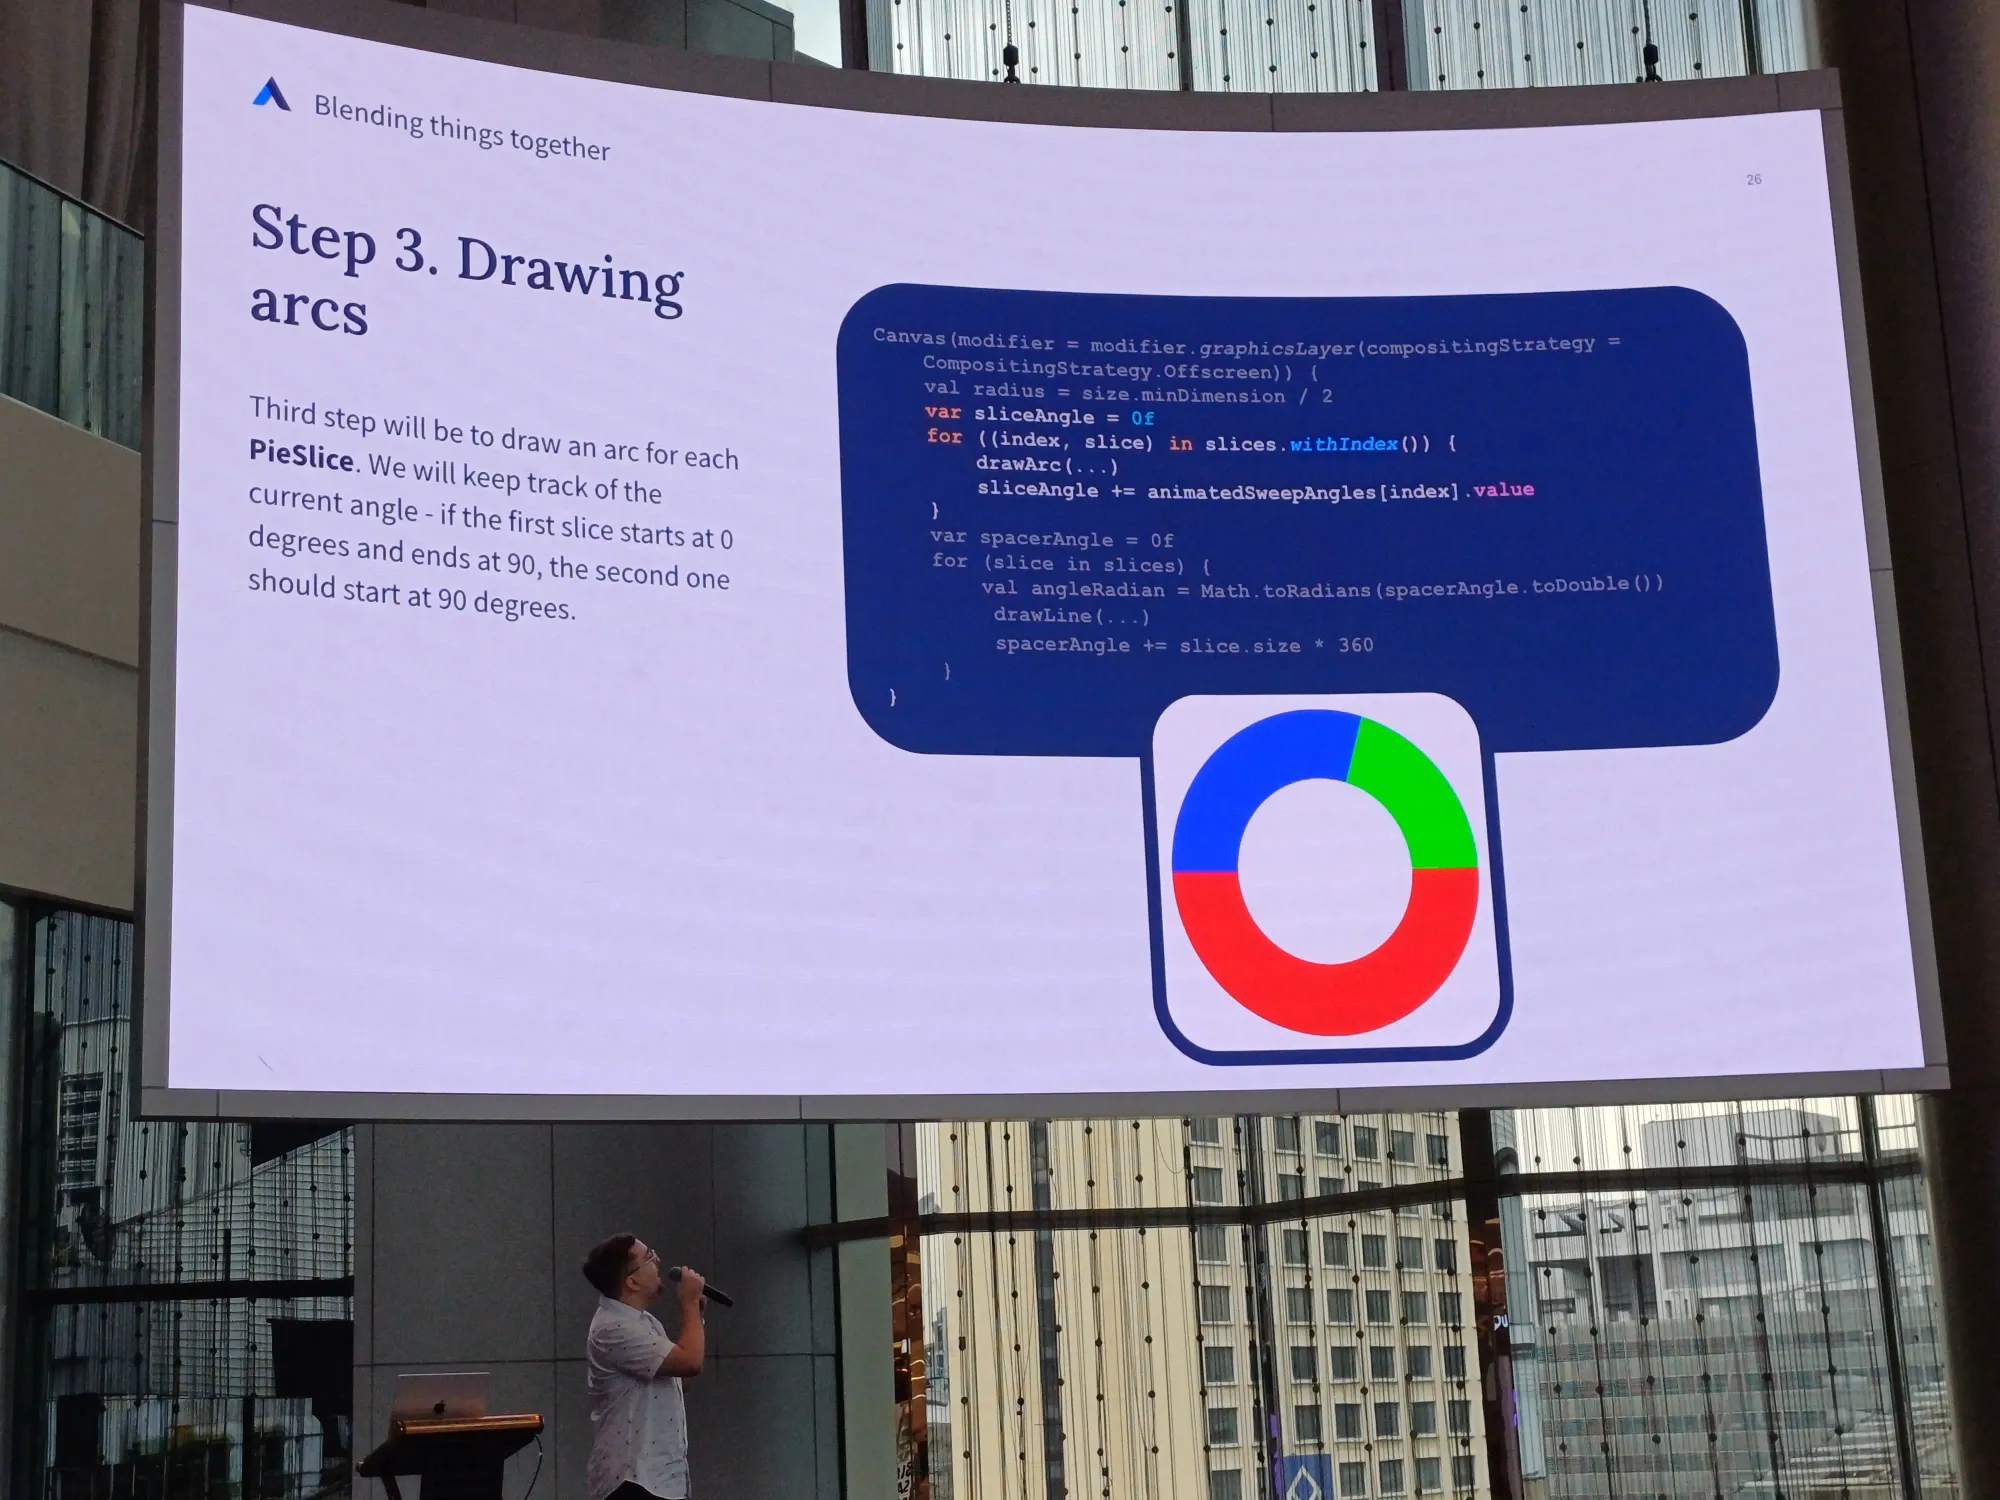
พูดถึงการ blend ของ 2 สิ่งเข้าด้วยกัน เช่น การสร้าง pie chart เป็นการเอาสี่เหลี่ยมกับวงกลมมาซ้อนกัน แล้วก็แสดงแบบหมุน ๆ จนเต็มวง
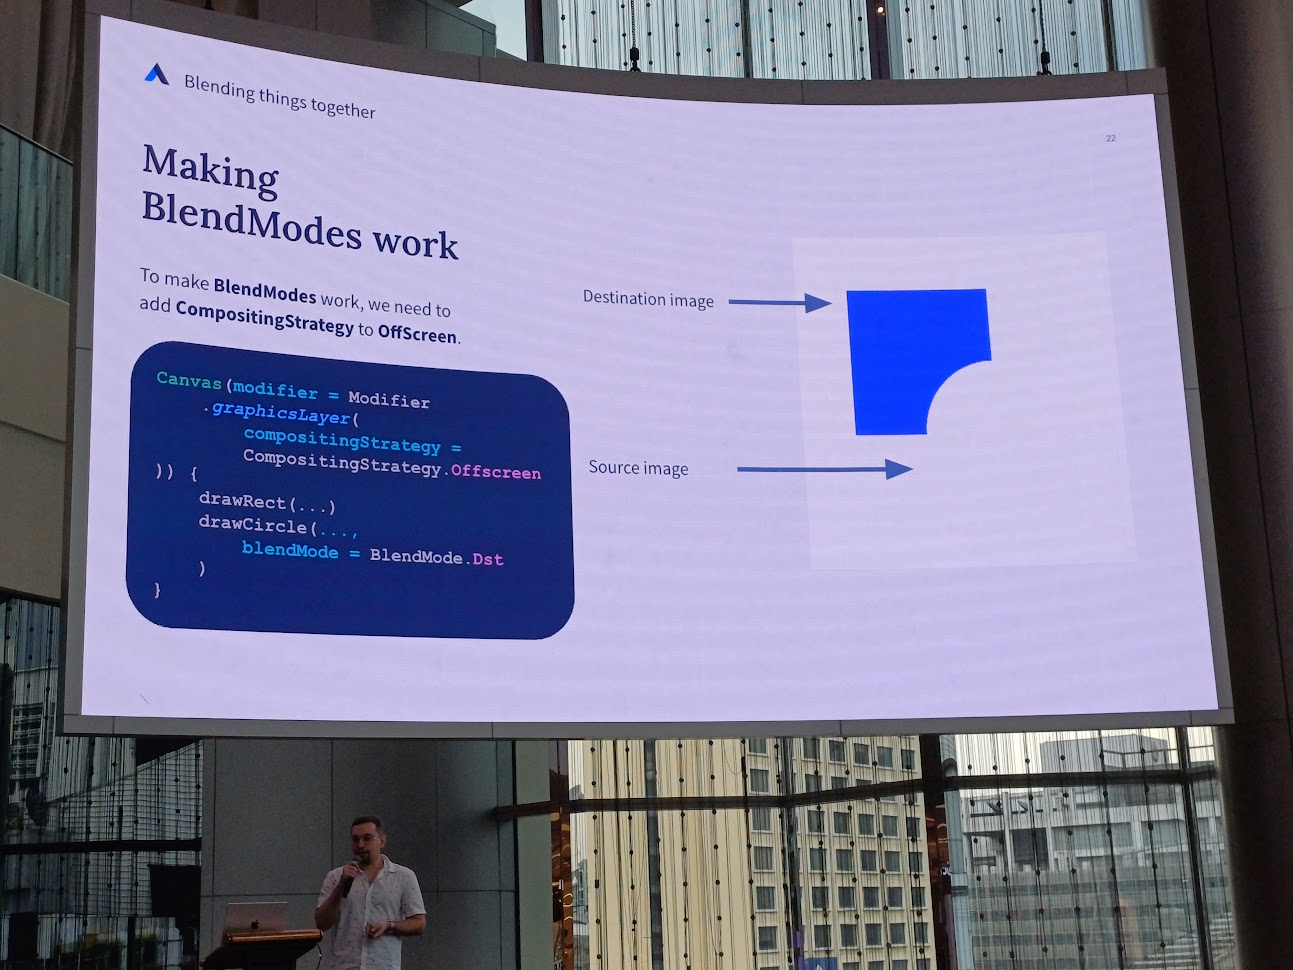
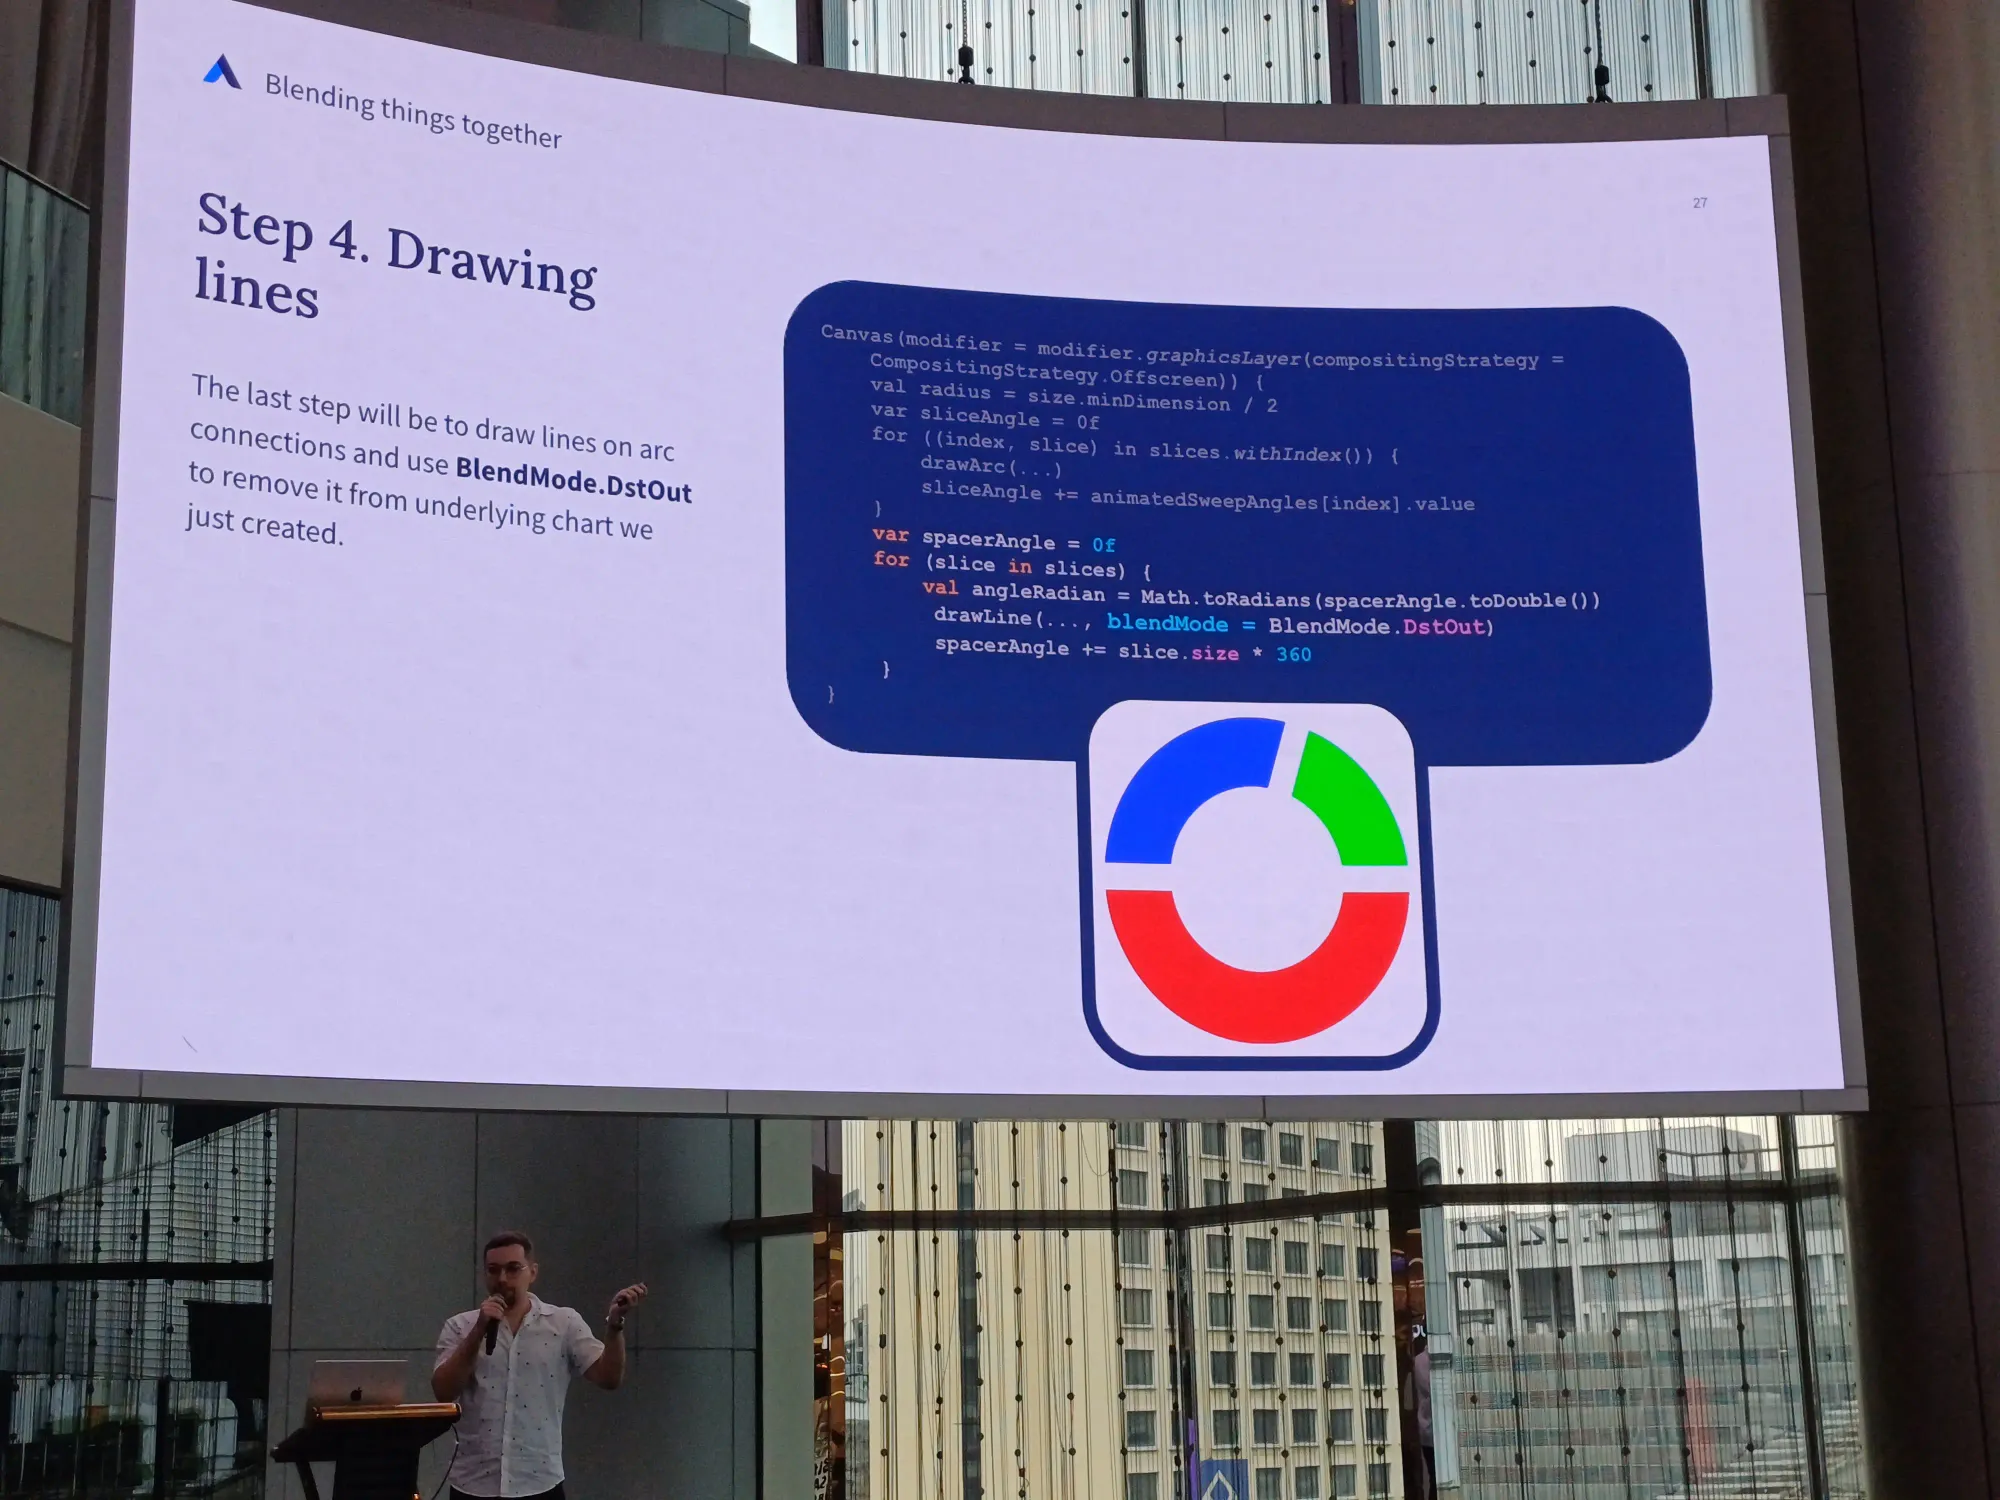
เริ่มจากสร้าง data class มาเก็บค่าสี และ size แล้วมาทำ animate วาดเส้น arc แล้วลากเส้นจนครบวง
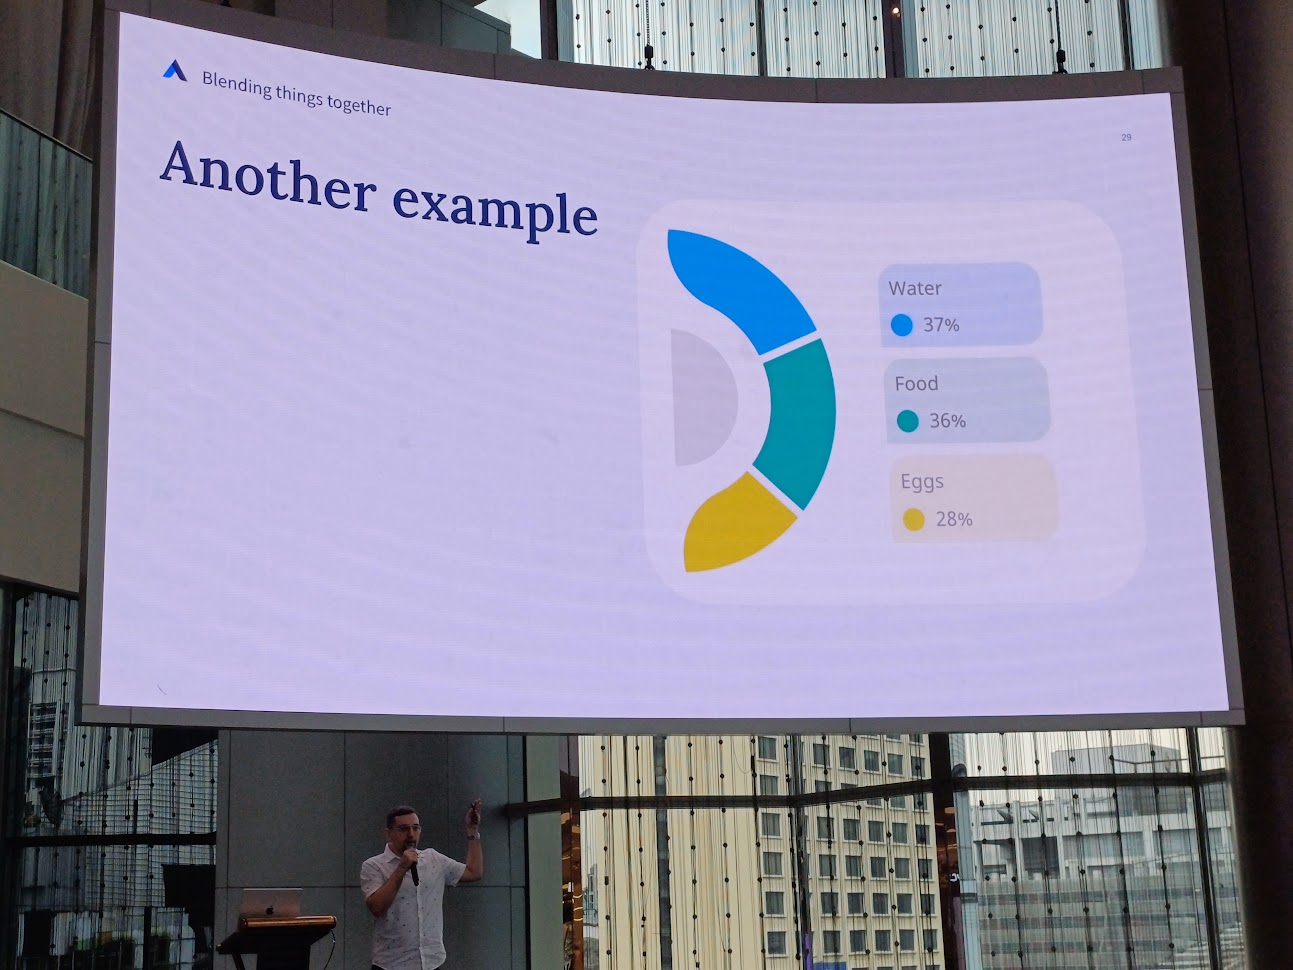
ตัวอย่างอื่นที่ประยุกต์ใช้ได้
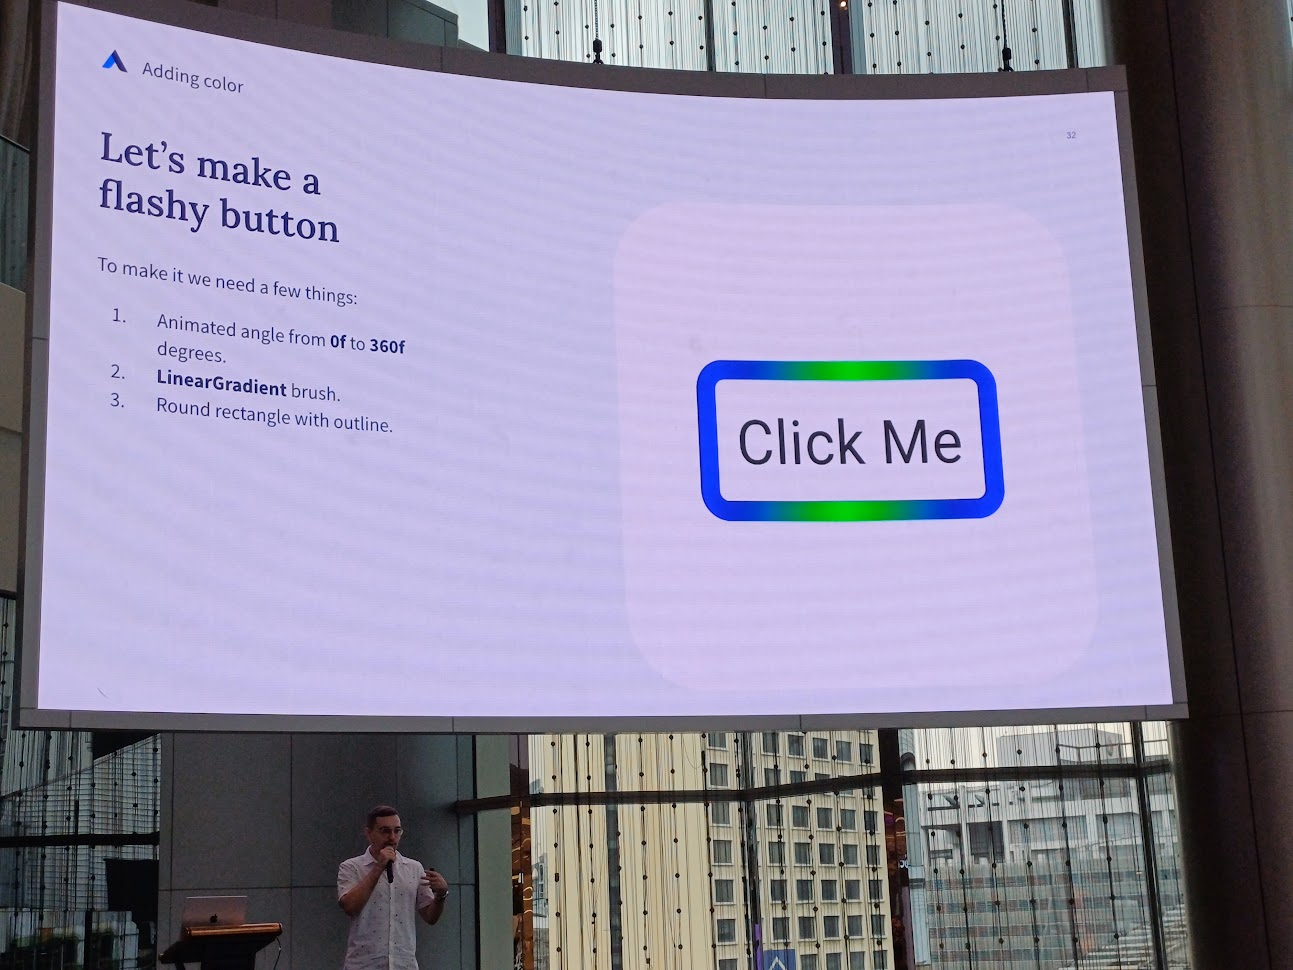
Adding Colors
การระบายสี มีหลาย ๆ แบบ เช่น เทสีลงไปเลย หรือใช้ gradient ในแบบต่าง ๆ
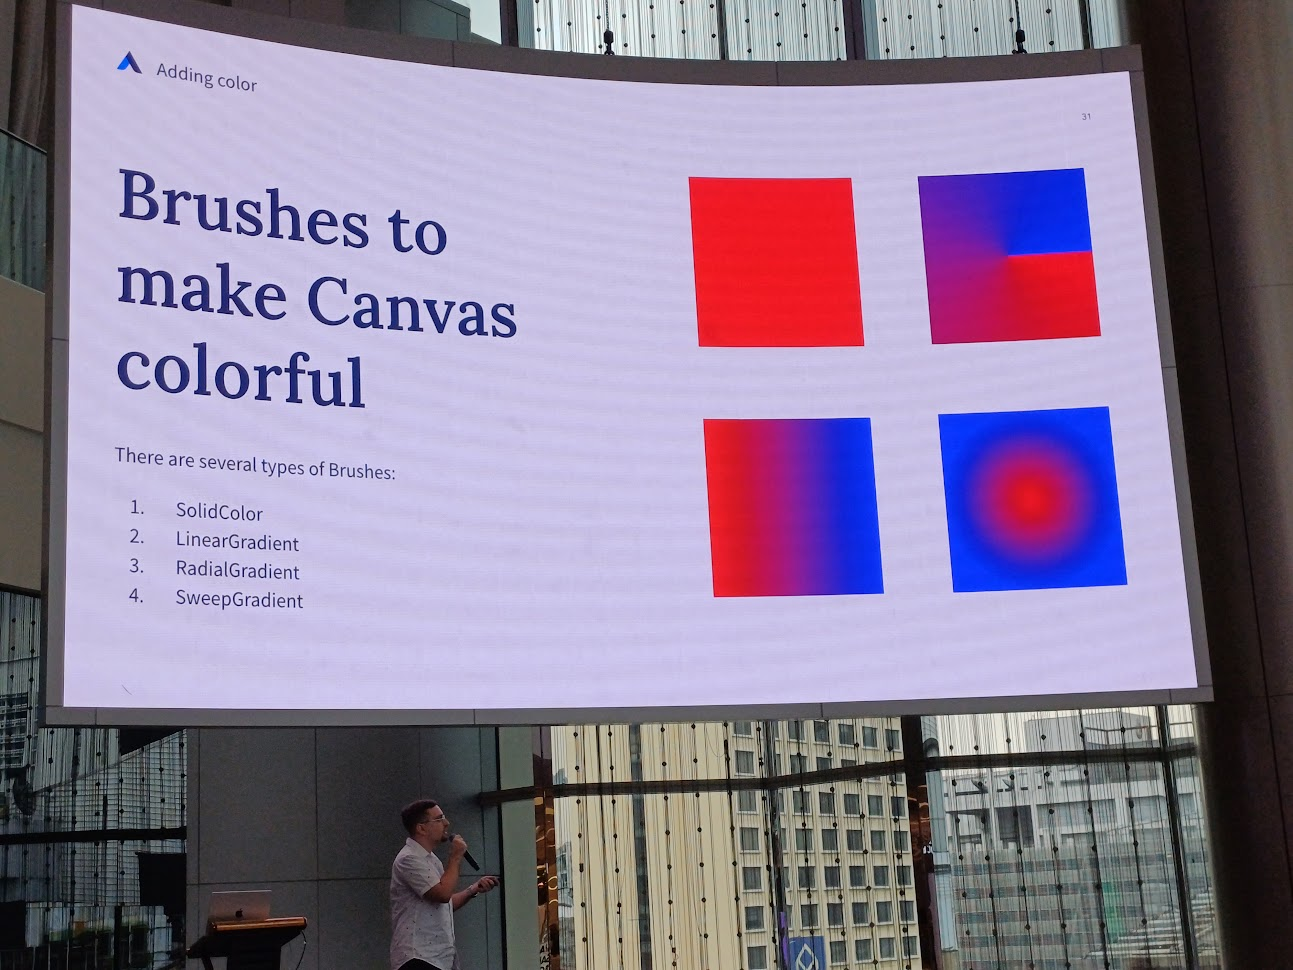
ตัวอย่าง คือการทำ flashing button มีการเล่น animation จากมุมทั้งหมด 360 องศา โดยใช้ LinearGradient และเป็นสี่เหลี่ยมมุมมน
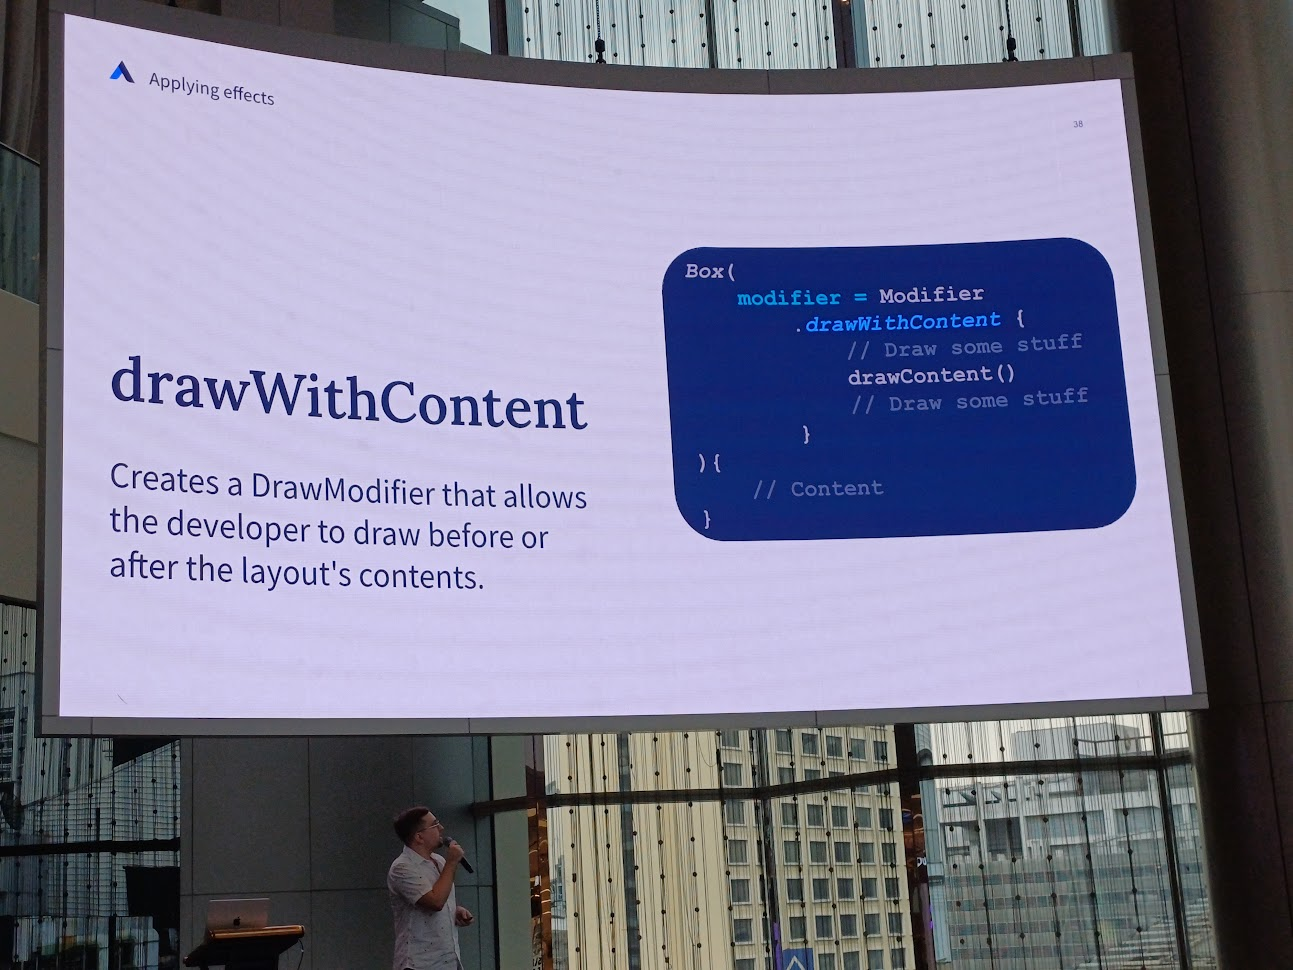
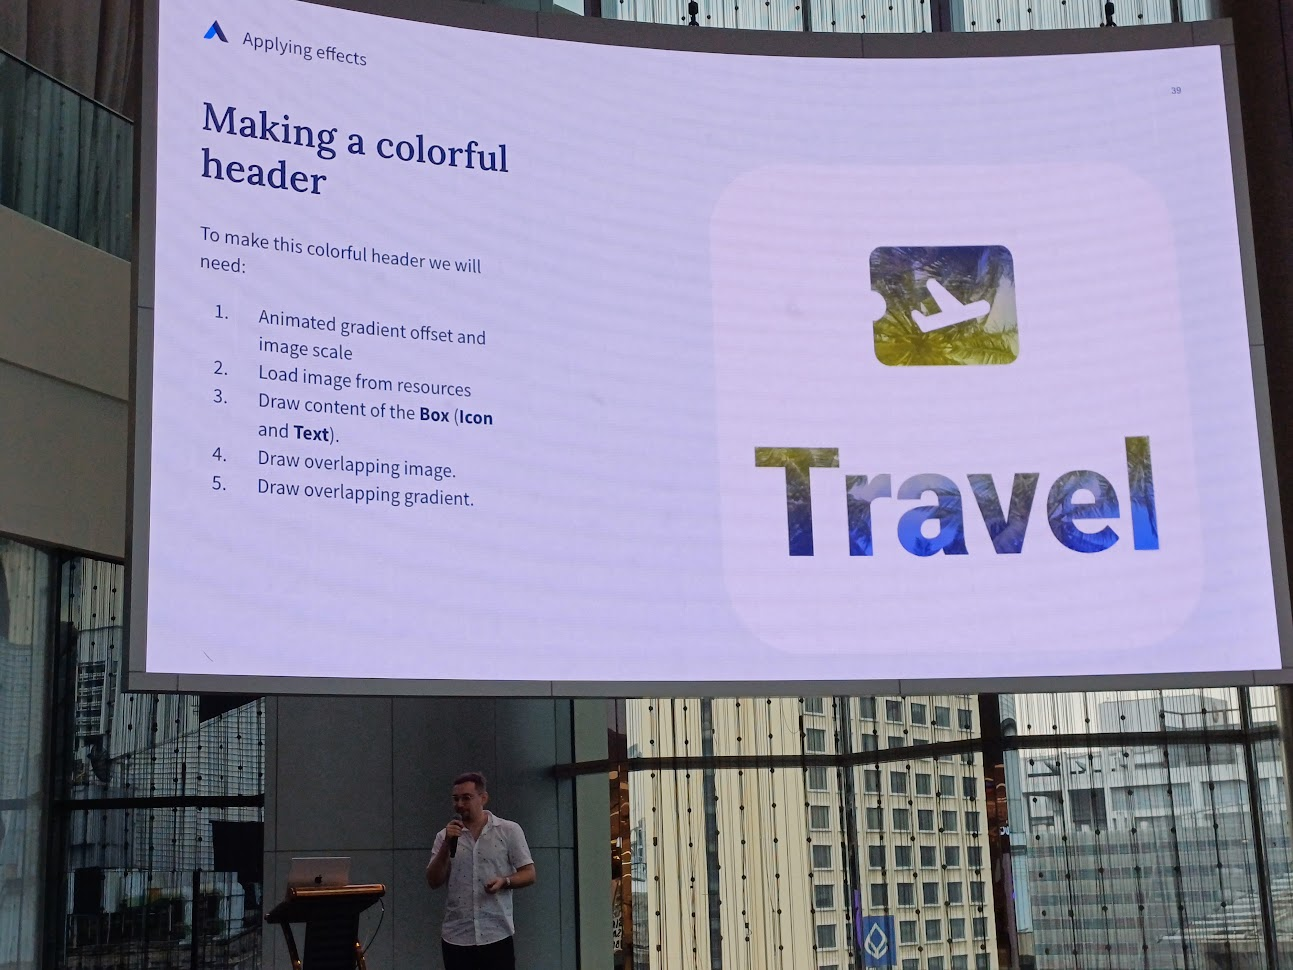
Applying effects
สร้าง DrawModifier ในการวาด content ที่เราต้องการ
ในที่นี้คือทำตัว view นี้ และพื้นหลังเป็นรูปที่มีการเล่น gradient และซูมเข้าออก
วิธีการคร่าว ๆ คือ set gradient และ image scale ก่อน จากนั้นโหลดรูปที่ต้องการมาใส่ แล้วก็วาด content ด้านบนที่เป็นตั๋ว กับคำว่า travel แล้วเอารูปที่ทำมาซ้อนหลัง แล้วใส่ gradient
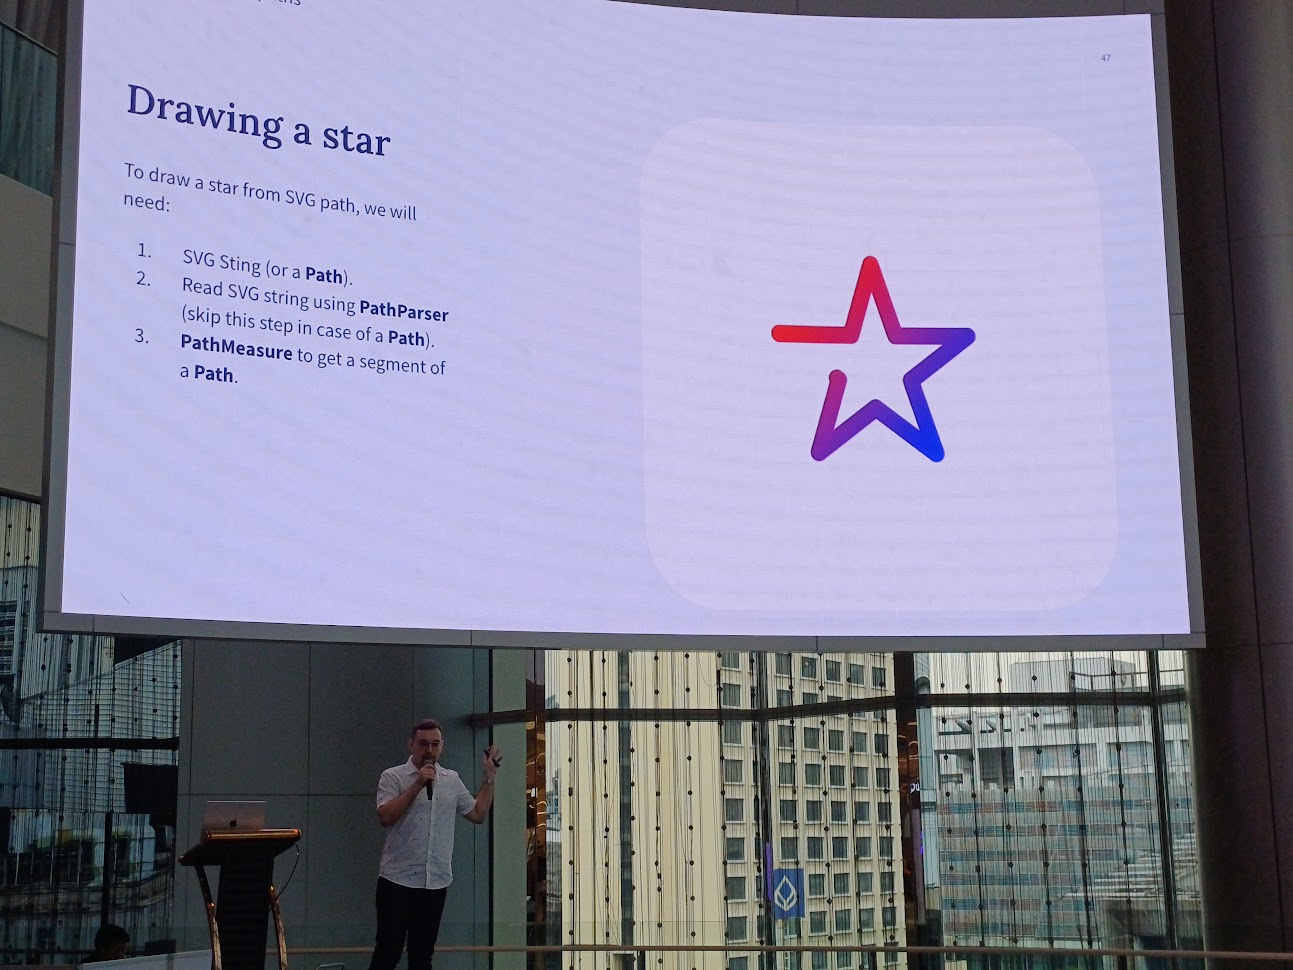
Animation Paths
วาดเล่นให้เป็นดาว คือรูปดาวนี้เป็นไฟล์ svg สามารถเอามาใช้ในการวาด path ได้เลย
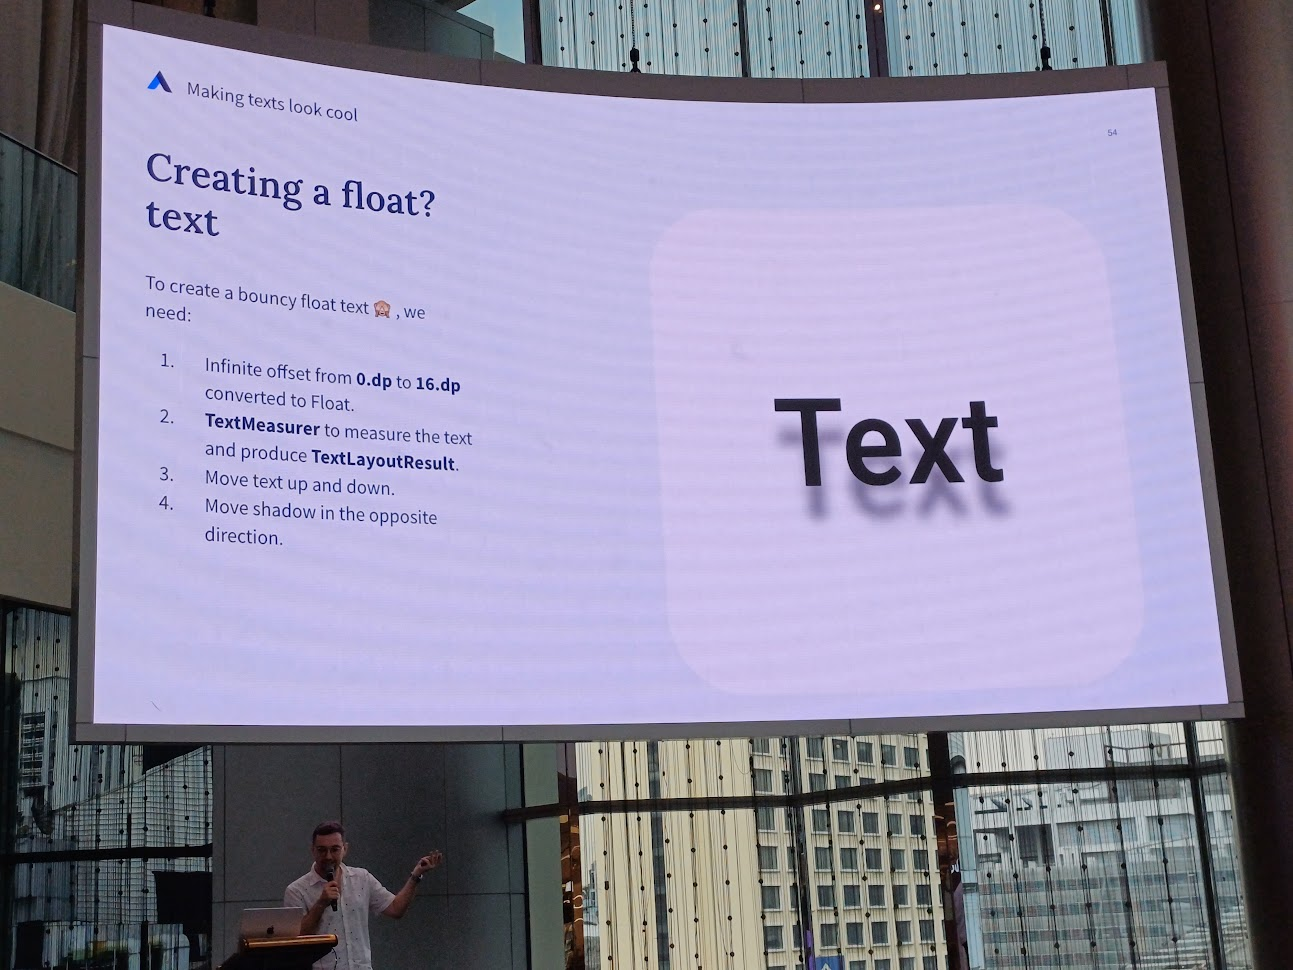
Making texts look cool
อันน้ีว้าวหน่อย คือวาด text ด้วย Compose Canvas

อันนี้เป็น text ที่มีเงา แล้วเลื่อนขึ้นลงไปมา การทำคร่าว ๆ คือ set animating offset ว่าเราขะให้ขึ้นลงเท่าไหร่ จากนั้น measuring text แล้วสั่งให้เล่นขึ้นลง แล้วเลื่อนเงาไป
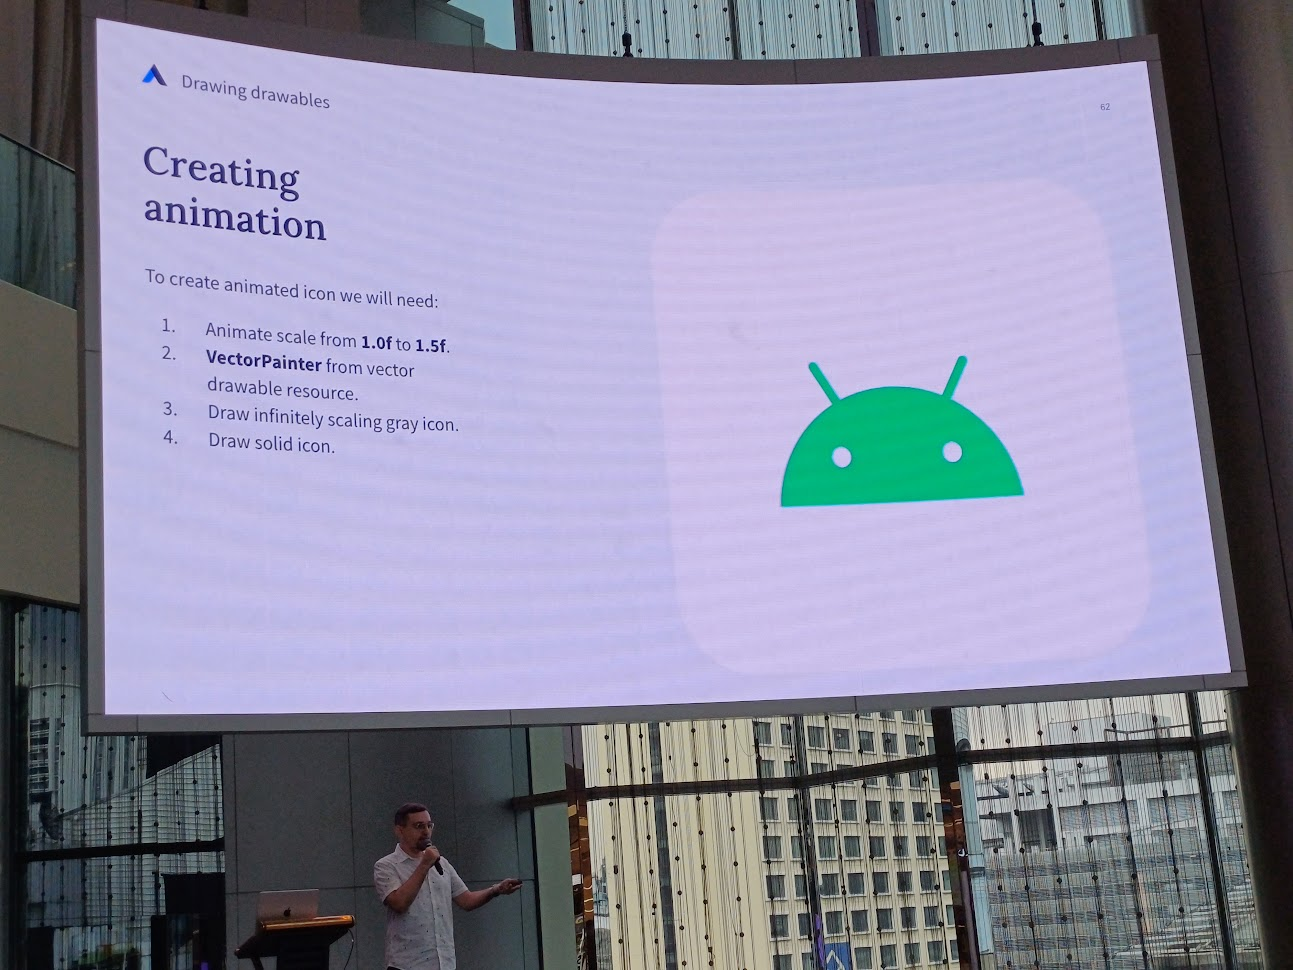
Drawing drawables
ใช้ Oainter class ในการวาดบน DrawScope ทำโดยการสร้าง animation แล้วใช้ VectorPainter ในการวาด drawable resource แล้ววาด icon อันนี้มาเพิ่ม
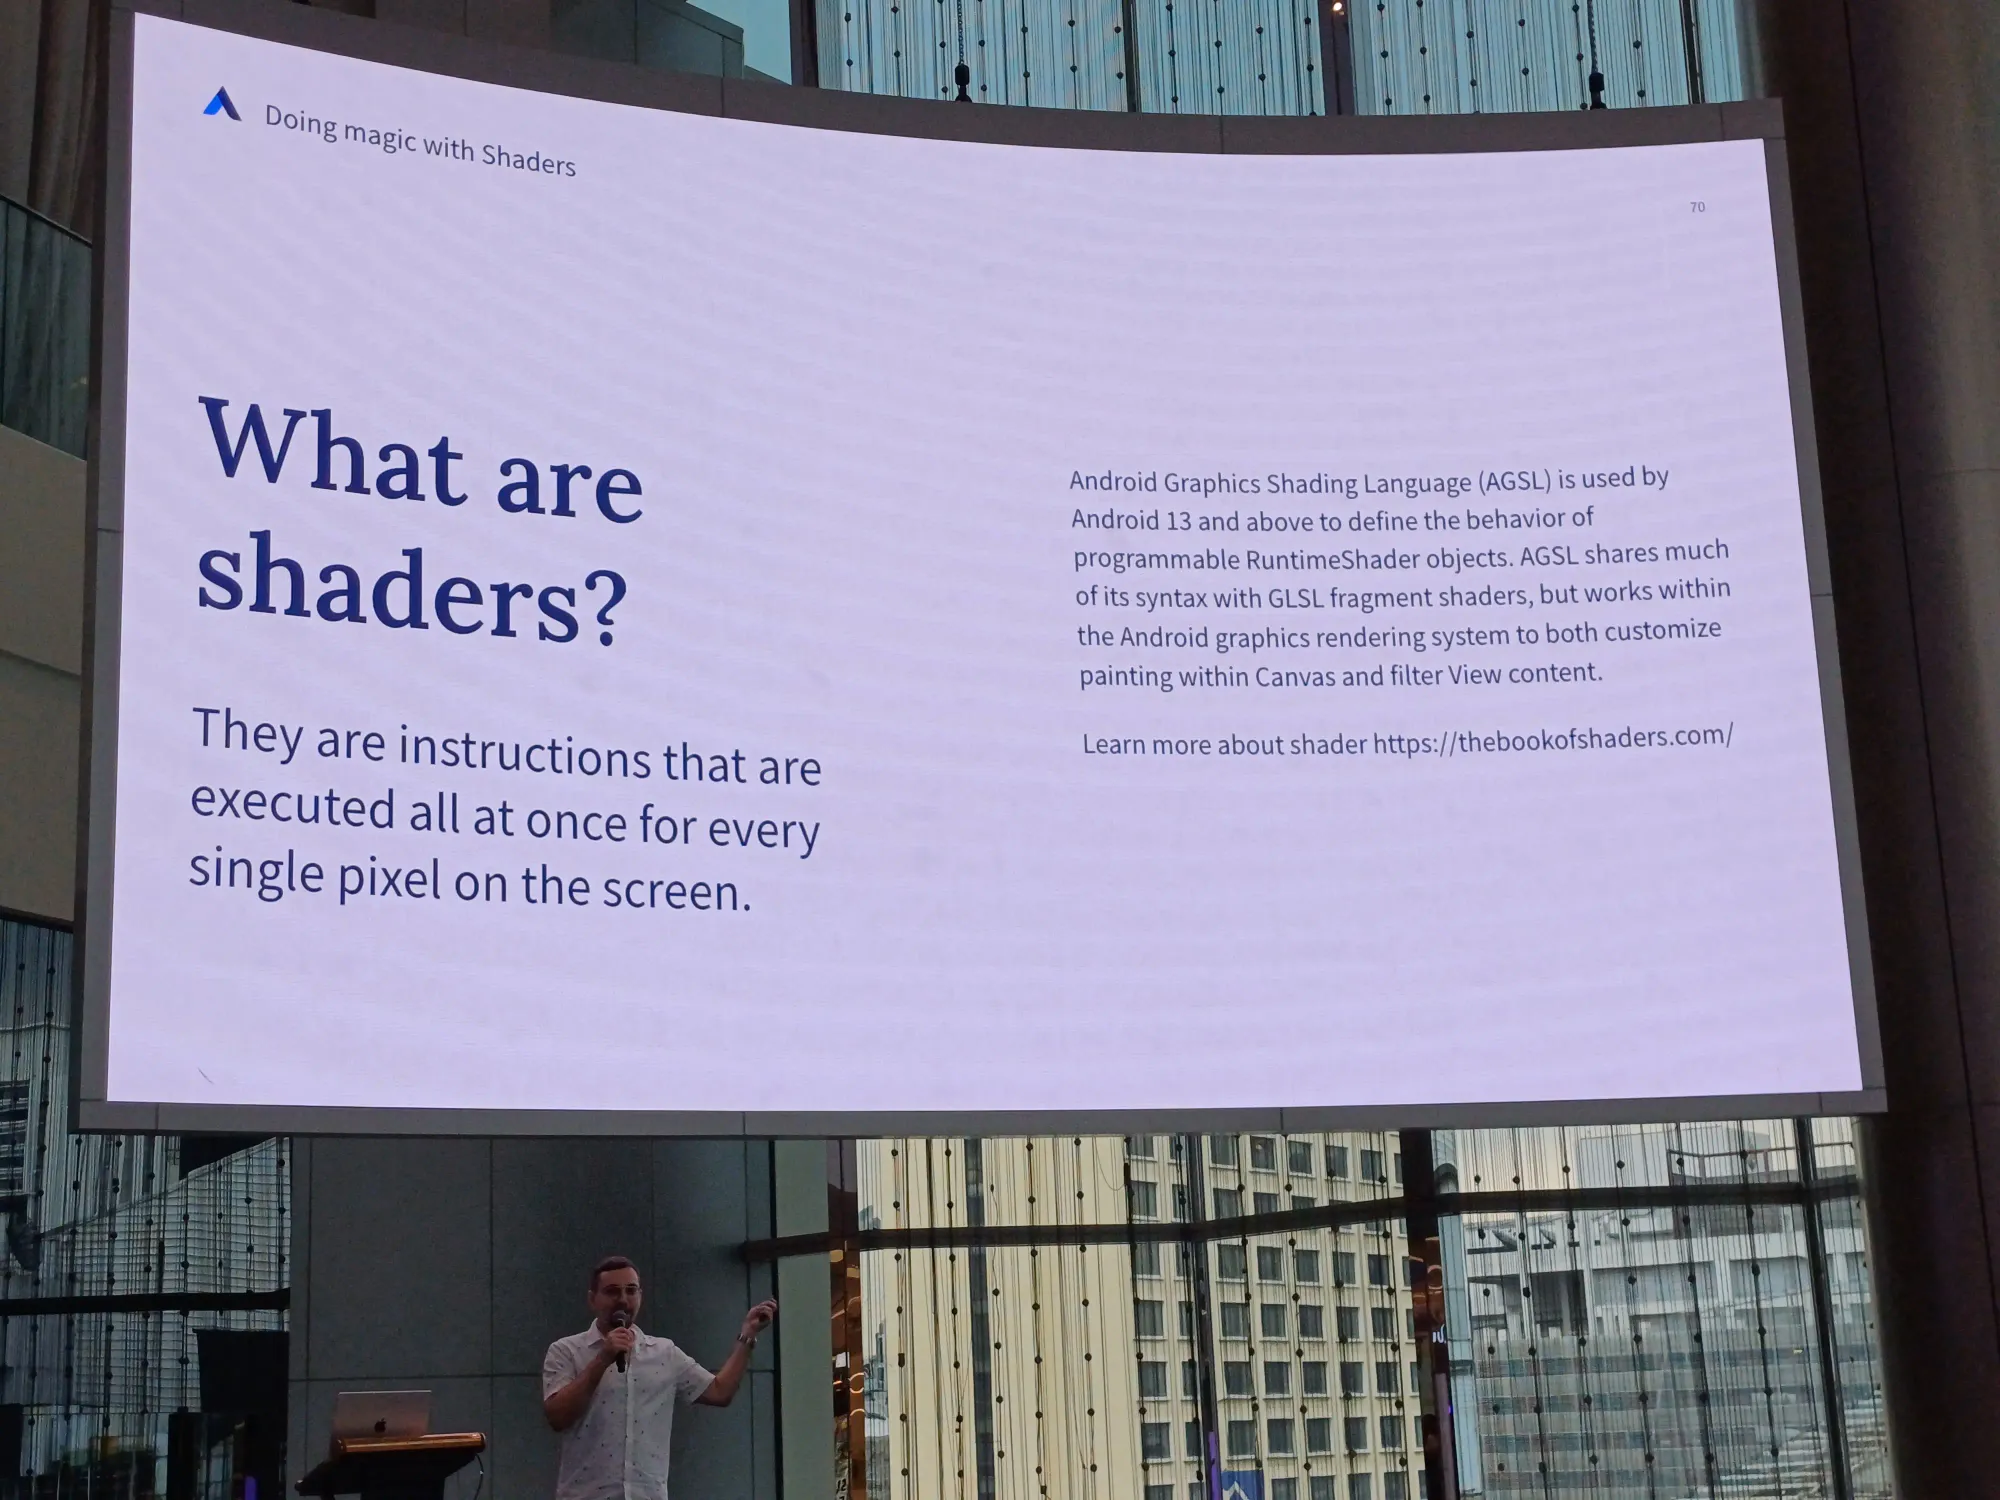
Doing magic with shaders
พูดถึง shader เป็นคำสั่งในการ exexute ทุก ๆ pixel บน screen อันนี้เขียน script ภาษา C++ แล้วให้มัน generate time frame ออกมาอะไรงี้

code ตัวอย่างทั้งหมดใน session นี้
 logomount
ส่วนอันน้ีสไลด์จ้า ค่อย ๆ อ่านสไลด์เอาเนอะ ทางเราสรุปแบบคร่าว ๆ

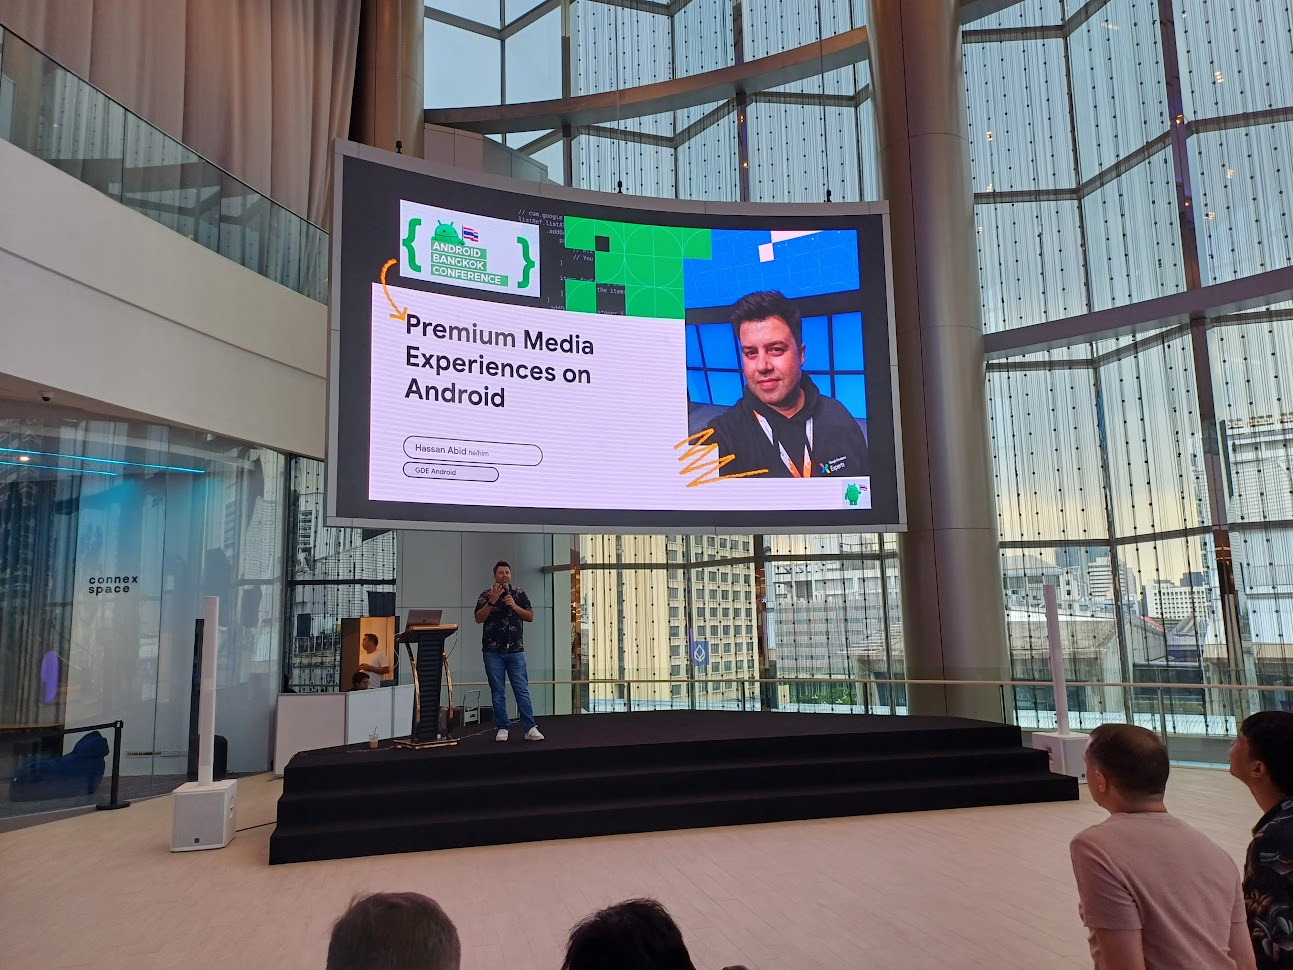
Premium Media Experiences on Android - Hassan Abid
ก่อนอื่นเขาเปิดคลิปอันนี้ก่อนเลย
คนใช้มือถือทำอะไรบ้าง? ส่วนใหญ่ใช้ในการเสพสื่อต่าง ๆ และความบันเทิง เช่นฟังเพลง ดู YouTube และใช้ social network ต่าง ๆ การที่มีคน subscription พวก entertainment เยอะ ทำให้ตัว platform มีรายได้
premium devices มีความเกี่ยวข้องกับ 3 เรื่อง คือ
- Technology ที่ใหม่ล่าสุด ในส่วนของ processor, กล้อง, senser และหน้าจอ
- Longevity มีการใช้งานที่ยืนยาว โดยอัด RAM มาแบบเต็มที่ มี chip ที่ทำให้อายุการใช้งานเครื่องยาวนาน และ support การ update software แบบยาวนานด้วย
- Polish ใส่ hardware ที่ดีในการทำงานต่าง ๆ ของมือถือได้อย่าง smooth มากขึ้น เช่น เล่นเกมส์ที่กราฟฟิคดี ๆ ได้, AI/MLfeatures, สร้างและเล่น media ในคุณภาพที่สูงได้
ถ้าไม่ใช่ premium devices มีข้อจำกัดทาง hardware ทุกอย่าง ซึ่งบาง feature ก็ไม่ได้ support ทุก device ด้วย
Jetpack Media3
เป็น playback video และ audio ตัวนี้เป็น new ExoPlayer ด้วยล่ะ
Migration Guide
ExoPlayer2 → Media3 ดูตาม document นี้เลย


Video Editing (Transformation API)
ตัว Transformation API อยู่ใน Media3 มี API ต่าง ๆ ให้ใช้ดังนี้
- Transcoding เช่นถ่ายจาก pixel ไปเปิดรูปบน Fold ให้มัน HD เหมือนเดิม
- HDR Video
- Video Editing ตัดต่อ video แหละ
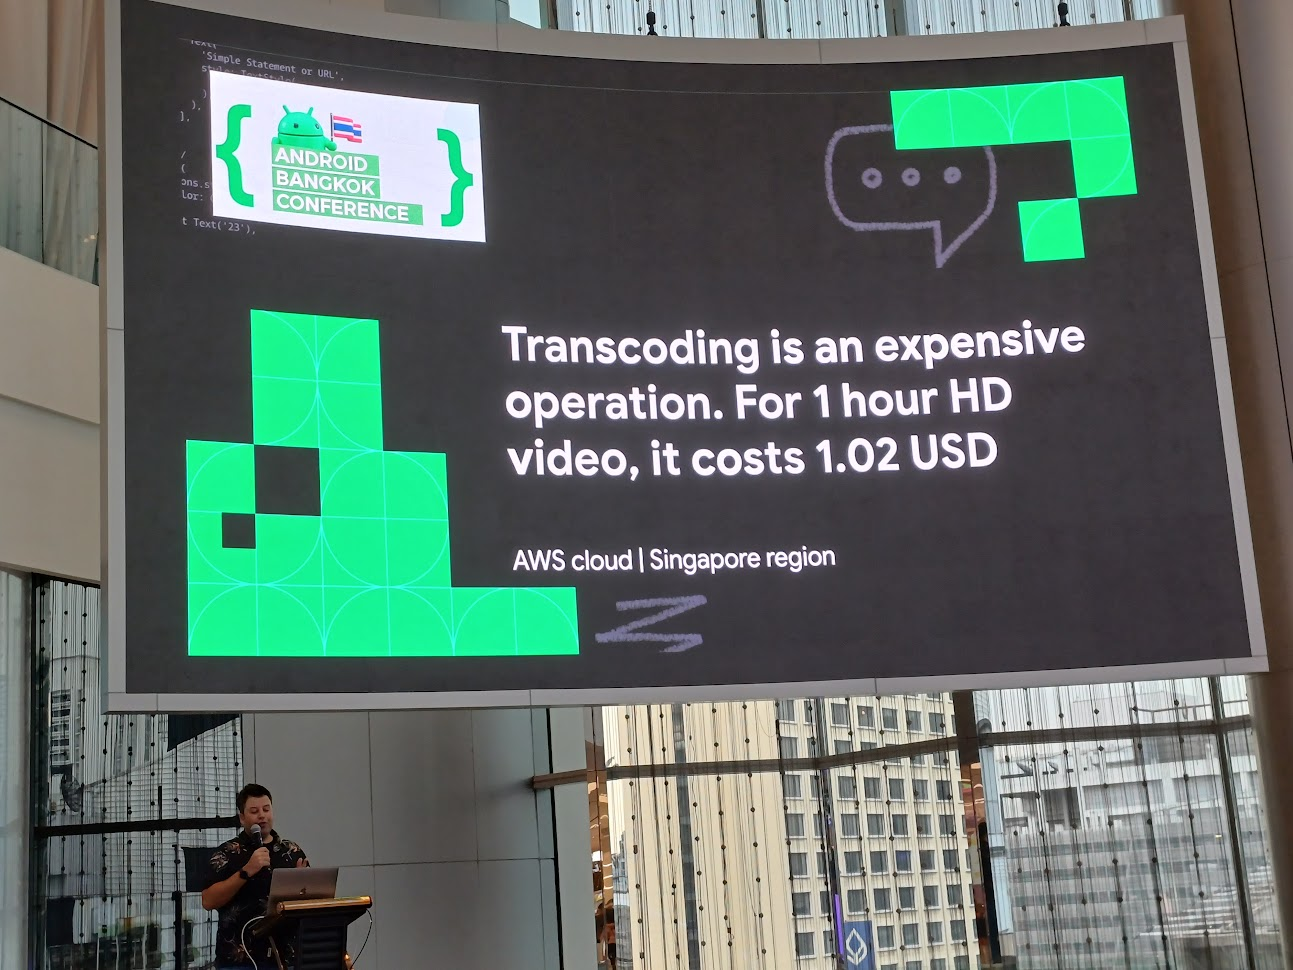
Transcoding
การ Transcoding เป็นอะไรที่แพงมาก วิดีโอ HD 1 ชั่วโมง ใช้เงินไป 1.02 USD
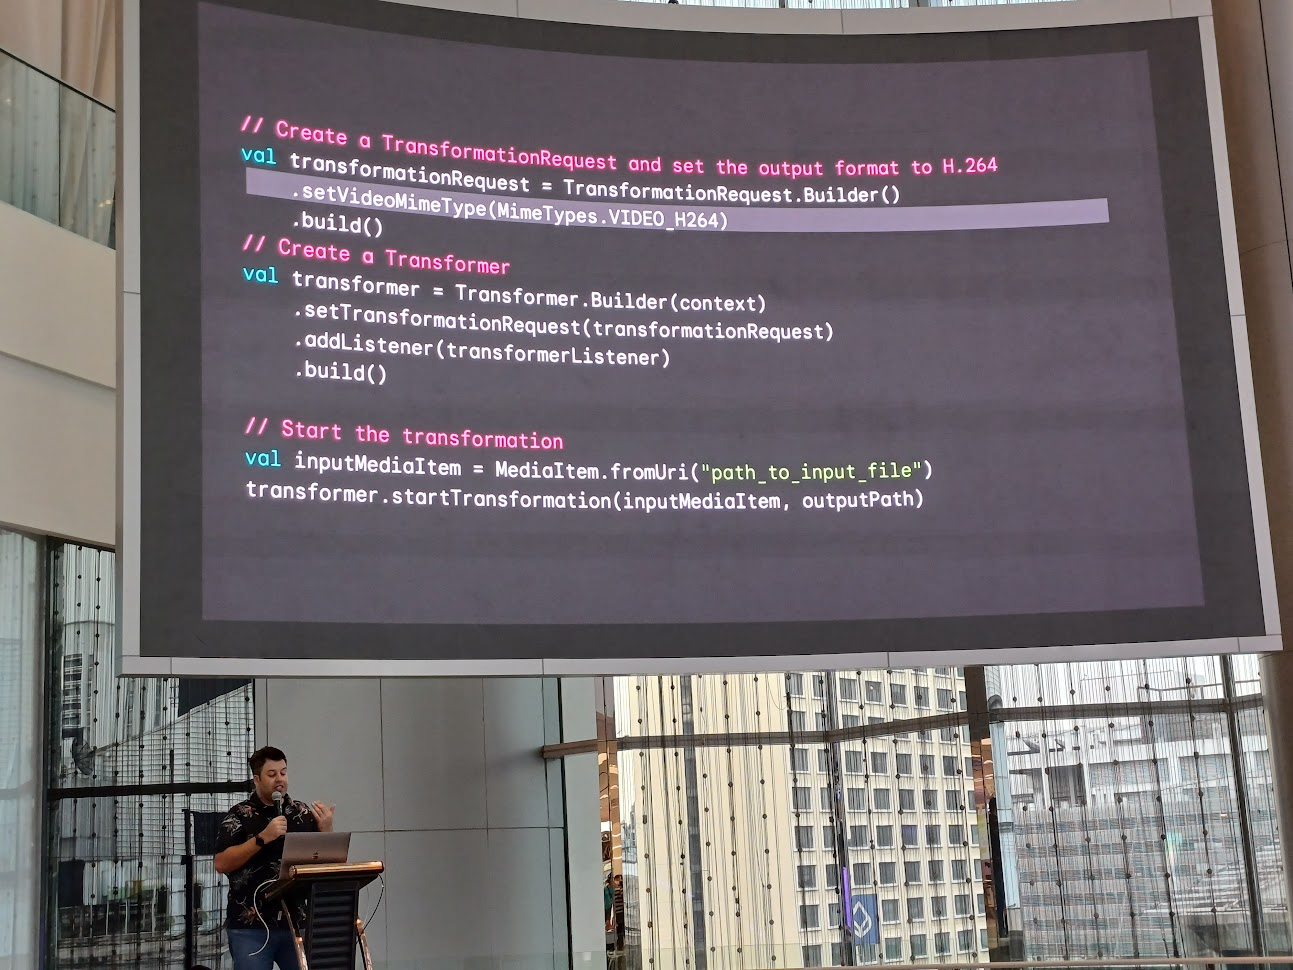
การใส่ Trancode ใส่อันนี้ไปในโค้ดแบบนี้ setVideoMimeType(MimeTypes.VIDEO_H264)
Video Editing
การตัดต่อวิดีโอแหละว่ากันง่าย ๆ มีการหมุนคลิป, zoom-in and zoom out, trim video, OpenGL effect, Single Asset Edits ส่วน Multi Asset ติดตามกันต่อไป
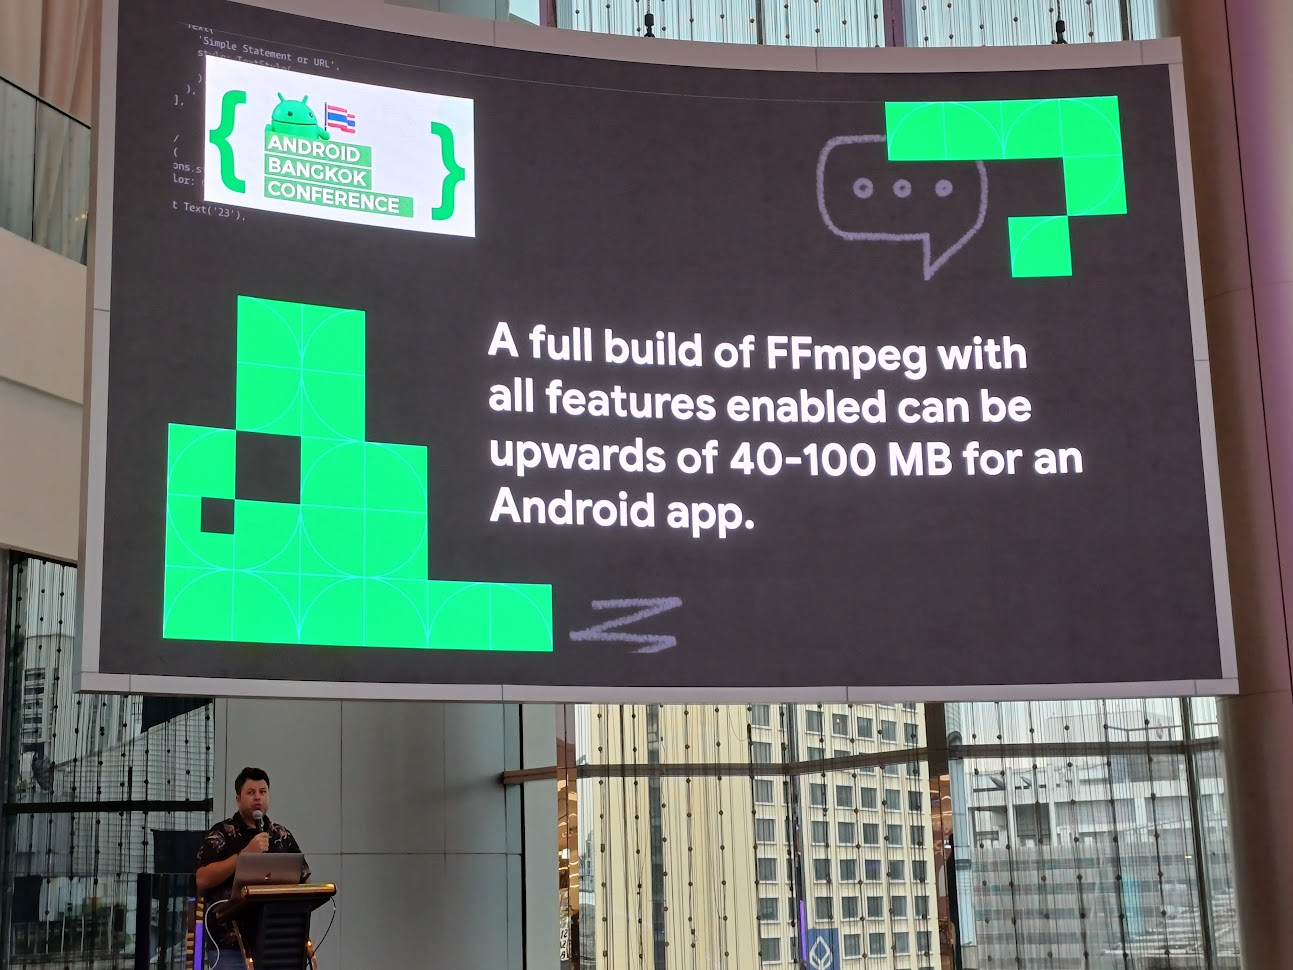
แน่นอนว่าถ้าใครที่ลองเล่น FFmpeg ตามความเข้าใจของเราคือมันเป็น low-level library เนอะ ใส่ไปปุ๊ป ทำให้แอพเราบวมขึ้น 40-100 MB เลย
ถ้าเราใช้ FFmpeg ในการหมุนคลิปมันทำยากเนอะ จำไม่ได้ว่าทำยังไง แต่สำหรับ Media3 เพียง implement ไปแบบนี้ ก็เป็นการหมุนคลิปแล้ว
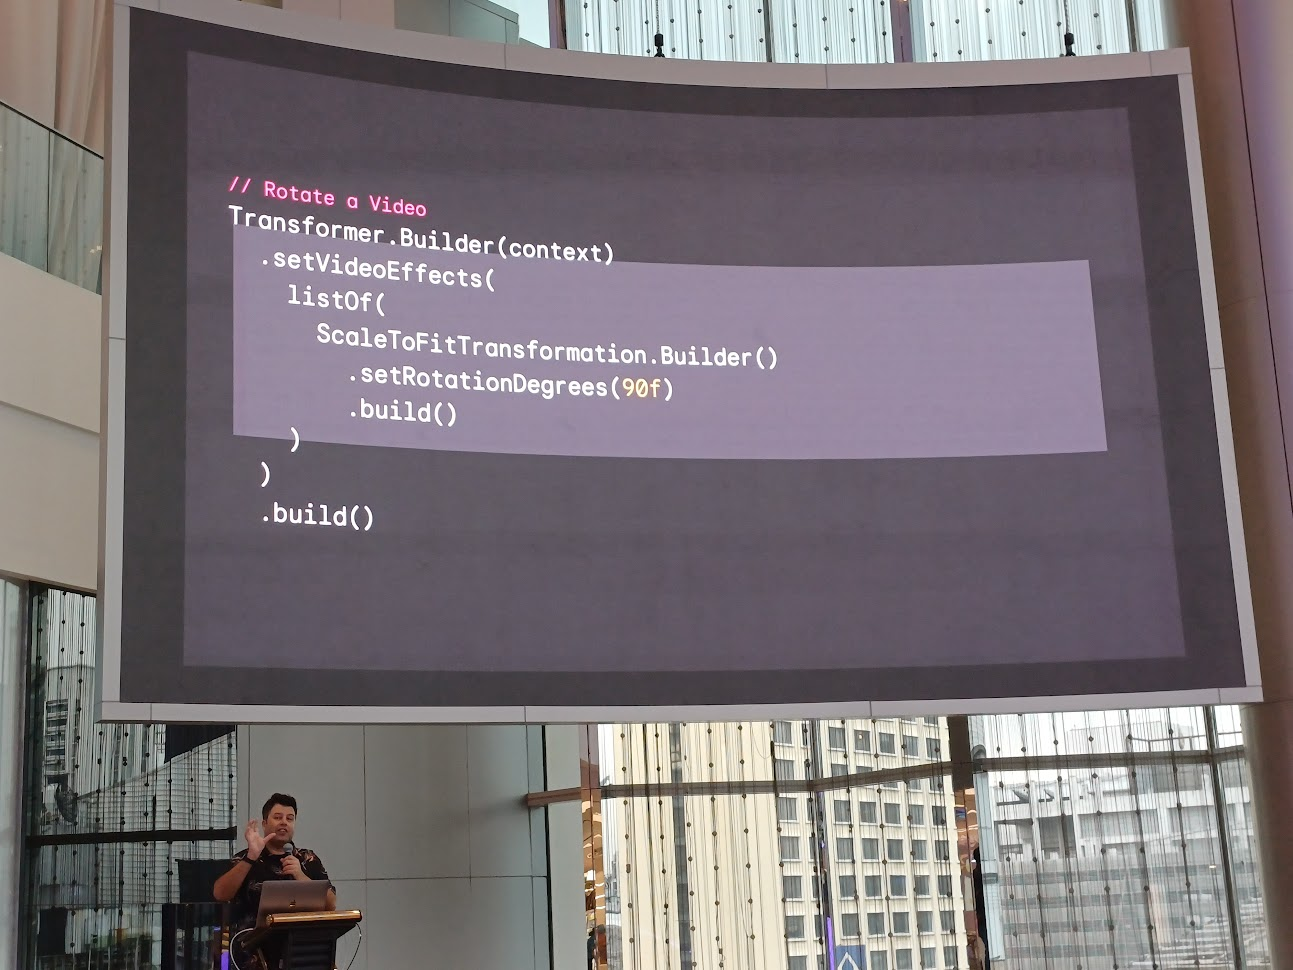
// Rotate a Video
Transformer.Builder(context)
.setVideoEffects(
listOf(
ScaleToFitTransformation.Builder()
.setRotationDegrees(90f)
.build()
)
)
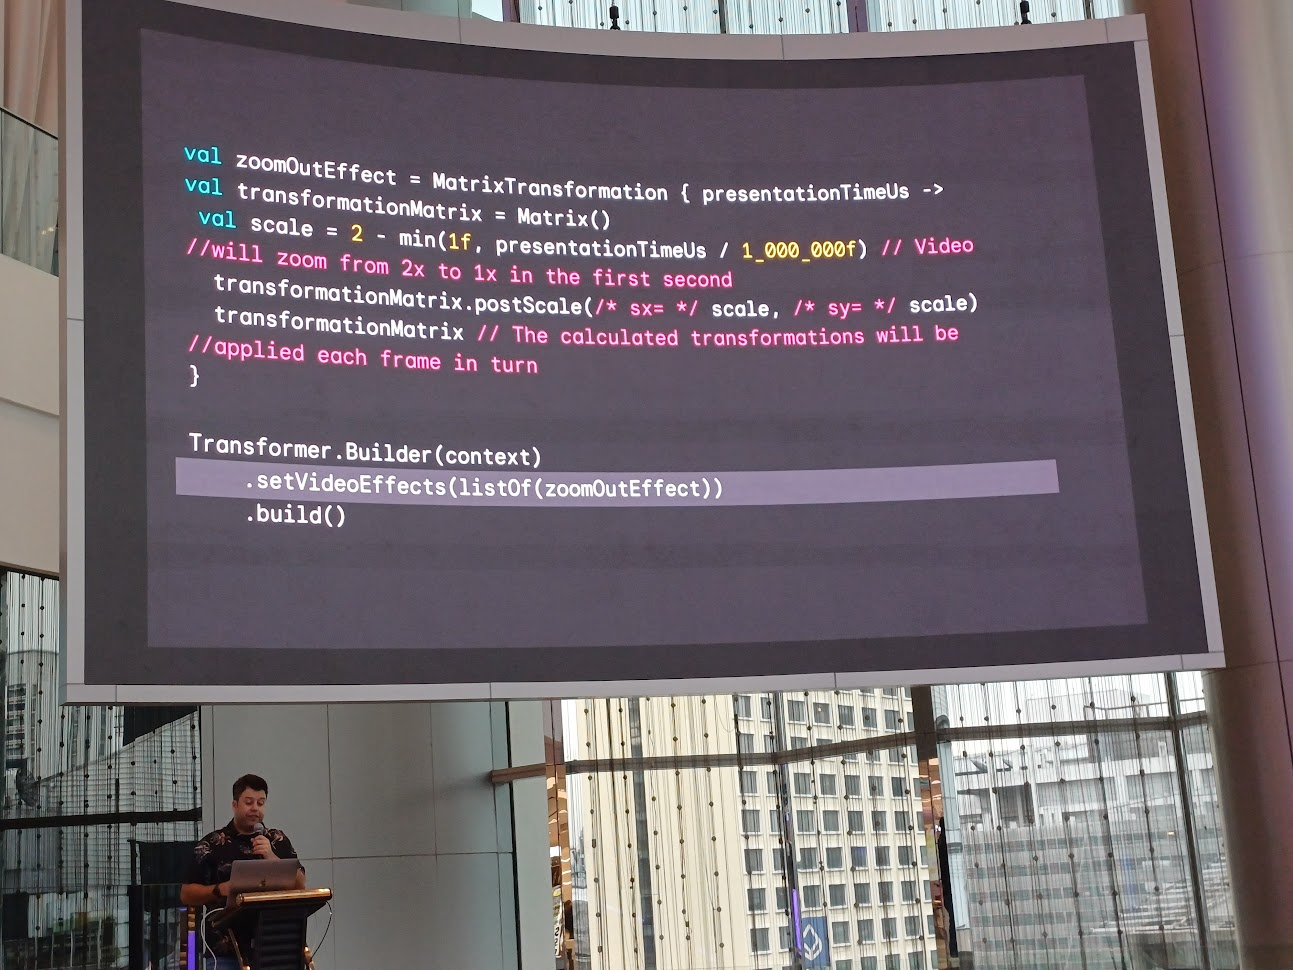
.build()หรือการ zoom-out ก็เช่นกัน
MediaPipe
เช่น face filter บน TikTok
androidxDemo
เชื่อมกับ Firebase ดึงเครื่องเทสจาก Firebase Test Lab ออกมาใช้ด้วยแหะ แต่ด้วยเหตุบางอย่าง เลยไม่ได้ใช้
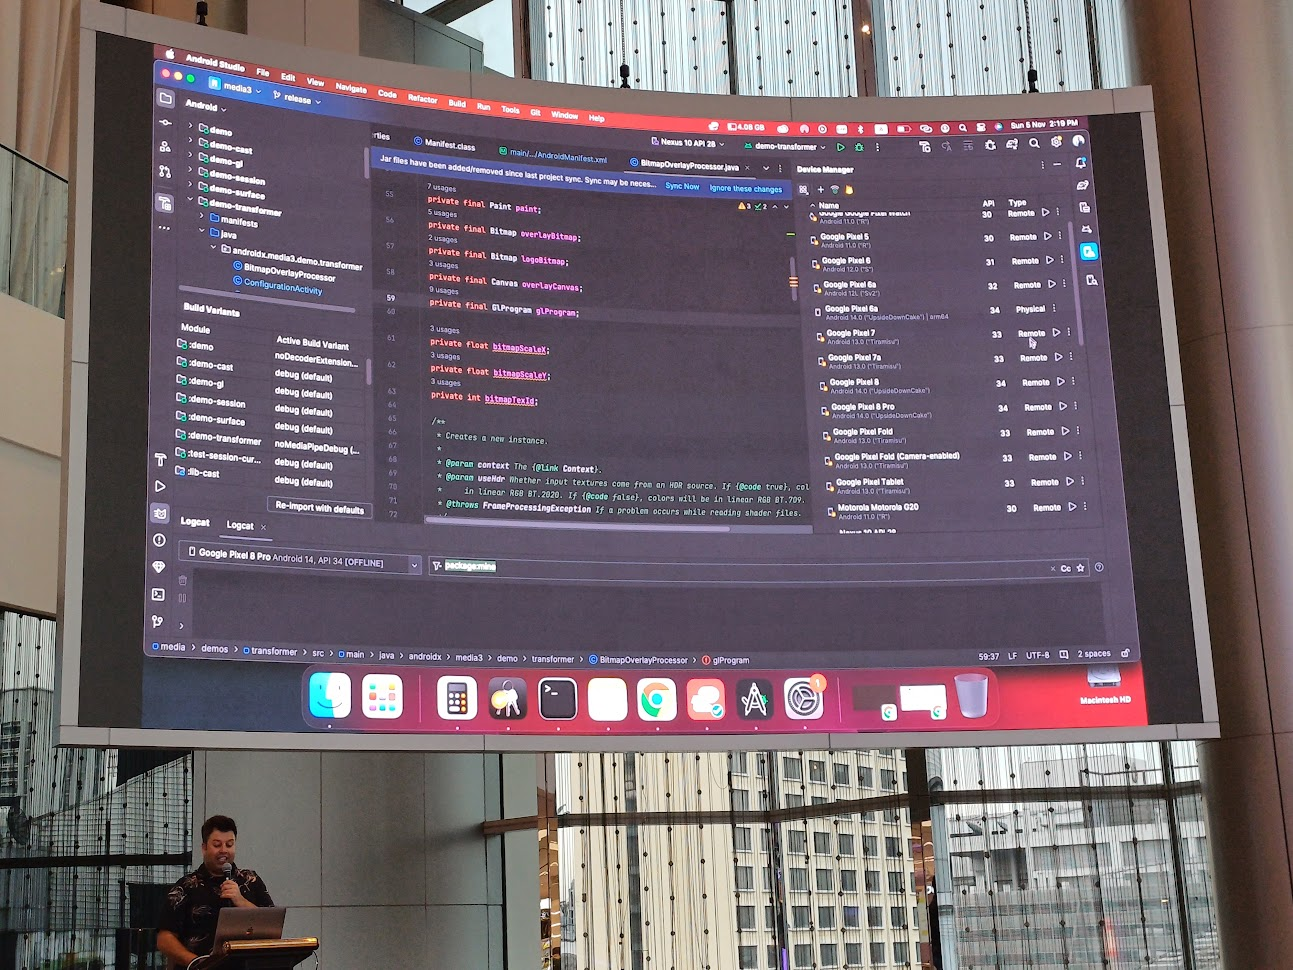
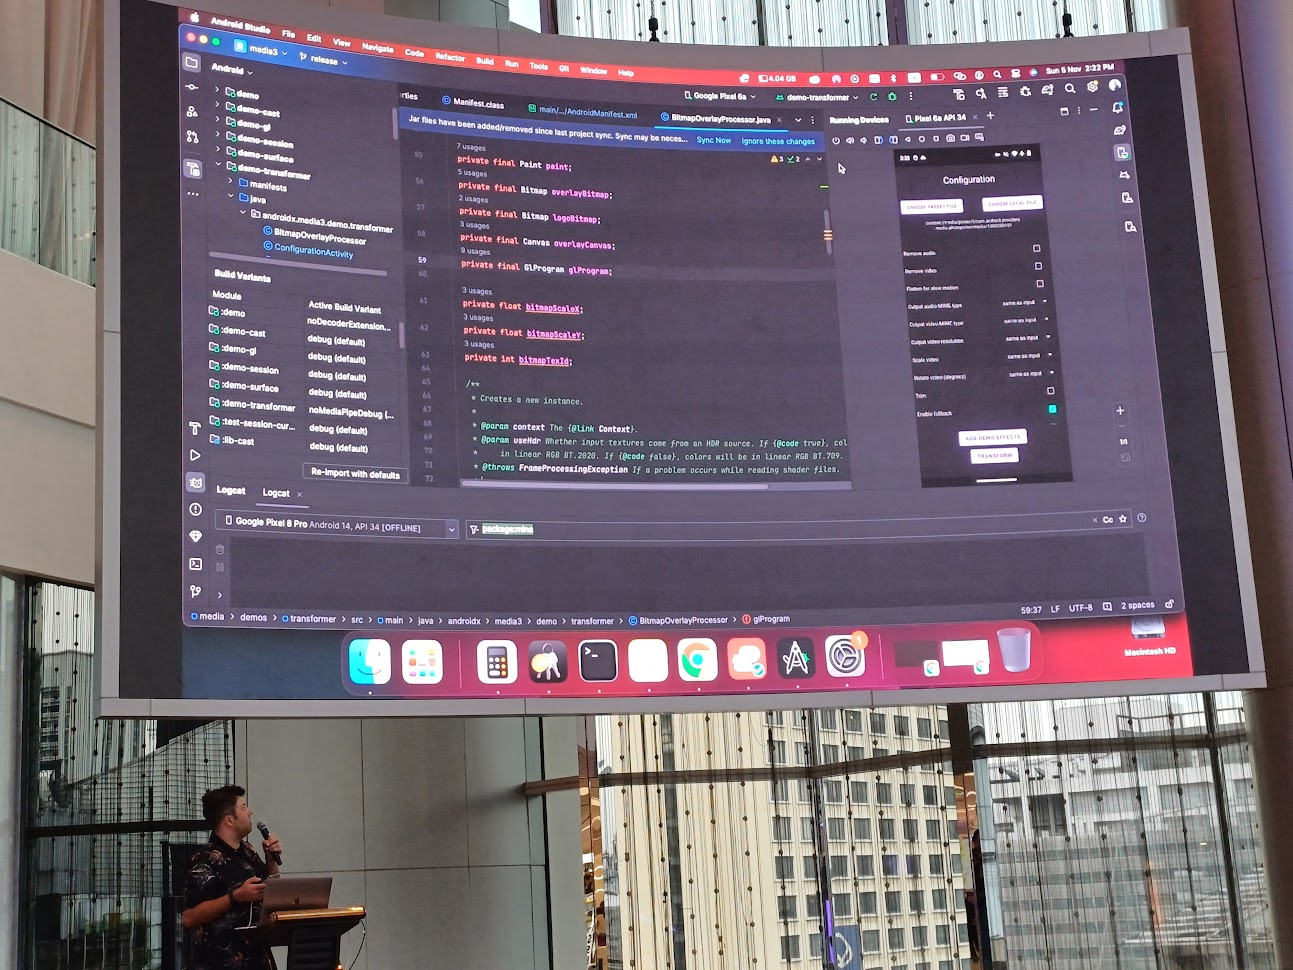
เขาเปิด sample app เพื่อนำวิดีโอมาใช้กับ Transformer APIs และ MediaPipe
อันนี้เป็นคลิป
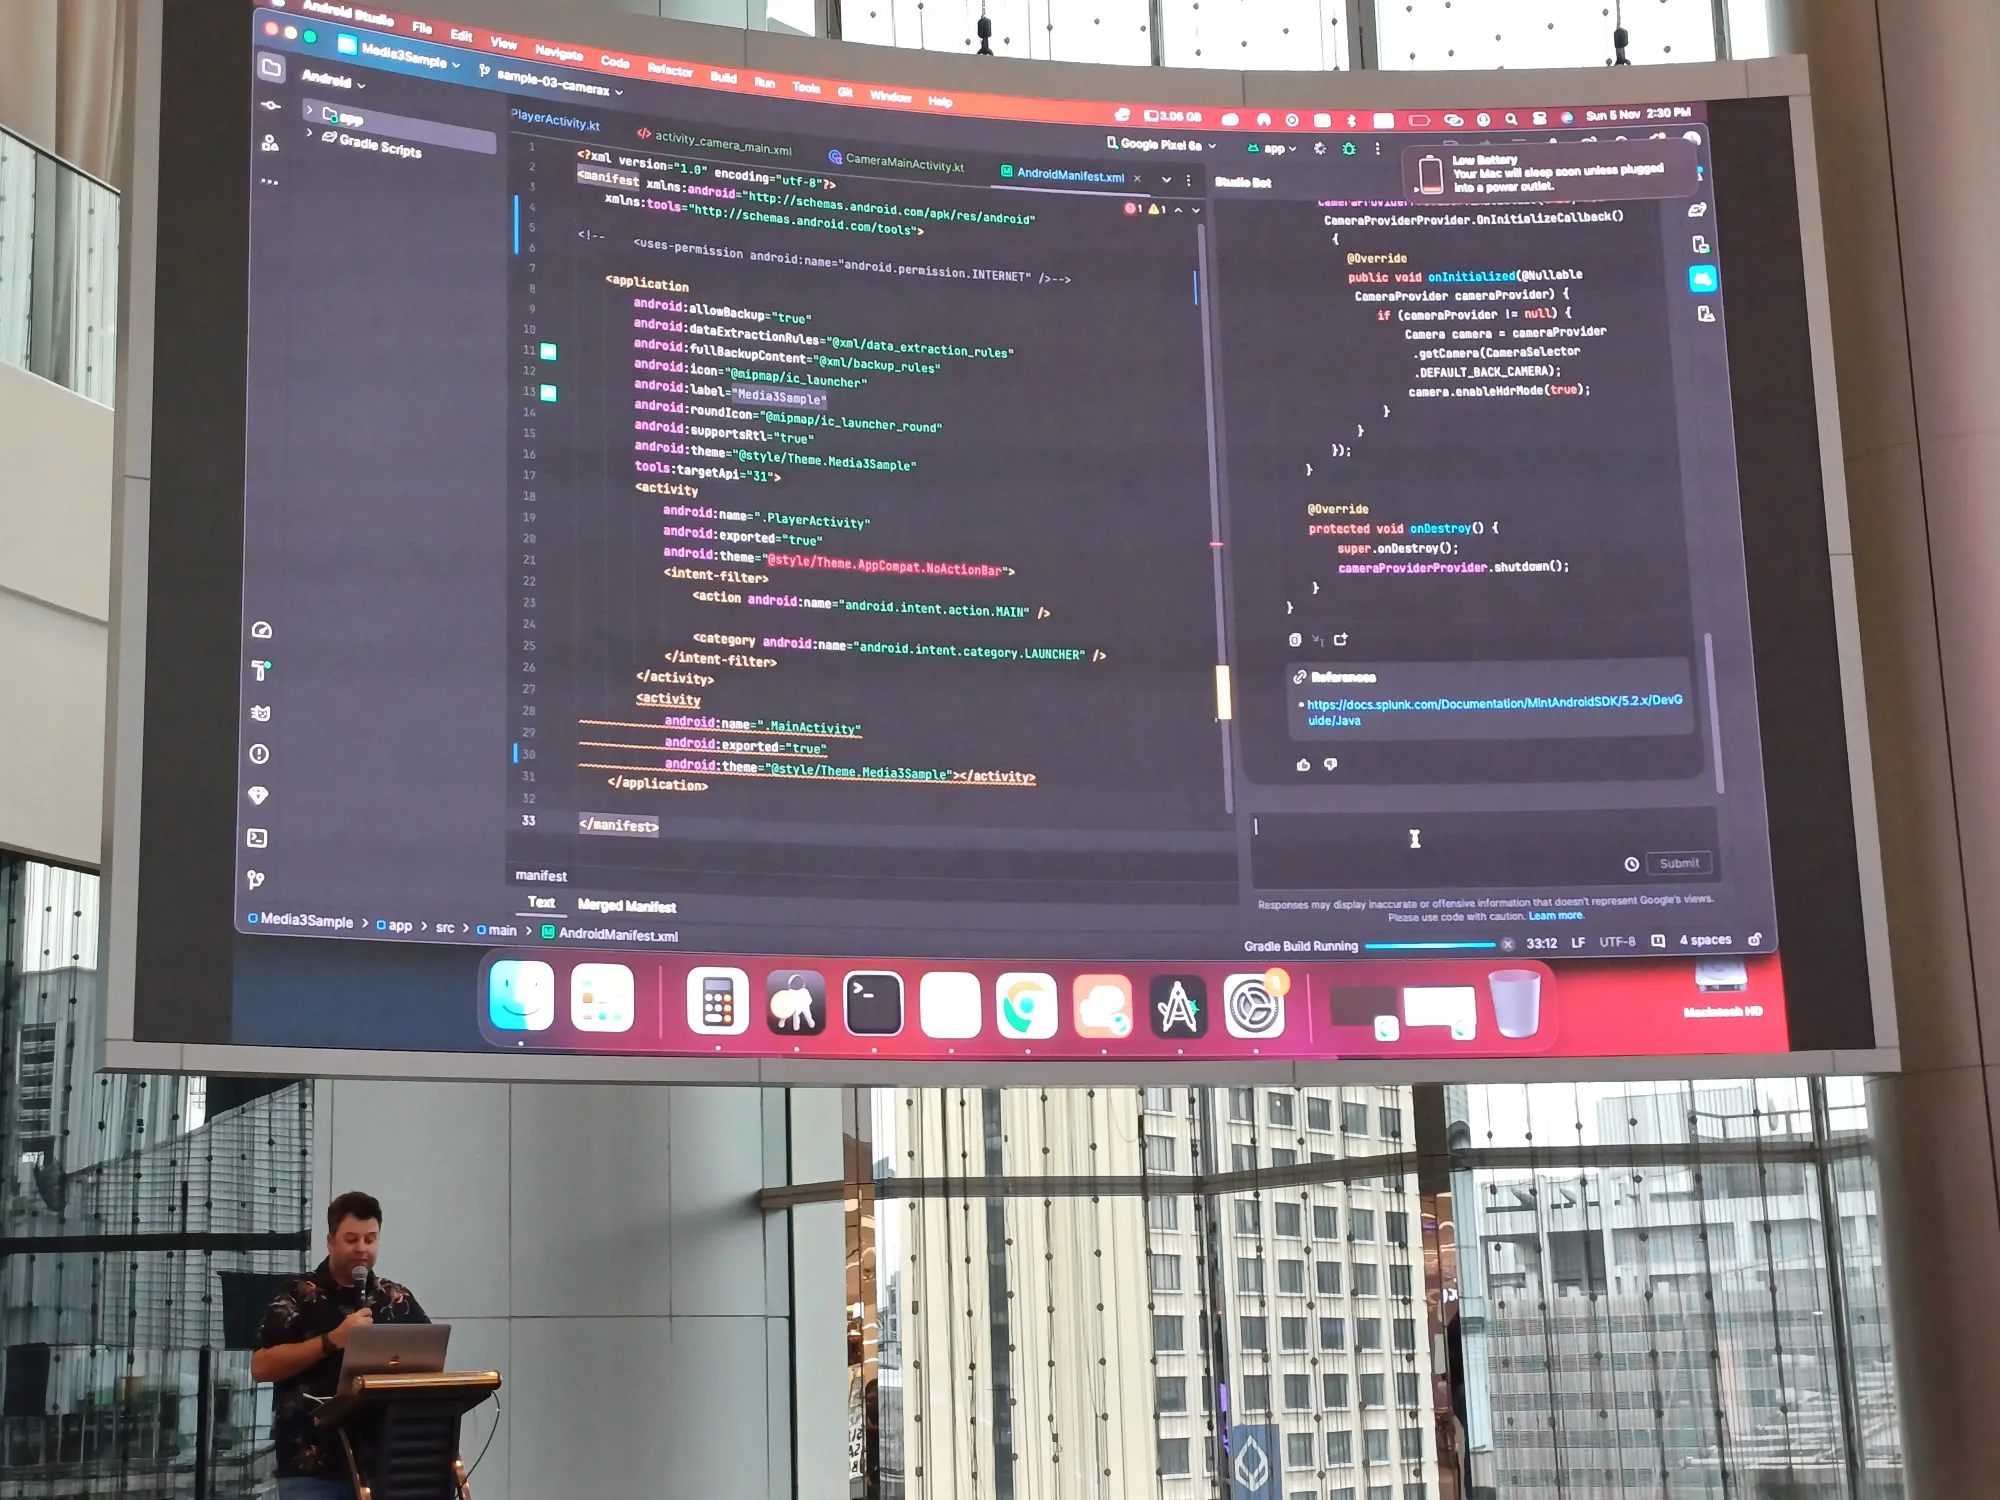
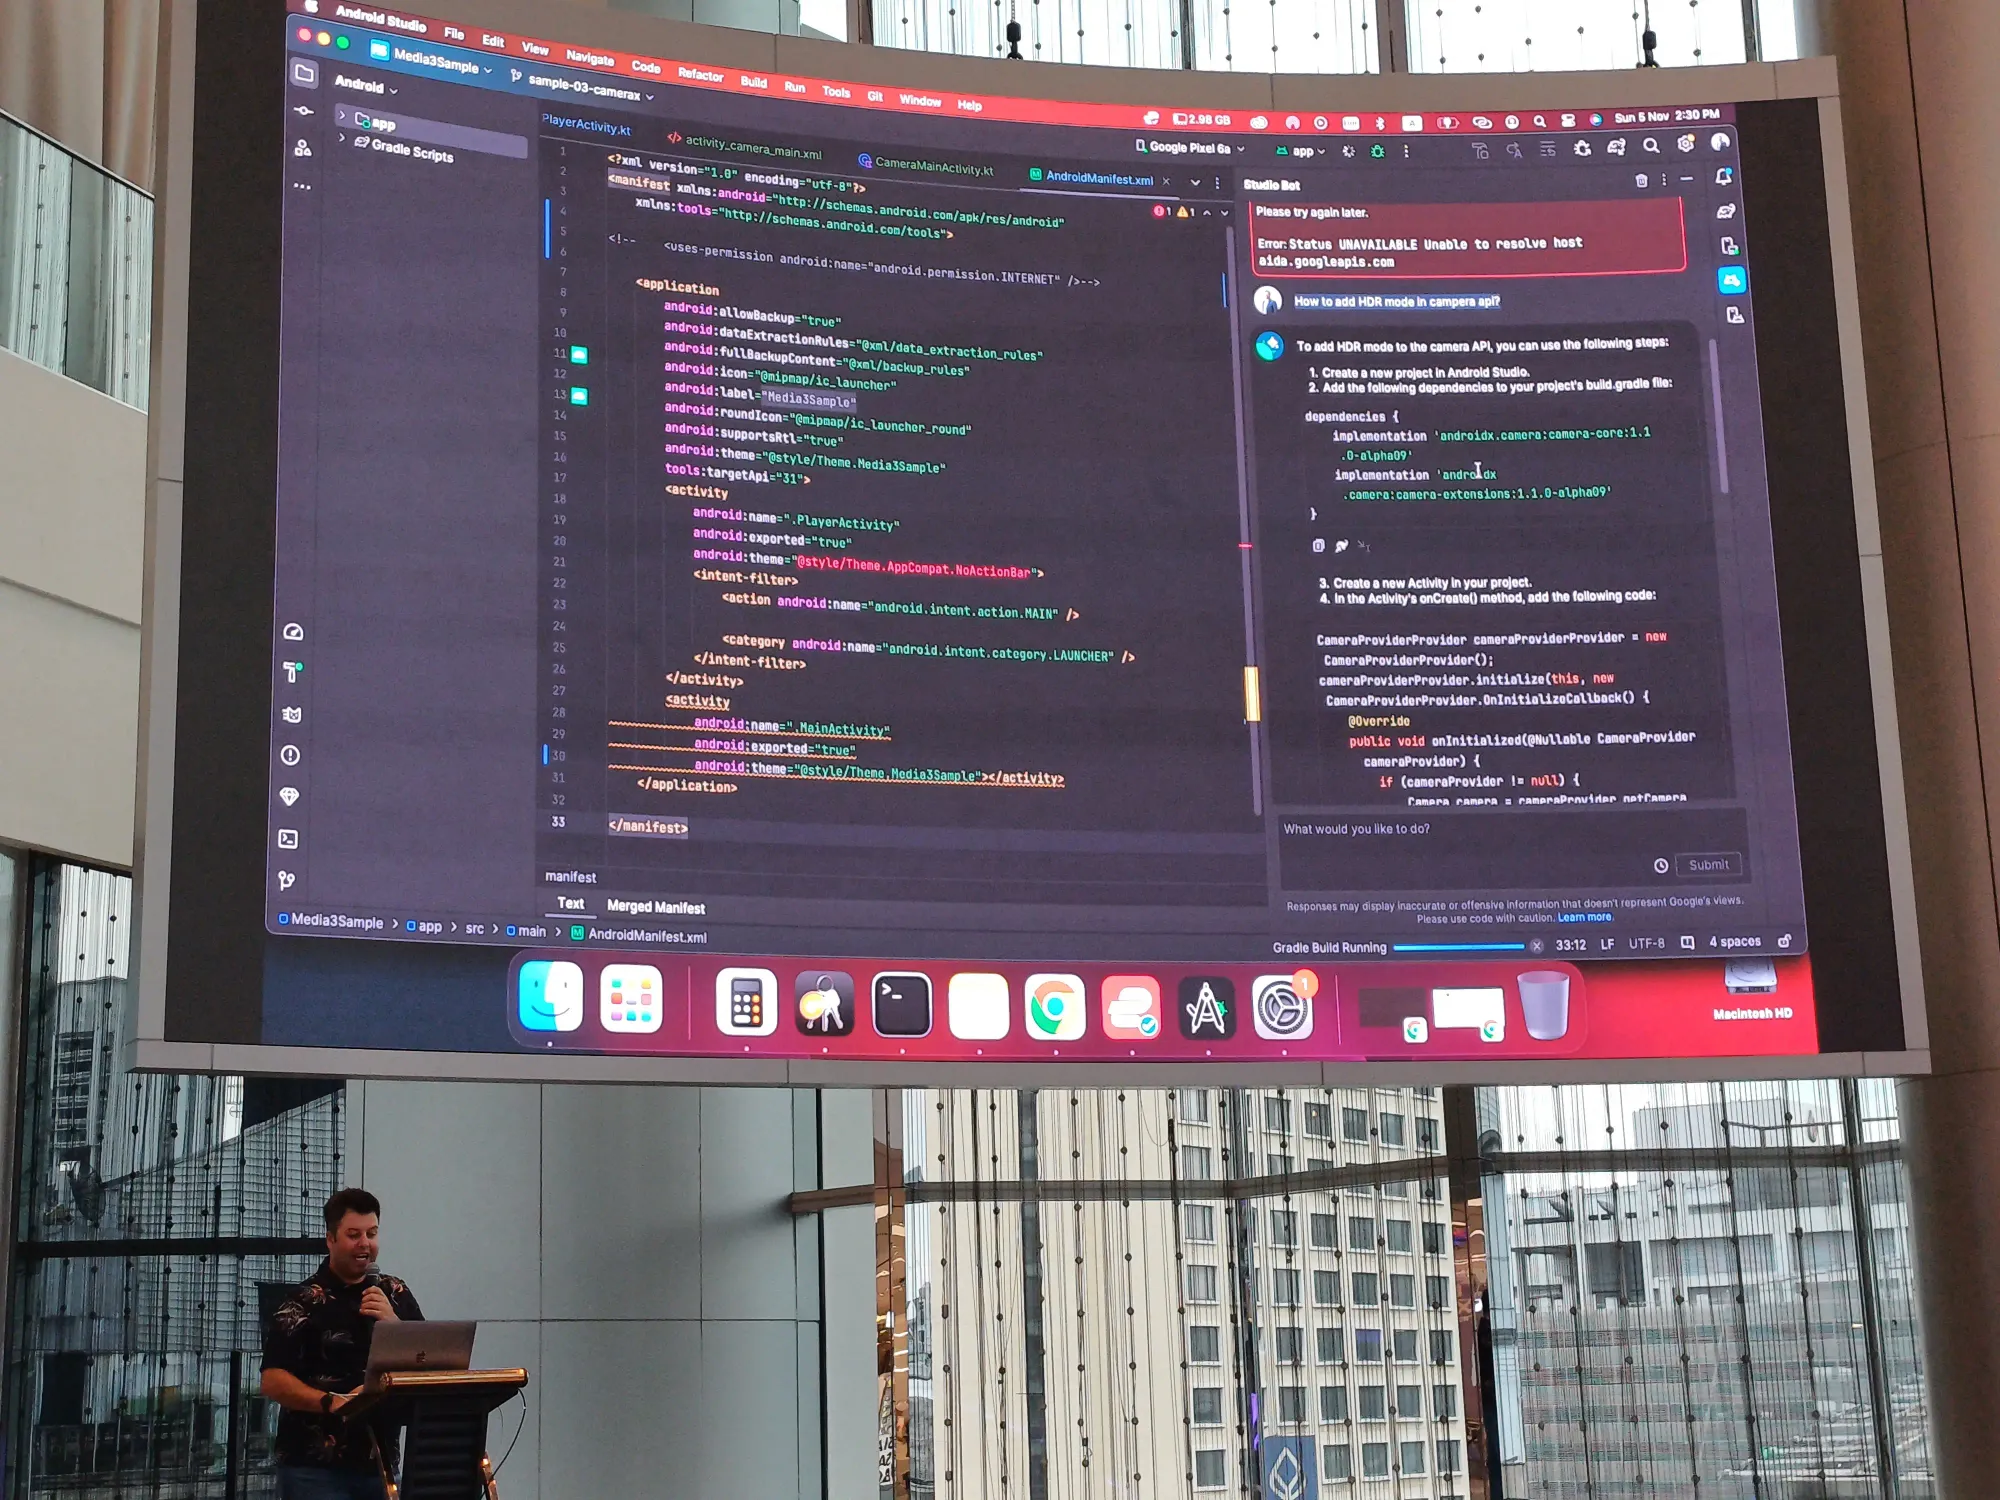
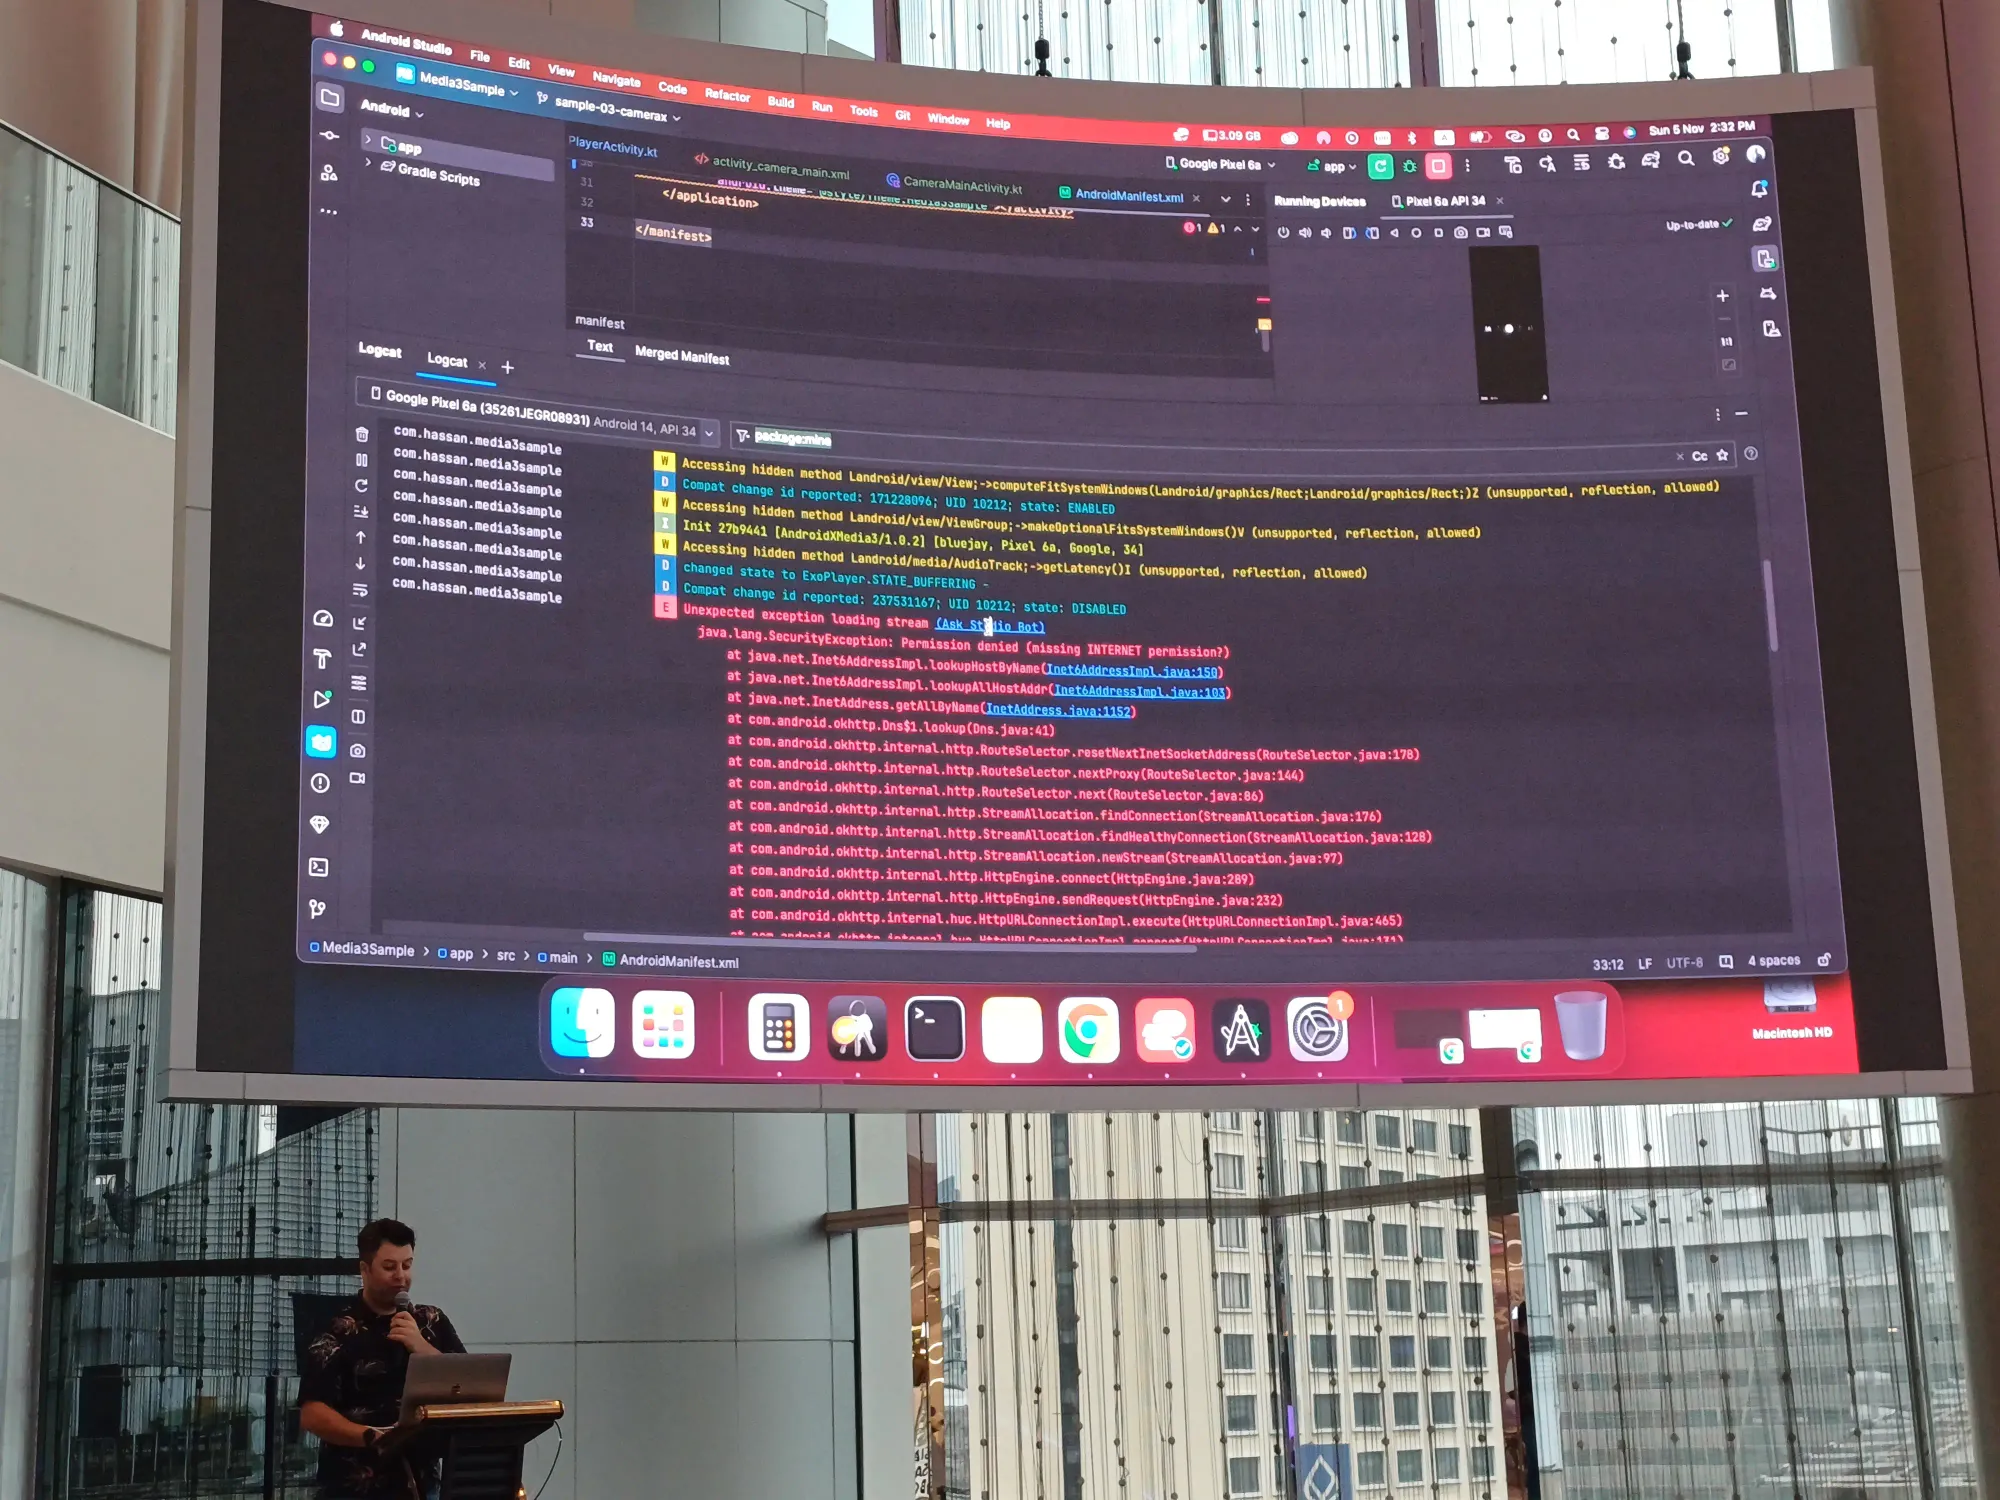
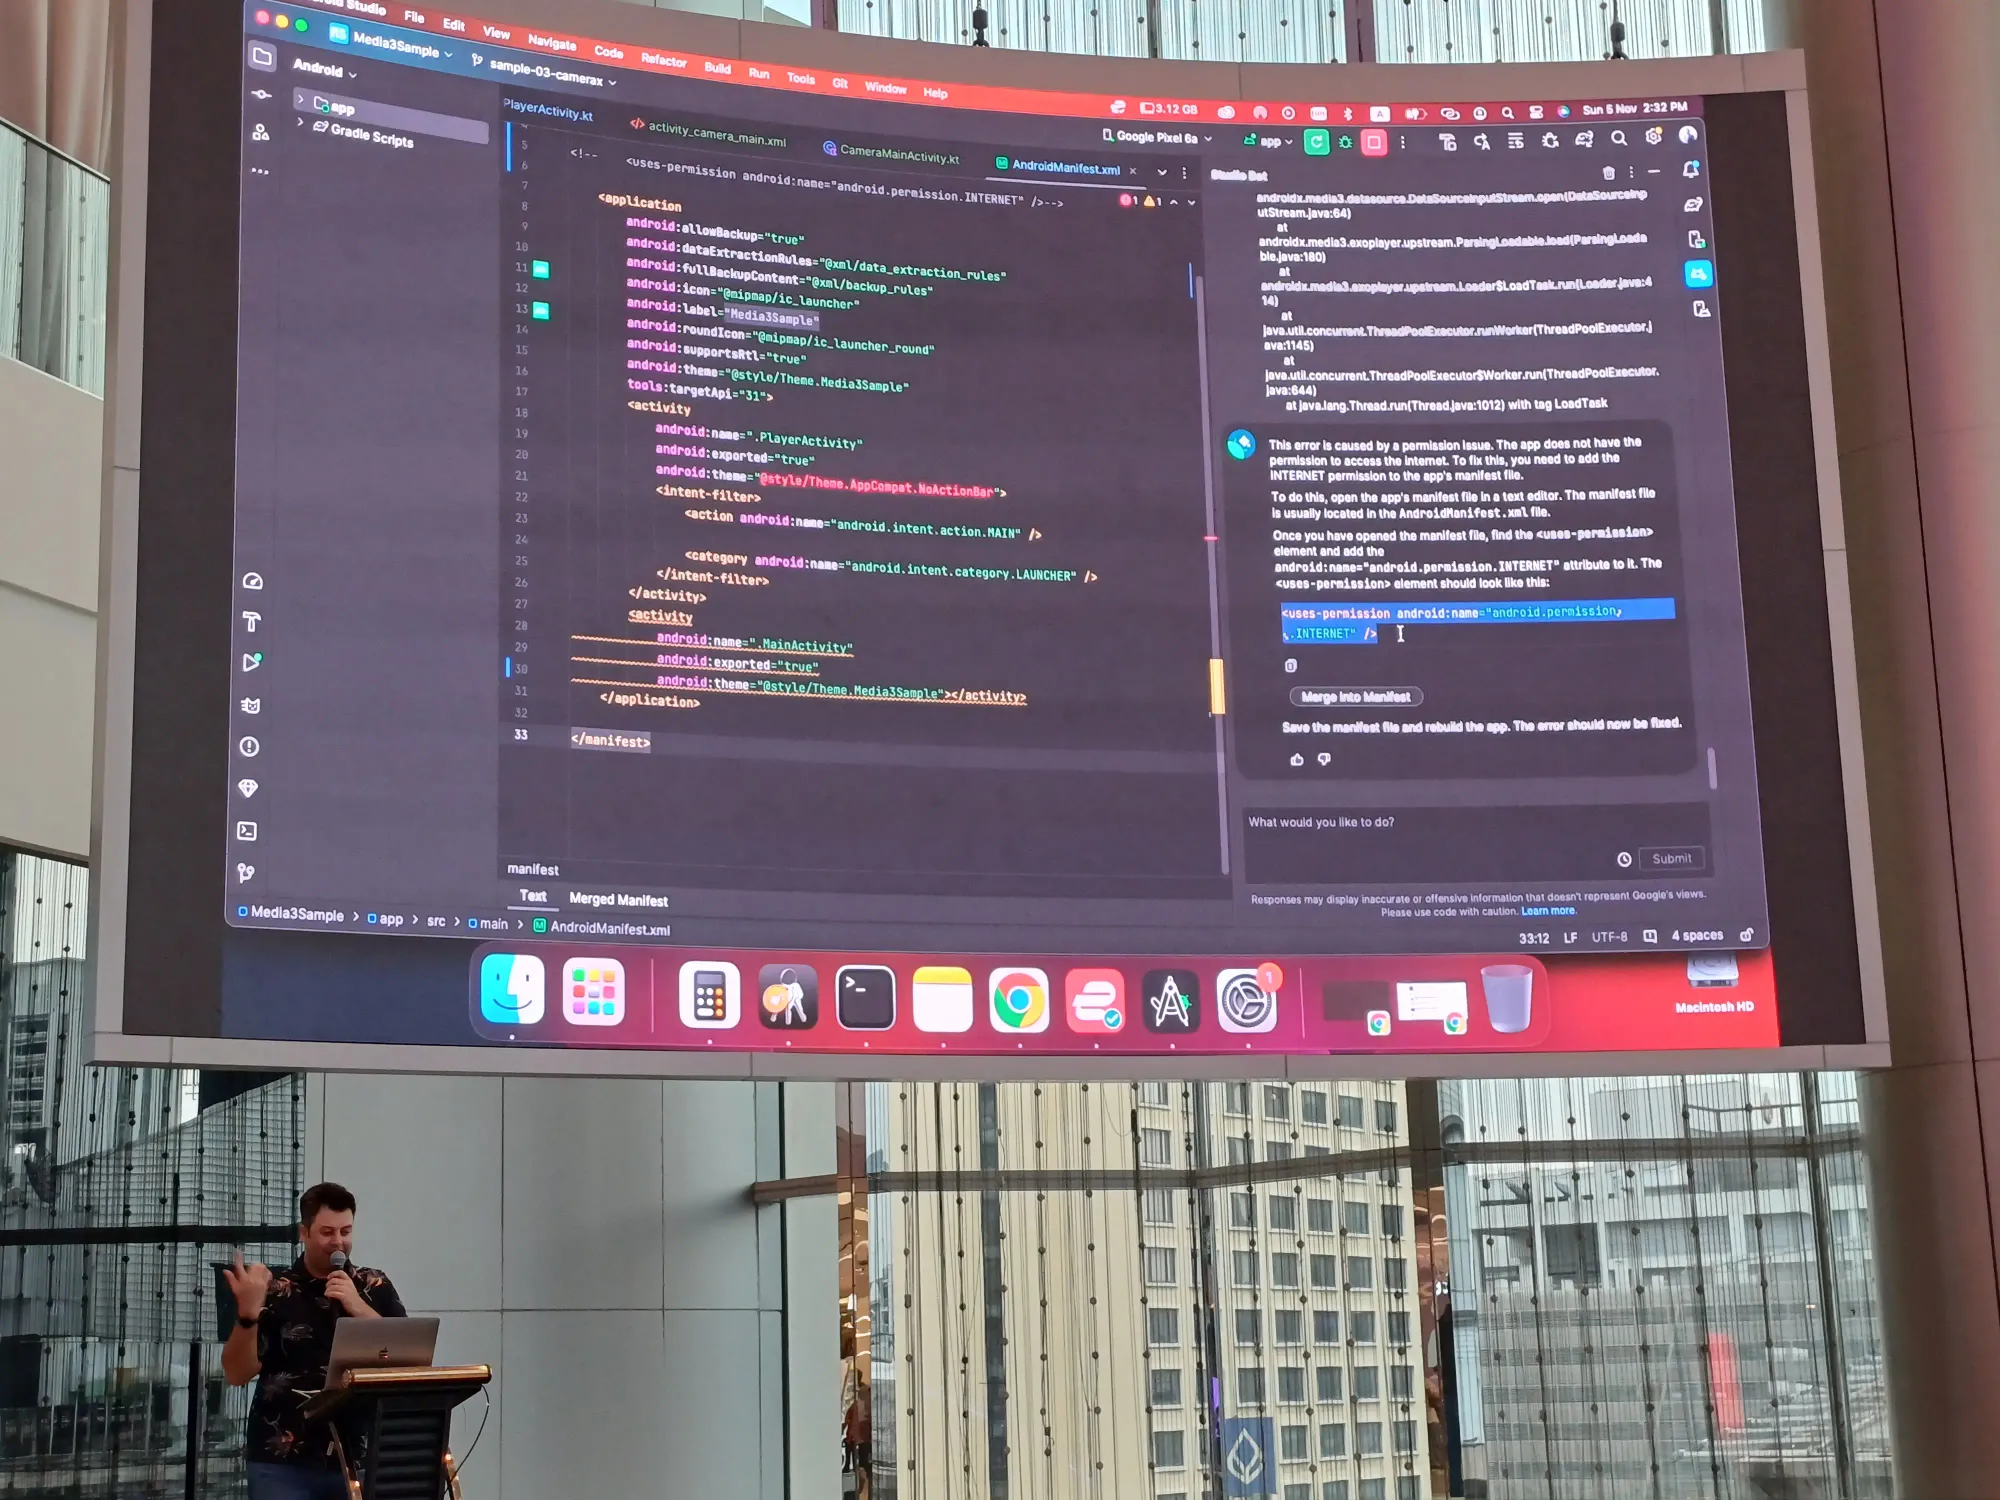
Studio Bot
เป็น feature ที่ยังไม่รองรับประเทศไทยซะที เราสามารถถาม code กับตัว bot ได้ แล้วเรา copy error ไปถามได้ด้วยน้า แล้วก็กด merge ตรงสาเหตุนั้นได้ คุณ speaker เลยเปิดเล่นเป็นบุญตาให้กับ developer ชาวไทย
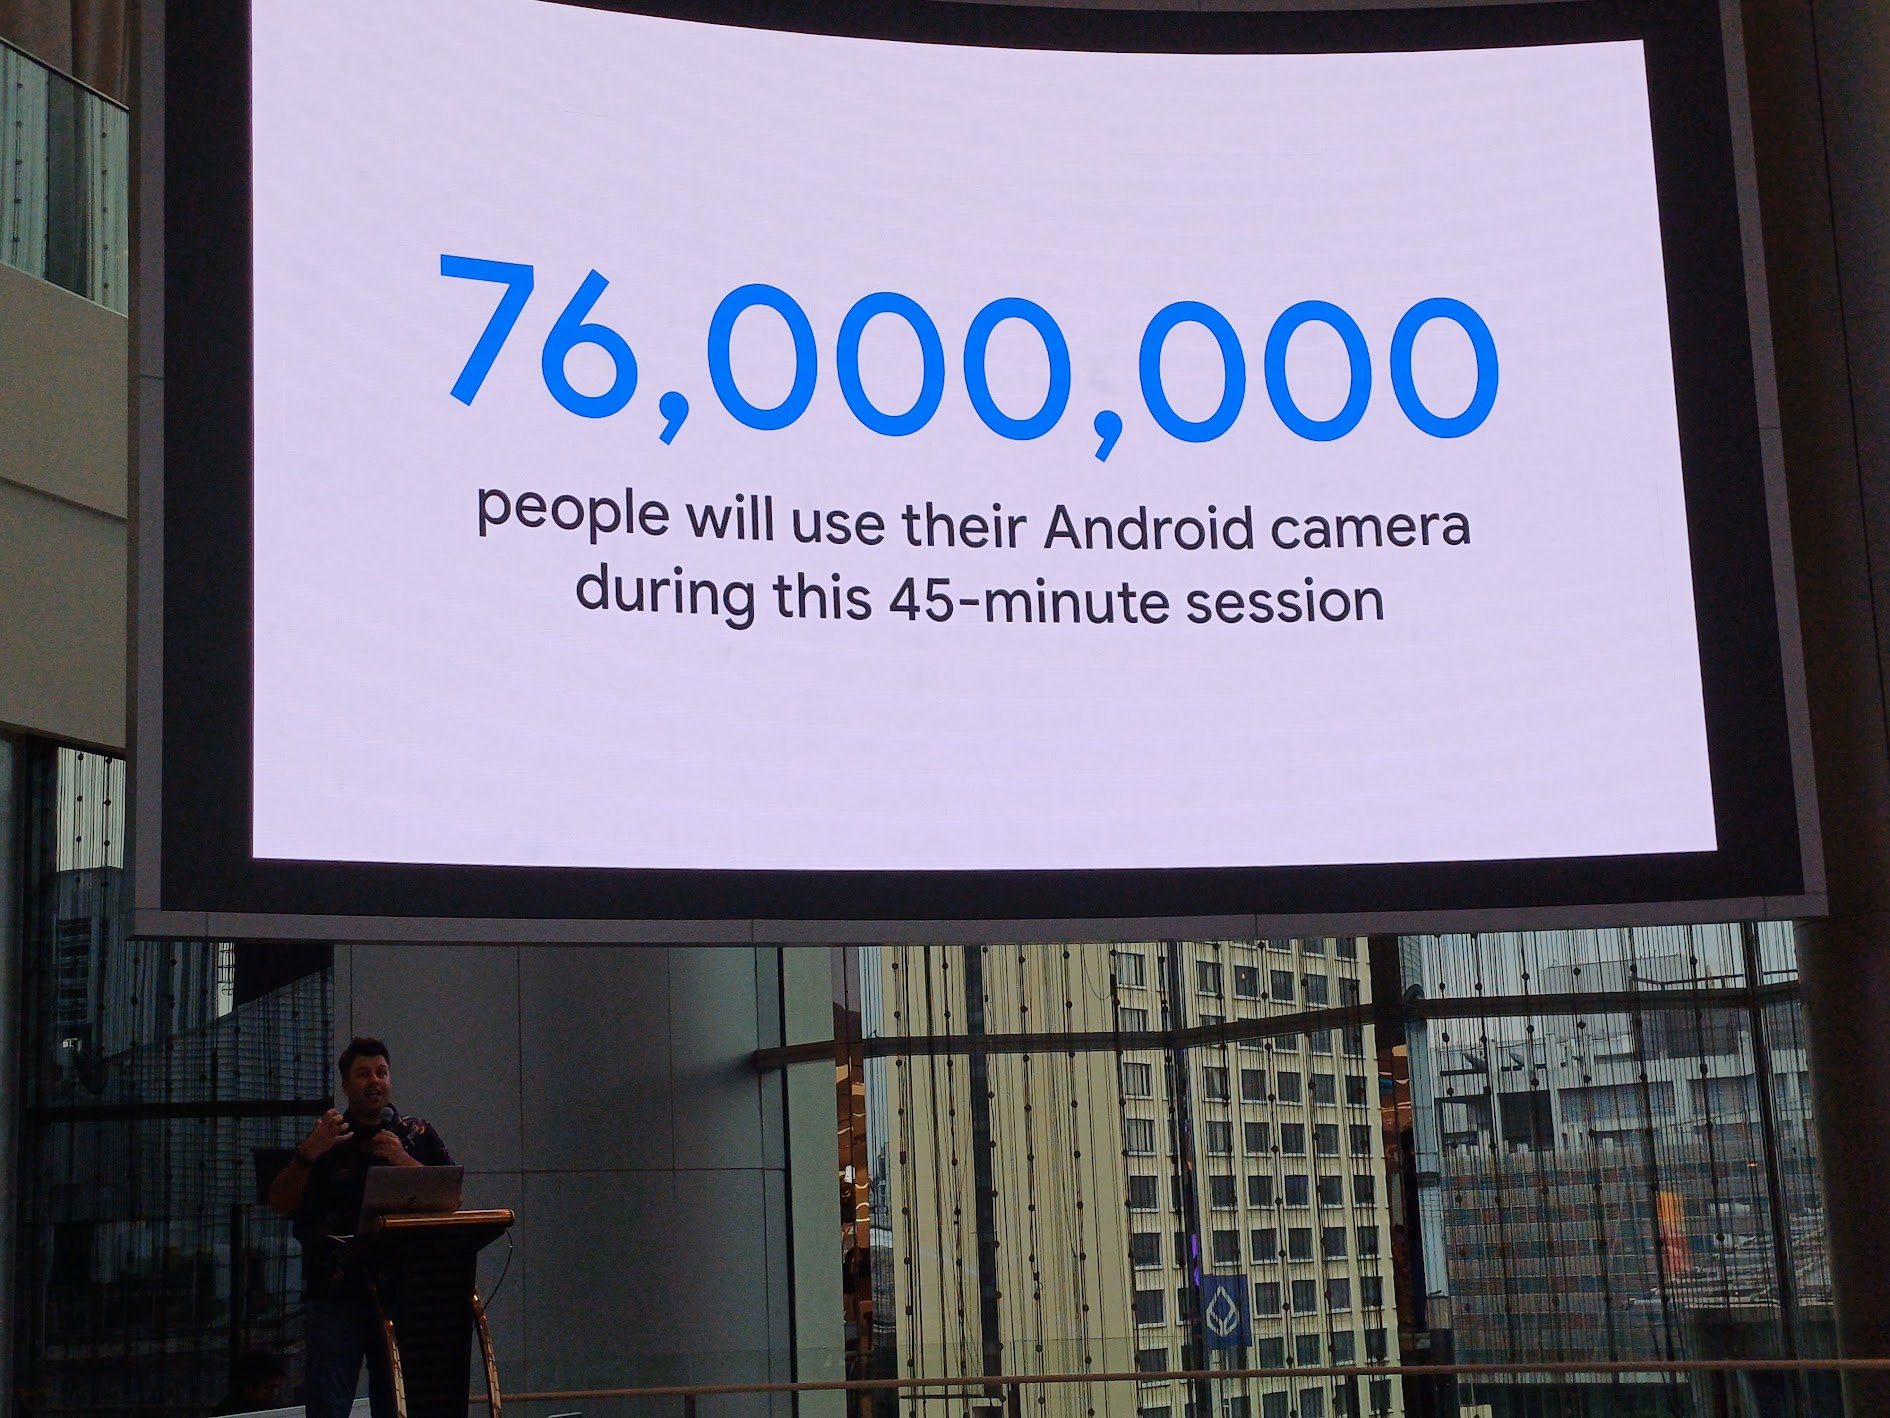
Camera Previews
เห็น stat อันนี้ก็ไม่แน่ใจเลย ว่า 76 ล้านคน ใช้เวลากับกล้องในแต่ละครั้ง 45 นาทีอ่ะ
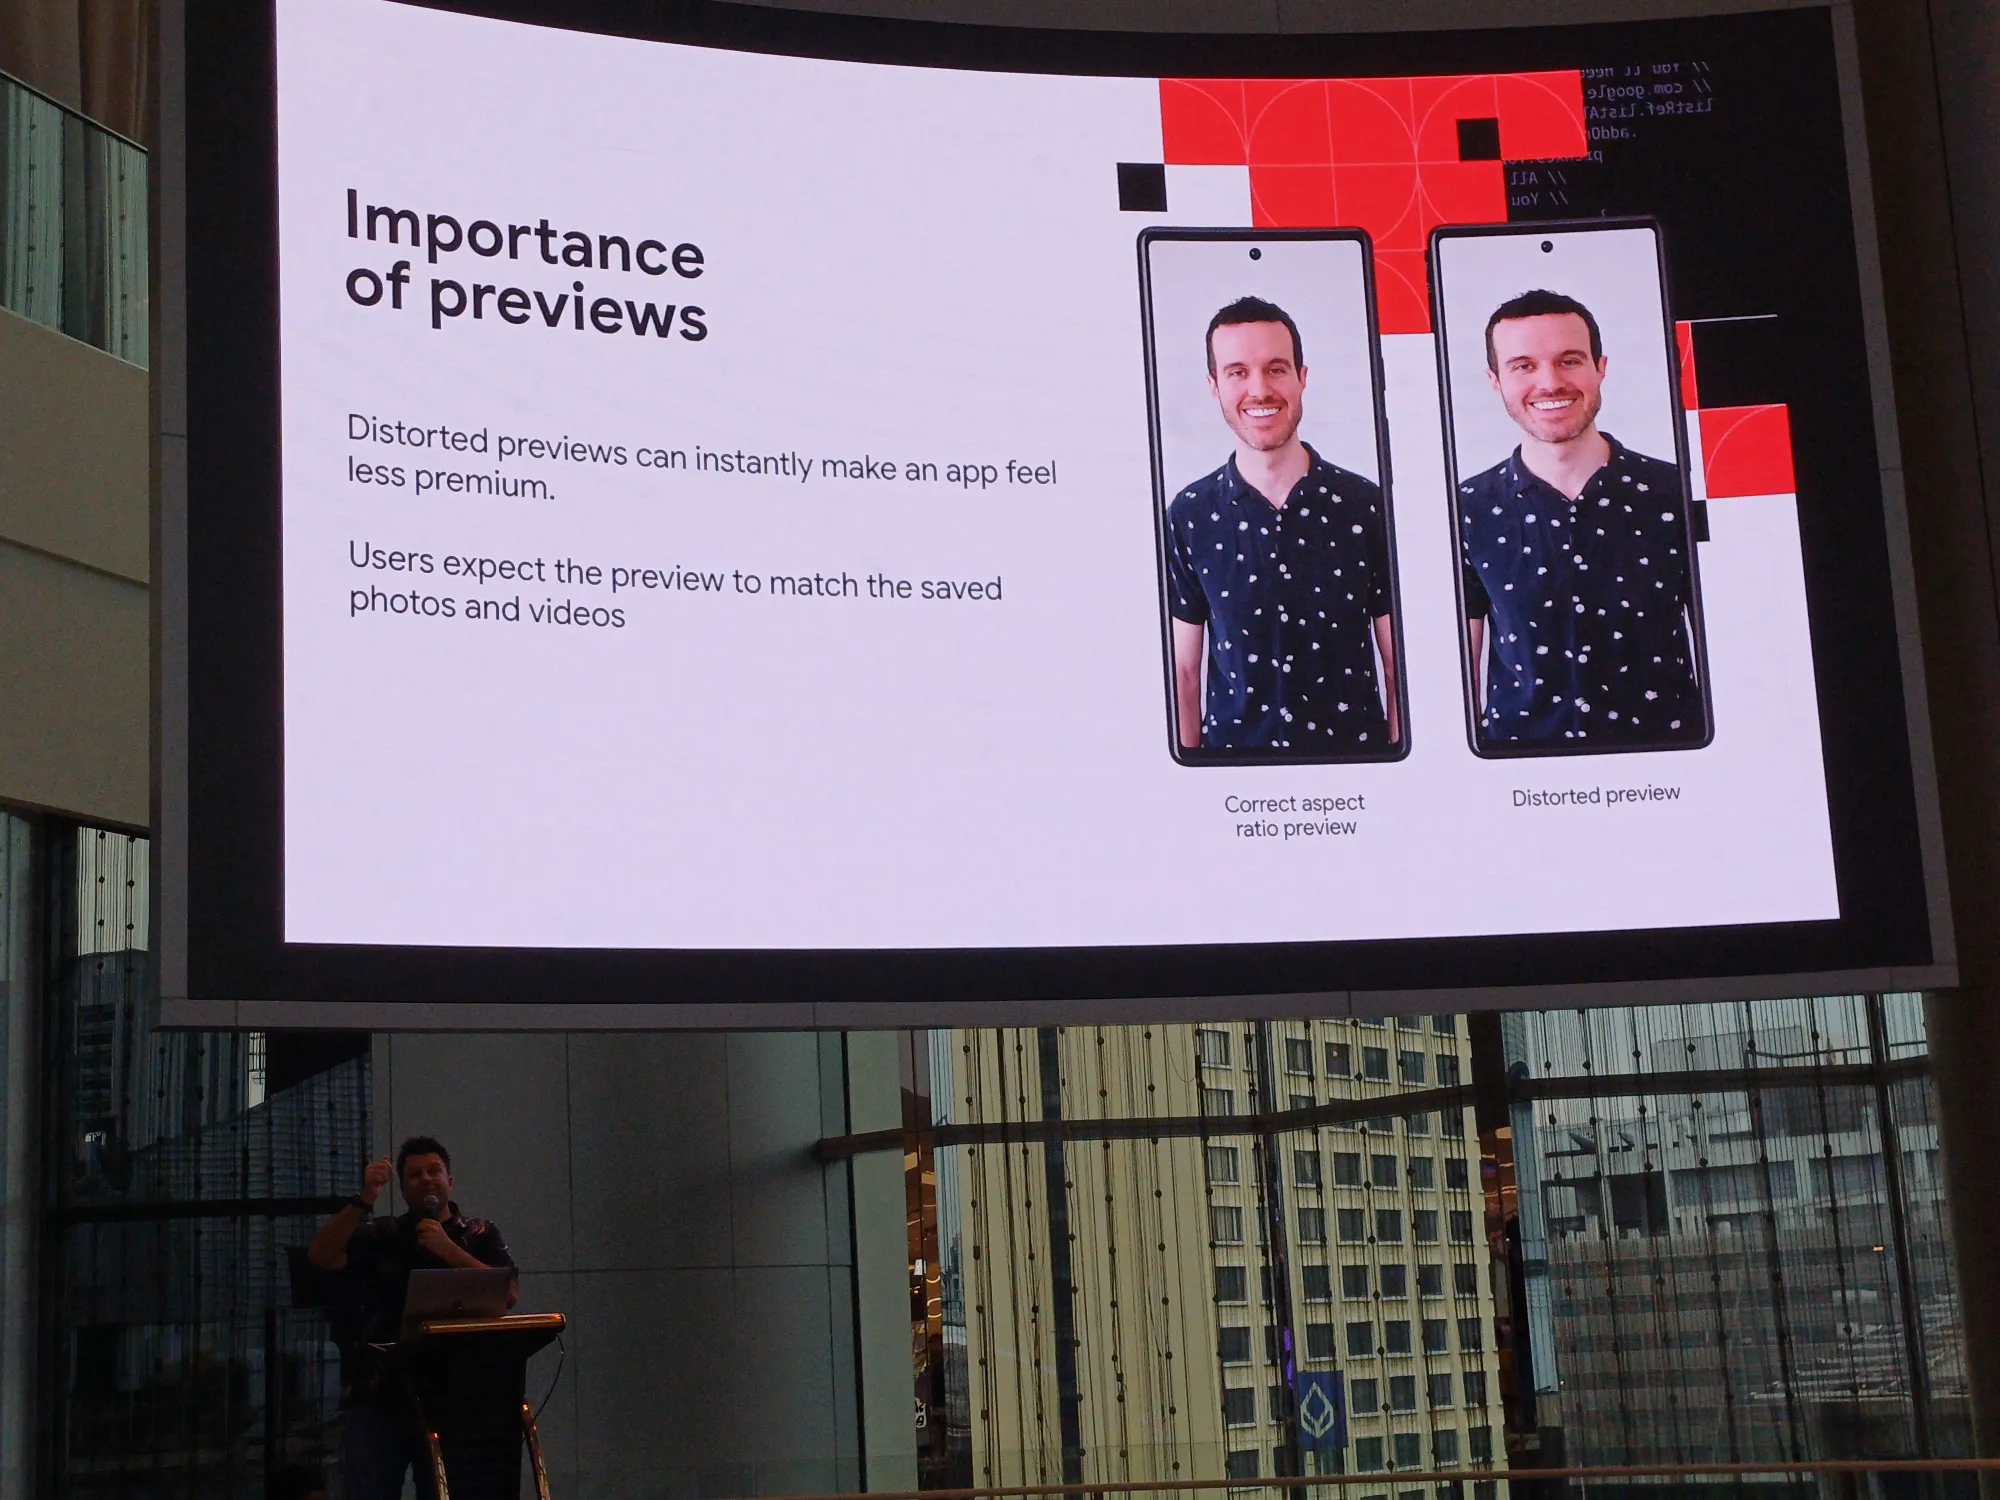
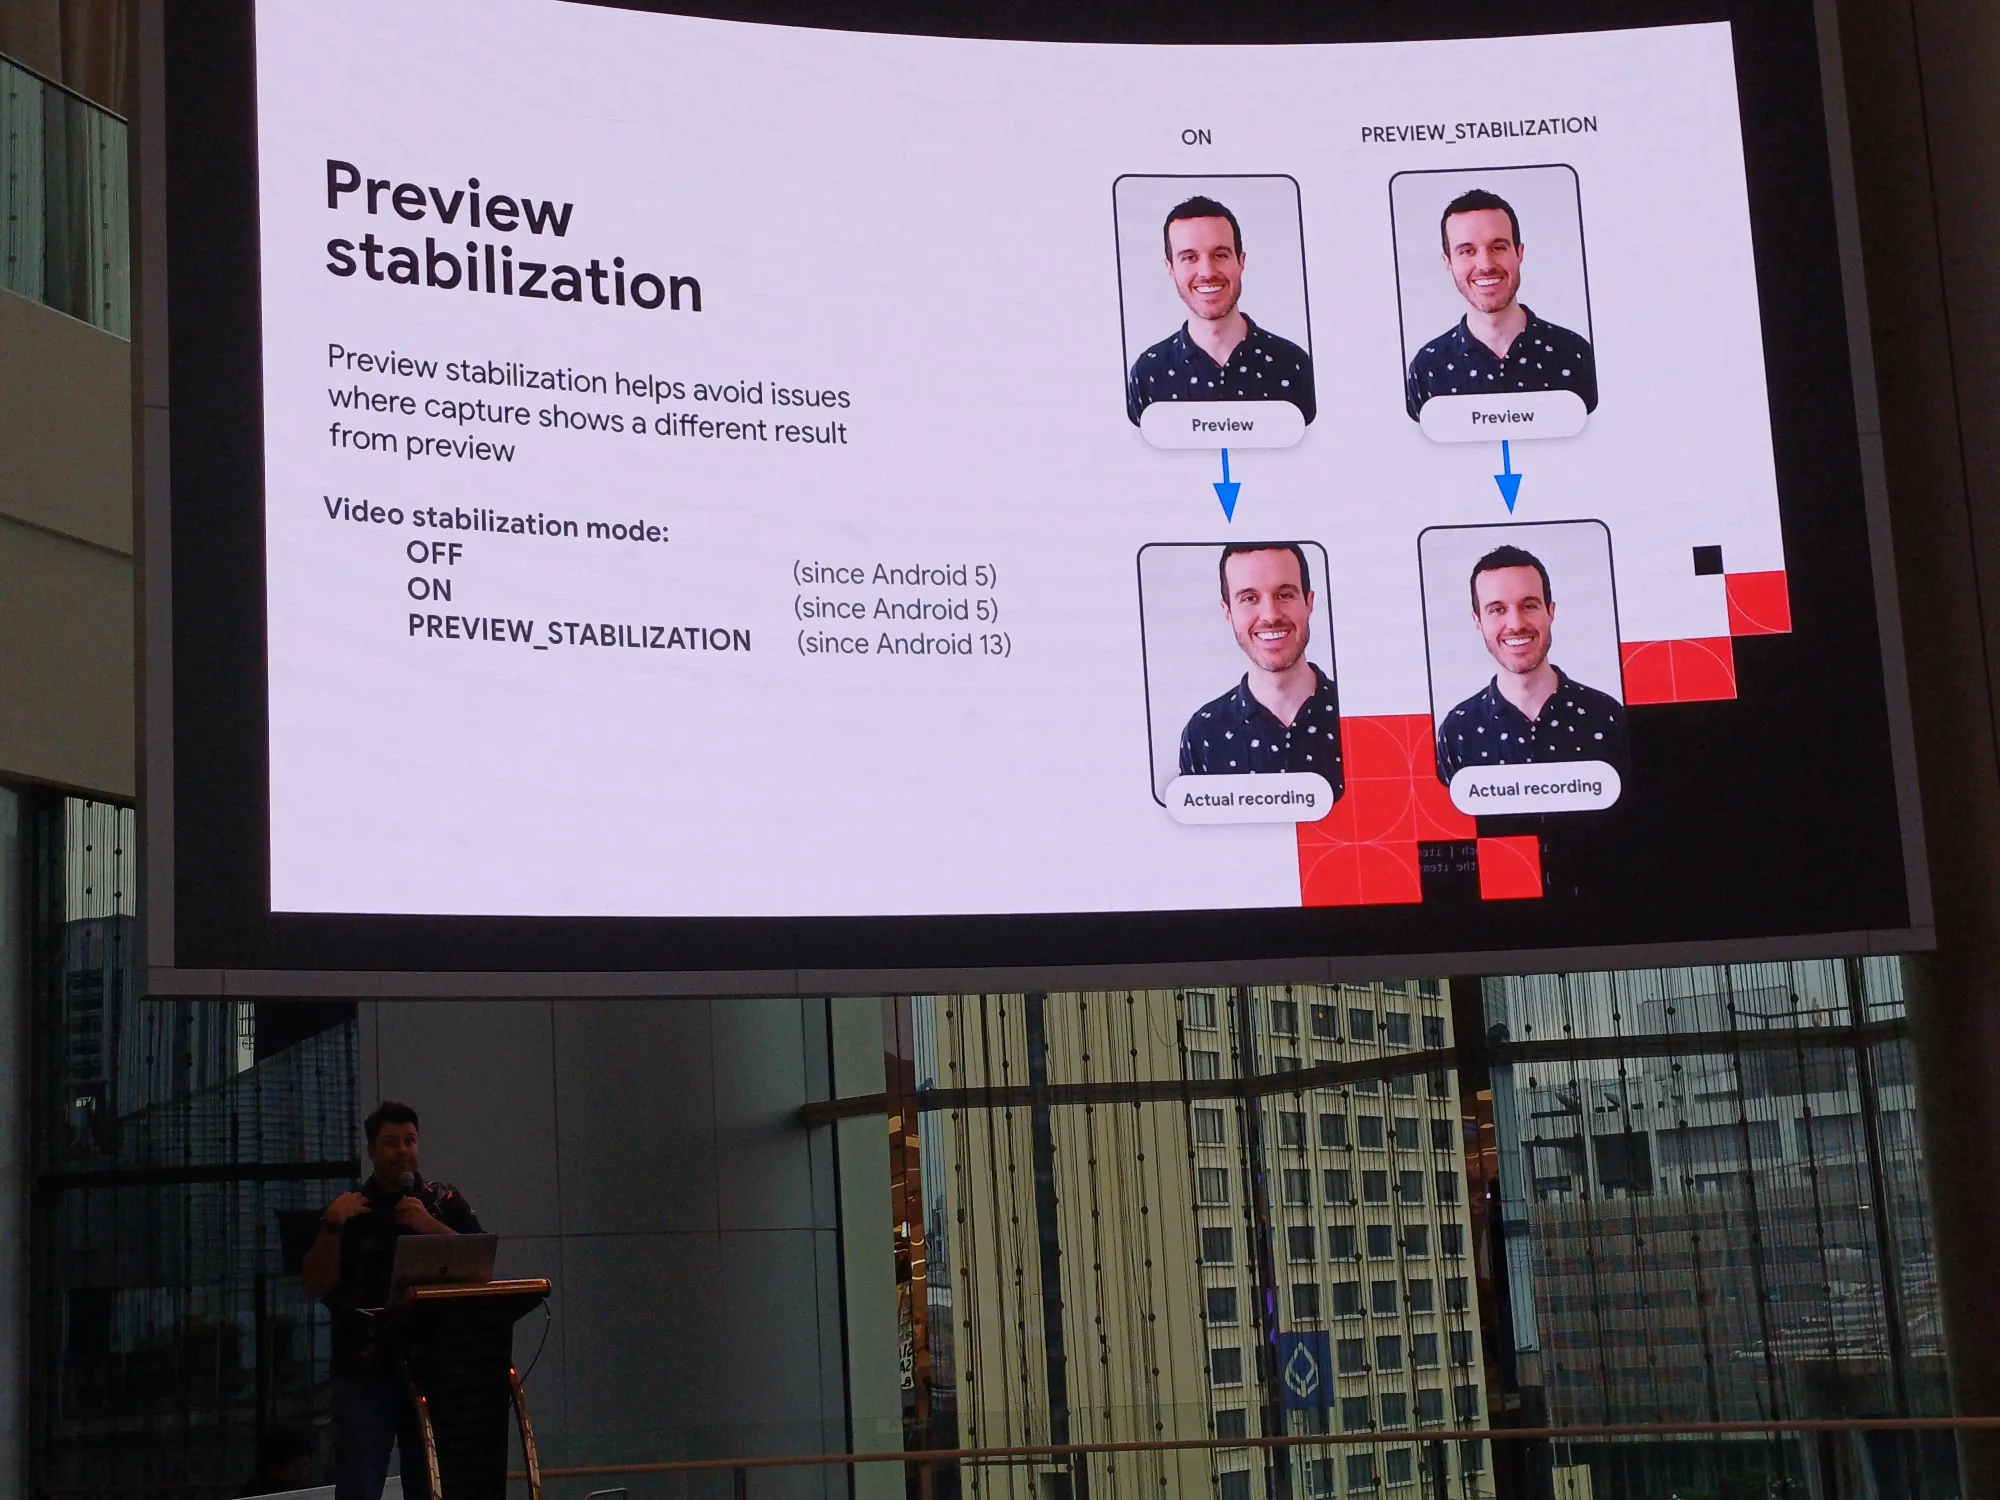
- preview จริงเราบวม ดังนั้นทำให้ preview กับของจริงตรงกัน ด้วย stabilization mode
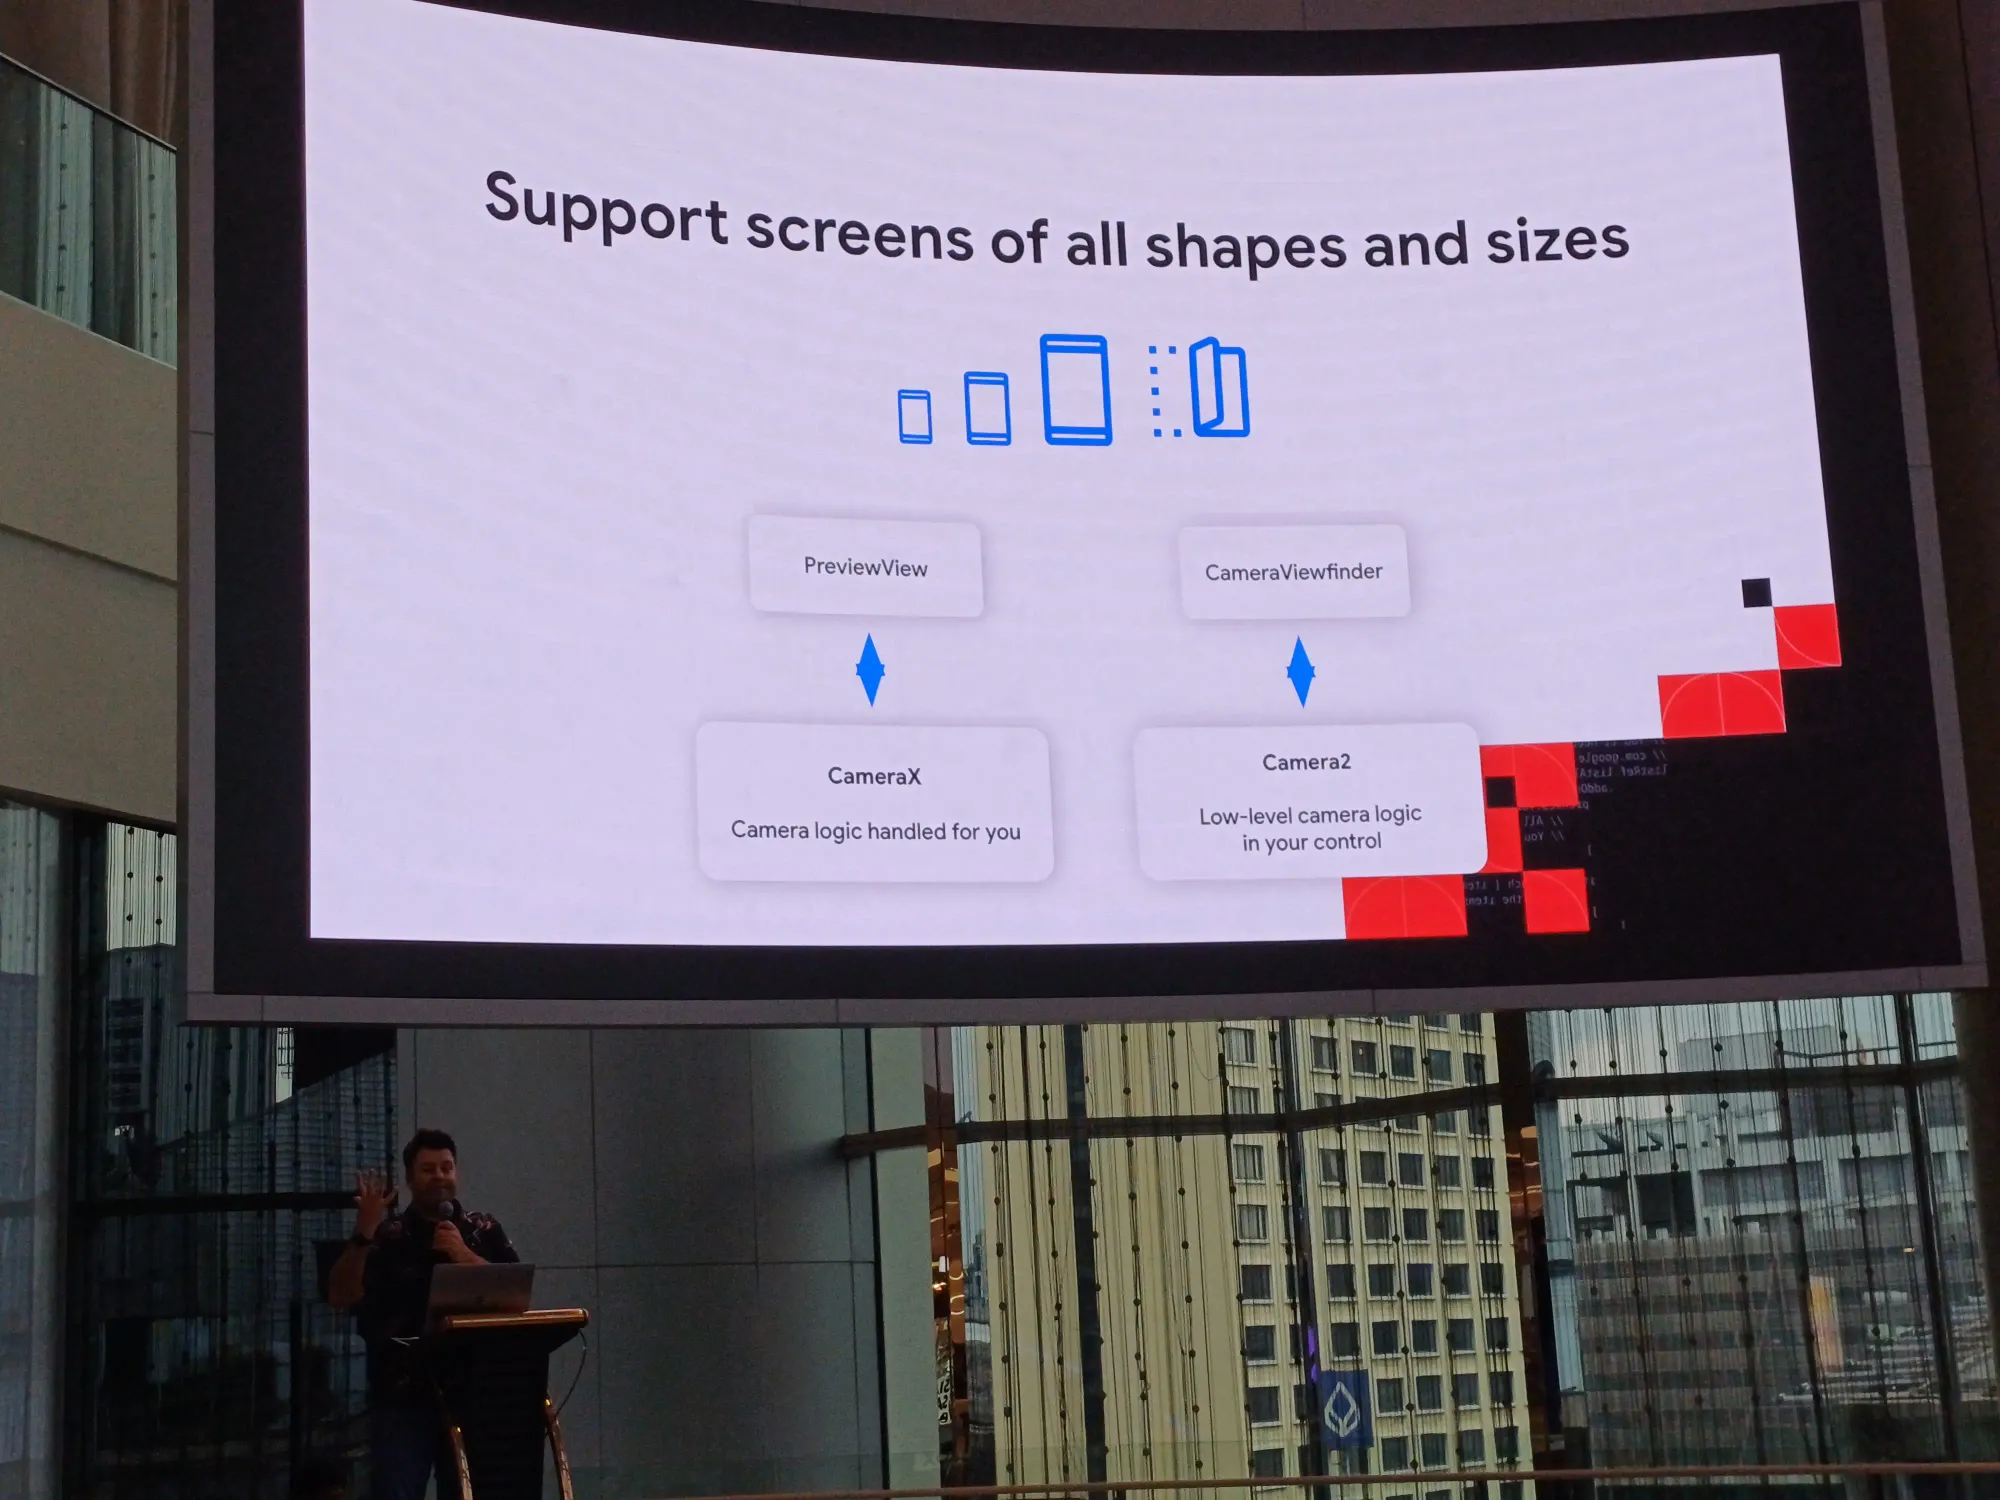
- ทำให้ feature กล้อง support ทุก screen
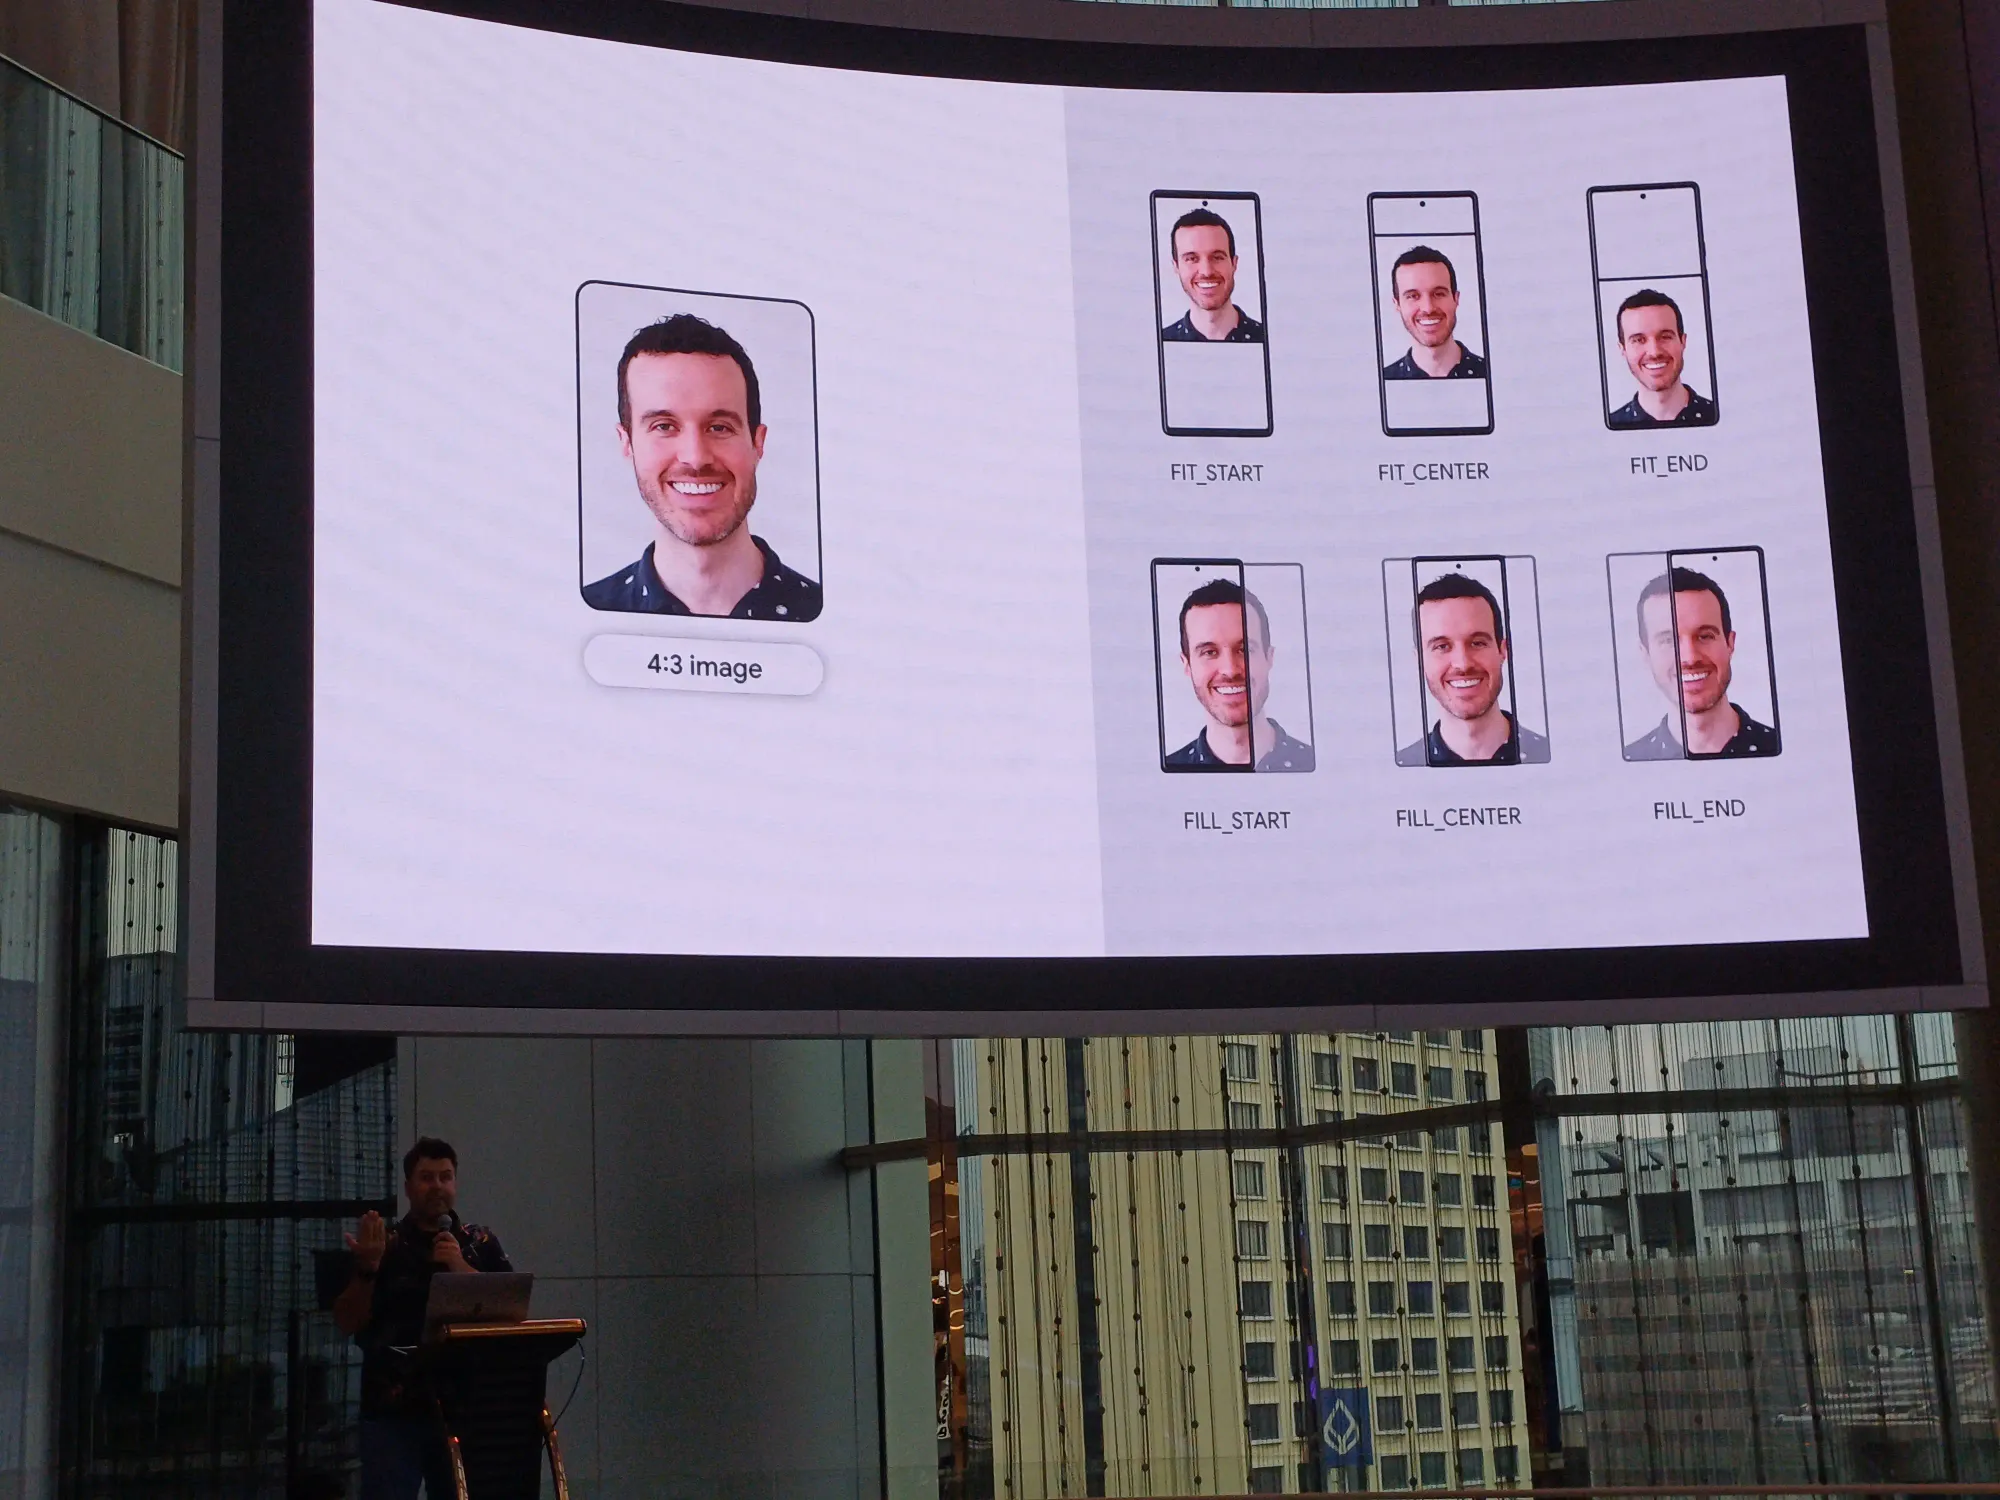
- Foldable ออกแบบให้ user สามารถ selfie ได้ดีขึ้น
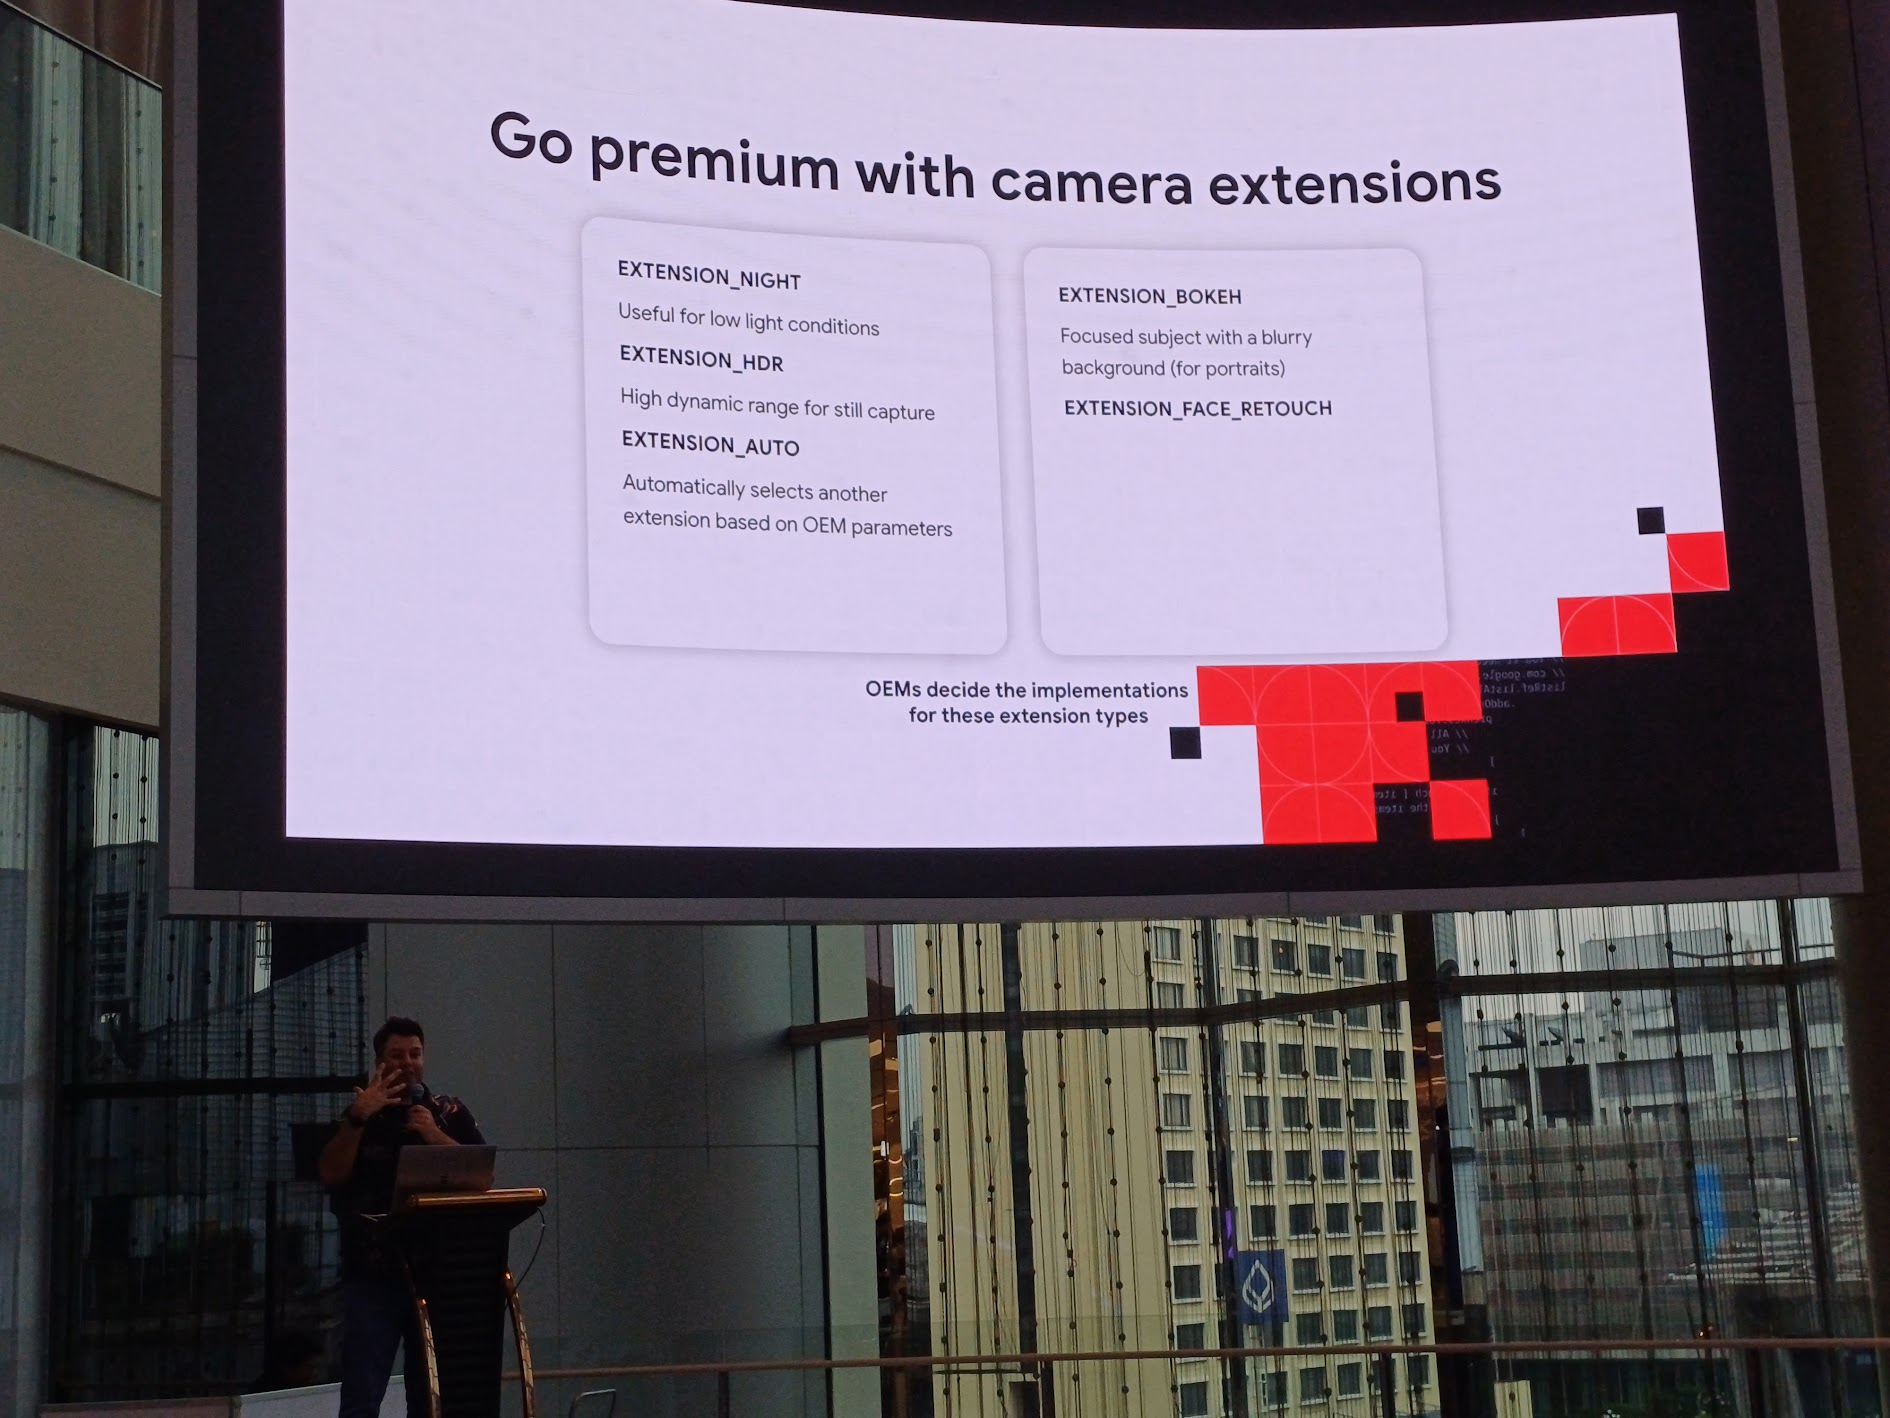
- ใส่ camera extension ให้ go premium
picture-in-picture เป็น UX ที่ดี สามารถเล่น media บน background ได้
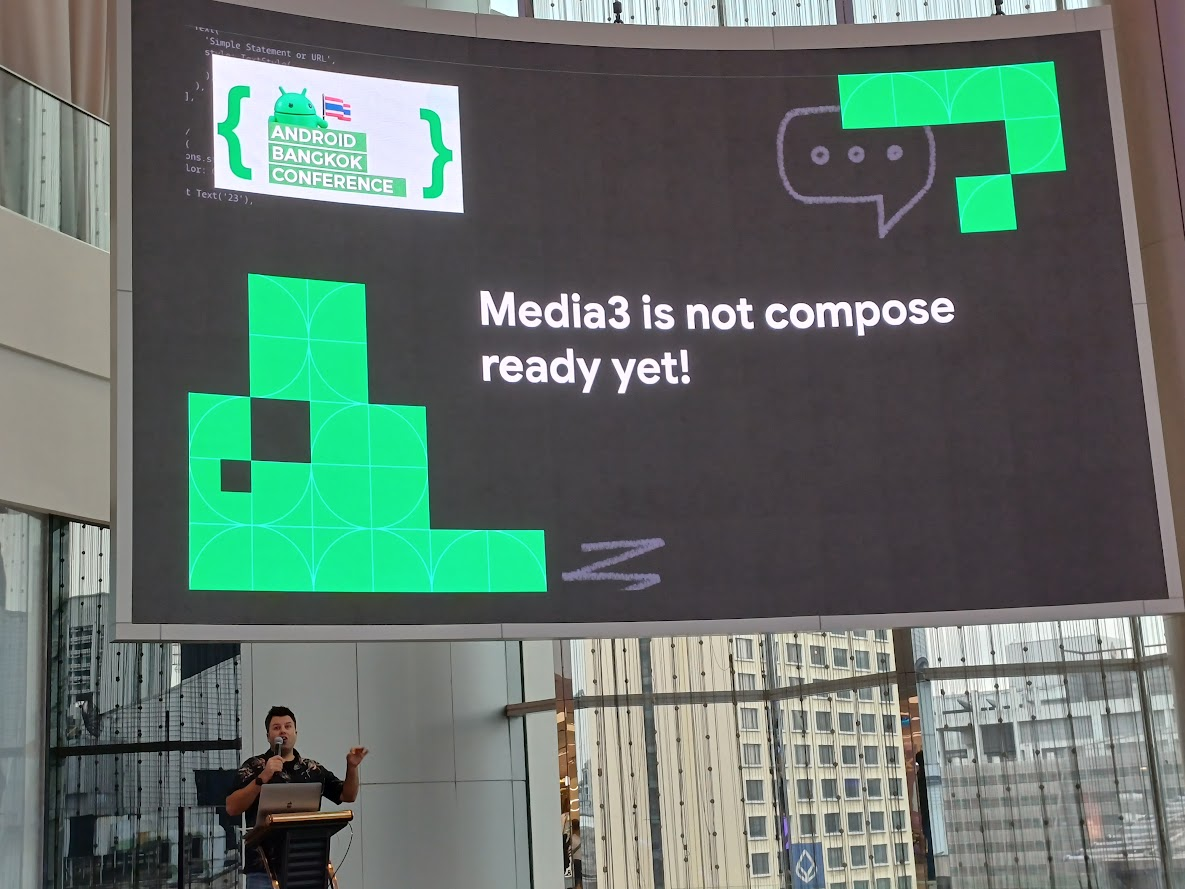
ตอนนี้ media3 ยังไม่พร้อมใช้ใน Compose ให้ติดตามกันต่อไป
อันนี้สไลด์ของ speaker ซึ่งเขาให้เรา scan ช่วงต้น session เลย

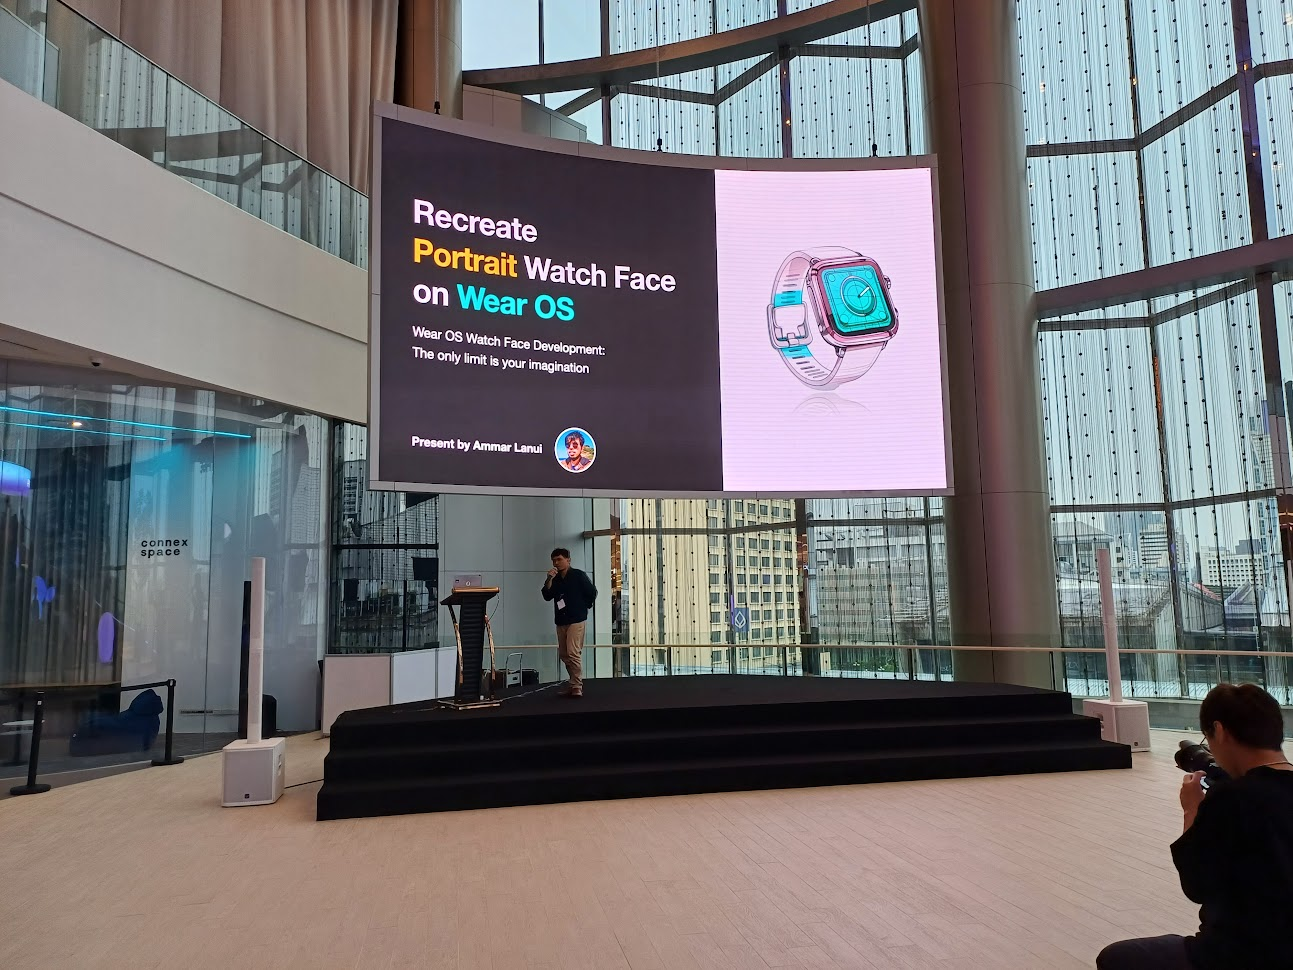
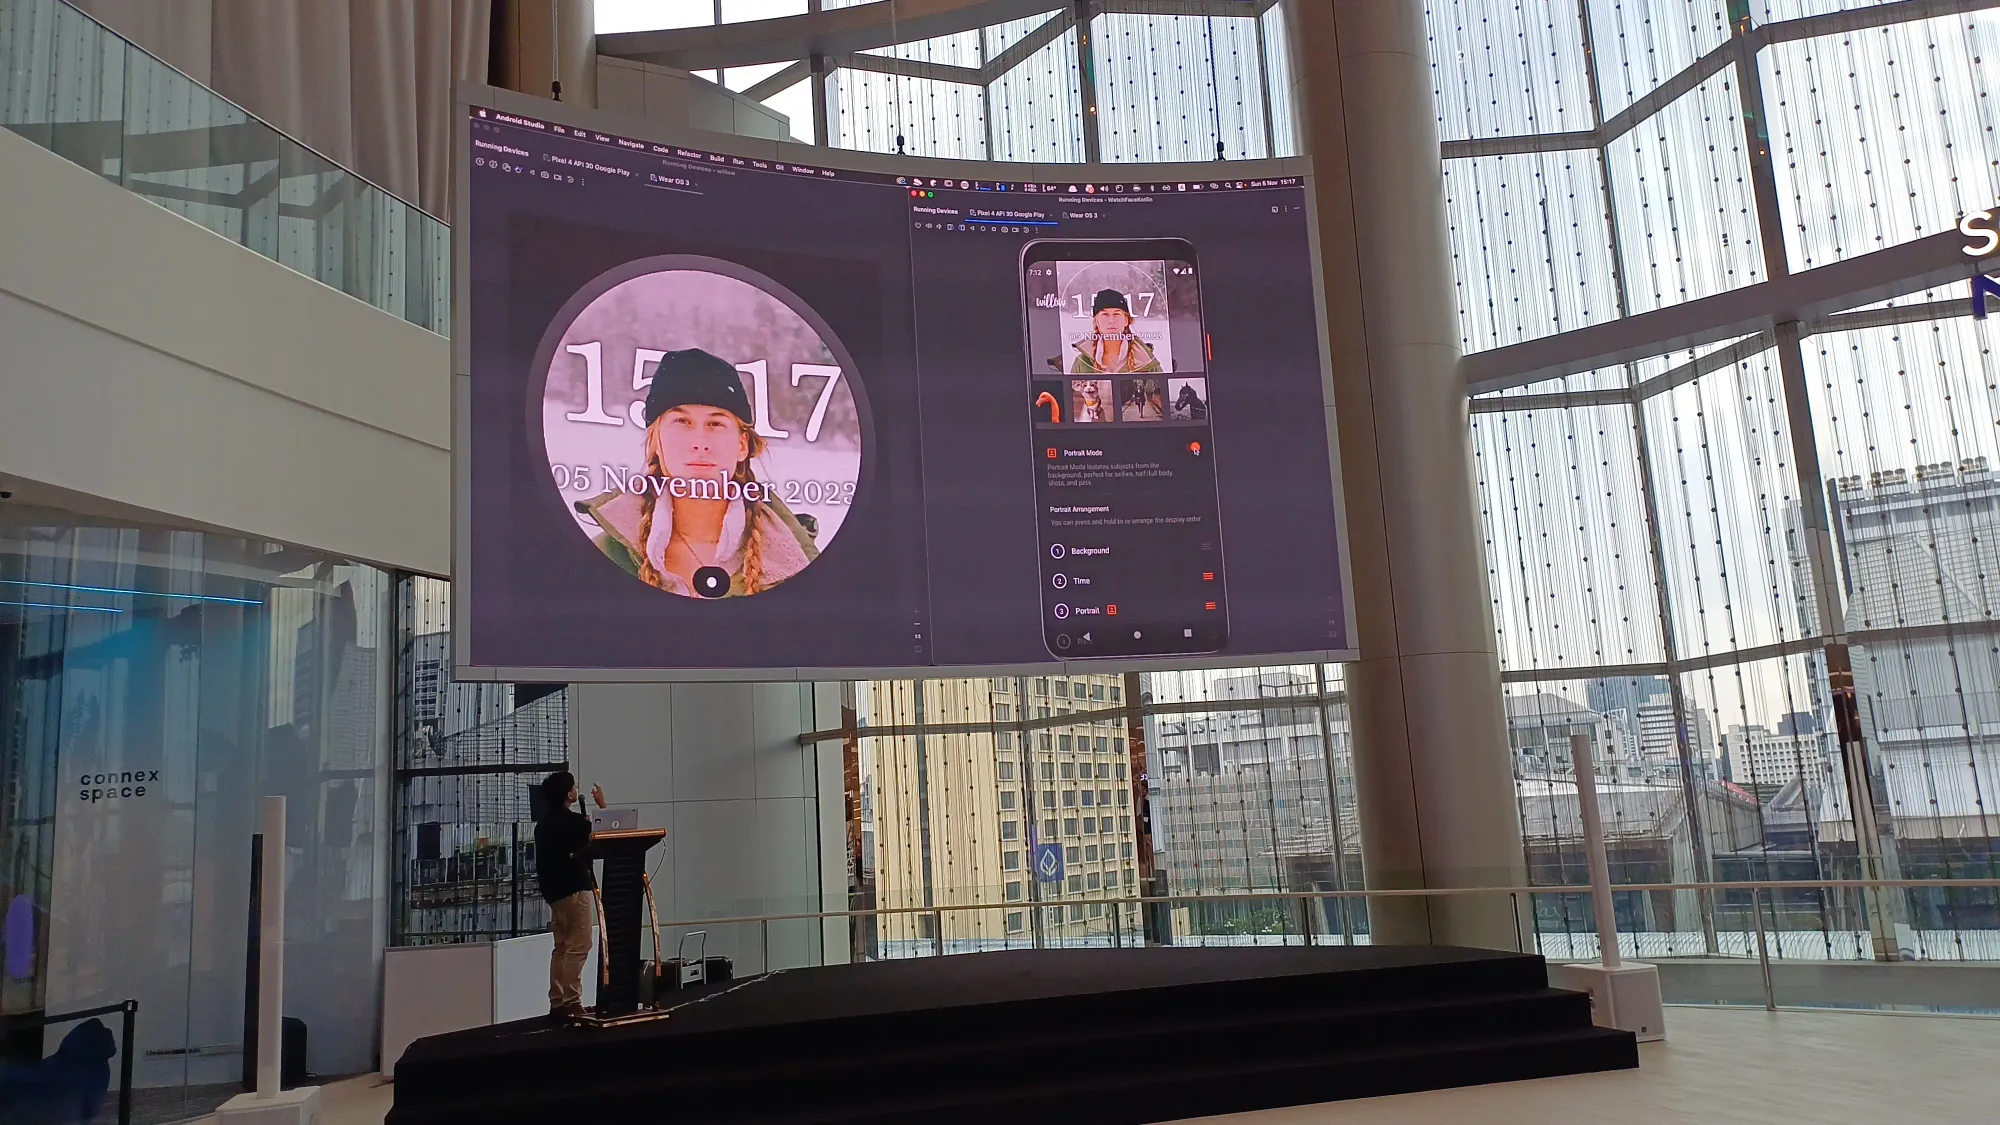
Recreate Portrait Watch Face on Wear OS - Ammar Lanui
อันนี้ฟังสนุกดี คือเป็นการทำ portrait watch face เอารูปไปใส่ในอุปกรณ์ Wear OS ได้รับแรงบันดาลใจจาก Apple Watch แล้วทำได้ไหม ต้องทำยังไงบ้าง ไปดูกัน
speaker แนะนำตัว เขาเป็นผู้มีประสบการณ์ด้าน Wear OS มานานมาก ๆ
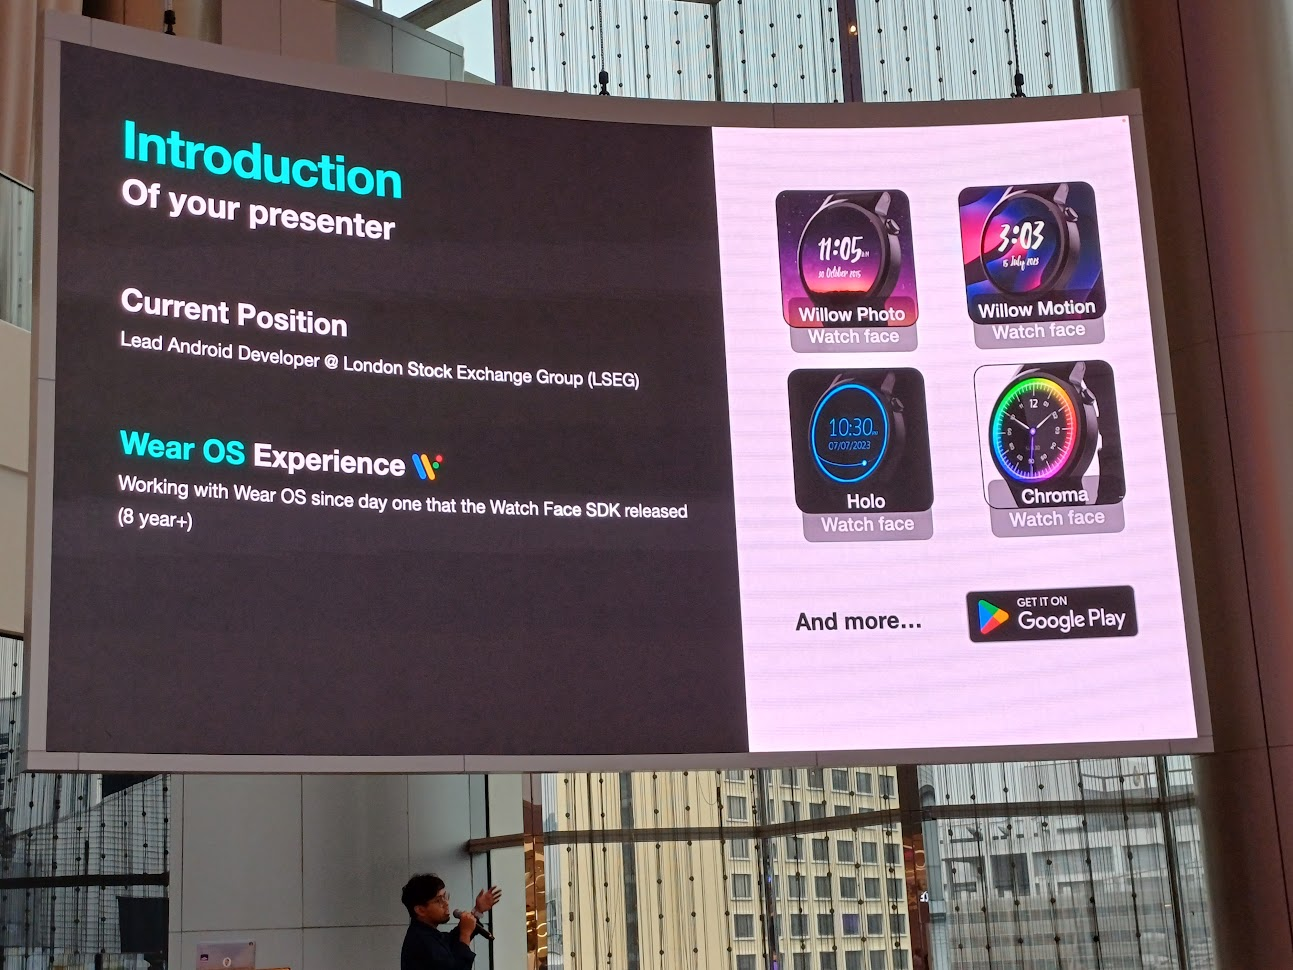
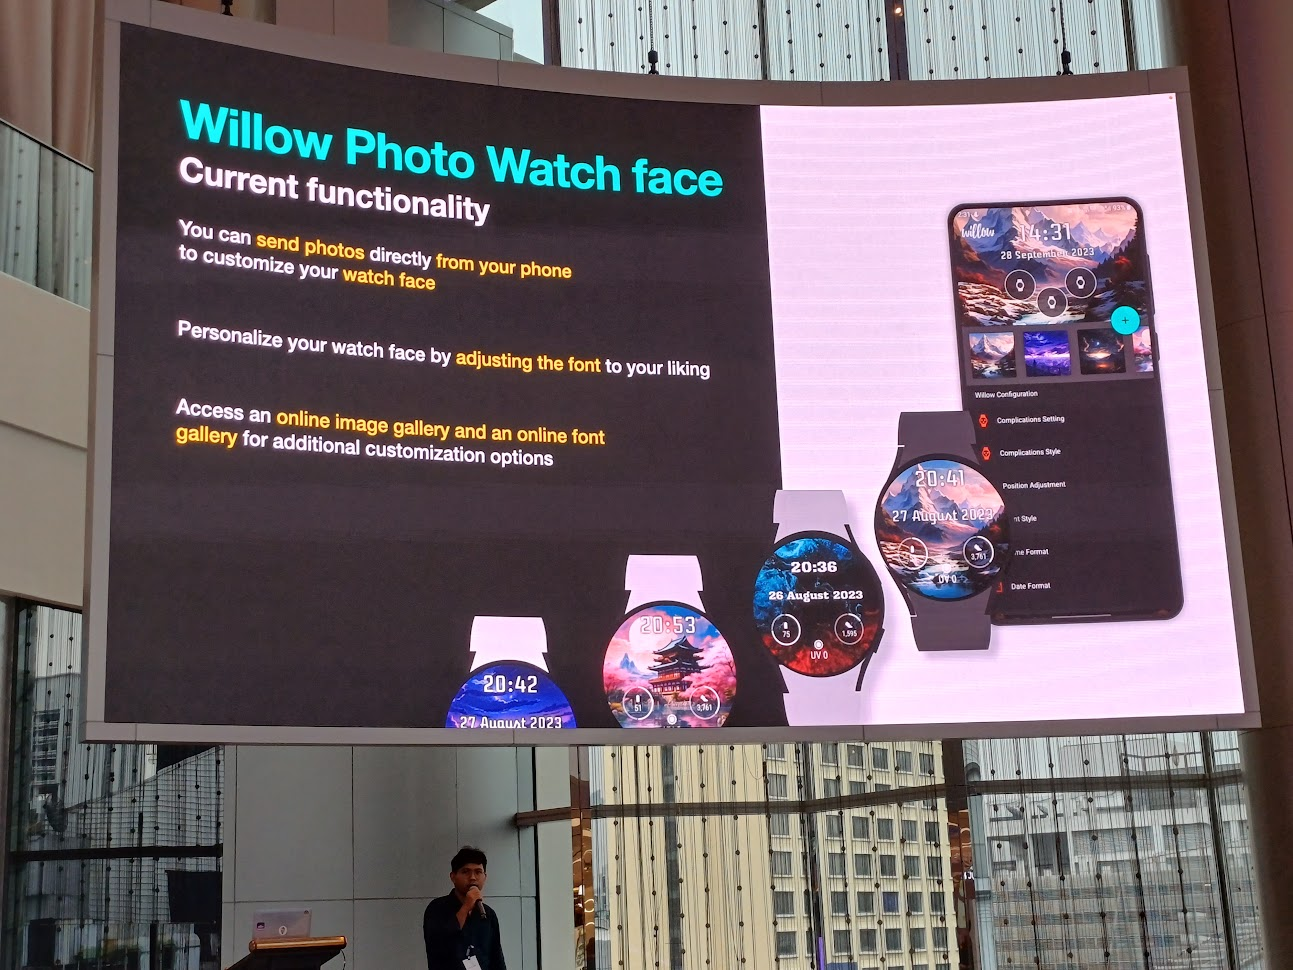
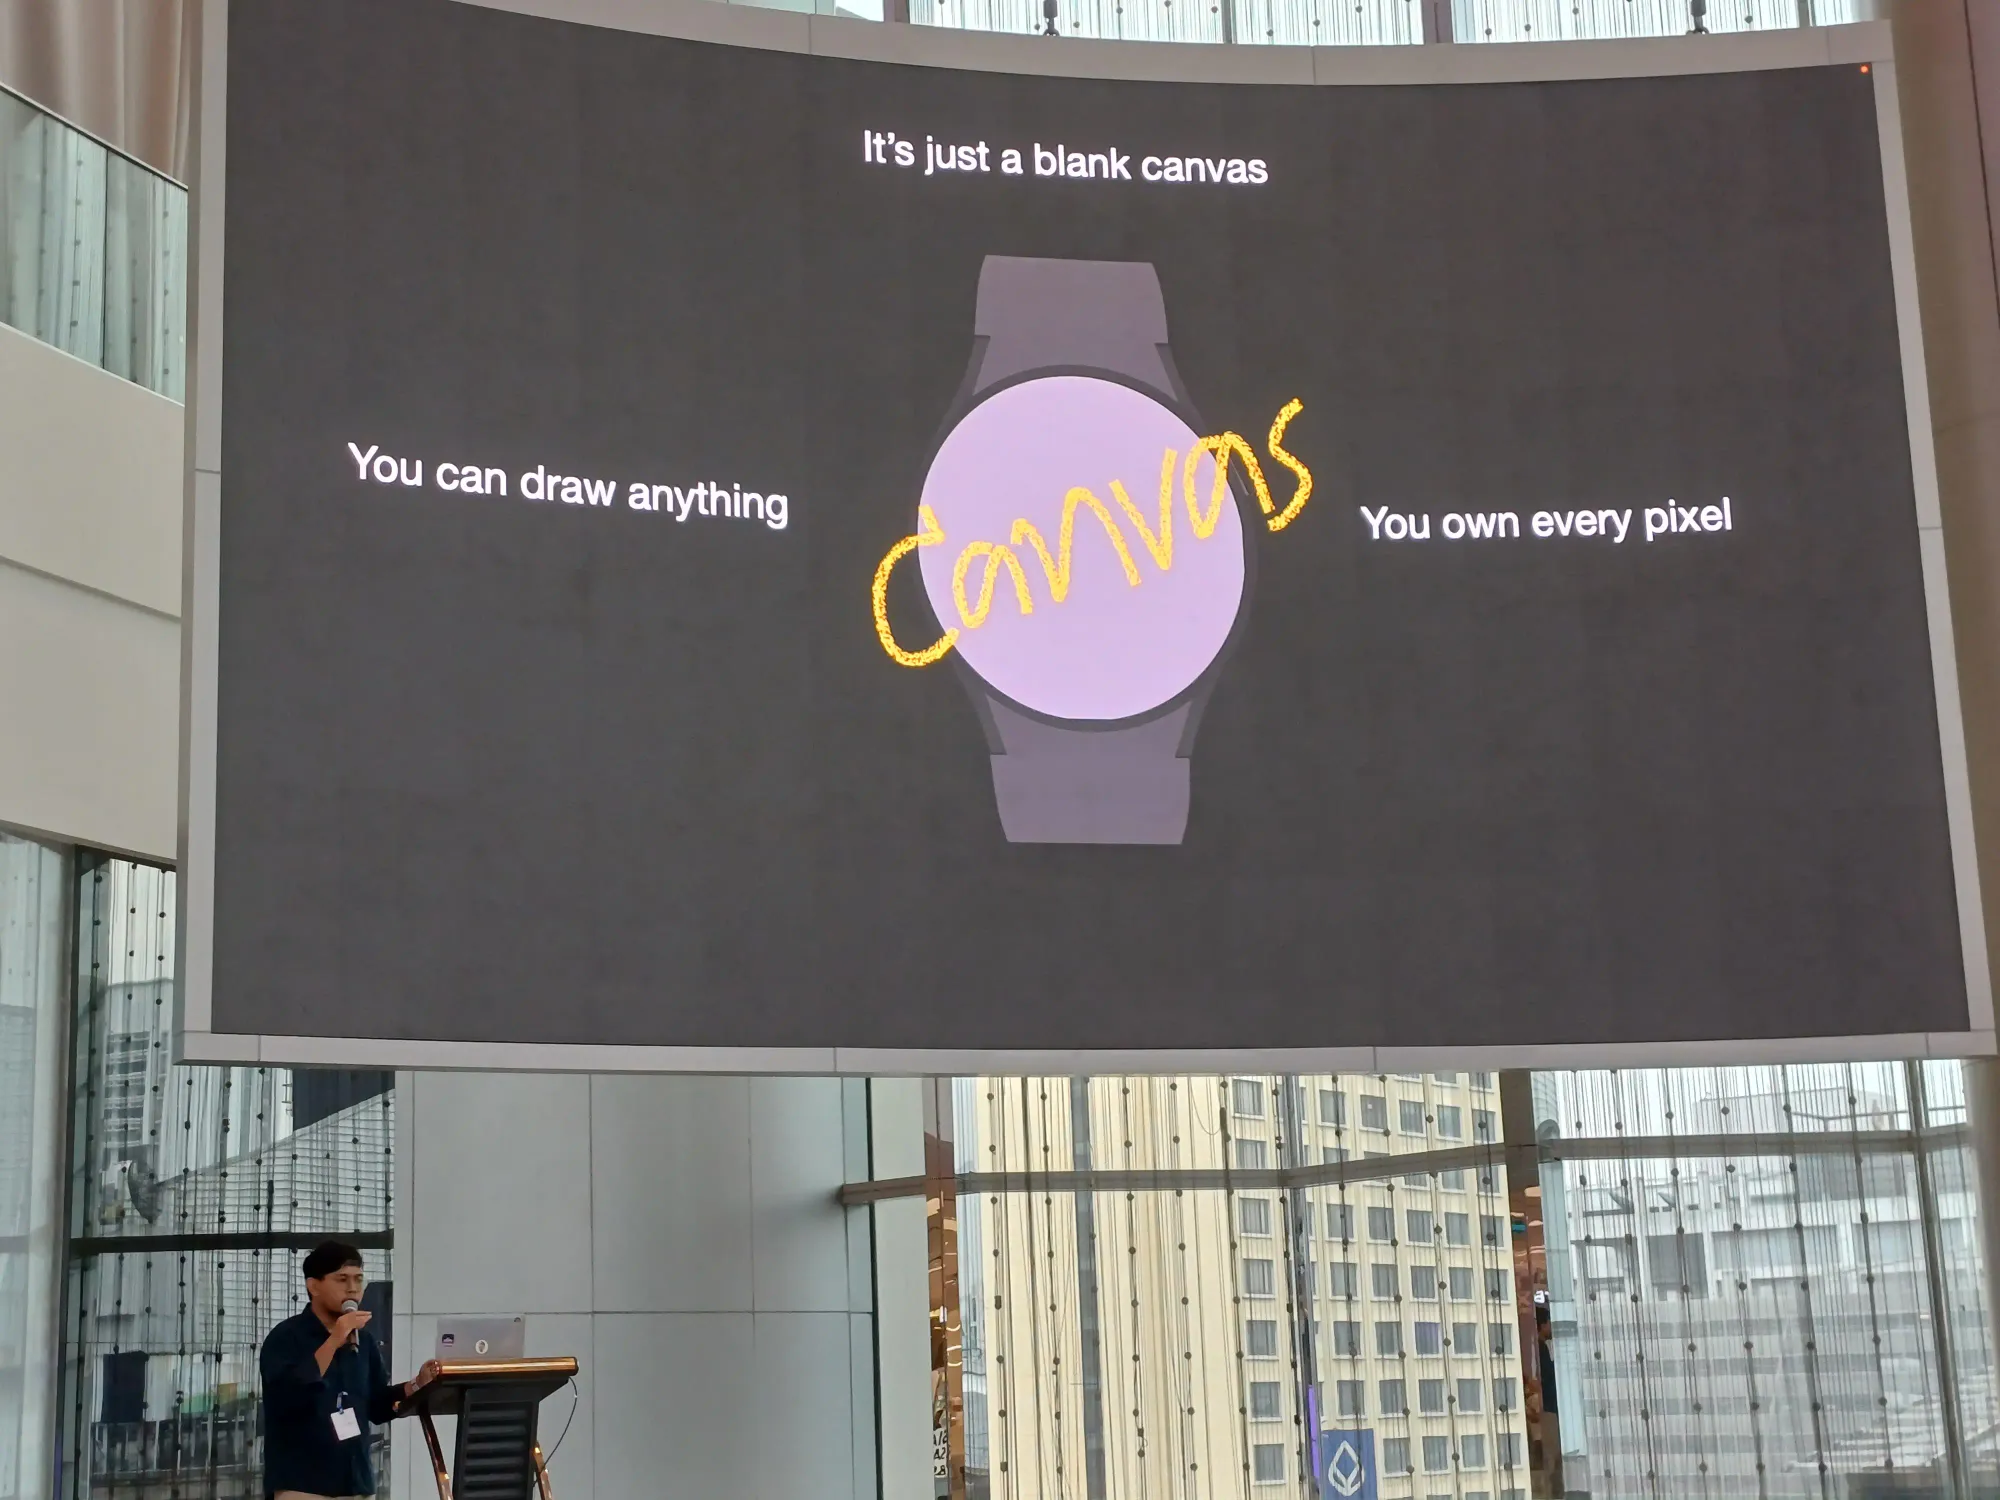
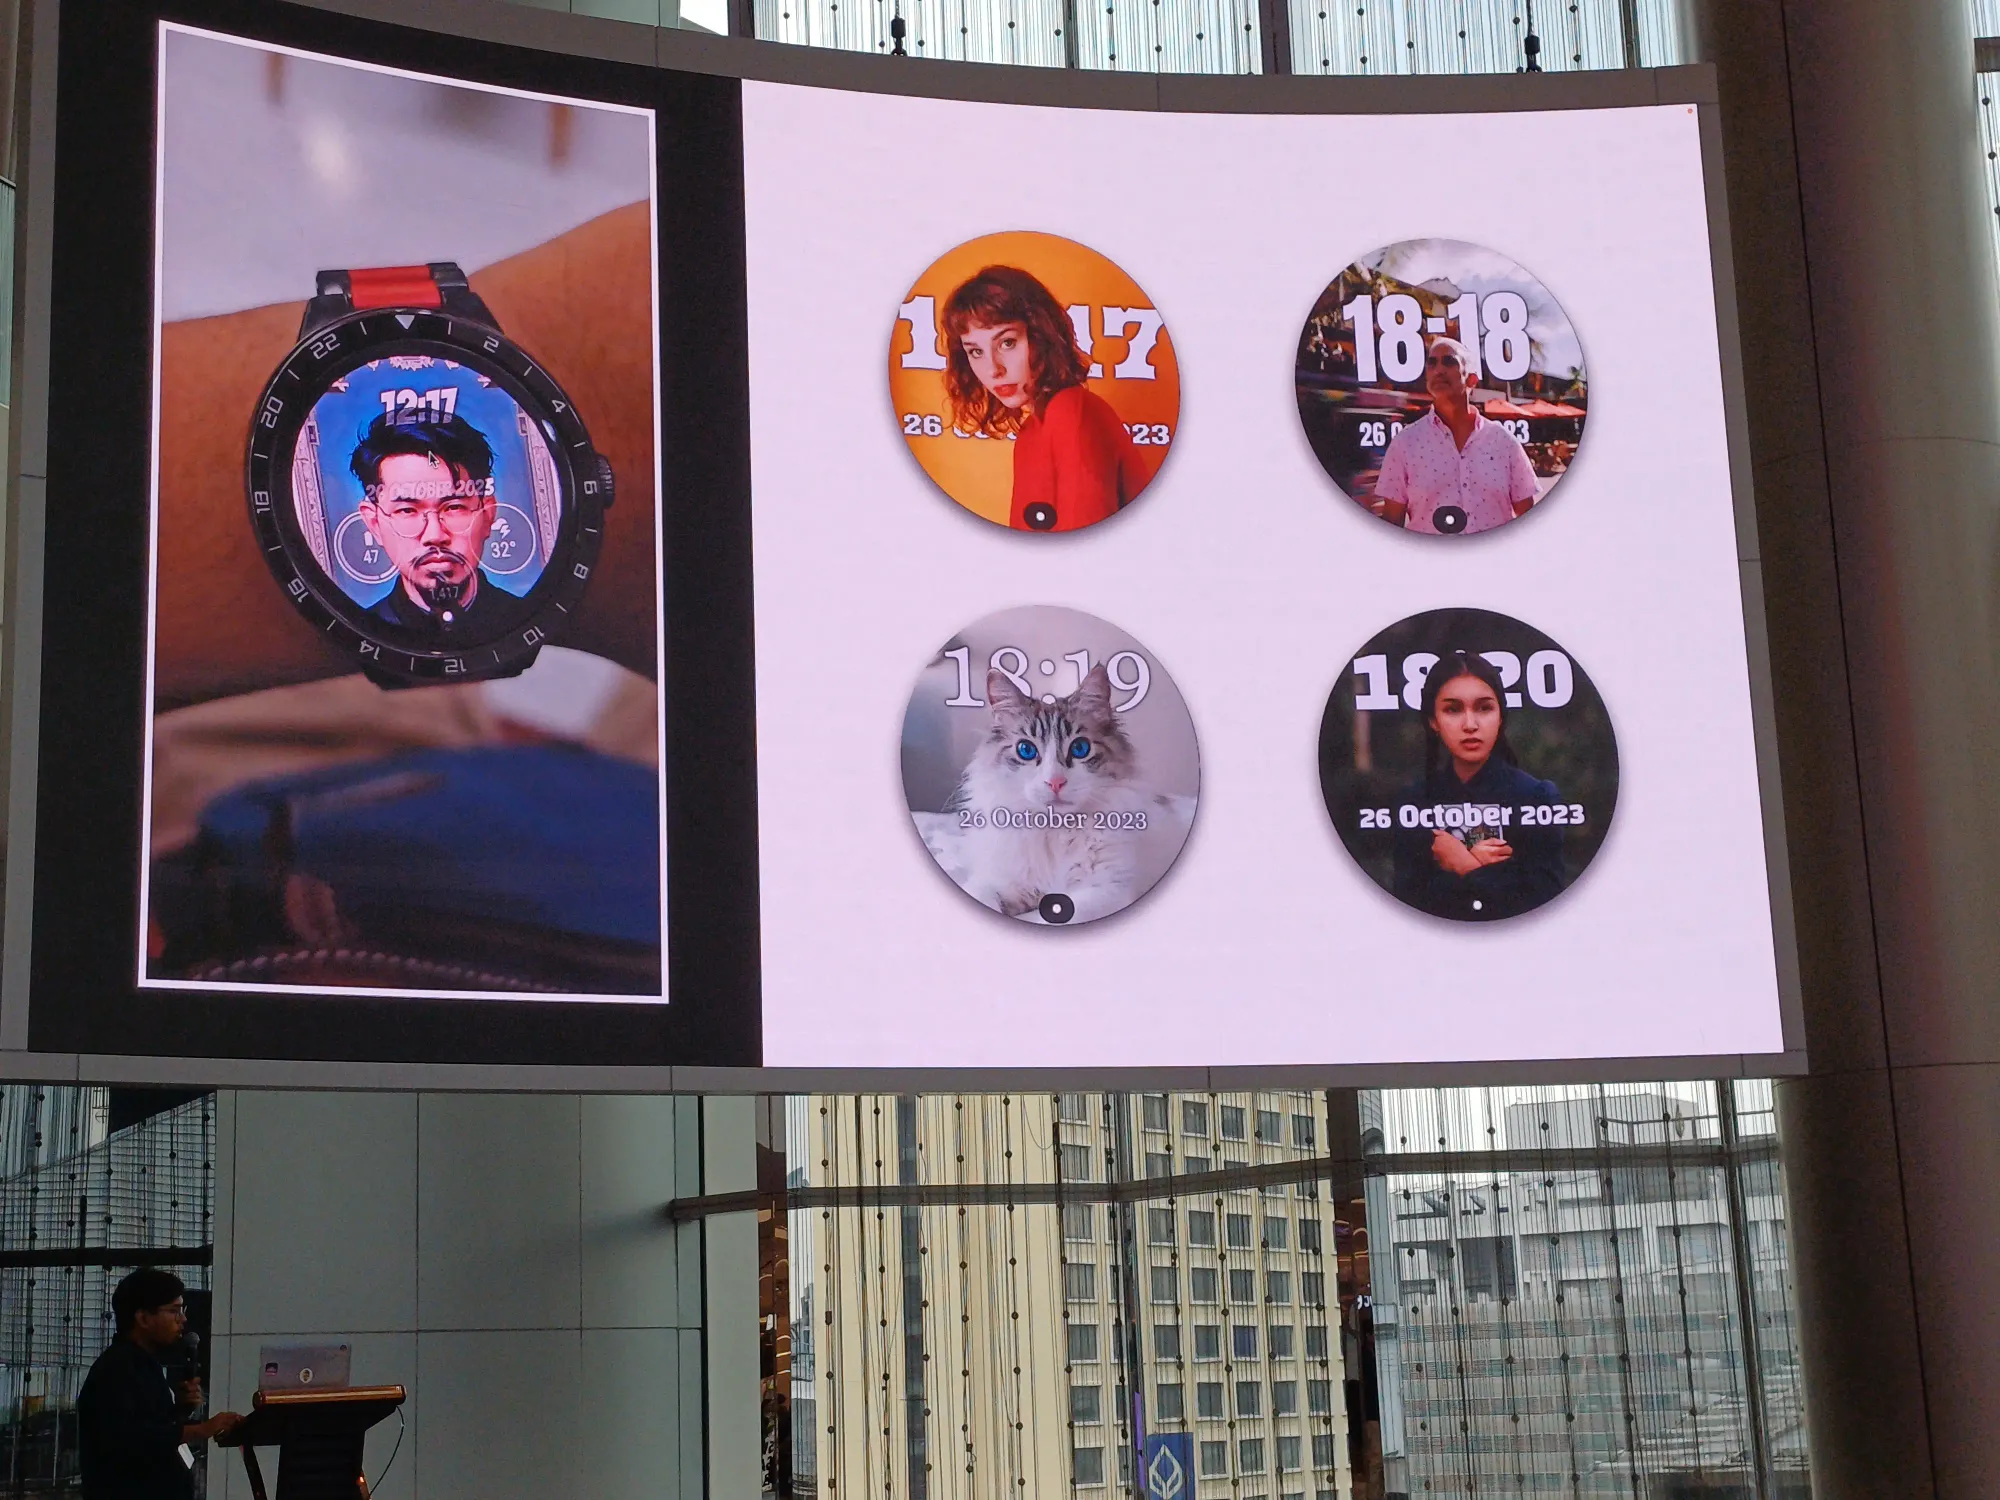
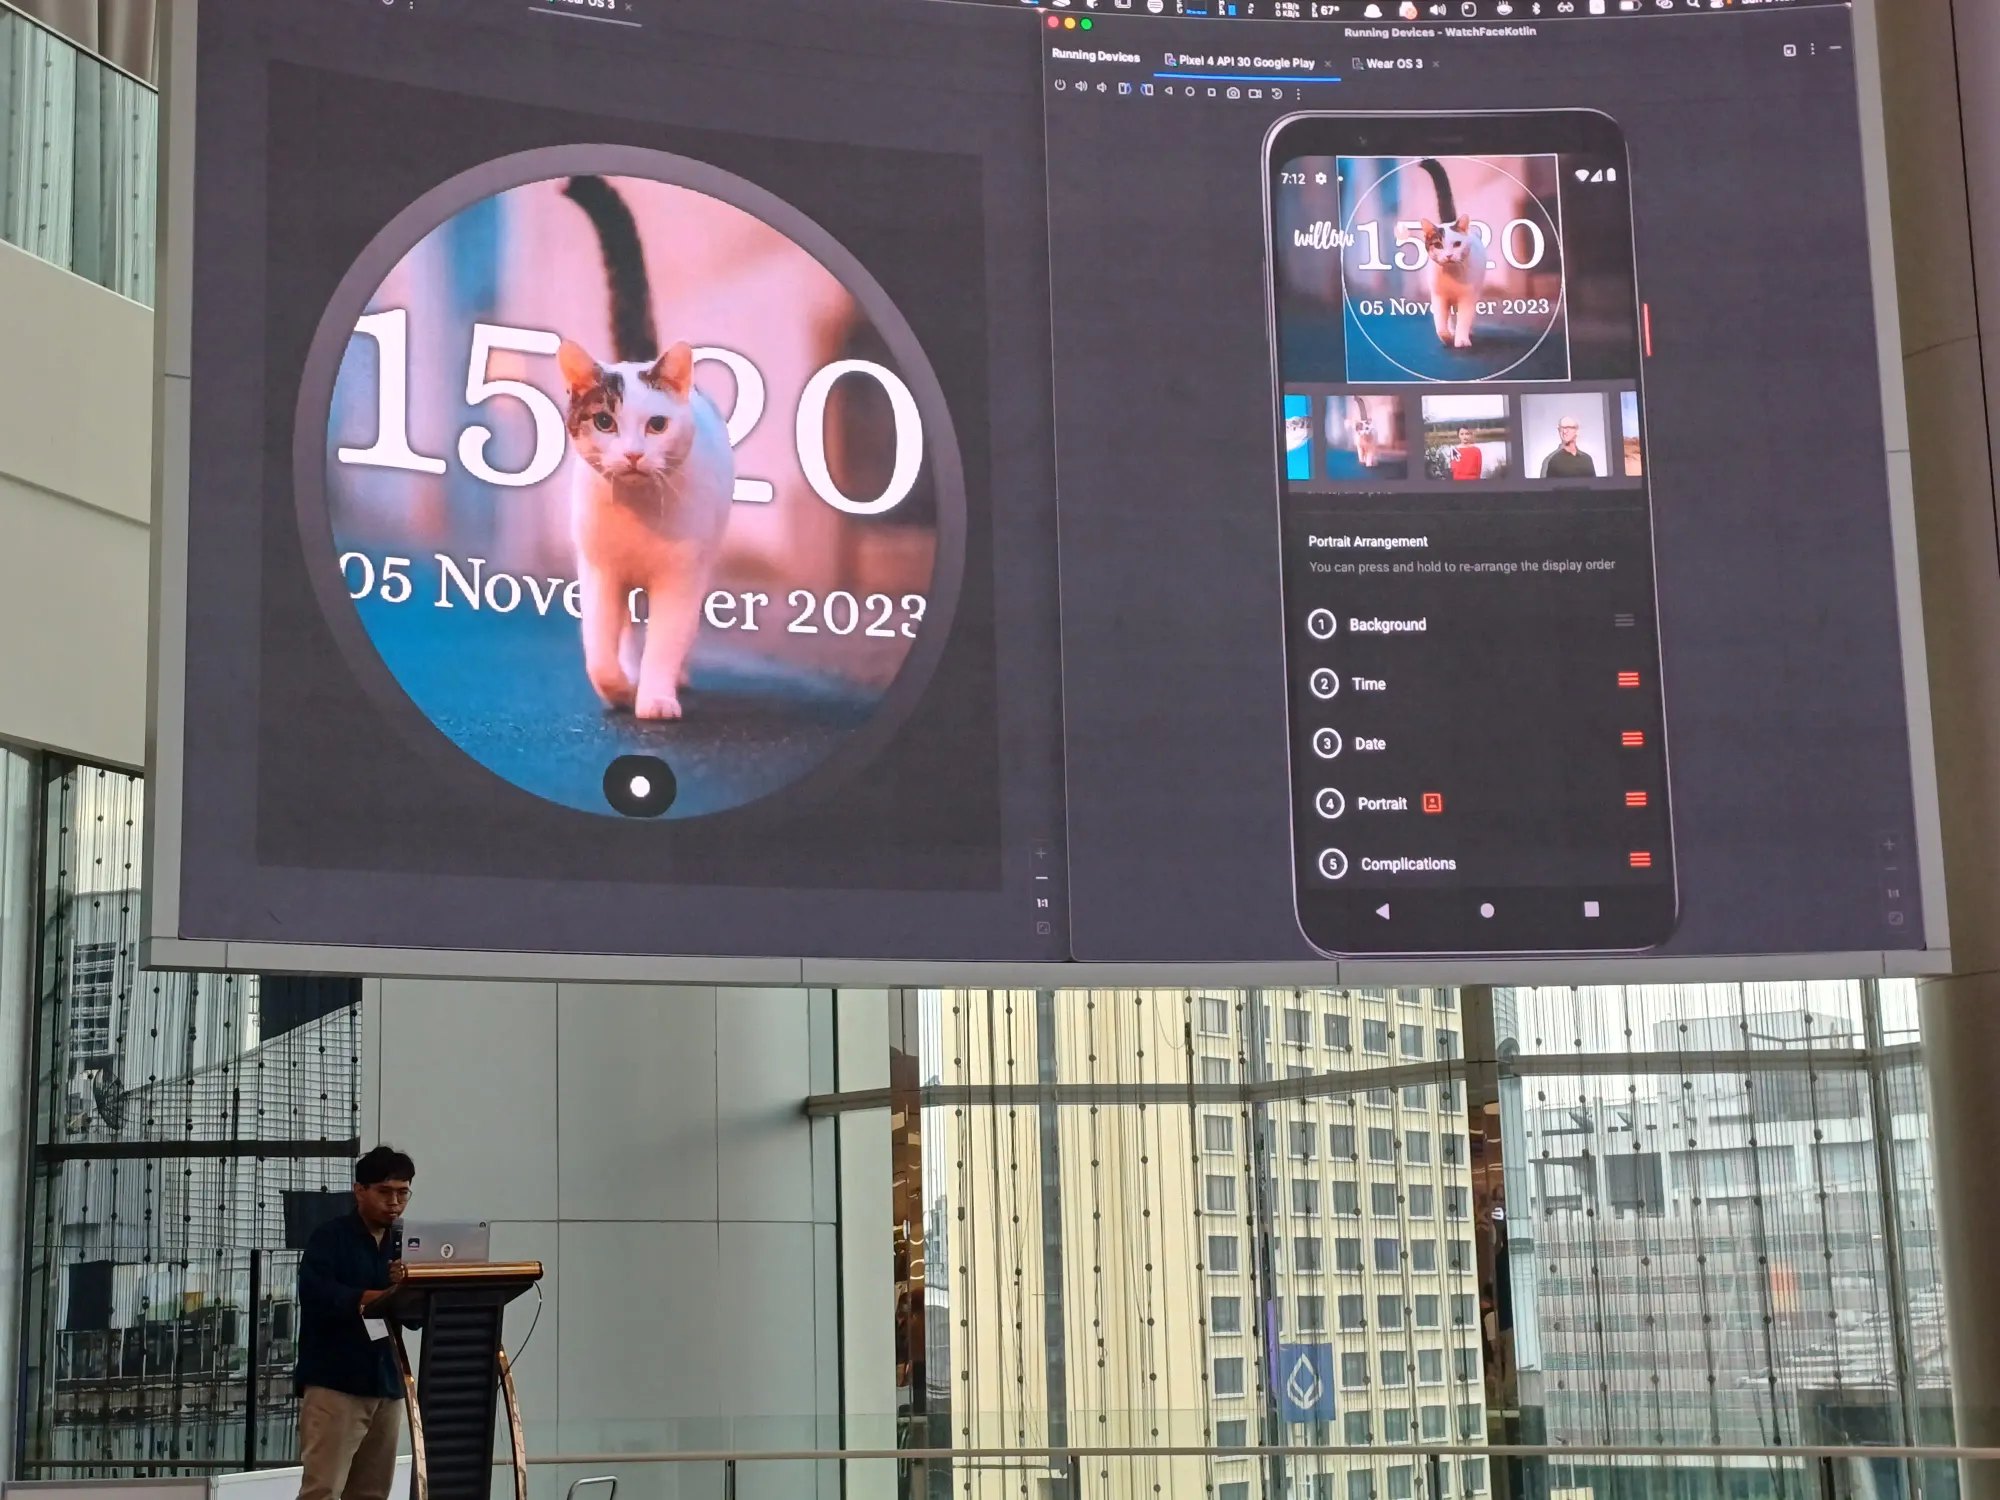
ตัวแอพที่เขาทำ ชื่อว่า Willow สามารถส่งรูปจากโทรศัพท์ของเราเพื่อไปปรับแต่งตัว watch face ได้ มีการปรับพวก font ใน style ที่เราชอบ และนำรูปและ font จากภายนอกมาใช้ได้ด้วย
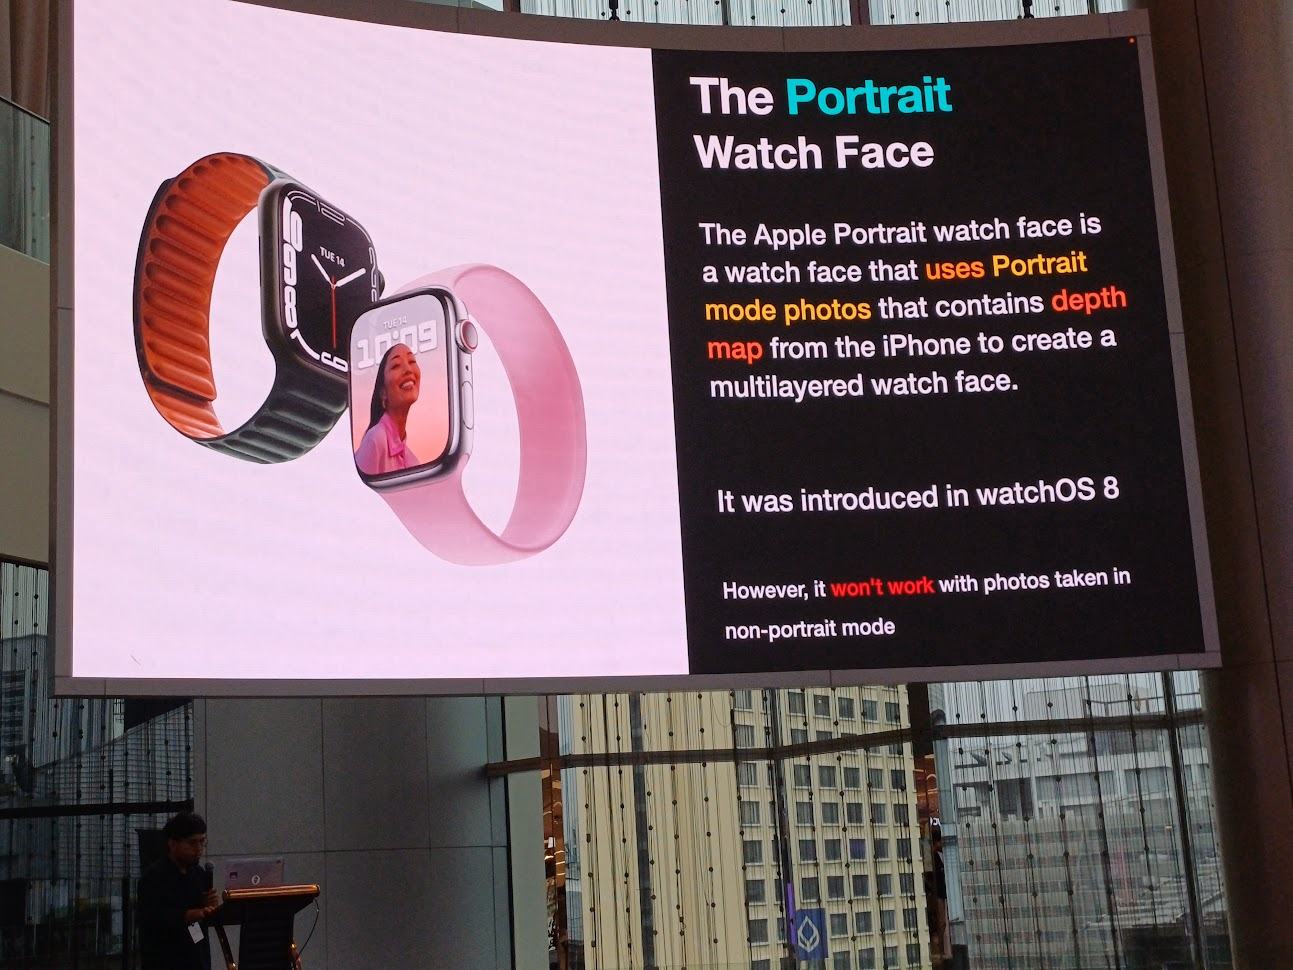
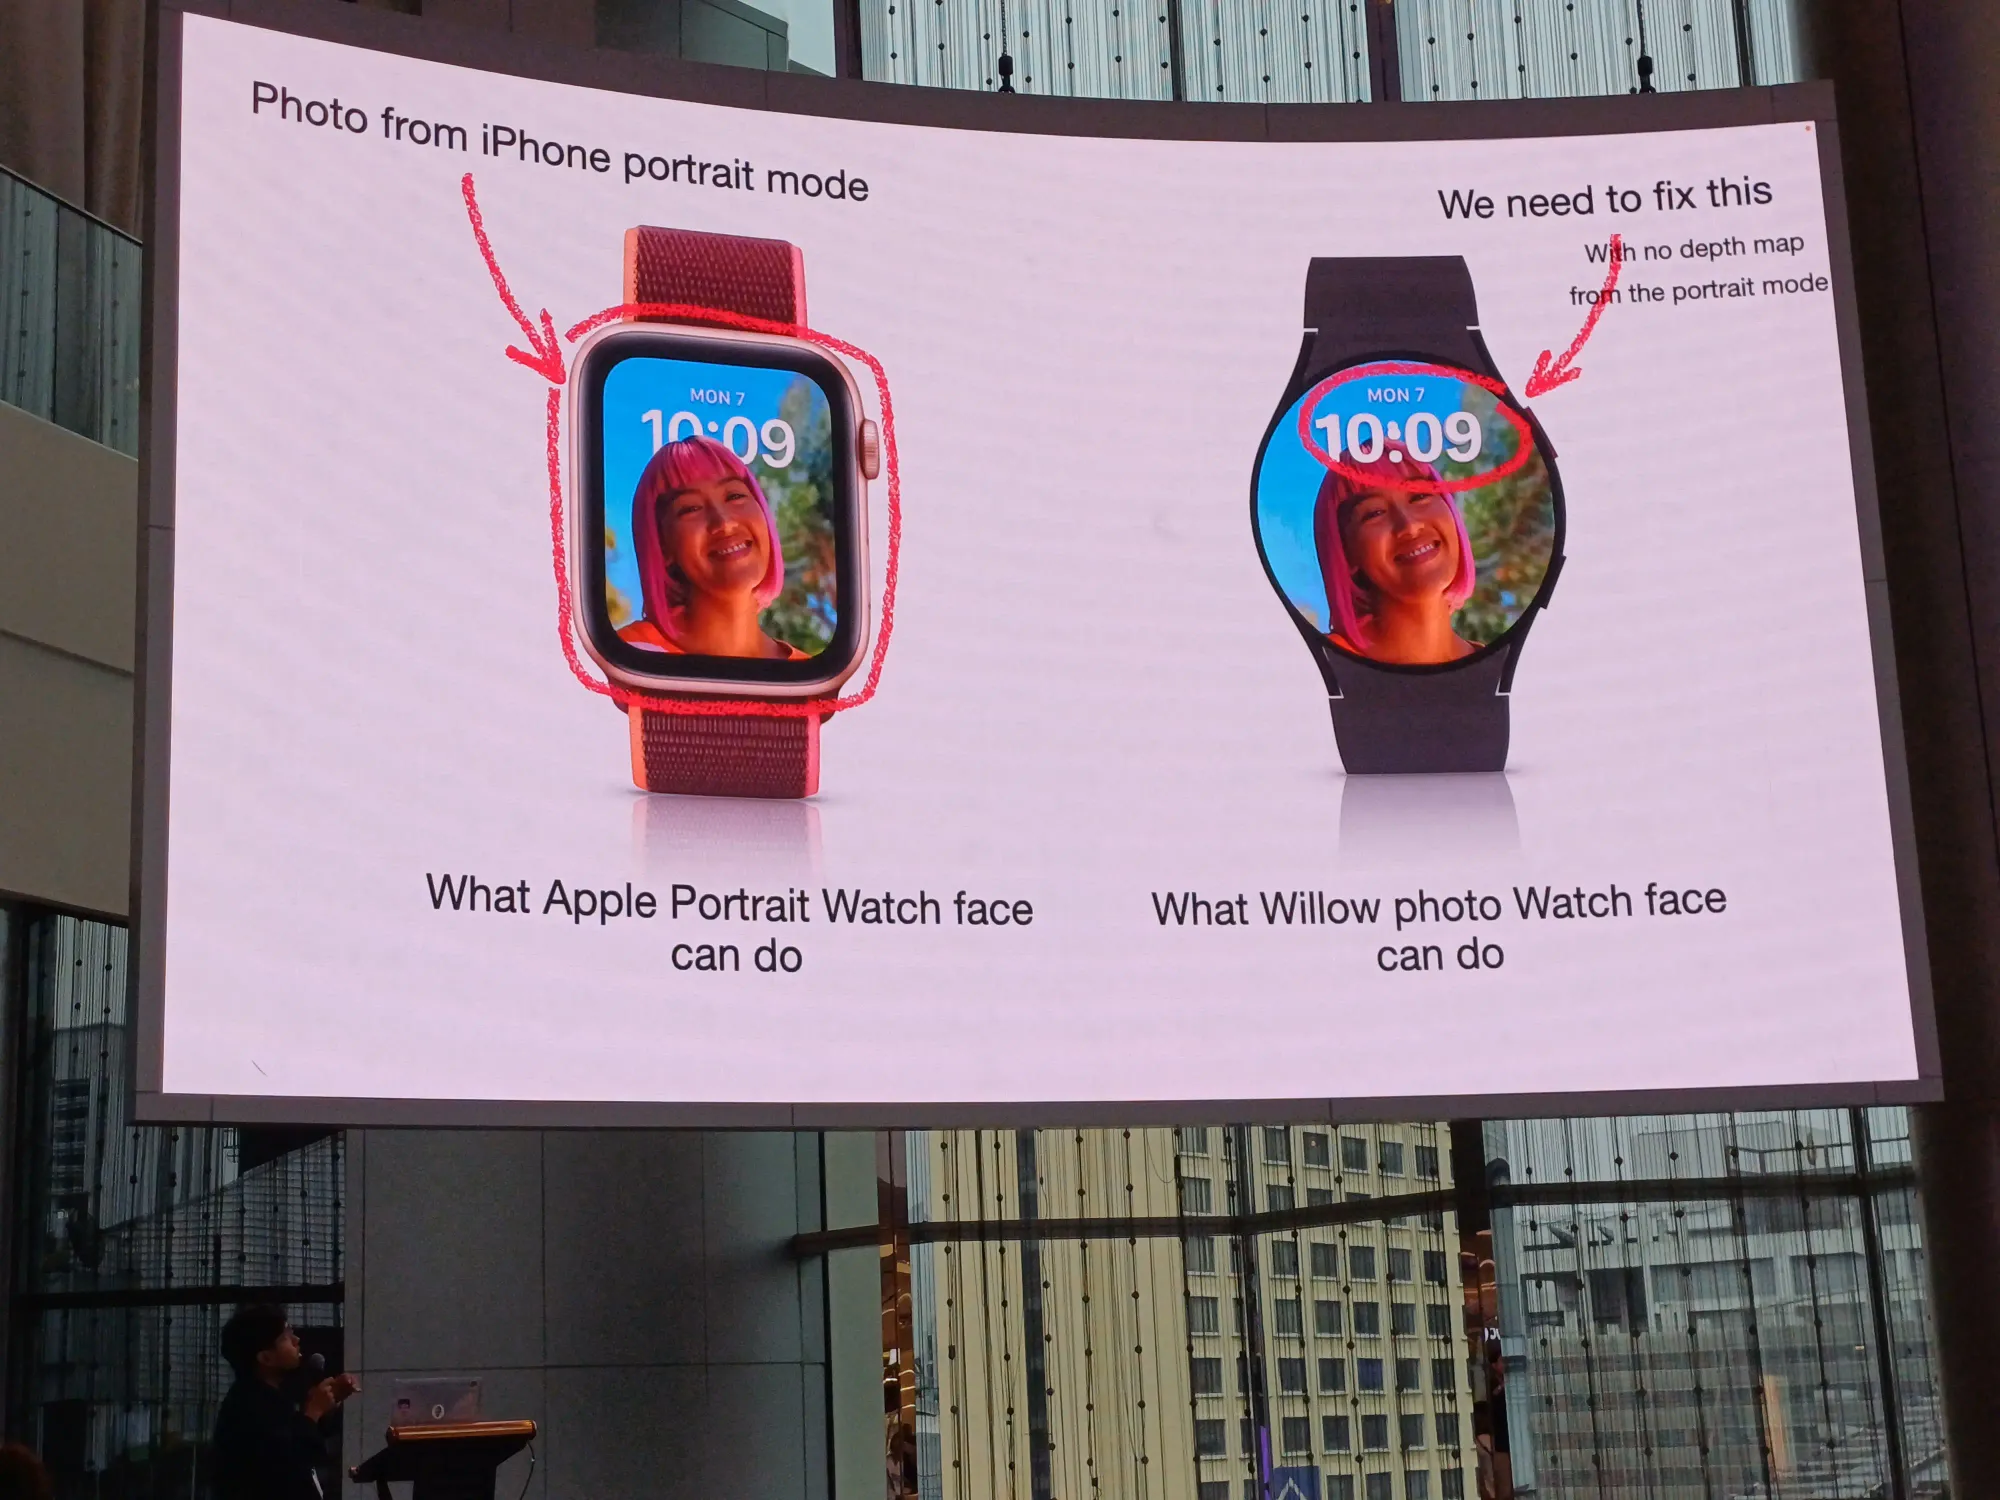
ตัว portrait watch face ได้แรงบันดาลใจมาจาก Apple Watch ซึ่งตัวรูป portrait จะมี depth map จากตัว iPhone เอามาเล่น multilayer ได้ด้วย
ถ้าถ่ายรูปโหมดอื่นที่ไม่ใช่ portrait จะเล่นแบบนี้ไม่ได้นะ
เมื่อลองมารวมร่างกัน พบว่ามี issue ในเรื่องความสวยงามมากมาย
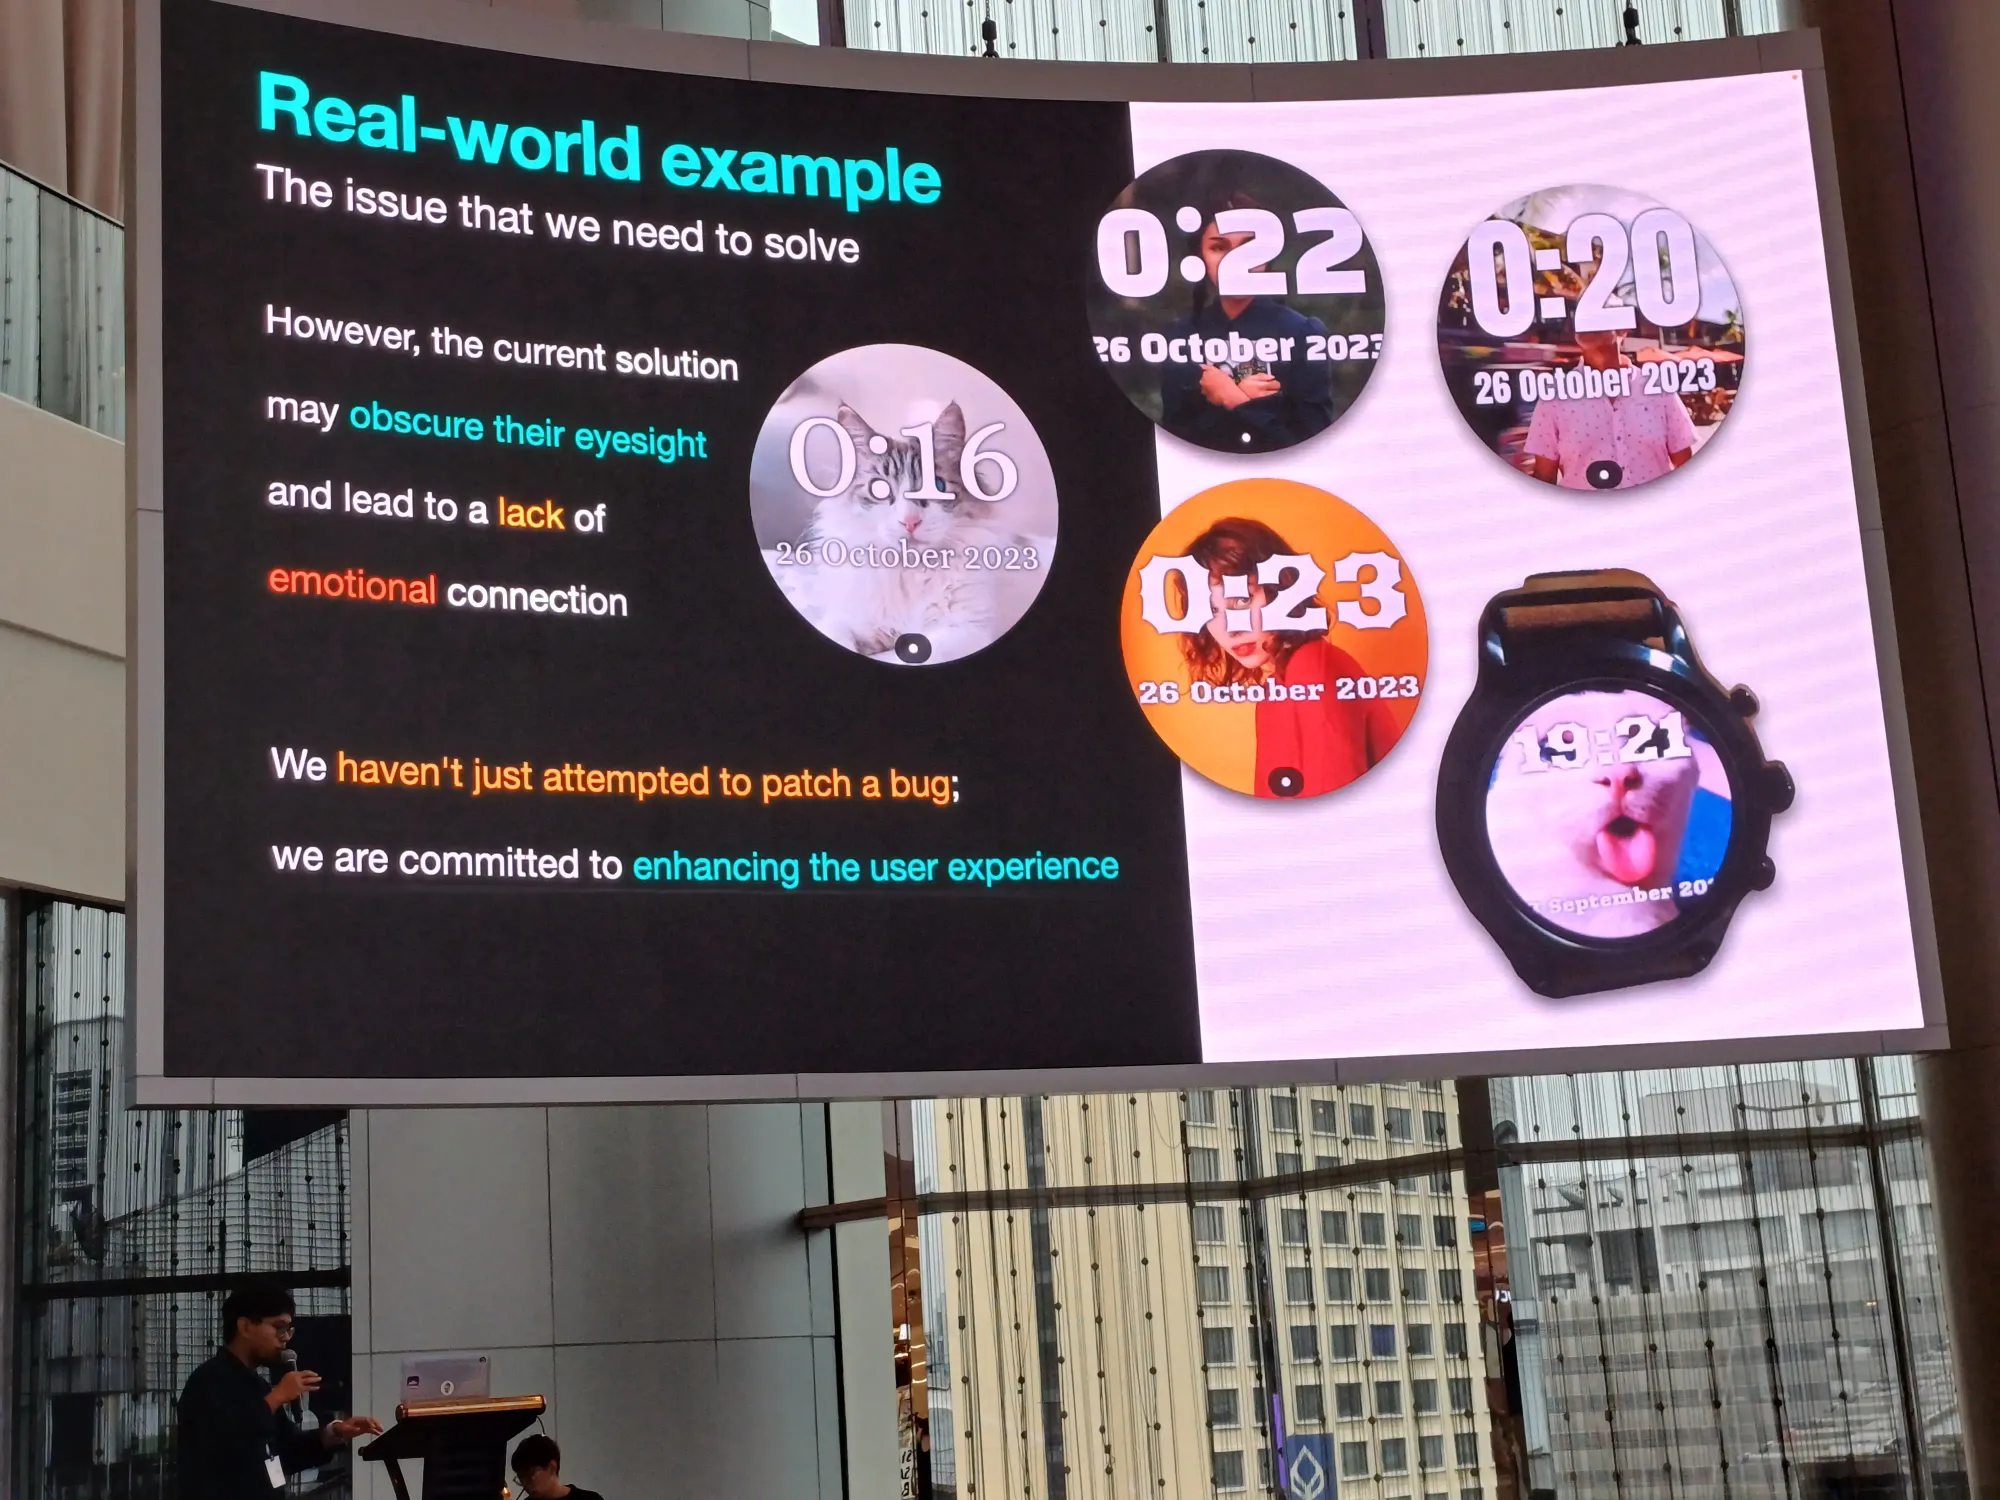
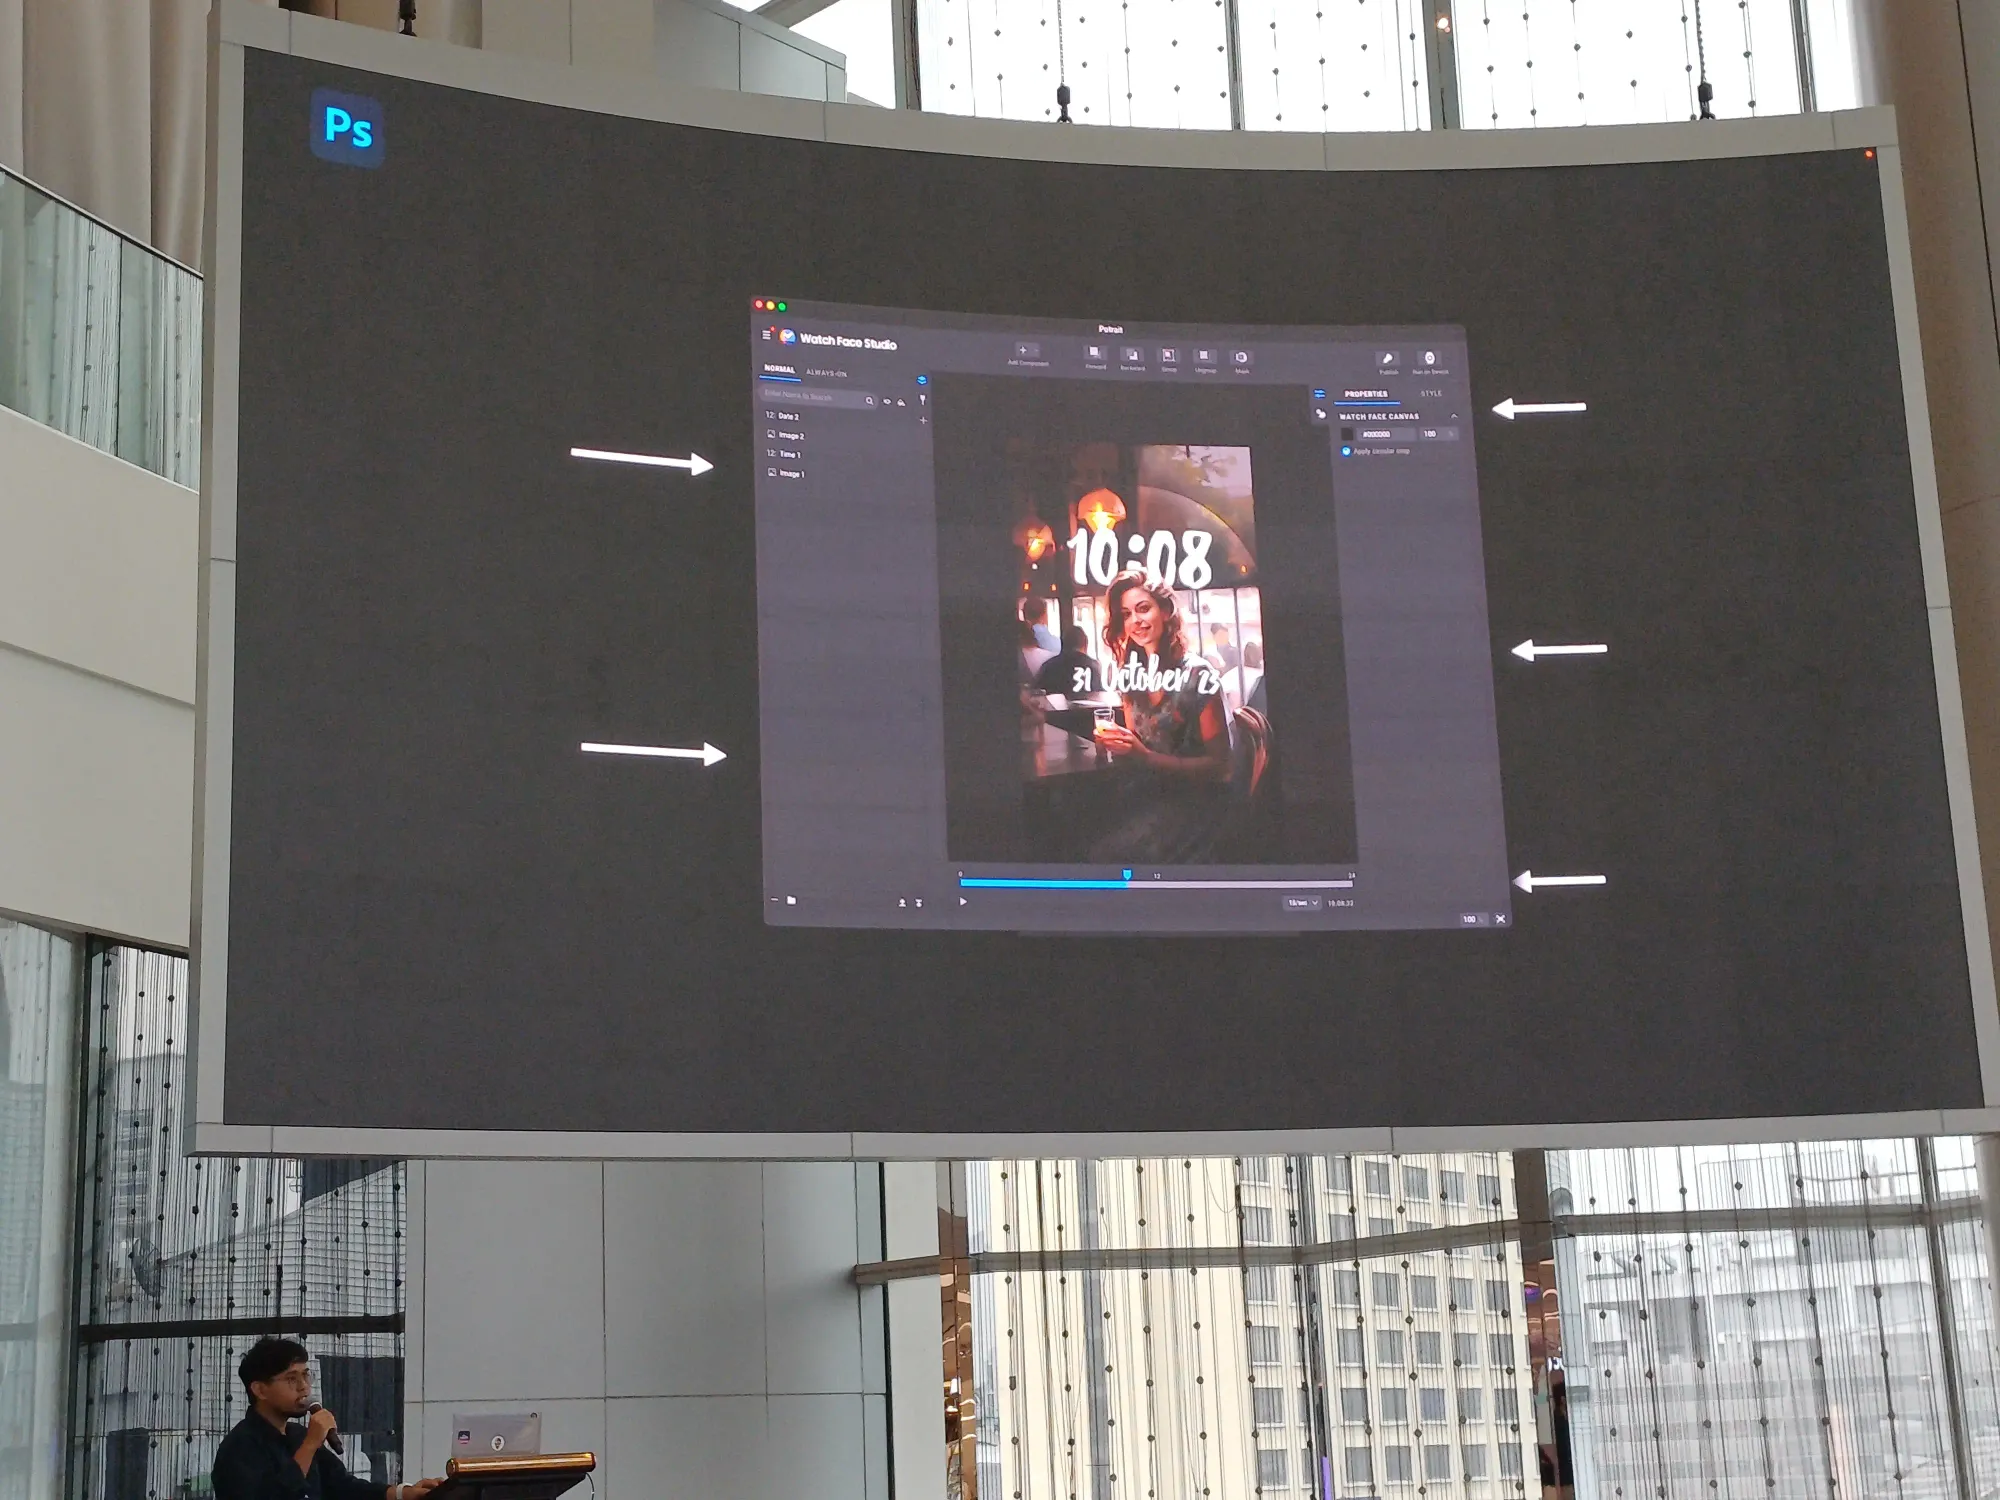
ขั้นตอนการทำ
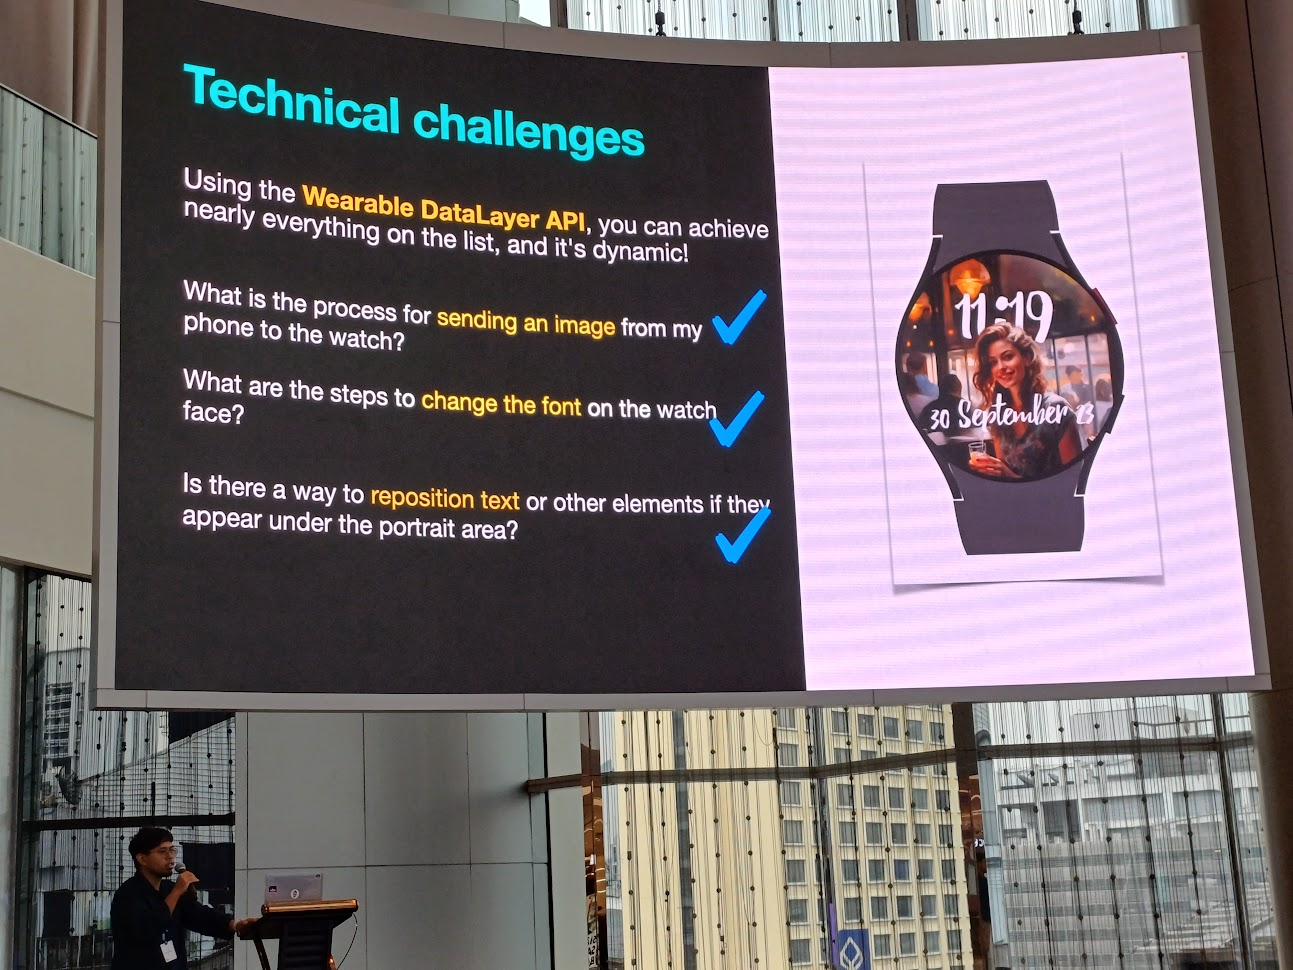
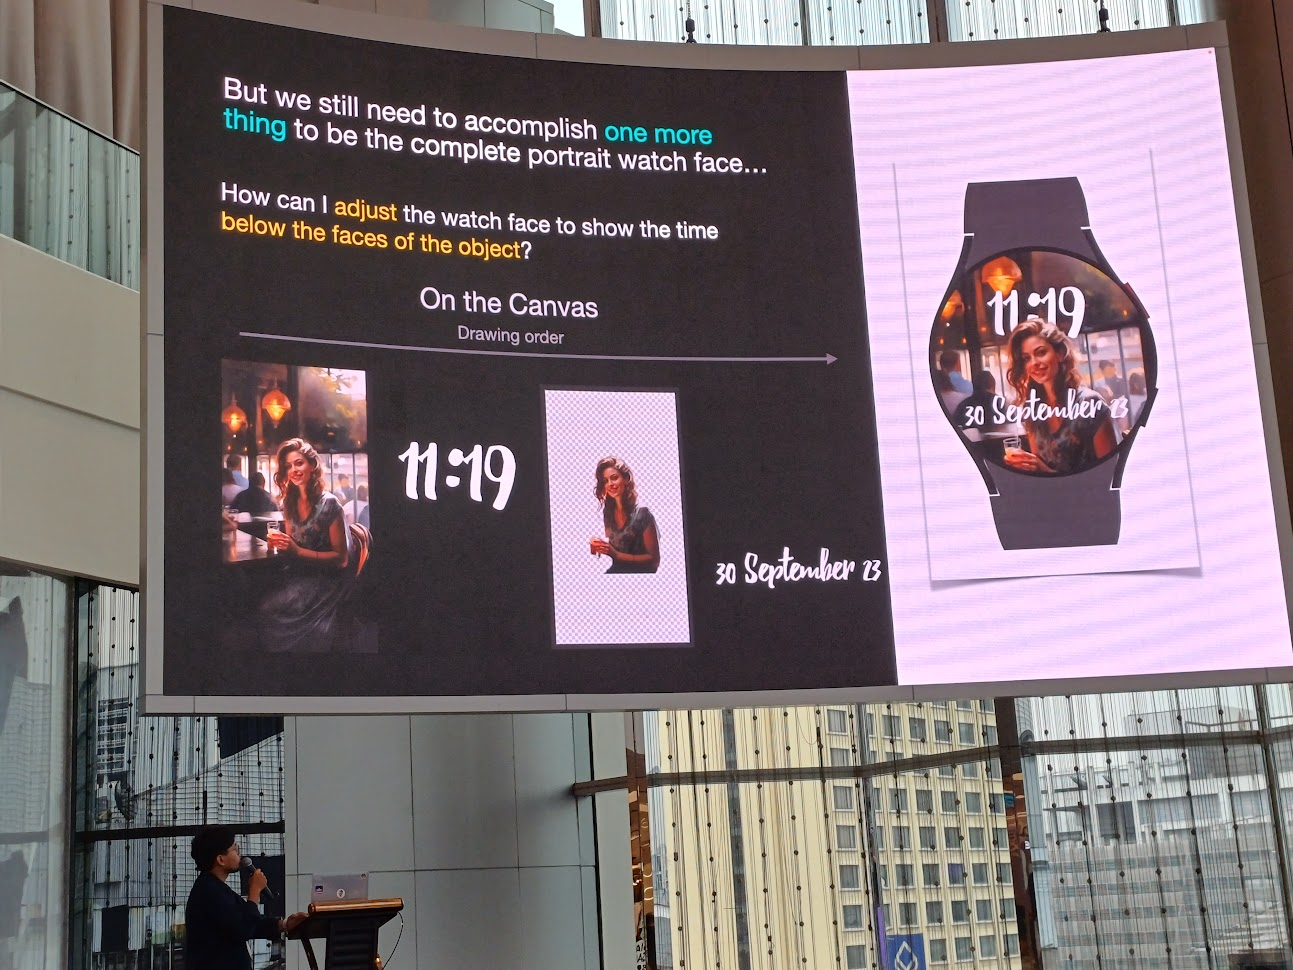
- Multilayered effect from Depth map: แยก layer ต่าง ๆ มี original image, text แสดงวันที่, text แสดงเวลา และส่วน portrait image ซึ่งอยู่บนสุด

- Focused subject: เรา focus ส่วน portrait image
- Blur background: blur พื้นหลัง
- Options for Typography: เพิ่ม text แสดงเวลา และเรื่อง font
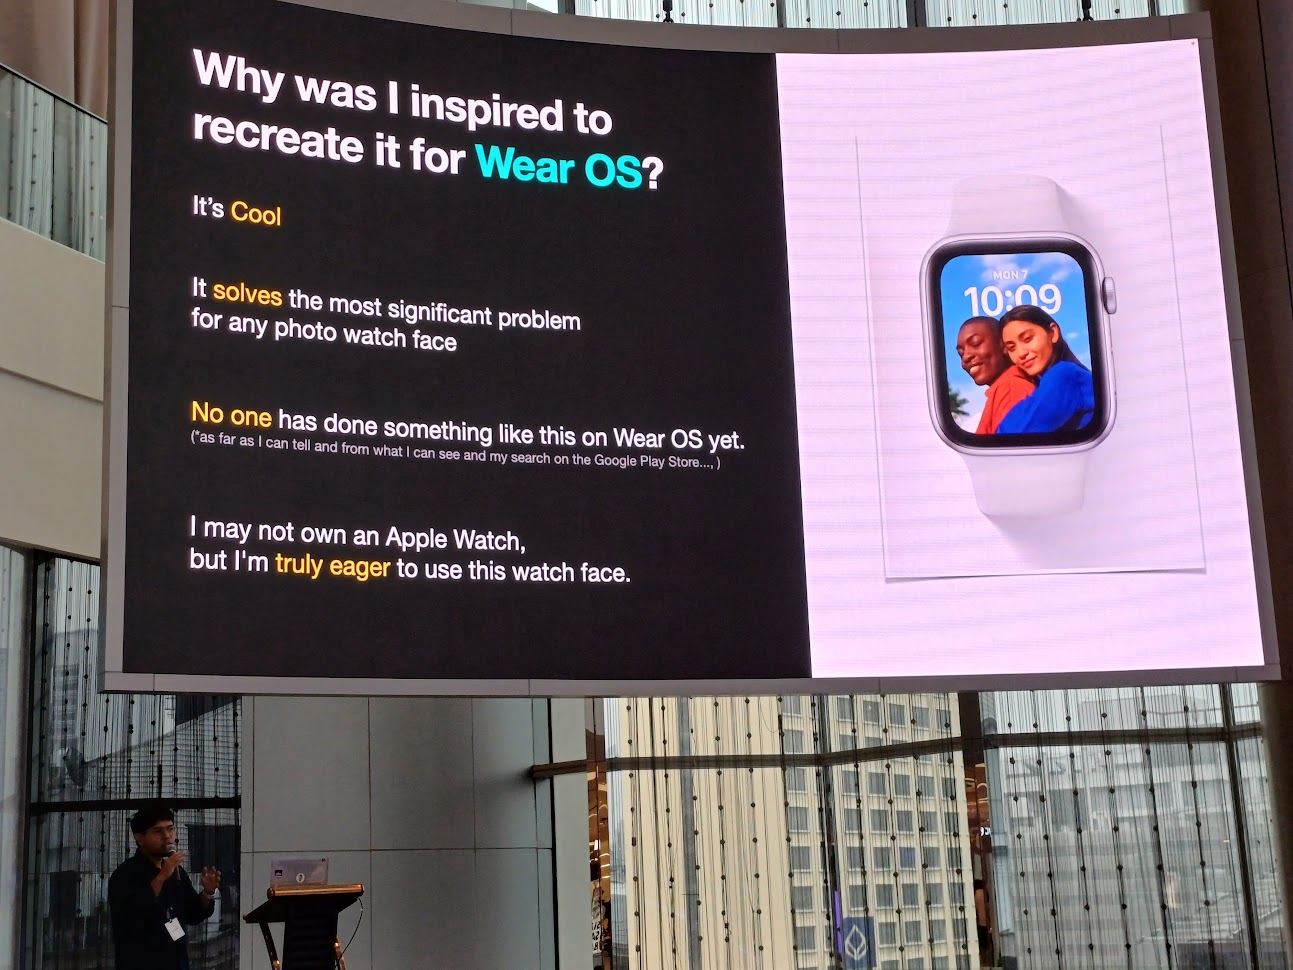
ทำไมถึงอยากทำสิ่งนี้บน Wear OS ล่ะ?
- มัน cool
- มันตอบโจทย์ปัญหาต่าง ๆ เกี่ยวกับรูปบน watch face
- ยังไม่มีคนทำสิ่งนี้บน Wear OS
- คนที่ไม่มี Apple Watch ก็อยากใช้สิ่งนี้
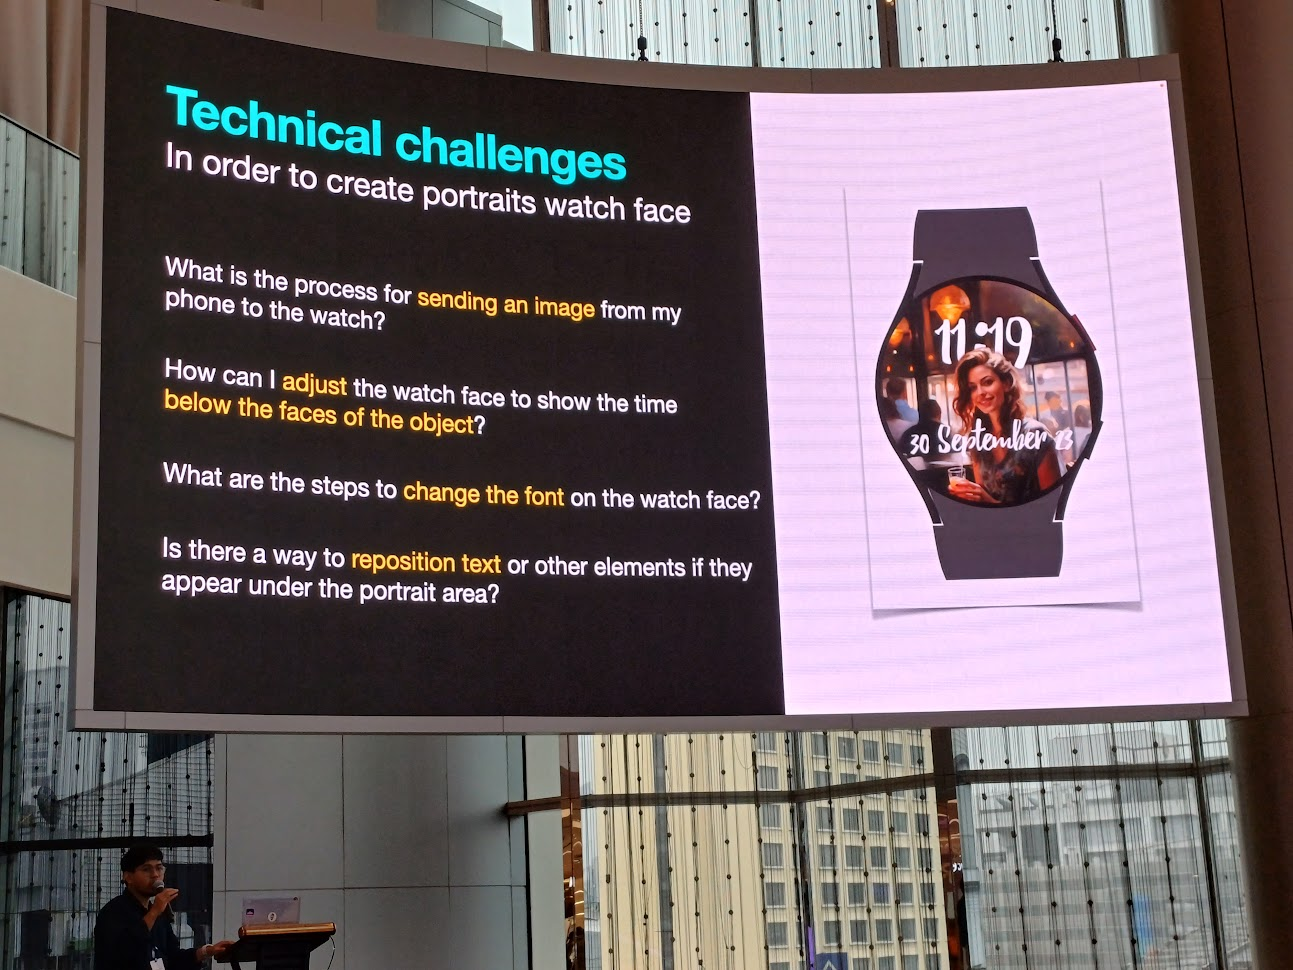
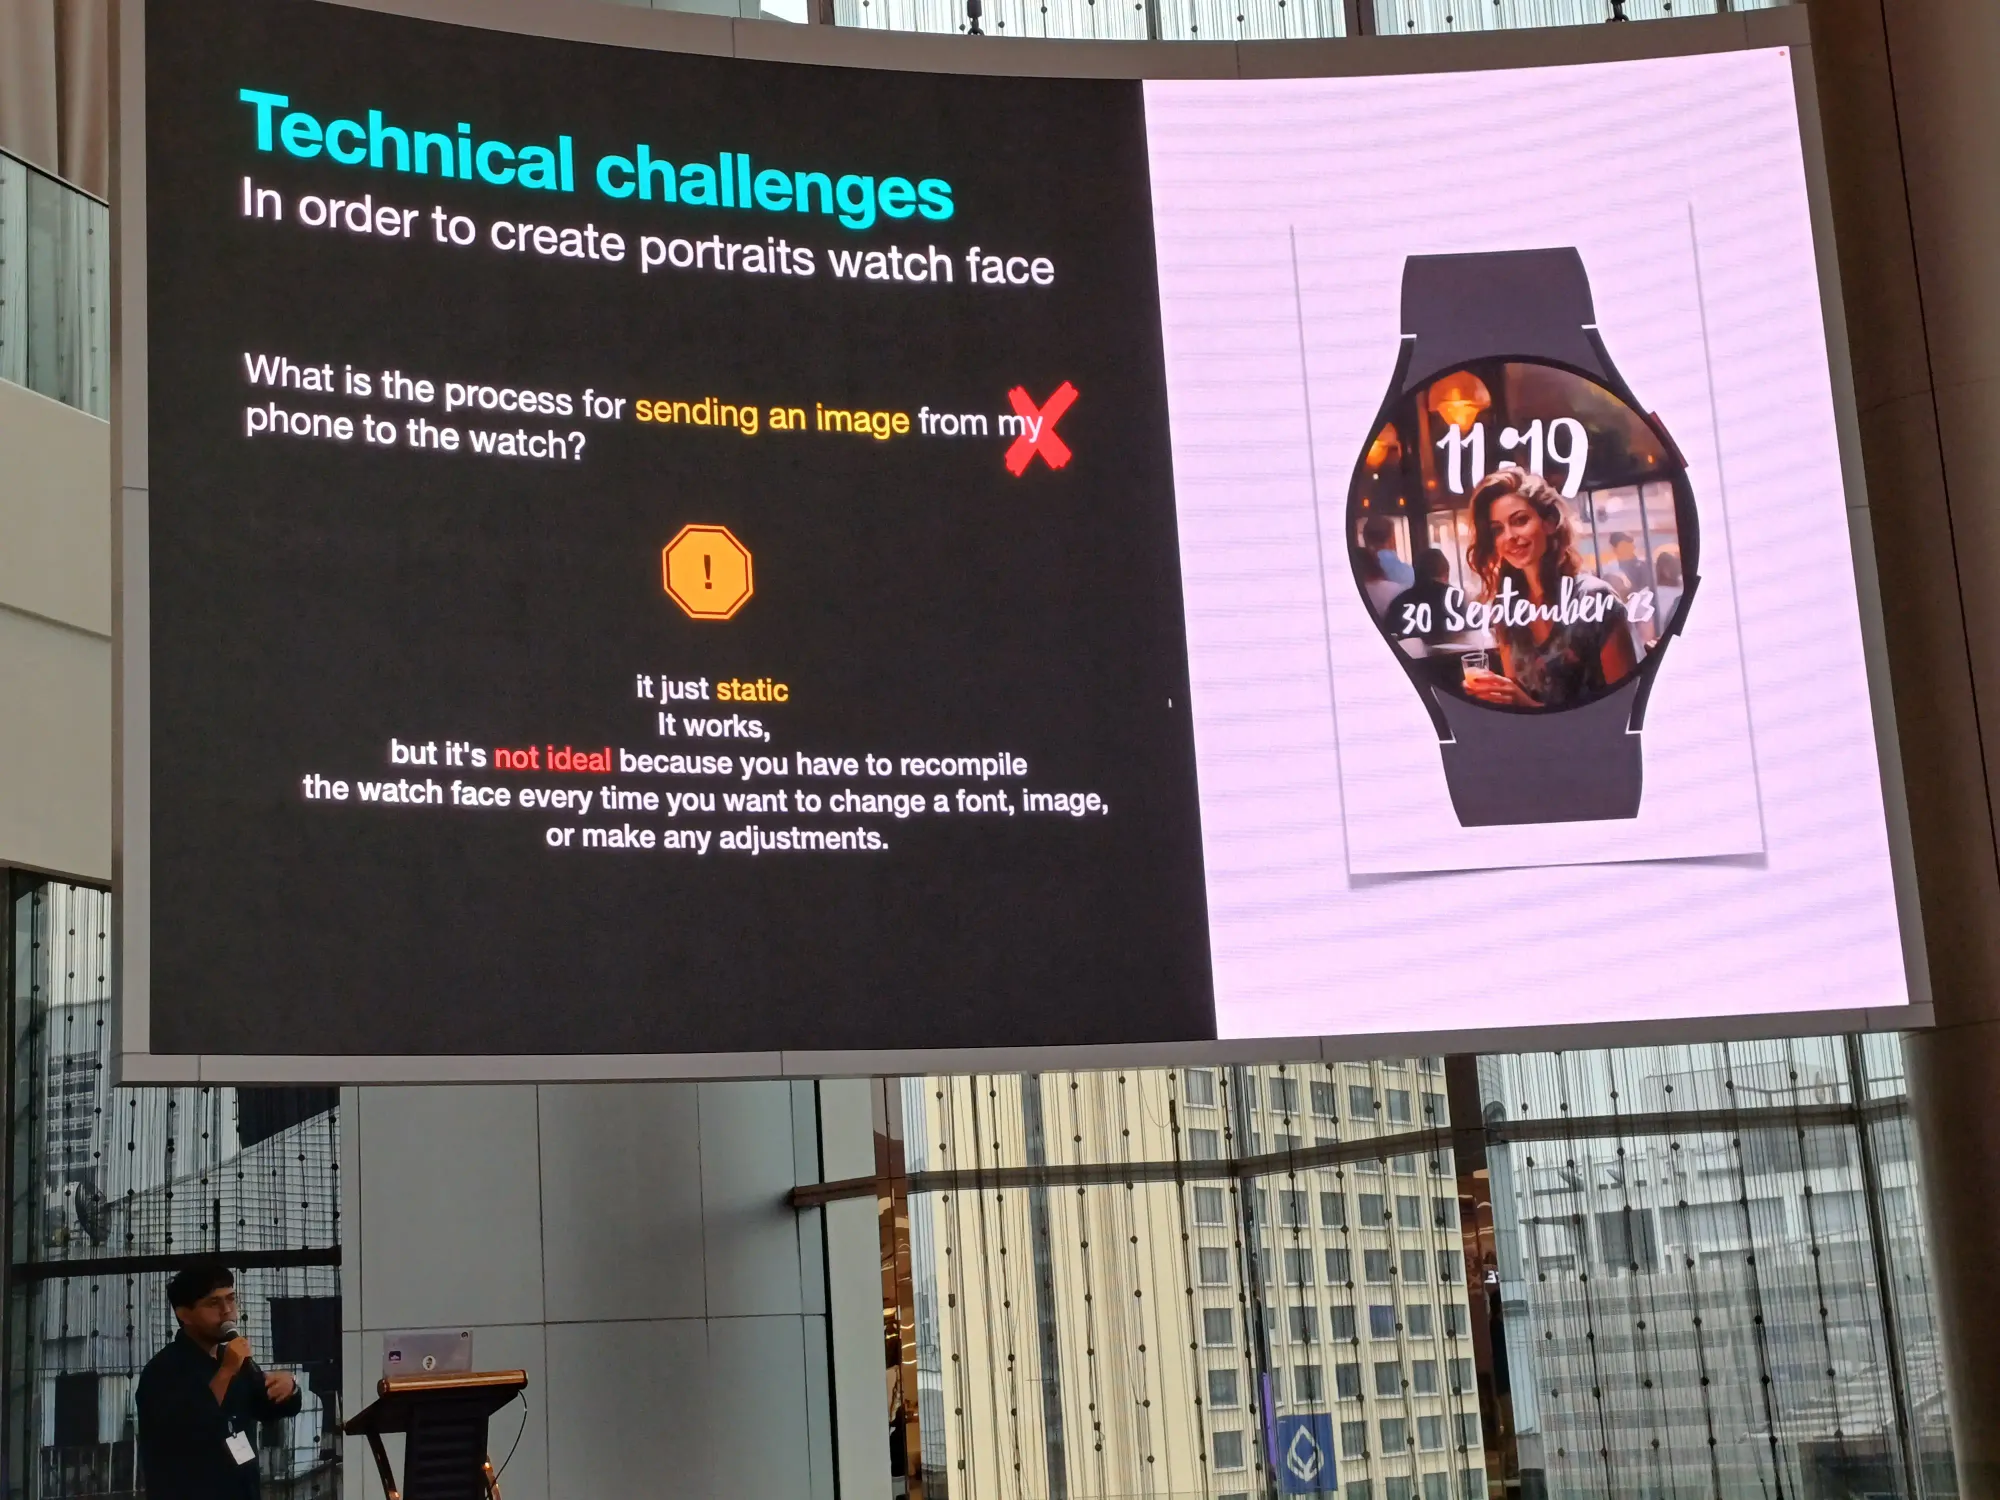
Technical challenge
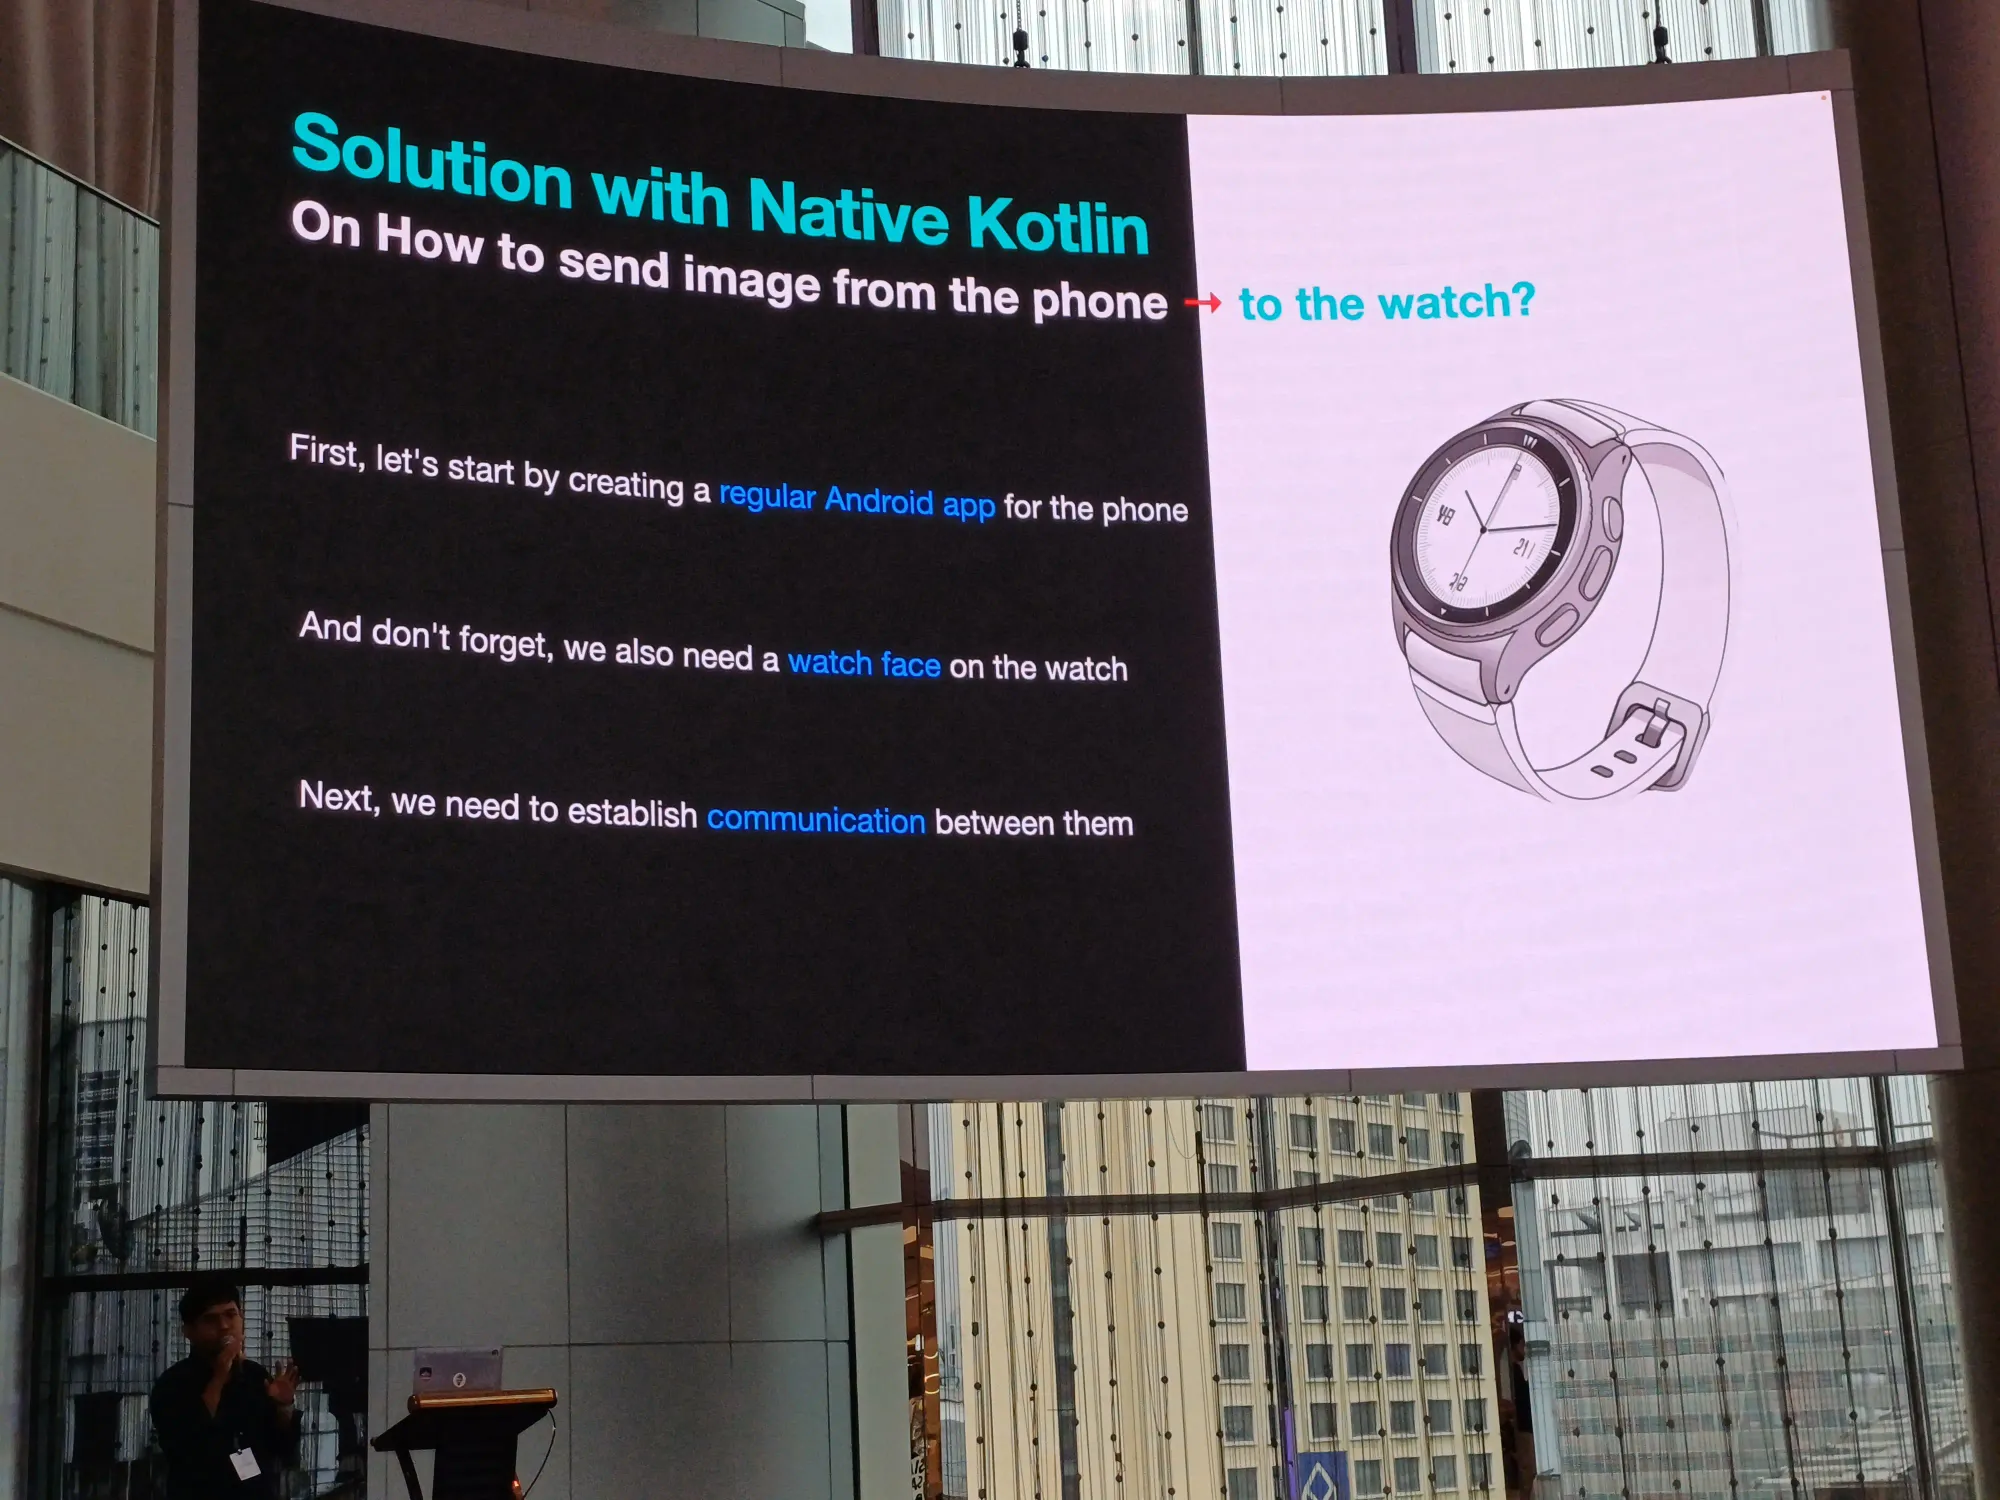
- อะไรคือ process ในการส่งรูปจากมือถือไปแสดงบน watch
- เราจะปรัย watch face ให้แสดงเวลา โดยแสดงอยู่ข้างหลัง object ที่เราสนใจ
- อะไรคือ step ในการเปลี่ยน font บน watch face
- เราจะ reposition text หรือ element อื่น ๆ ที่อยู่ใต้ portrait area ได้อย่างไร
Watch Face Creation Tool
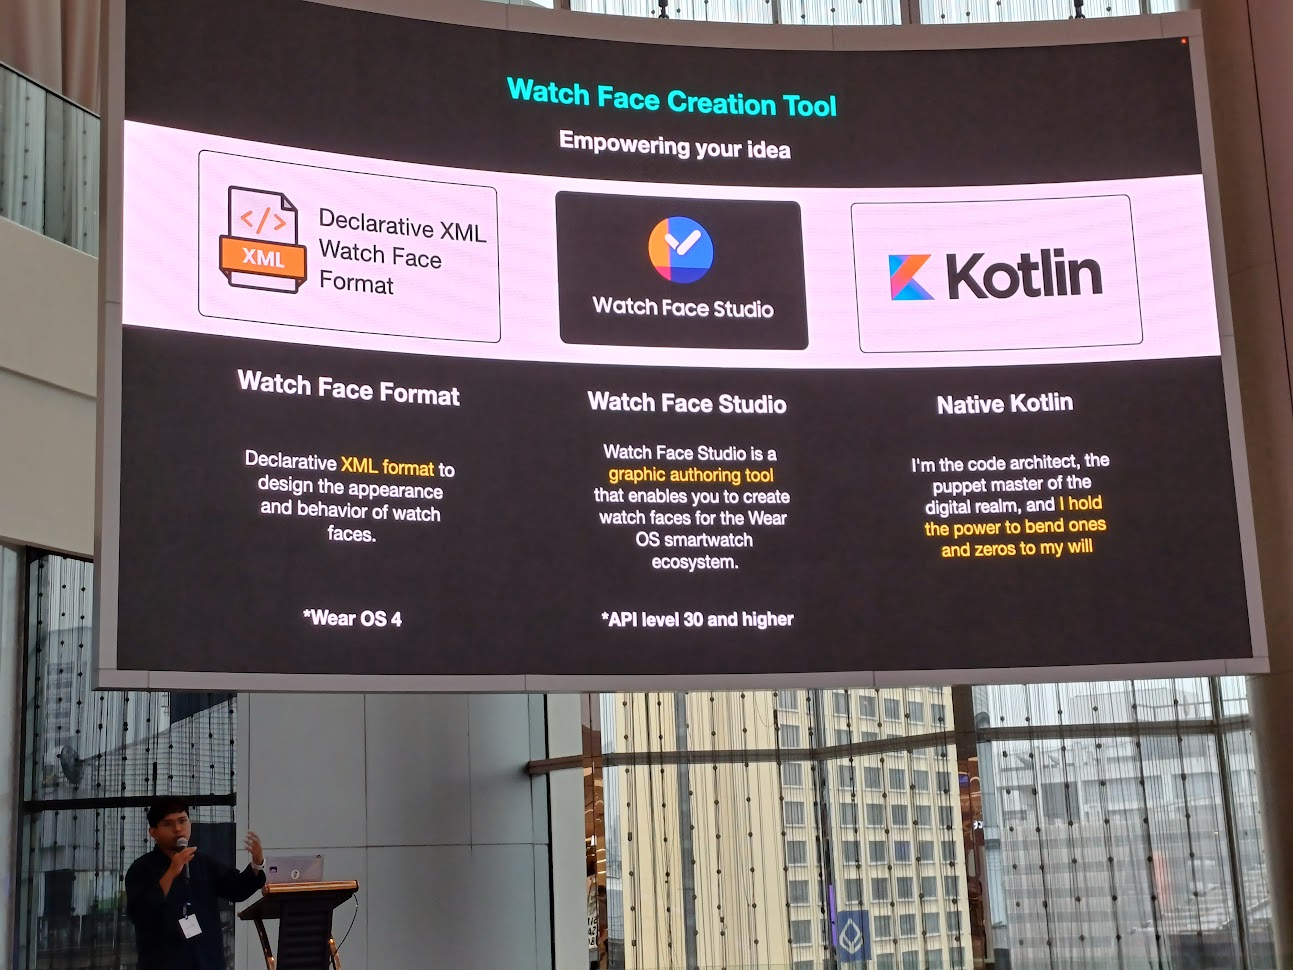
Watch Face Format: ตัวนี้สามารถลากวางได้ โดยเอารูปจริง และตัว background มาใส่ได้
Watch Face Studio: เช่นของ Samsung มีให้ทำ face watch เองได้ เหมือนทำบน Photoshop สามารถ submit ไป Play Store ได้
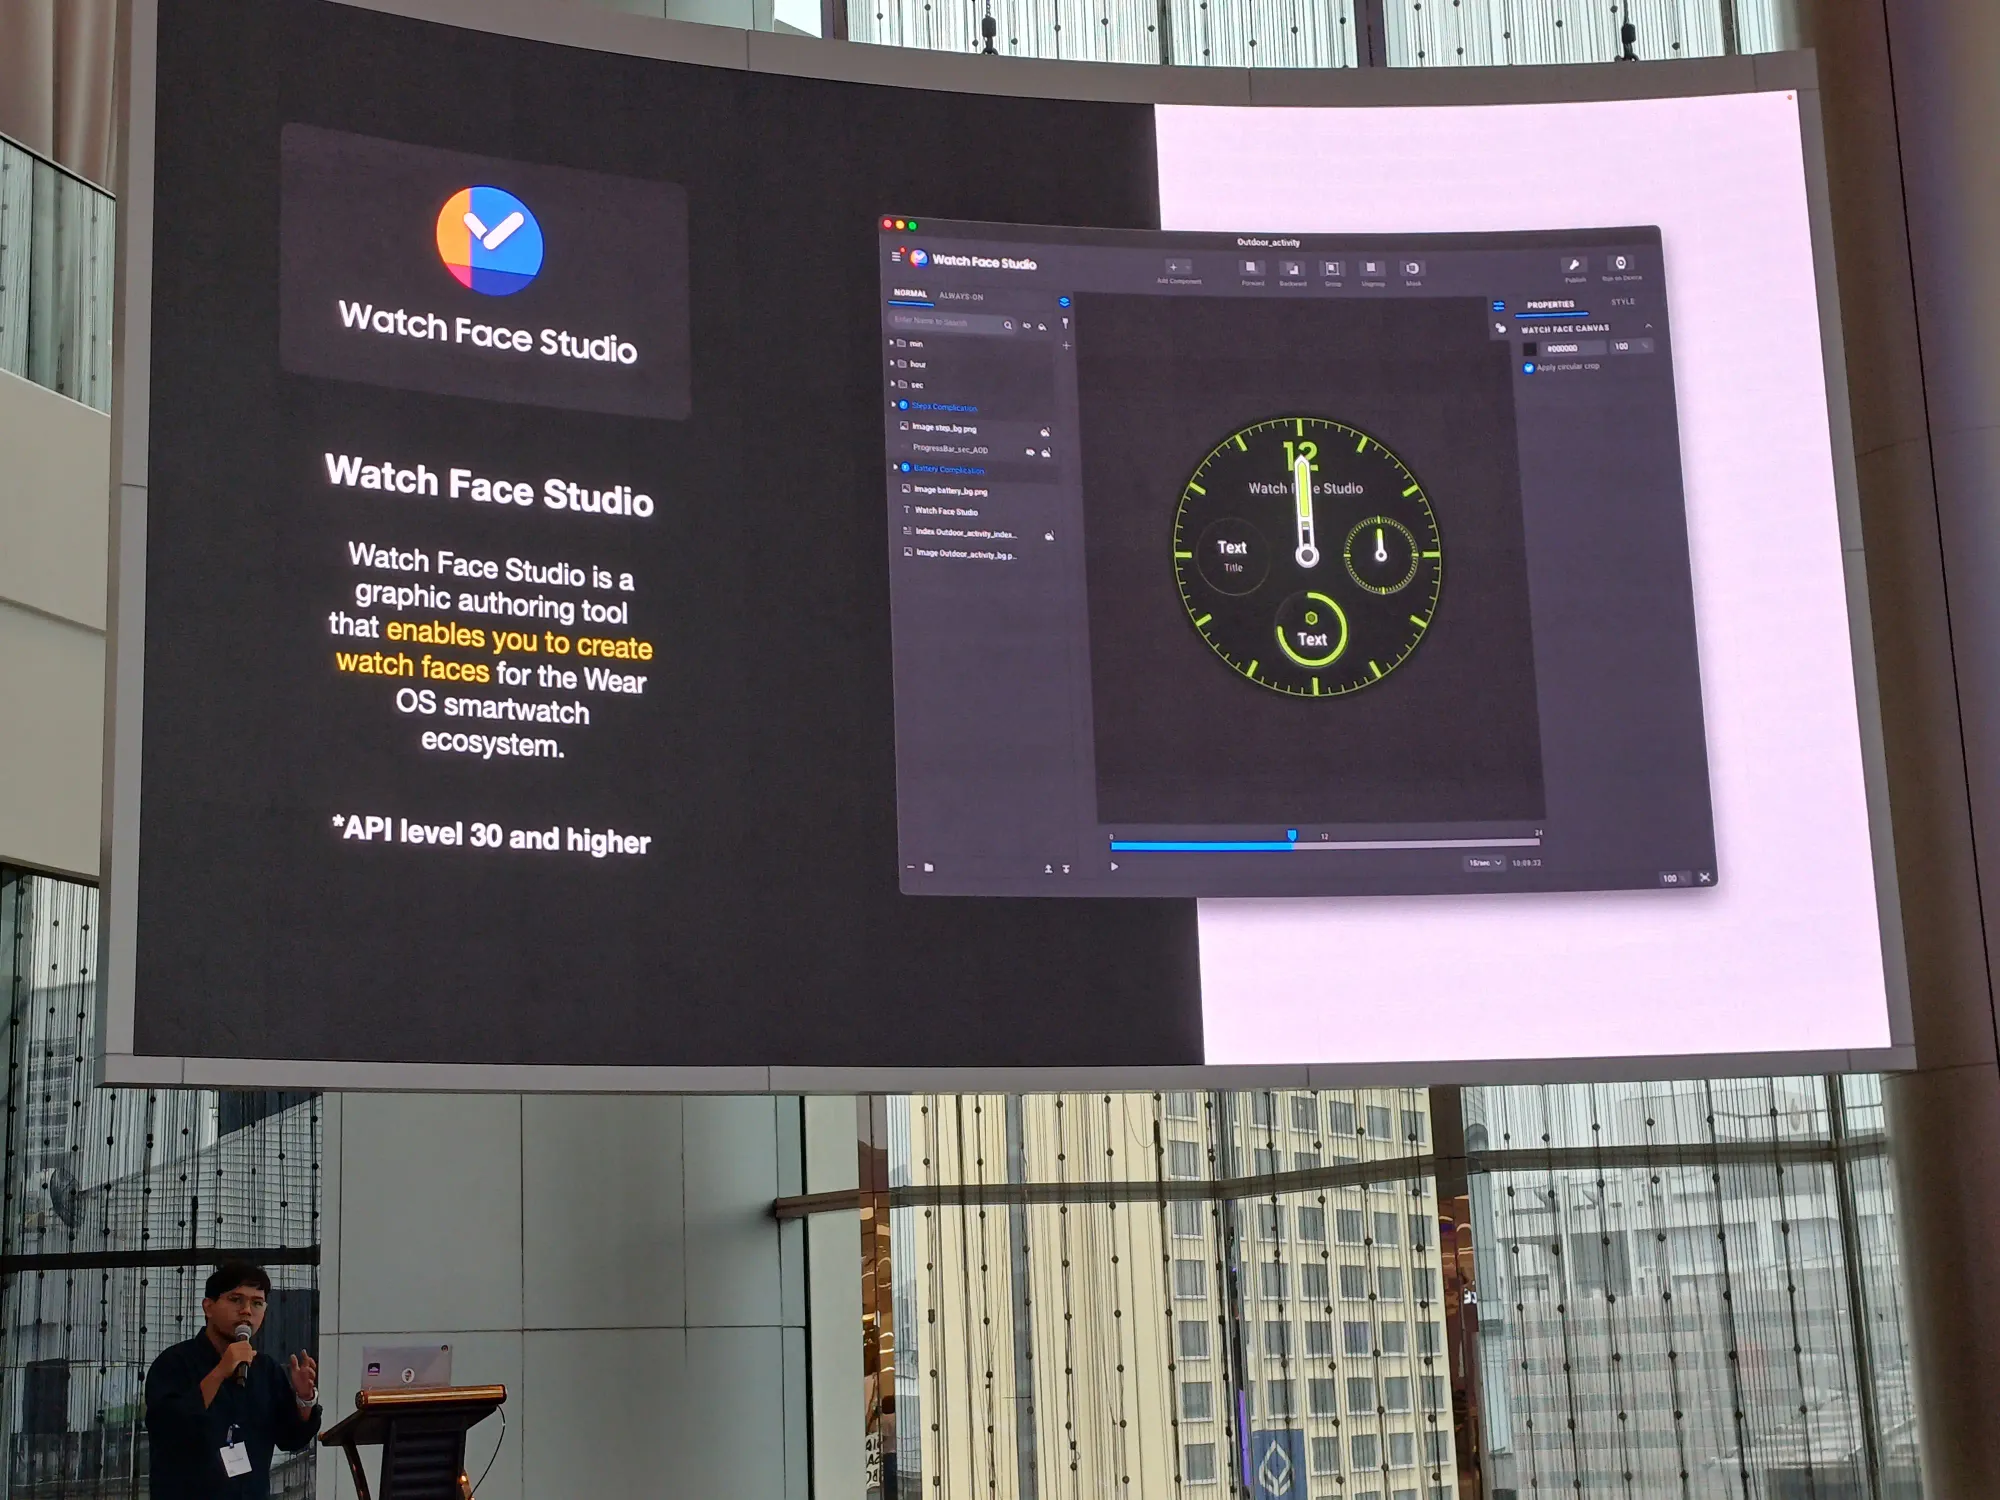
แต่วิธีนี้มันเป็น static แล้วมัน recompile ไม่ได้

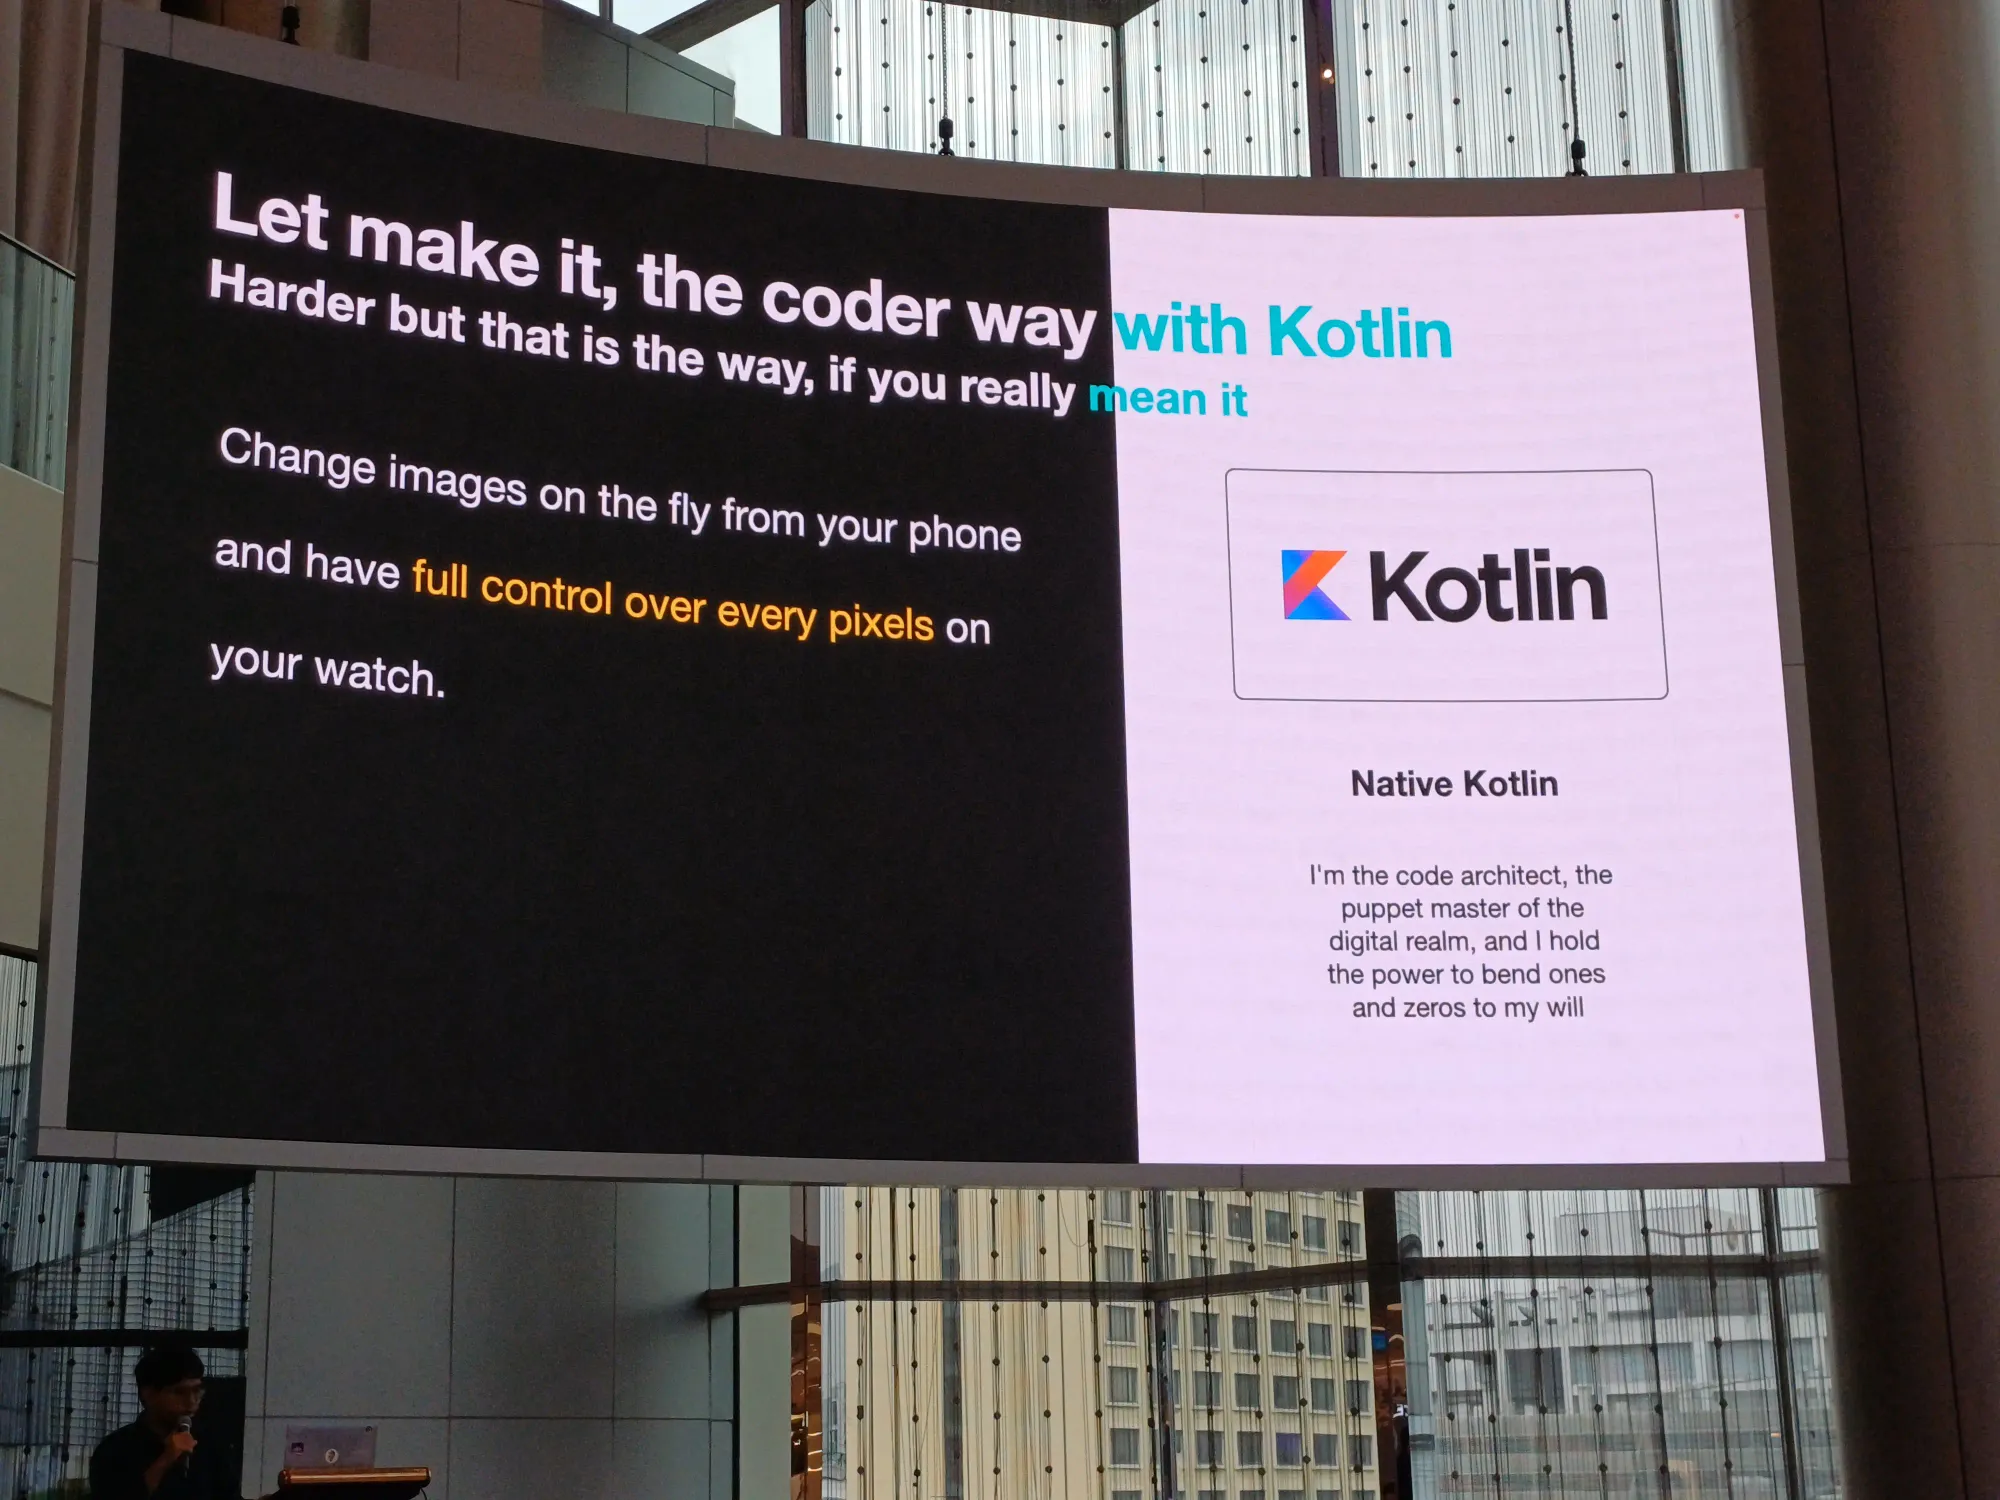
Native Kotlin: control program การทำงานต่าง ๆ ได้ เราสามารถเขียนอะไรก็ได้ เหมือนเราเป็นเทพเจ้าในการสร้างสิ่งนี้ขึ้นมา
แล้วระหว่างมือถือ และตัว watch จะคุยกันยังไง? คุยผ่าน Wear OS สิ ง่ายกว่า ในการใช้ API ในการคุยกัน
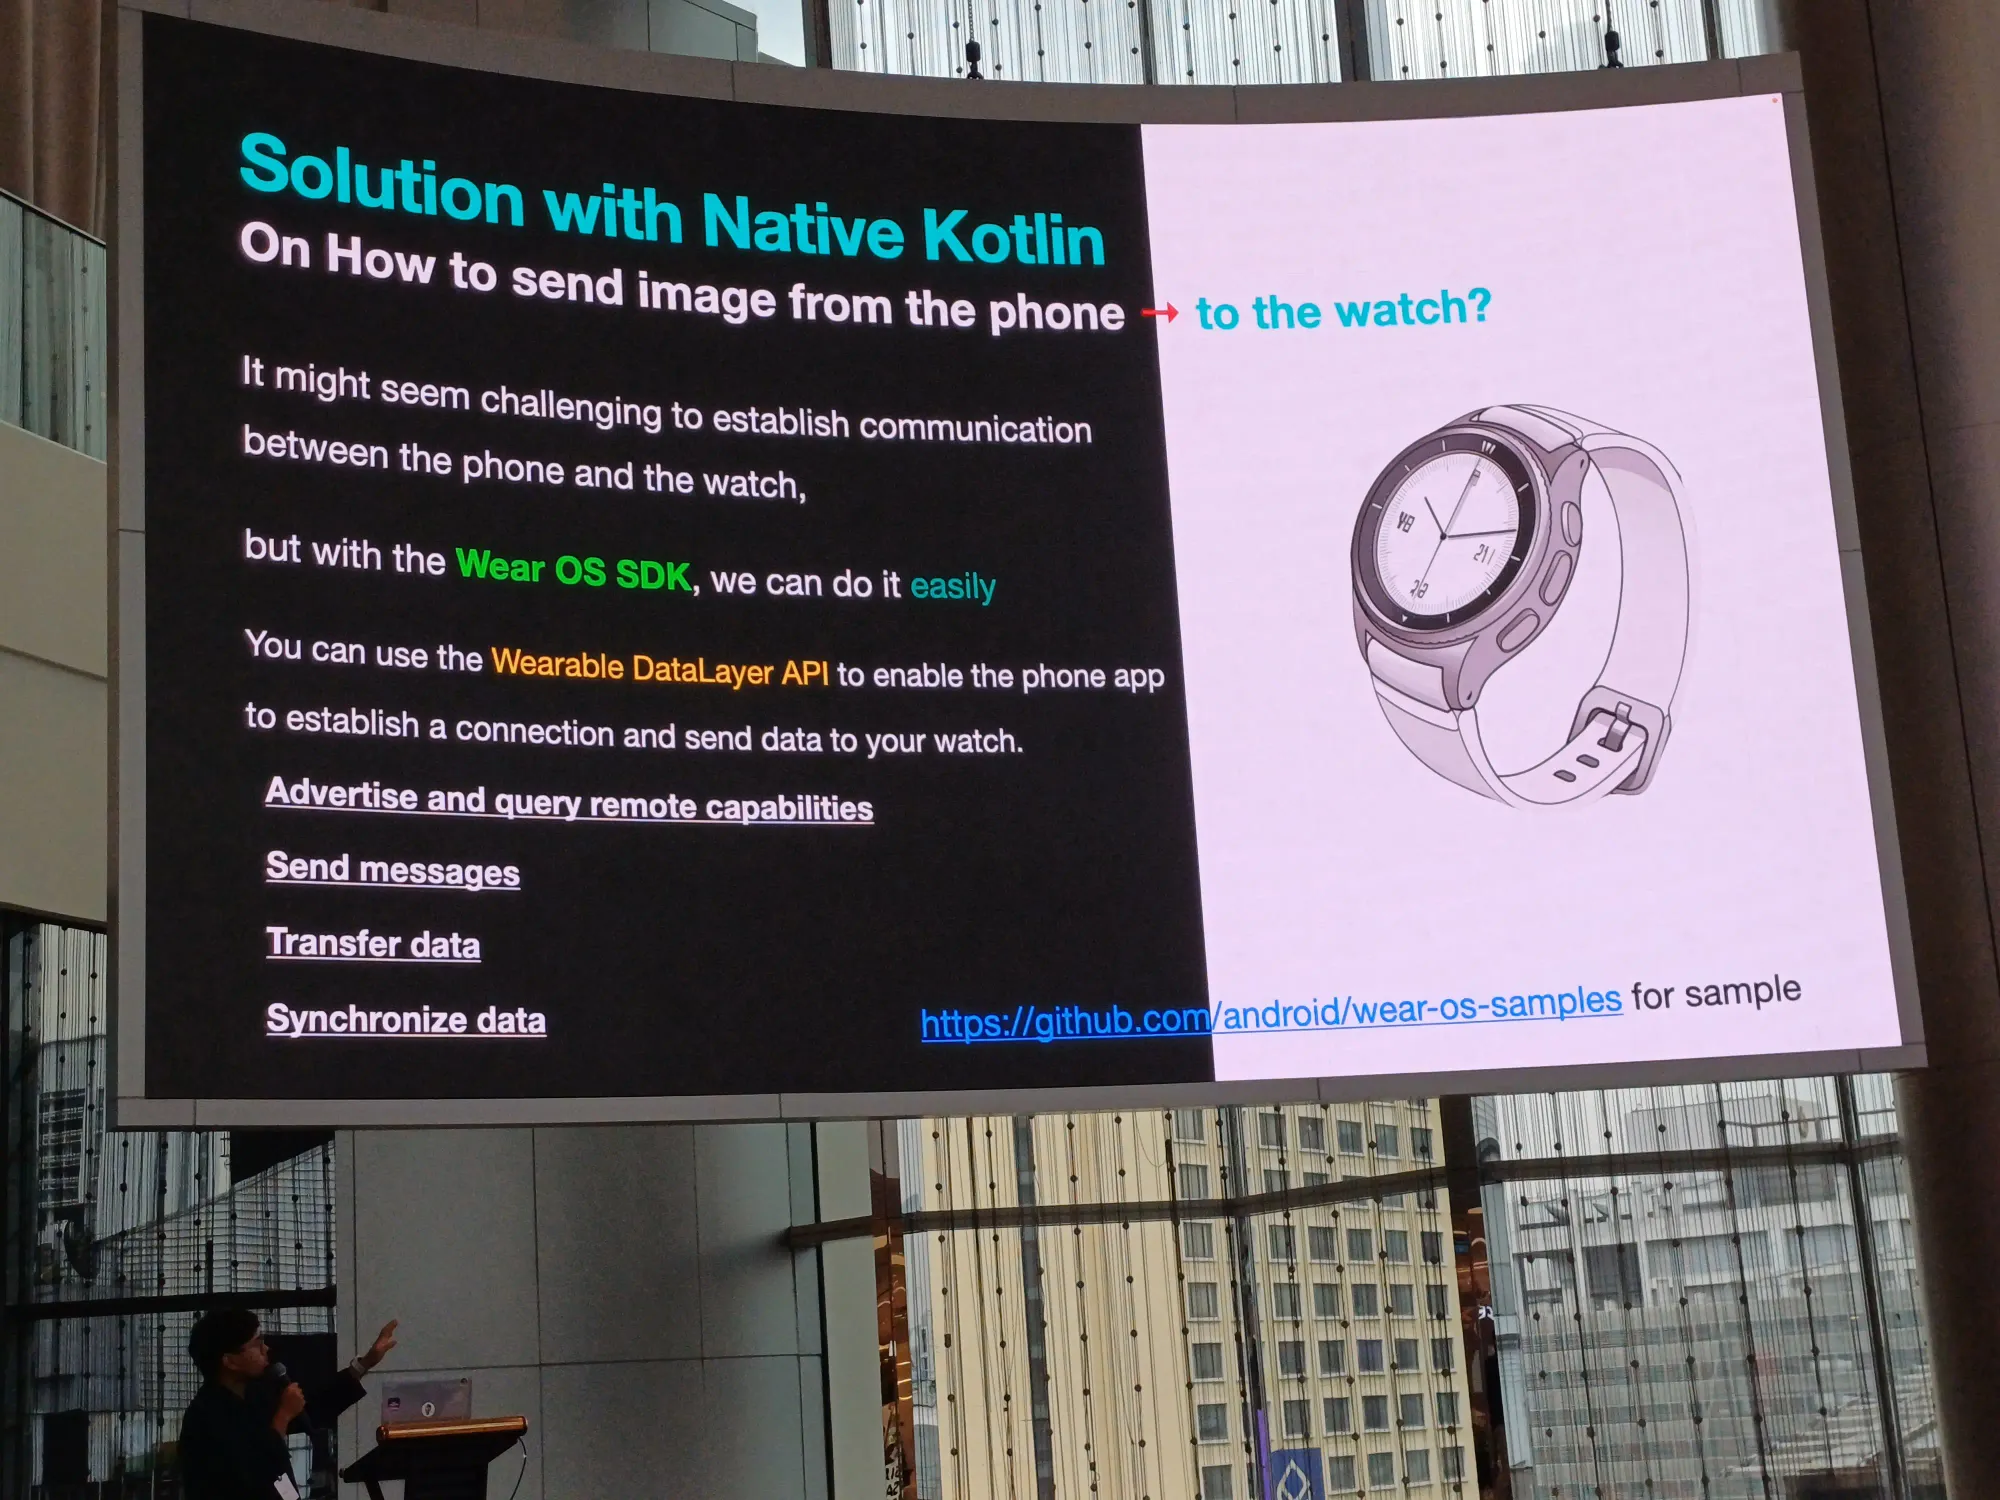
ในส่วนนี้สามารถศึกษา github sample code เพิ่มเติมได้เลย
androidตอนนี้ตอบ technical challenge ได้หมดล่ะ
แต่ยังเหลือ challenge อีกอย่างนึงคือ เราจะลบ background ออกยังไง?
ไม่ใช้ machine learning เพราะกลัว bias ของ AI แล้วตัดผิด
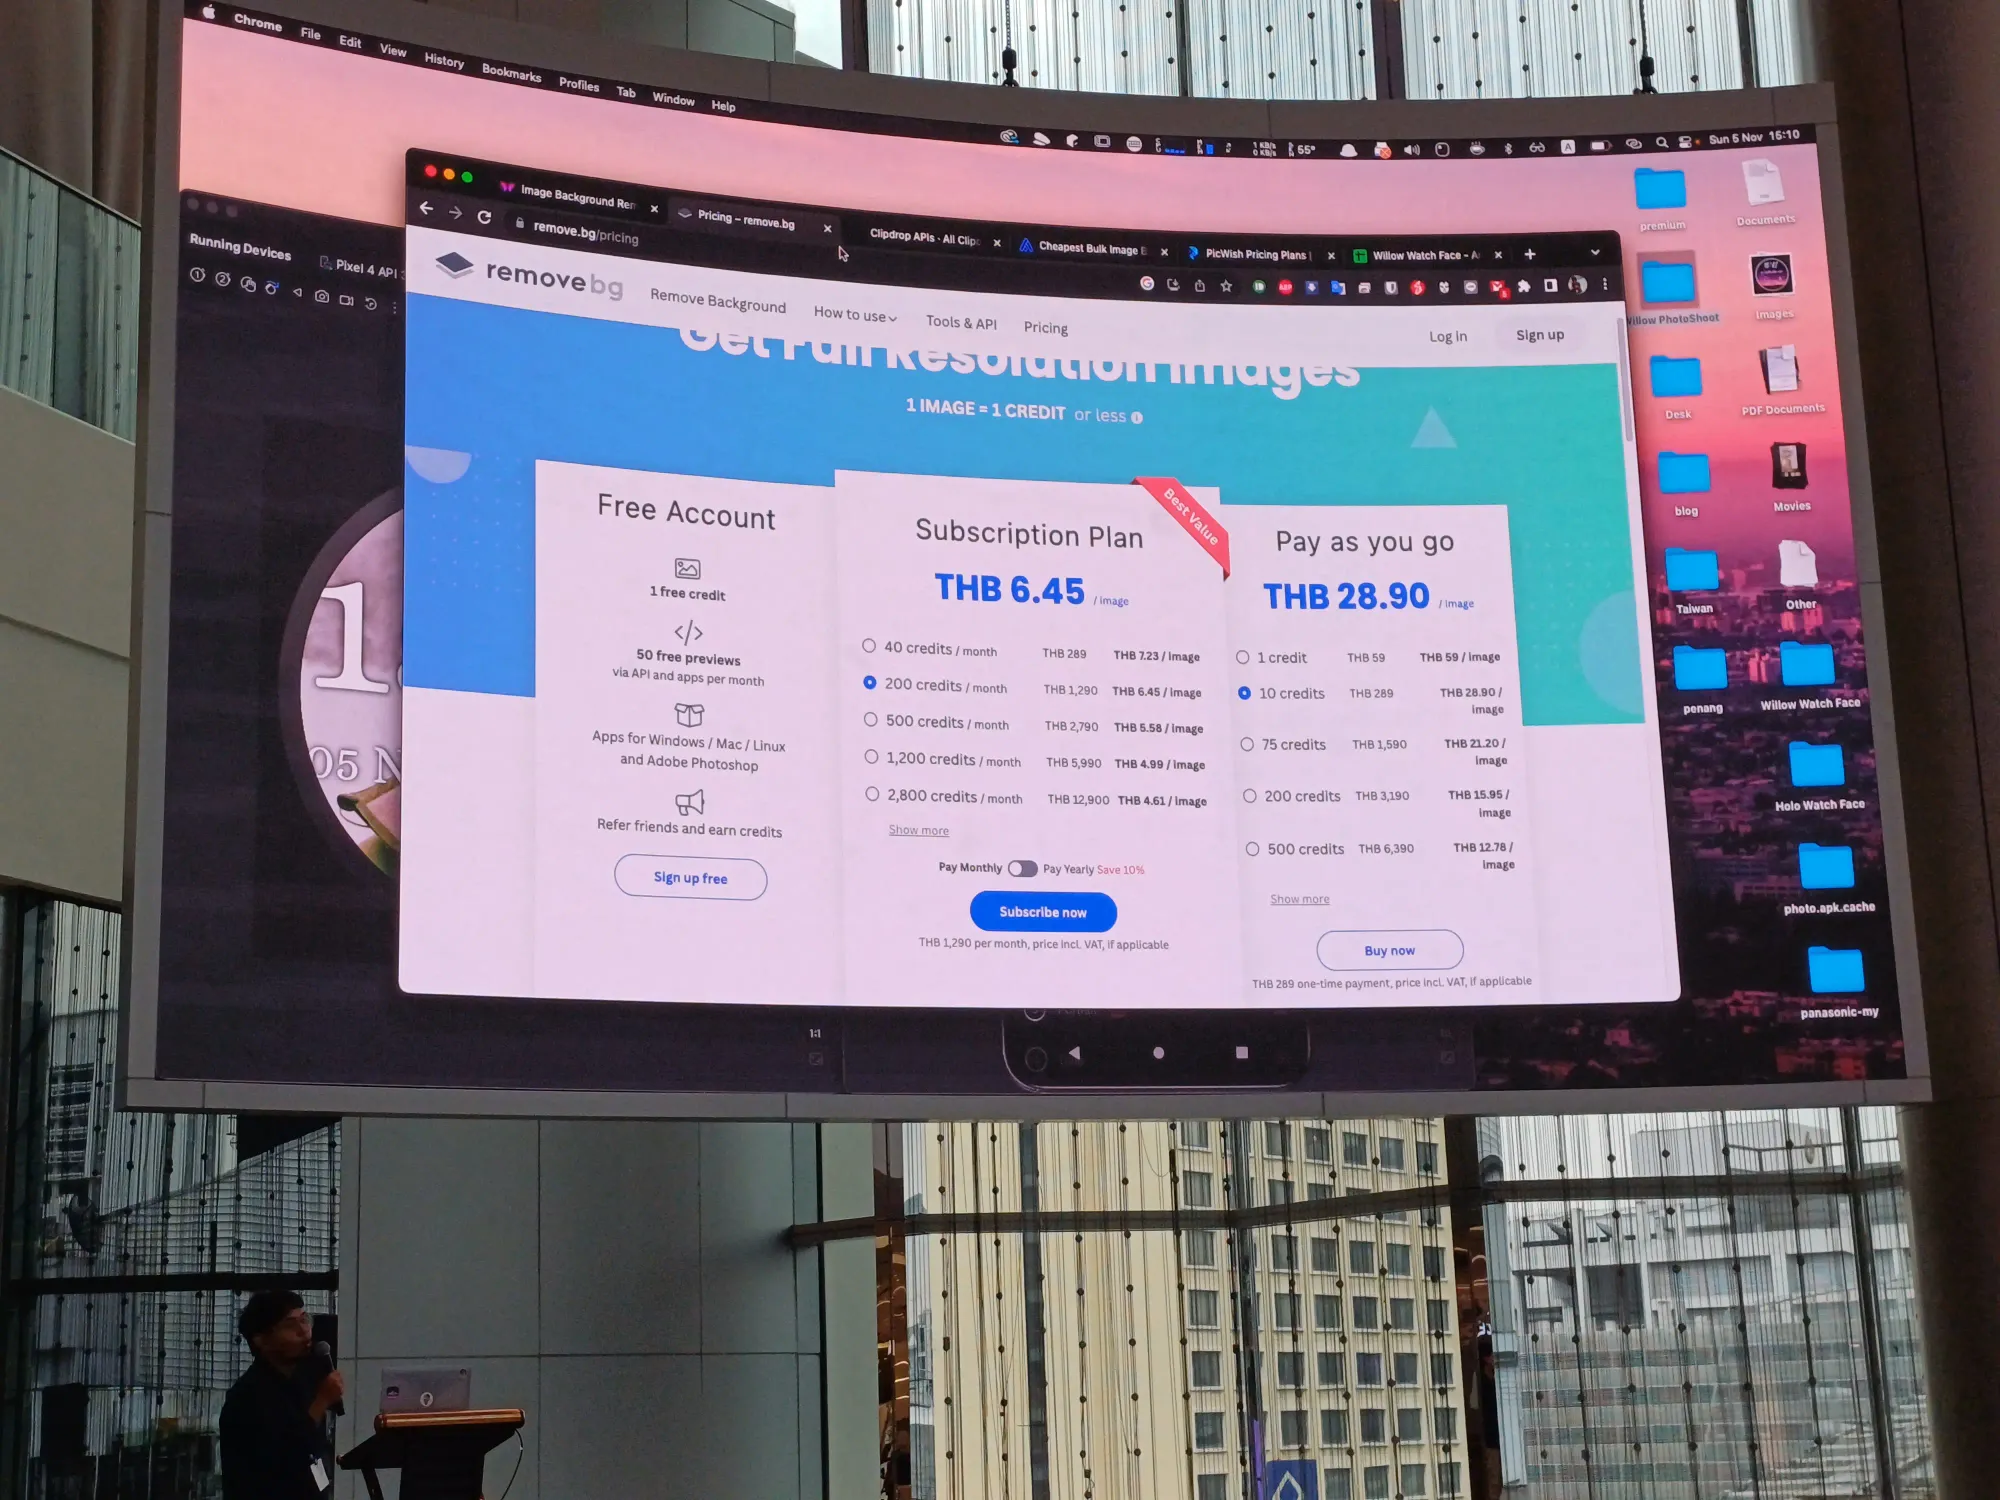
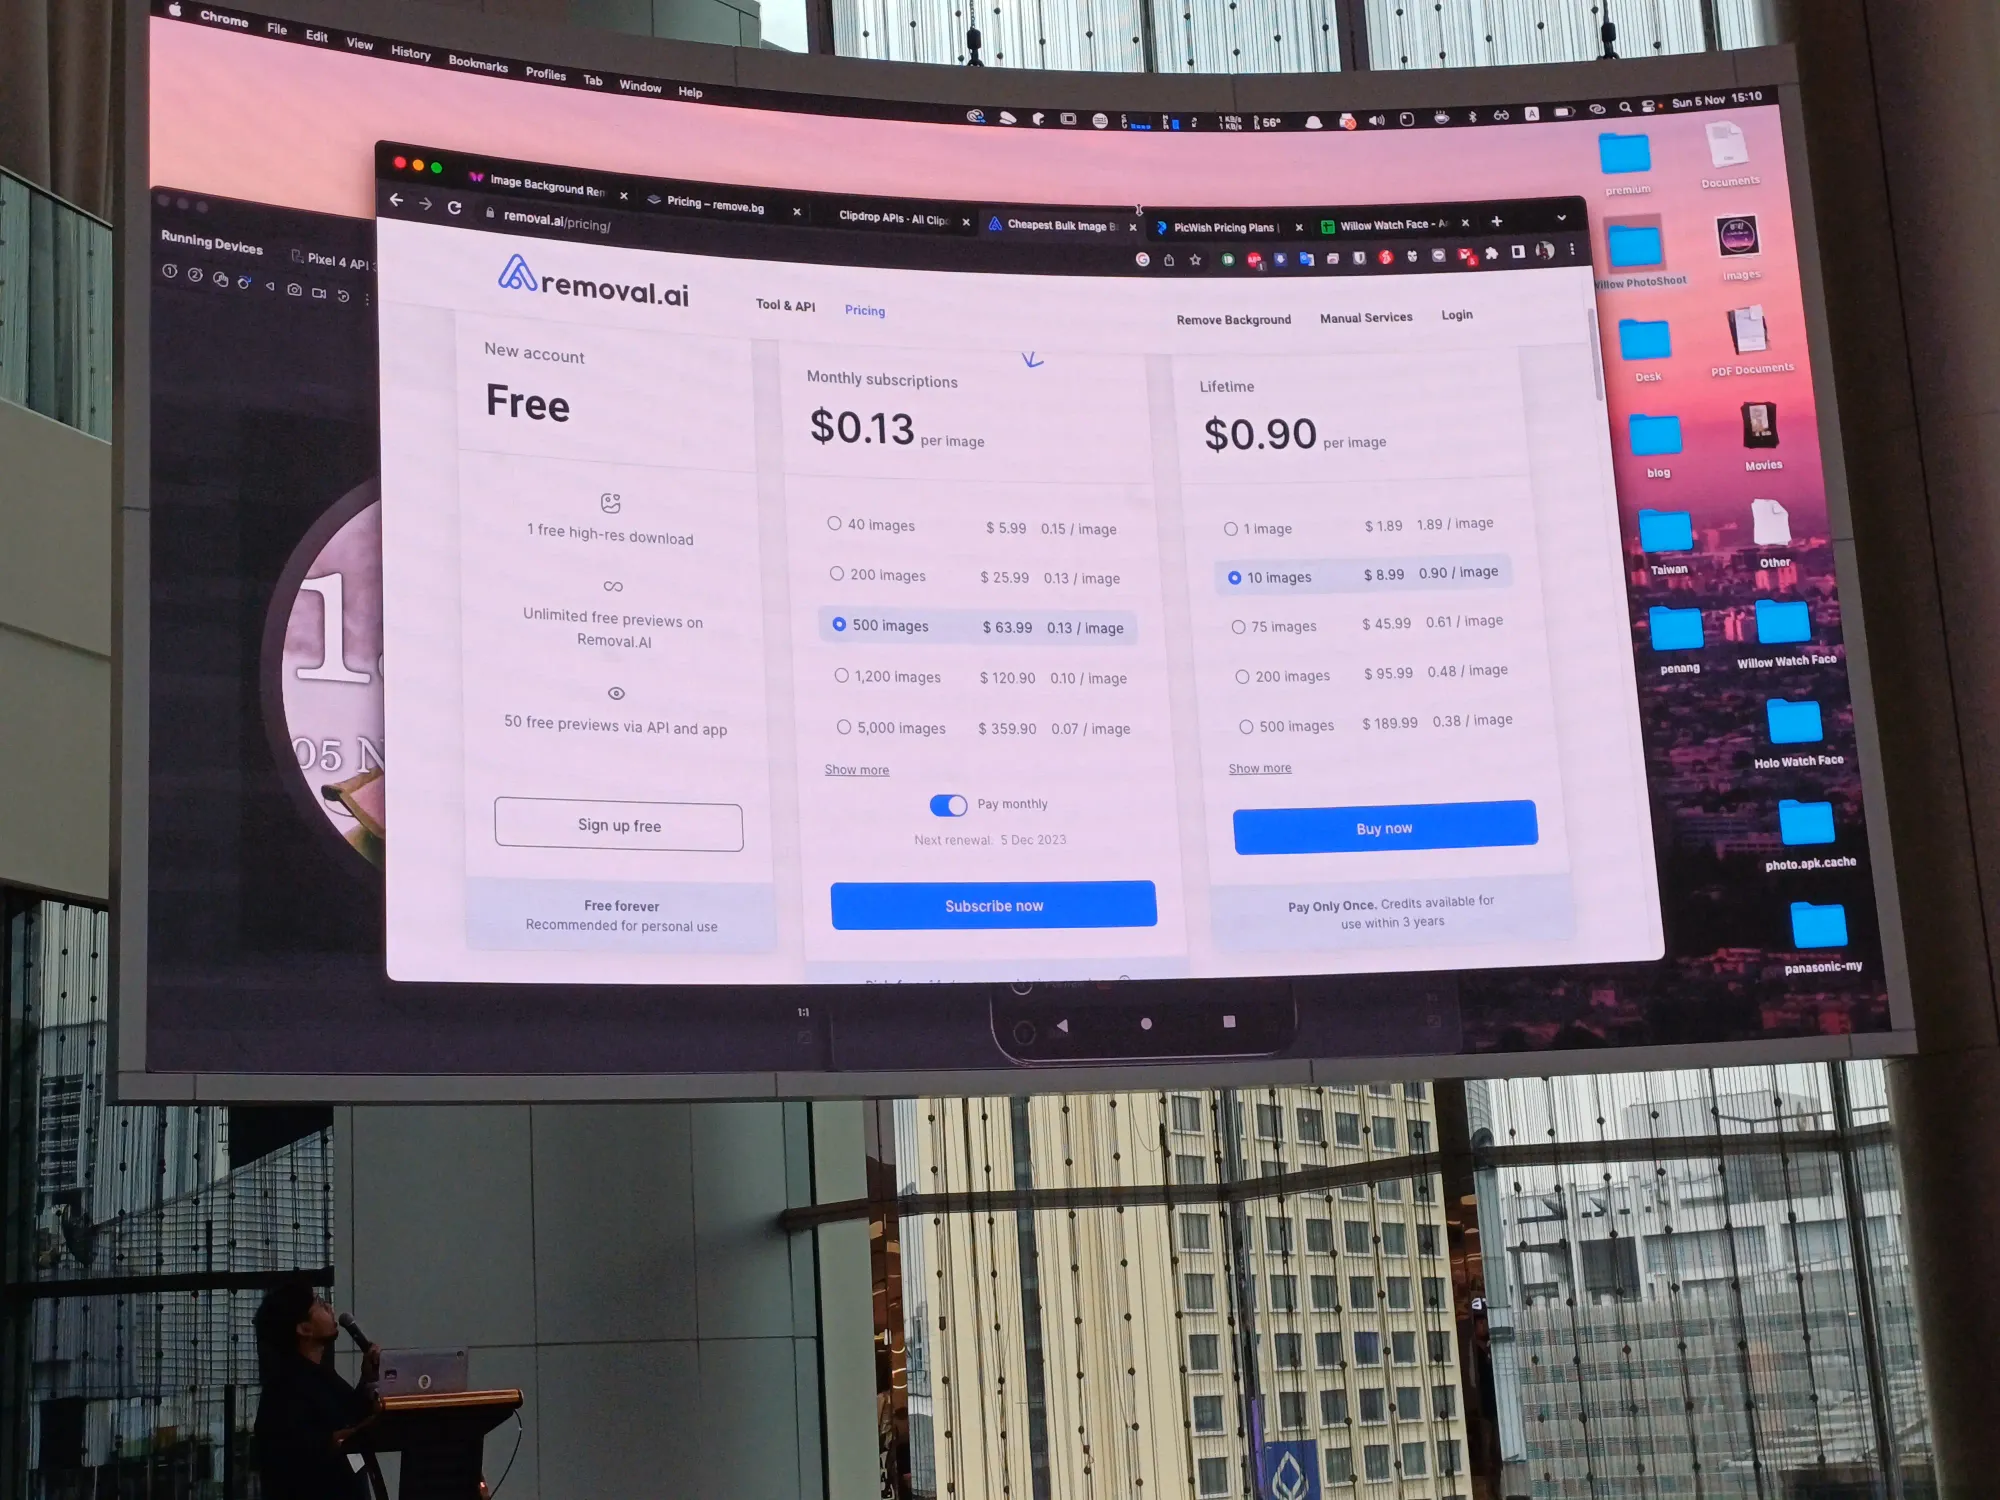
ถ้าส่งไป online service ดีไหมนะ? มีการ upload phone และมีเรื่อง privacy แล้วก็ consent ต่าง ๆ มีการลบ data ออกจาก server ให้ด้วยไหม เก็บข้อมูลเป็นระยะเวลาเท่าไหร่ แล้วมีเรื่อง cost ต่าง ๆ ด้วย
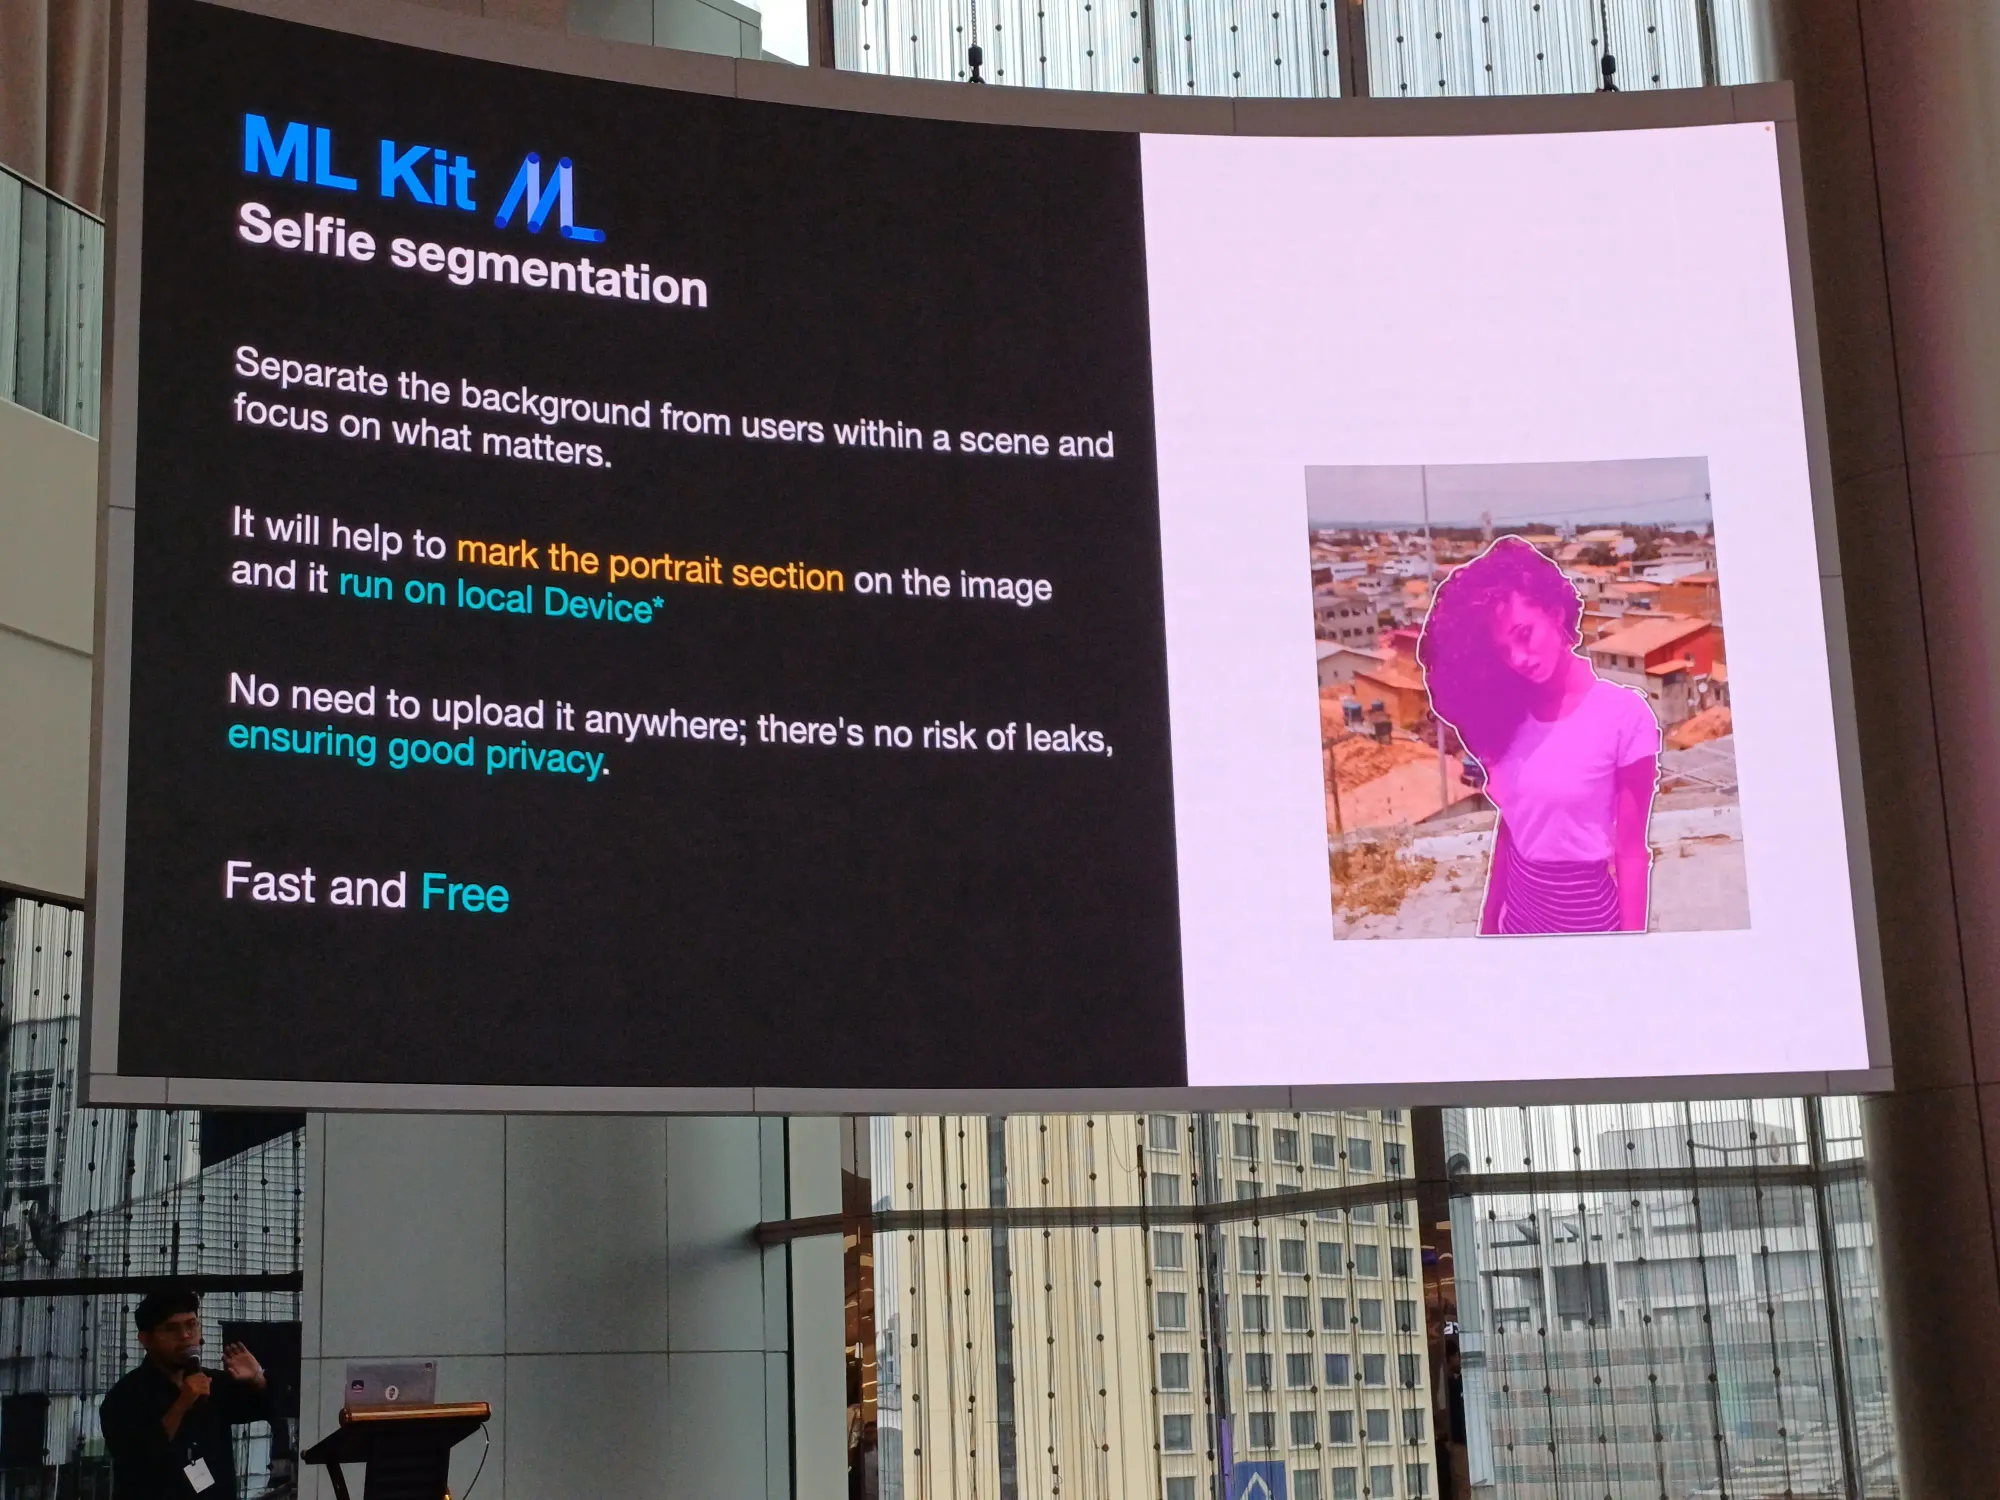
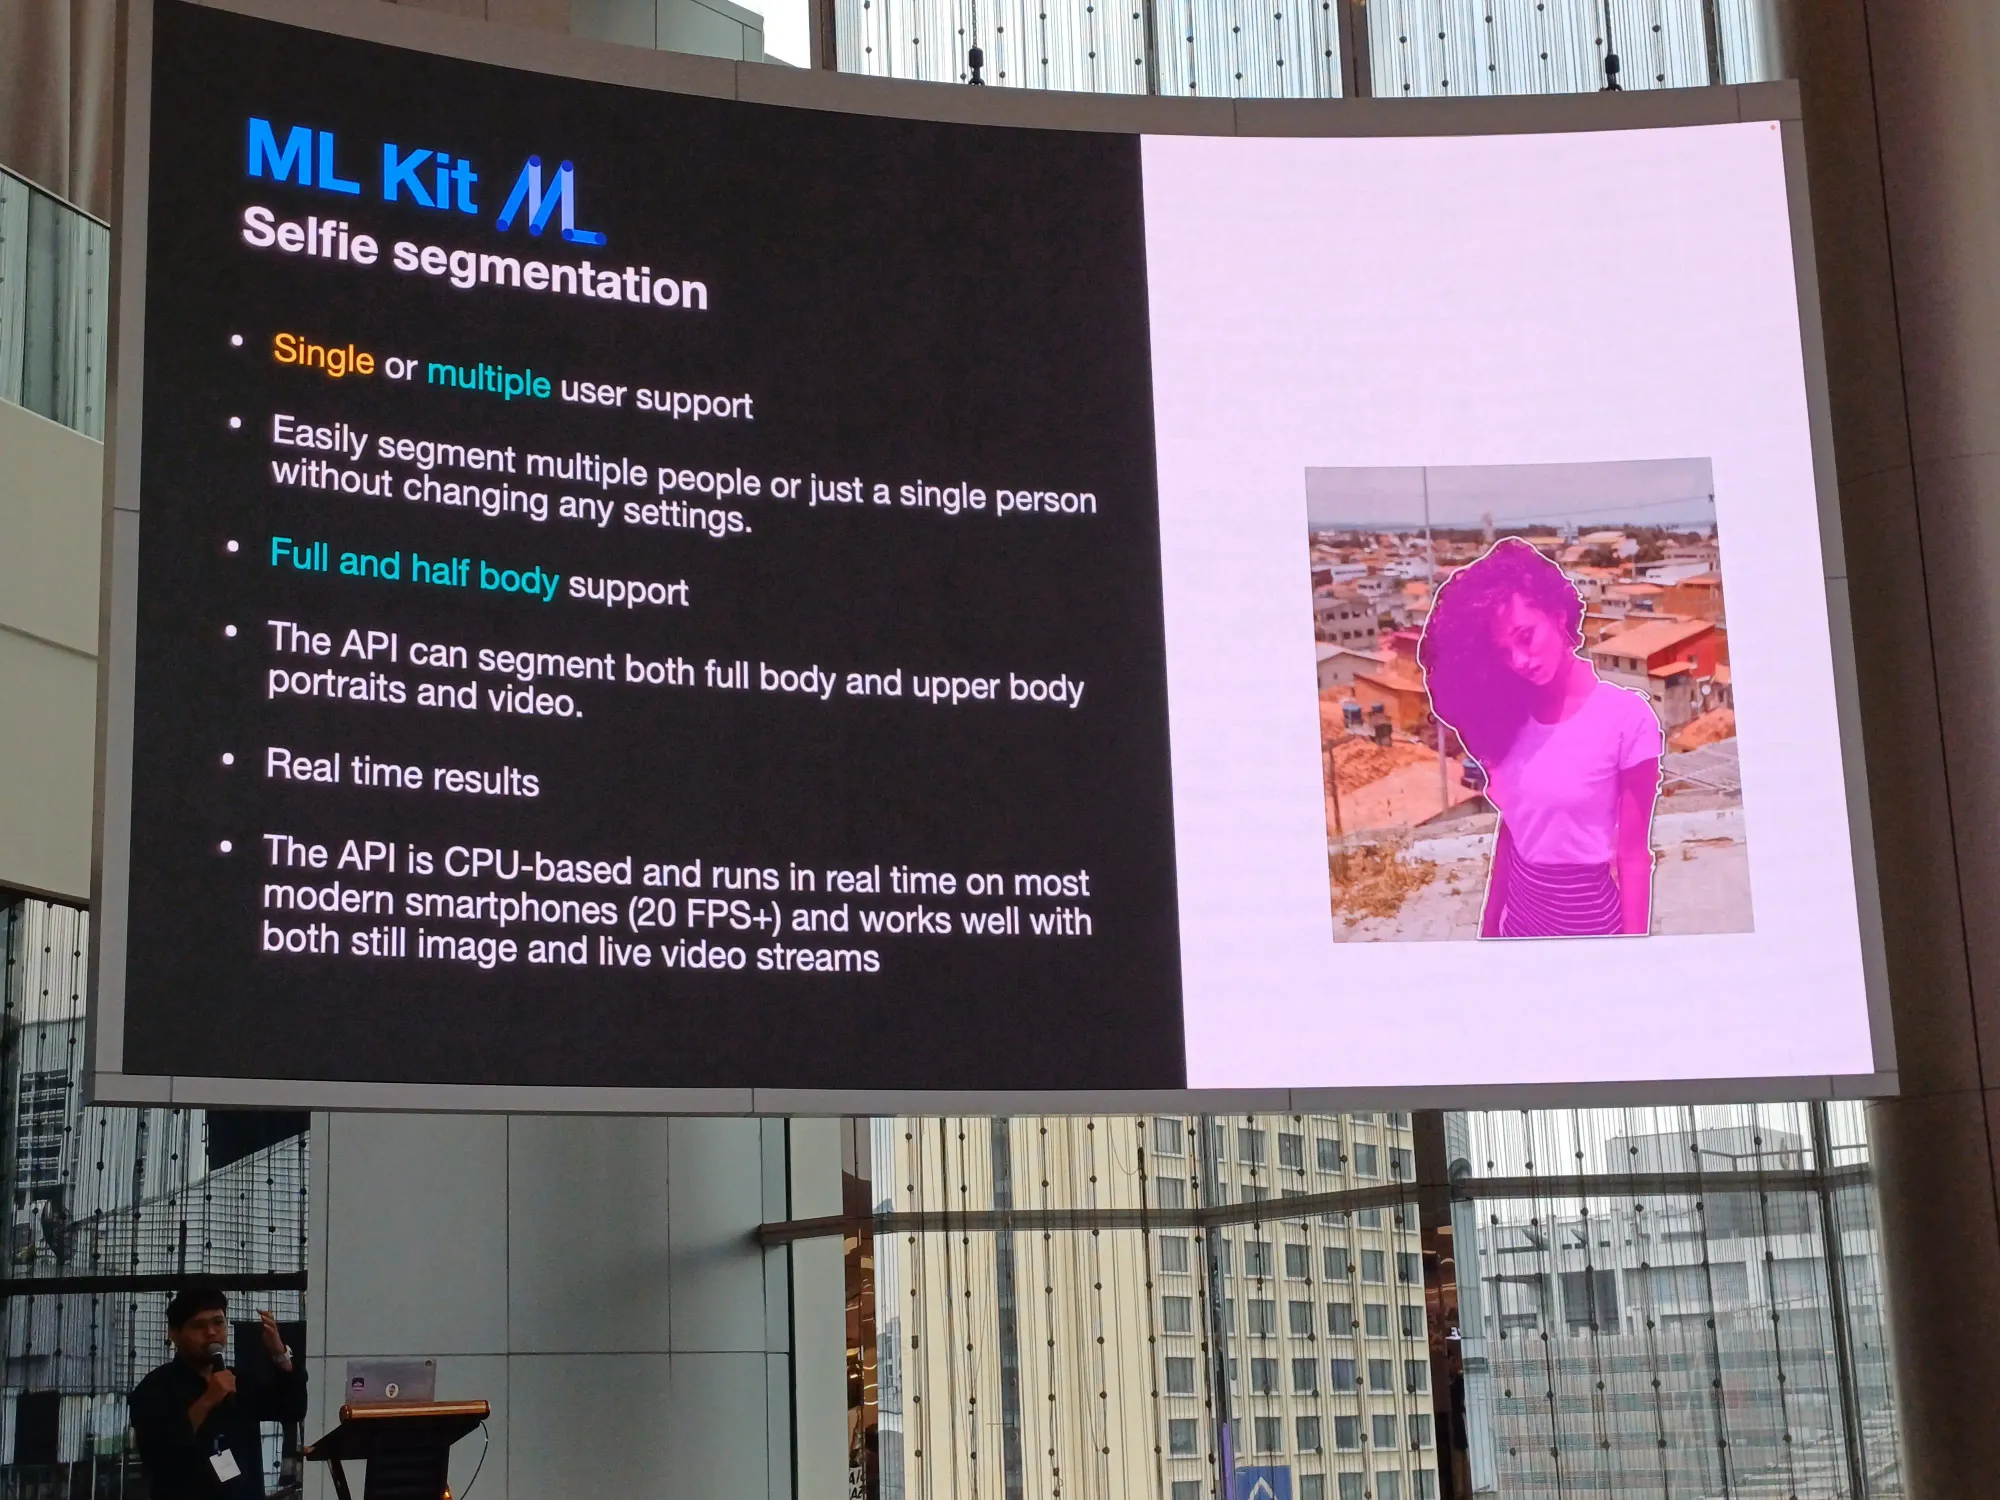
สุดท้ายใช้ ML Kit ในการตัดพื้นหลัง และมัน run on device ทำให้หมดปัญหาต่าง ๆ process ต่าง ๆ จะอยู่บน on-device
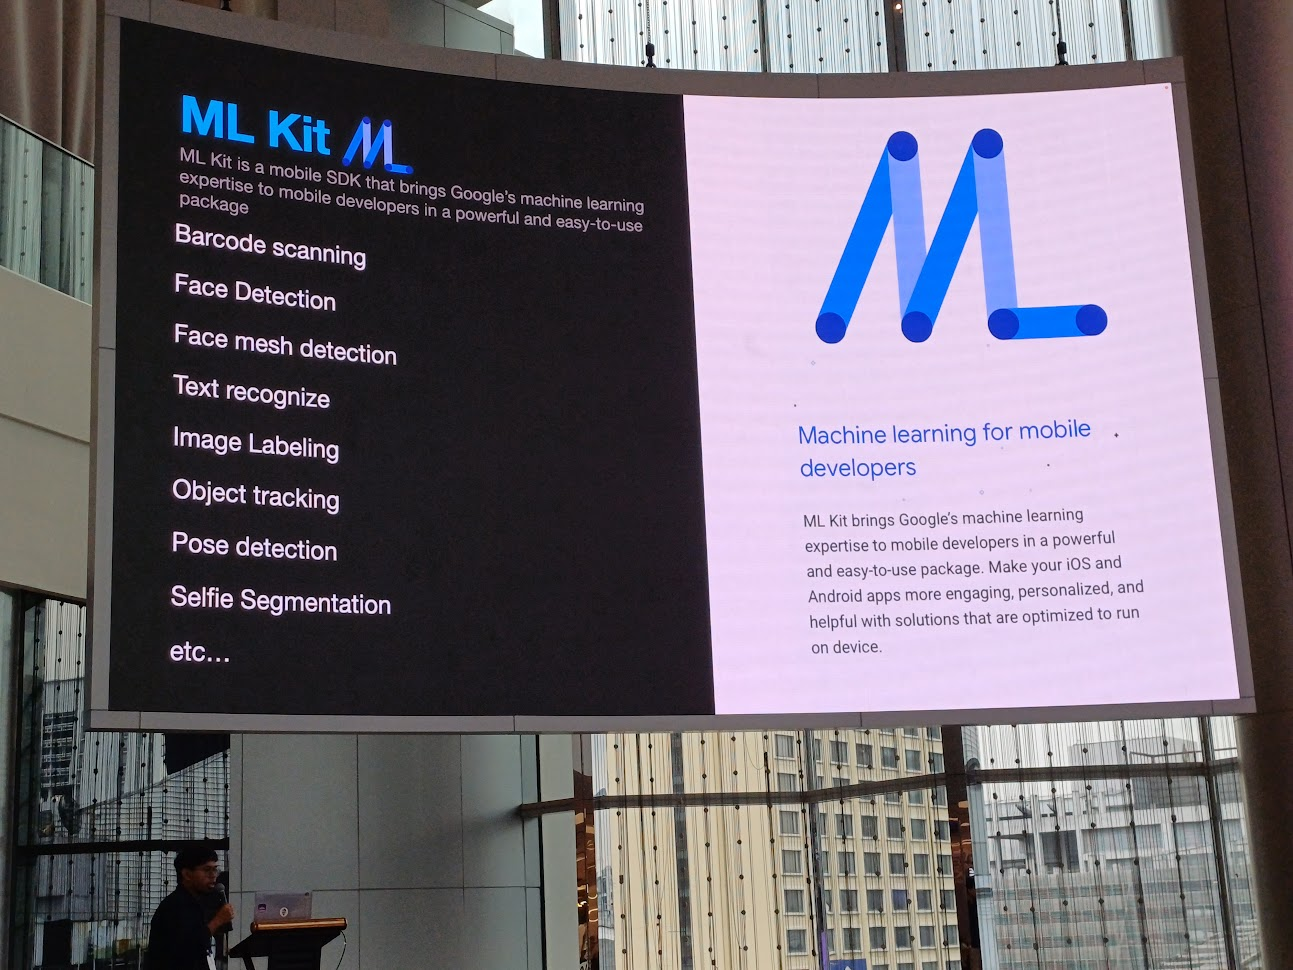
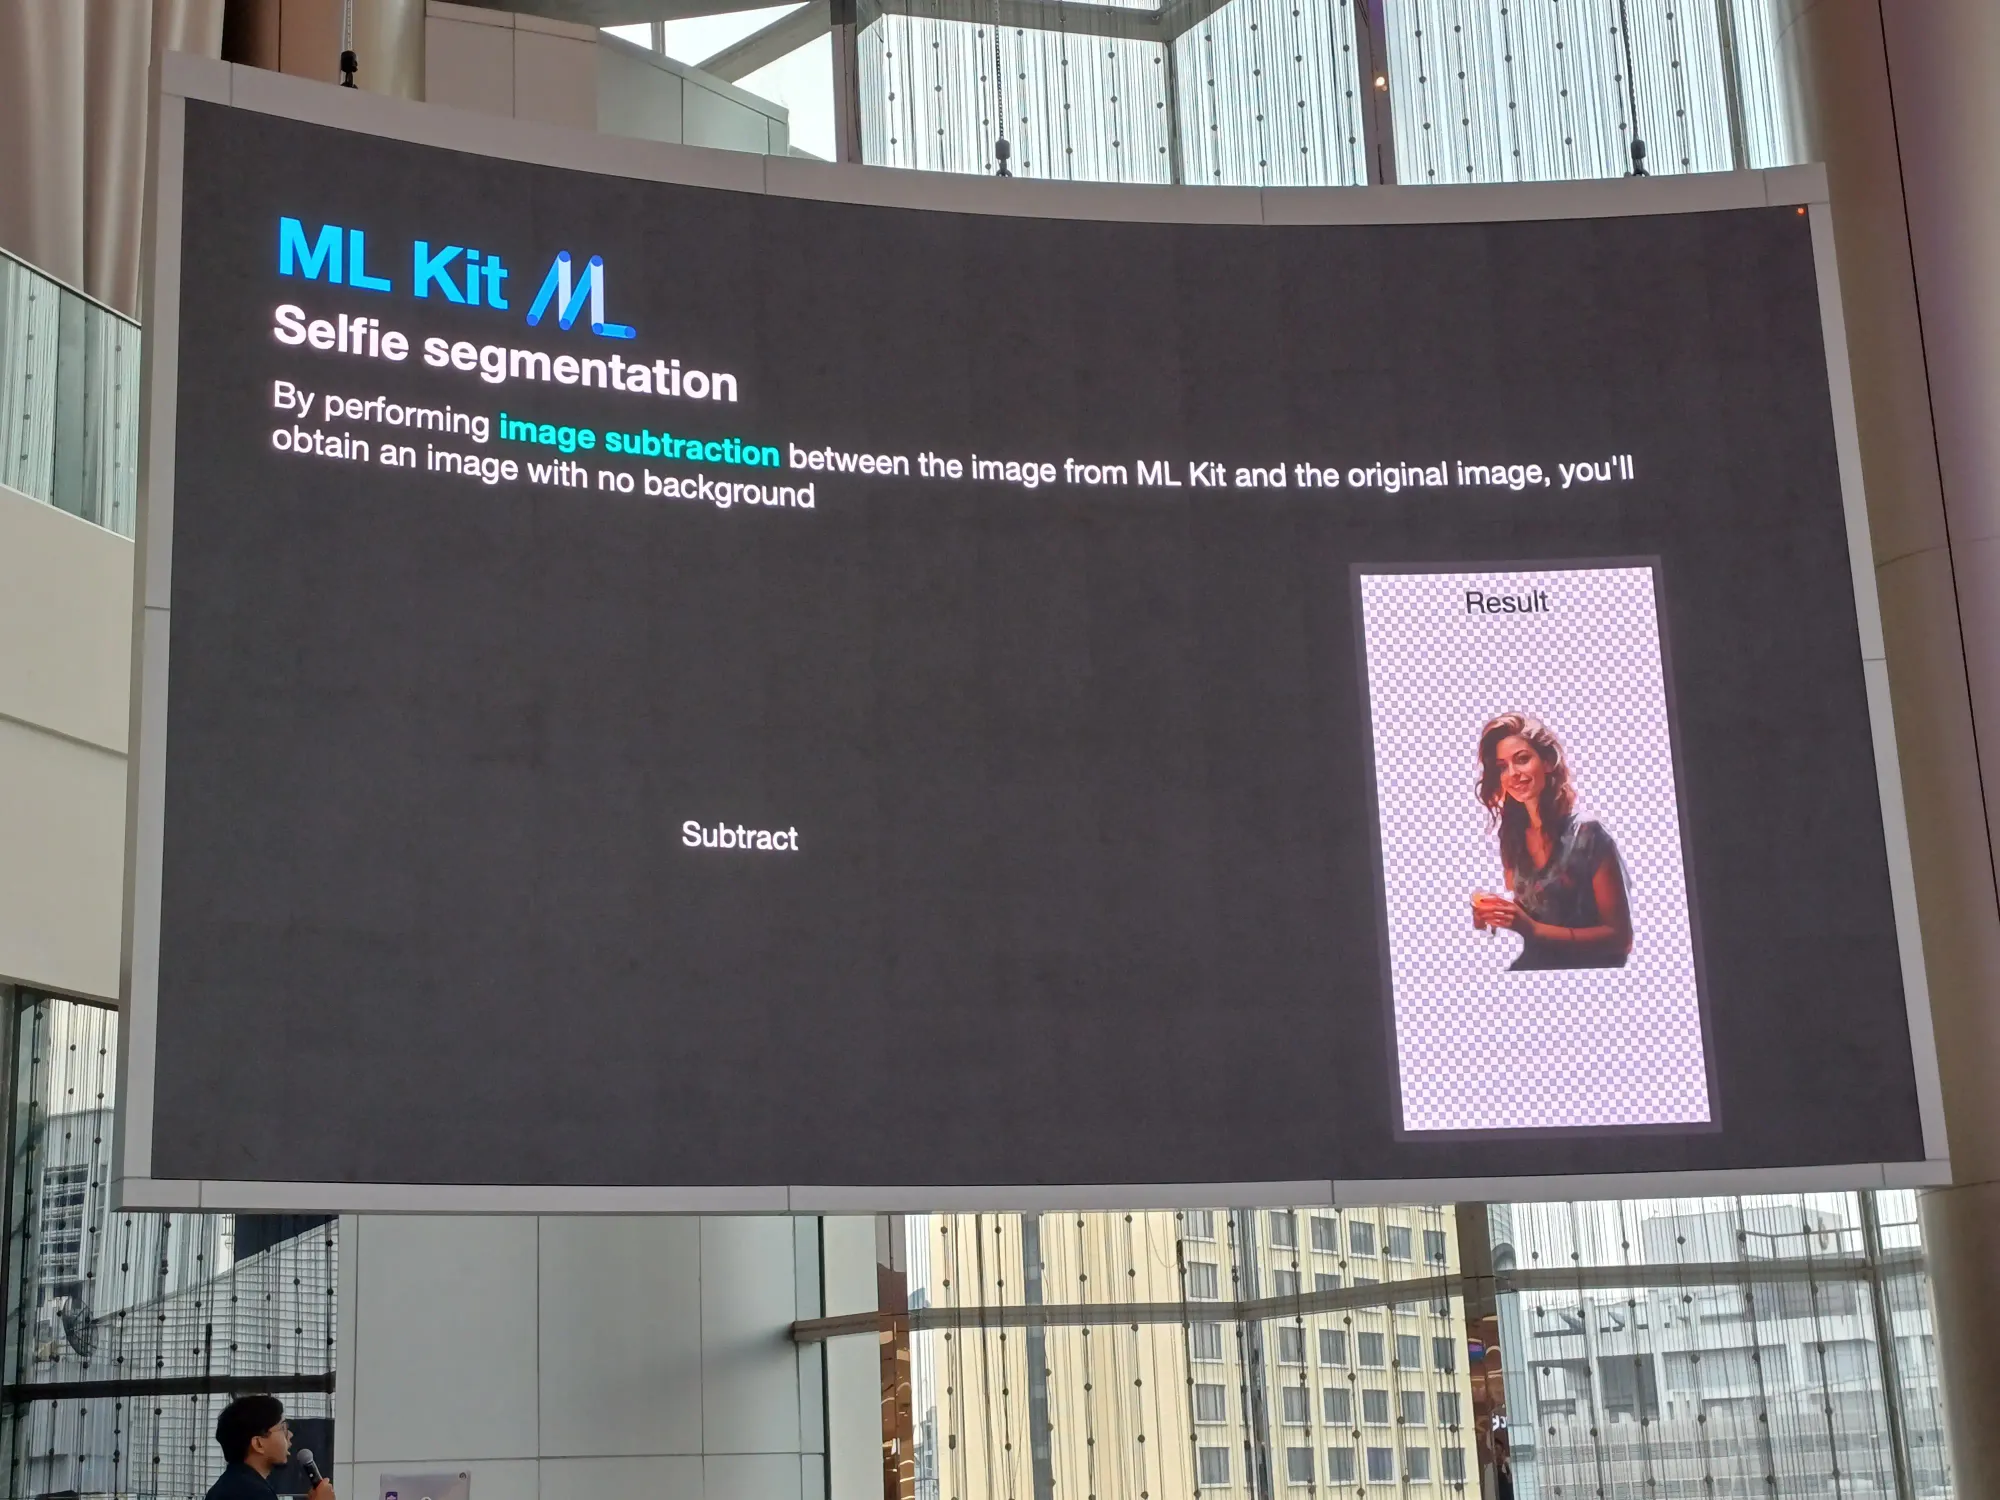
ใช้ selfie segmentation เป็น image subtraction แยก background กับคนออกจากกัน
Demo
เป็นแอพที่เลือกรูปจากตัวแอพ แล้วก็สลับ layer ต่าง ๆ ได้ ประมาณนี้
ตัวสไลด์ของ session นี้
อันนี้ตัว code ของแอพ Willow Watch Face ใช้ได้เฉพาะ Samsung Watch device เท่านั้น ใครสนใจมาตำได้ ยังเหลืออยู่

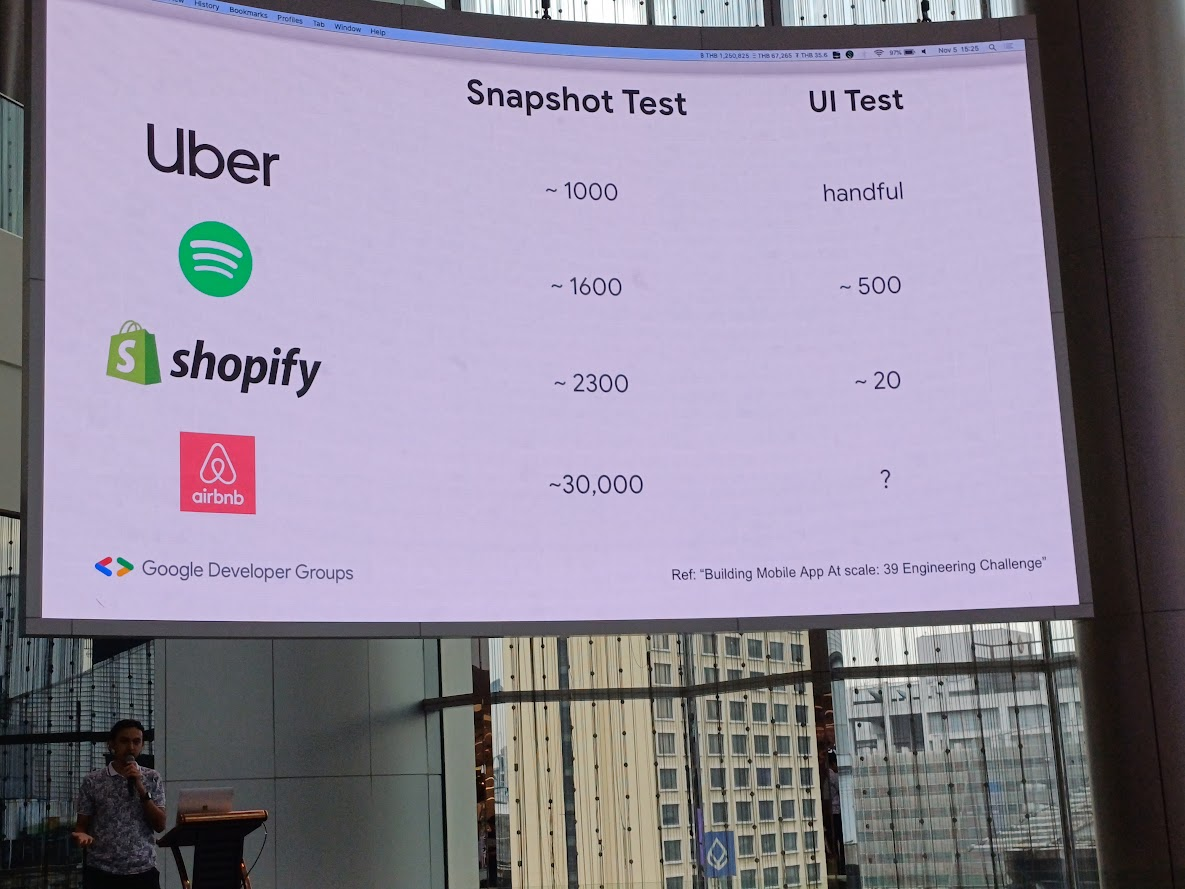
A to Z of Snapshot Testing - Aung Kyaw Paing
แว่บแรกในงานทุกคนเห็นอะไรจาก session นี้
เนื้อหา ❌
ราคา BTC, ETH, USDT ที่อยู่แถบด้านบนจอของ speaker ✅
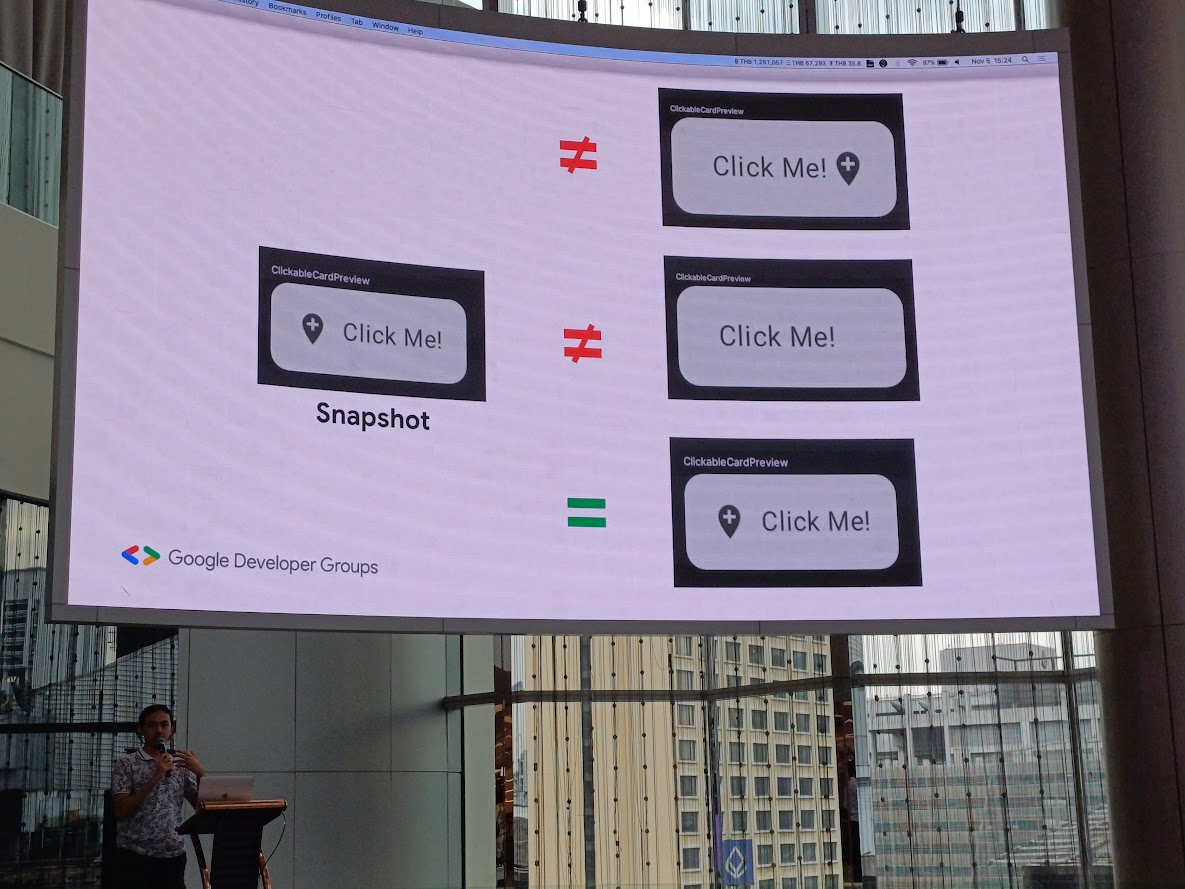
ก่อนอื่นเลย snapshot != UI Test แต่มันคือเป็นการ check ความถูกต้องว่ามันตรงกับ design ไหม
เข้าใจว่าถ้าเราทำ Snapshot Test เยอะ ๆ จะทำให้เราทำ UI Test น้อยลงด้วย
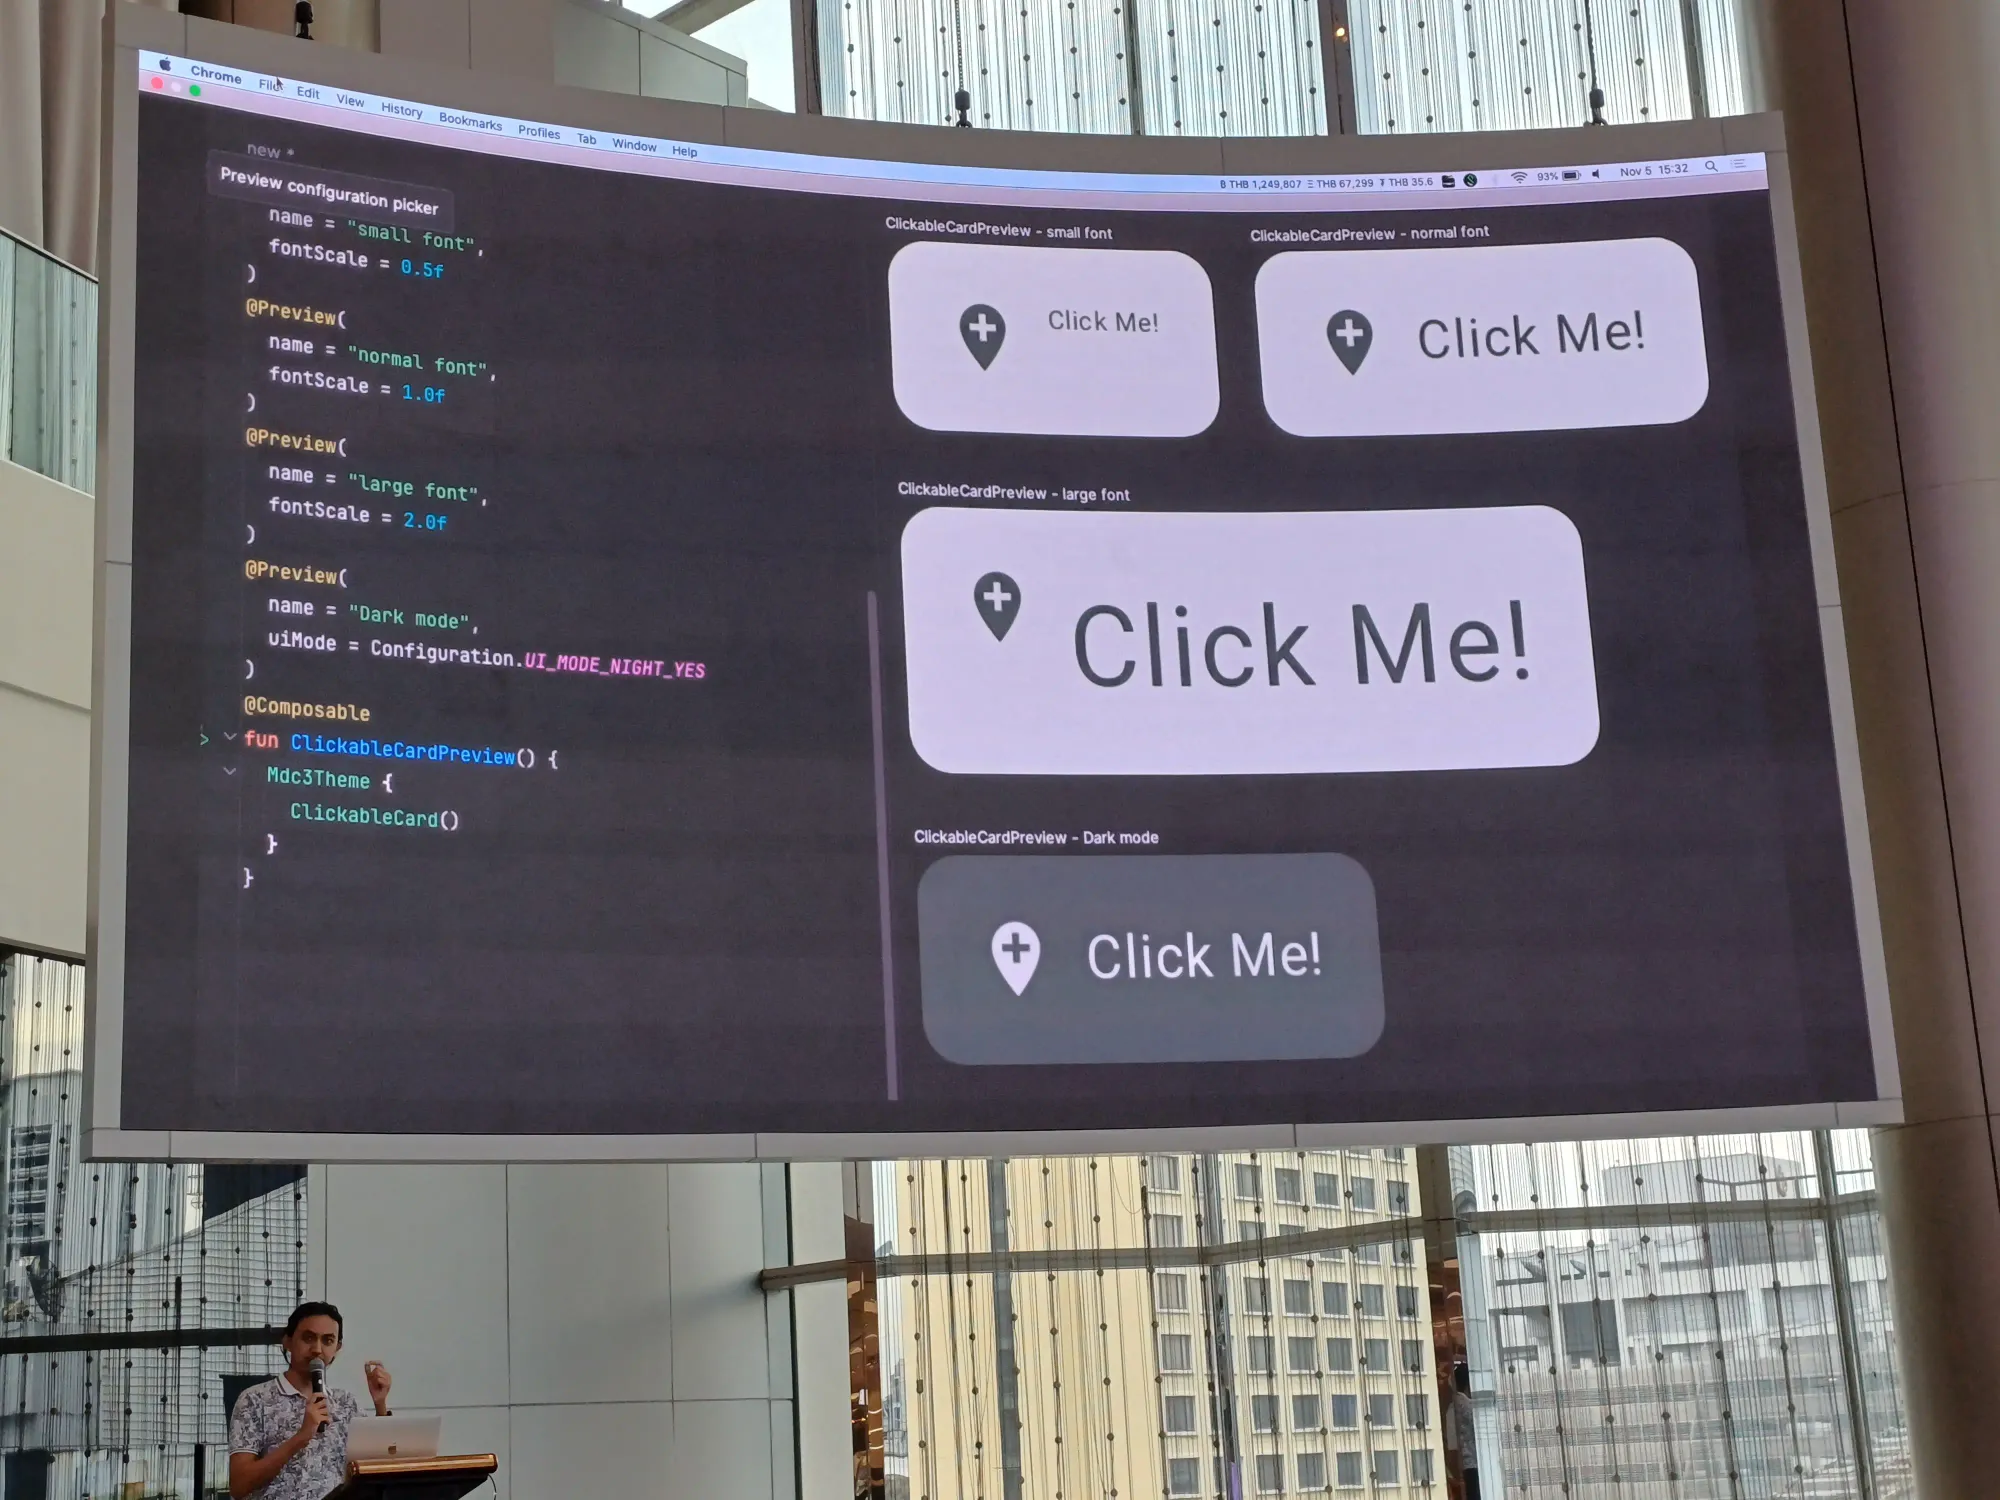
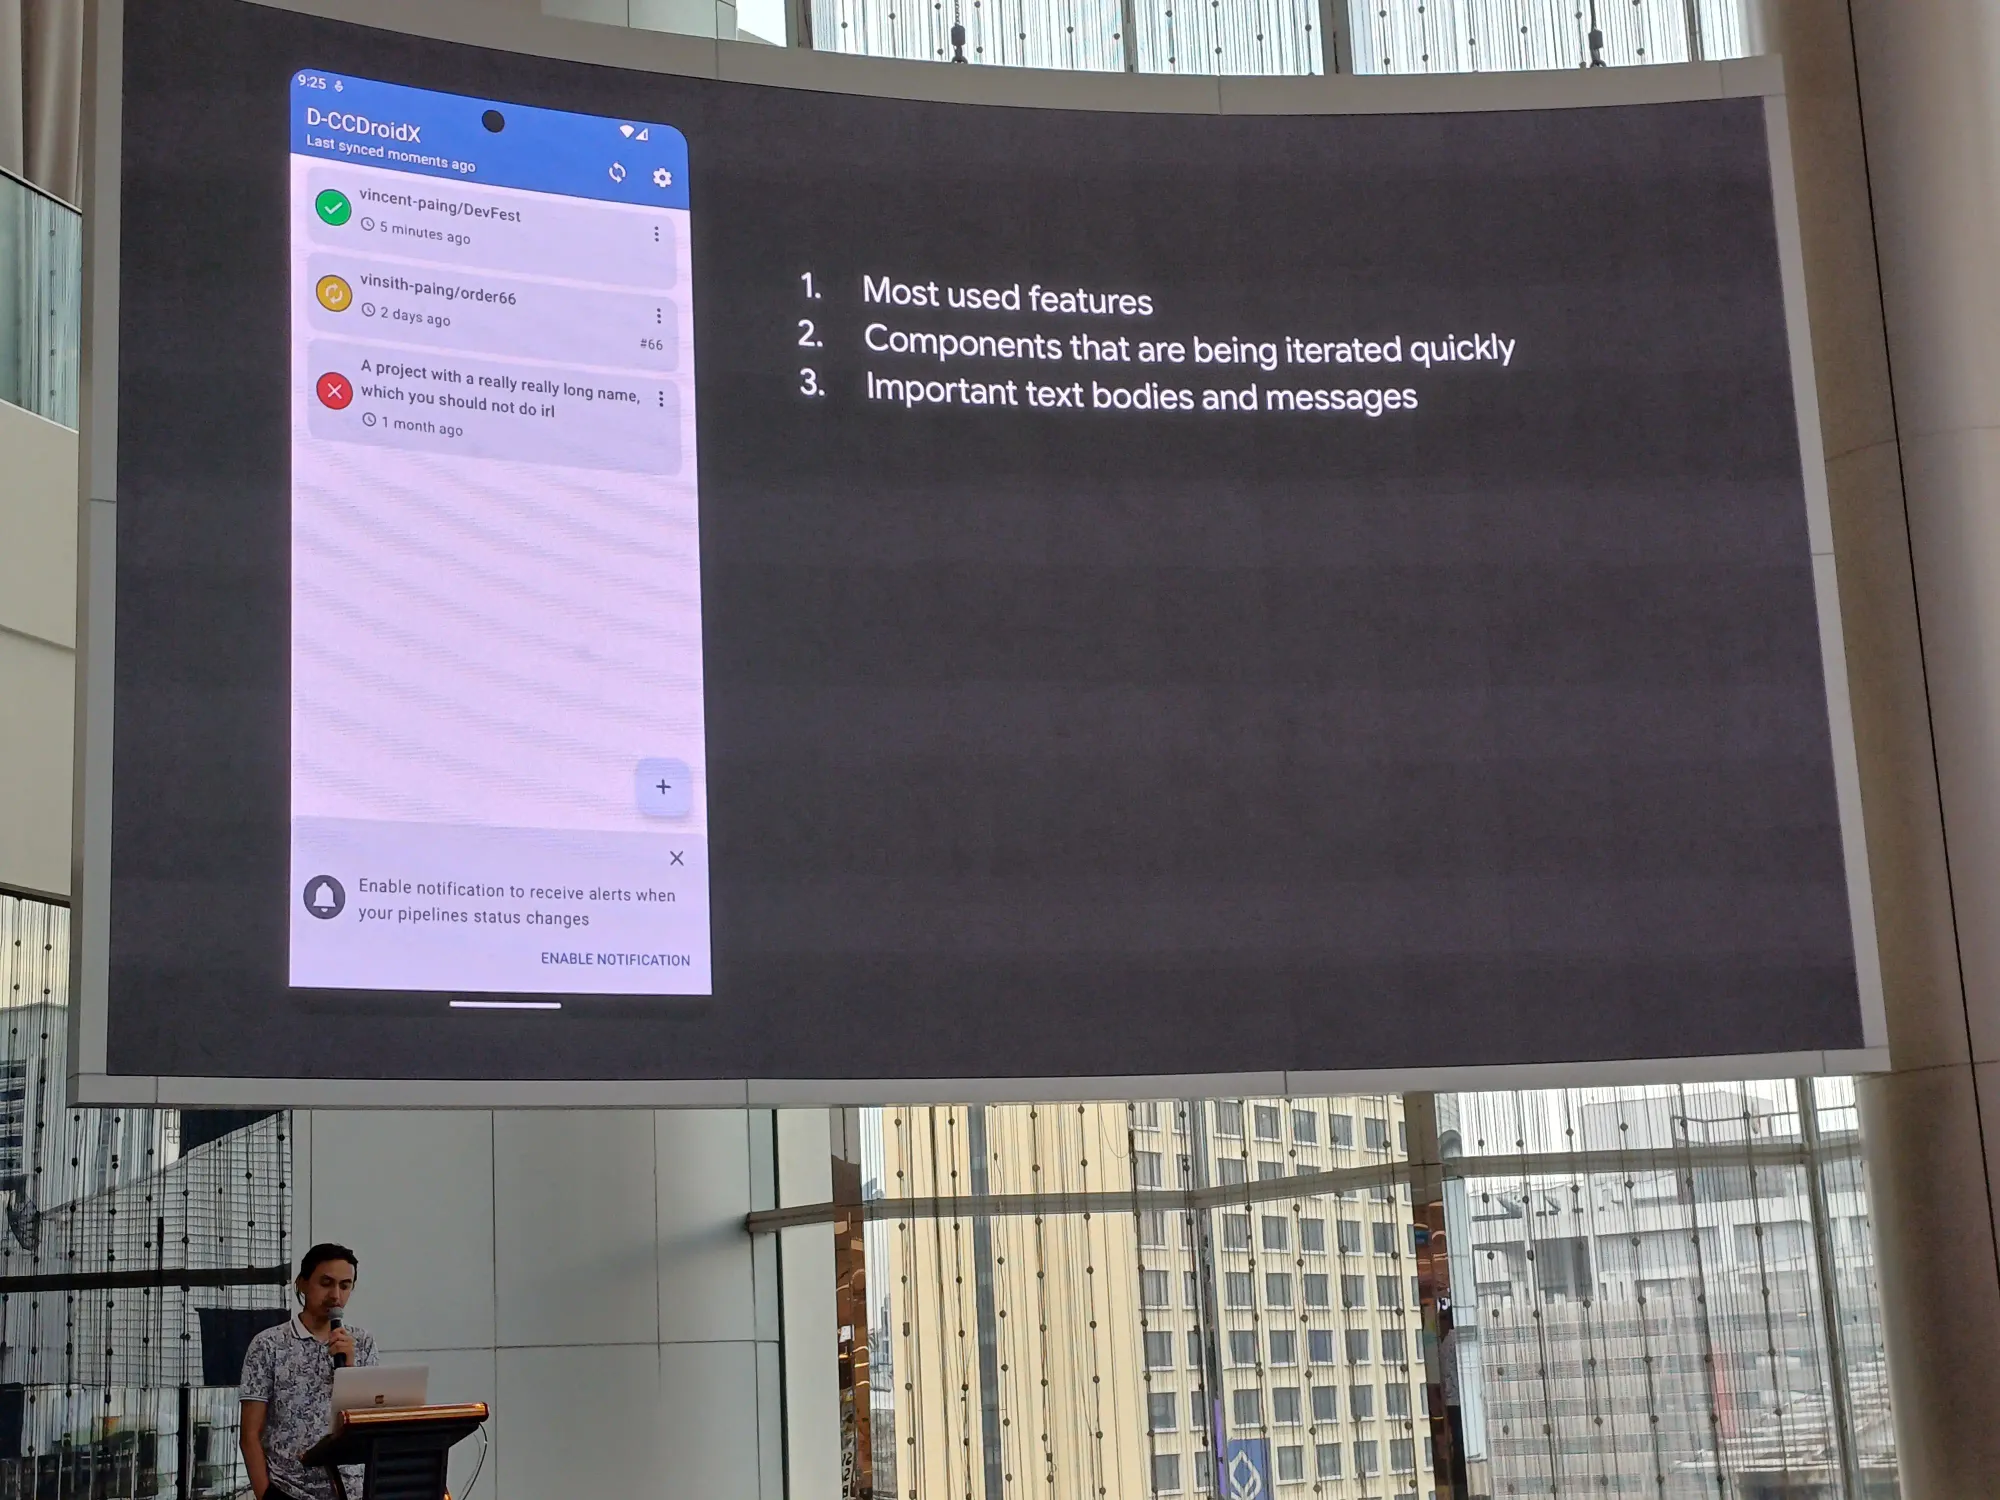
เช่น view Card Render เรา check ว่า
- text แสดงไหม
- icon แสดงไหม แสดงเป็นหน้าตาแบบนี้นะ
- icon แสดงด้านซ้าย text แสดงด้านขวา
- content padding 64 dp
- มี background กับ text แบบนี้นะ
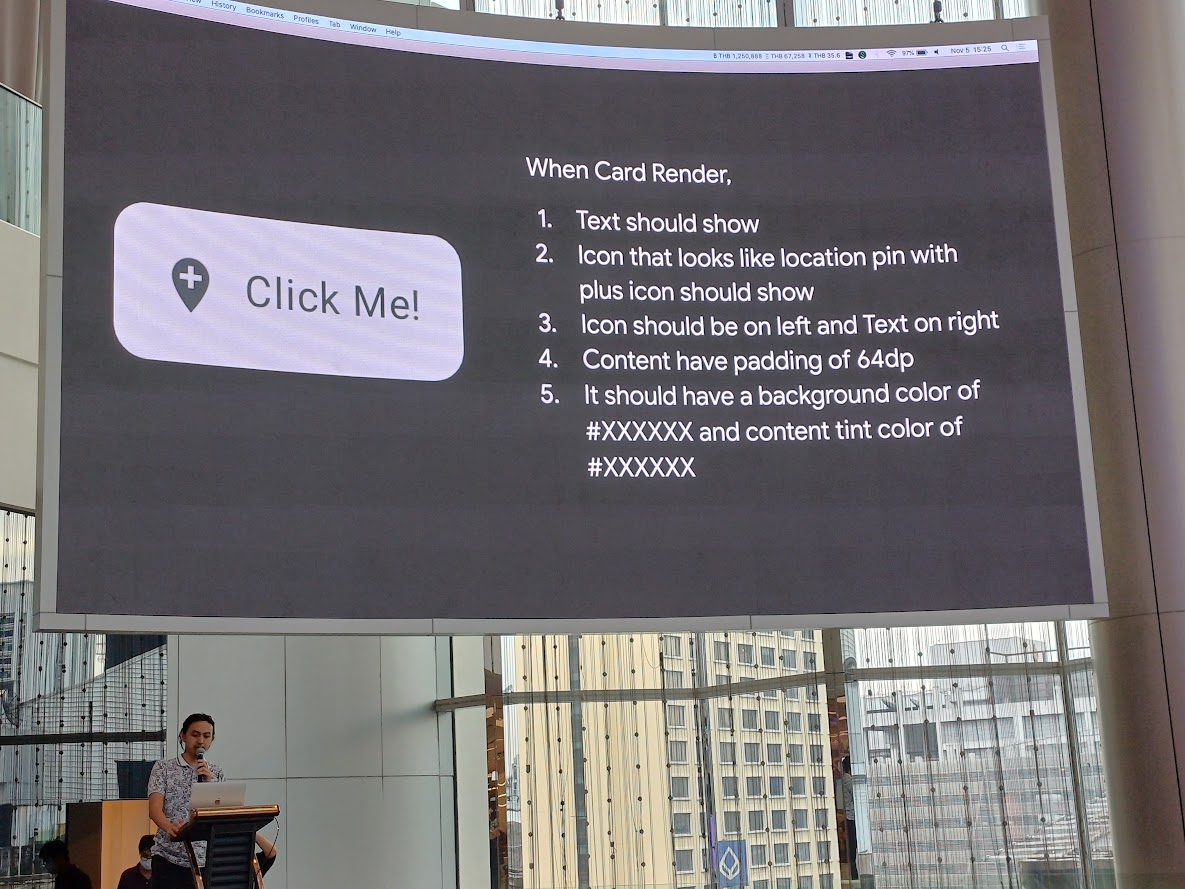
อันนี้ก็ test case เนาะ
ข้อเสียของ UI Test คือ ไม่สามารถ test แบบ visual aspect ของแต่ละ comonent ได้, ช้า, มีการ set up ที่ซับซ้อน
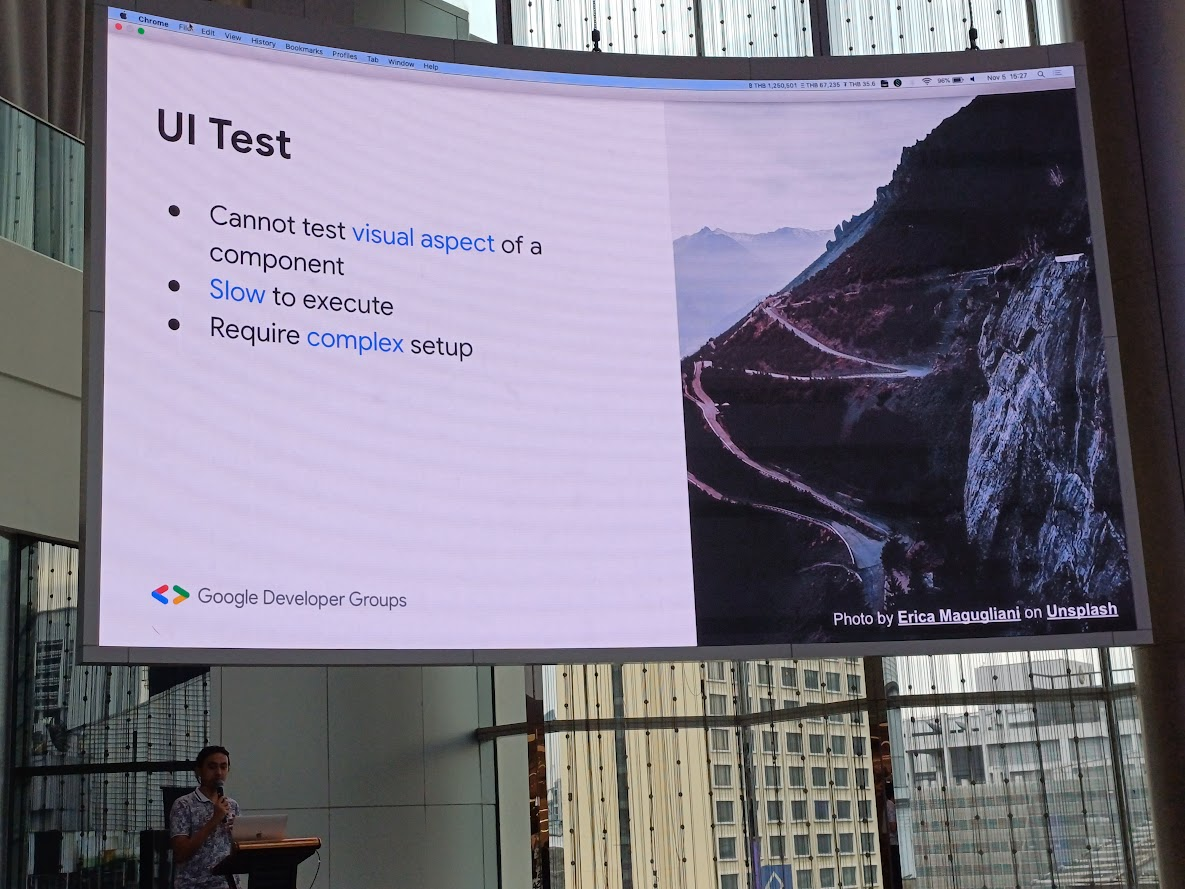
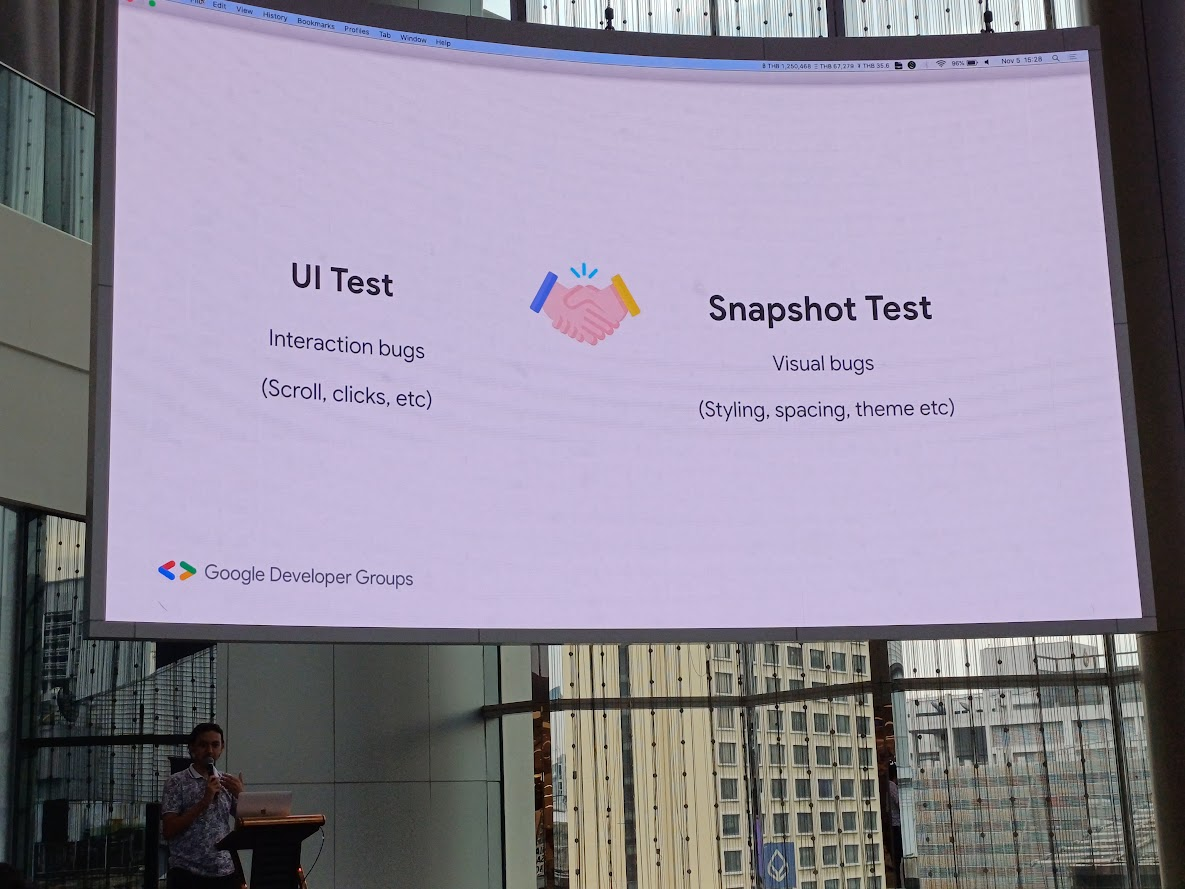
โดยตัว UI Test เน้นหา Interaction bugs เช่นการ scroll การกดปุ่มใด ๆ ส่วน Snapshot Test เน้นหา Visual bugs อย่างพวก style ต่าง ๆ ความห่าง ธีม
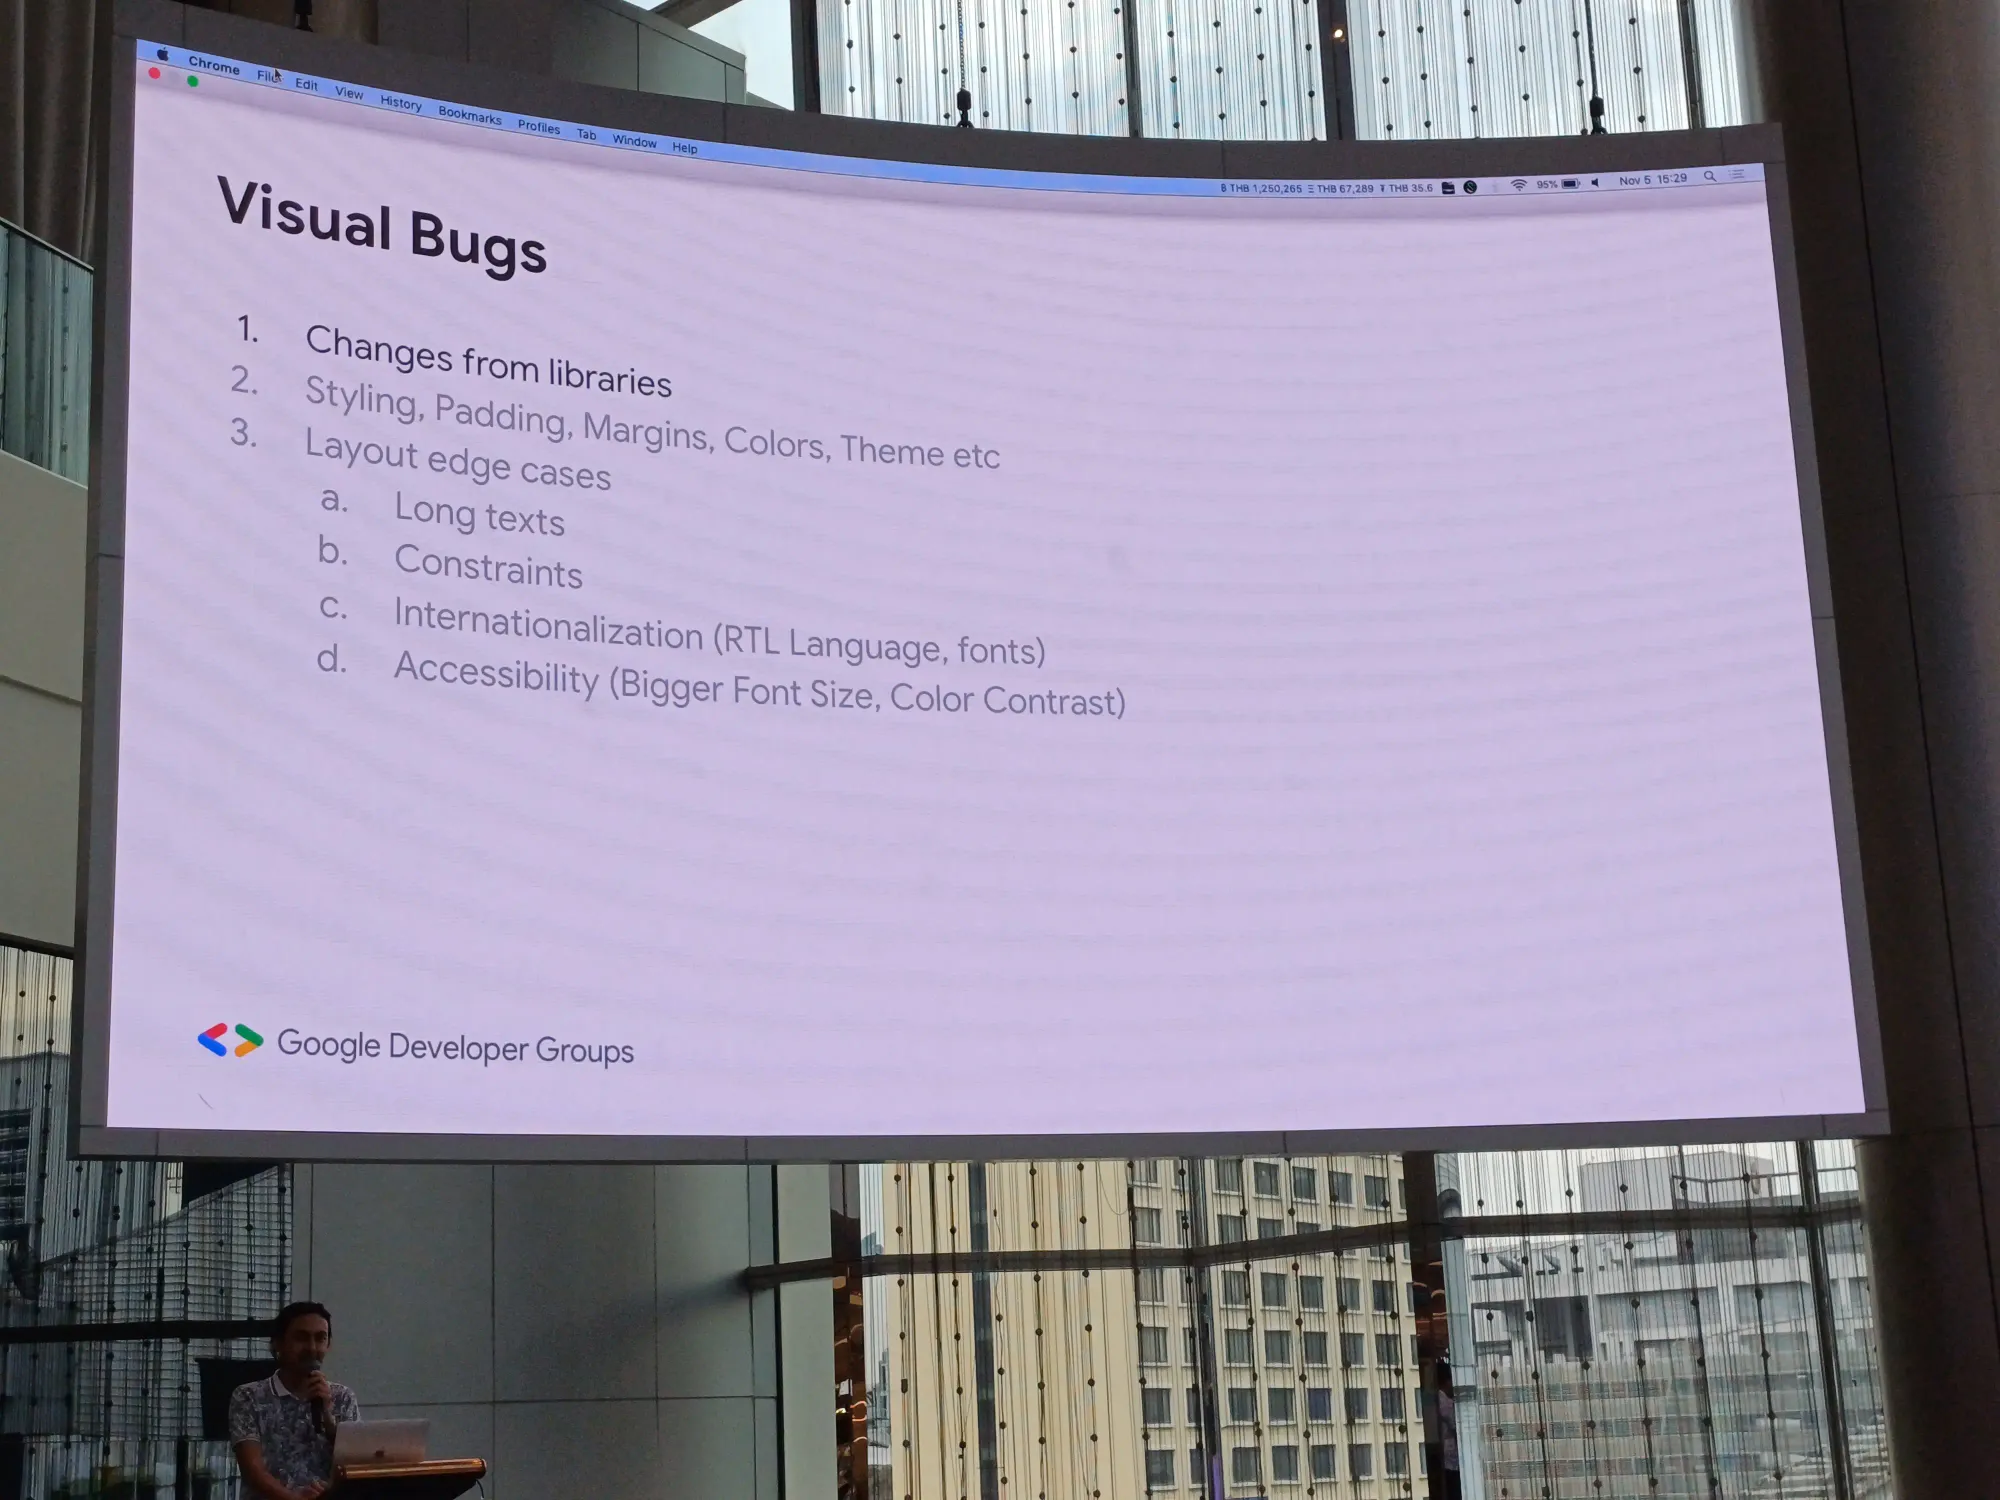
Visual Bugs
แล้ว visual bug มีอะไรบ้าง? นอกจากการเปลี่ยนแปลงจากตัว library เองแล้วยังมีพวก style, padding, margin, สี, ธีมของตัวแอพ แล้วก็ layout edge case
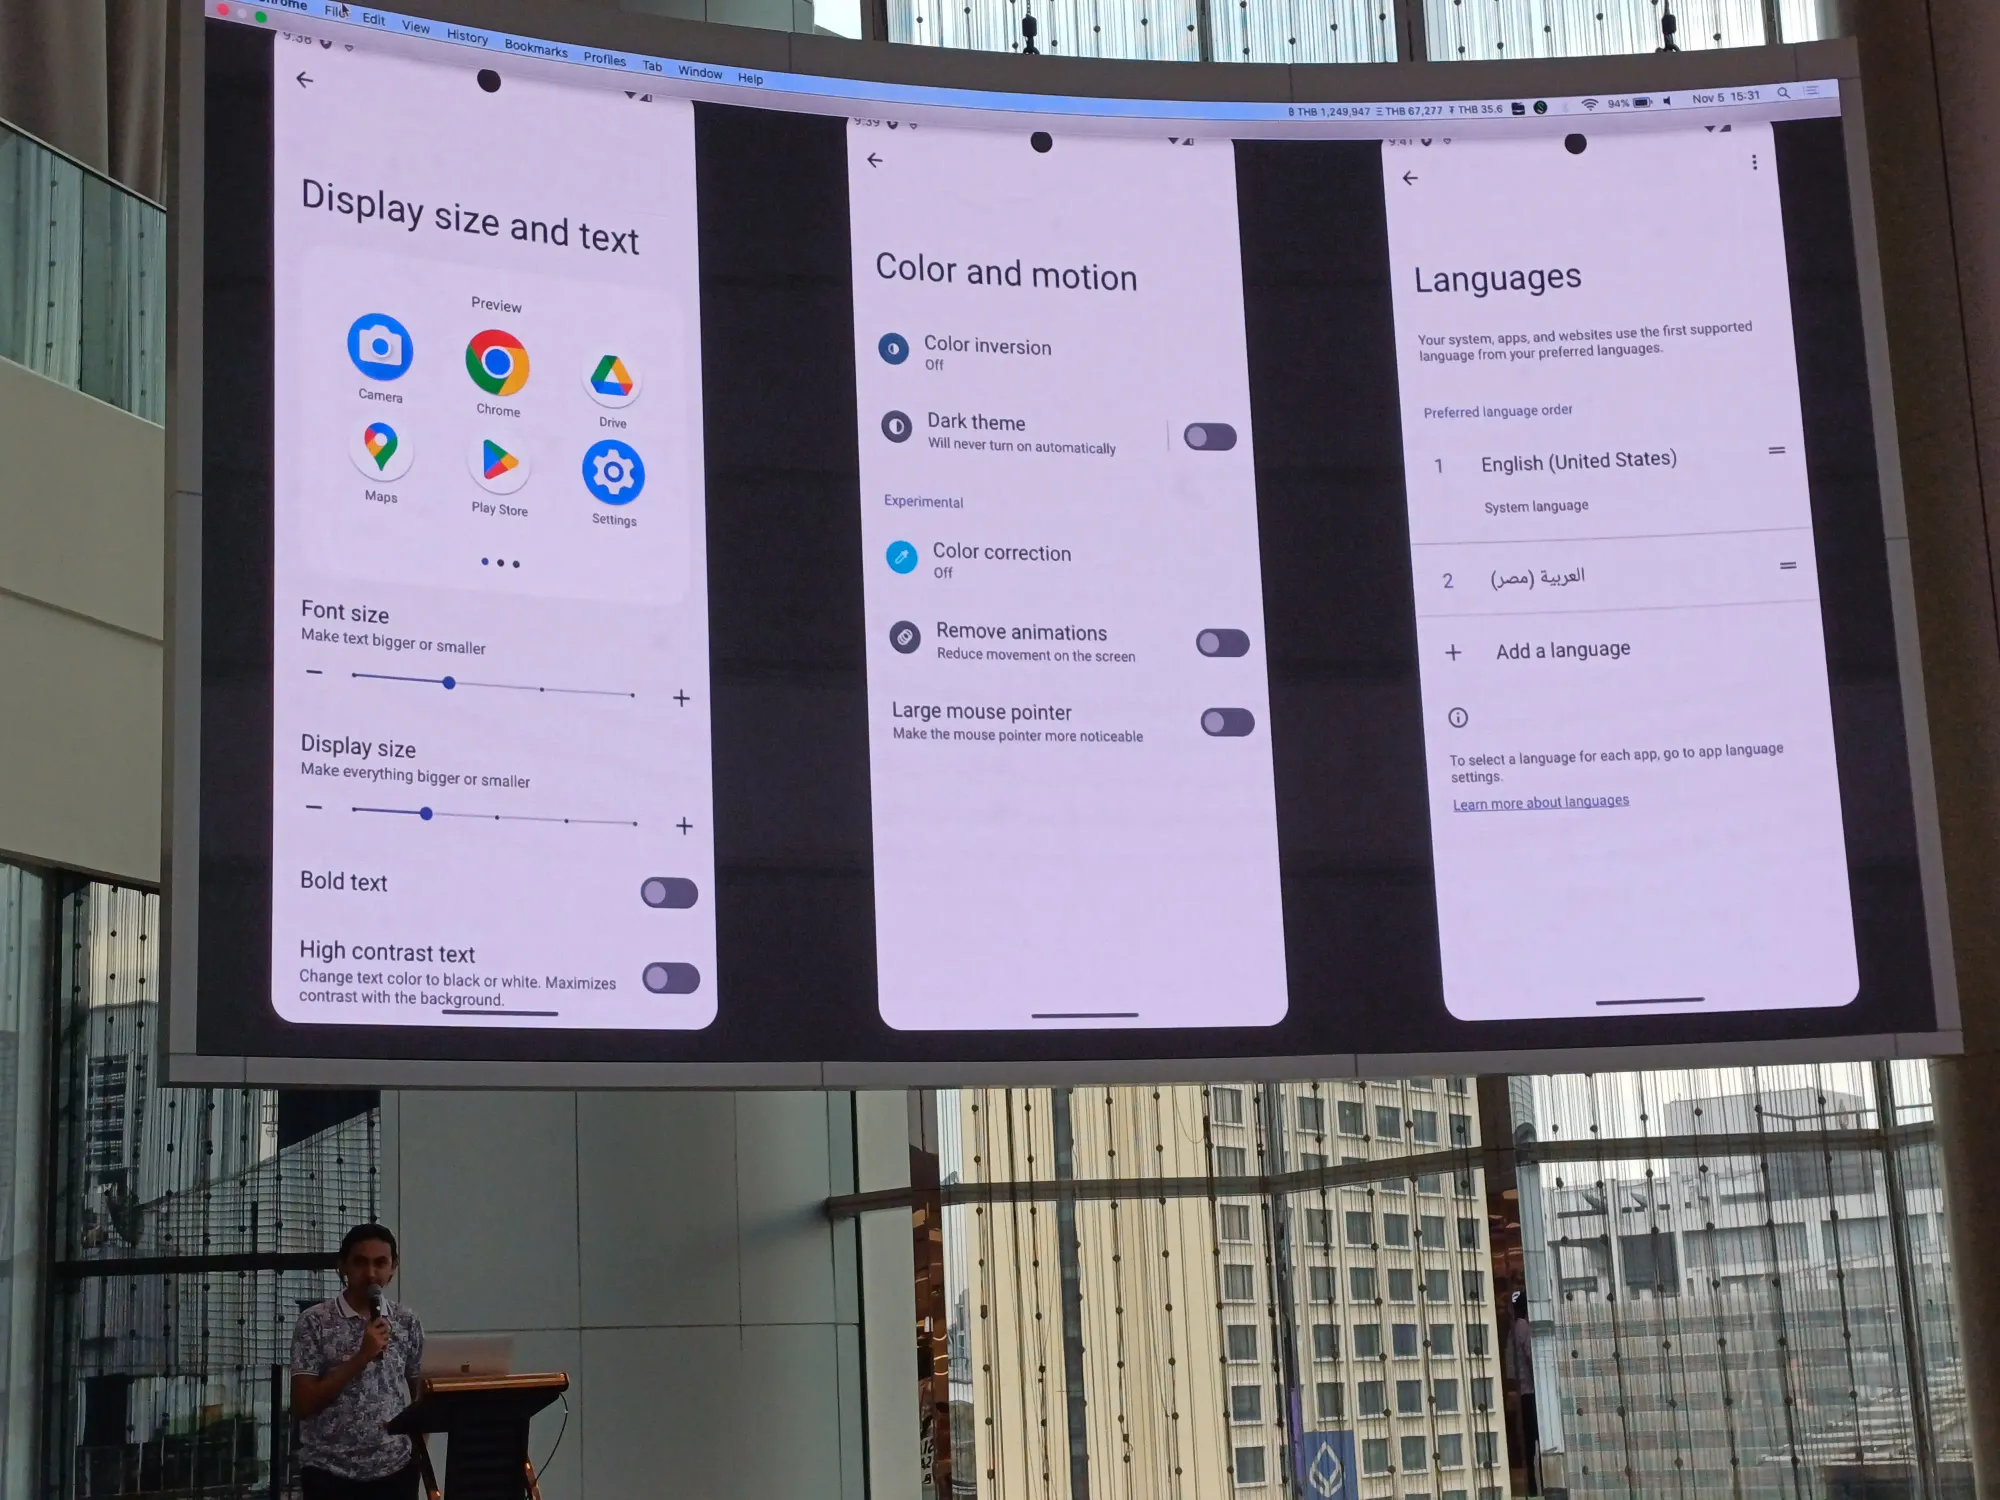
ก่อน test อย่าลืม check device กันก่อนนะ ไม่ว่า layout จะเป็น xml หรือ compose เองก็ตาม
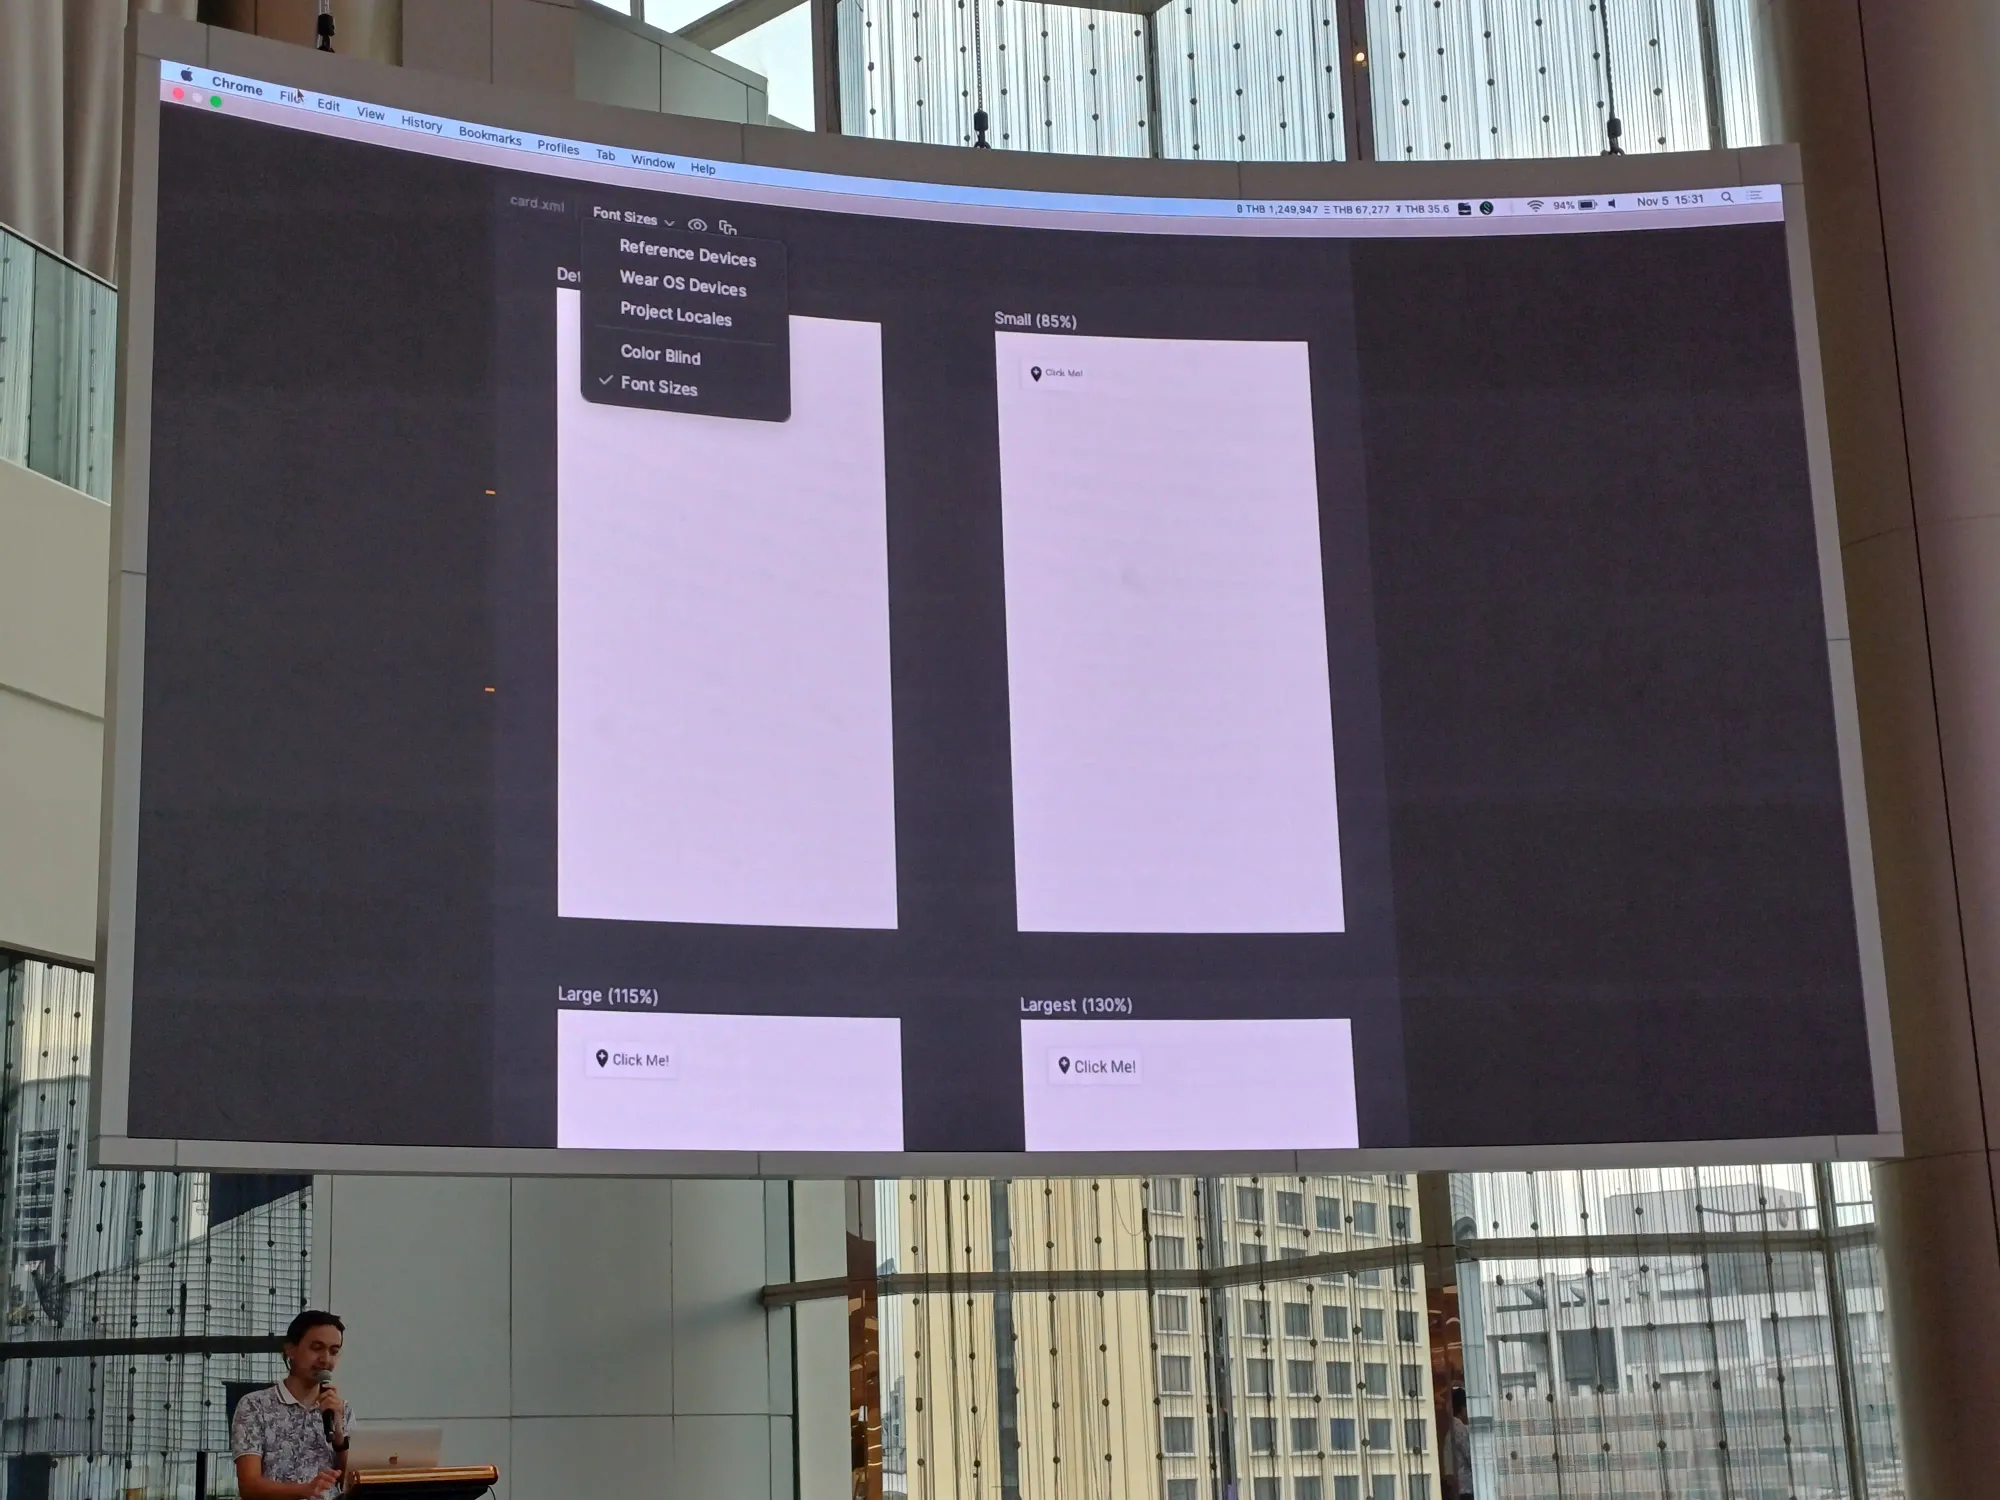
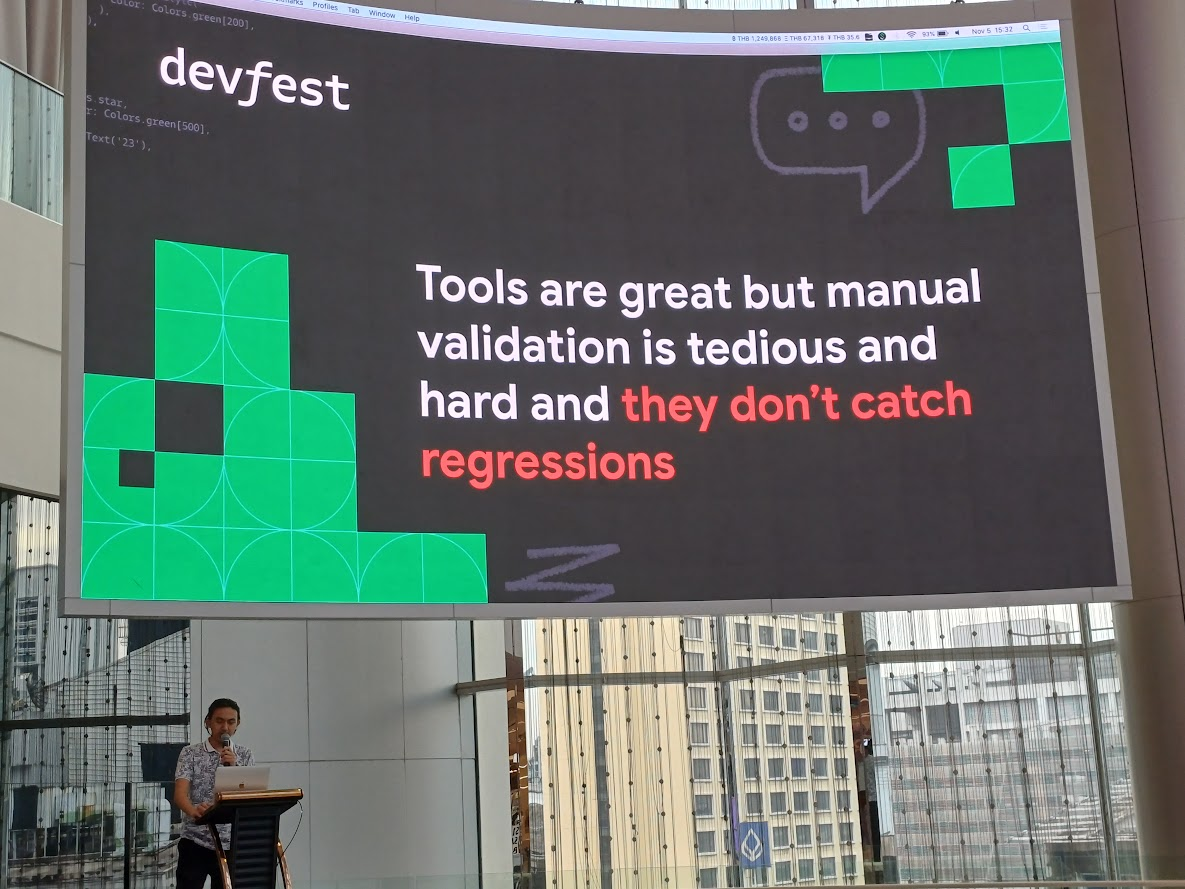
tool มันดี แต่การทำ manual มันน่าเบื่อ และยาก อีกทั้งทำให้ regression ไม่ได้
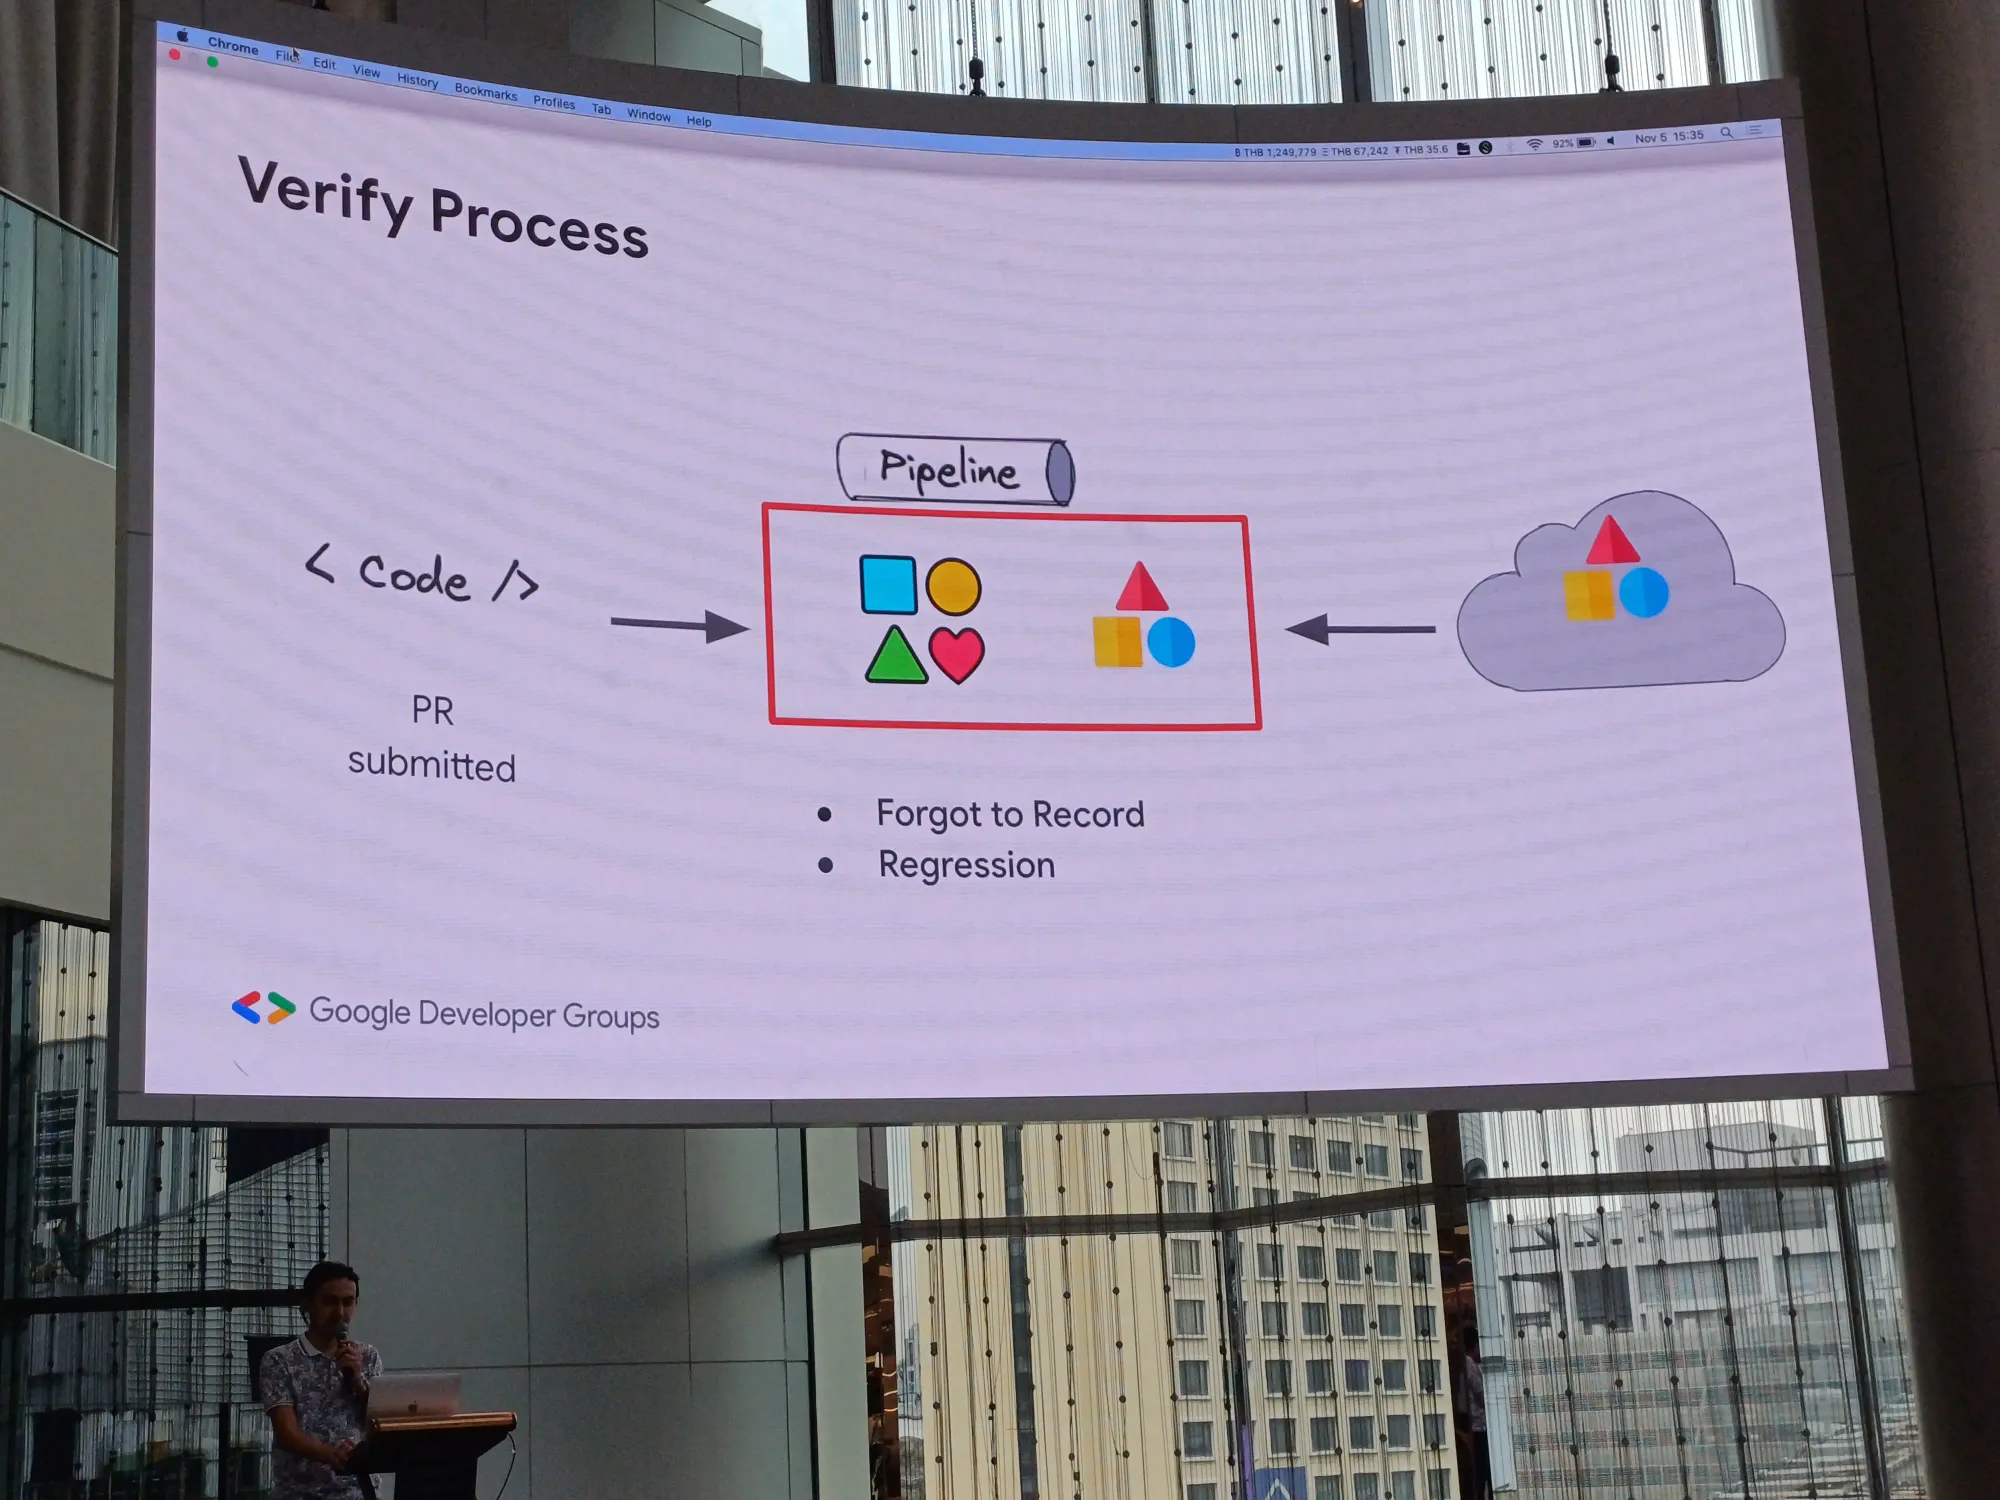
Snapshot Testing
เราจะใช้ screenshot หรือ snapshot ที่มี reference ในการ compare ผลกัน
ขั้นตอนก็จะมี
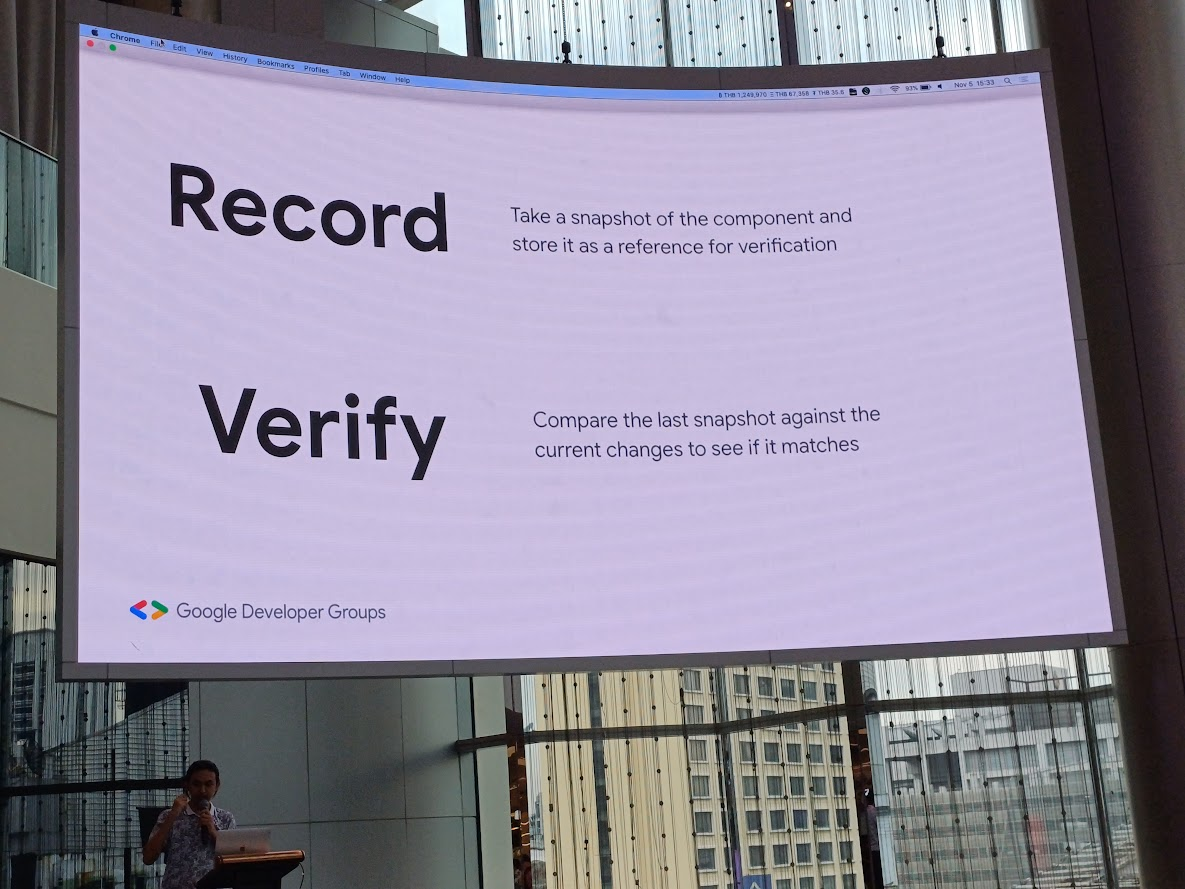
- Record: take snapshot เก็บไว้
- Verify: compare กับ snapshot ล่าสุดว่ามัน match กันไหม
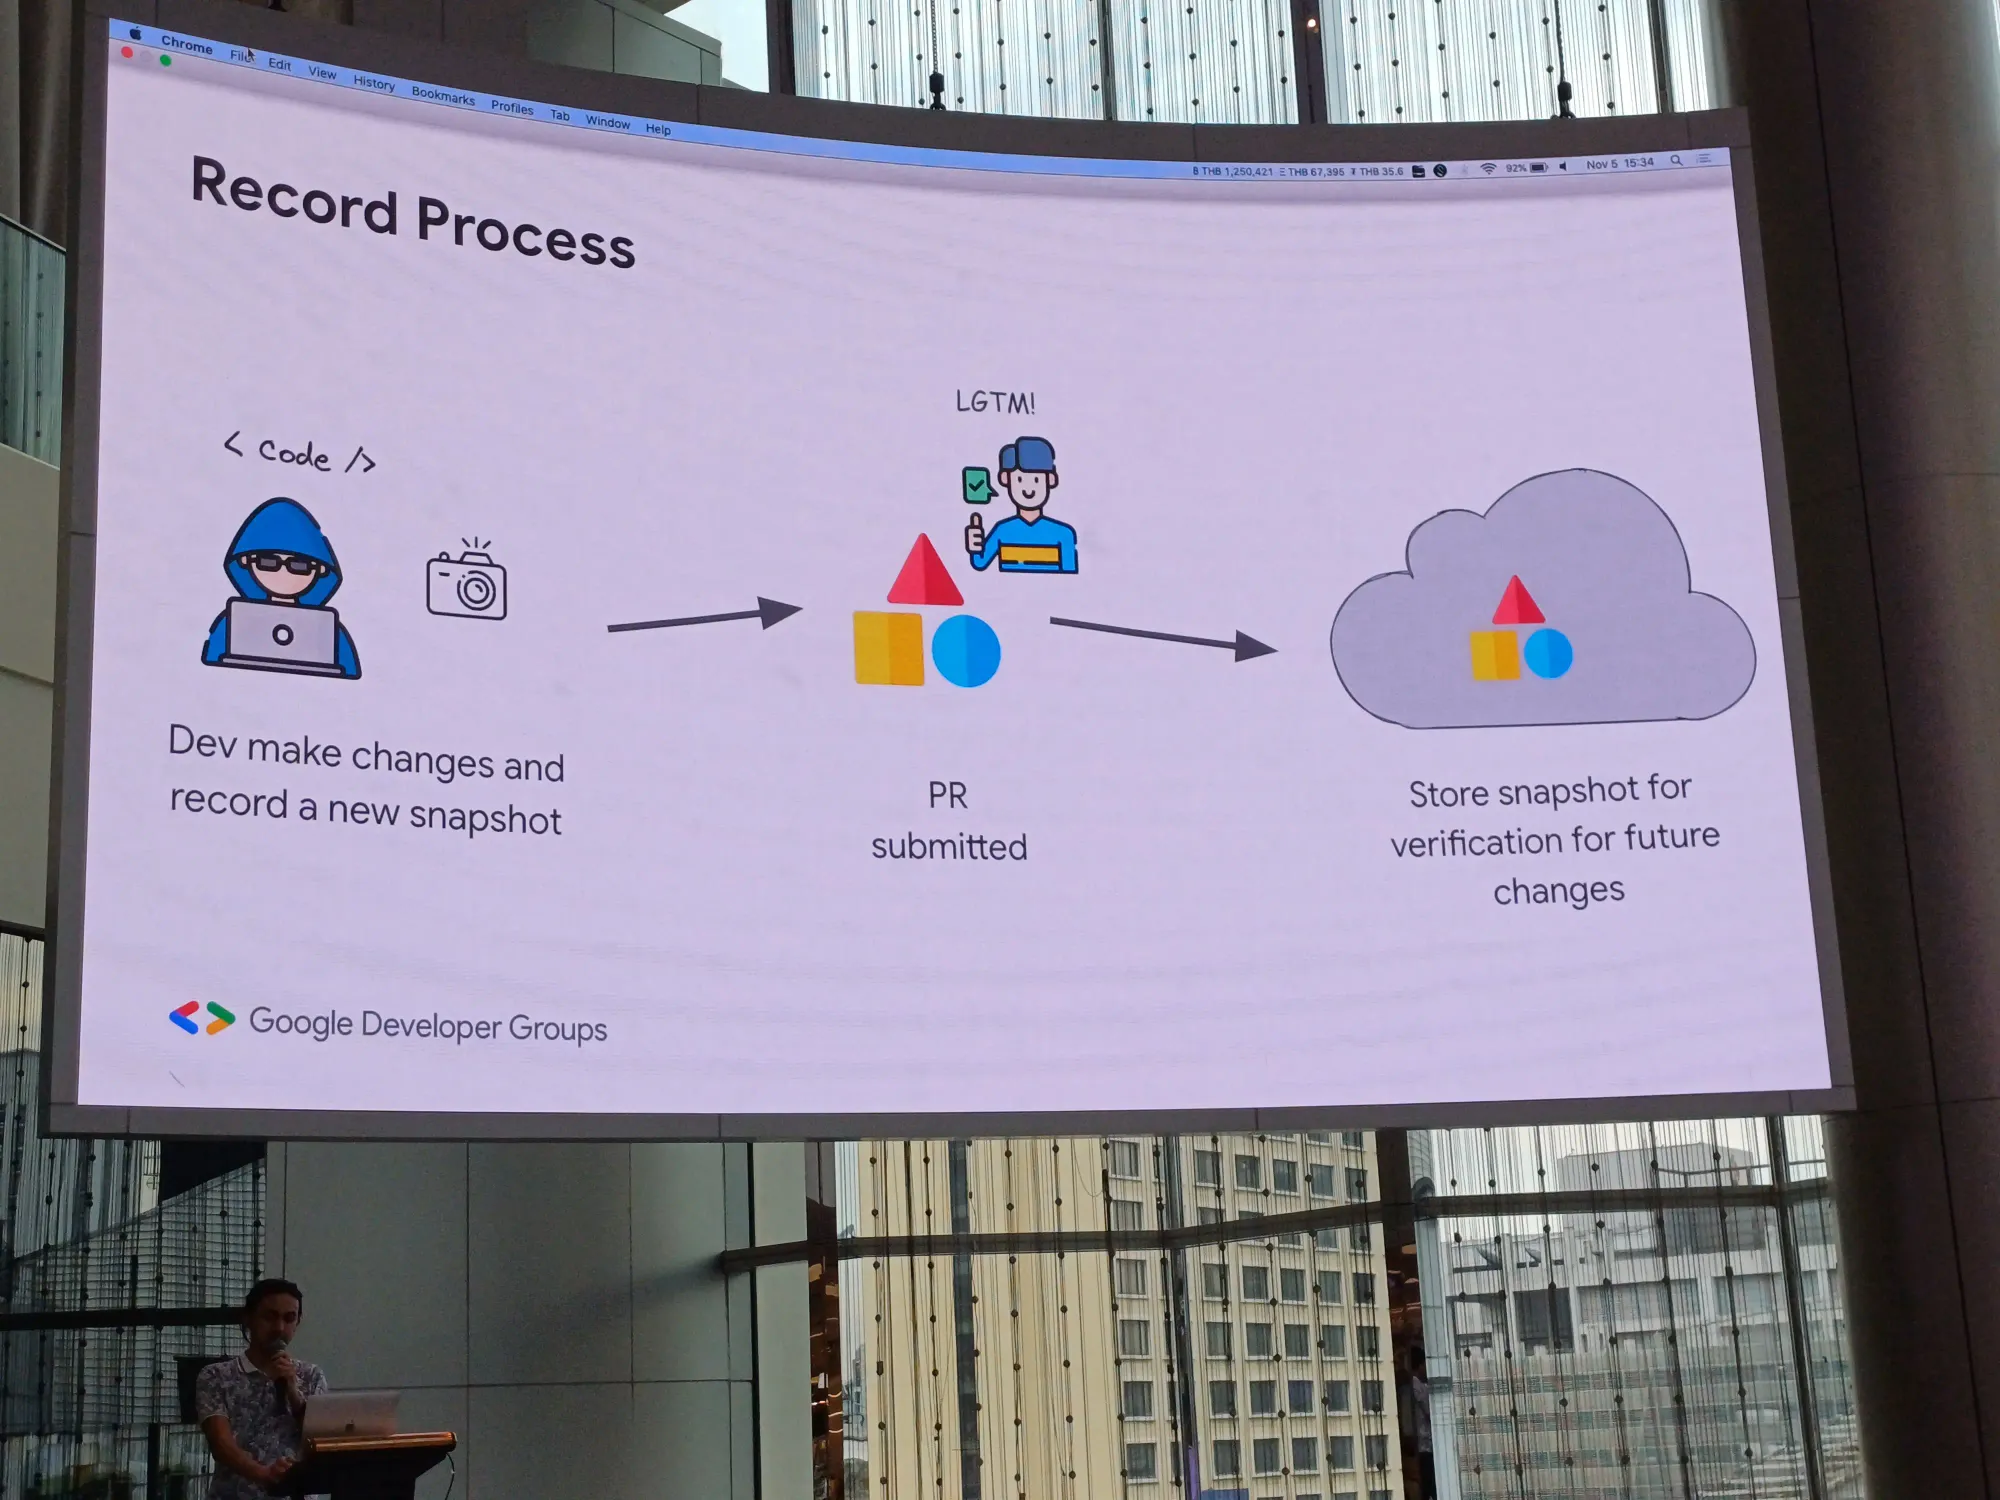
ในส่วน record เมื่อเดฟทำการเปลี่ยน layout บางอย่าง และ record snapshot ใหม่ไปให้ ทำการเปิด PR เอา snapshot ไปเก็บไว้
ส่วนการ verify หลังจากเปิด PR ก็เข้า pipeline เพื่อเอาก้อน record มา check
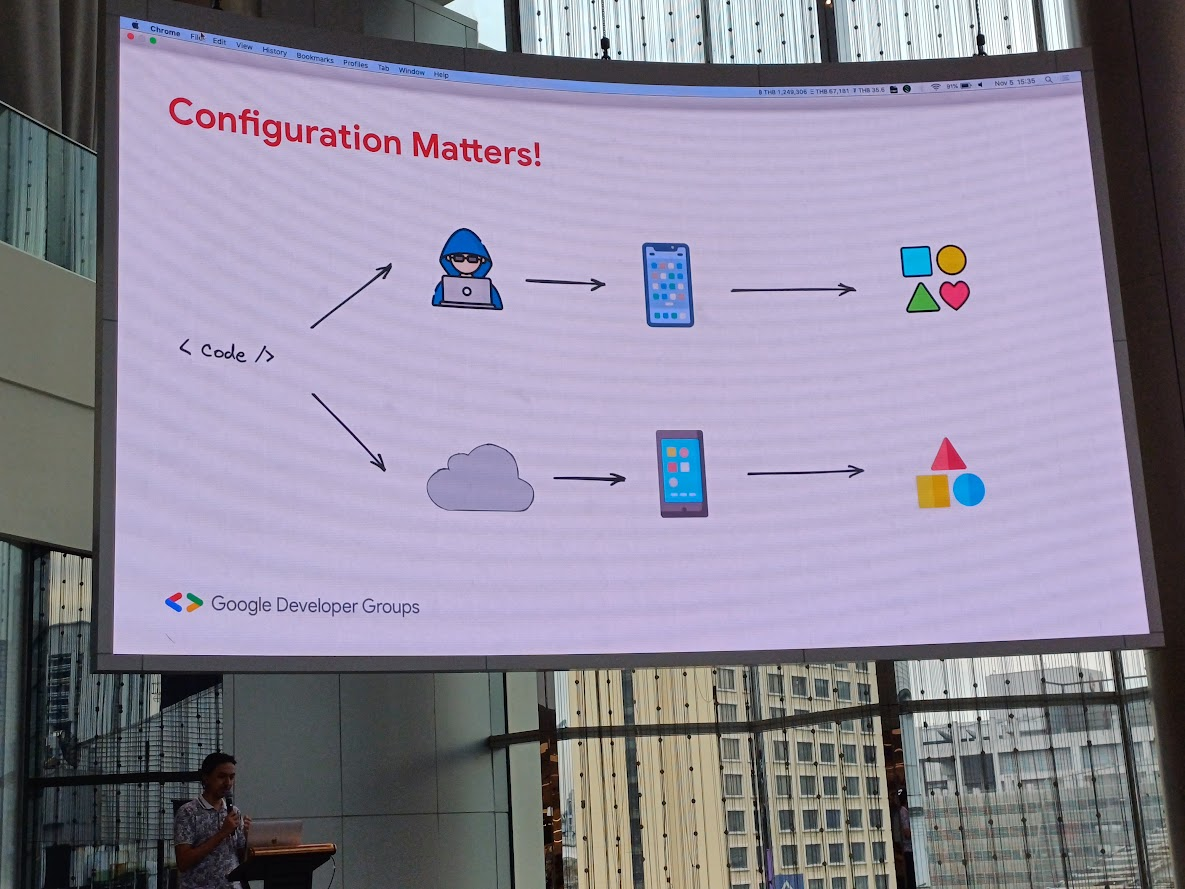
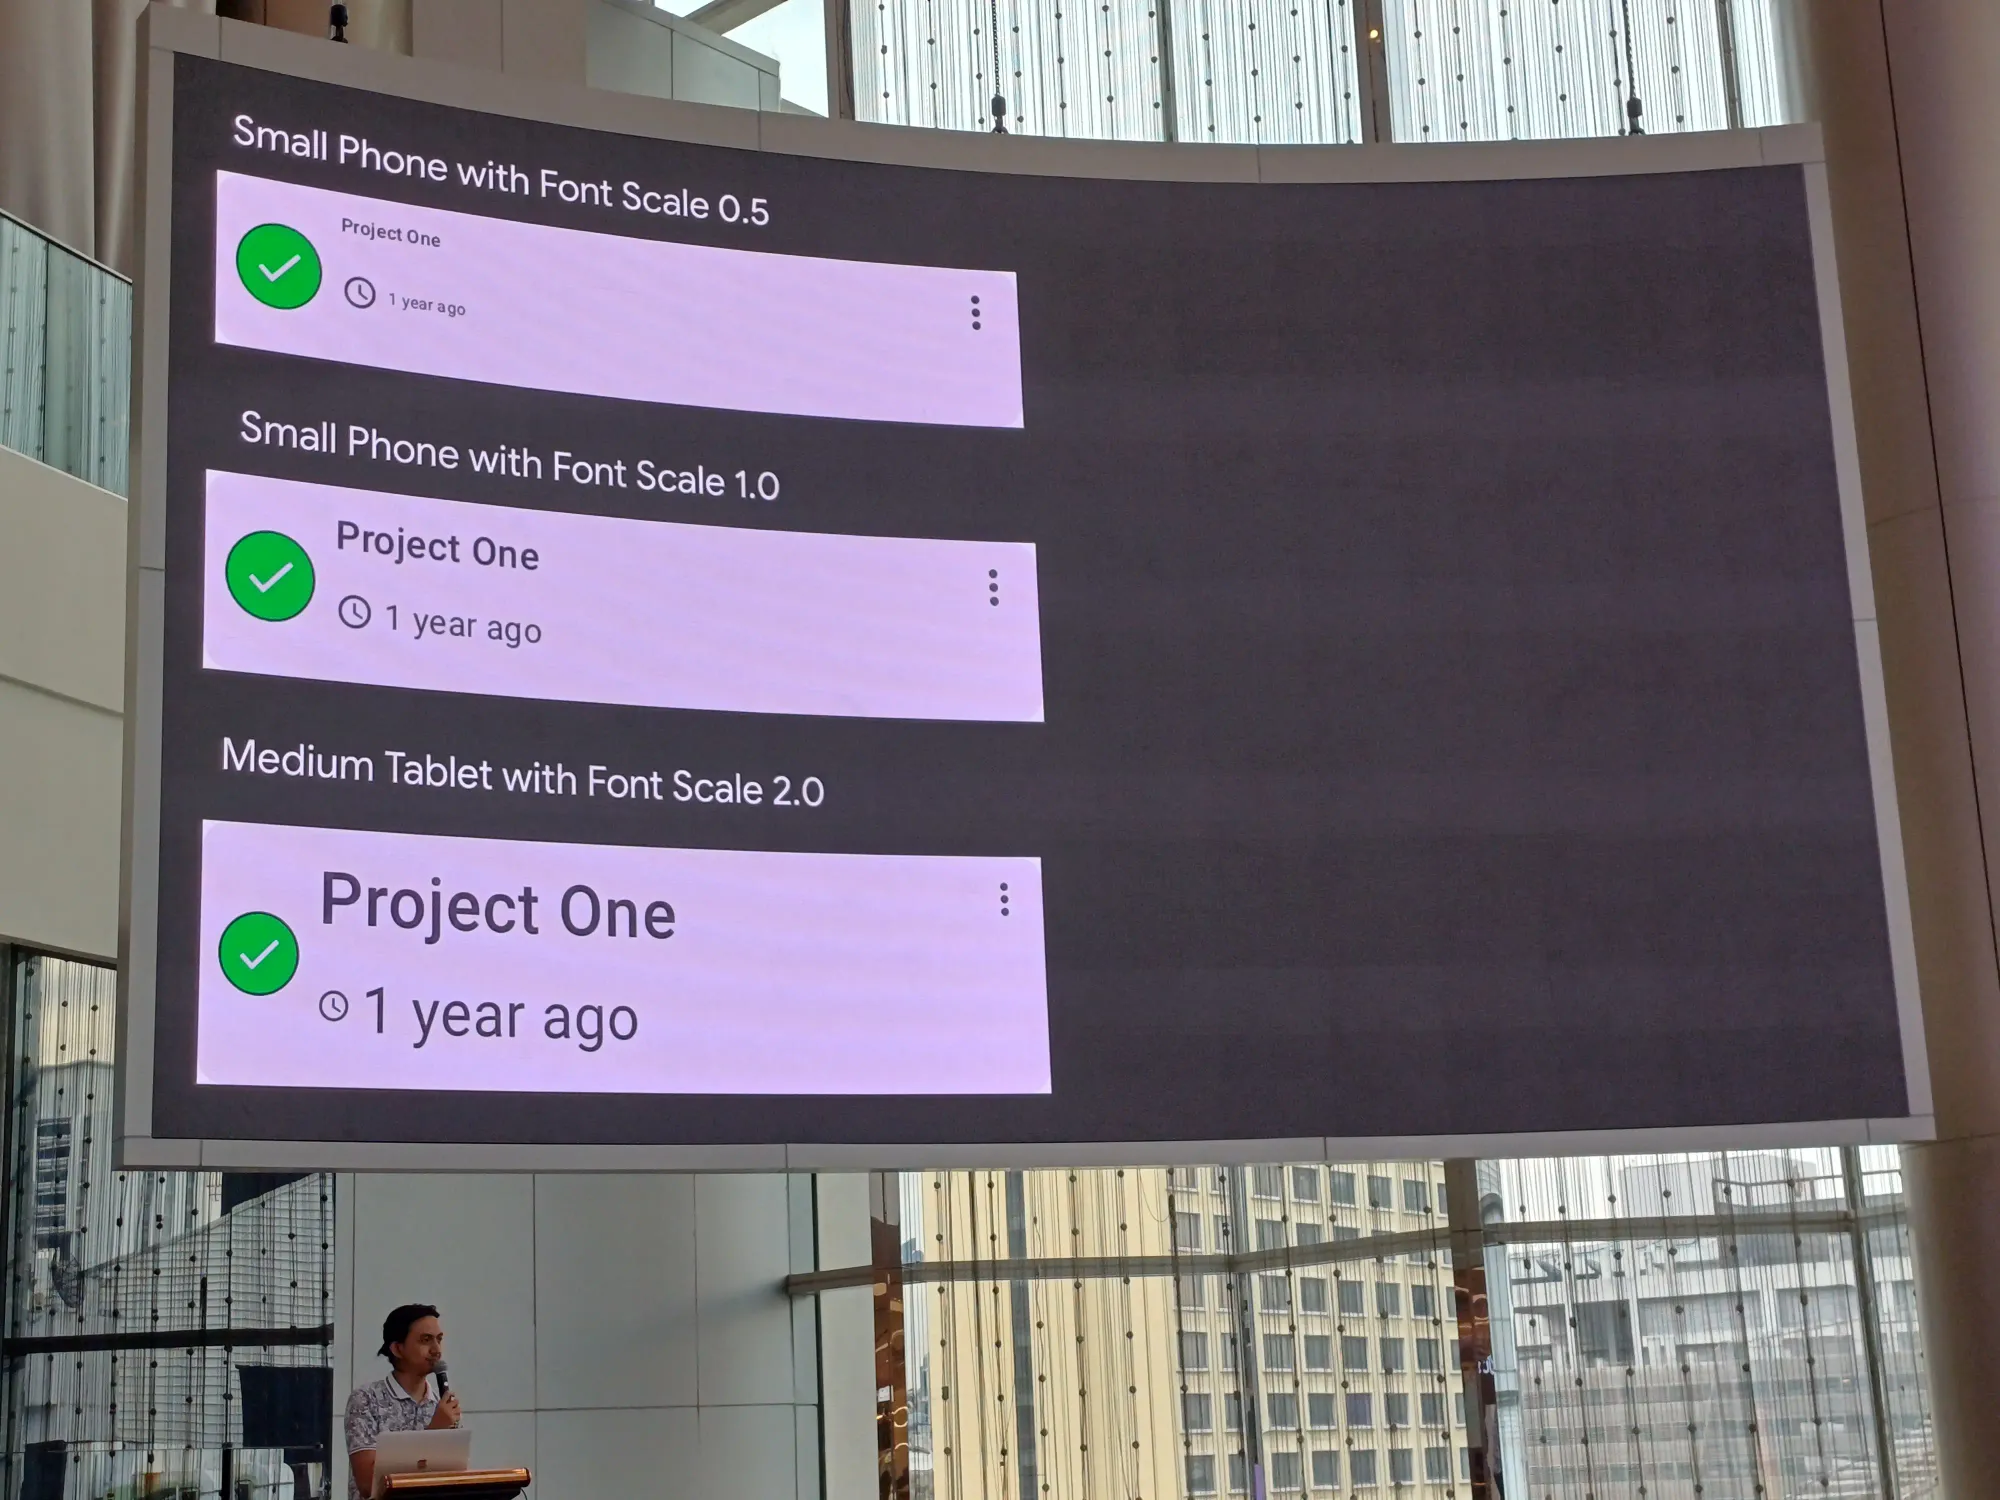
Configuration Matters!
ผลอาจต่างกัน ตาม enironment ที่ set ไว้
แล้วเราจะเริ่มยังไง?
- Screen level snapshot testing: ใช้ dependencies เยอะ มี state มากมาย มี component เยอะแยะ และยากในการ trace เมื่อมีการเปลี่ยนแปลง
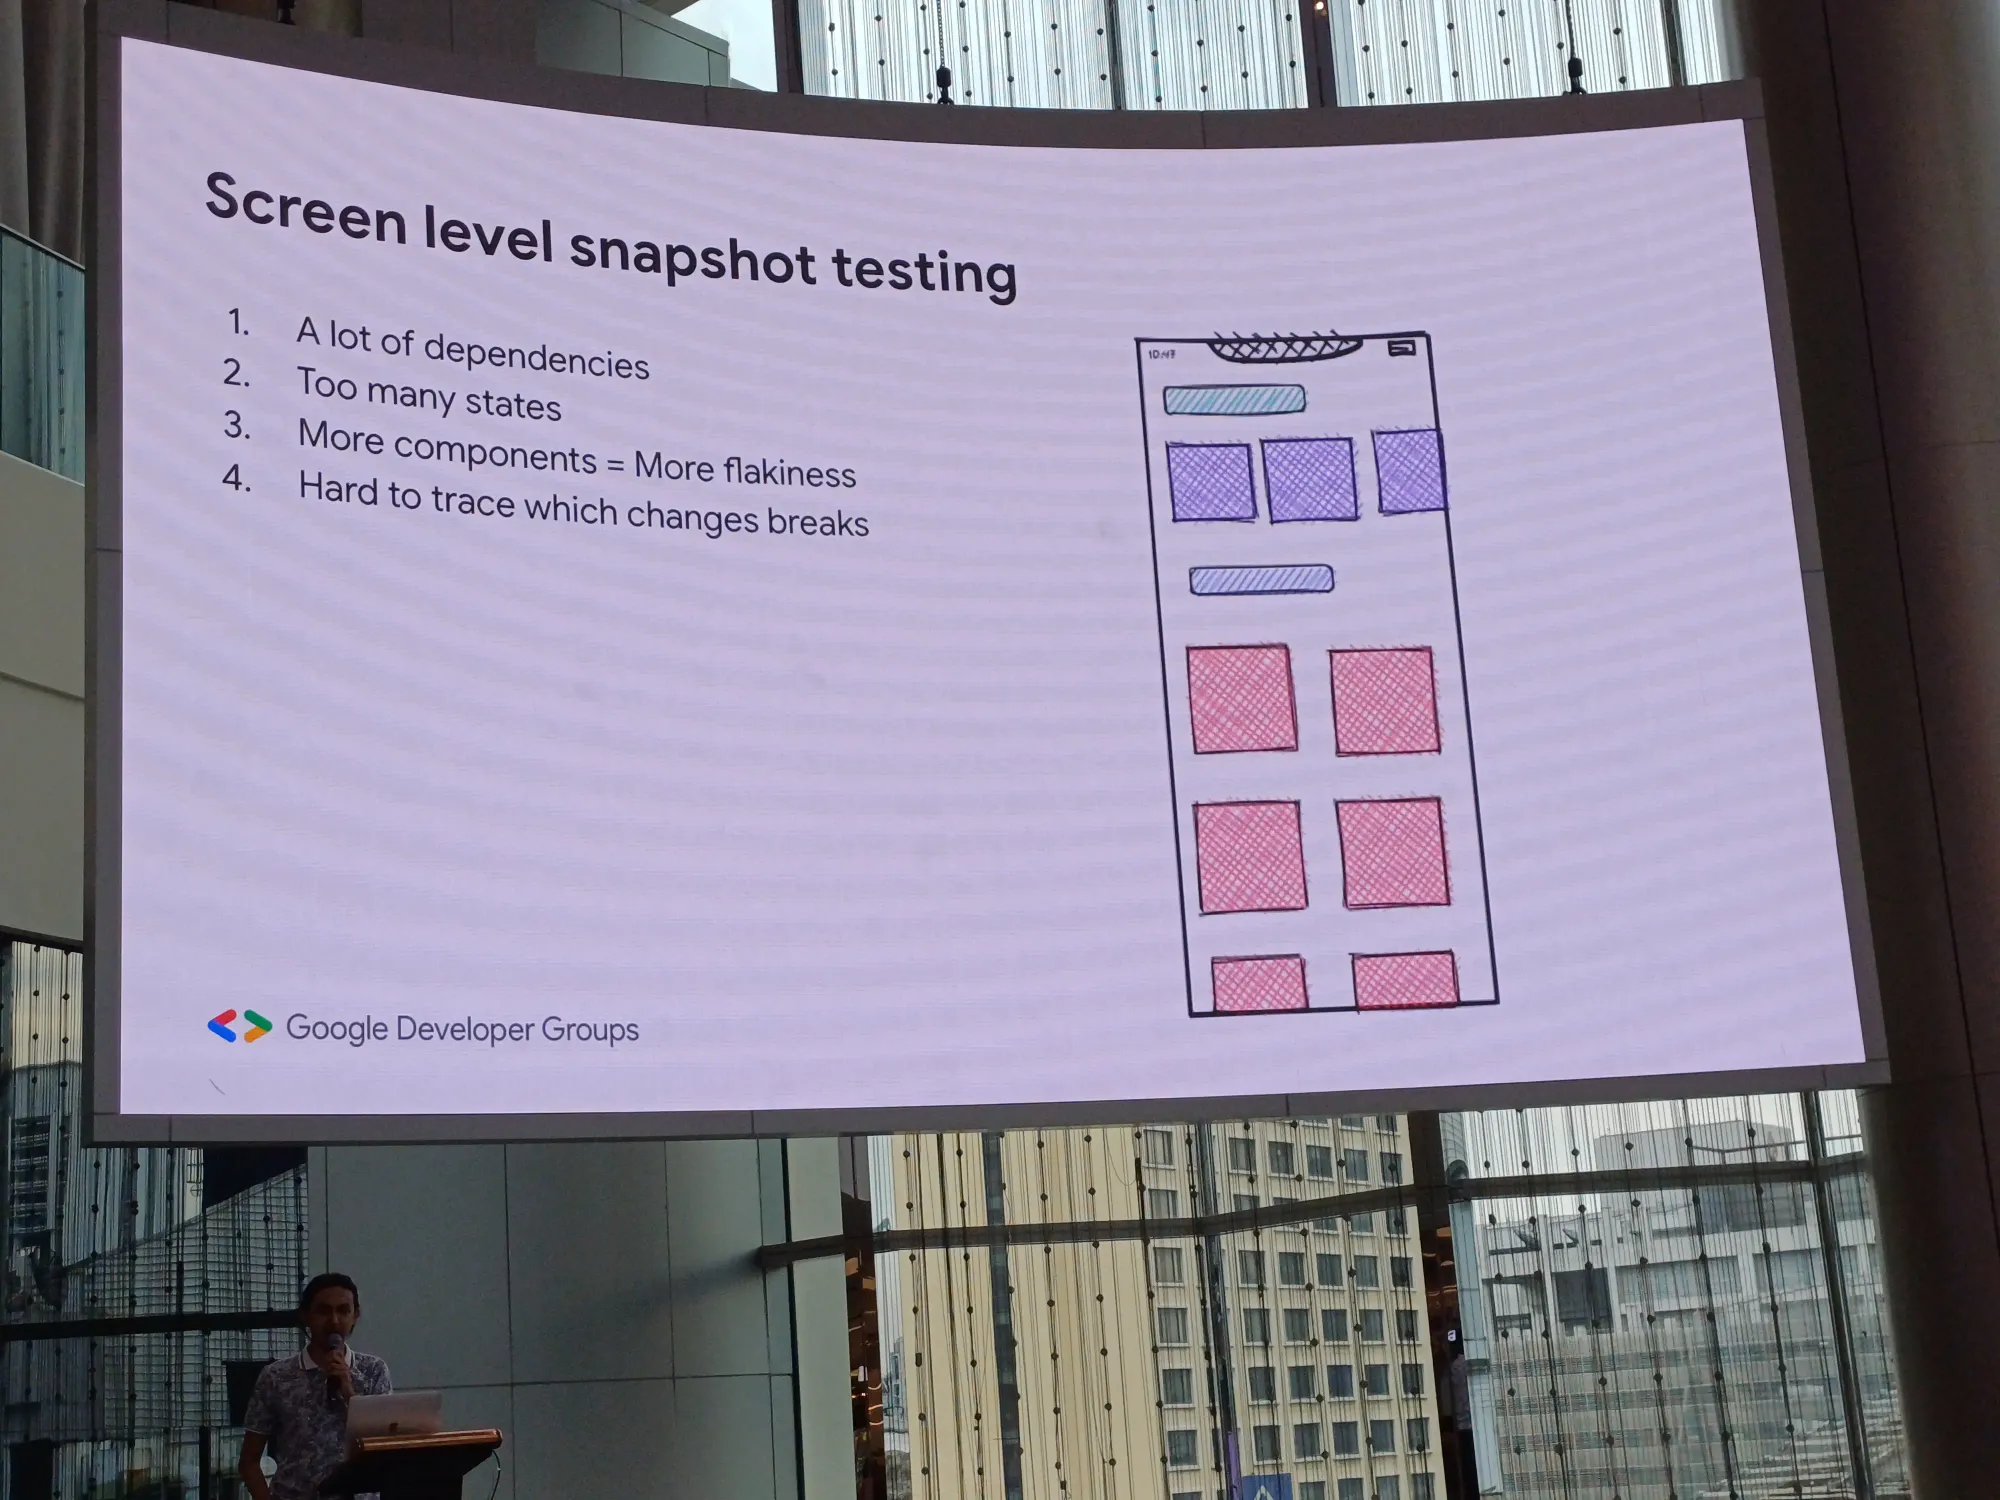
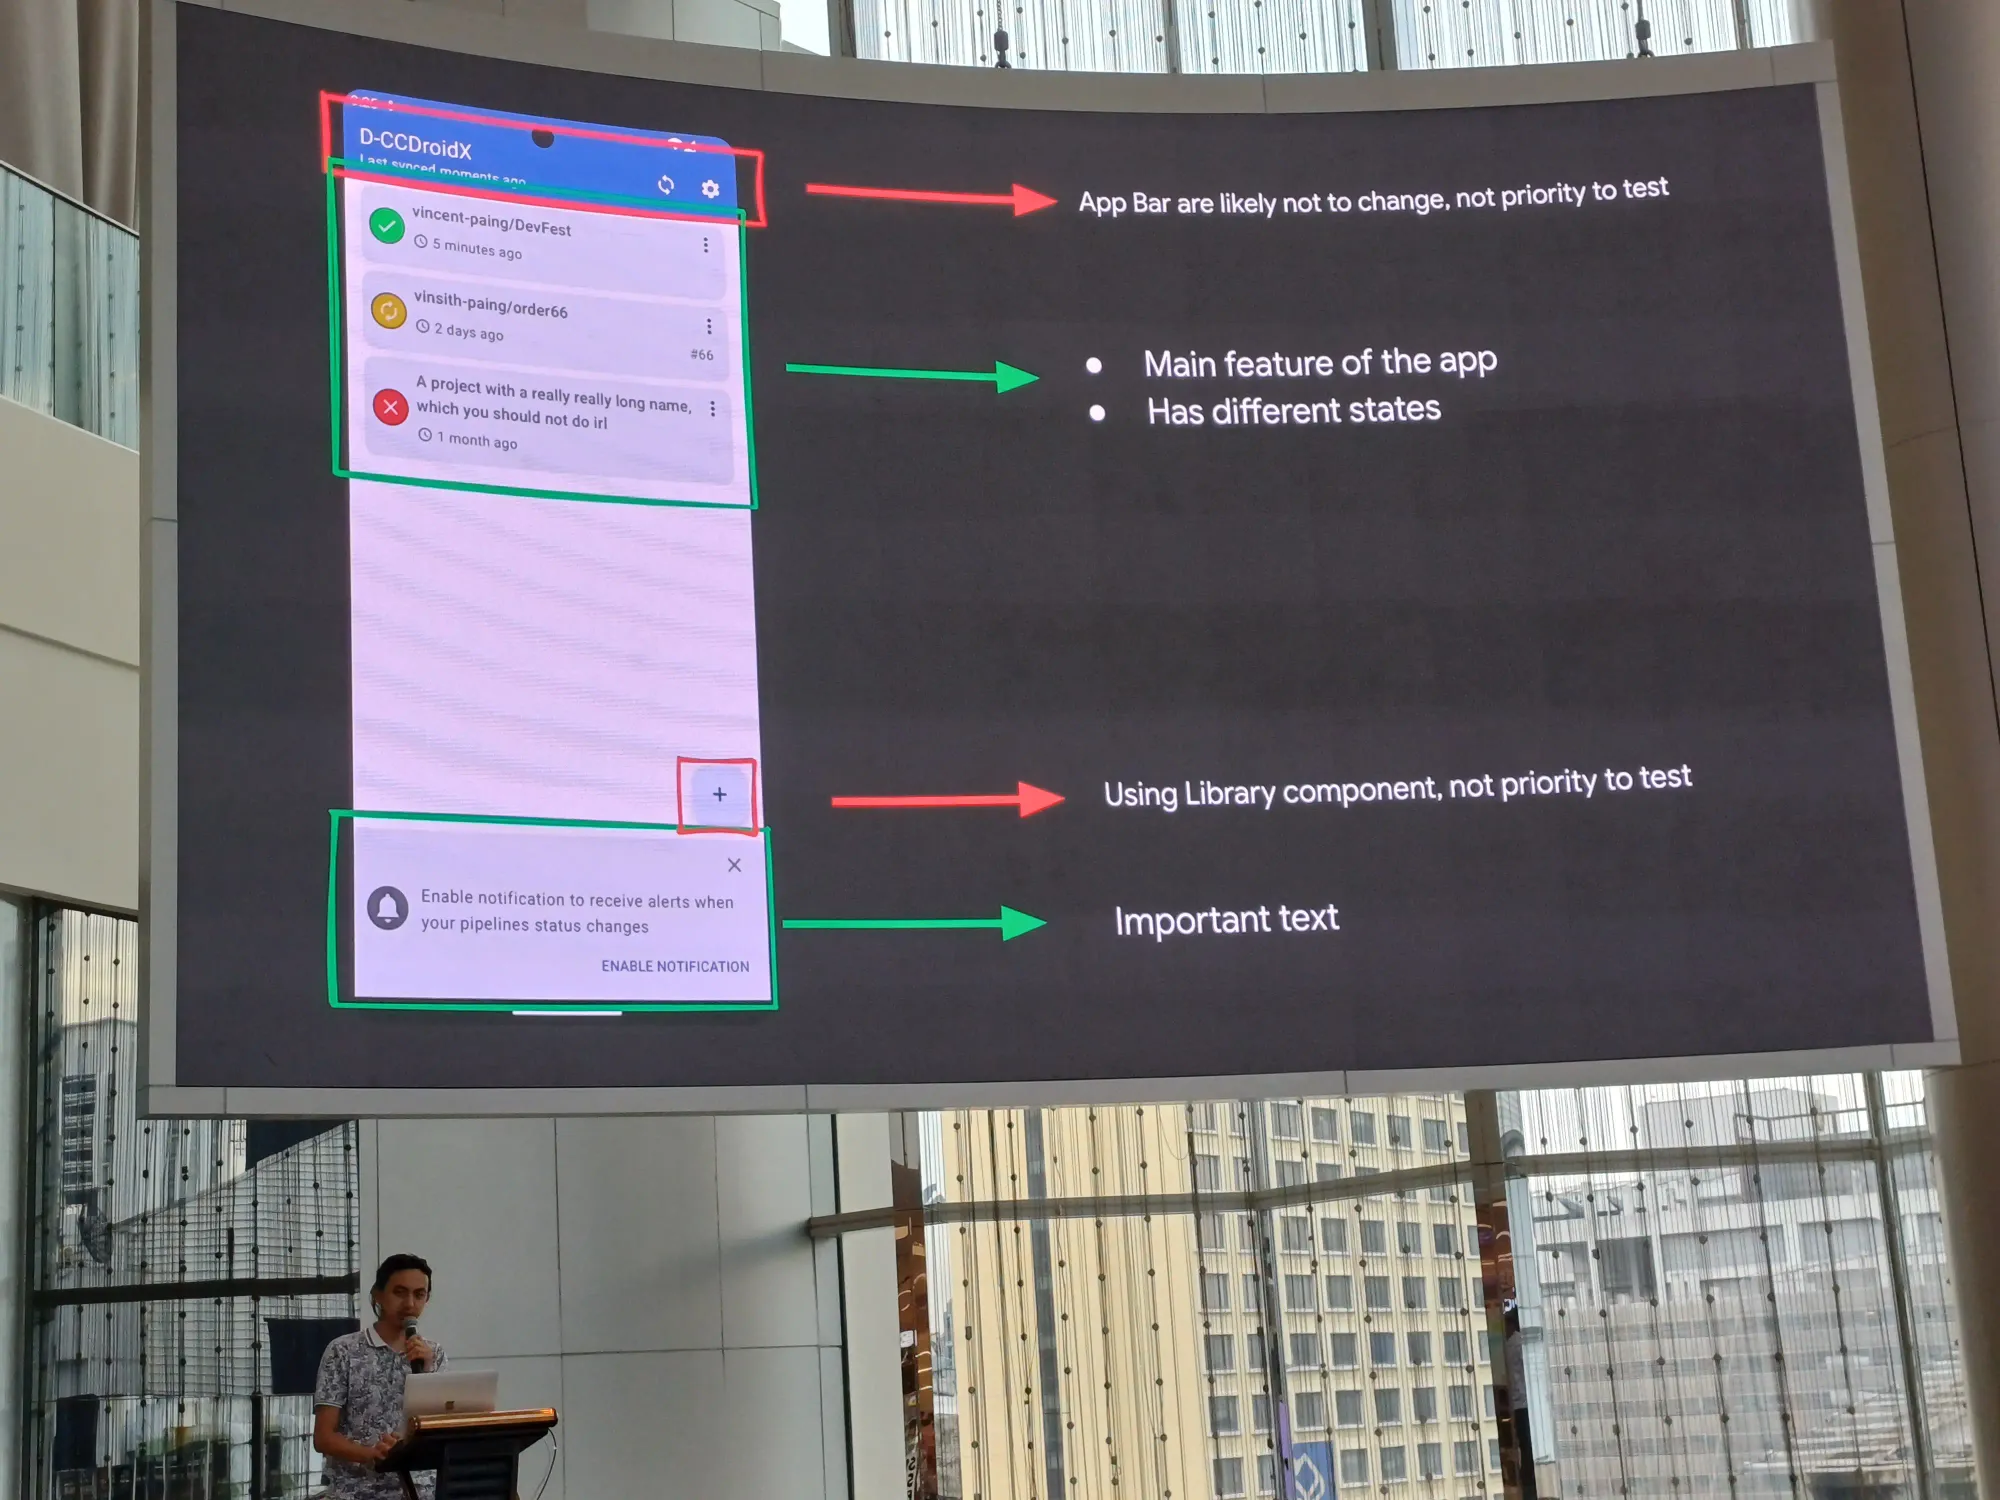
- Component level snapshot testing? เราควรหยิบตรงไหนมาเทสดี?
ไม่หยิบ app bar ที่ไม่เปลี่ยน กับพวก library component เพราะเขาน่าจะเทสมาแล้ว ให้หยิบ content มา test
Tooling
มีเยอะแยะมากมายเลย
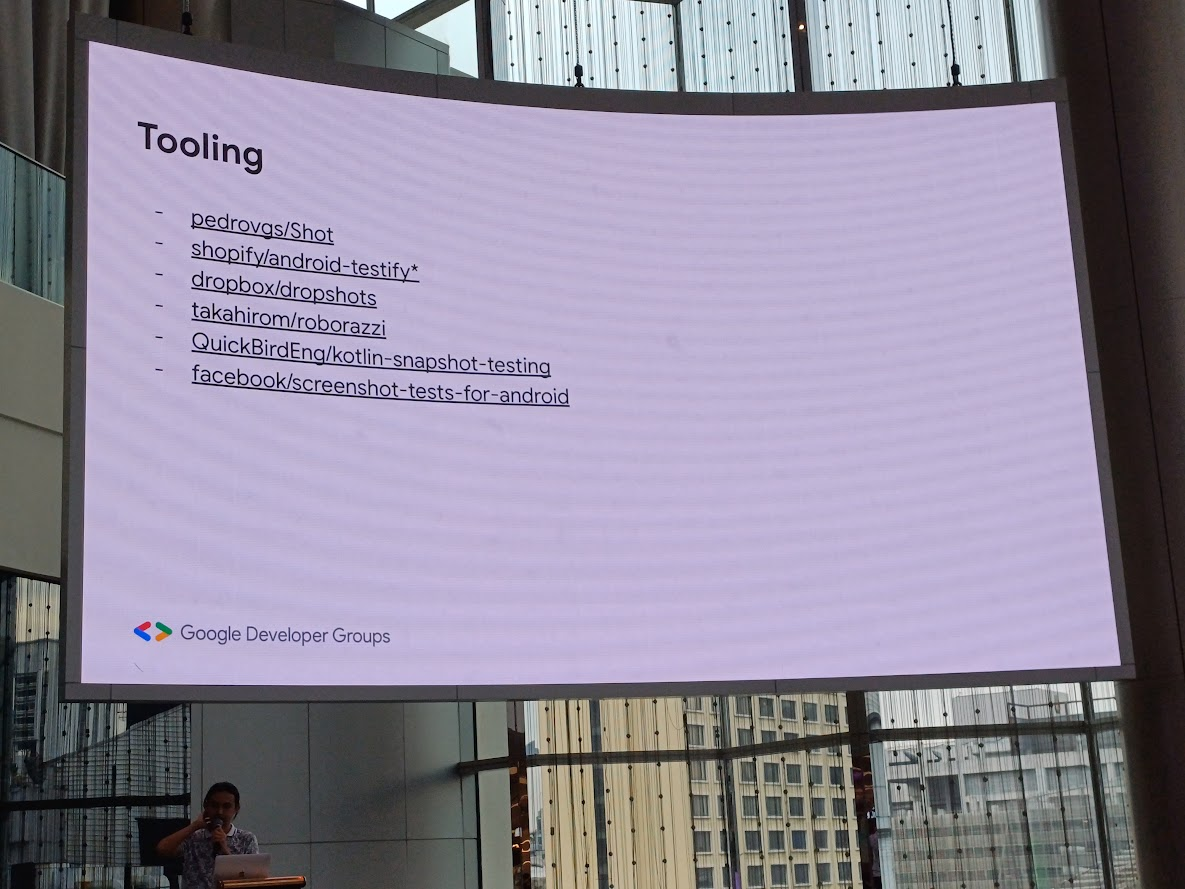
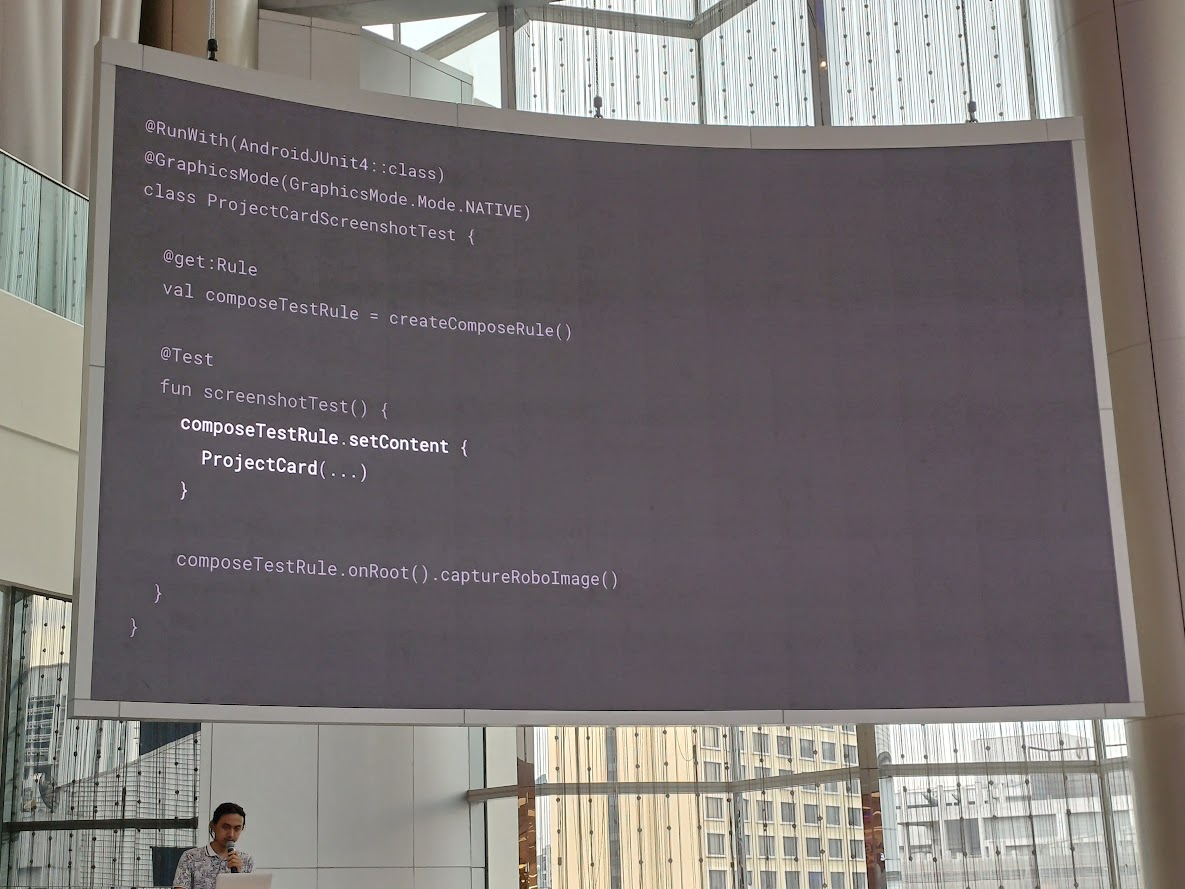
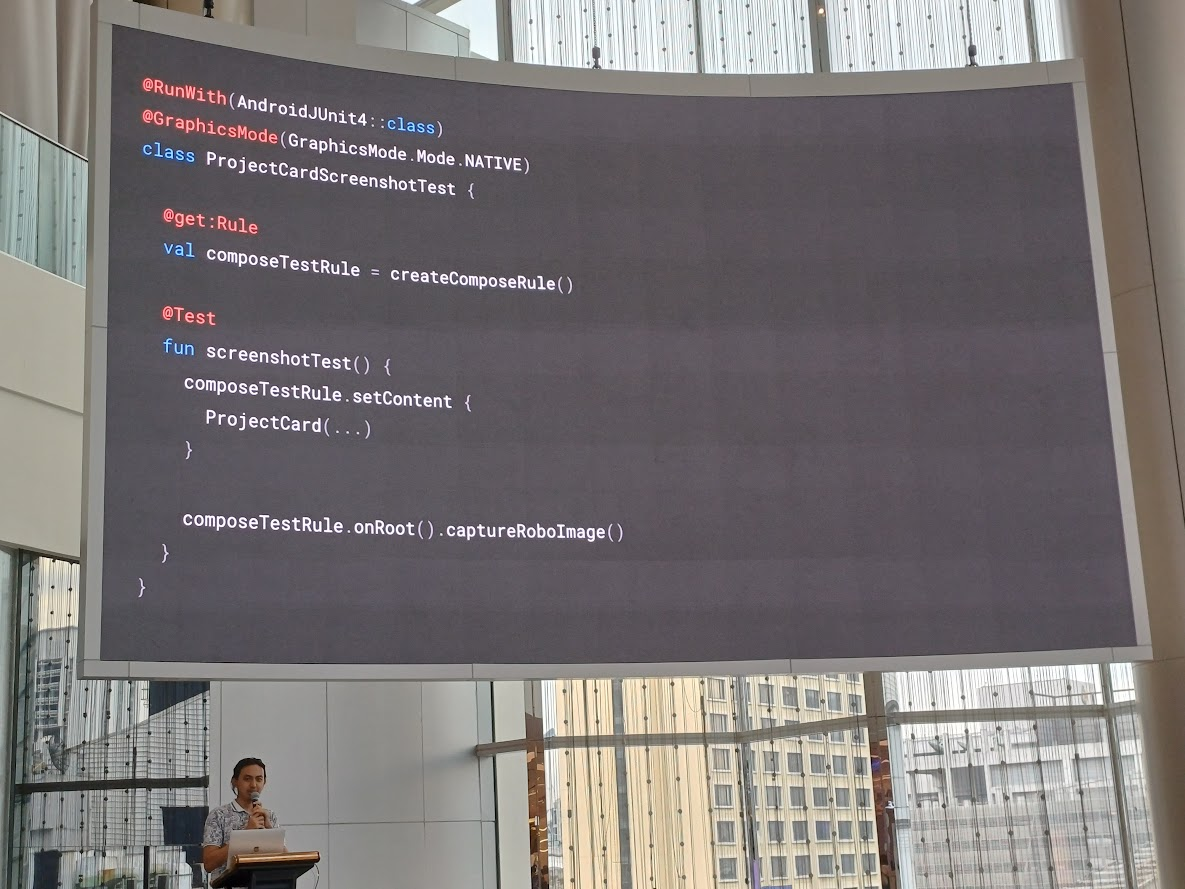
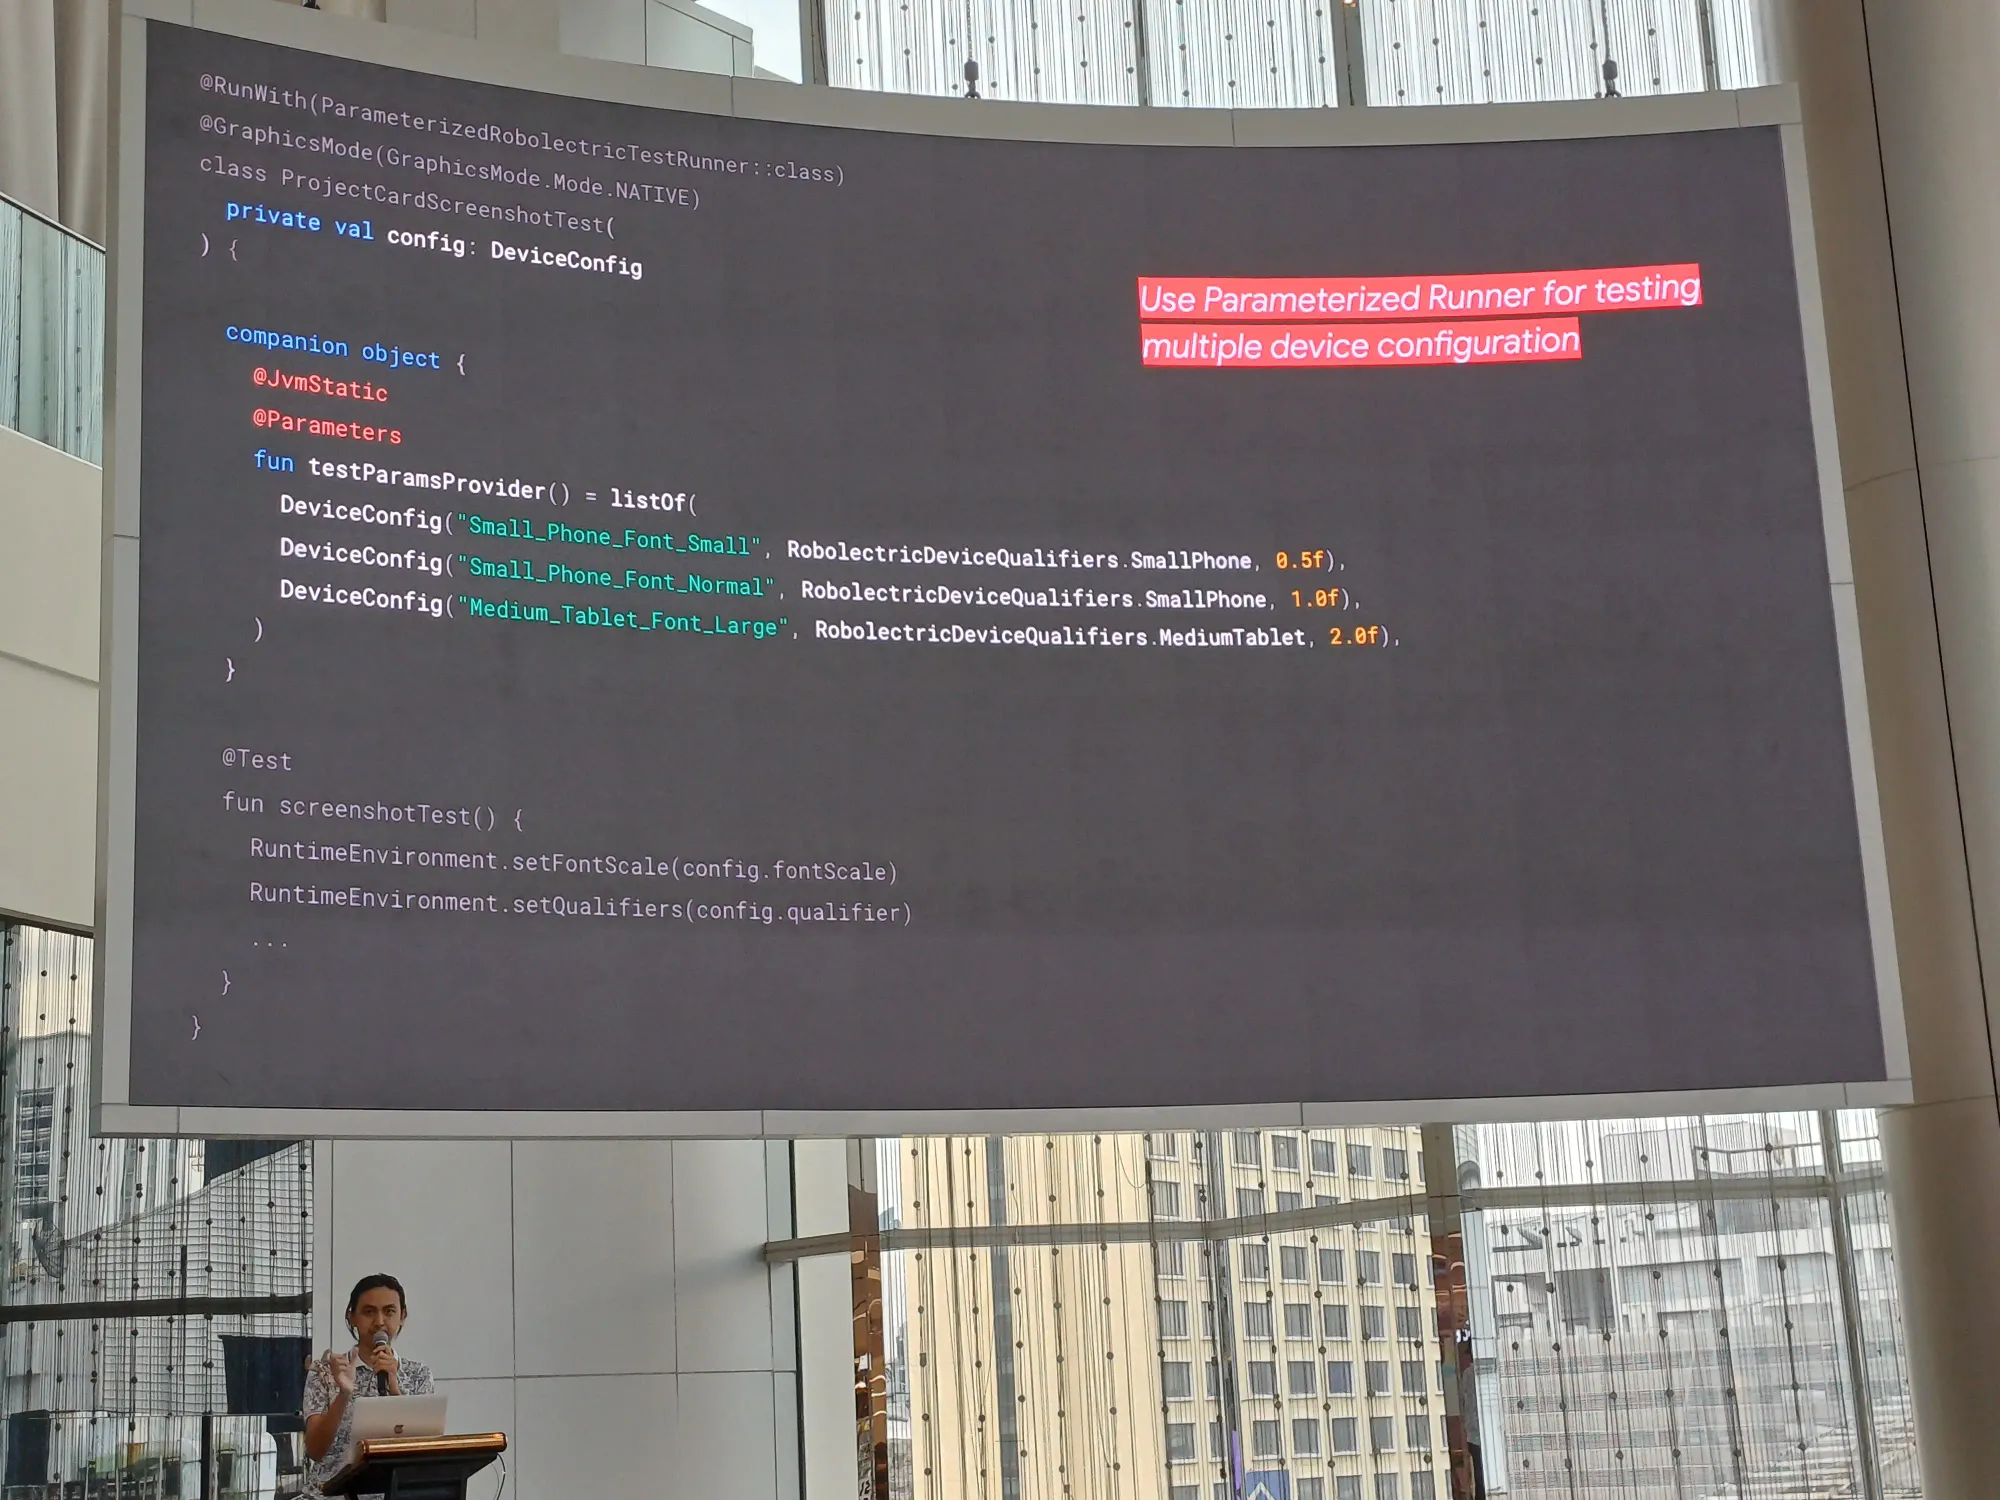
ในที่นี้พูดถึง Roborazzi เช่นเราอยาก test view นี้
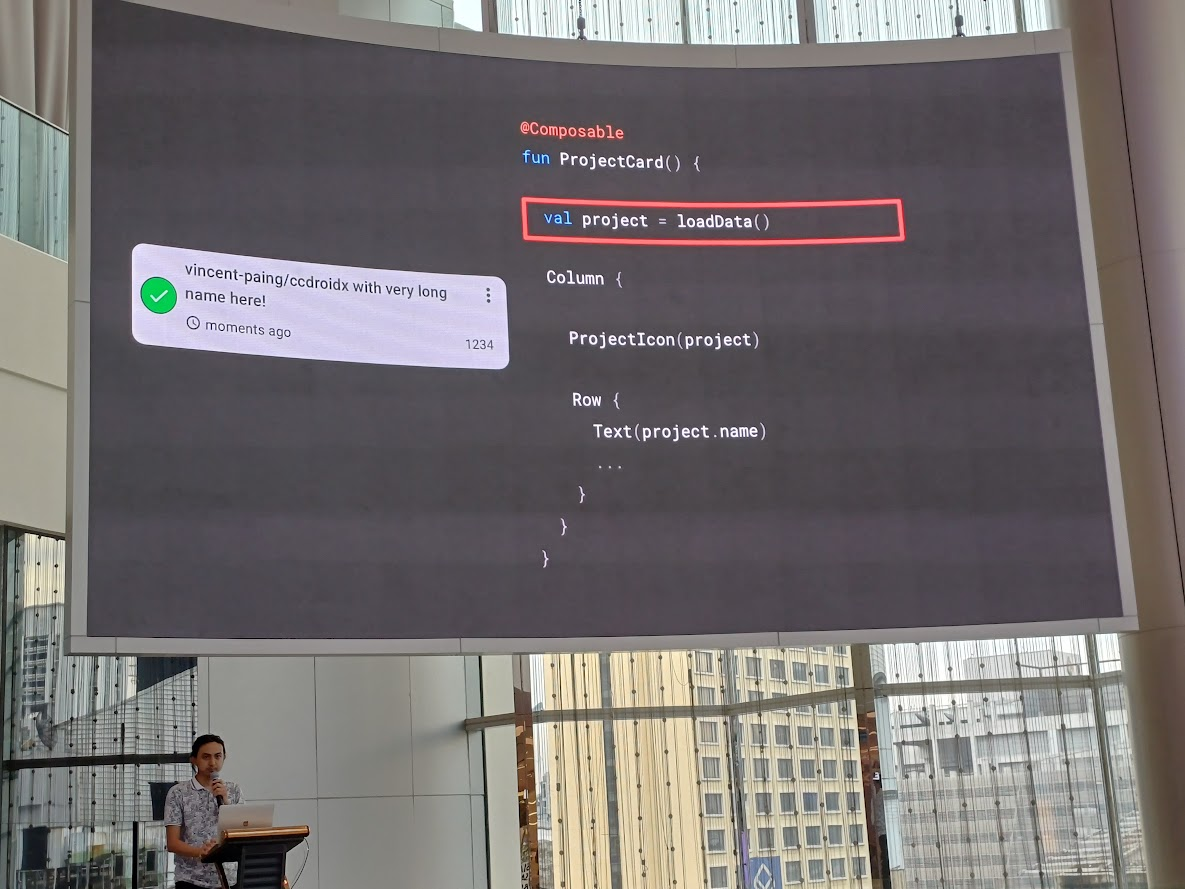
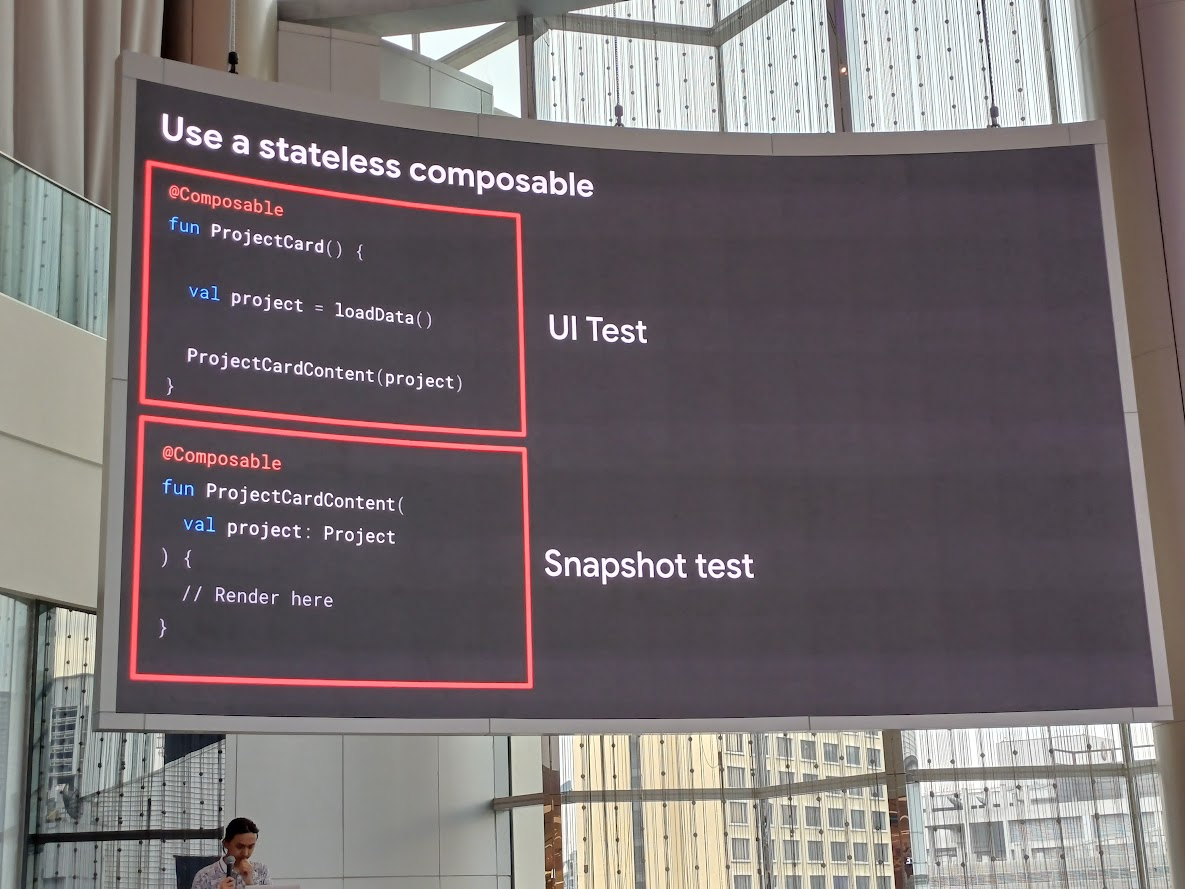
อ่าตัวโปรเจกต์ตัวอย่างใช้ Jetpack Compose ถ้าใช้ stateless composable จะแบ่ง UI Test และ Snapshot Test คือ UI Test เน้นพวก flow เช่นโหลดข้อมูลมาแสดง ส่วน Snapshot Test ดูว่ามัน render ถูกตำแหน่งไหม
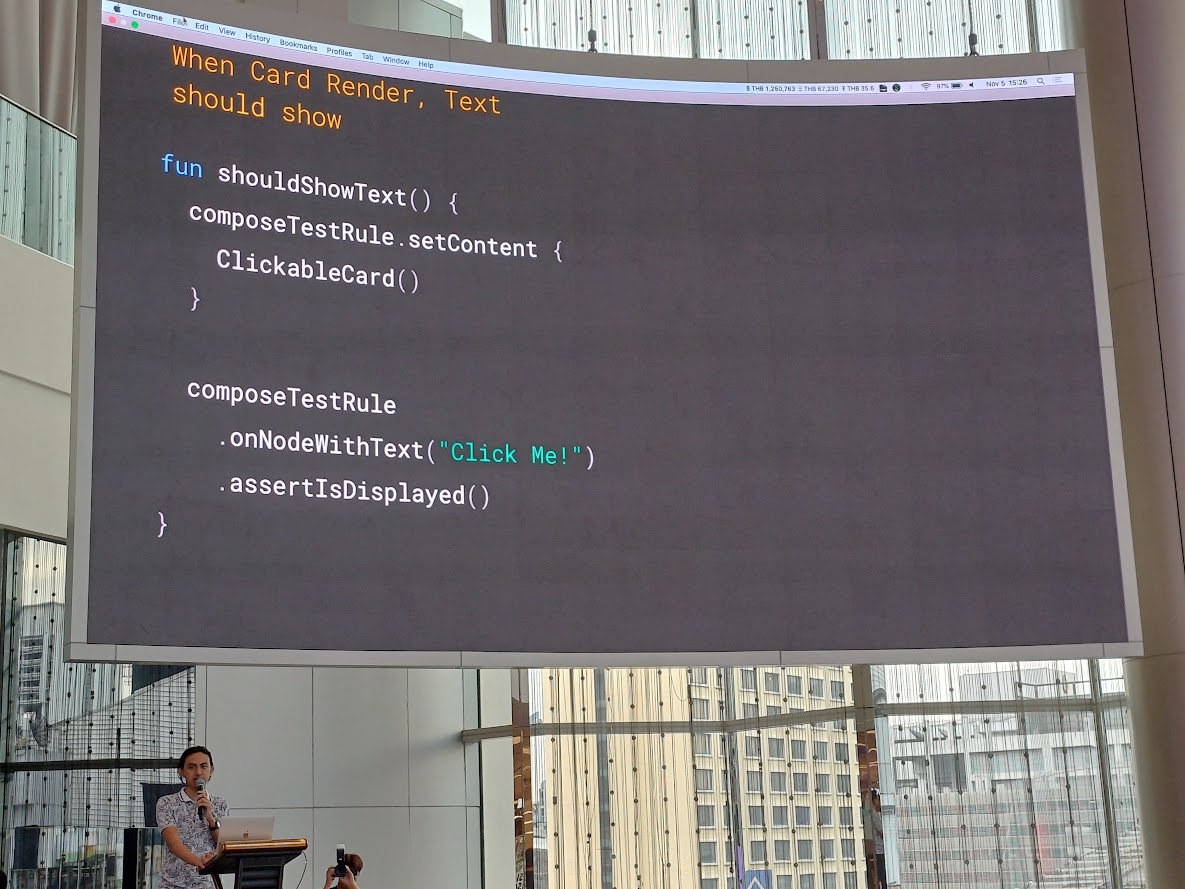
หน้าตา test case คร่าว ๆ
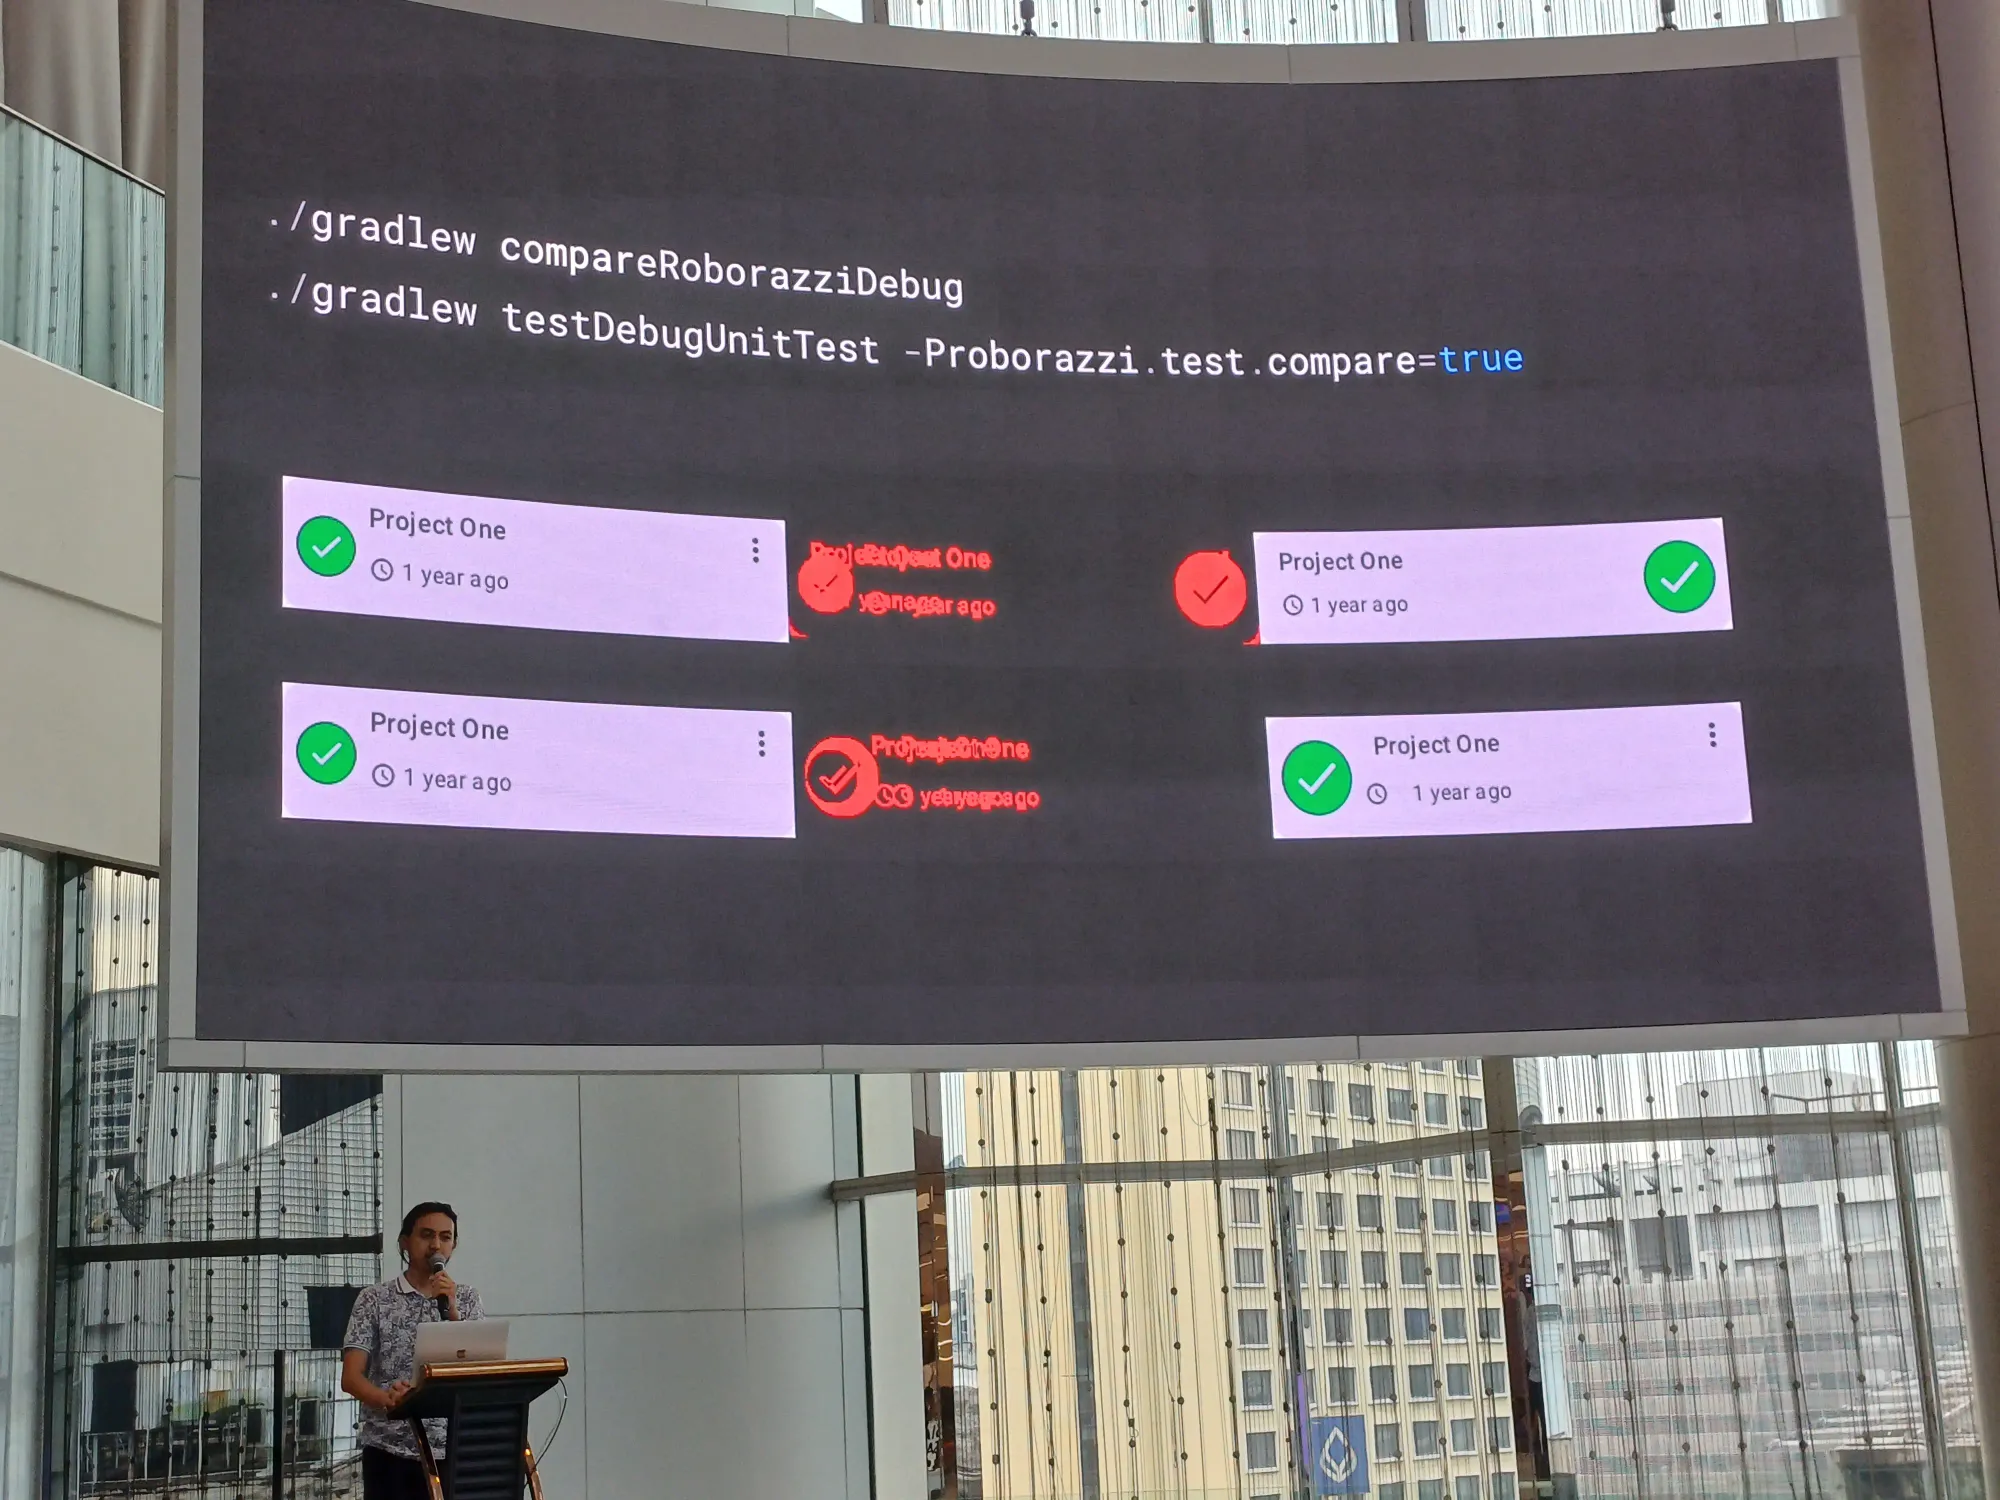
เรา setting ผ่าน gradle ตามนี้เลย ตอน compare เราจะเห็นเป็นอันแดง ๆ เนอะ
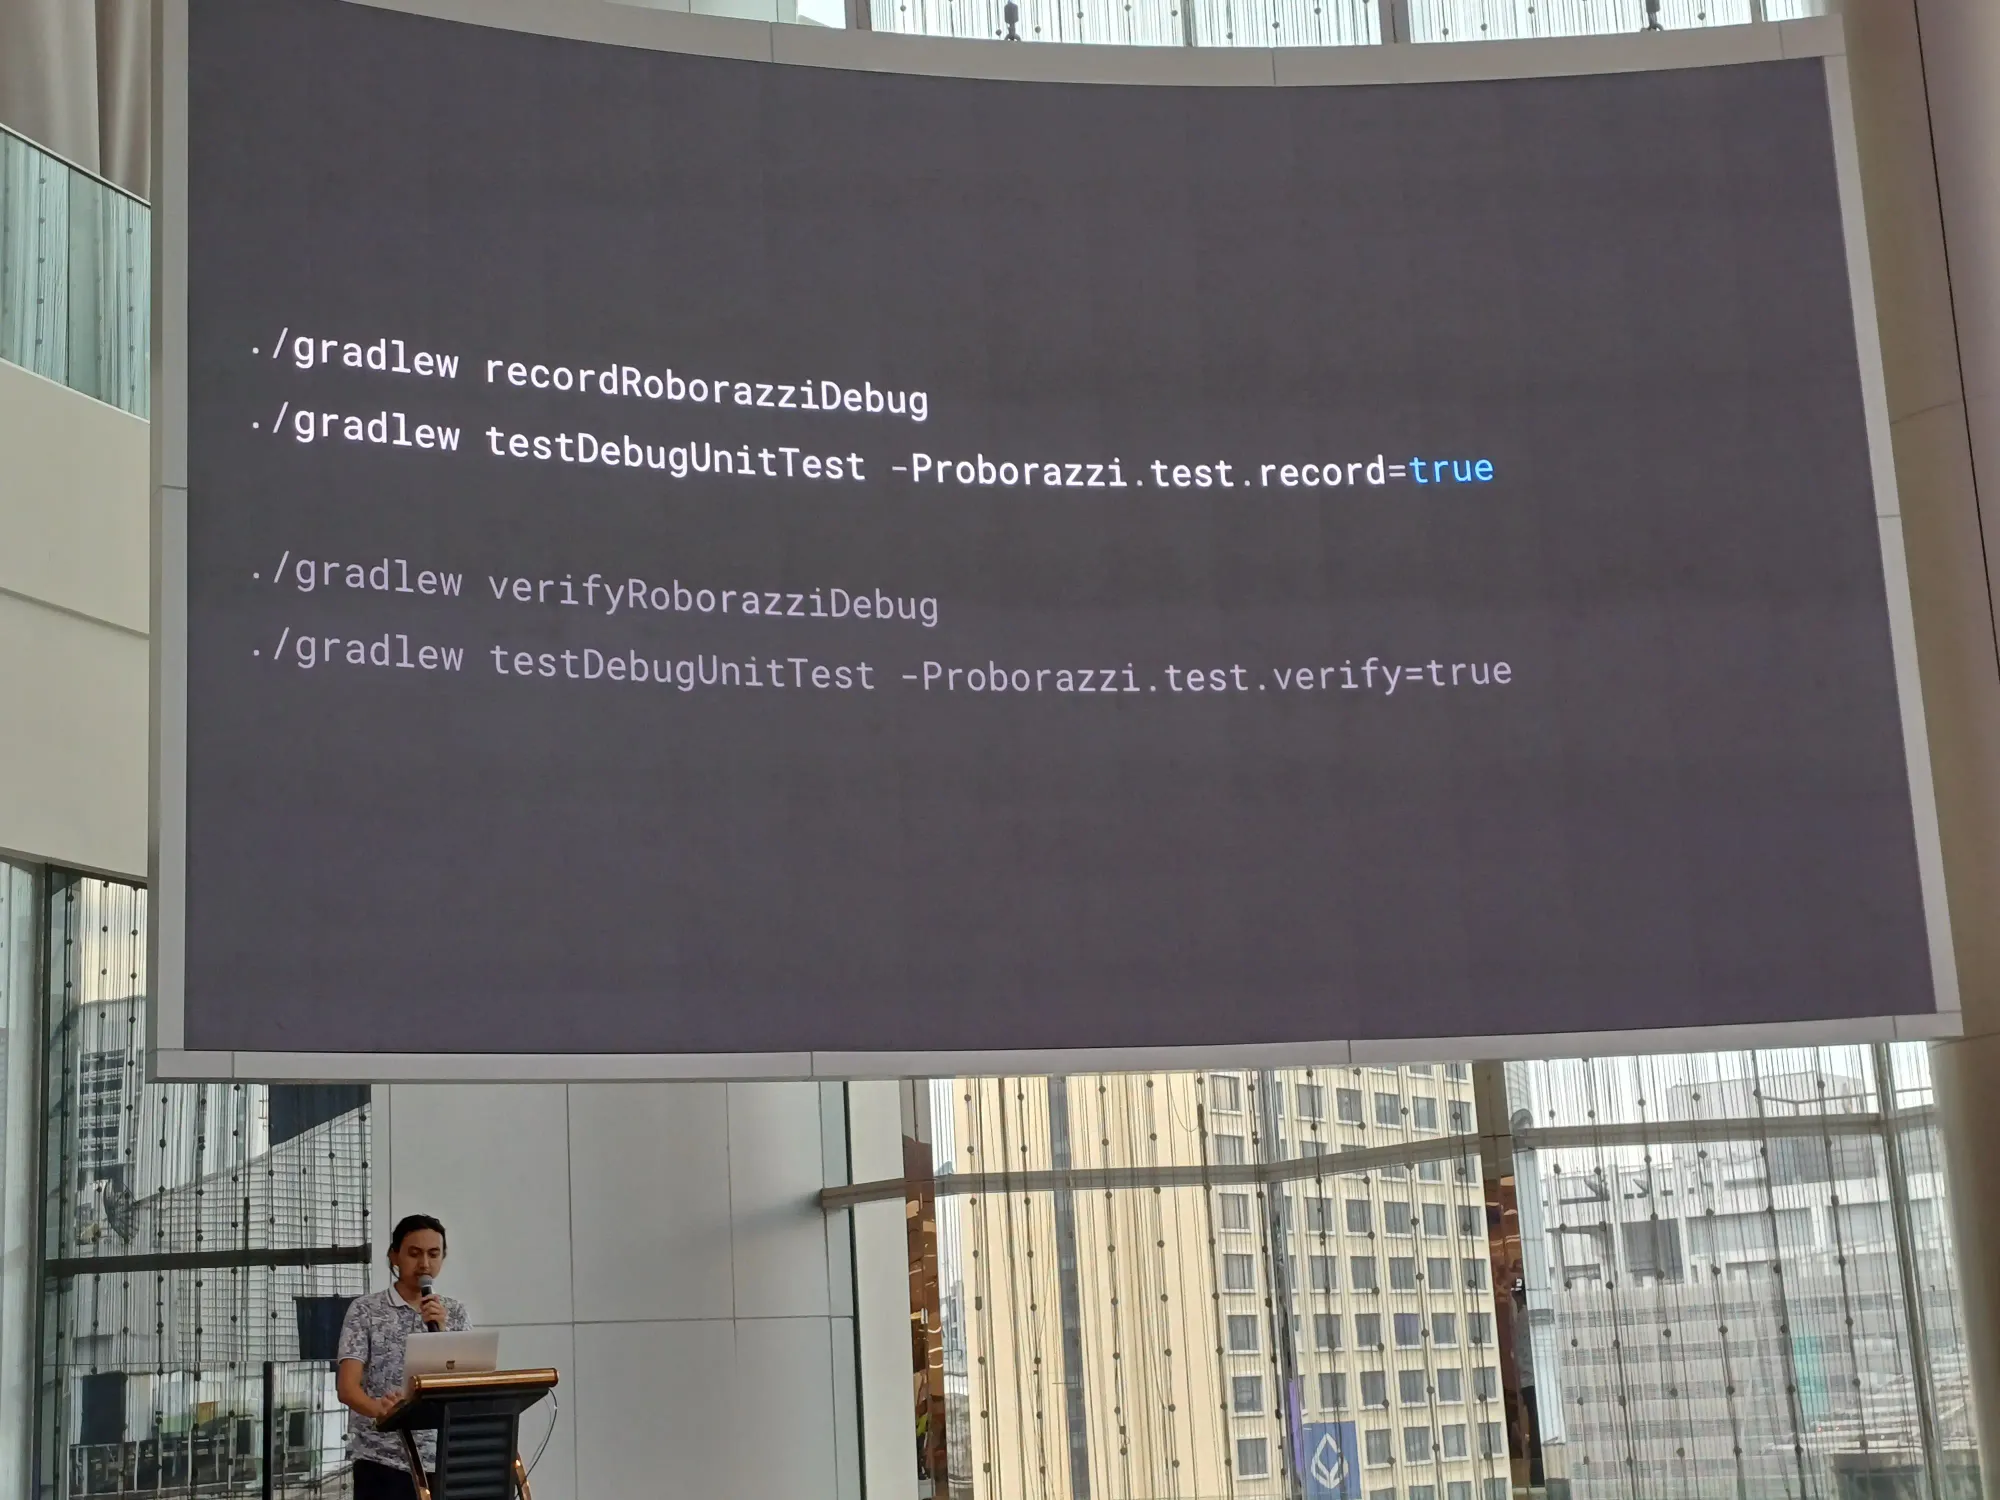
./gradlew recordRoborazziDebug
./gradlew testDebugUnitTest -Proborazzi.test.record=true

./gradlew verifyRoborazziDebug
./gradlew testDebug UnitTest -Proborazzi.test.verify=true

./gradlew compareRoborazziDebug
./gradlew testDebugUnitTest -Proborazzi.test.compare=true
ตัว test case มีการ set rule ไว้ก่อน test
มีการ set device ก่อนที่จะทำ test case ด้วย
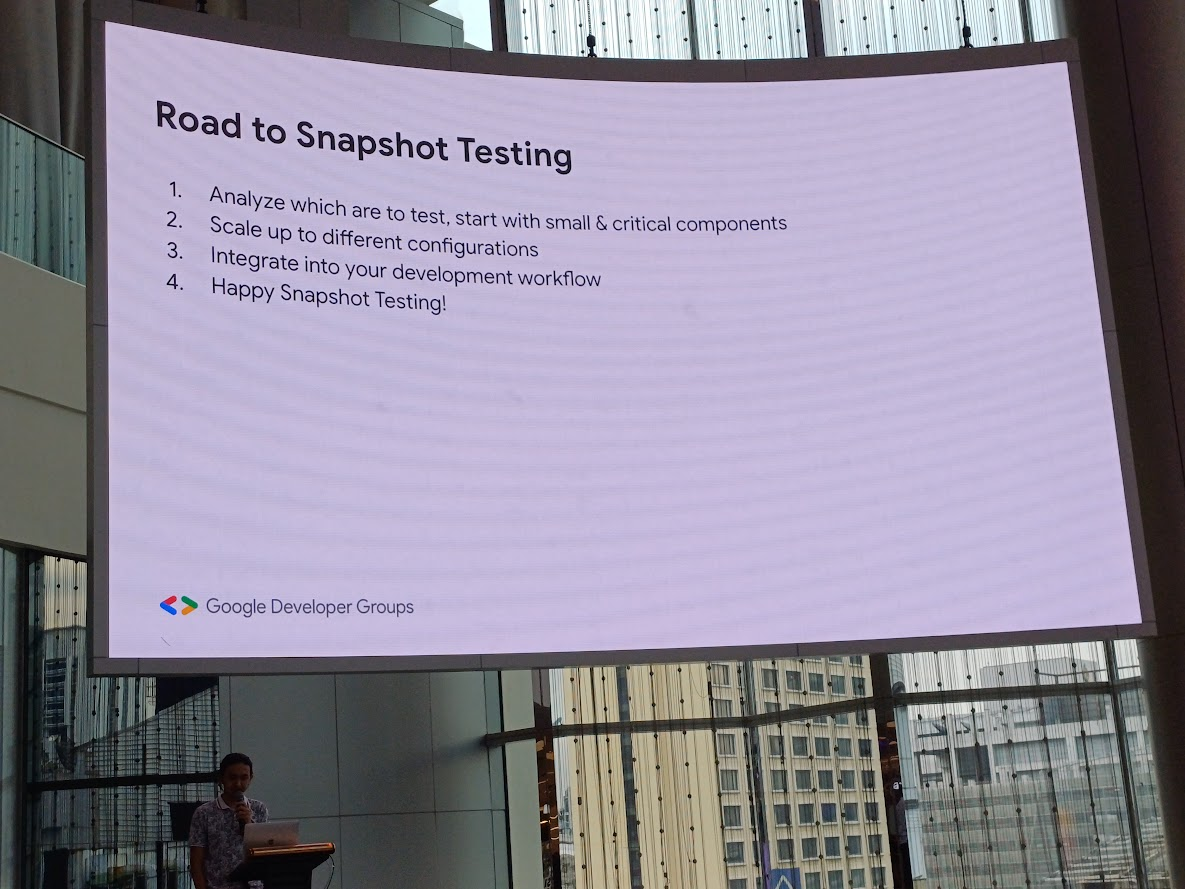
สรุปเส้นทางในการทำ Snapshot Testing
- analyze อันที่เราจะ test ให้เริ่มจากอันเล็ก ๆ และ critical ก่อน
- scale up กับหลาย ๆ config
- integrate กับ workflow ของเรา
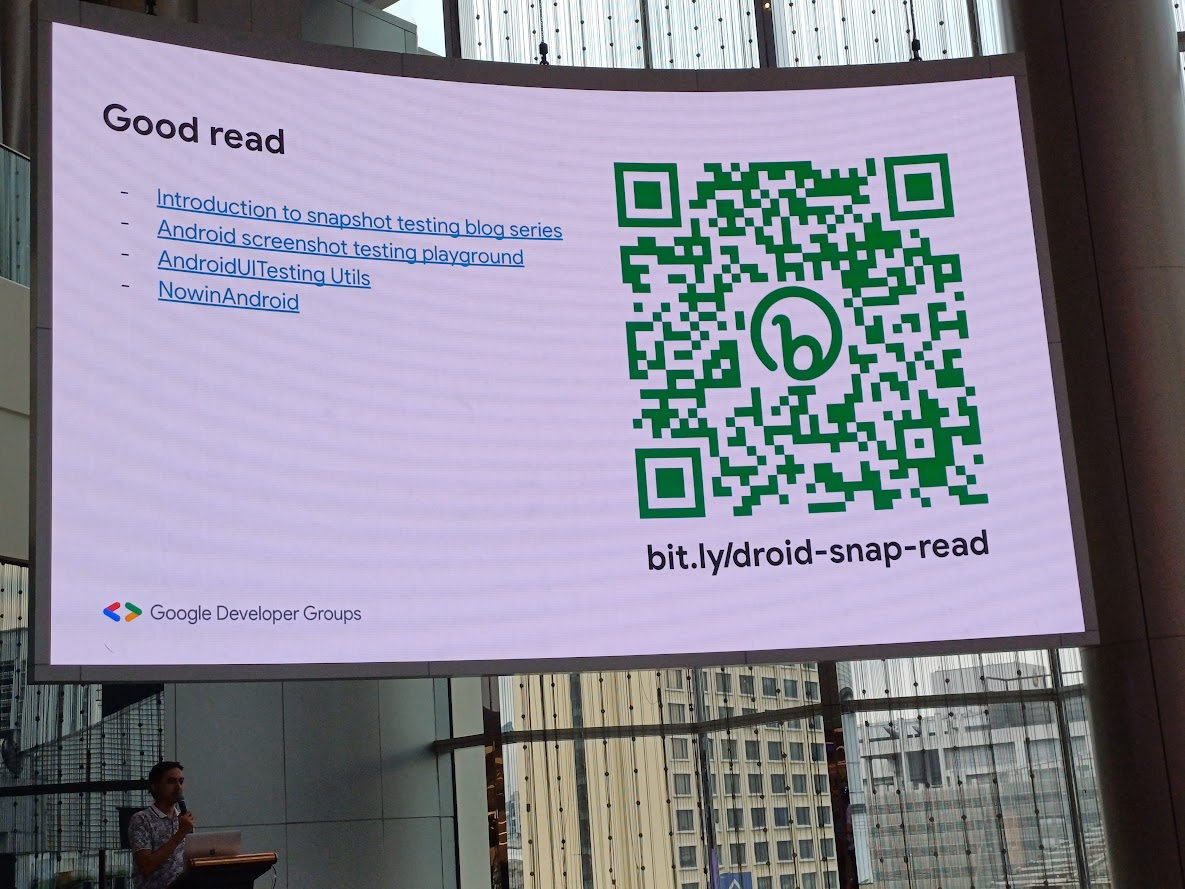
Resources เพิ่มเติม เผื่อใครอยากอ่านเพิ่ม
 Sergio Sastre Florez
 sergio-sastresergio-sastreandroid
อันนี้สไลด์จ้า
Optimizing Compose App - Thaw Zin Toe (Pe Tut)

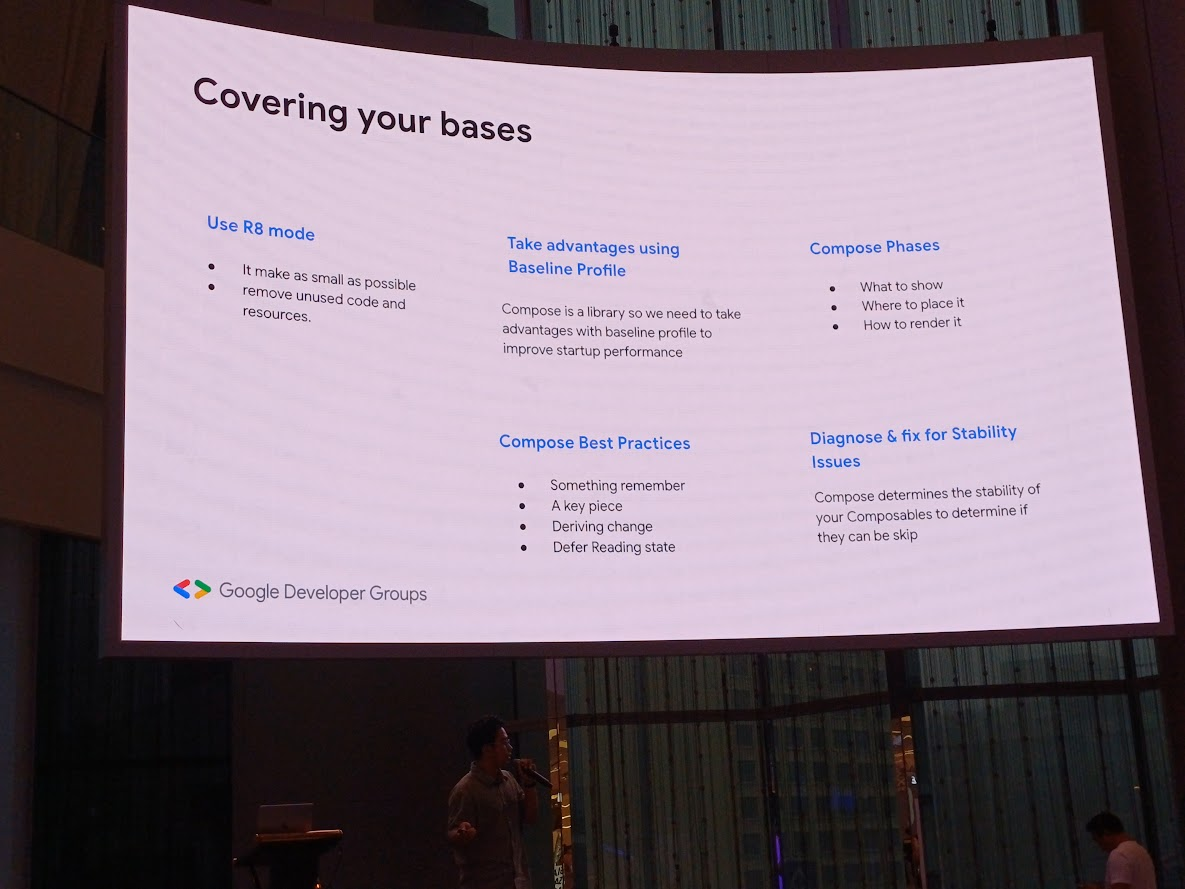
session นี้มีอะไรบ้าง ไปดูกัน
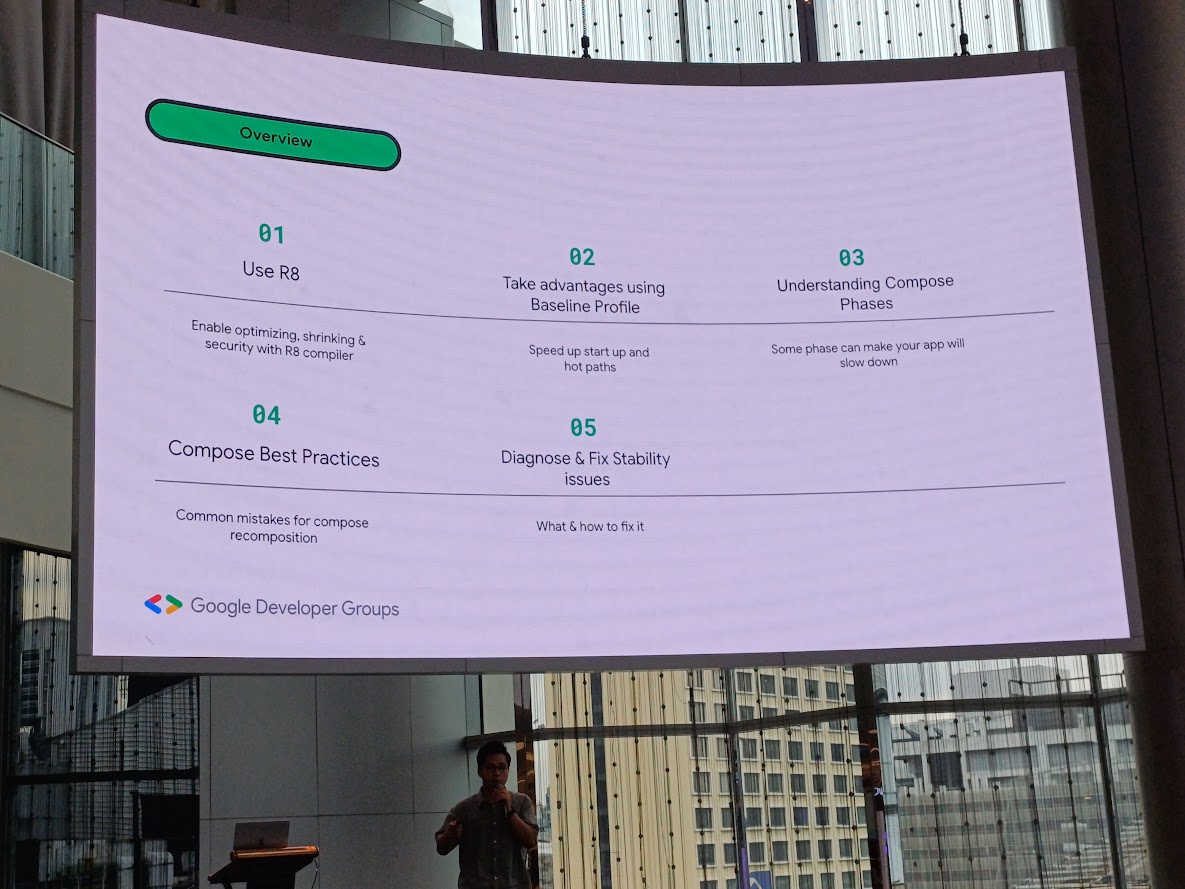
Use R8
ใช้ R8 mode ใน release mode
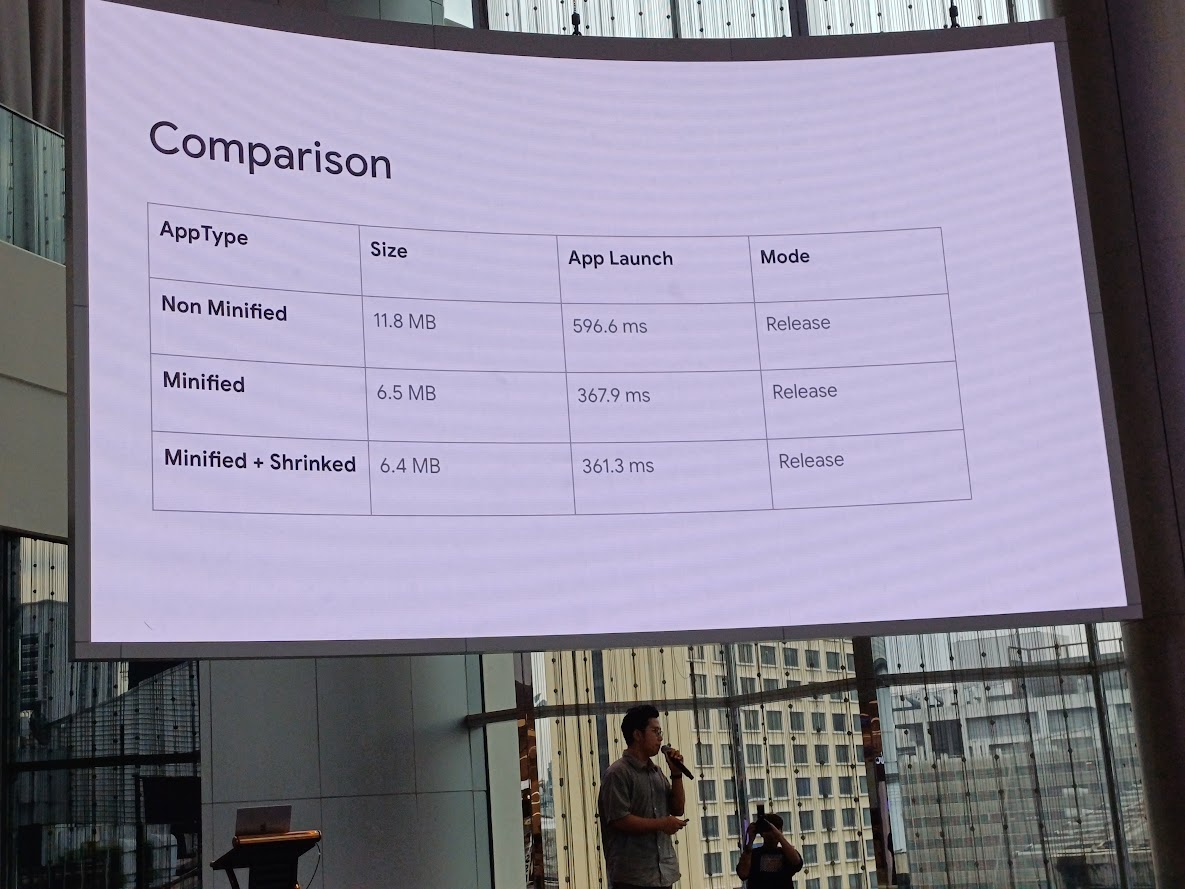
สามารถ optimize โดบการลบของที่ไม่ใช้ทิ้ง ไม่ว่าจะเป็น class, function, field, resource แล้วก็ optimize โค้ด
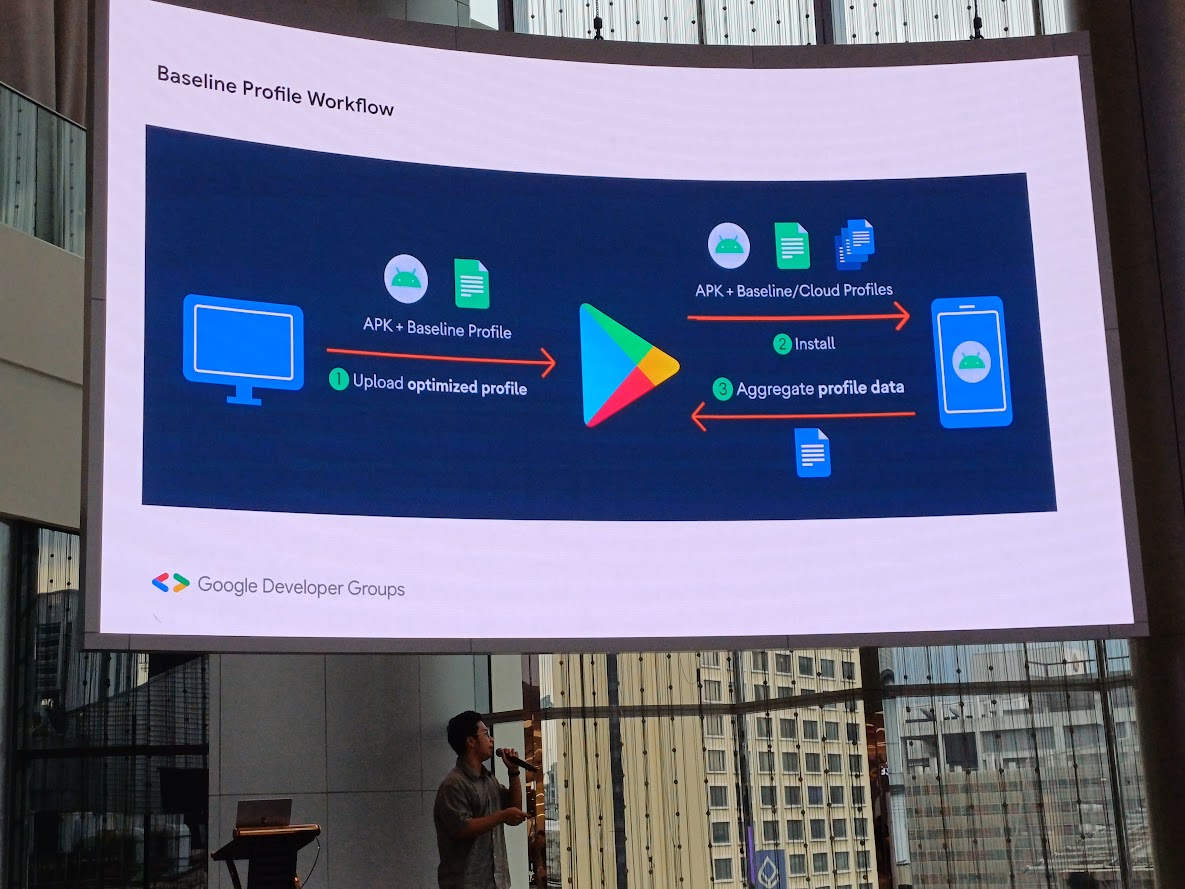
Take advantages using Baseline Profile
การใช้ Baseline Profile ช่วย improve code execution speed 30% จากการ launch ครั้งแรก
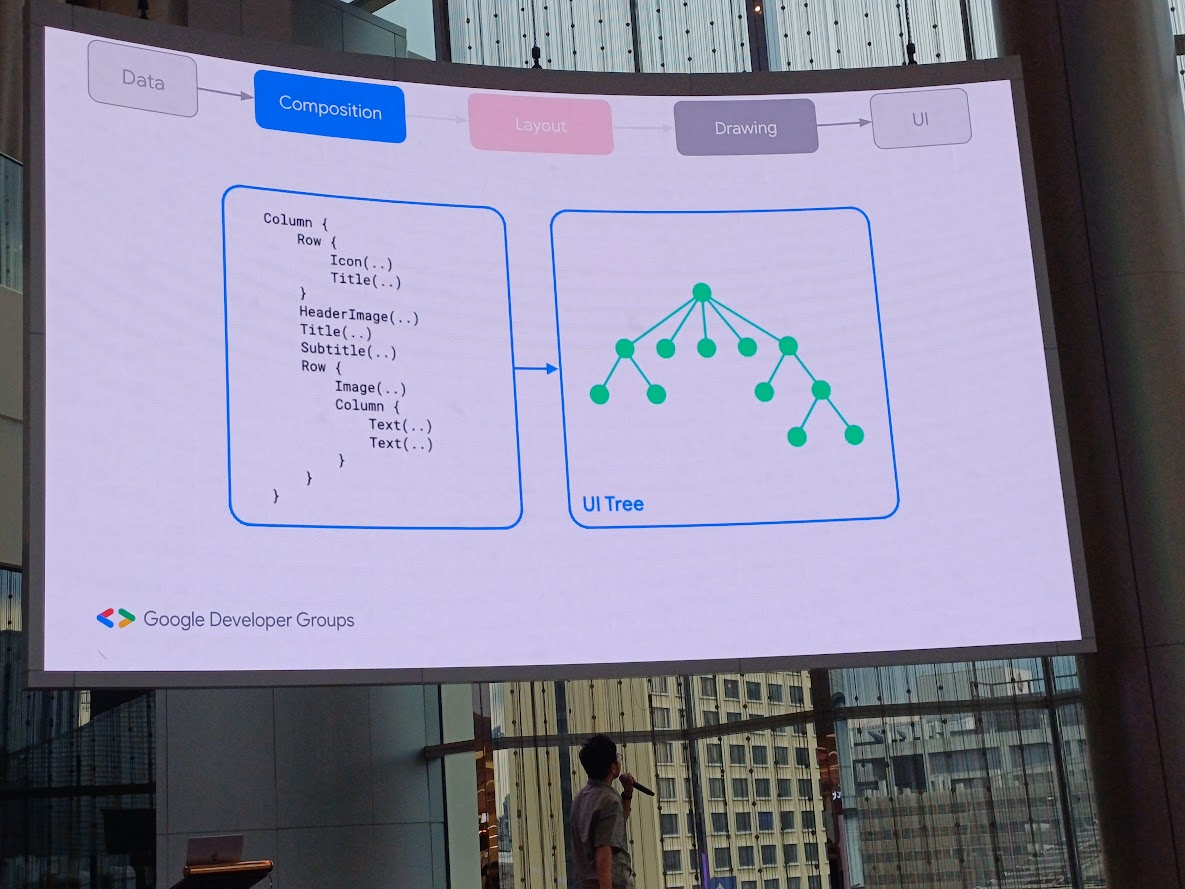
Understanding Compose Phases
ภาพคร่าว ๆ ว่าเราจะทำ composition อะไร ที่ layout ไหน และวาดยังไง
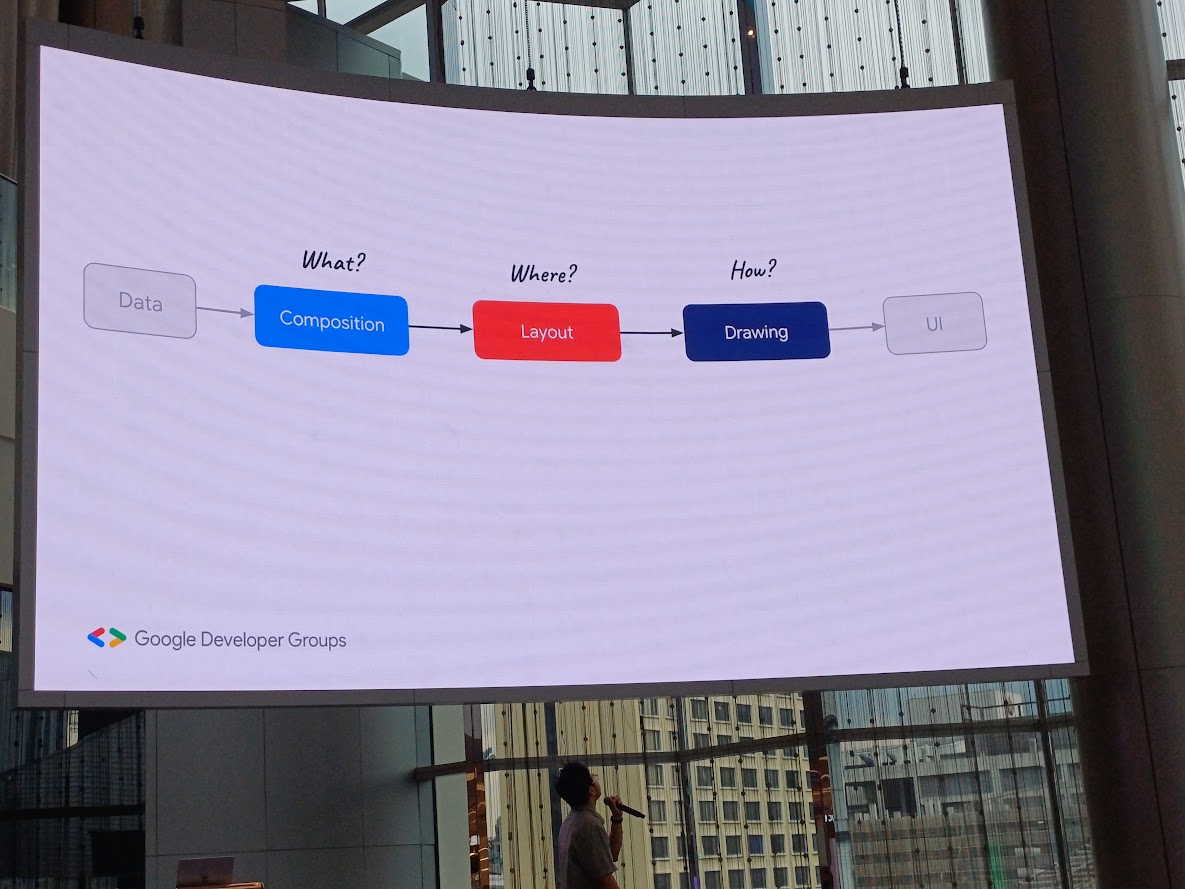
composition ดูเป็น UI Test มองเป็น node
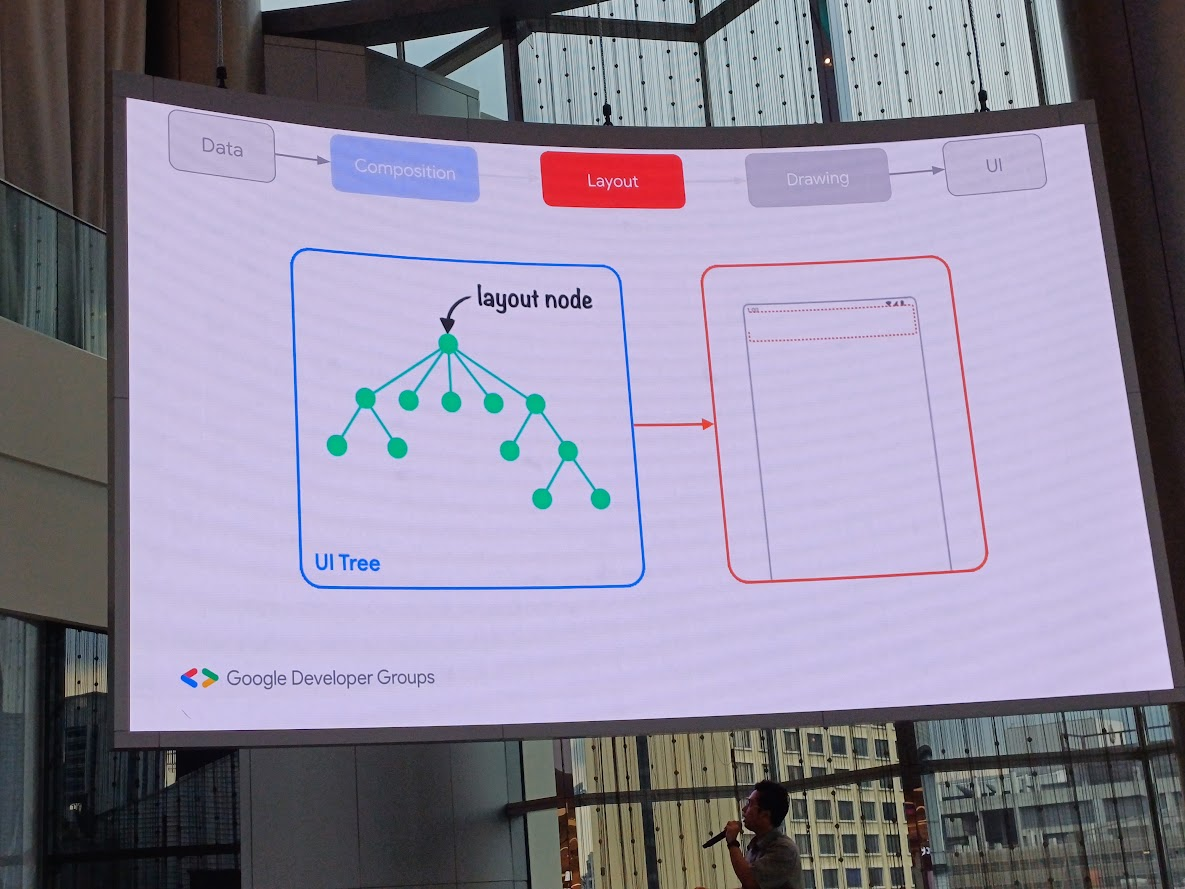
layout เราจัดวาง view ยังไง
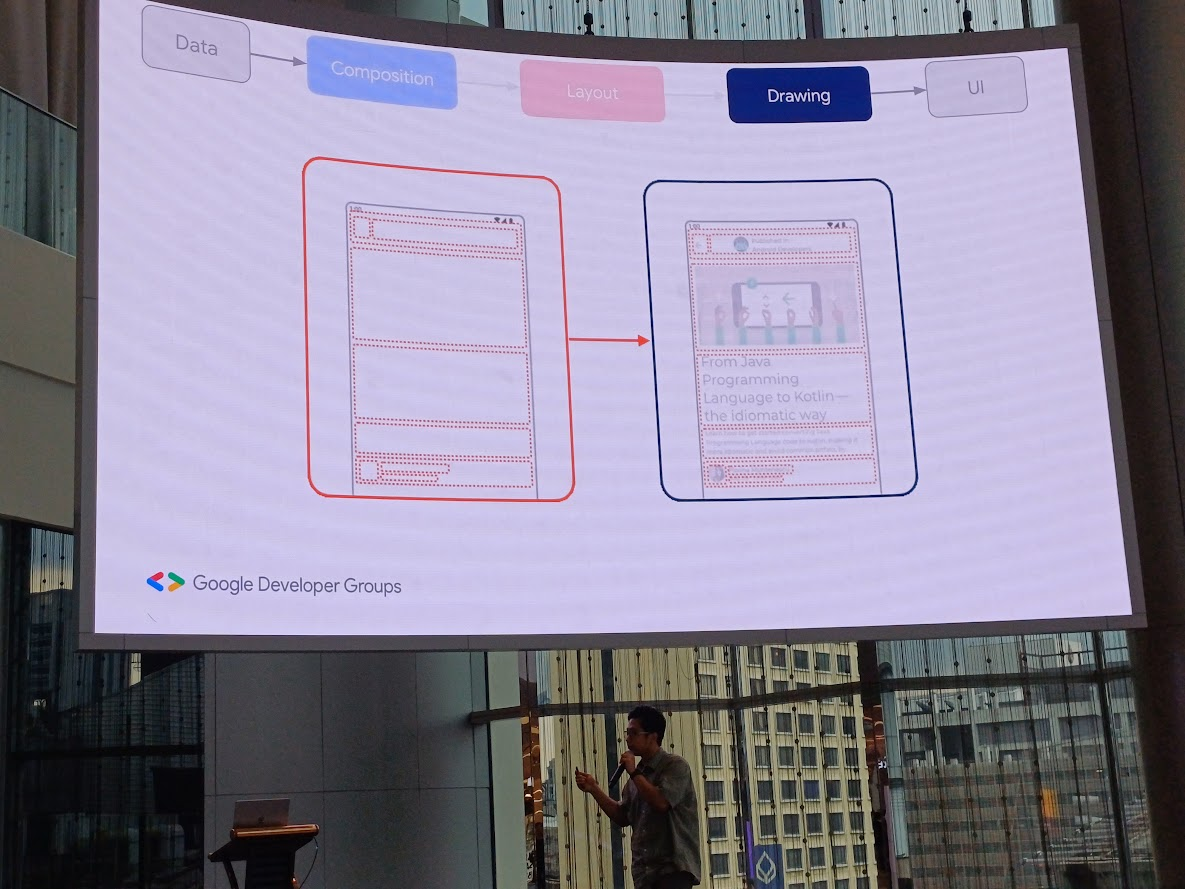
drawing เราวาด content อะไร
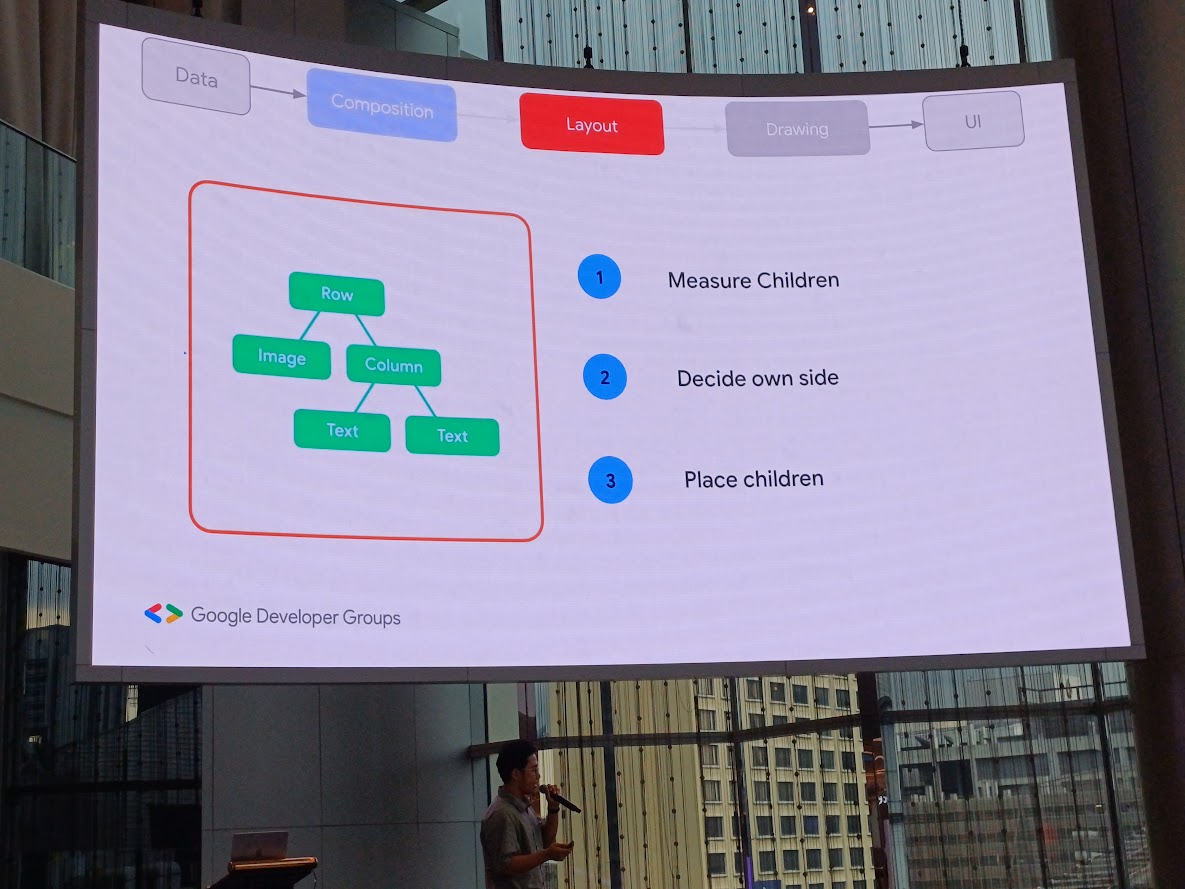
ในส่วน layout มีการวัด view ลูก ตัดสินใจ แล้ววาง view ลูก
Compose Best Practices
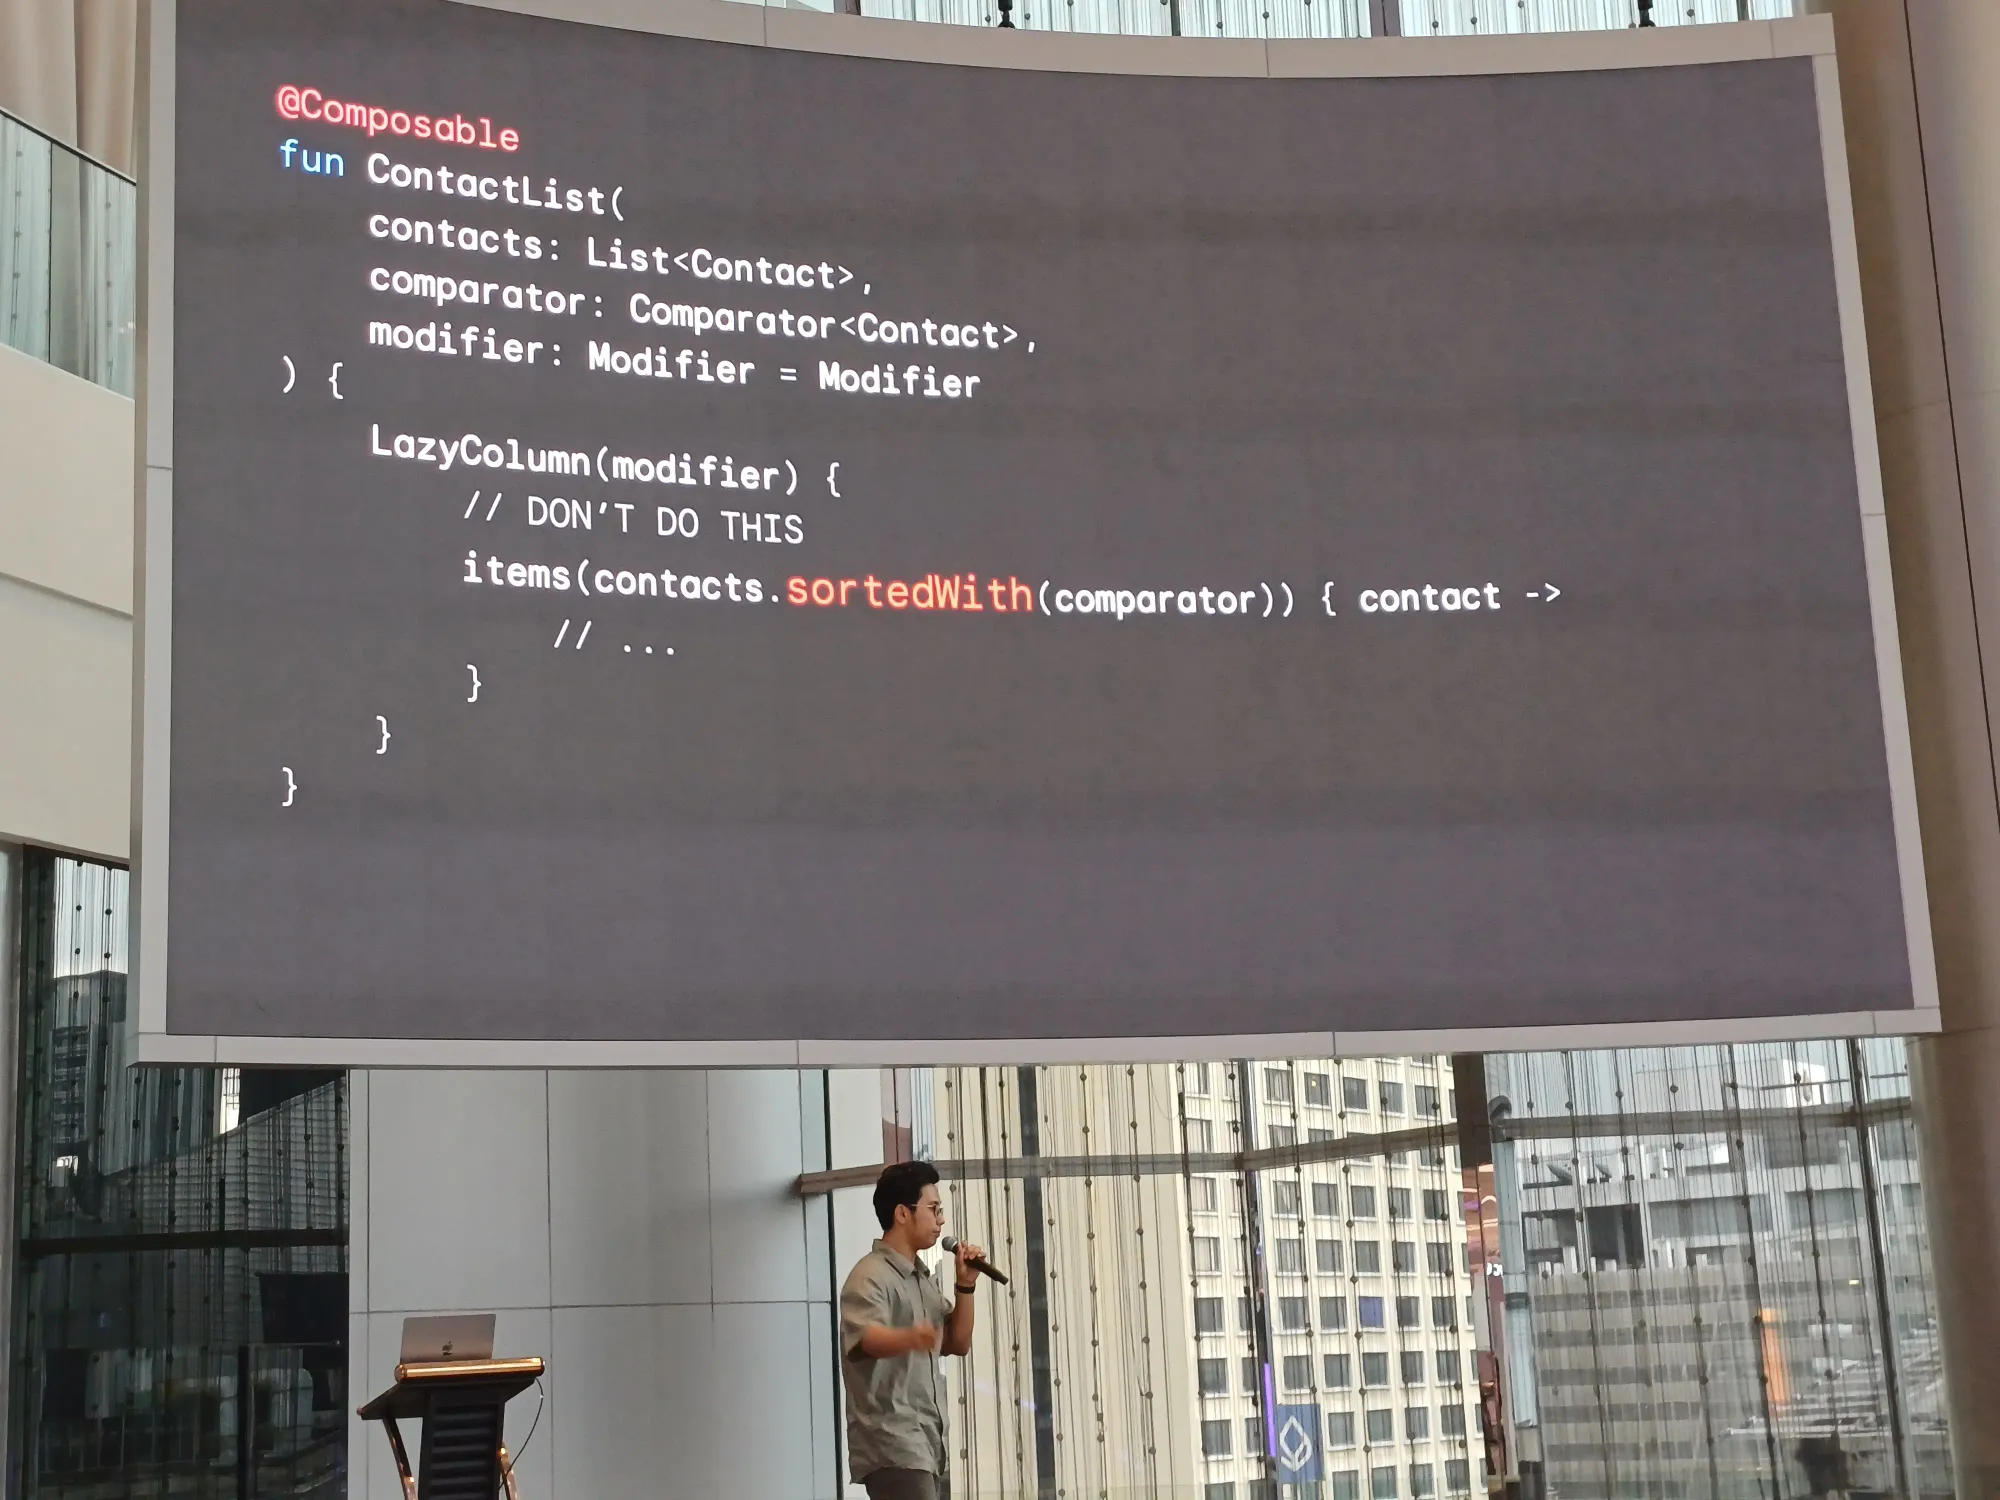
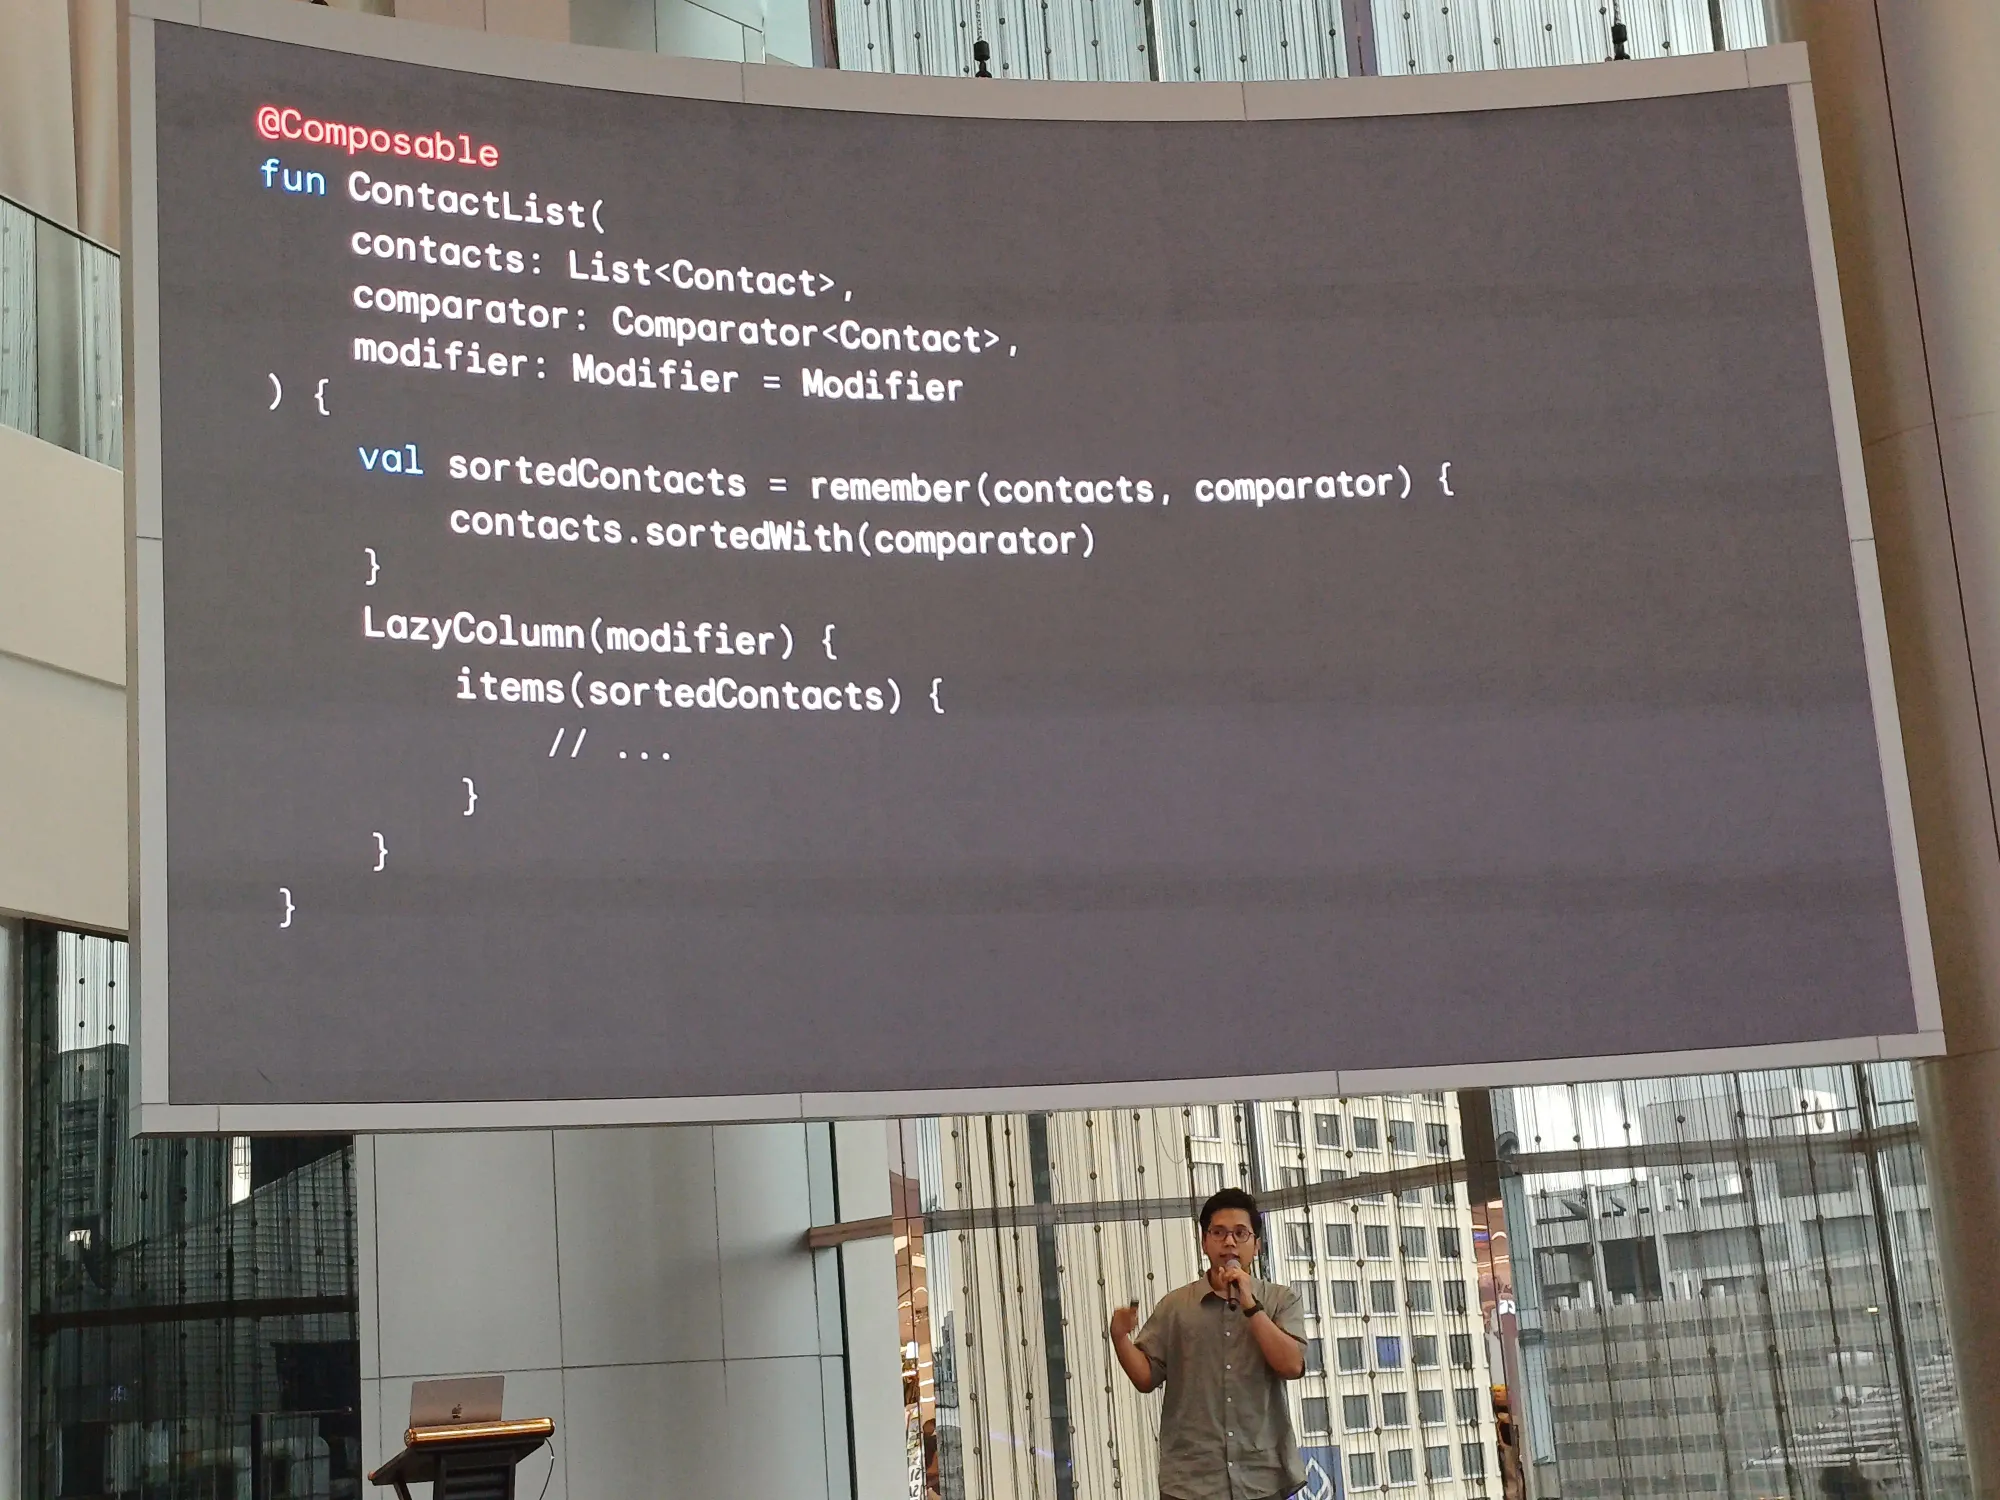
- อย่าเอาไป
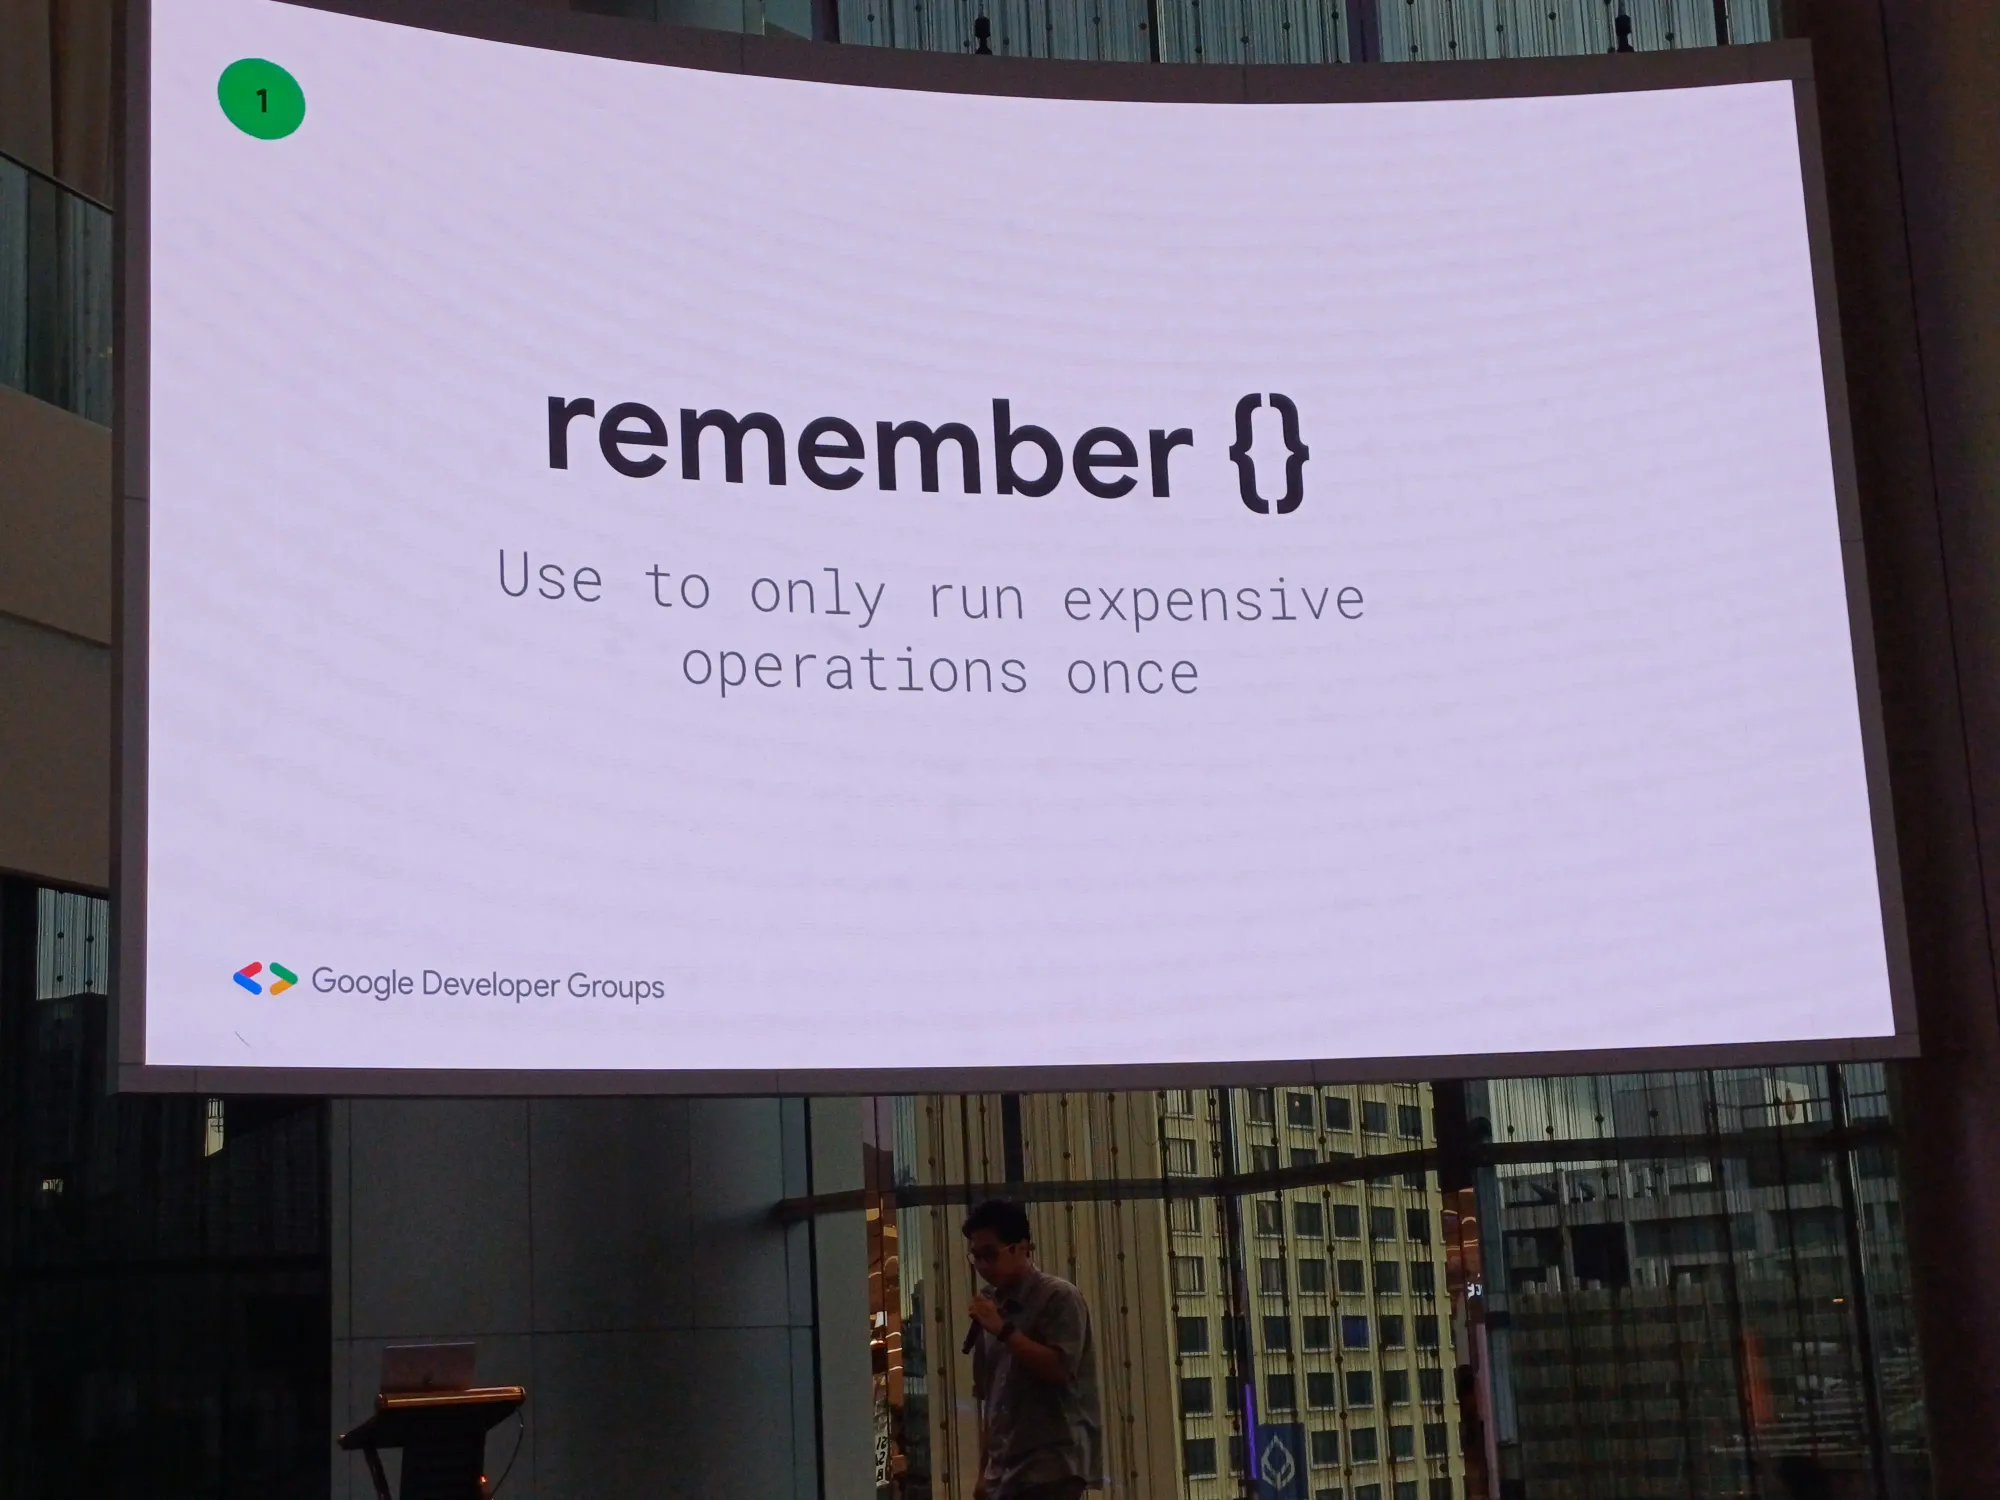
sortedWithก่อนขึ้น view ให้ใช้rememberแทน
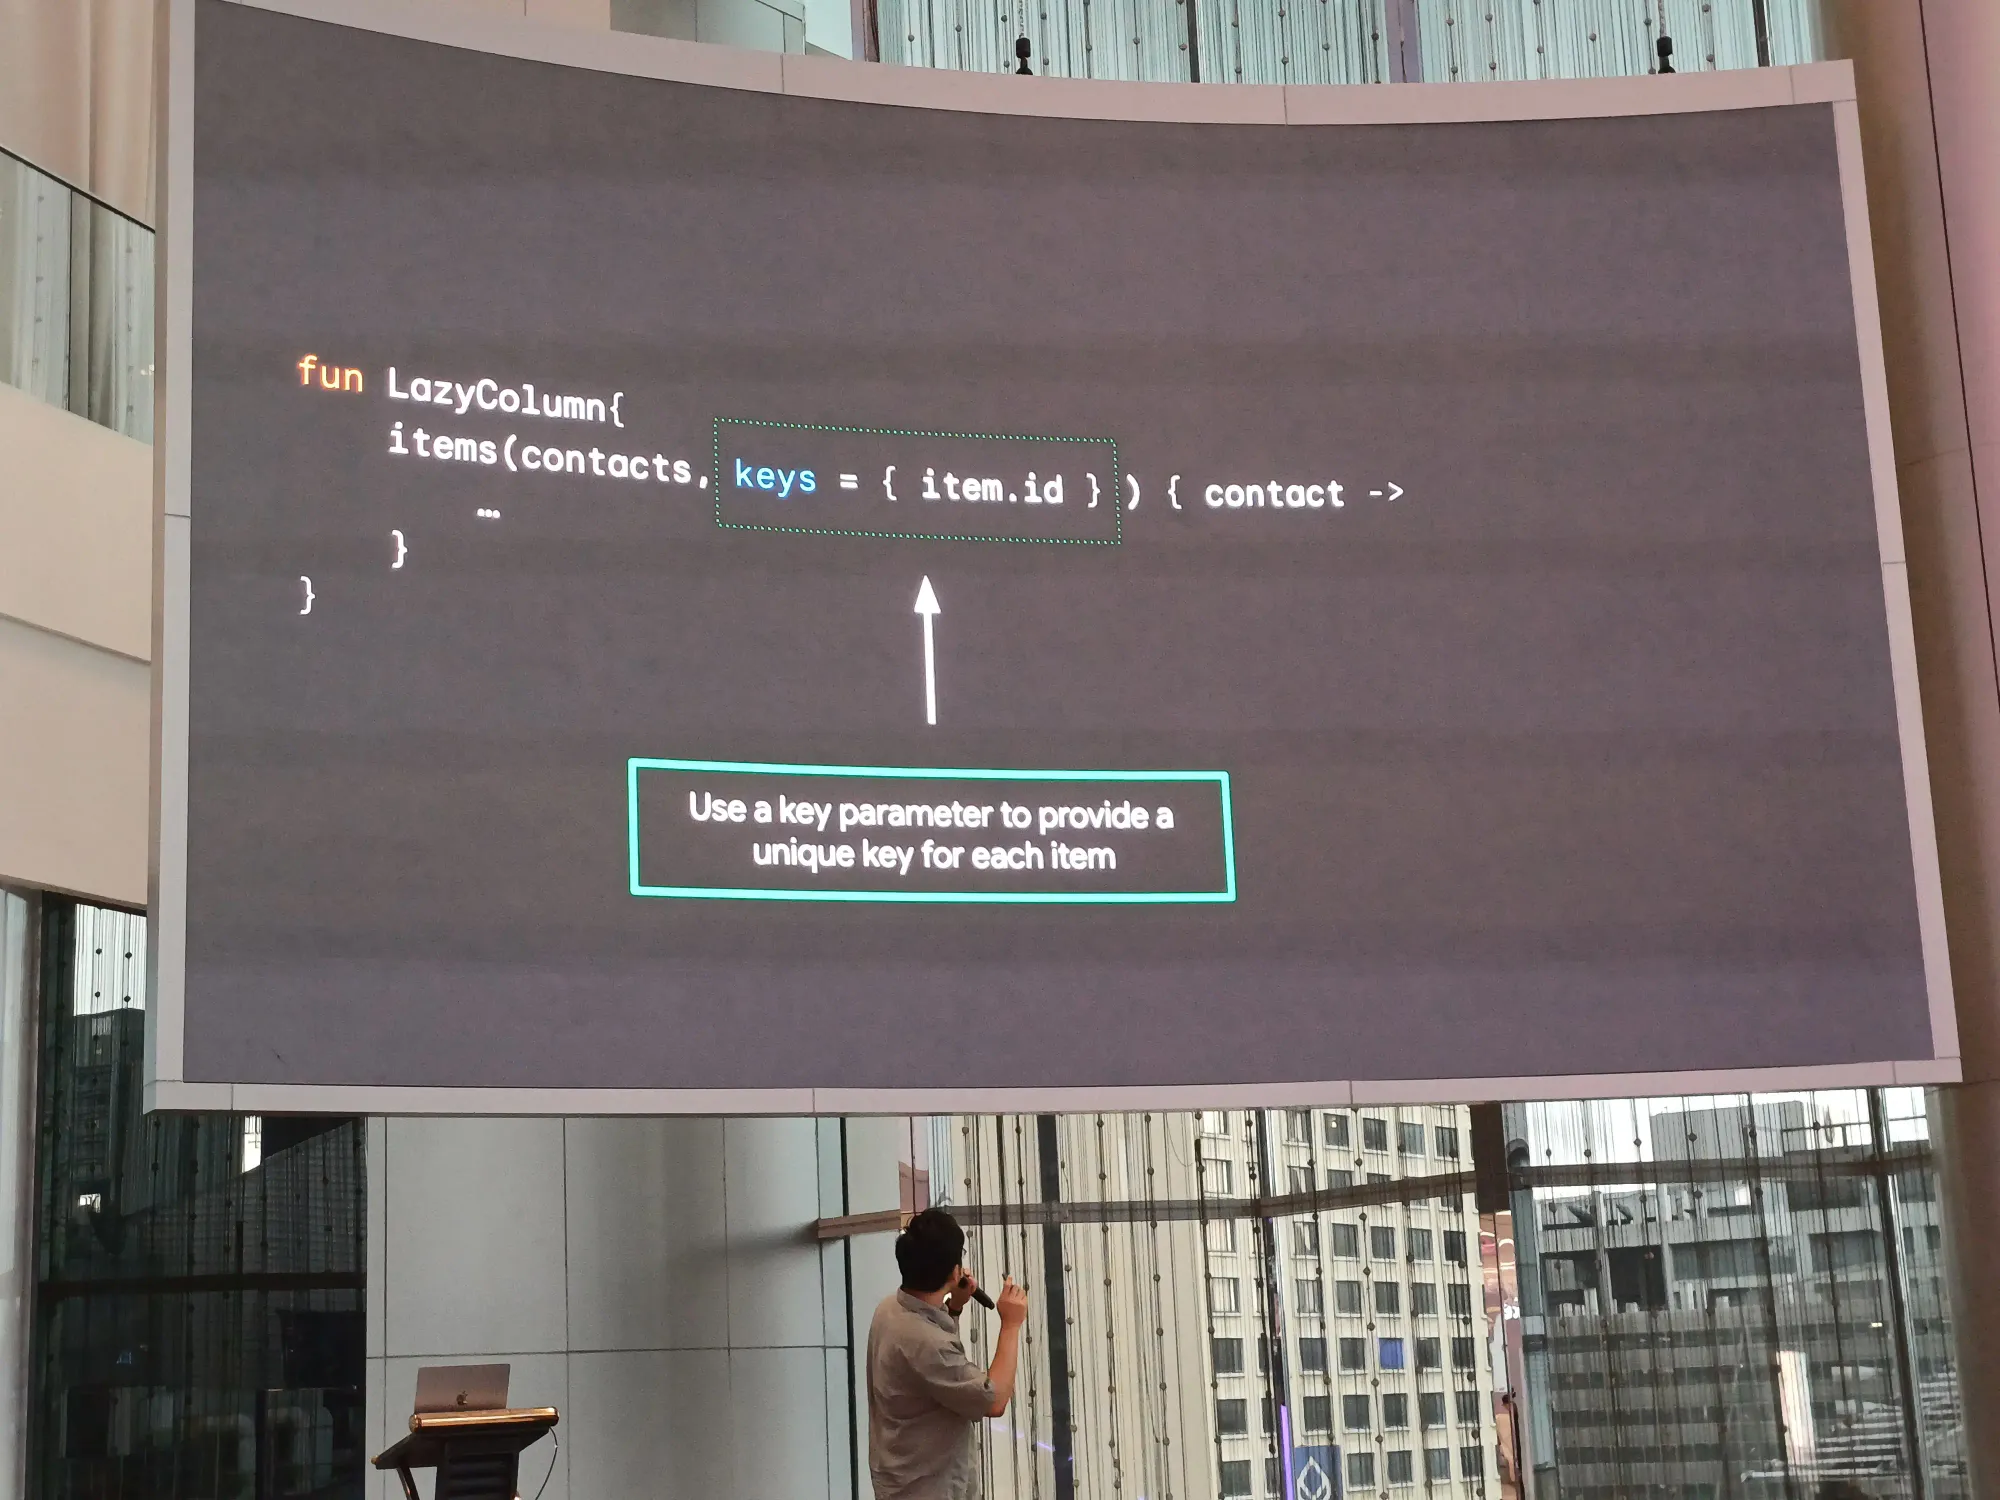
- Lazylist key ใช้ในการ define key แต่ละ item
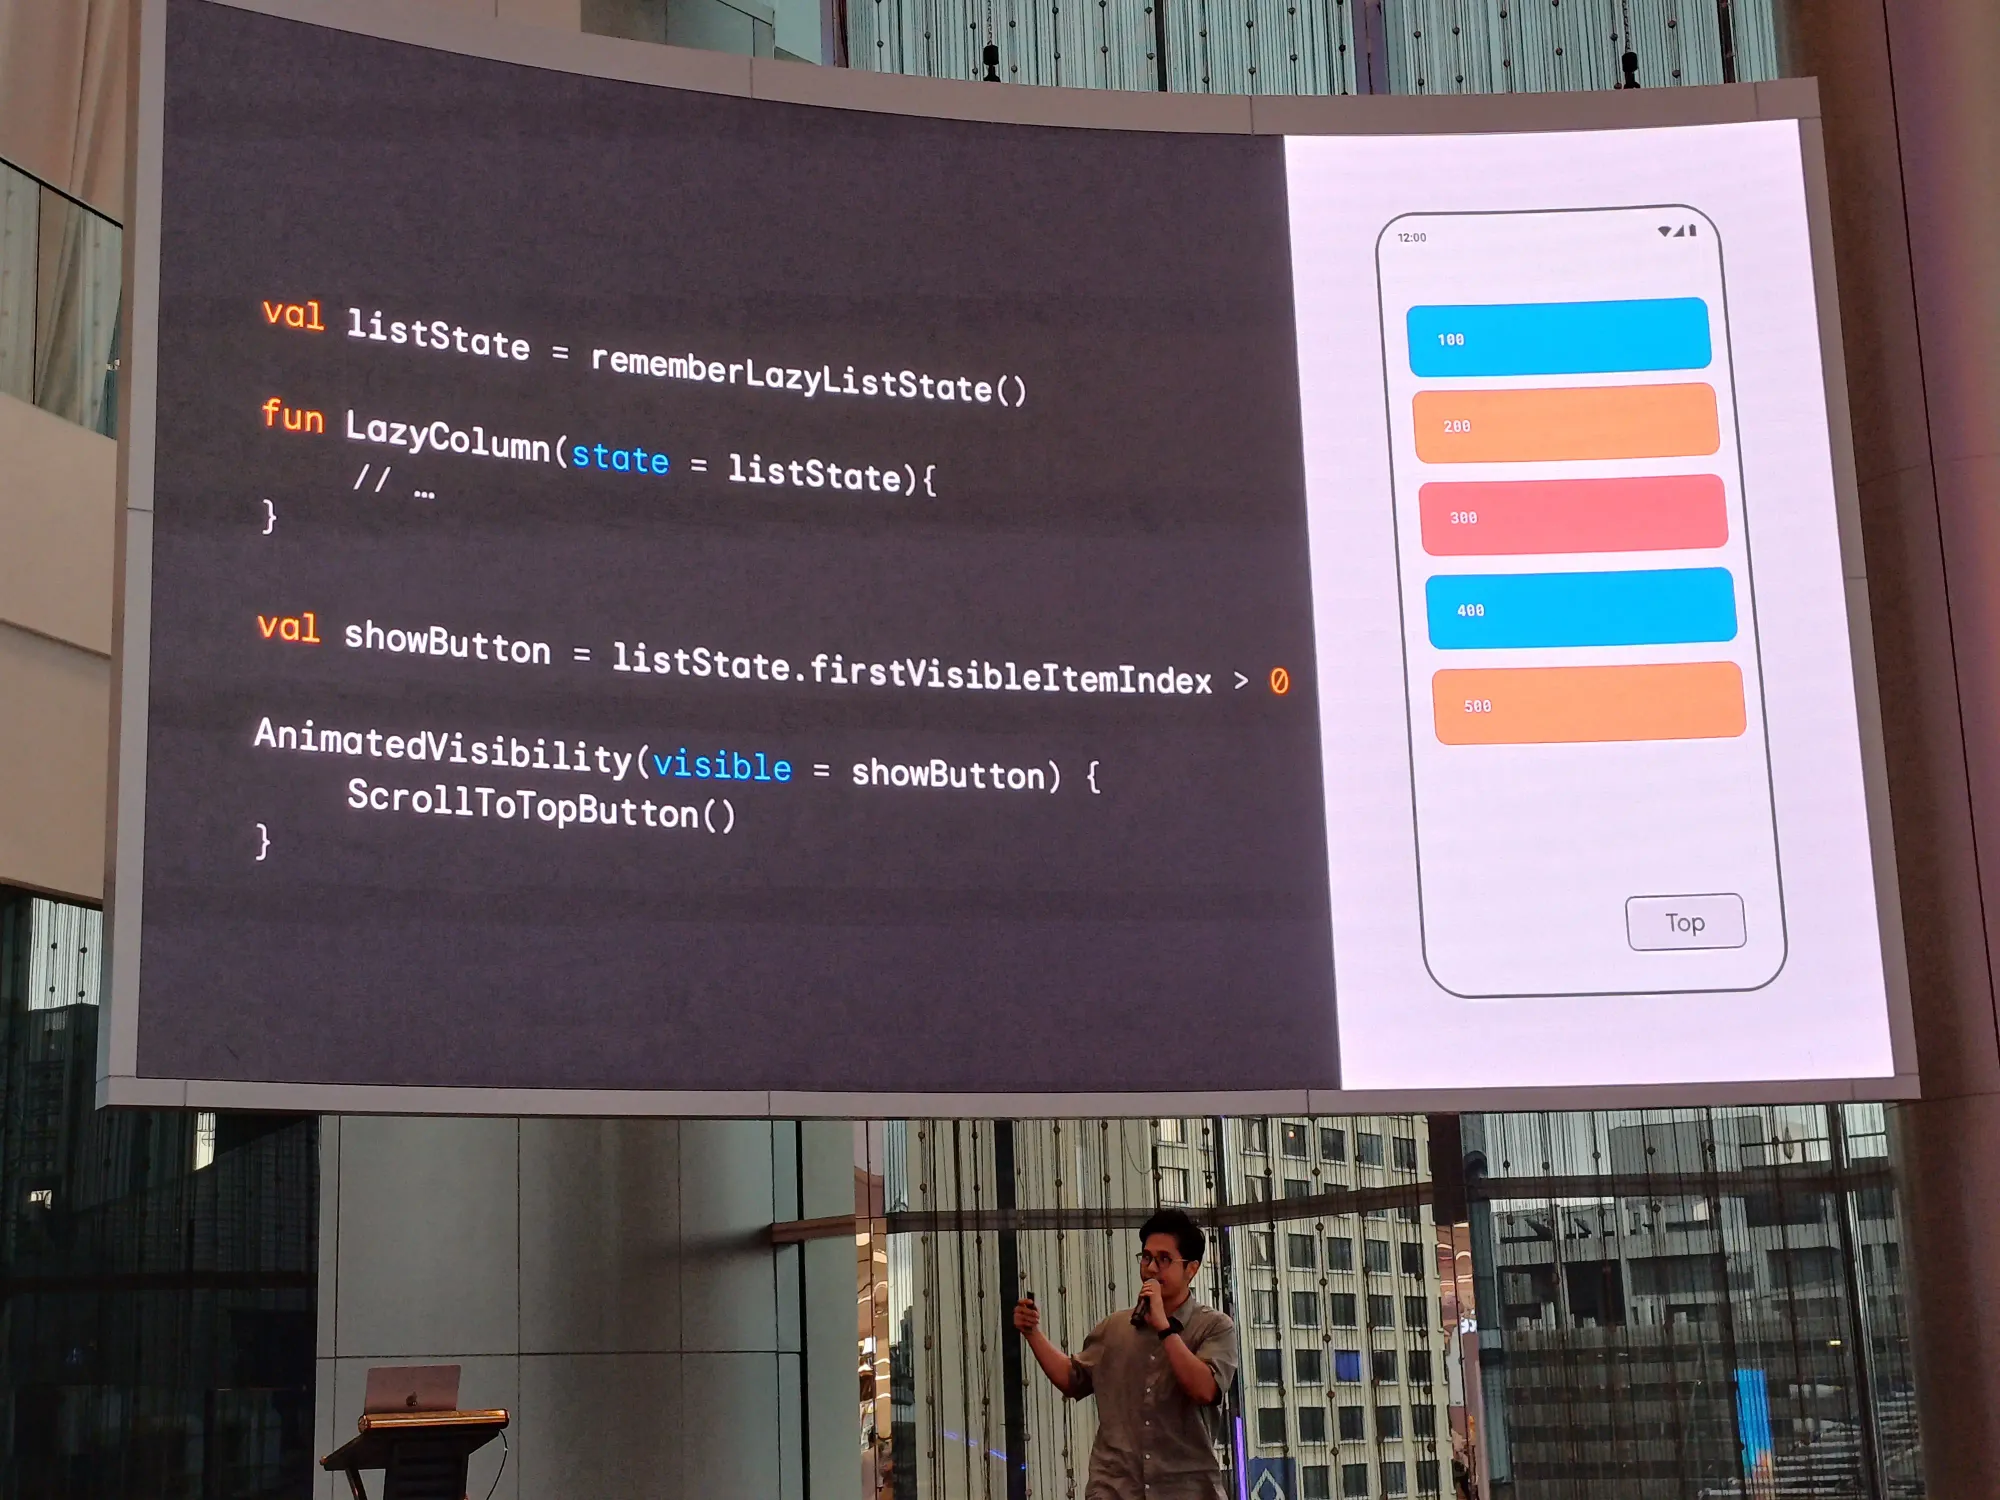
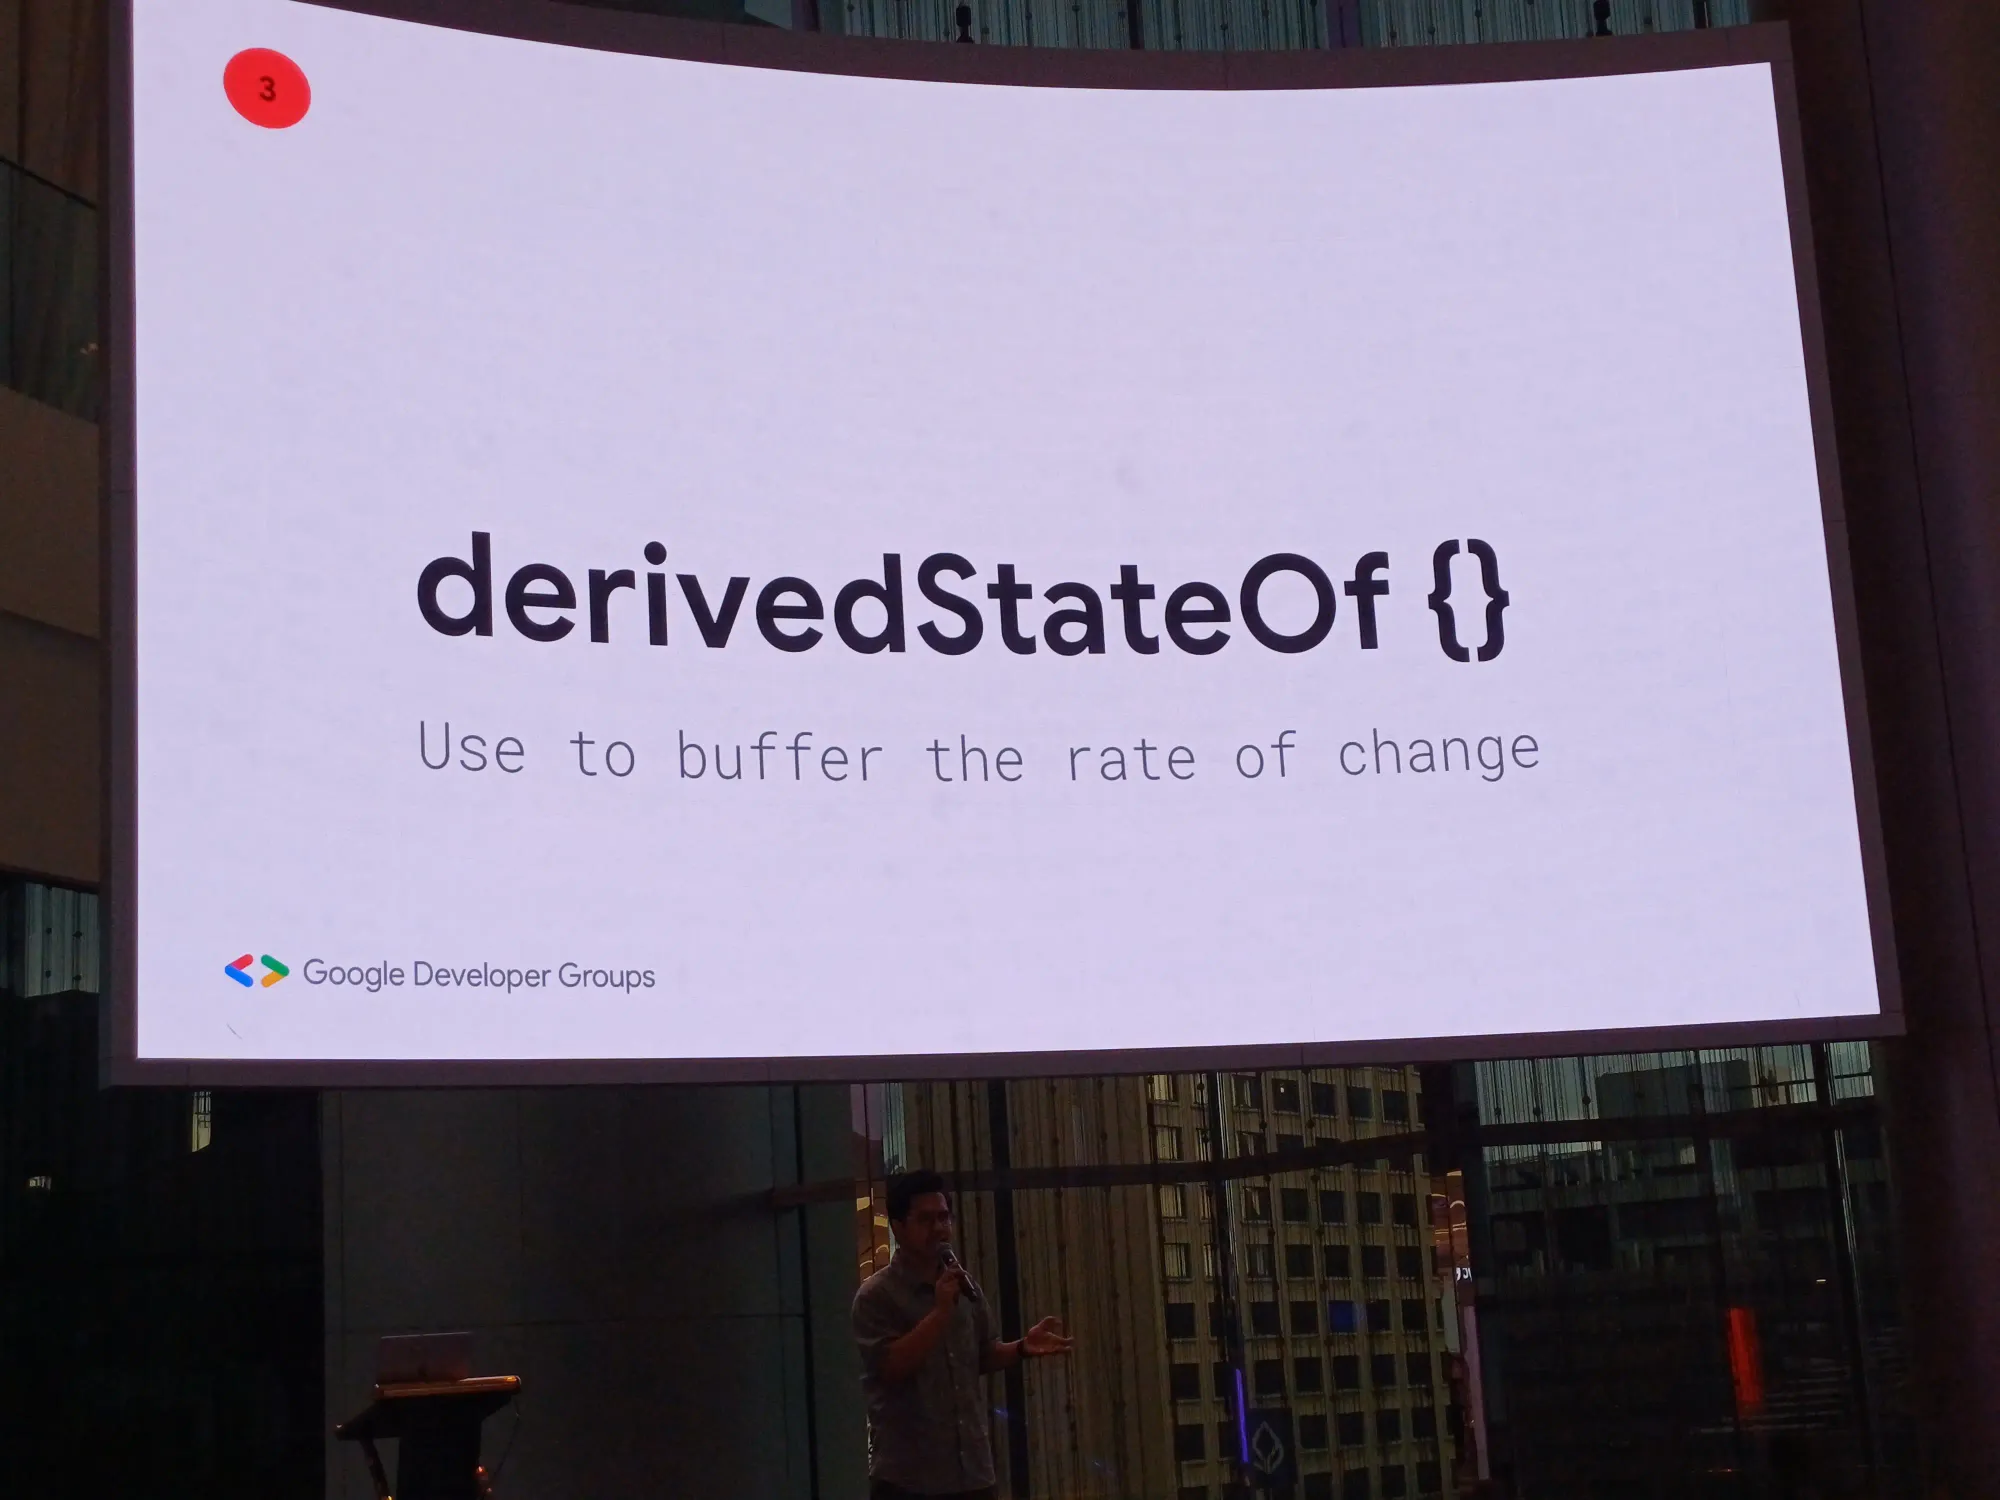
- devivedStateOf {} ใช้เพื่อ buffer ในการเปลี่ยนแปลง
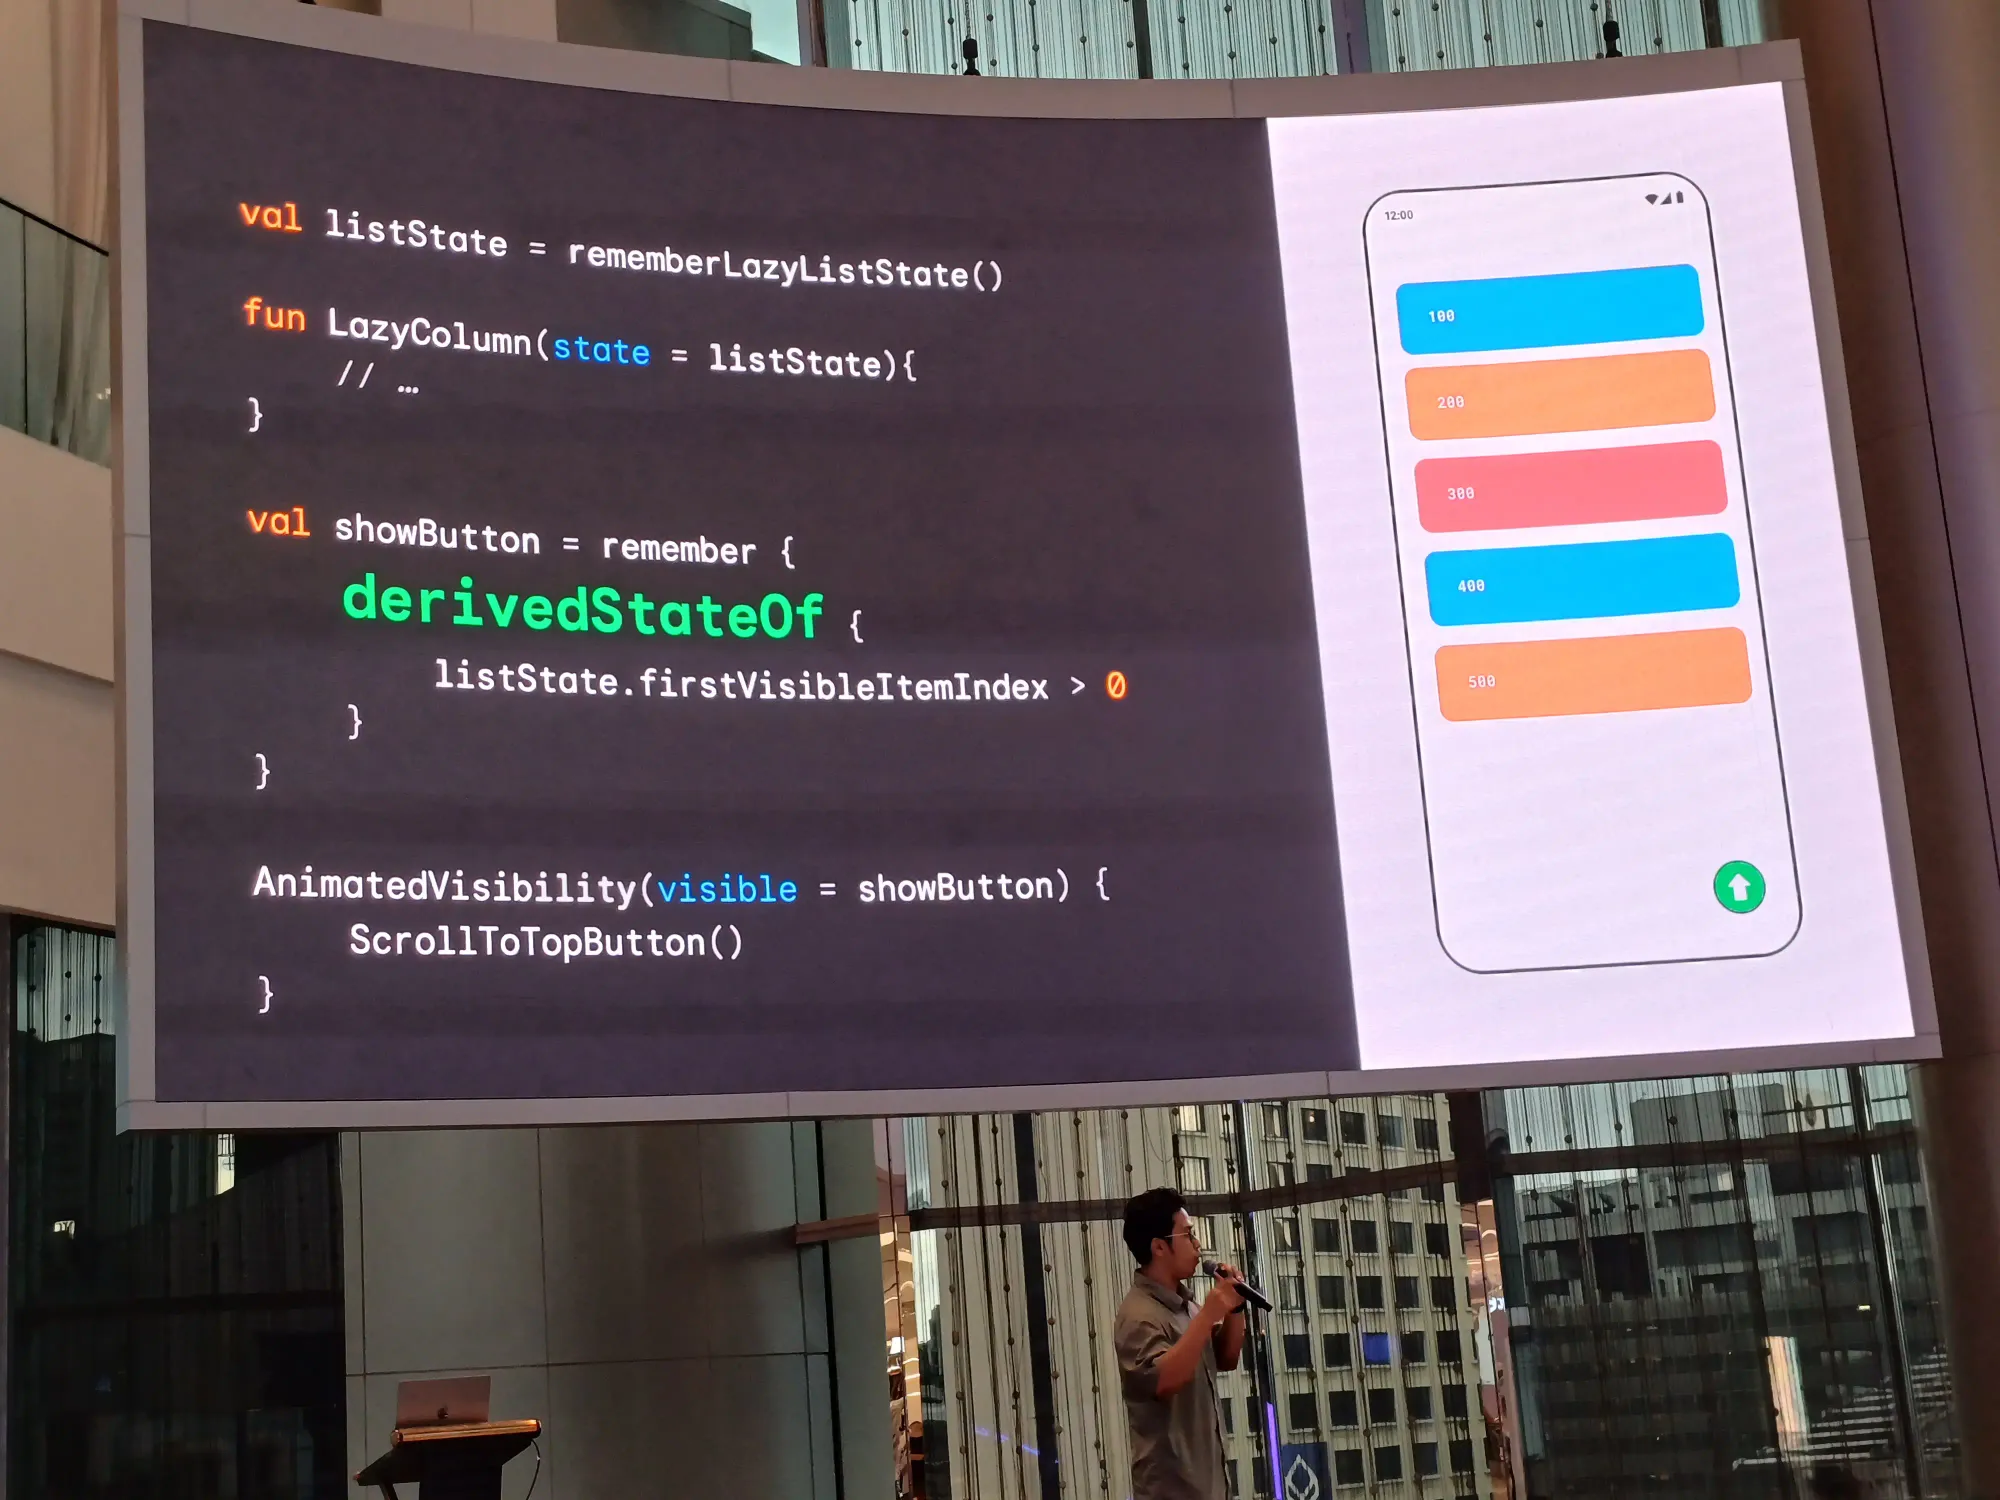
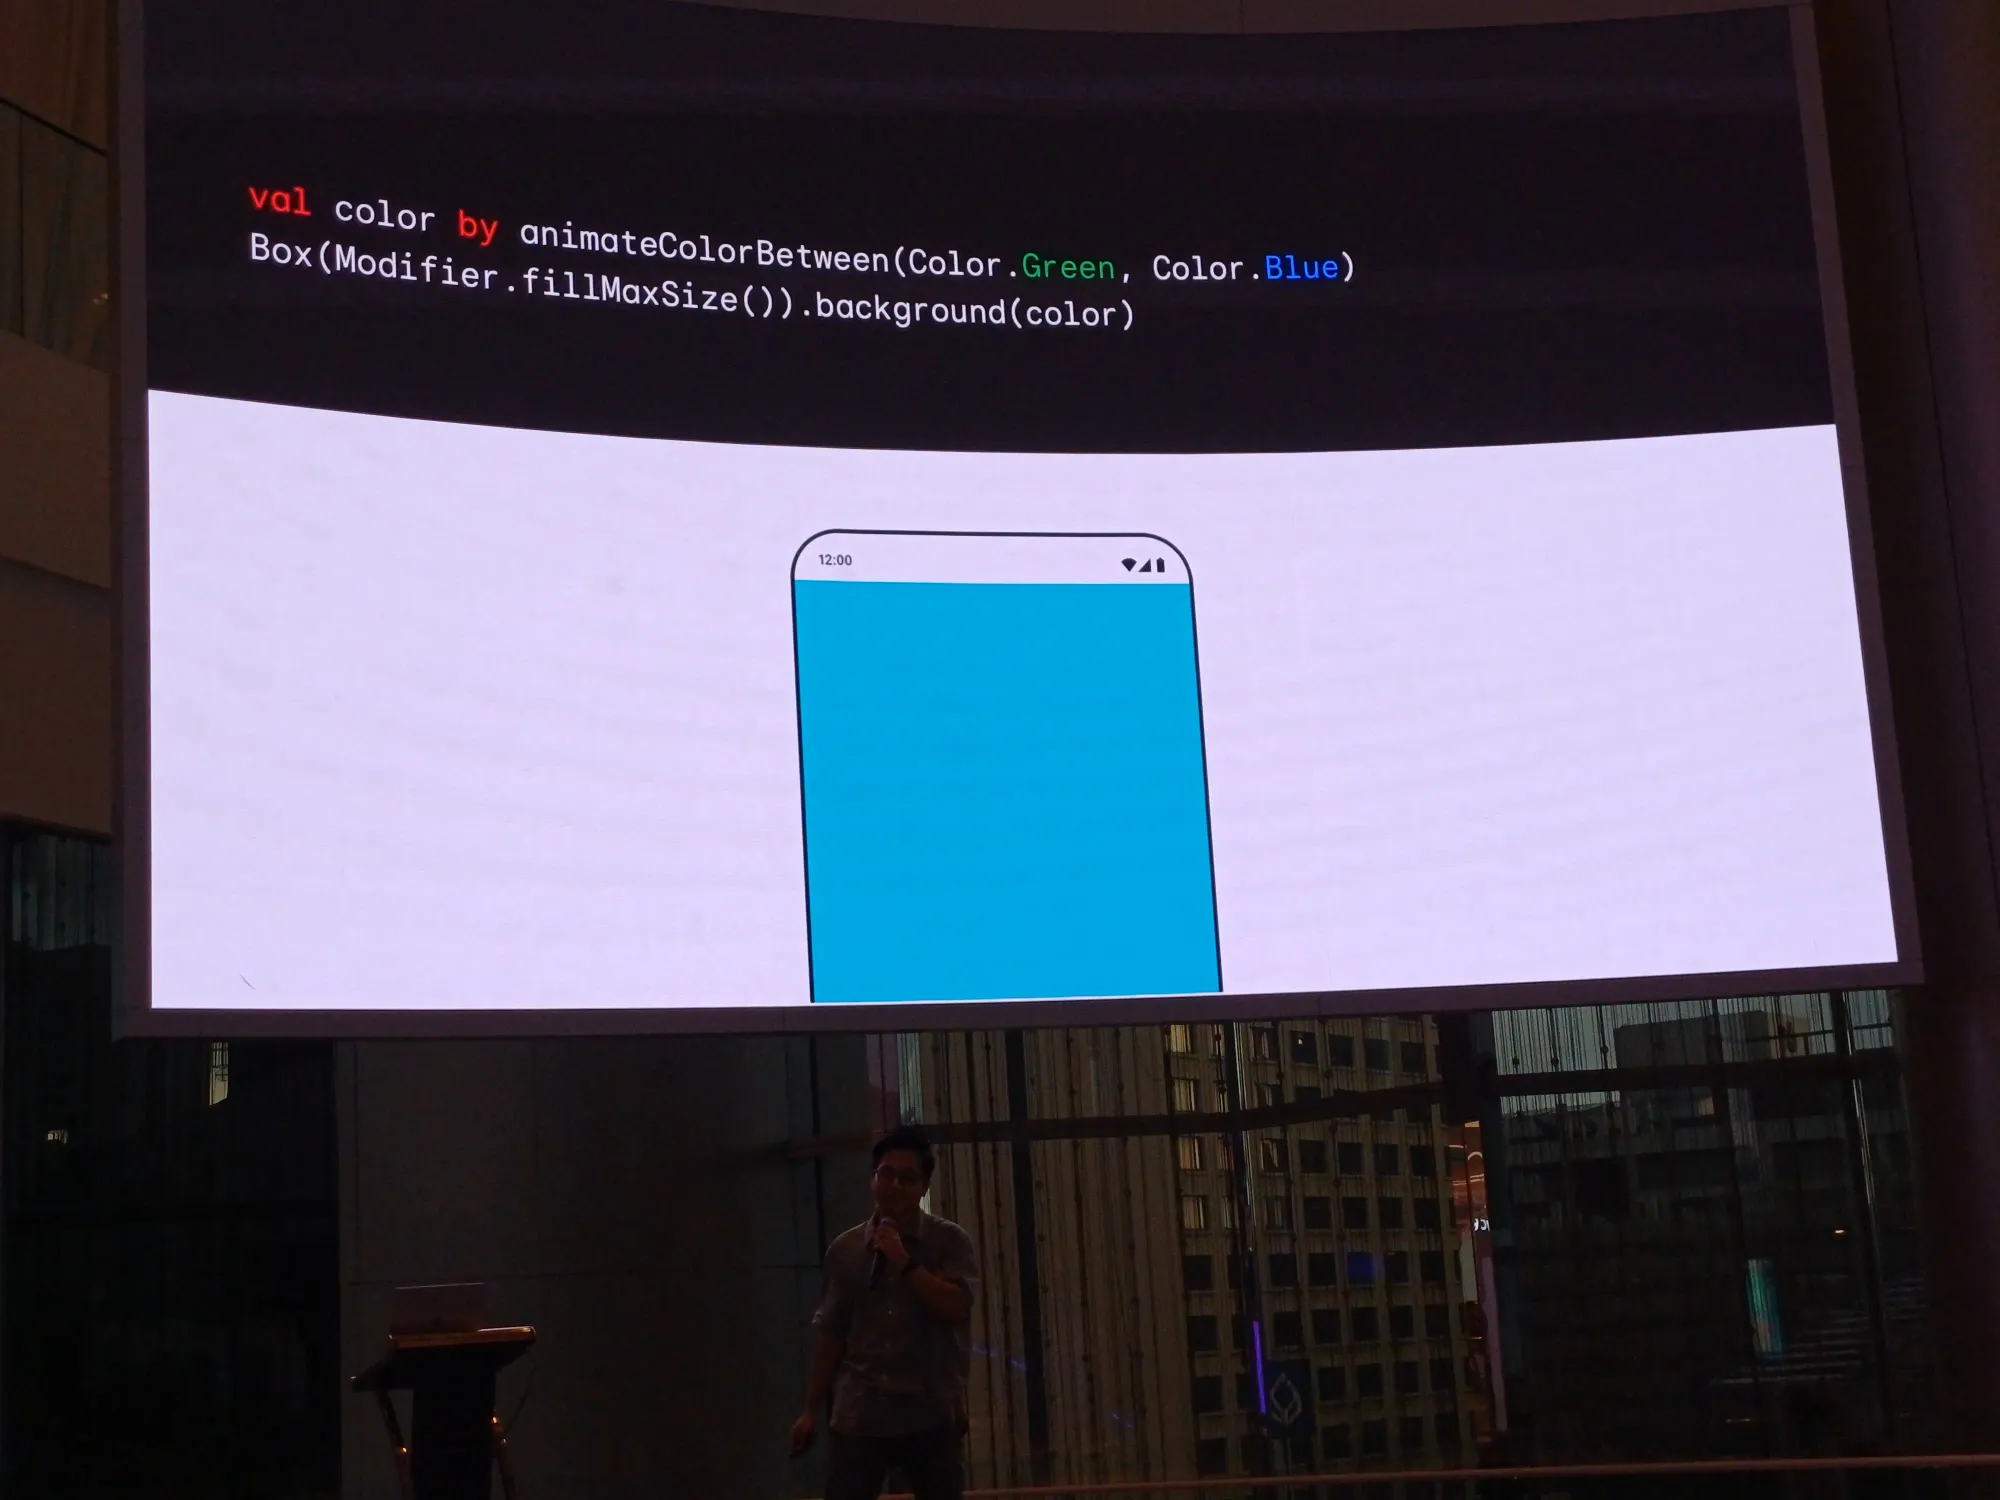
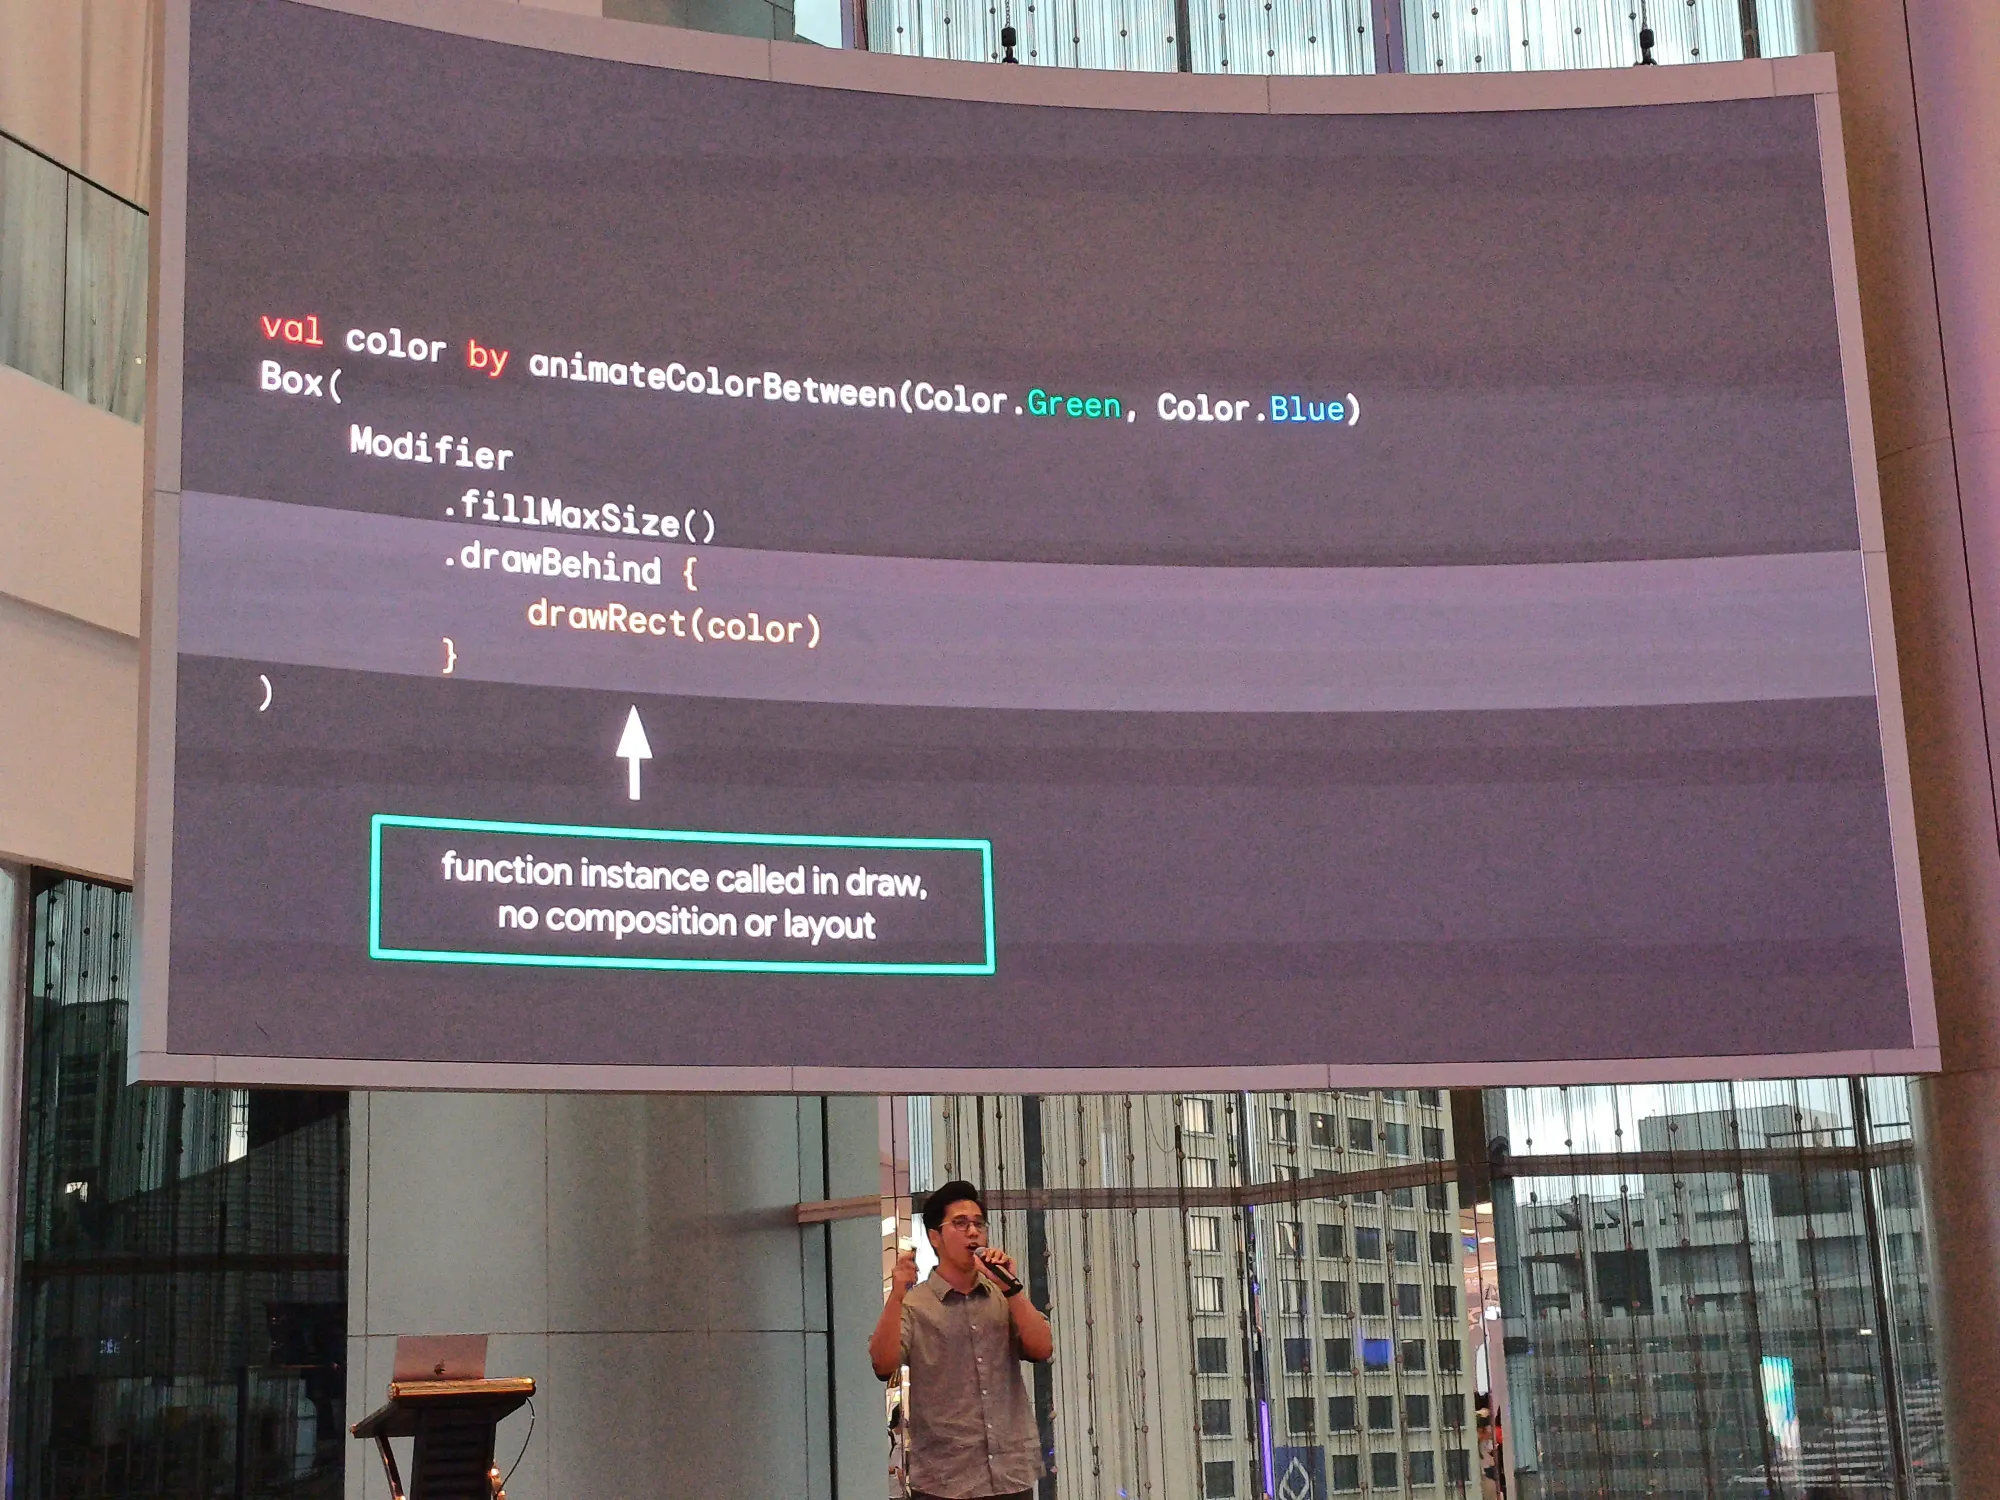
- Procrastination: เช่นการ animate background compare ทุก ๆ frame มีการ reading state
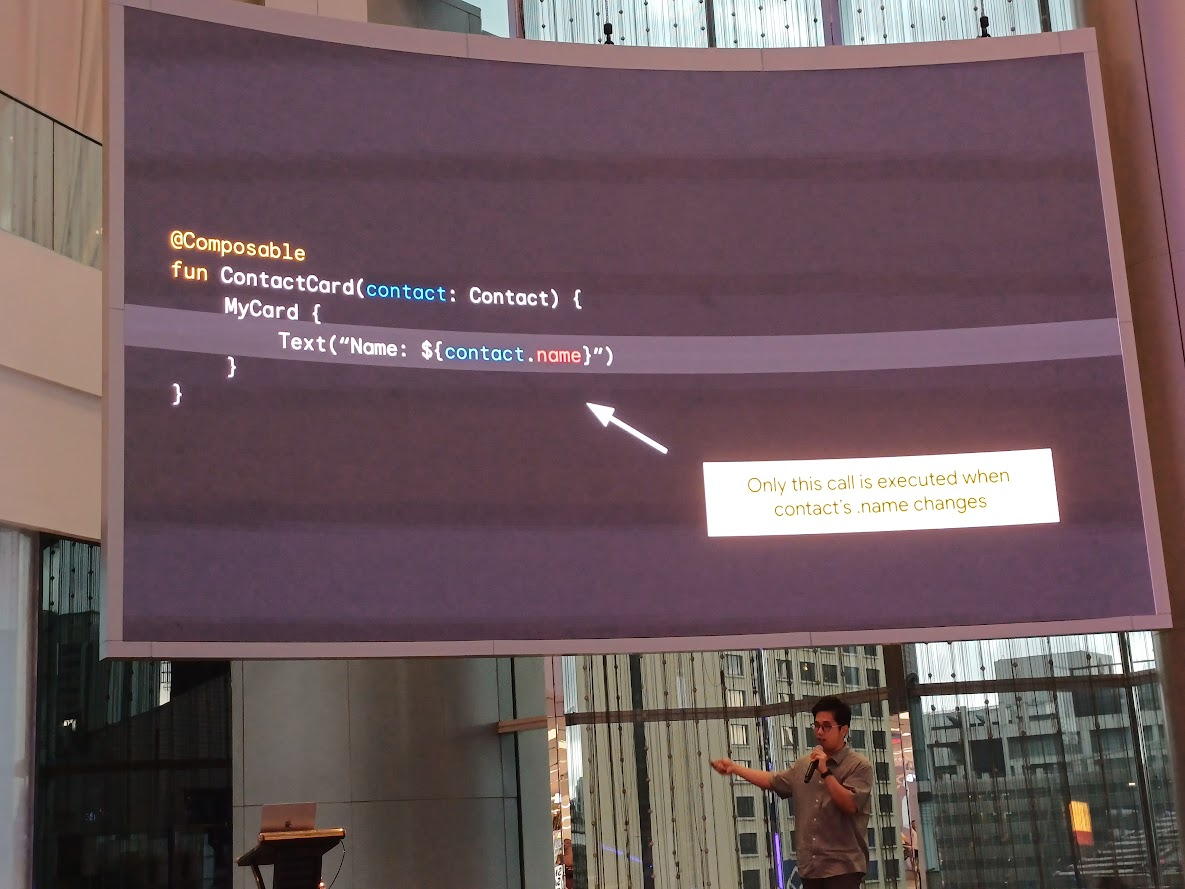
- Reading state
Diagnose & Find compose stability issues
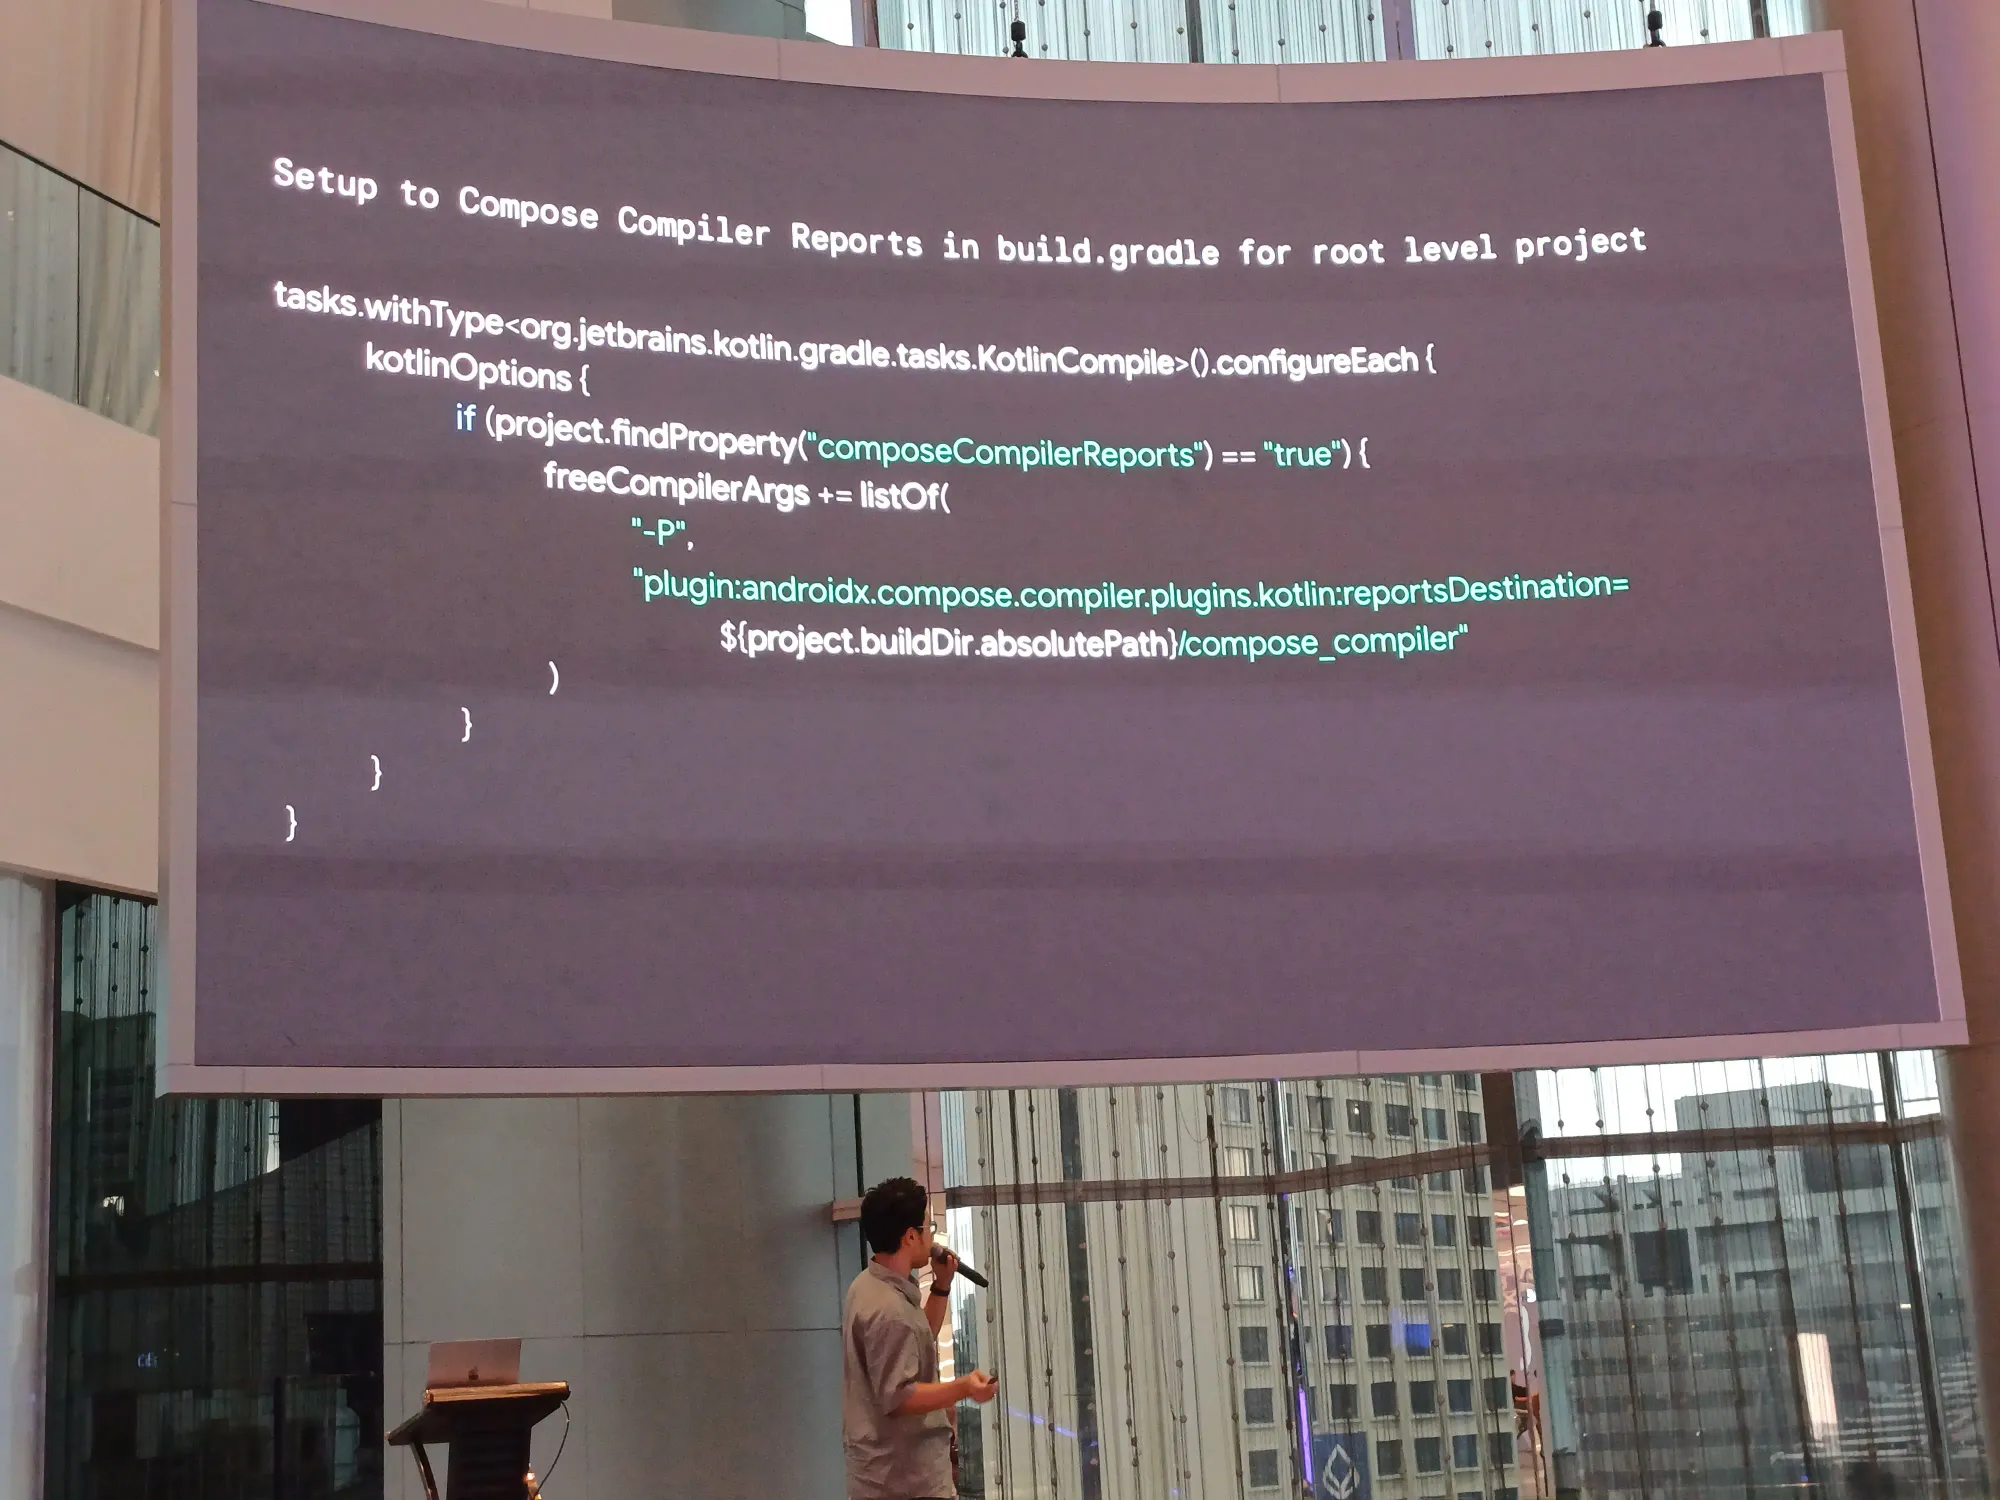
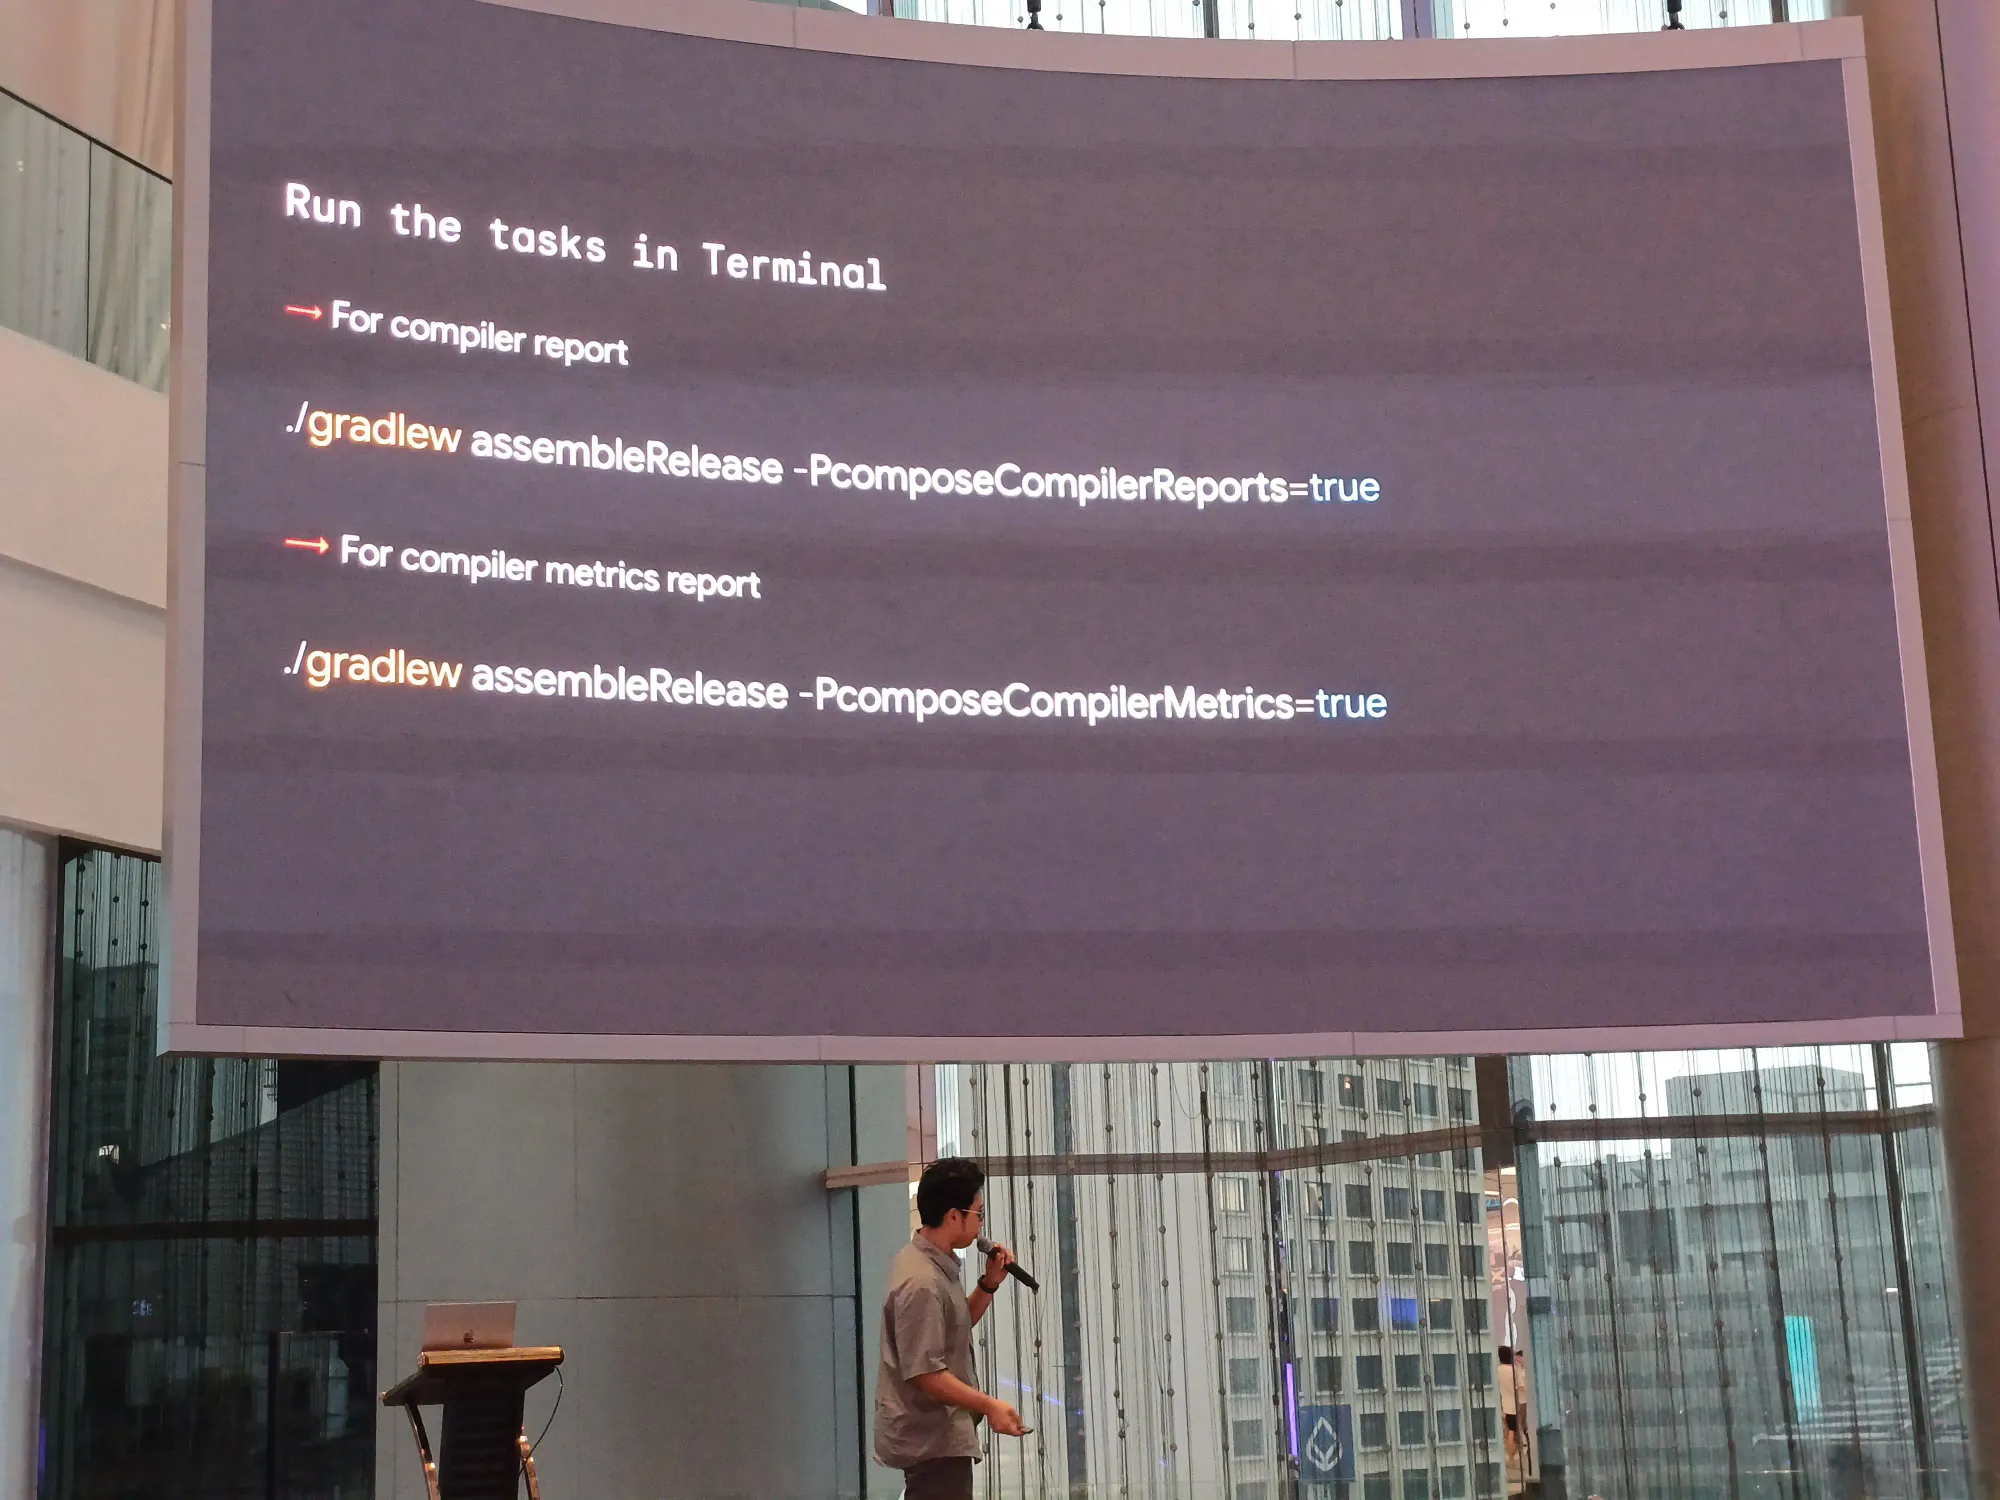
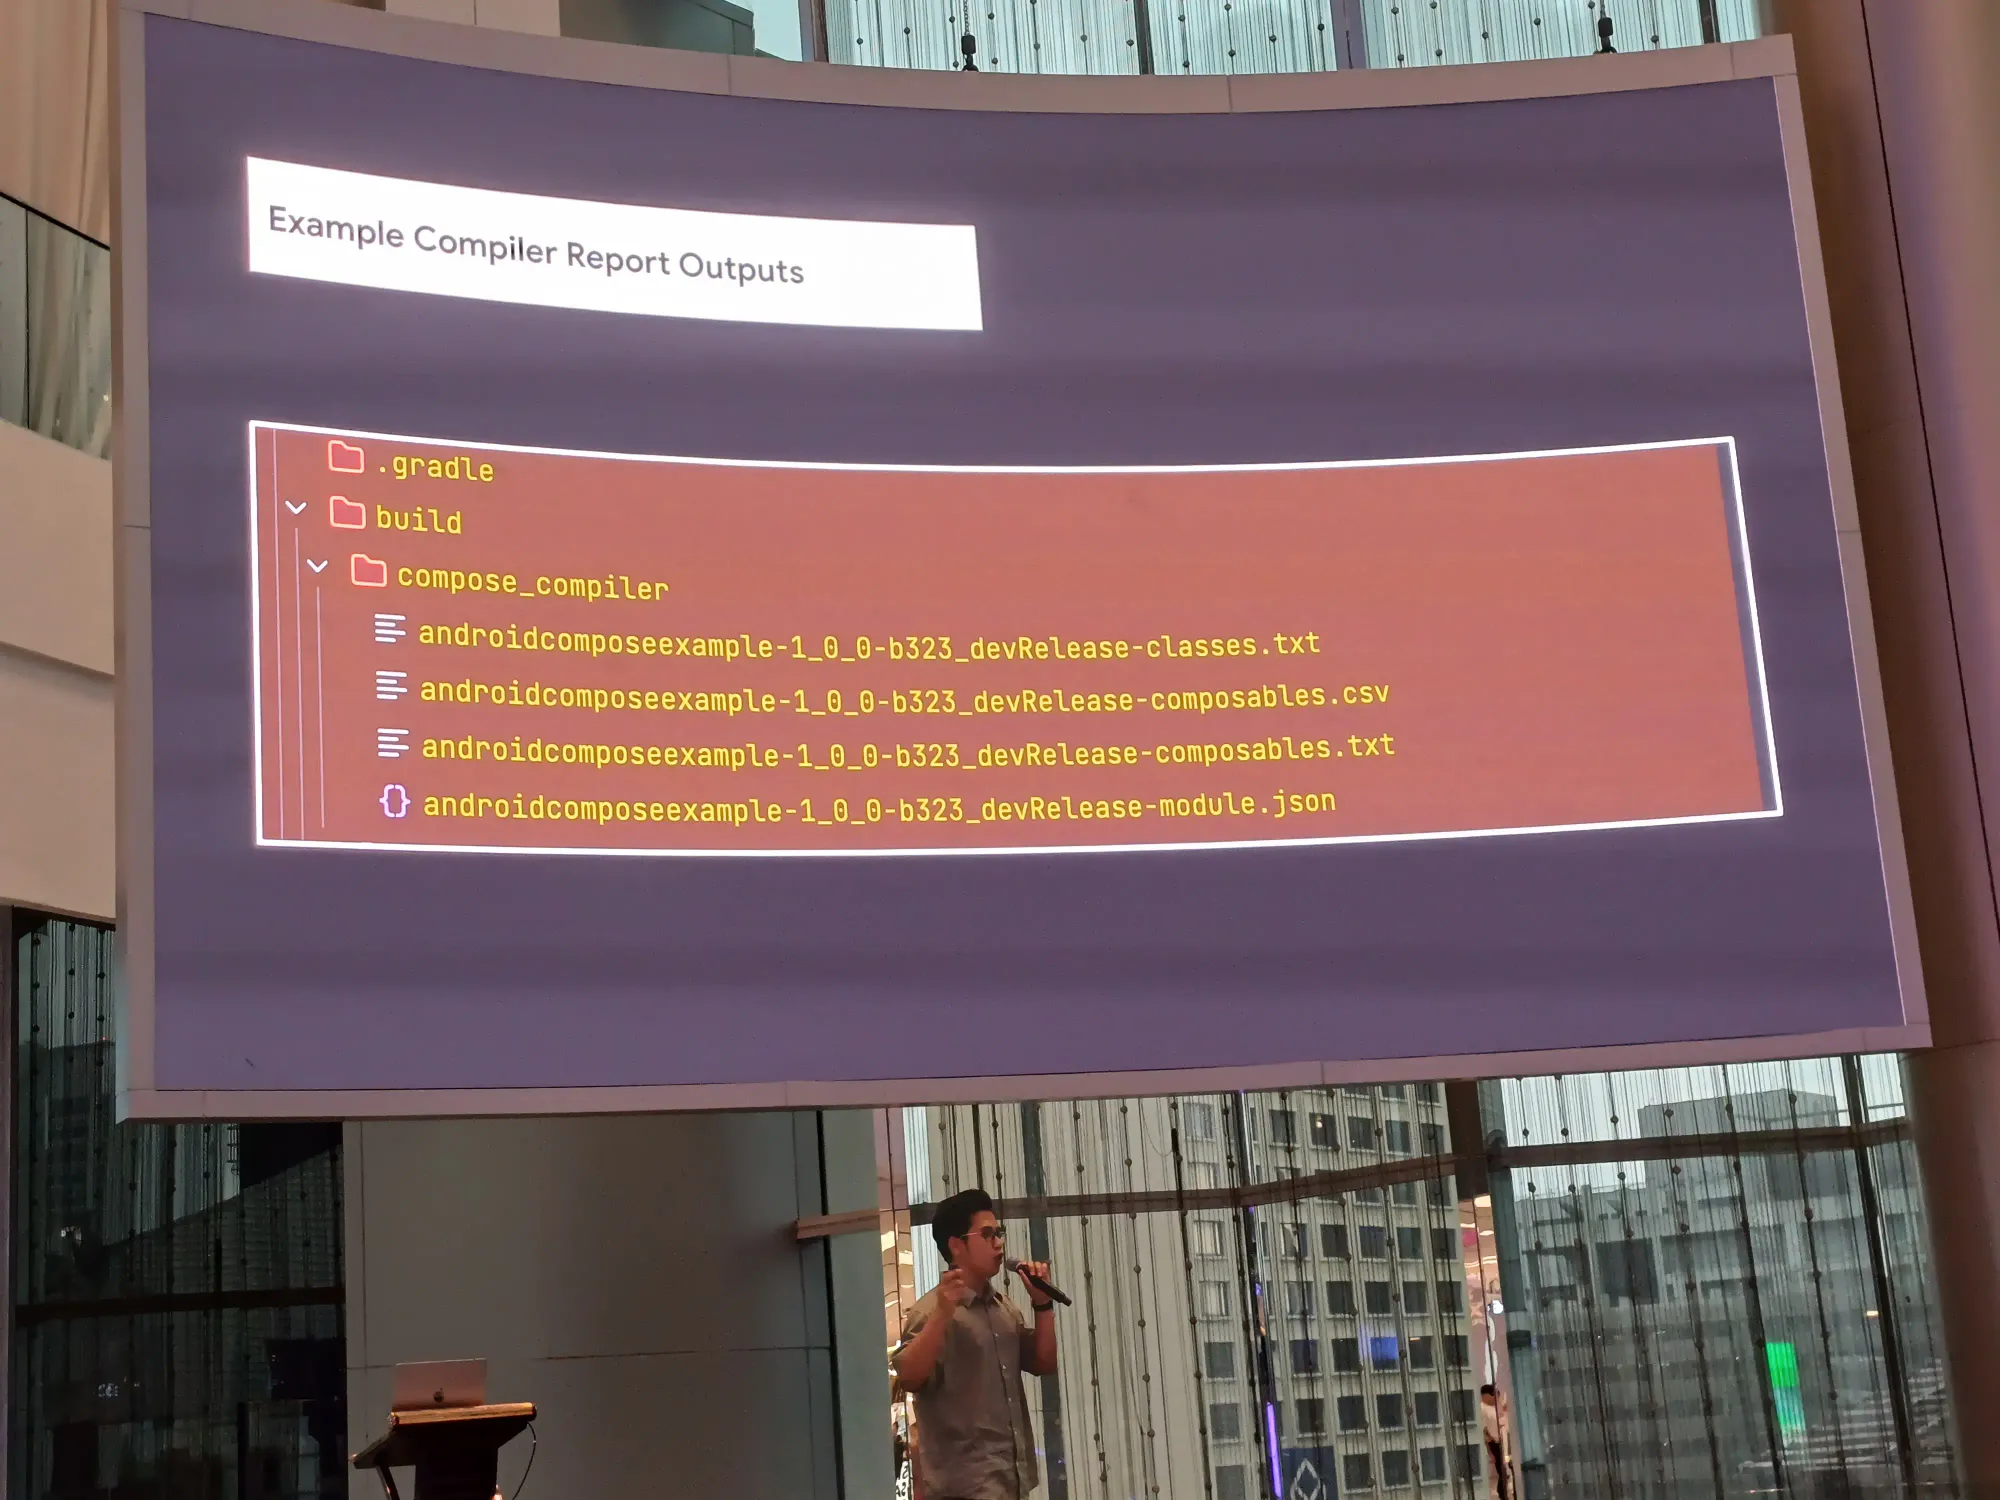
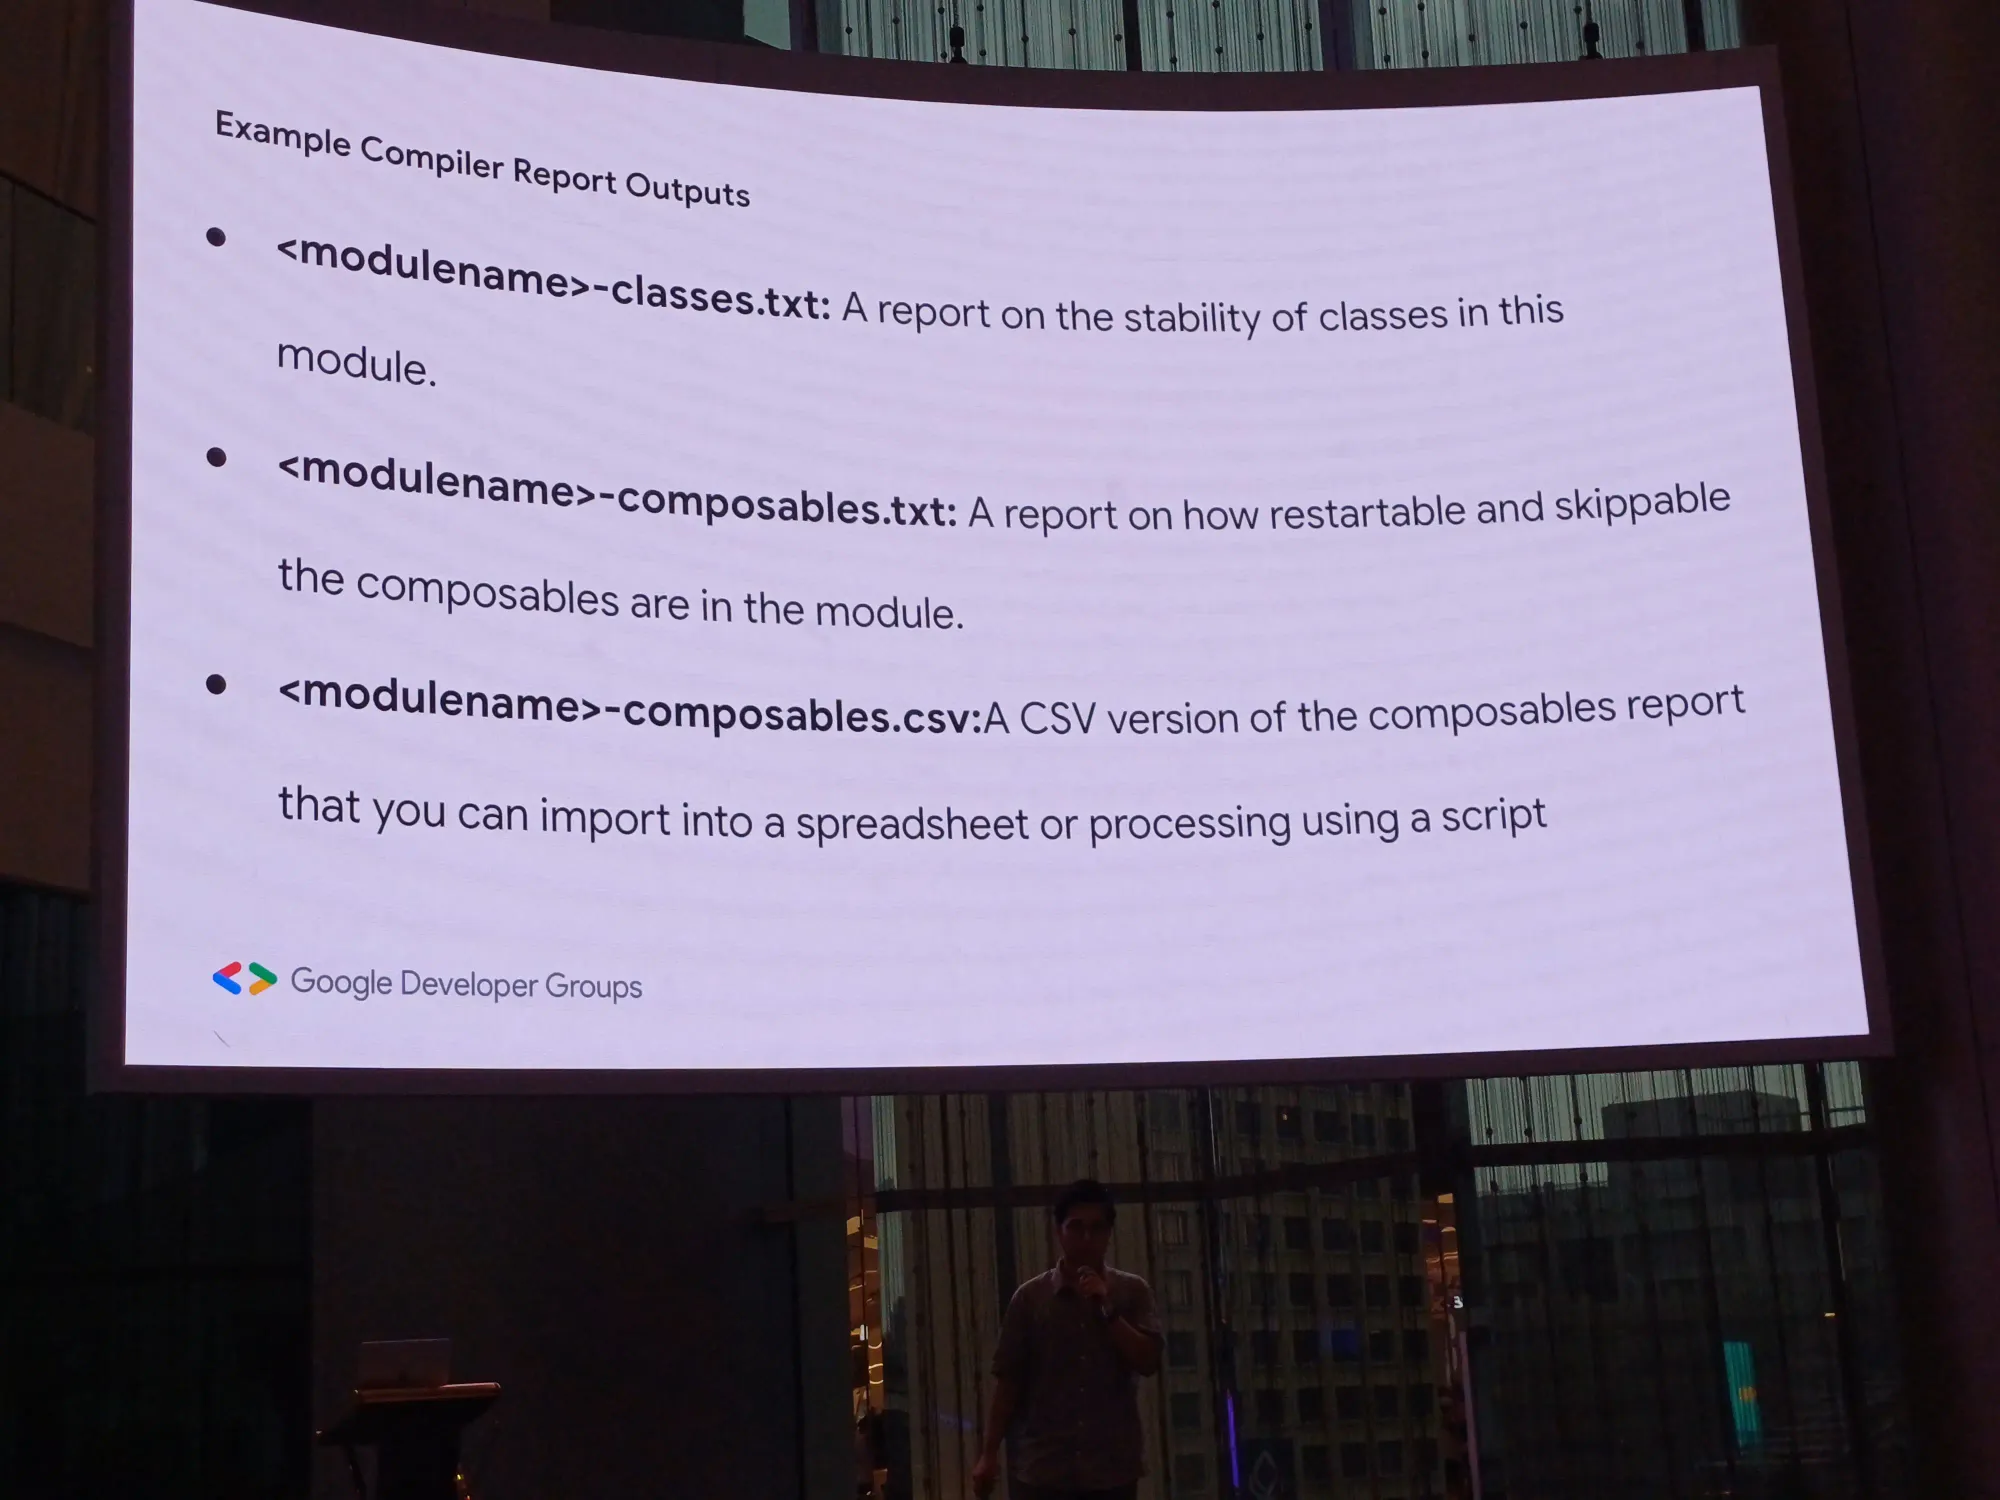
- Compose Compiler Reports วิธีการ setup และ generate report
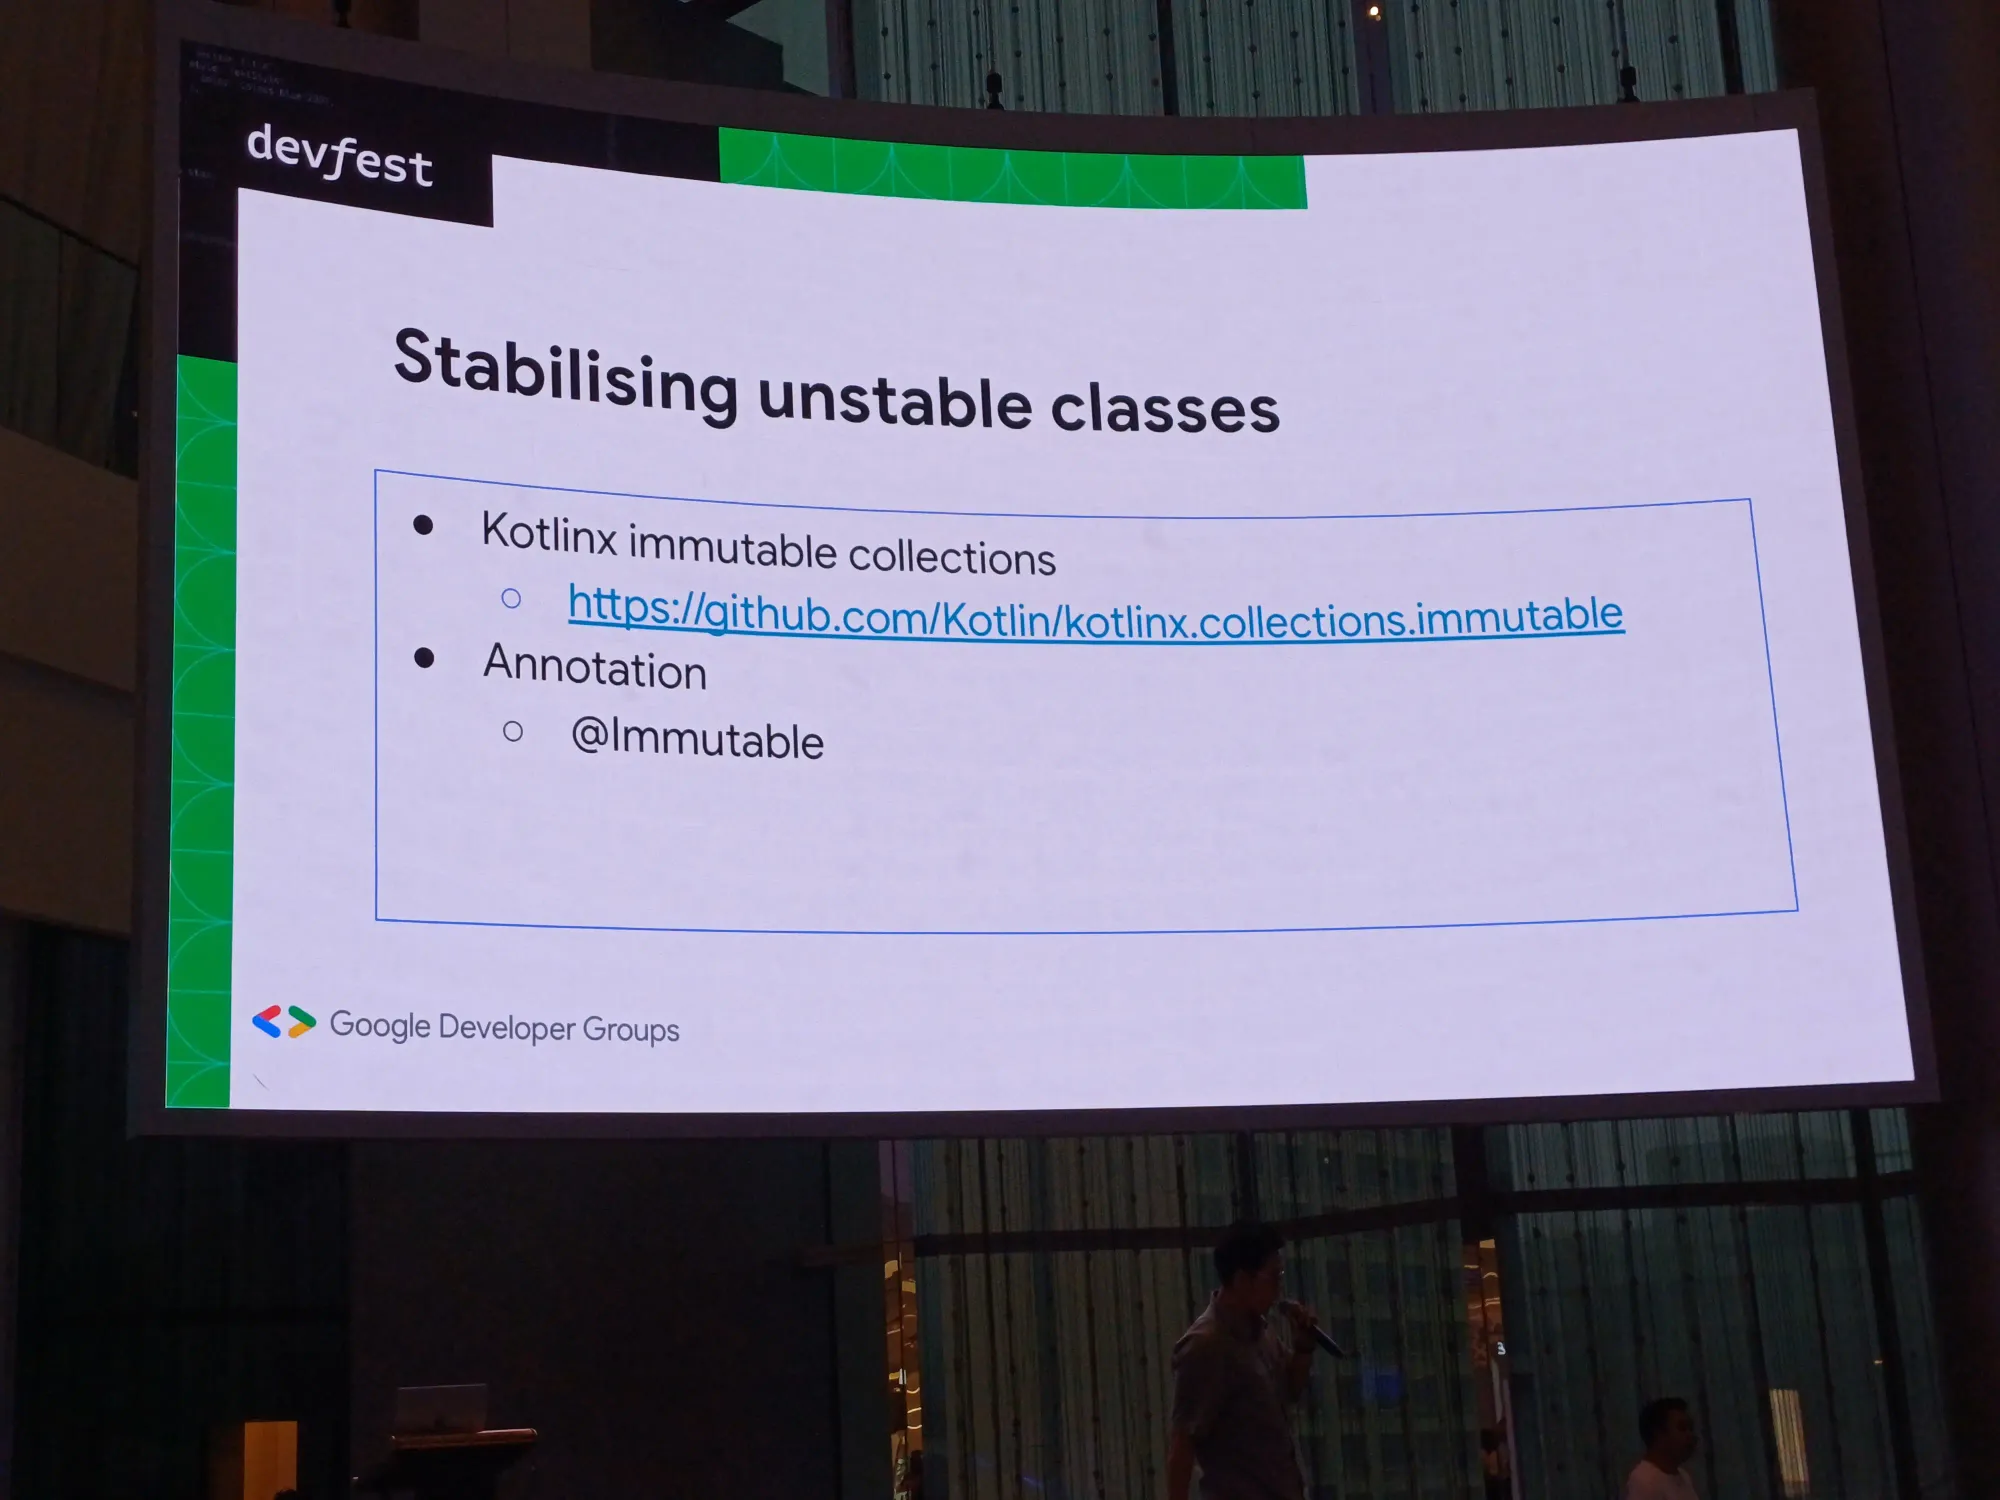
How to fix Stability issues ?
ทำความรู้จัก parameter แต่ละแบบ

list, set, map ไม่ unstable ให้ใช้ immutable แทน
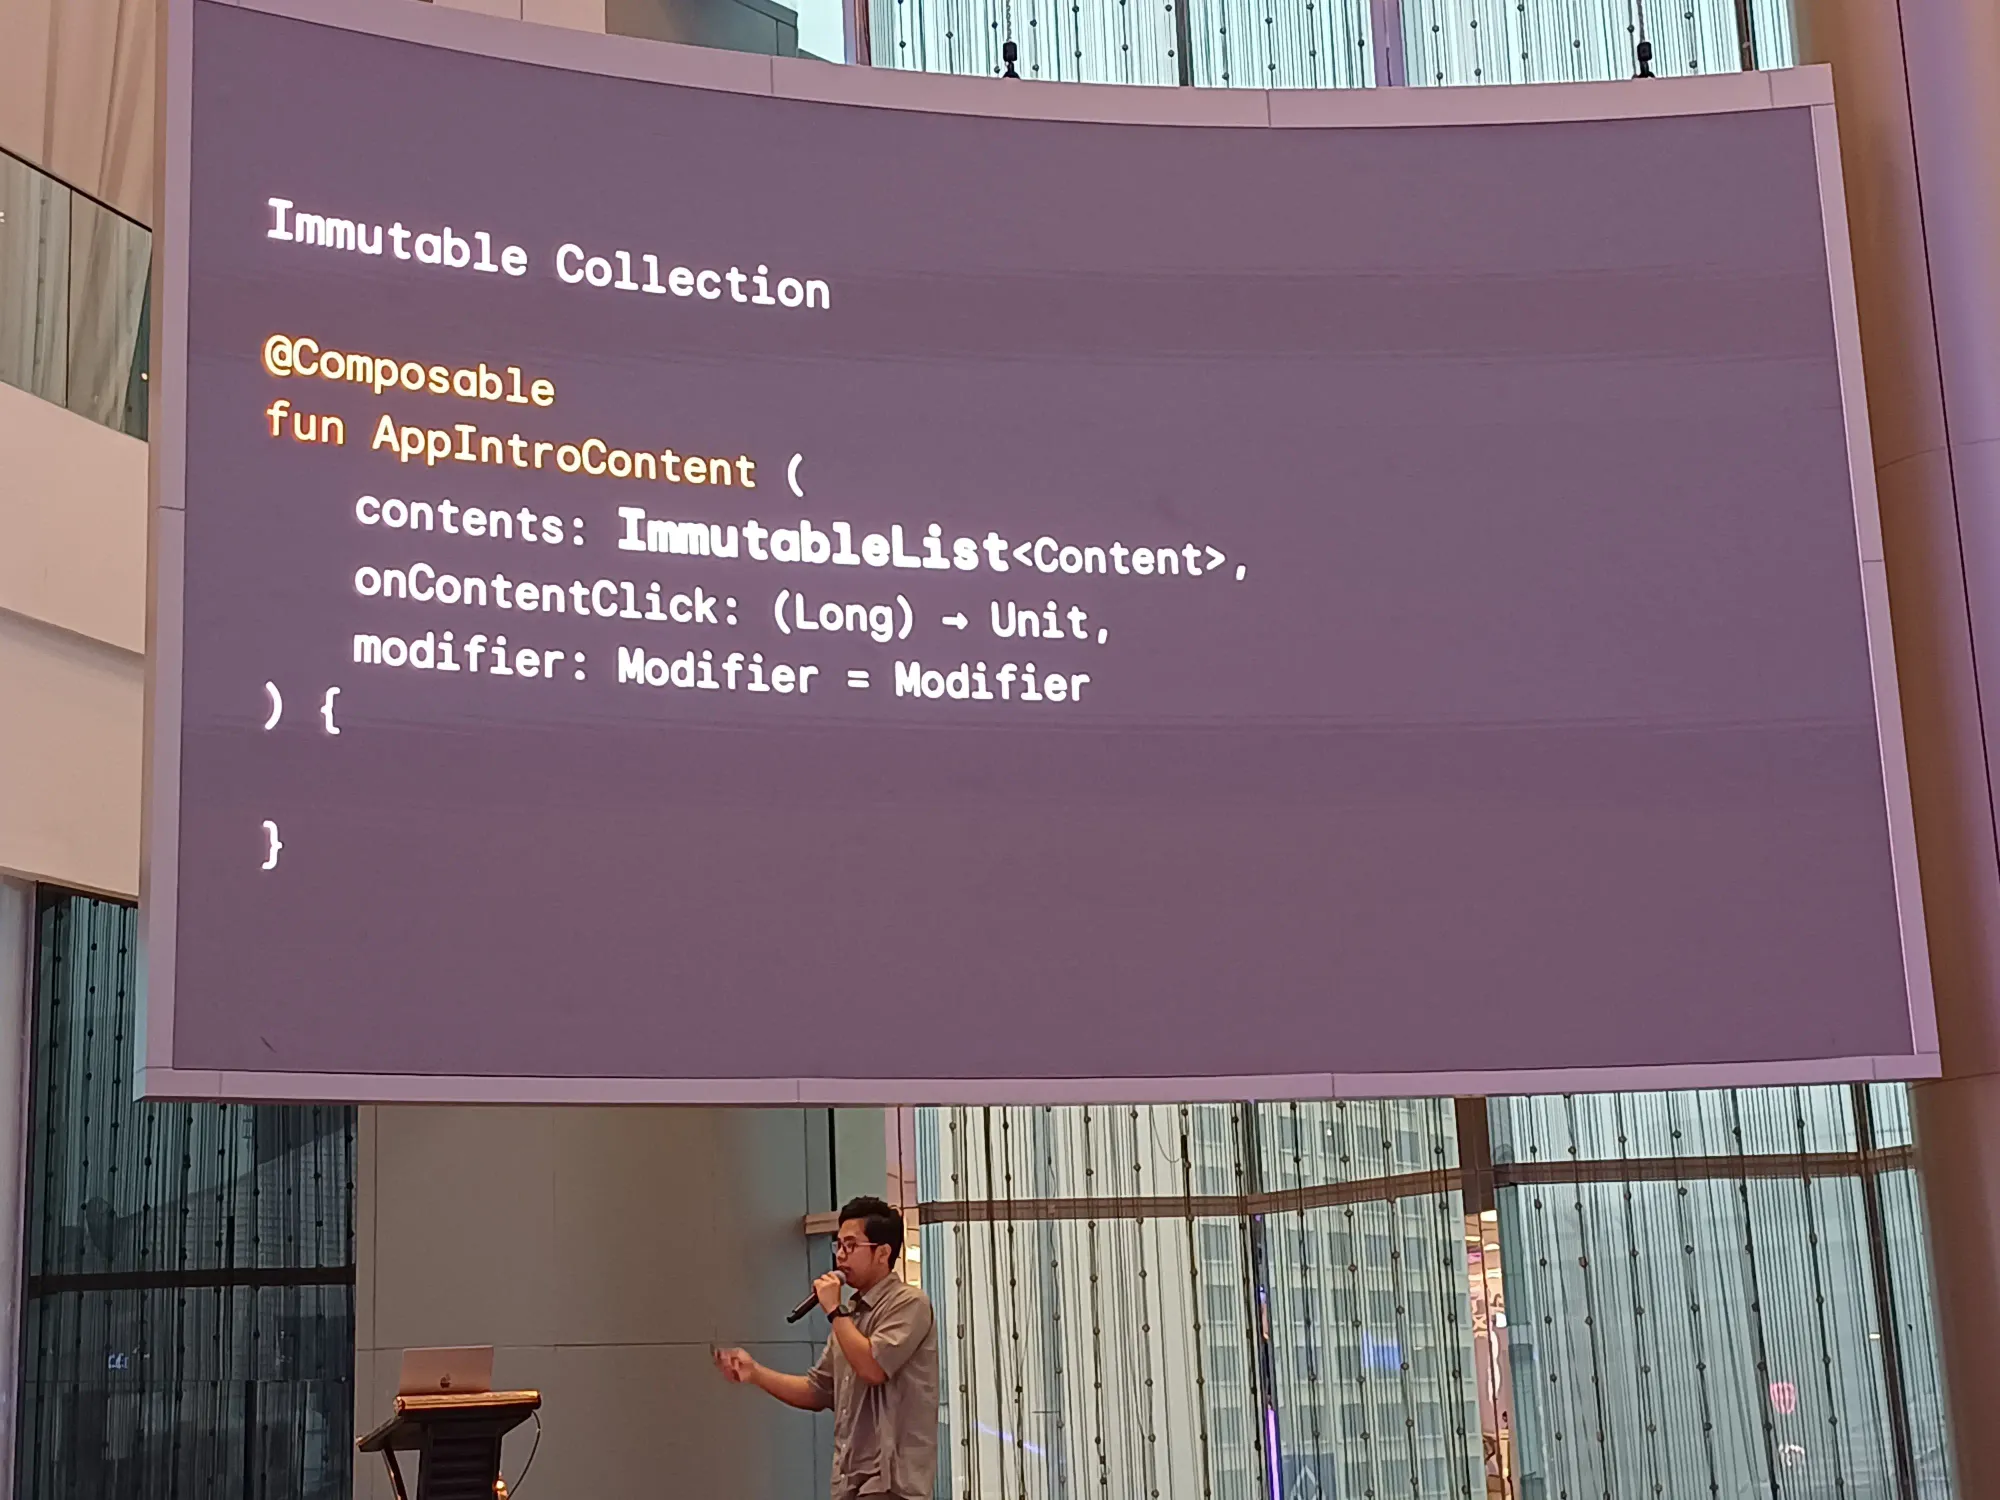
สรุปคร่าว ๆ
contact ของ speaker
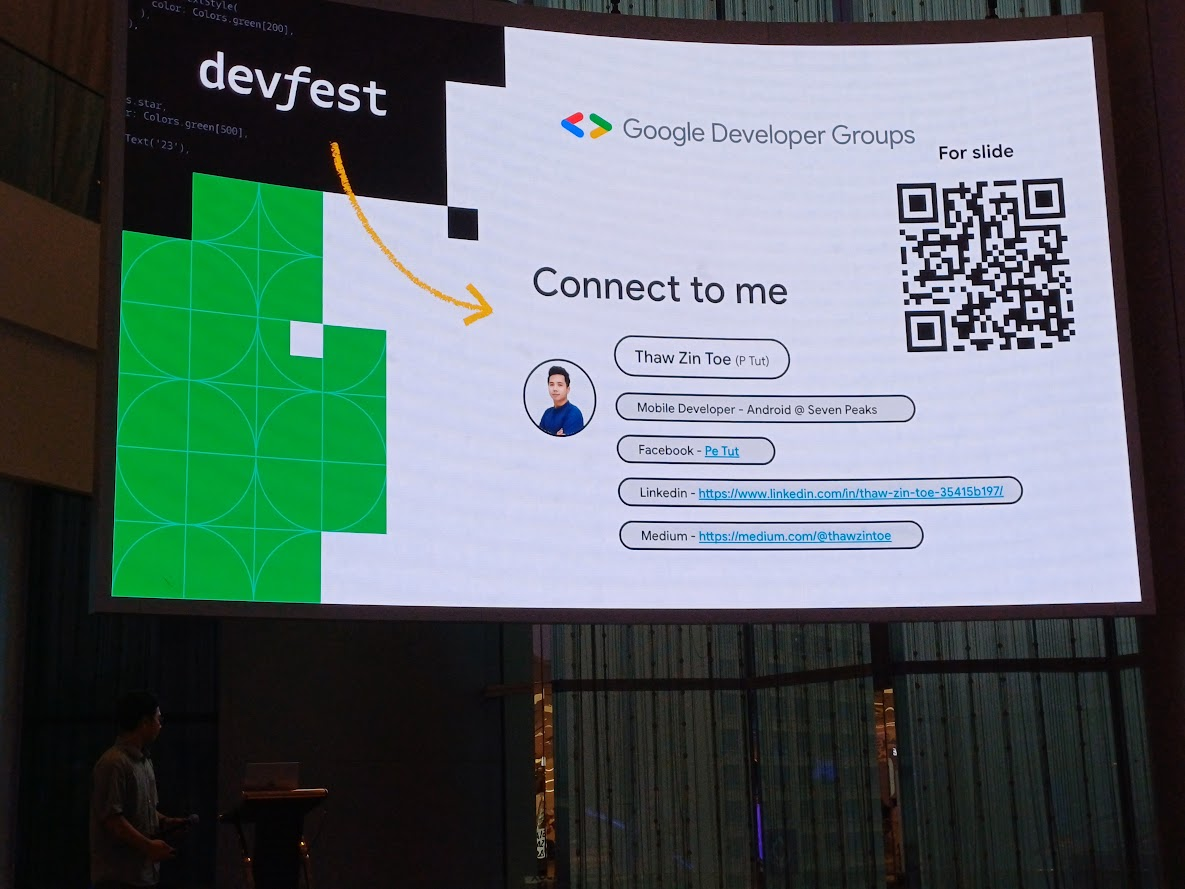
อันนี้สไลด์

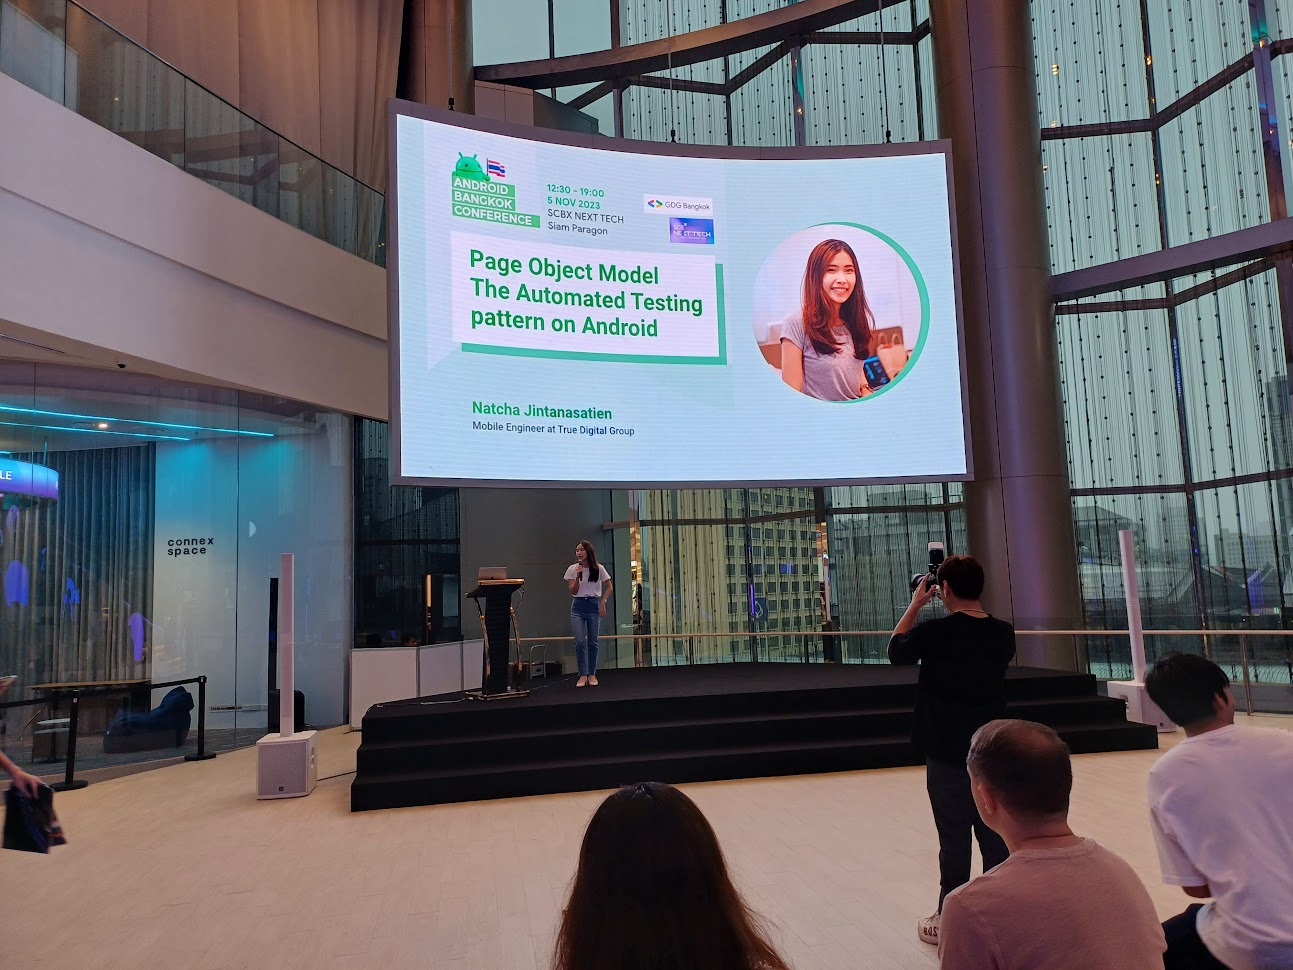
Page Object Model, The Automated Testing pattern on Android - Natcha Jintanasatien
agenda ของ session นี้
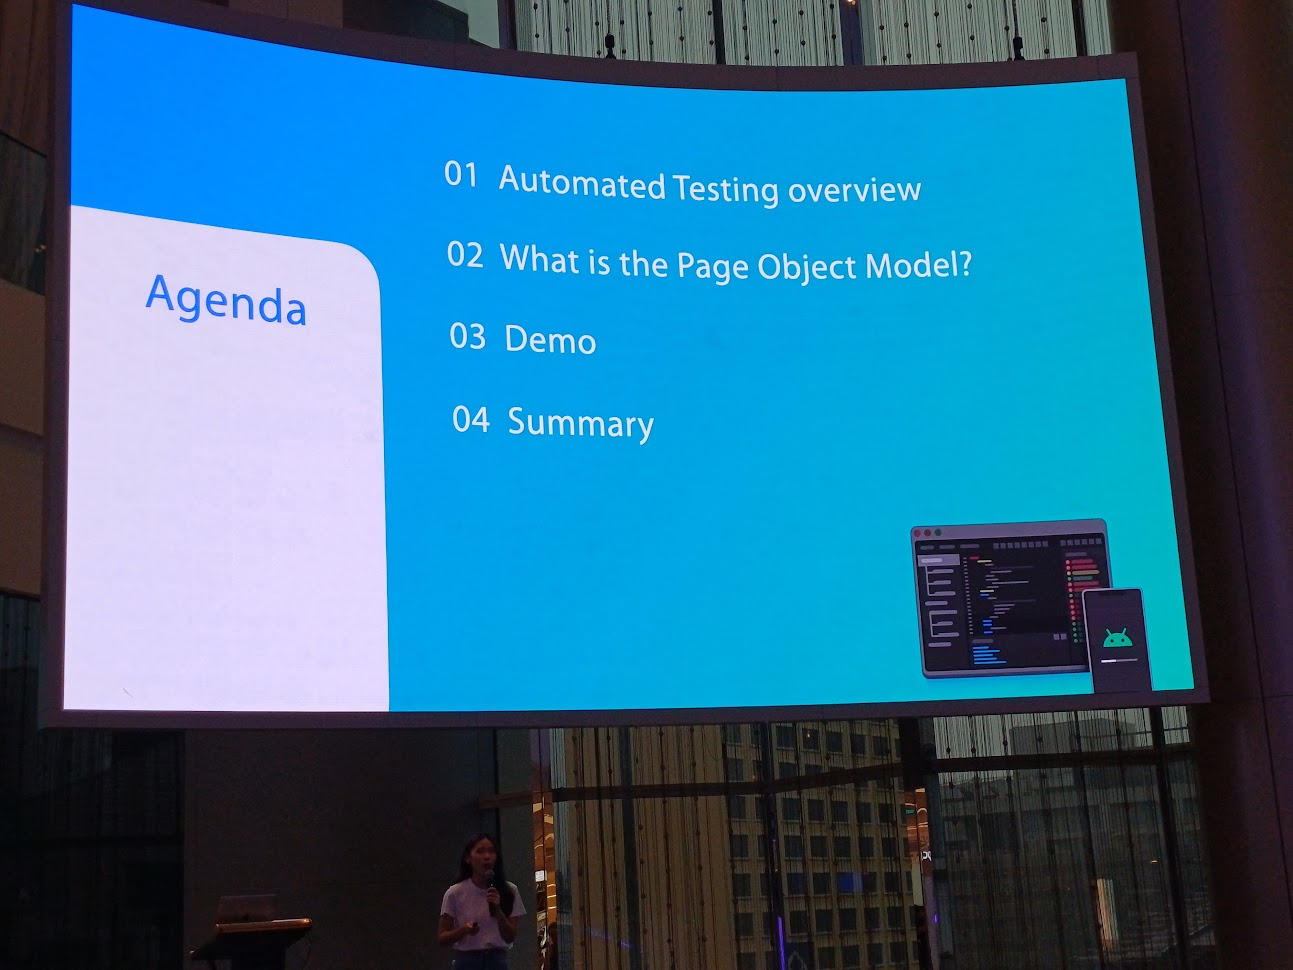
Automated Testing overview
Test Pyramid ทดสอบการทำงานของแอพ มี 3 ชั้น คือ
- Unit Test: test ส่วนที่เล็กที่สุด
- Integration Test
- E2E Test: test ว่าทั้งหมดทำงานได้ถูกต้องไหม

session นี้ เทสบน Android device โดยใช้ AndroidJUnitRunner, context ต่าง ๆ ว่าจะทำอะไร ใช้แทน id แล้วก็ test case
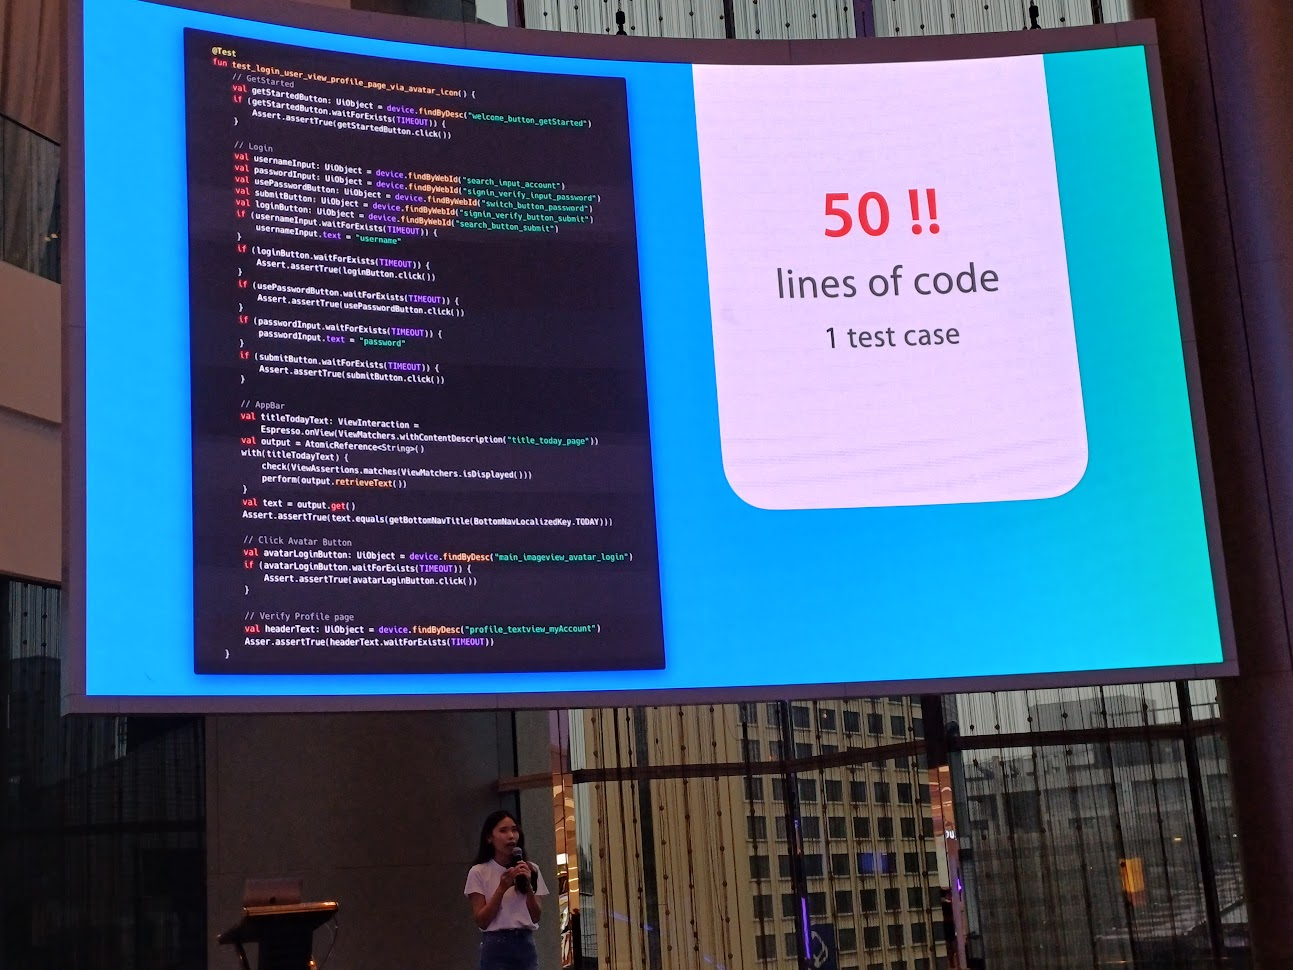
ตัวอย่างการทำ E2E เช่นการเข้าหน้าแอพ login จากนั้นเข้าหน้าแรก และคลิกที่ profile นับเป็น 1 test case
จาก demo ใช้โค้ด 50 บรรทัดต่อ 1 test case ไม่มี pattern เขียนต่อไปเรื่อย ๆ จะเกิด duplicate code แล้วจะทำยังไงดี?
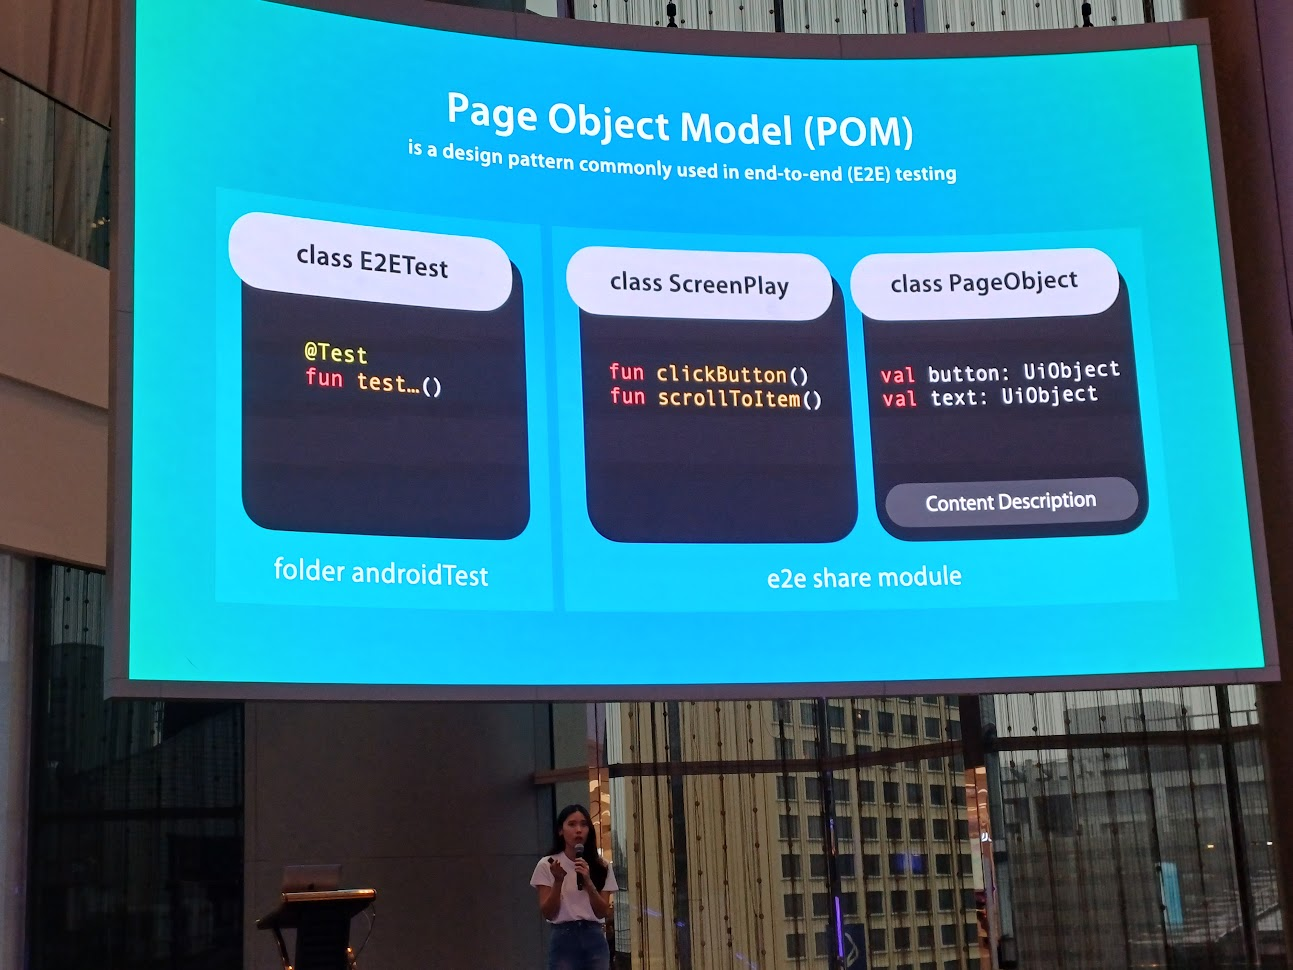
What is the Page Object Model?
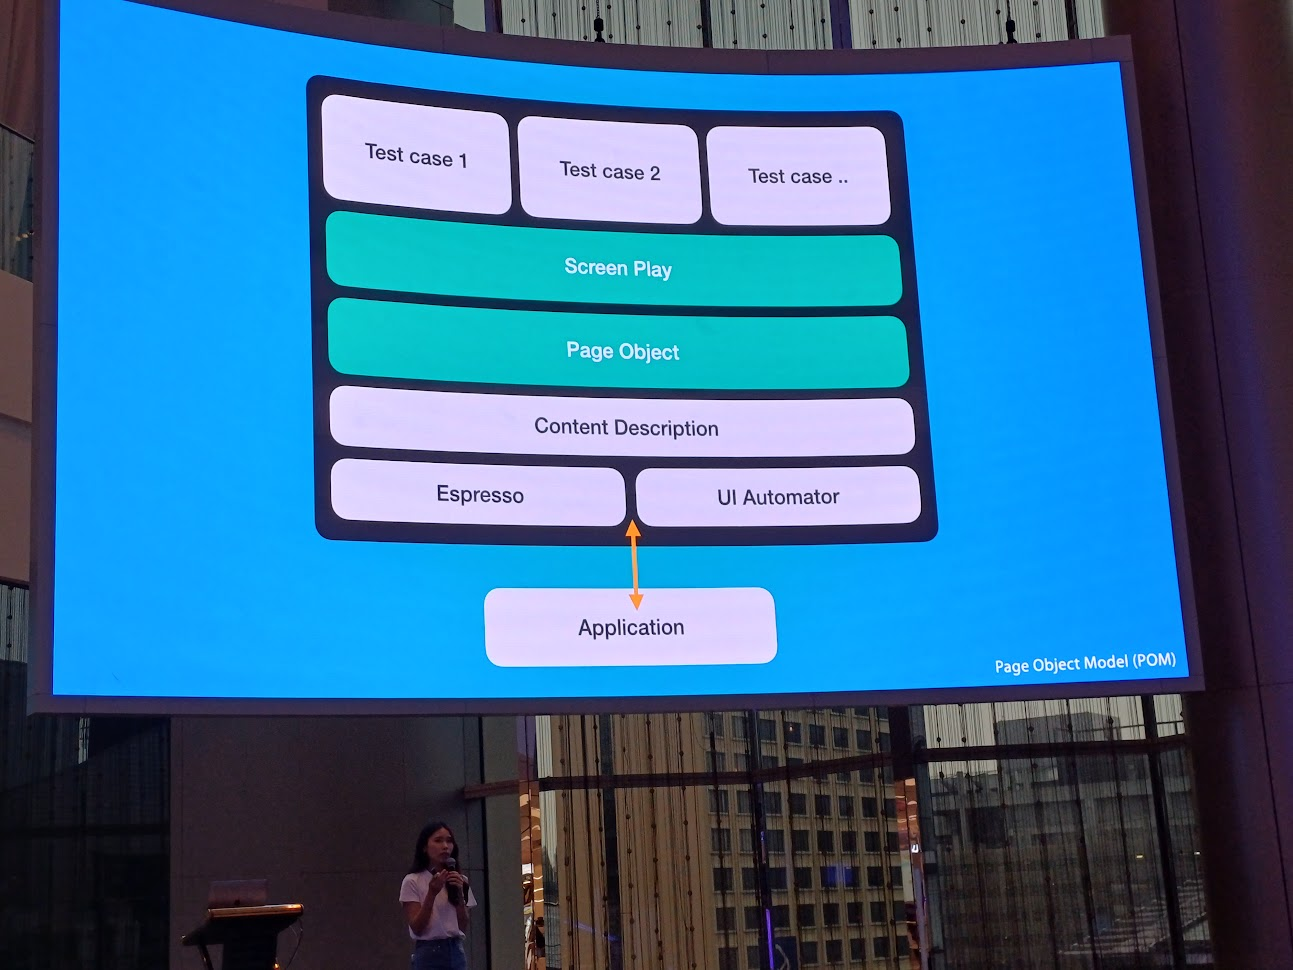
ทีมจะต้องมี pattern อ่านแล้วเข้าใจตรงกัน ในที่นี้คือ page object model เป็นการทำ E2E test
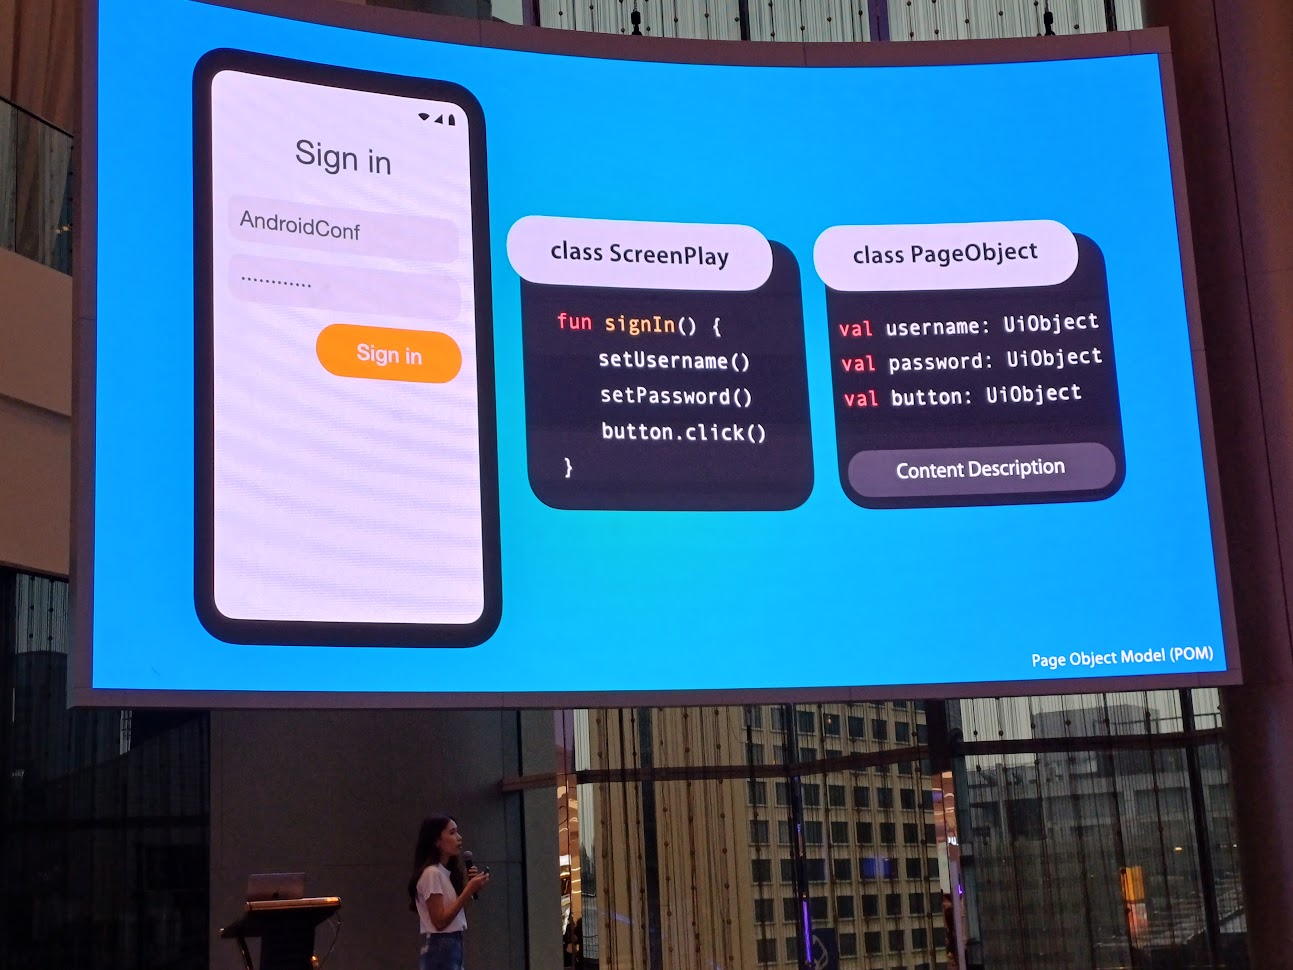
ส่วนประกอบคร่าว ๆ คือ ScreenPlay เอาไว้ทำ action ต่าง ๆ และ PageObject หา object ของ screenplay นั้น ๆ โดยทั้งสองเป็น module แยกเนอะ
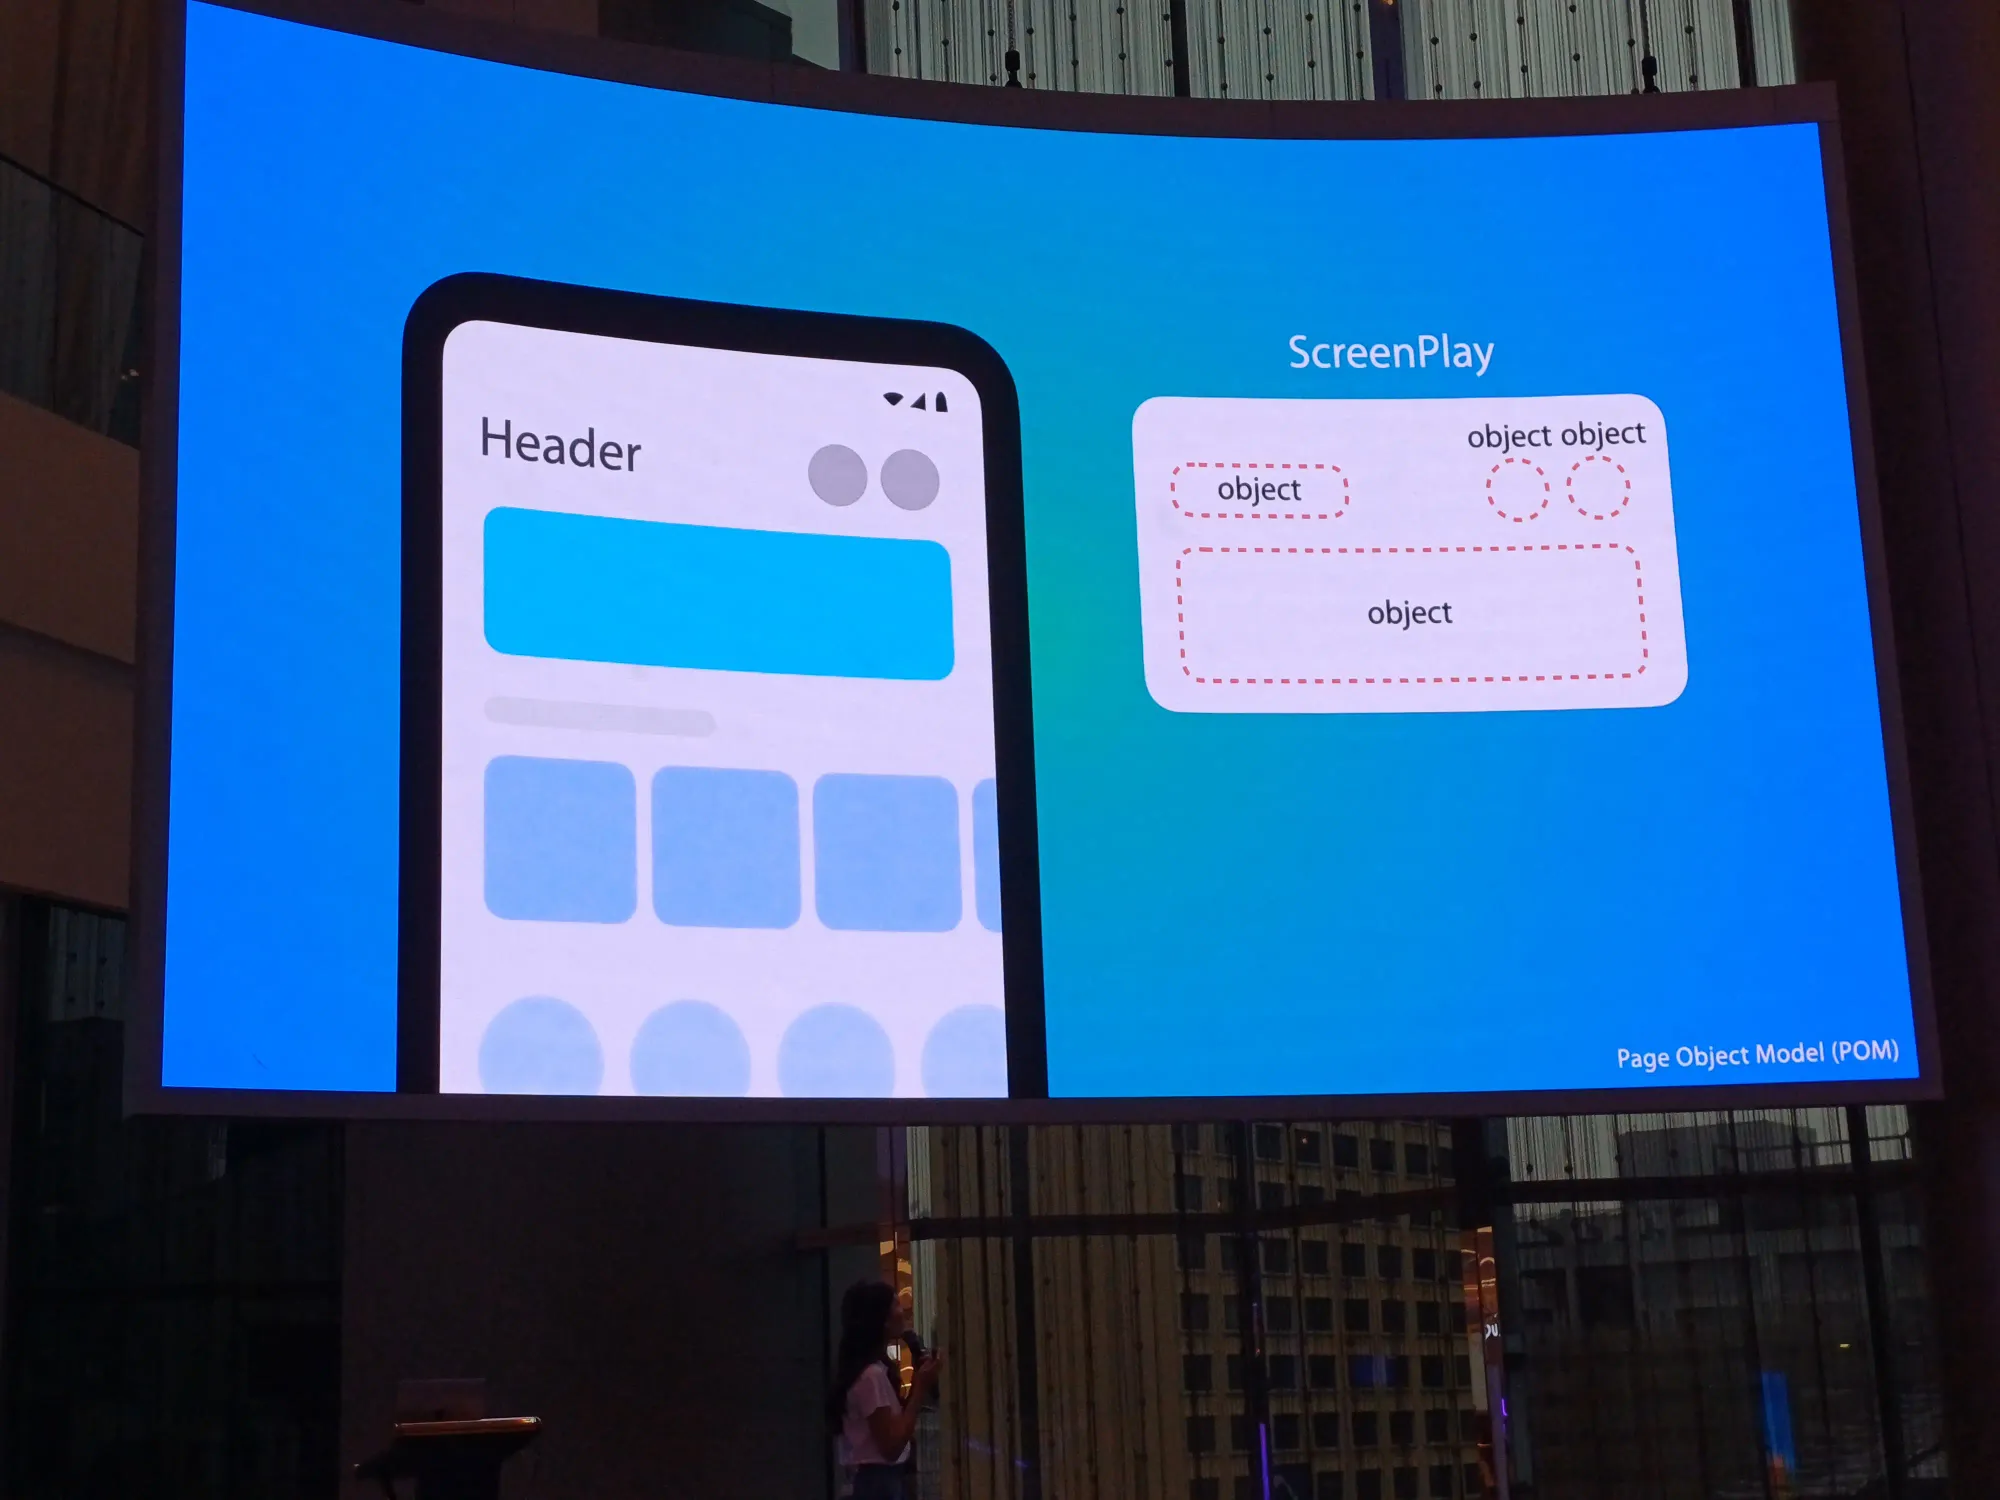
ตัวอย่าง UI แบ่งยังไงดี? เช่นหน้านี้เราจะ test การกด view ข้างบน ข้างในนั้นแบ่งเป็น object อยู่ใน PageObject ส่วนการคลิก item หรืออะไรใด ๆ มันคือ ScreenPlay ในที่นี้คือกดที่ object นึง

มาเขียน test กัน เช่นหน้า project file เข้าหน้าได้ถูกต้องไหม เช่น sign in → home → profile

ในส่วนหน้า sign in มี ScreenPlay คือ การกรอก username การกรอก password และการกดปุ่มเนอะ และตัว PageObject นี้ก็มีที่กรอก username ที่กรอก password และปุ่ม sign in
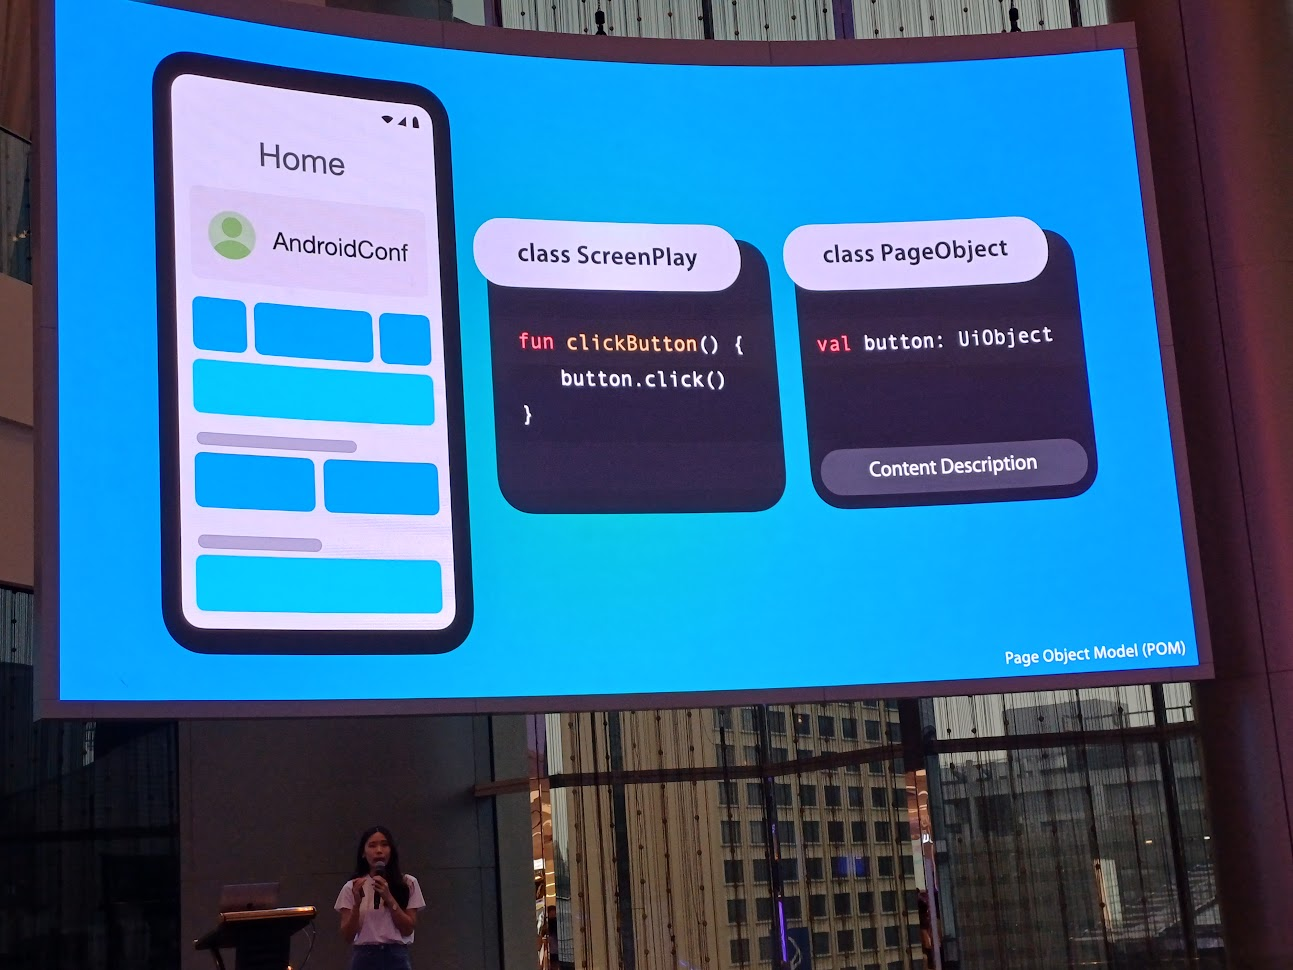
หน้า home เราสนใจการกดปุ่มเพื่อไปหน้า profile
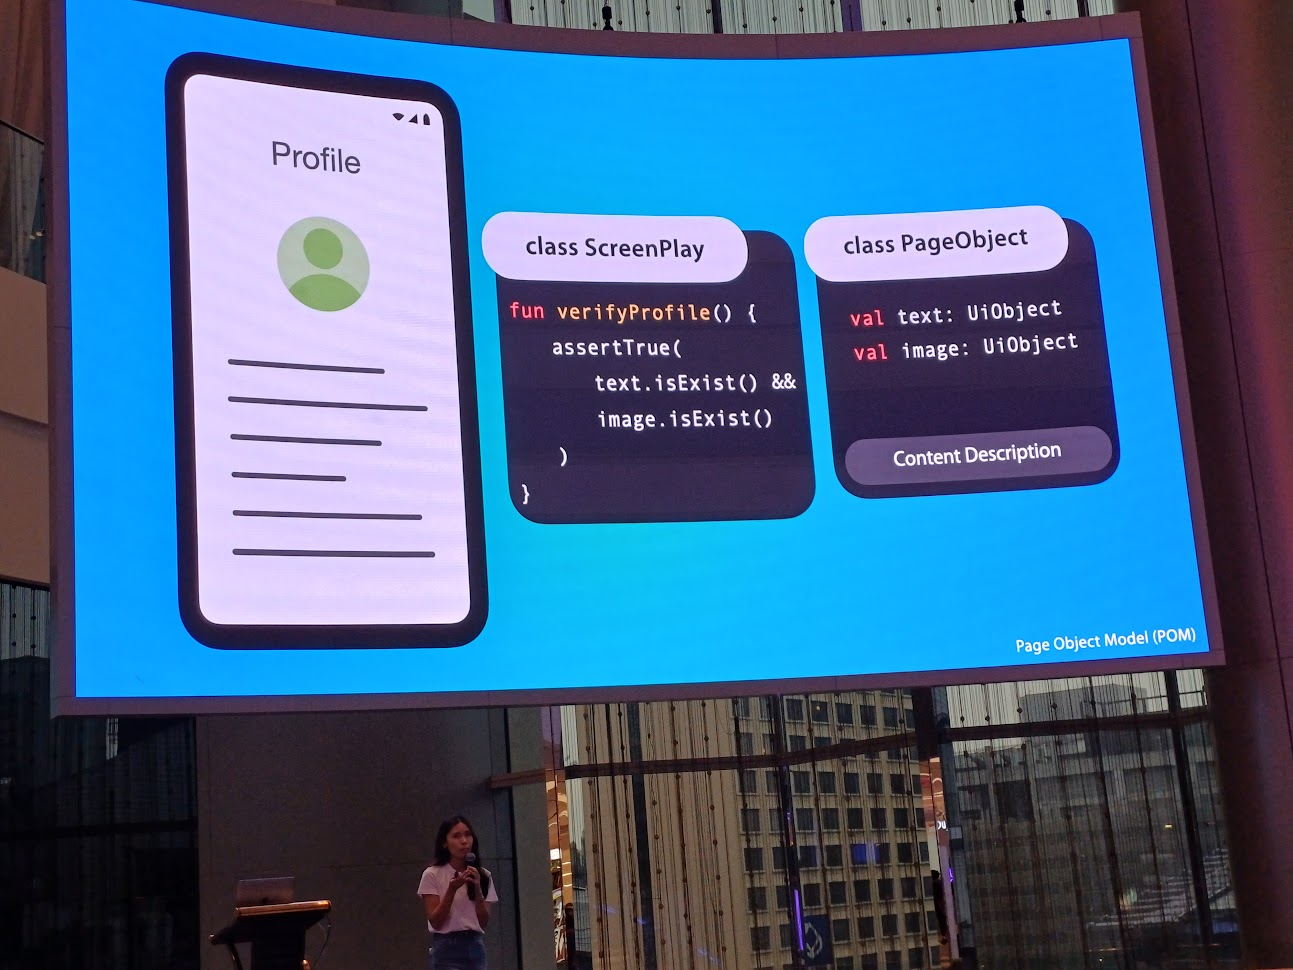
ส่วนหน้า profile นี้ก็มีหลากหลาย idea ในการทำ test case ในการตรวจสอบการแสดงผลด้วยนะ
และนำทั้งหมดมาเรียงร้อยเป็น E2E Test
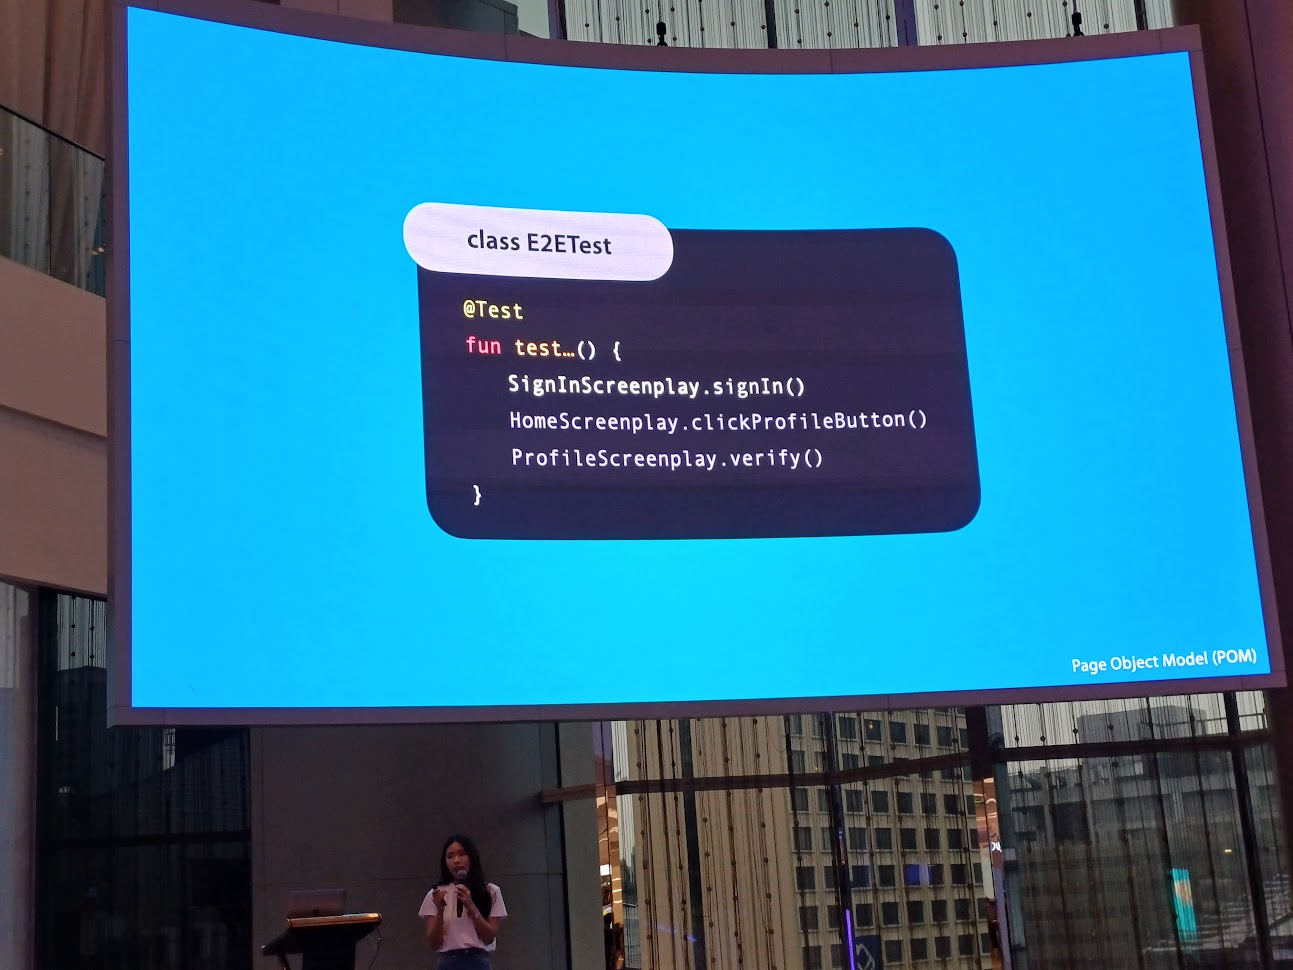
แต่ถ้า journey ลูกค้าเปลี่ยนไปล่ะ? เช่น จำรหัสผ่านไม่ได้ (เออปัญหาระดับชาติจริง) อยากได้ 1-time password ทำให้ test case นั้น failed ตั้งแต่แรก ตัว test case เดิมเปลี่ยนตัวหน้า และเพิ่มเรื่อง verify code เข้าไป
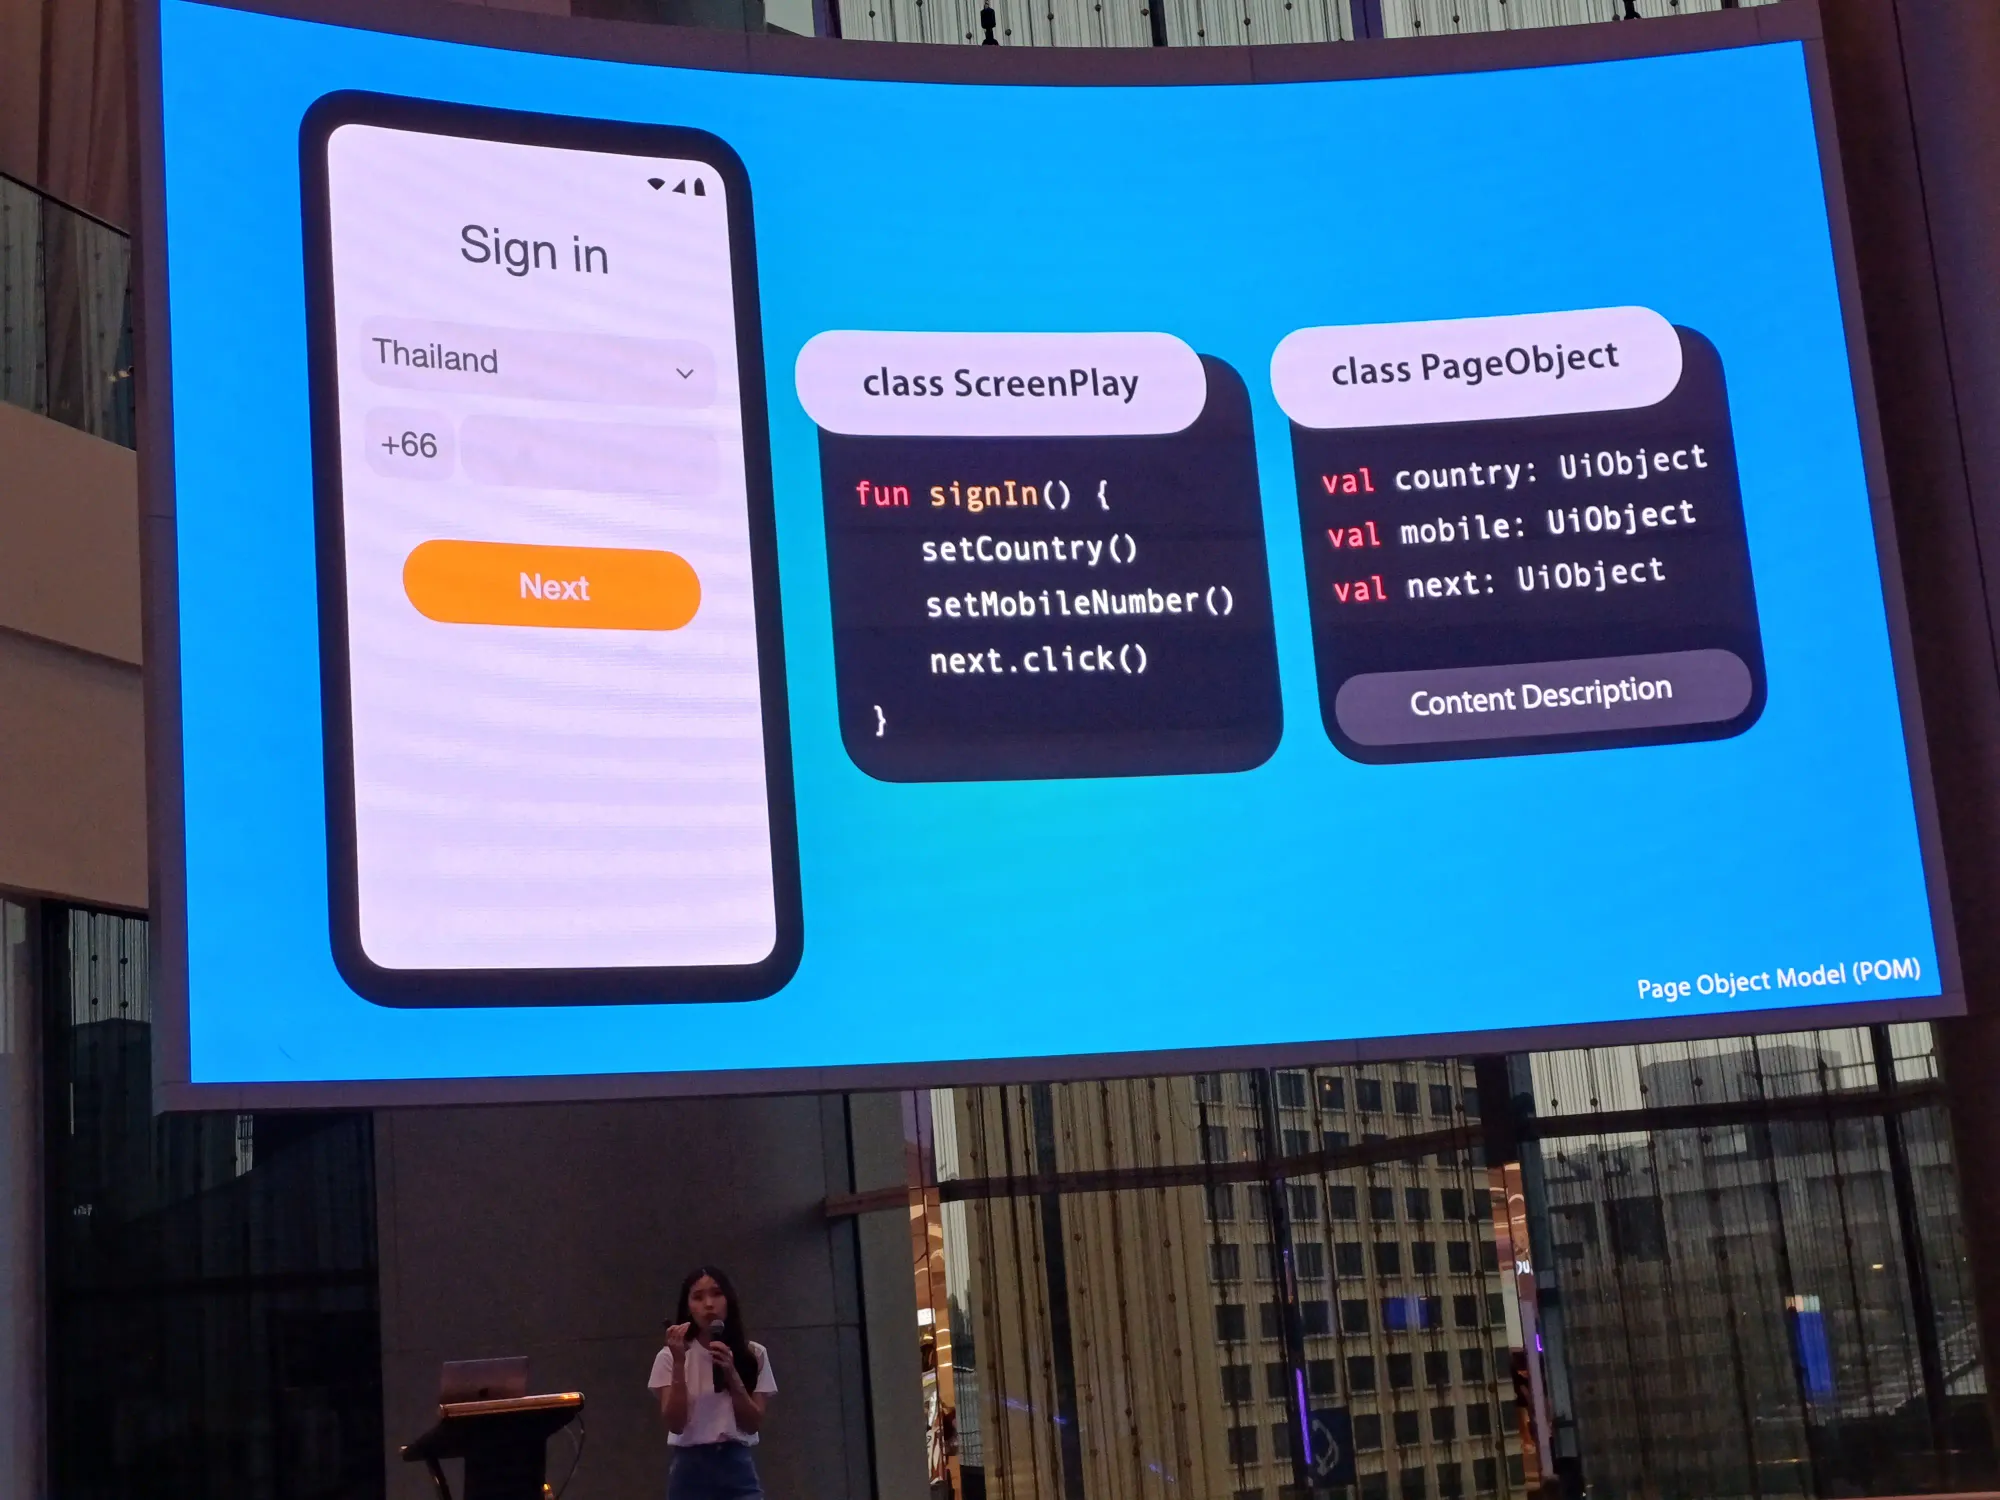
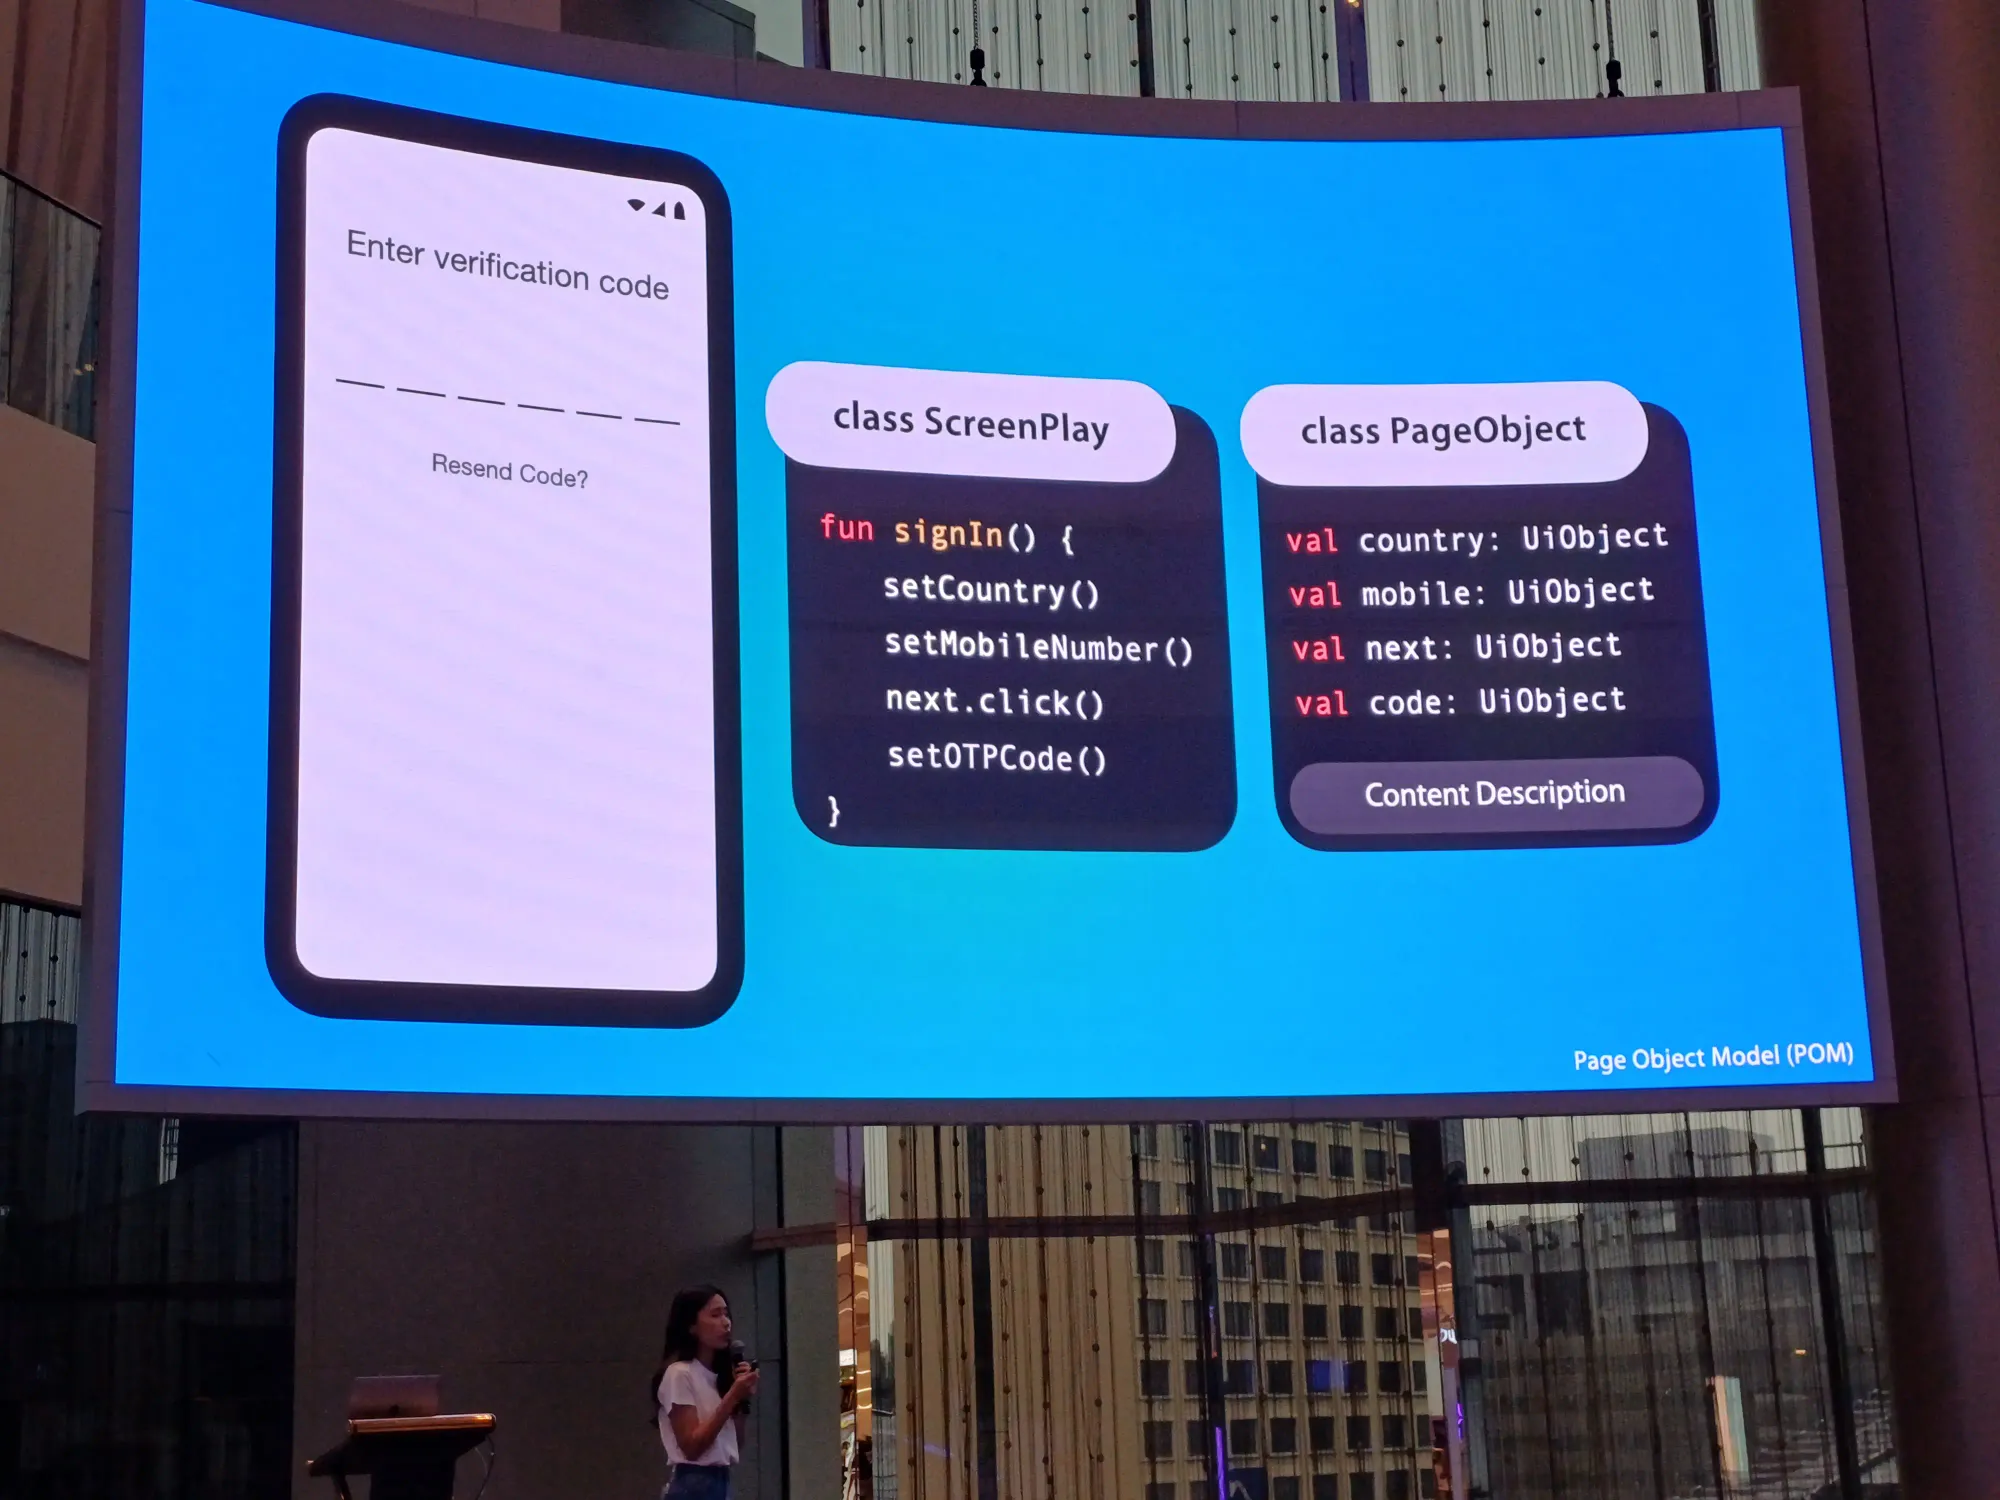
Screen Play ทำตาม action ที่ตัวเองมี ตาม test case และจำเป็นต้องรู้จัก Page Object ด้วยการหาปุ่มให้เรา ทำให้รู้จัก Content Description ของ object นั้น ๆ ได้ถูกต้อง
อันนี้สไลด์ของ session นี้
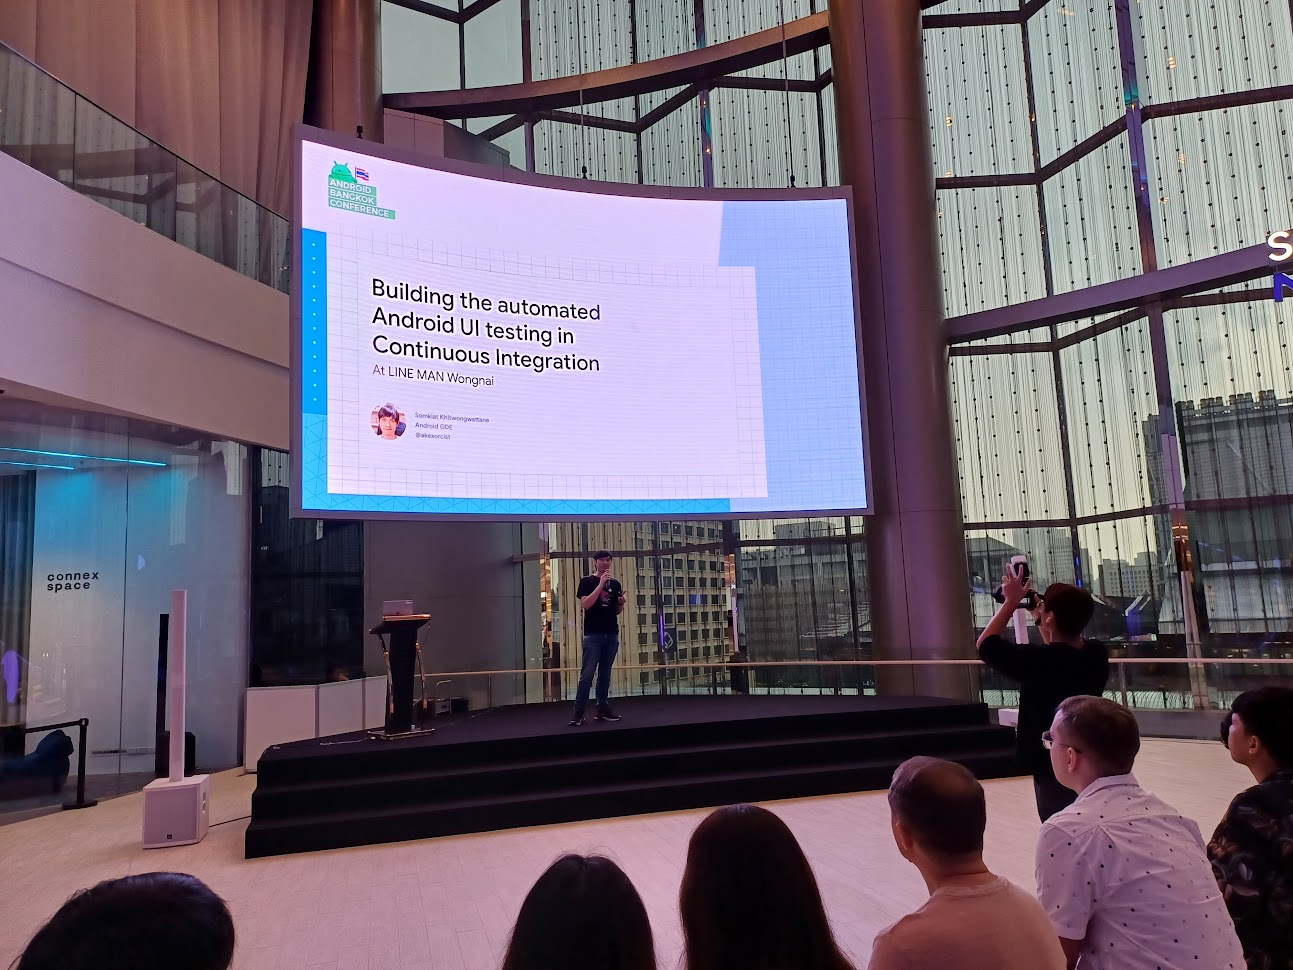
Building the automated Android UI testing in Continuous Integration at LINE MAN Wongnai - Somkiat Khitwongwattana
เมื่อเราเขียน test เป็นแล้ว ก็เอาไป run บน CI ต่อเล้ยย และการ test ไม่ควรผูกกับ framework
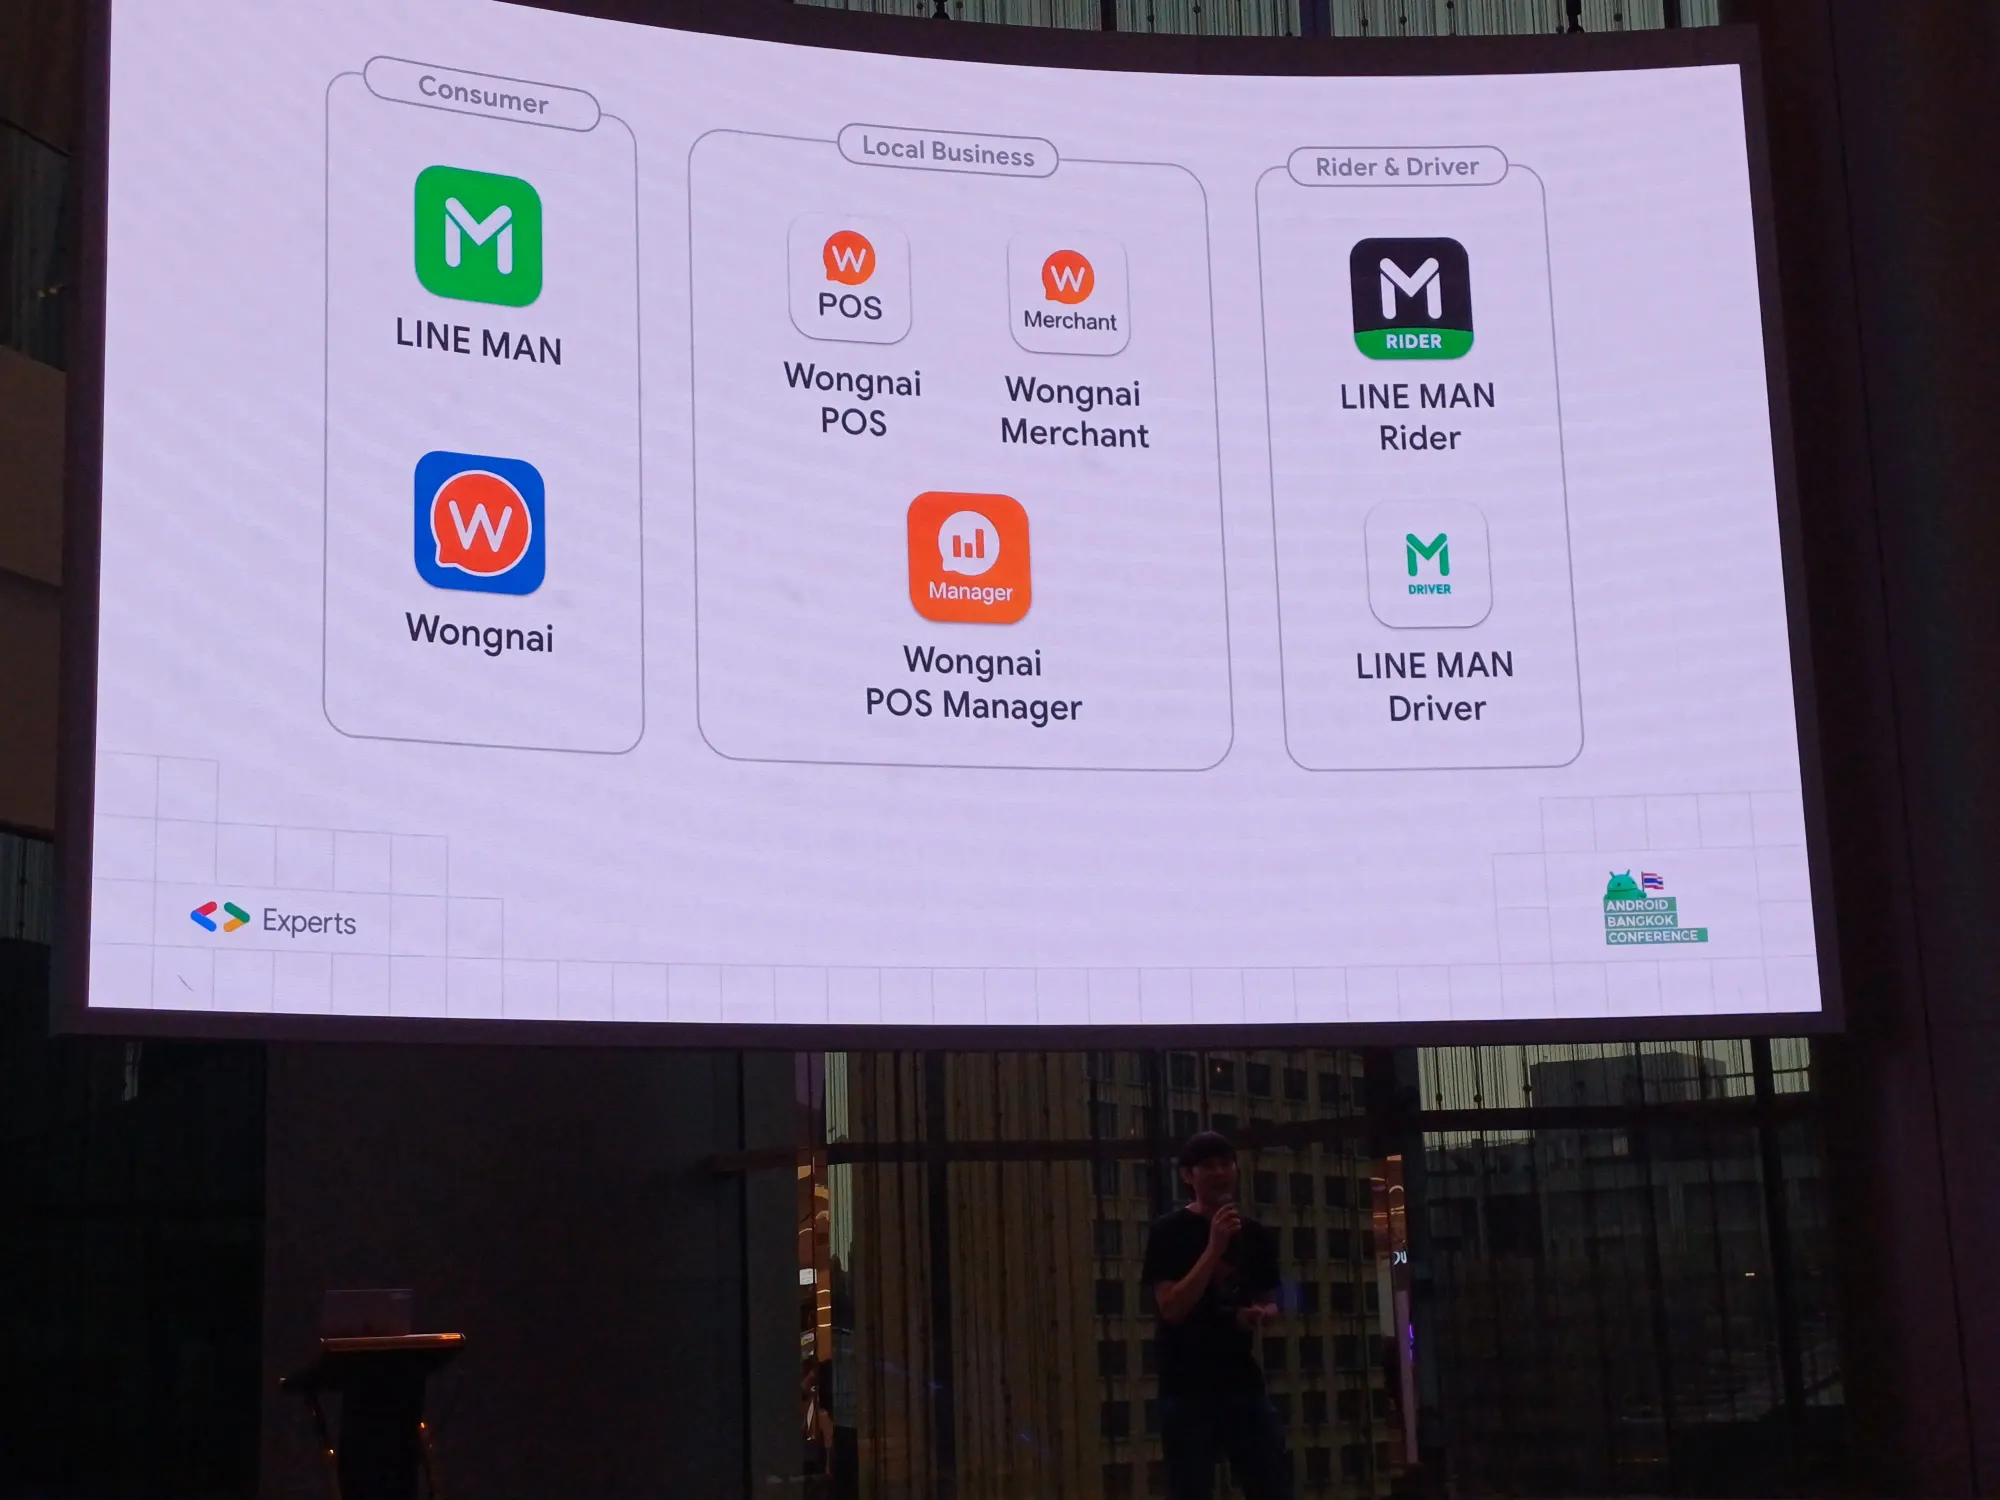
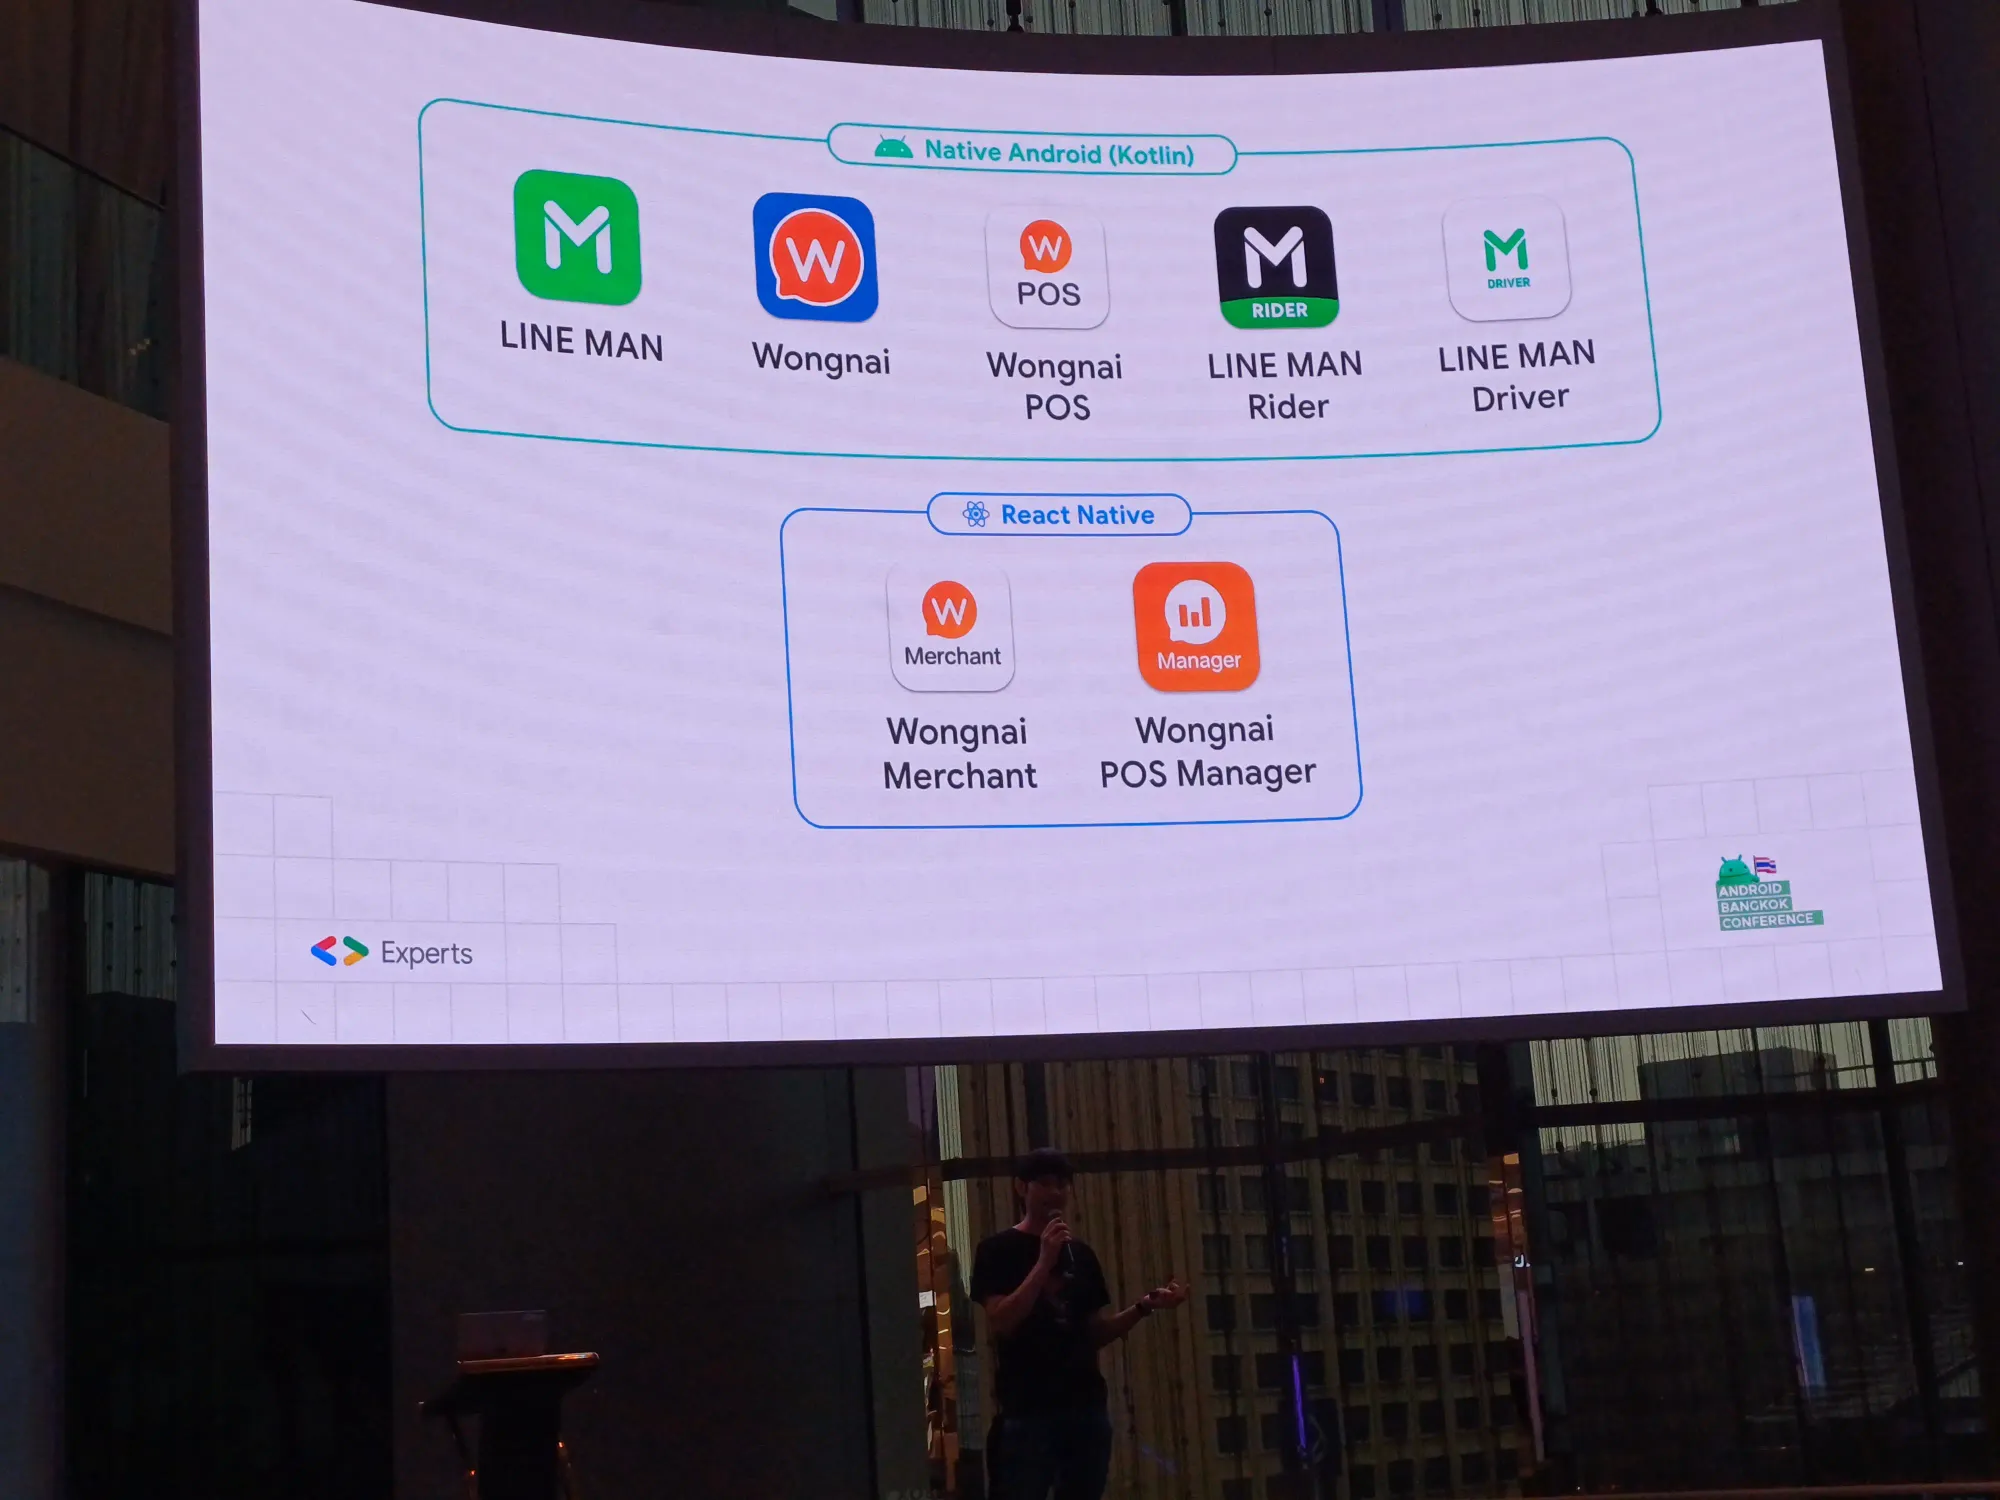
ก่อนอื่น LINE MAN Wongnai ไม่ได้มีแอพแค่ LINE MAN และ Wongnai เท่านั้น ยังมีแอพสำหรับร้านค้า และสำหรับ rider แลพ driver อีกด้วย และบางส่วนเป็น Native Android และเป็น React Native
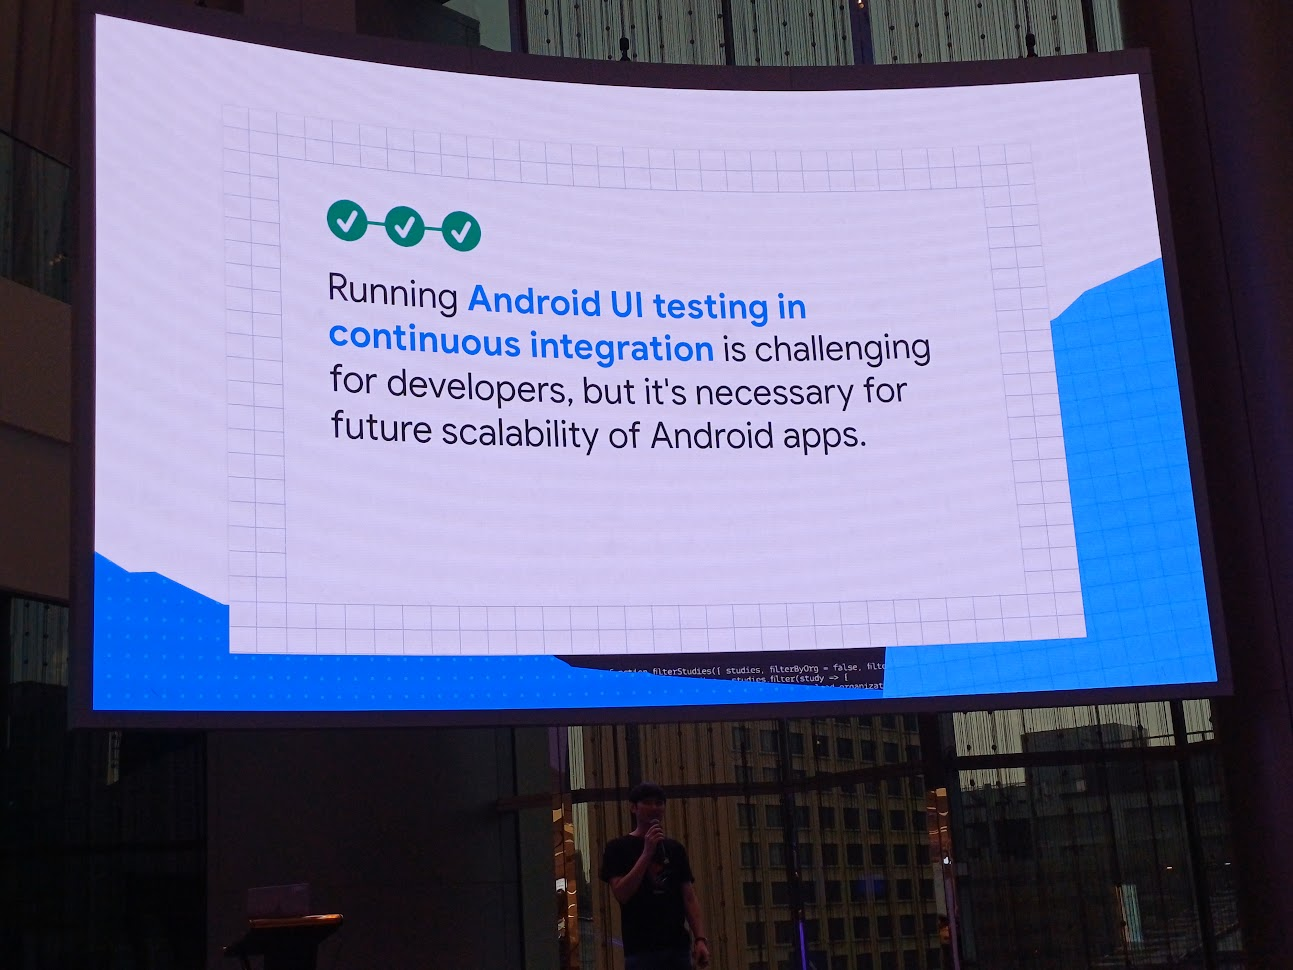
การทำ Android UI Testing บน CI เป็นเรื่องที่ท้าทายสำหรับ developer แต่มันจำเป็นต้องทำล่ะสิ เพื่อสามารถ scalability ได้ในอนาคต
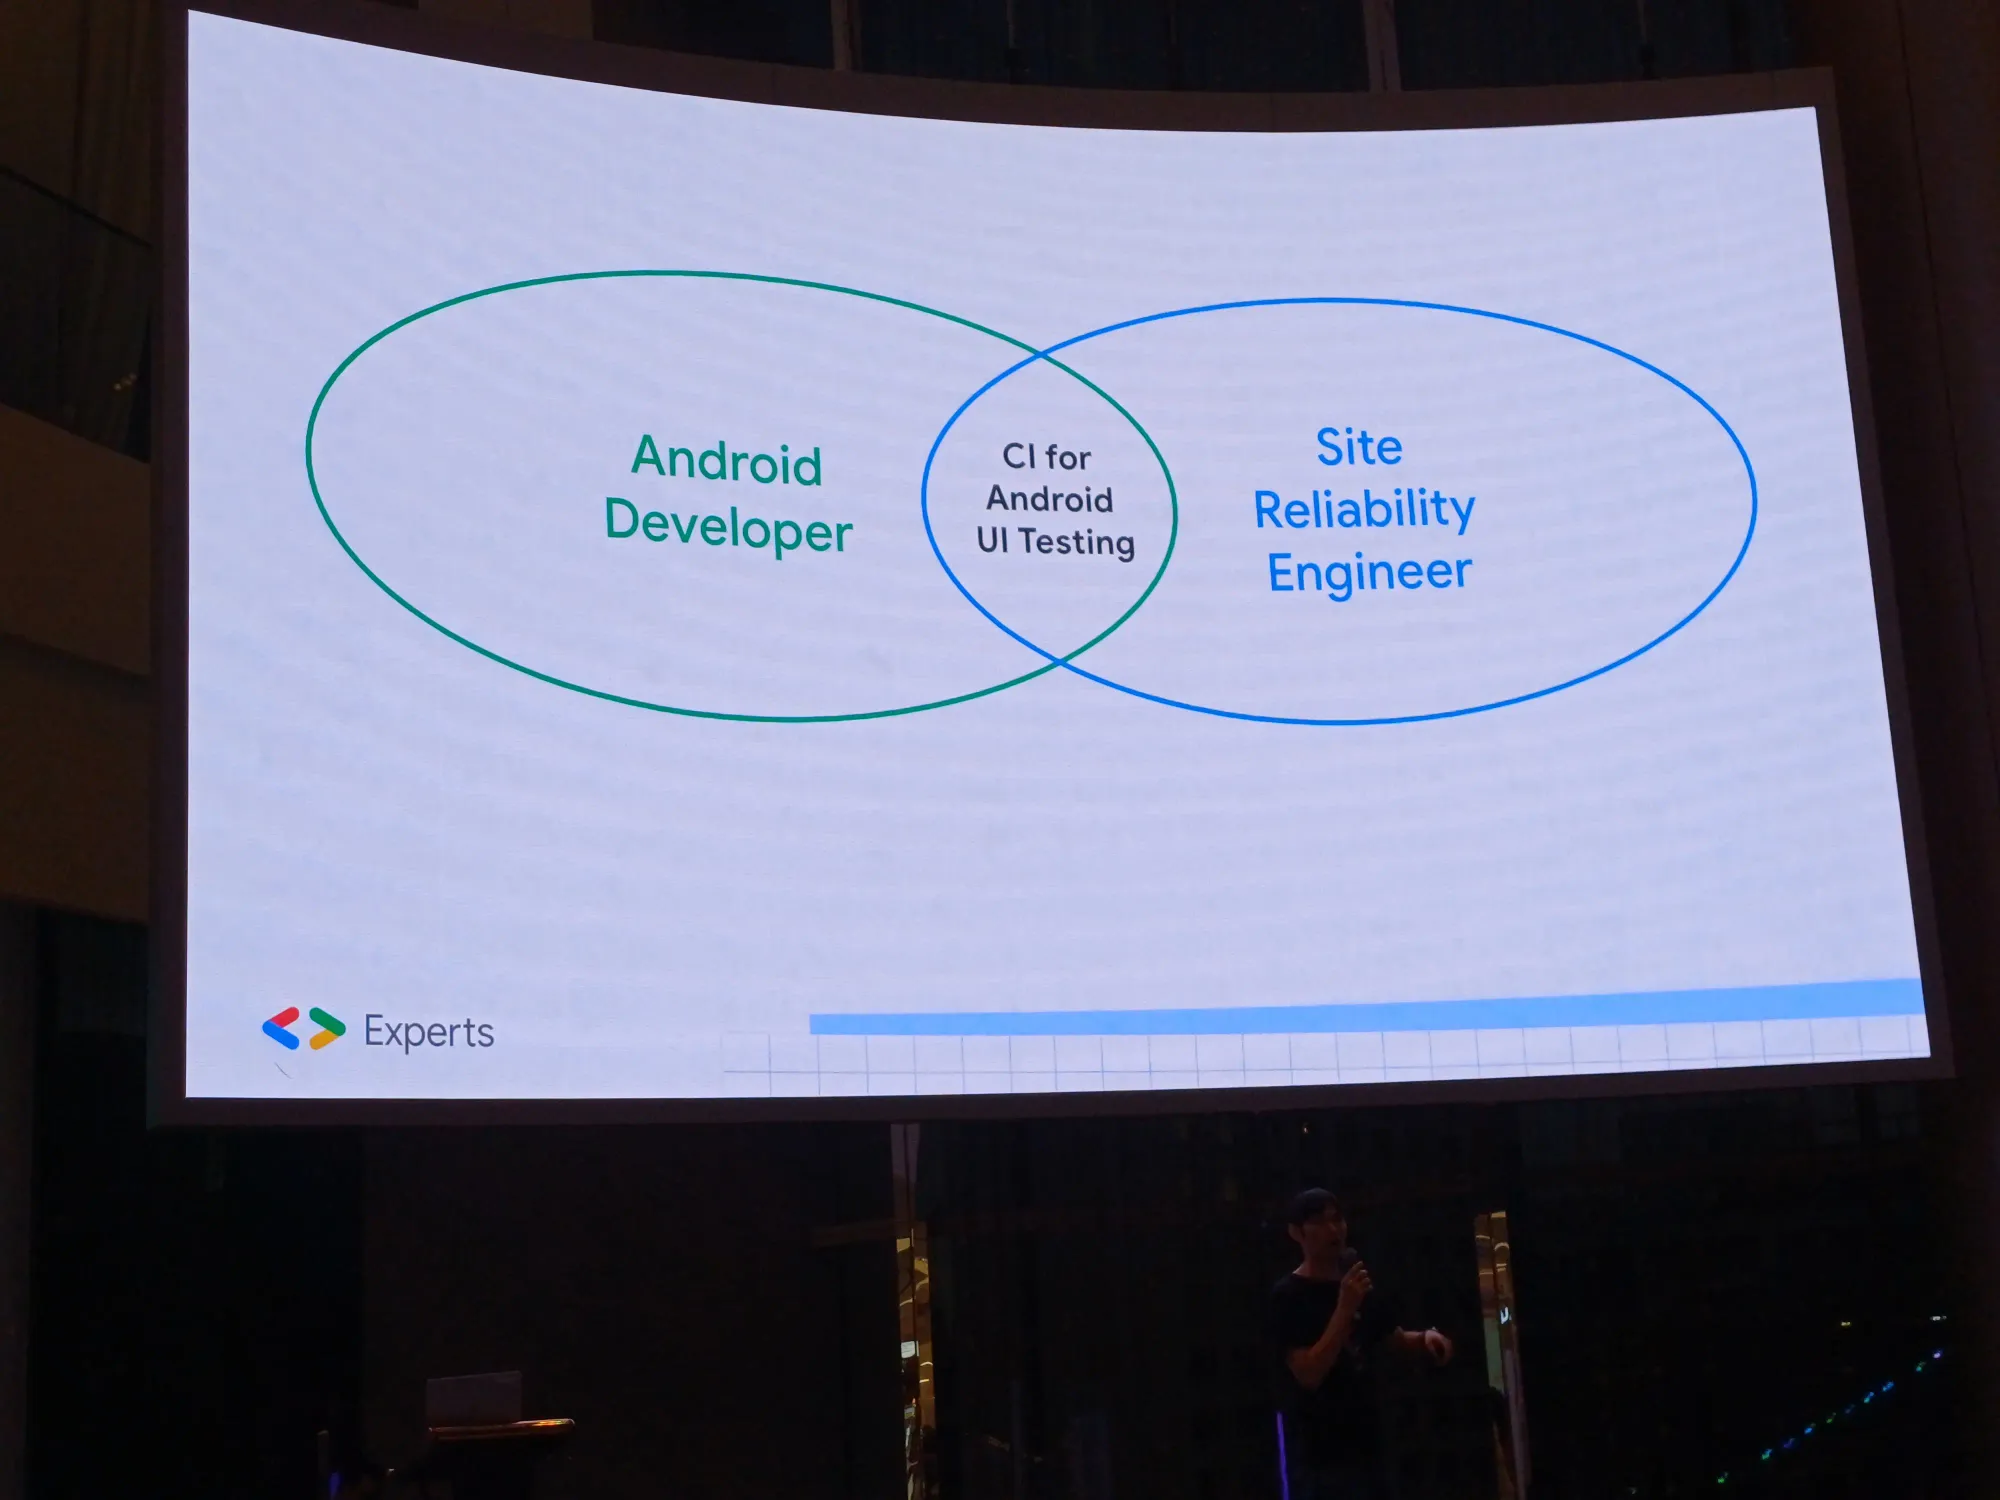
แล้วใครเป็นคนทำสิ่งนี้ล่ะ? Android Developer หรือ DevOps?
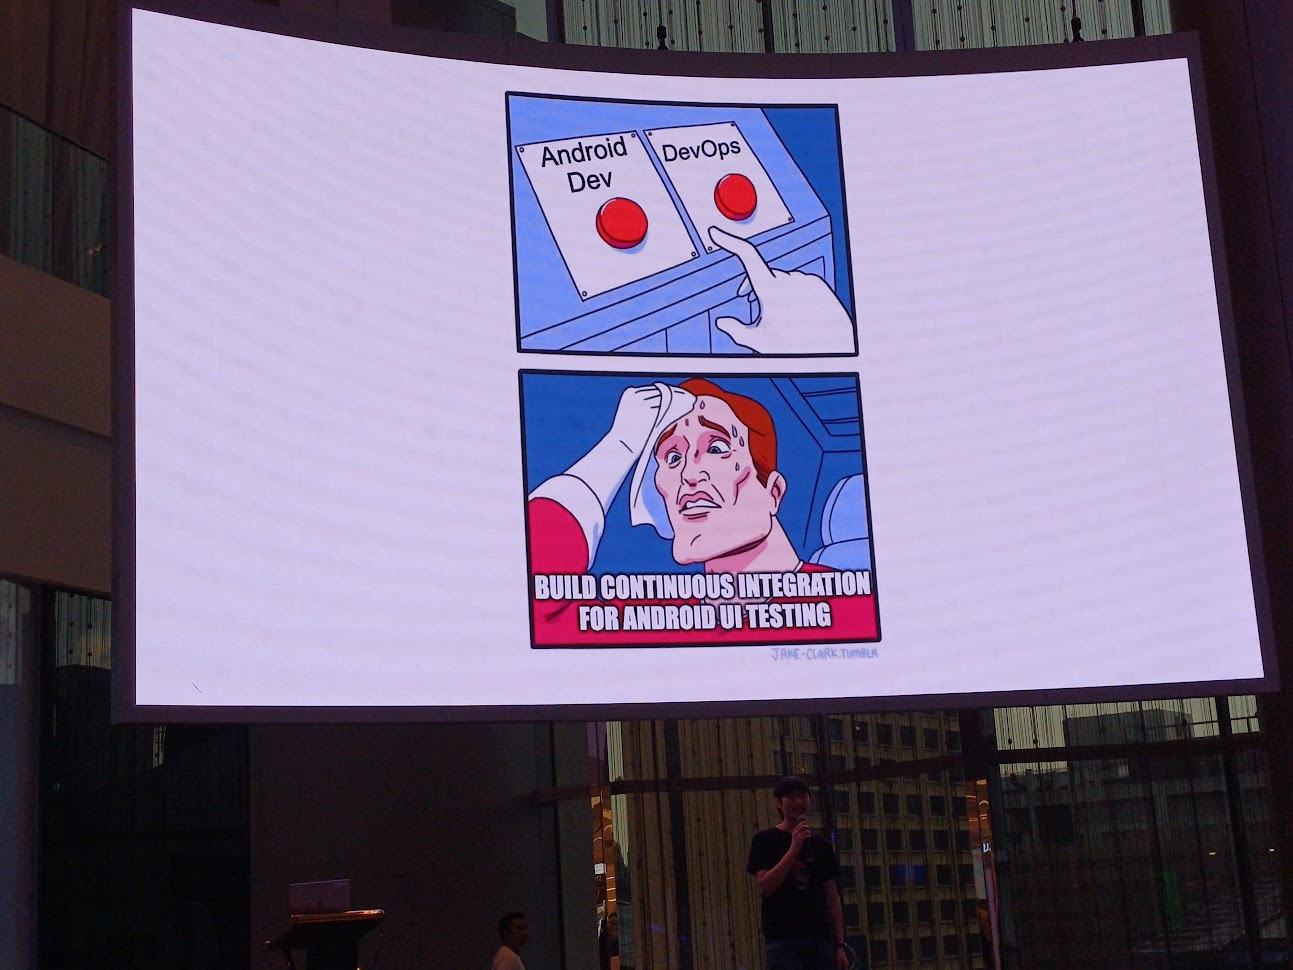
สรุป Android Developer จะรับผิดชอบในการทำ CI และมีคนดูแล structure ต่าง ๆ อาจจะเป็นทีม DevOps หรือคนอื่น ๆ
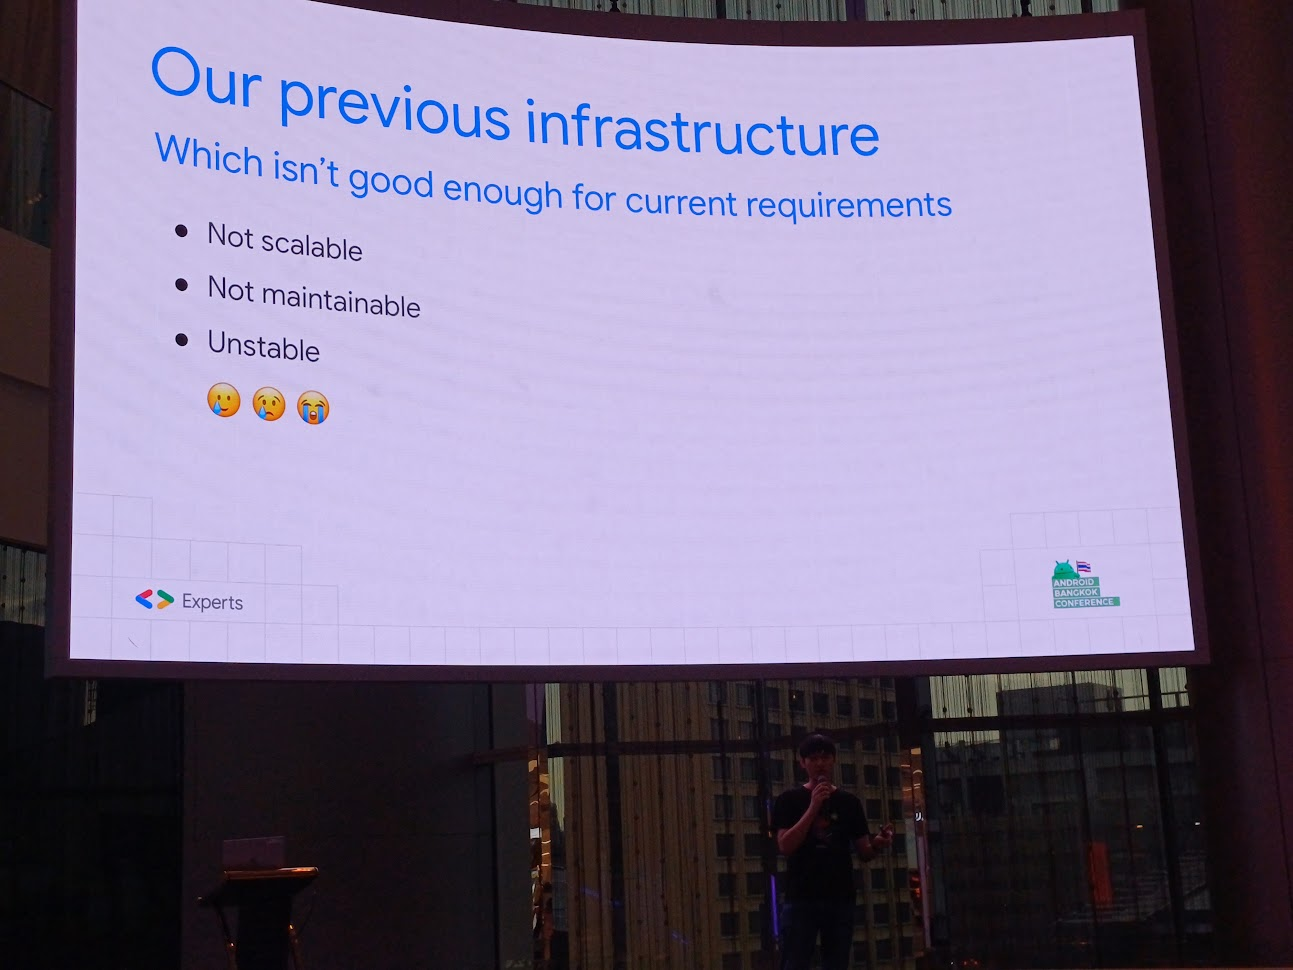
ซึ่งก่อนหน้านี้มี process ตรงนี้มานานแล้ว มี CI run E2E ต่าง ๆ บนเครื่อง iMac ที่ที่นั่นเรียกกันว่า machine b มีหน้าที่ในการ execute และ run emulator เมื่อน้องตุยขึ้นมา จะต้อง remote เพื่อ restart เครื่องได้ แล้วให้มันทำงานต่อ และมีช่วงโควิด machine b ตายแบบต้องกดปุ่ม reset ต้องมีคนเสียสละไปที่ออฟฟิศเพื่อทำสิ่งนี้ให้
มาดู stack กัน โค้ดของที่นี่อยู่ใน Gitlab และทำ integration test บางส่วน

แล้วพวก Android device ล่ะ? ถ้าไม่พึ่งพาเจ้า machine b ที่ฟังดูแล้วทำงานหนักเอามาก ๆ ก็ต้องเป็น emulator ที่อยู่บน cloud
Candidates
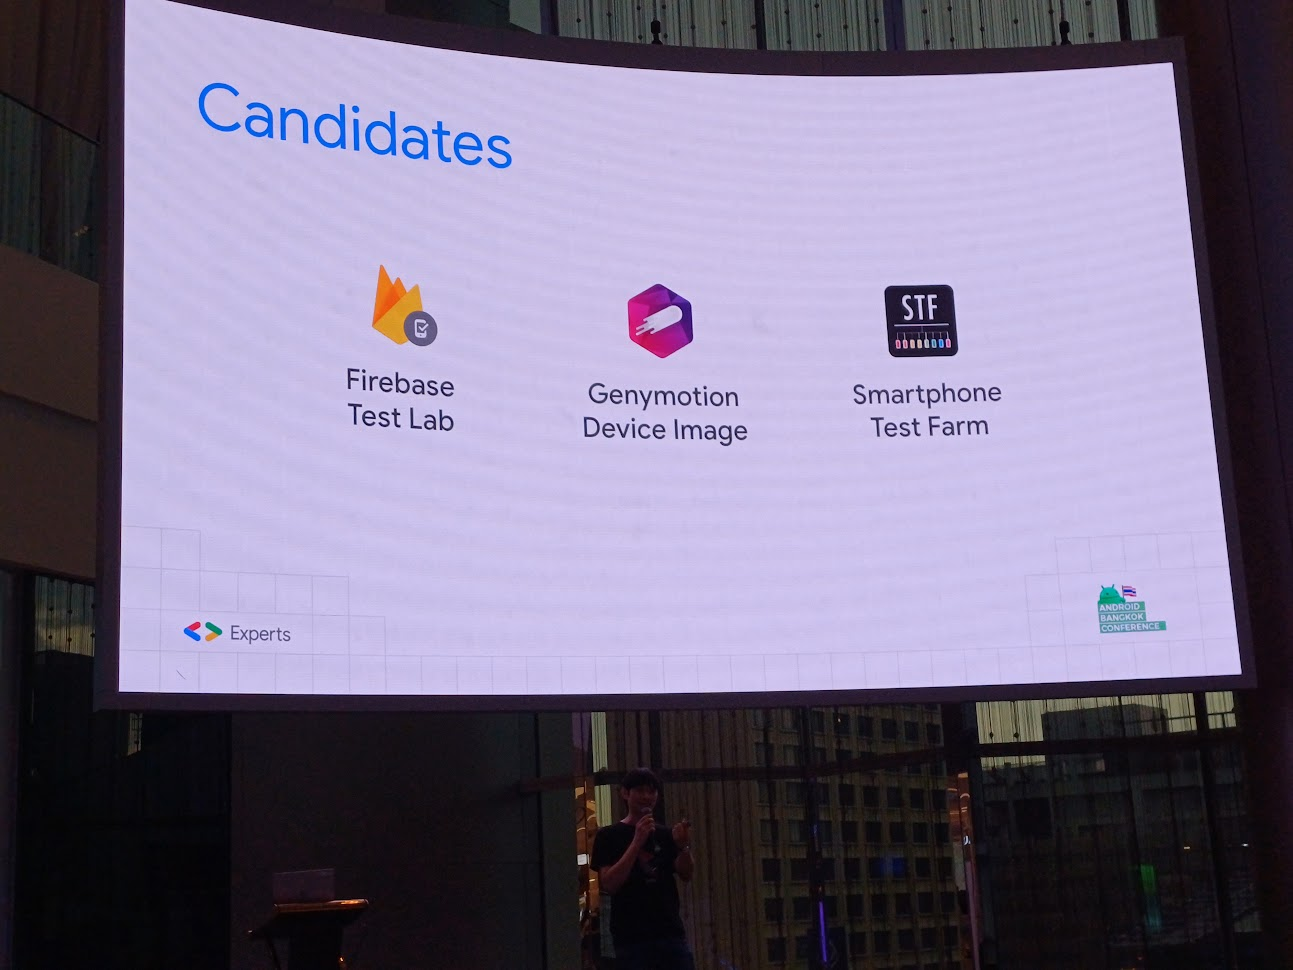
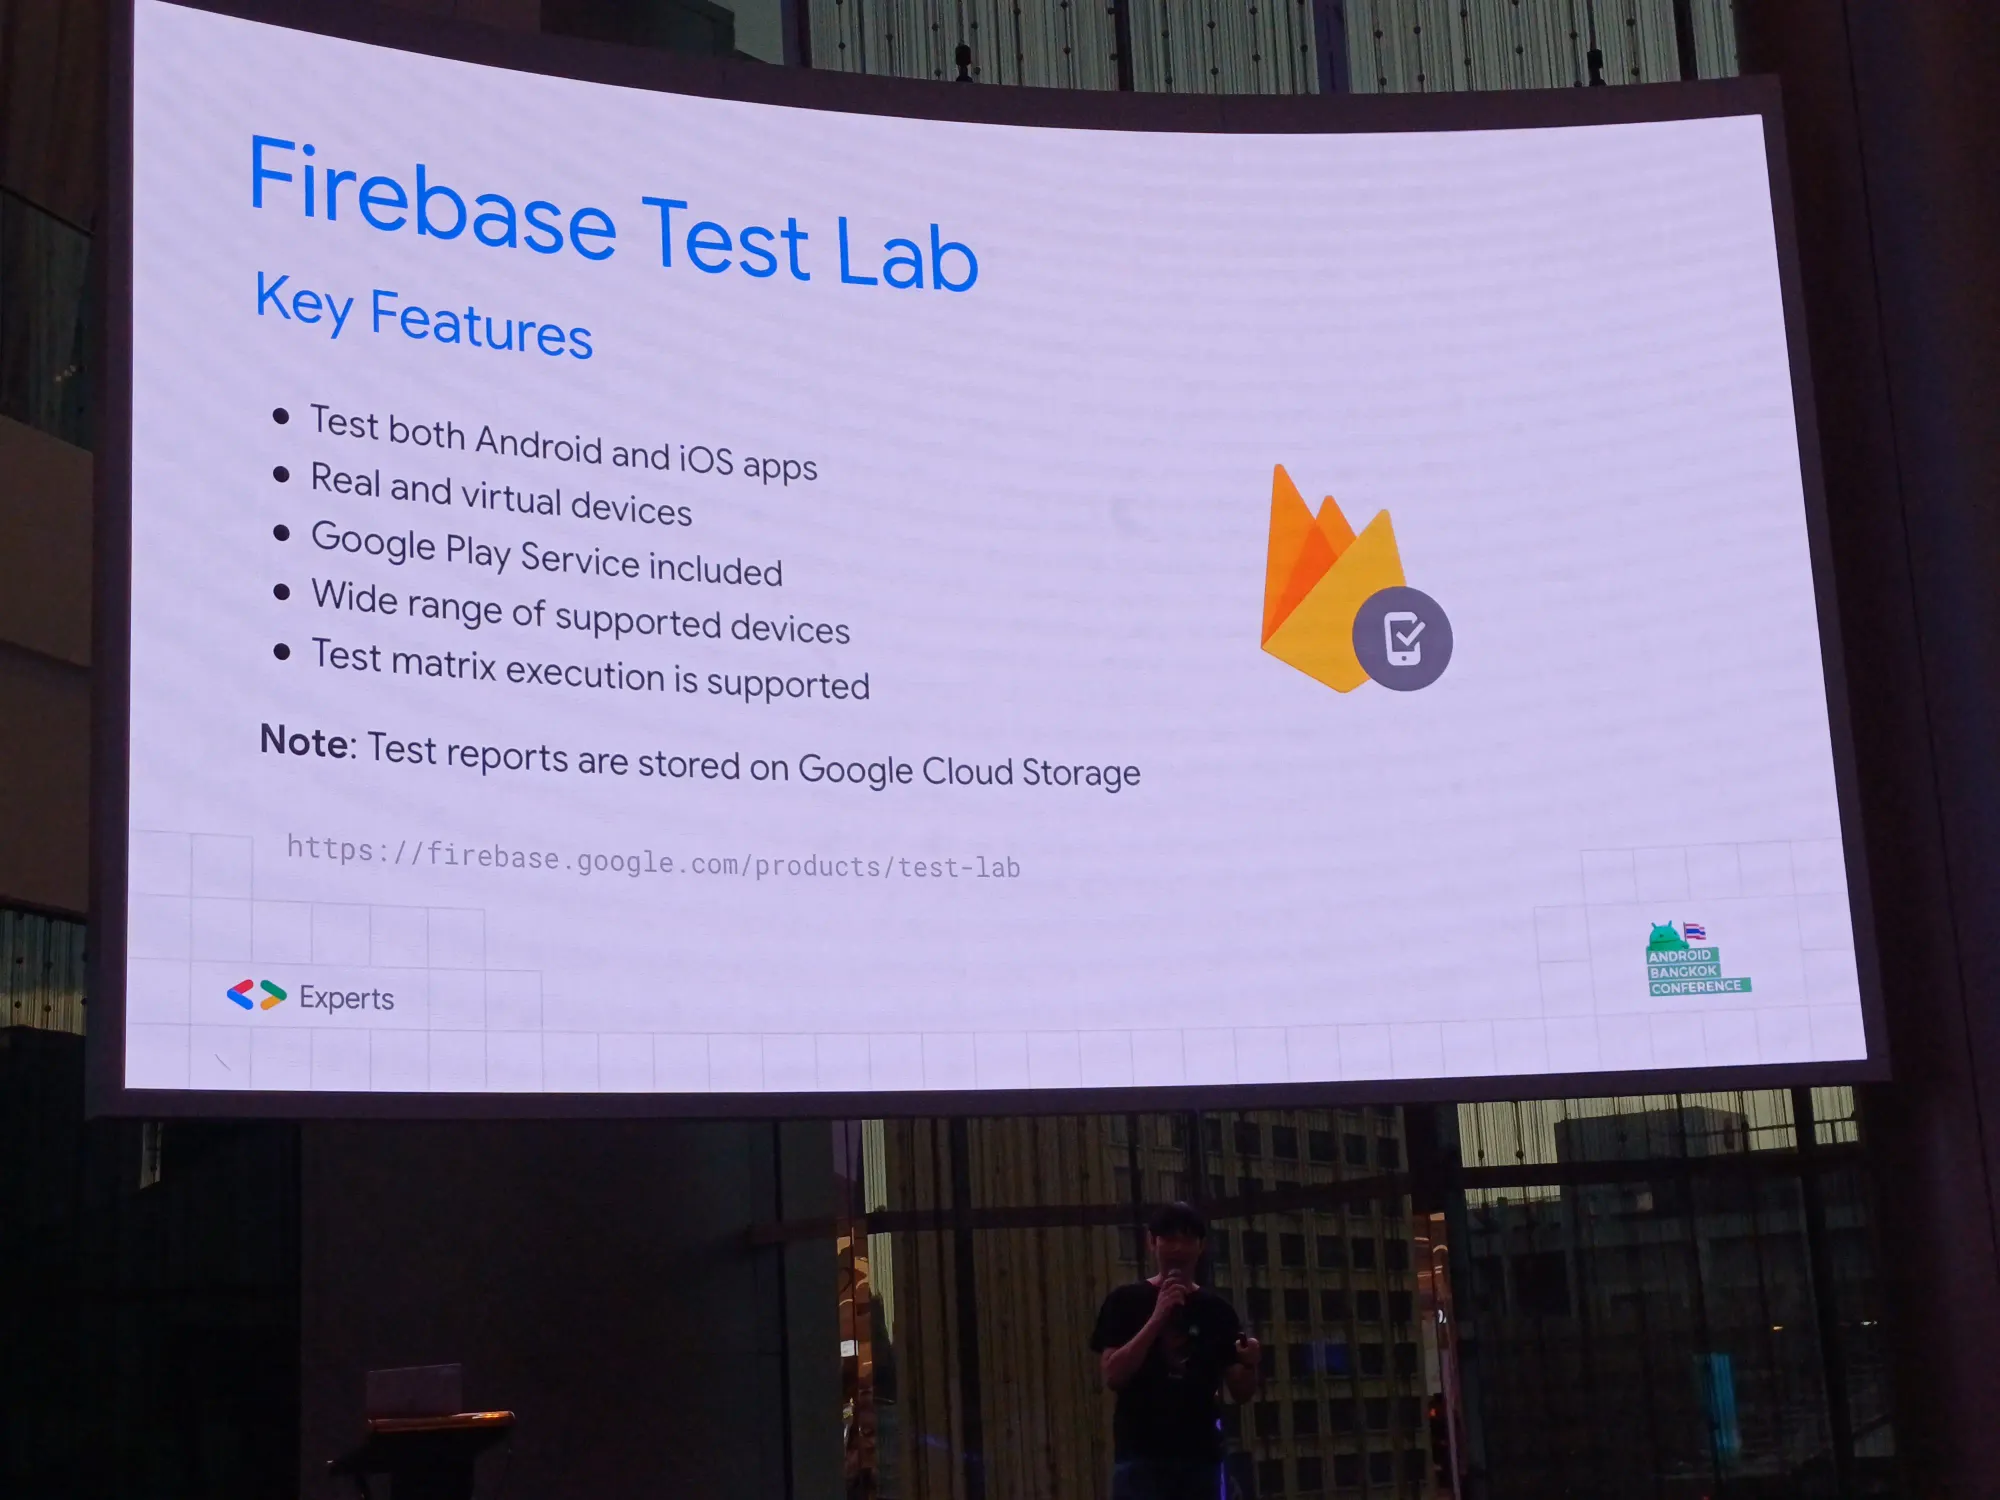
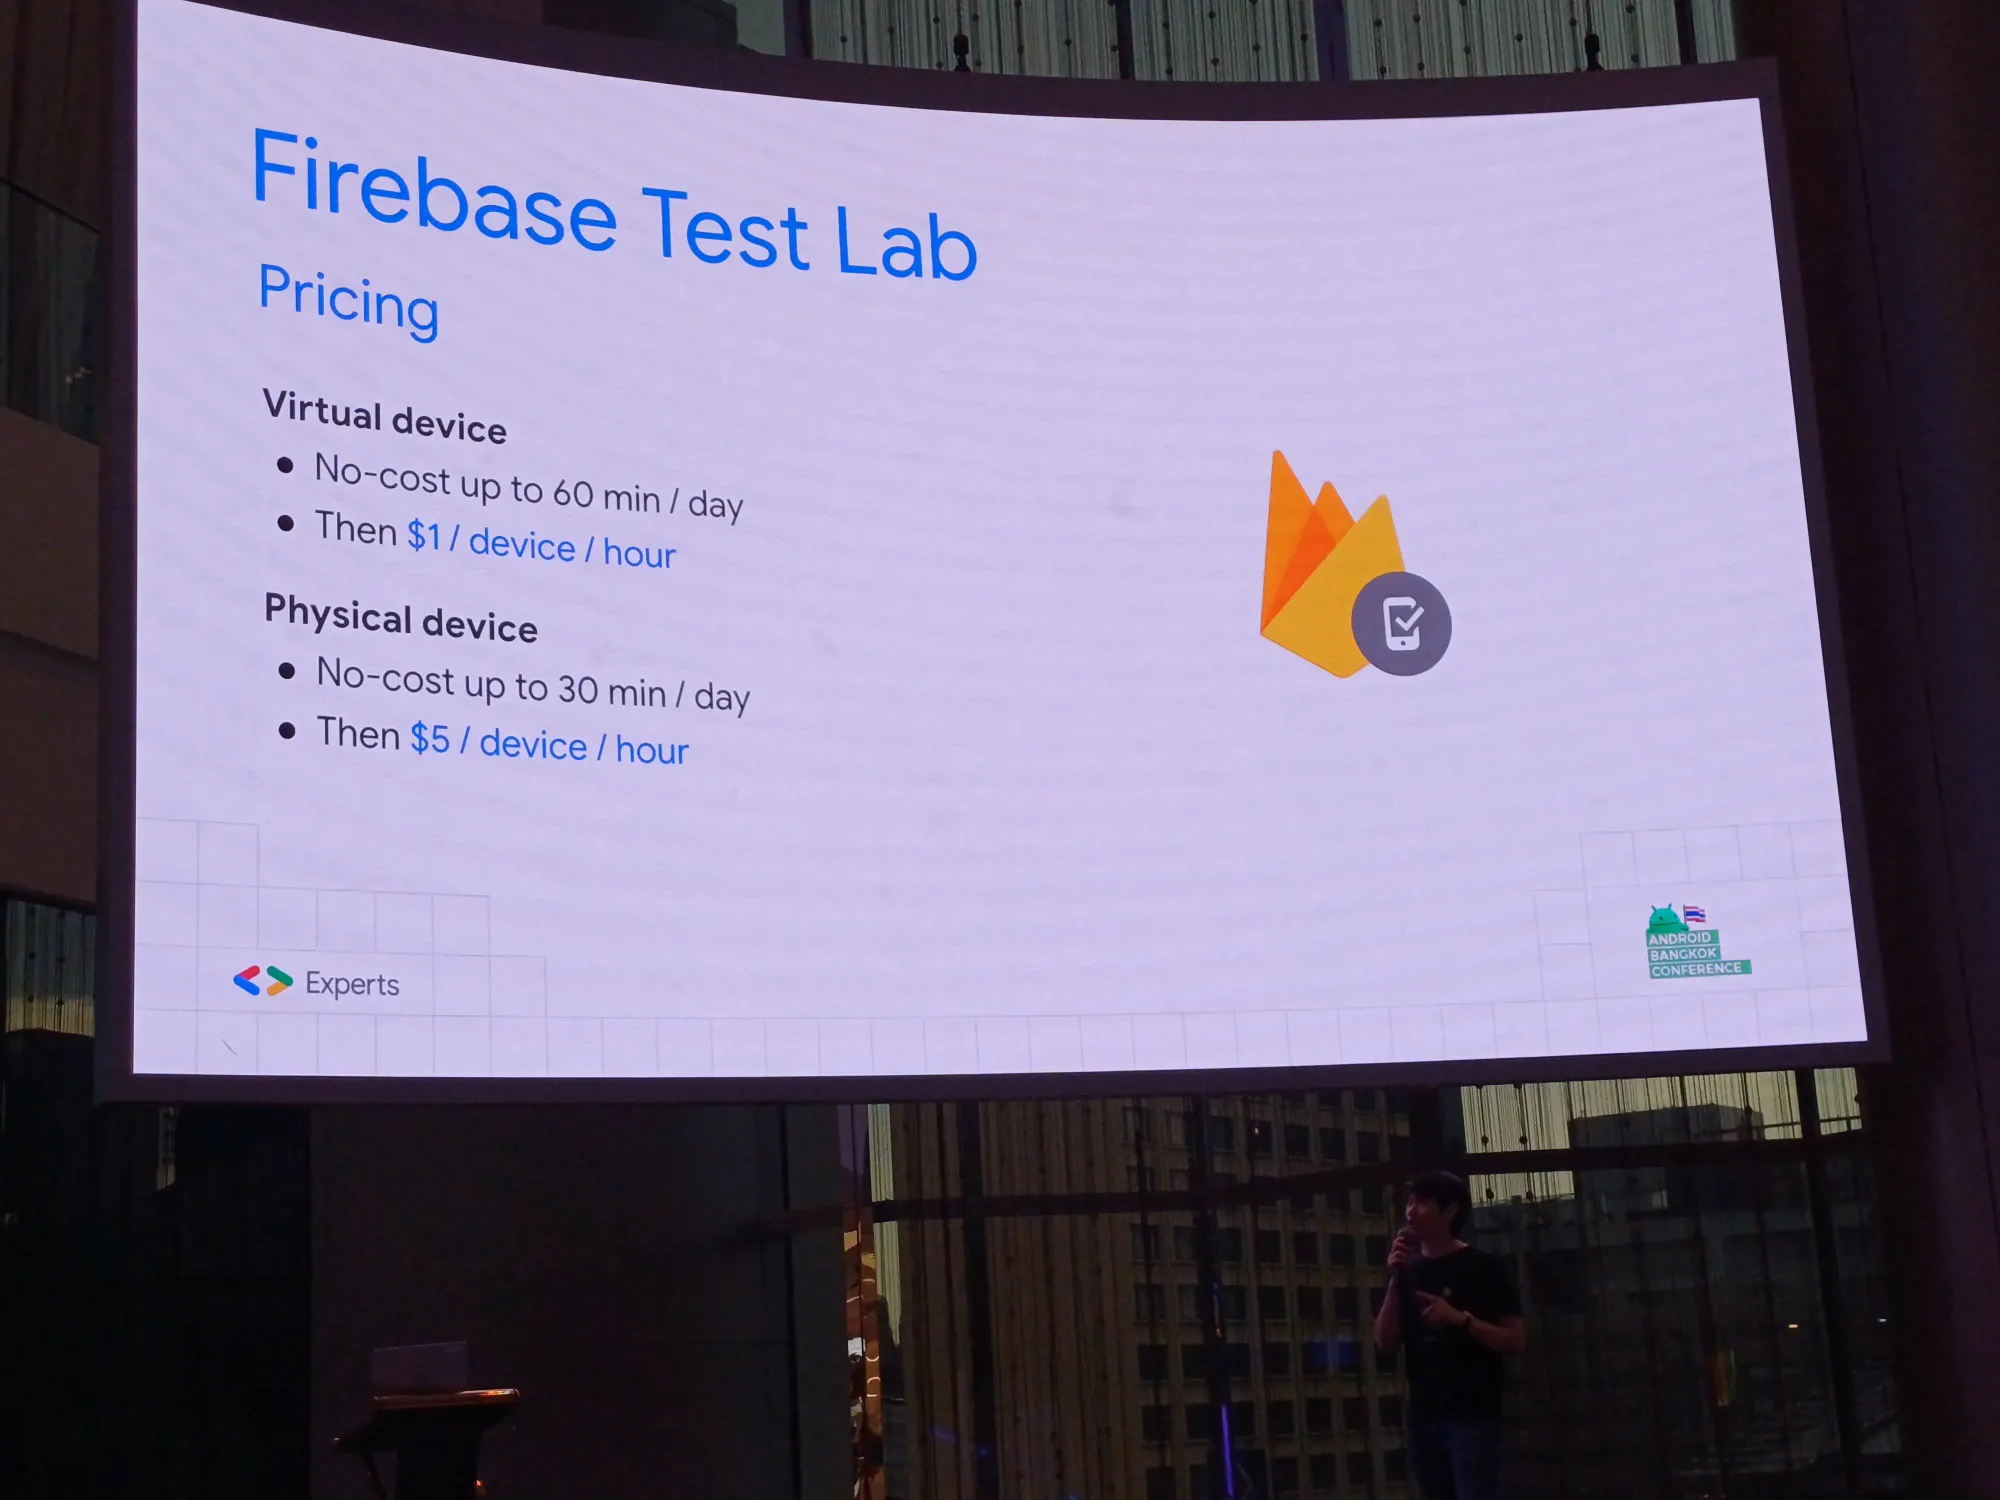
Firebase Test Lab: ได้ทั้ง iOS และ Andriod device, สามารถเลือกเครื่องได้ ทั้งเครื่องจริง และ virtual device, มีการติดตั้ง Google Play service ให้กับเครื่อง Android
note: test report เก็บใน Google Cloud Storage เลยไม่เลือกใช้ และเรื่องราคาด้วยส่วนนึง

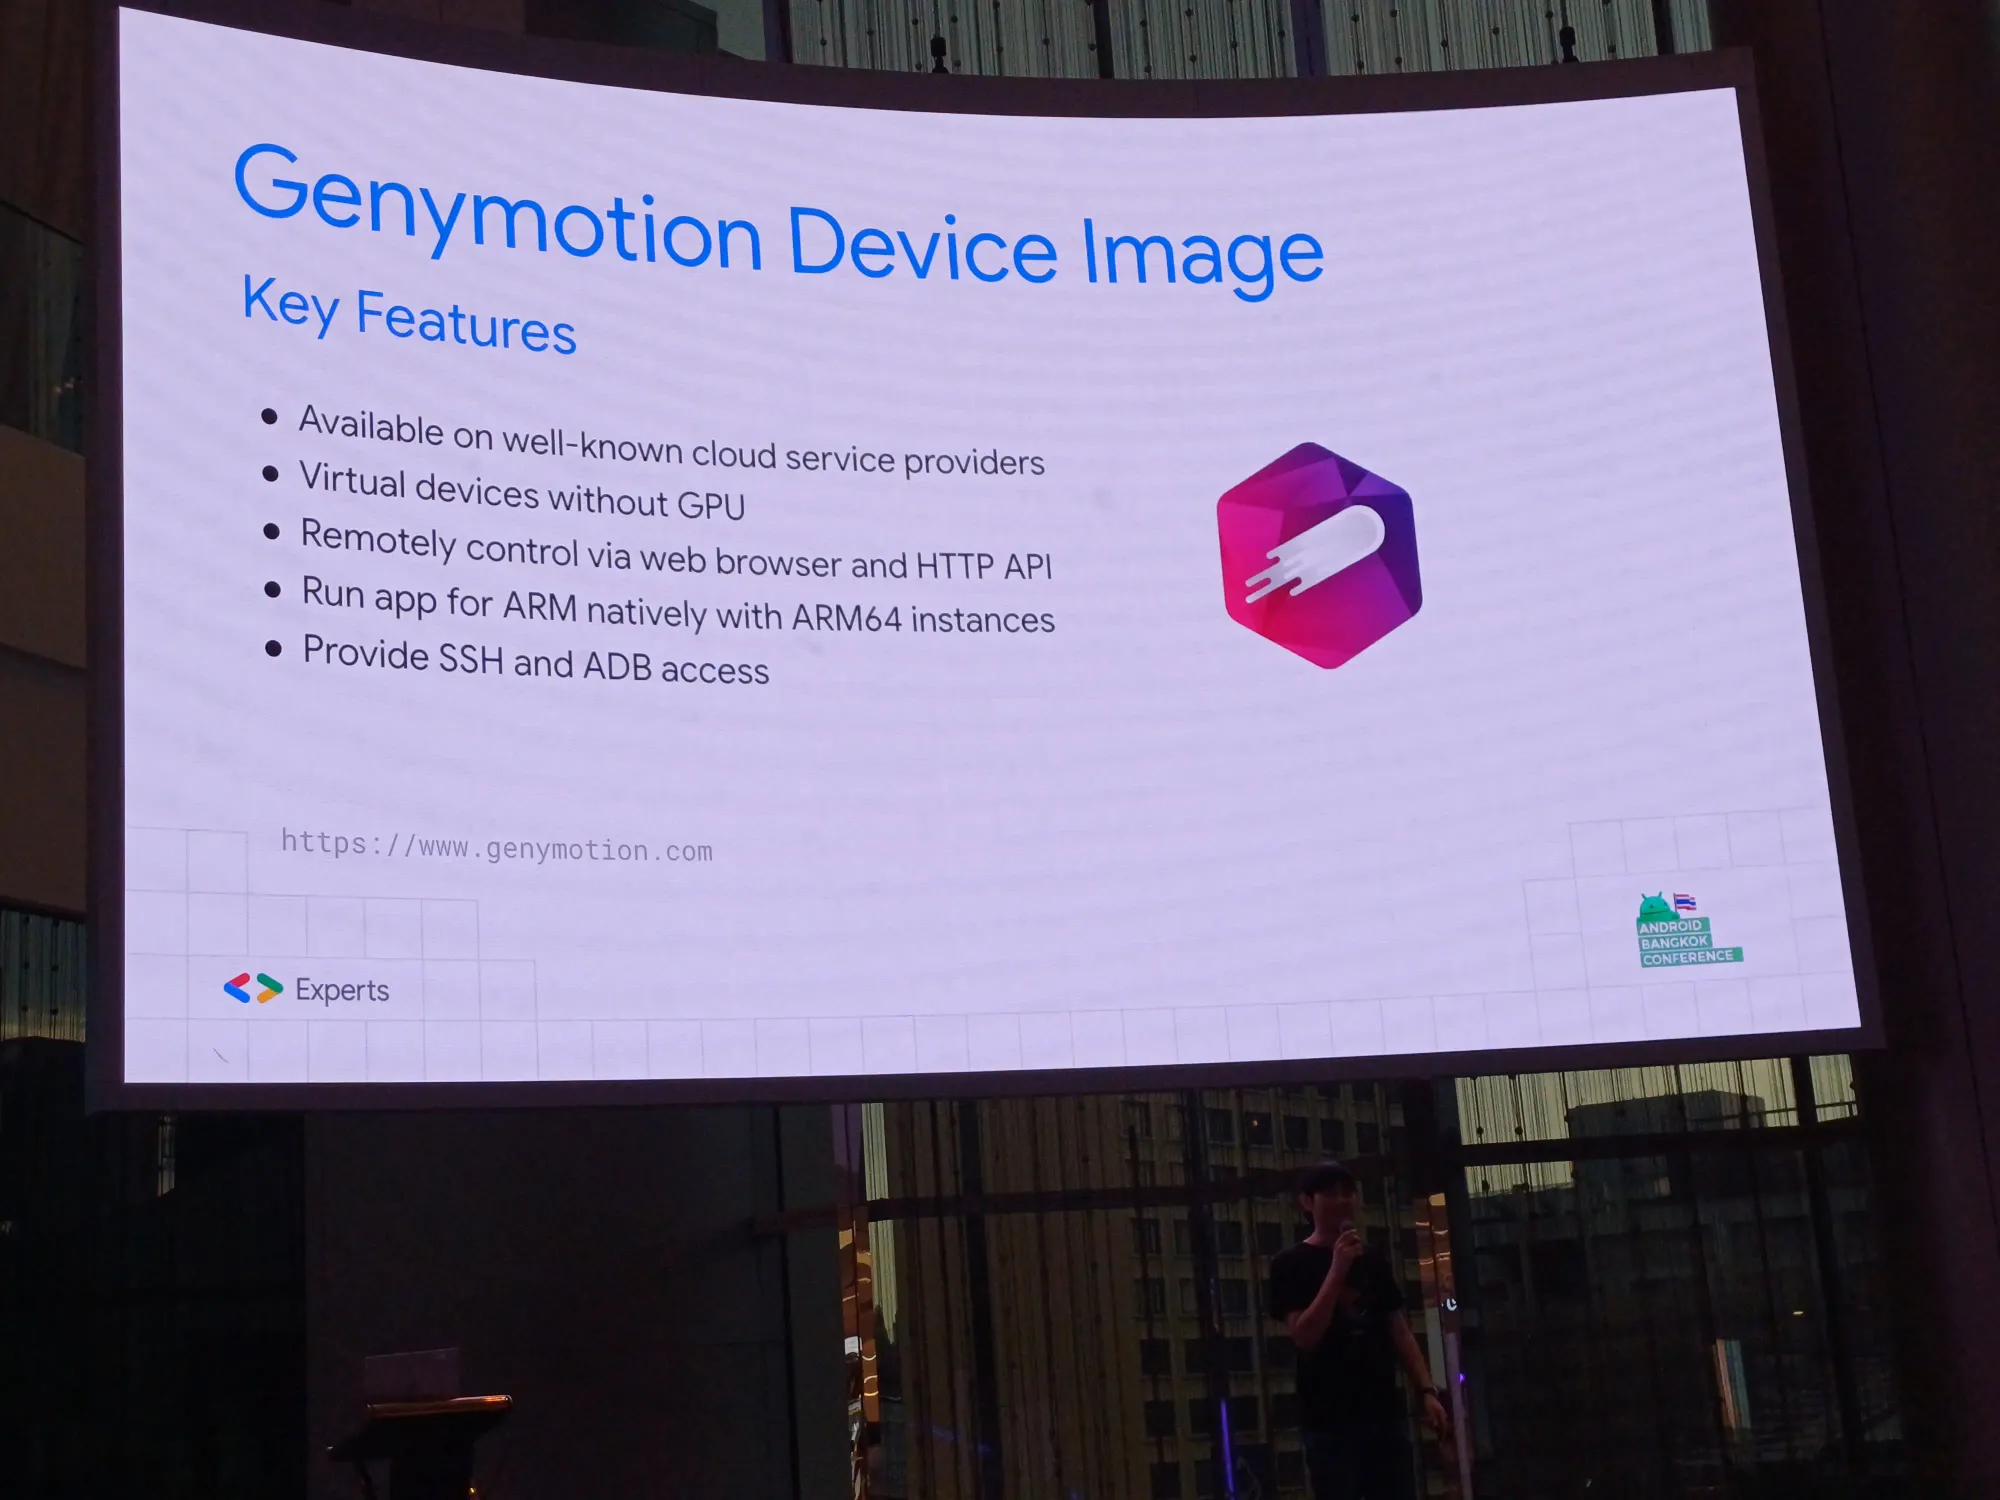
Genymotion Device Image: เขาเป็น cloud solution อยู่แล้ว มี vistual device ให้ cloud service provider มีการ sent CPI ให้รันลื่นโดยไม่มี GPU ได้ ถ้าไม่มีการ์ดจอแยกมาให้ และจ่ายเงินเป็น subscription โดยทาง LMWN ใช้ spec แรก คือ t4g.medium


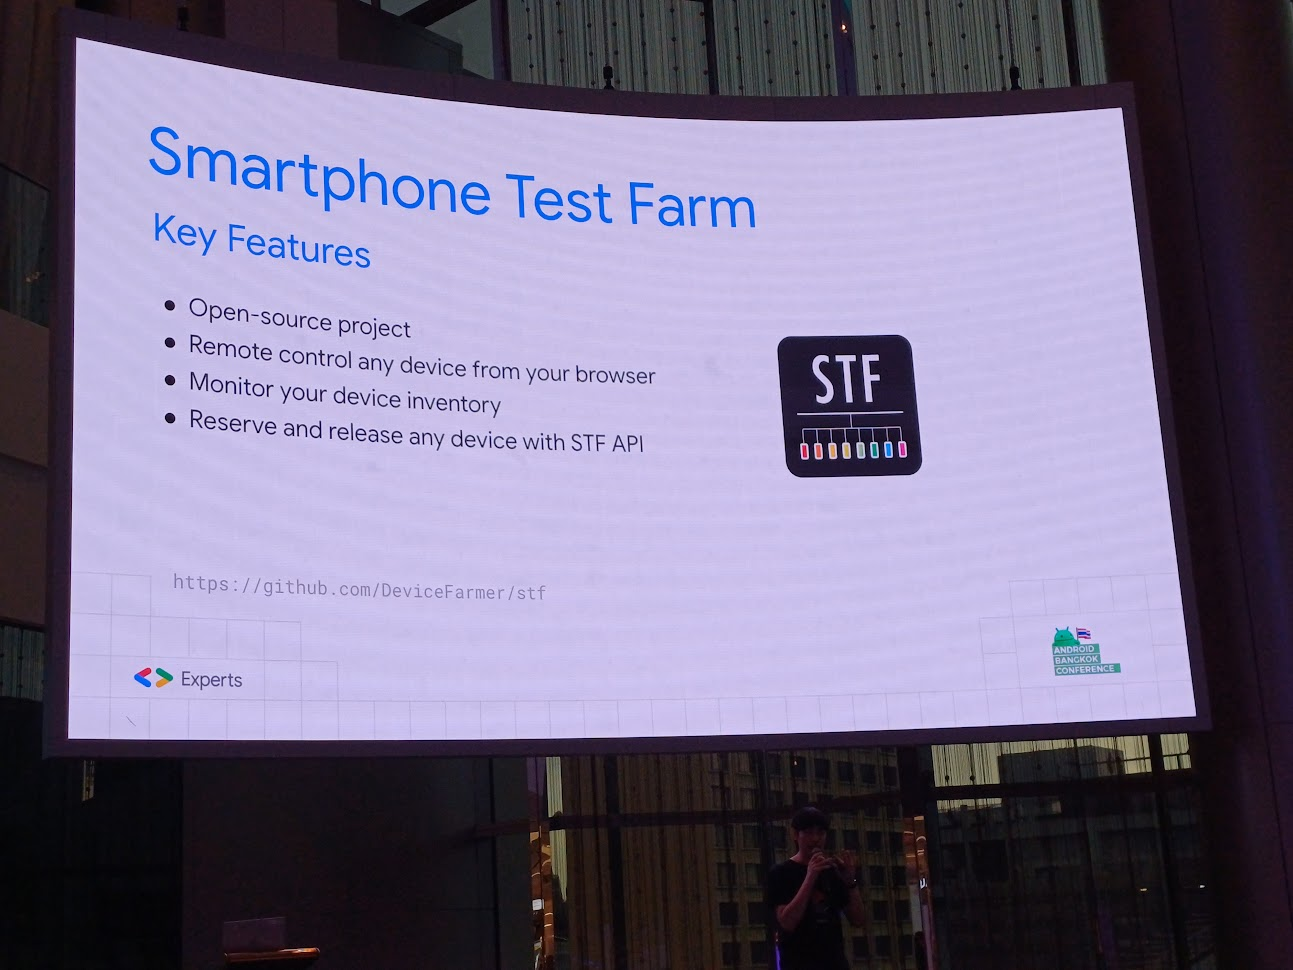
Smartphone Test Farm: เป็น farm device ของเรา เอาไป plug แล้วเอา pipeline เข้าไปได้ และเราเองก็ไม่อยากให้คนอื่นเข้าเครื่องที่เราใช้ เป็น open-source เข้าถึงได้ และจองคิวได้

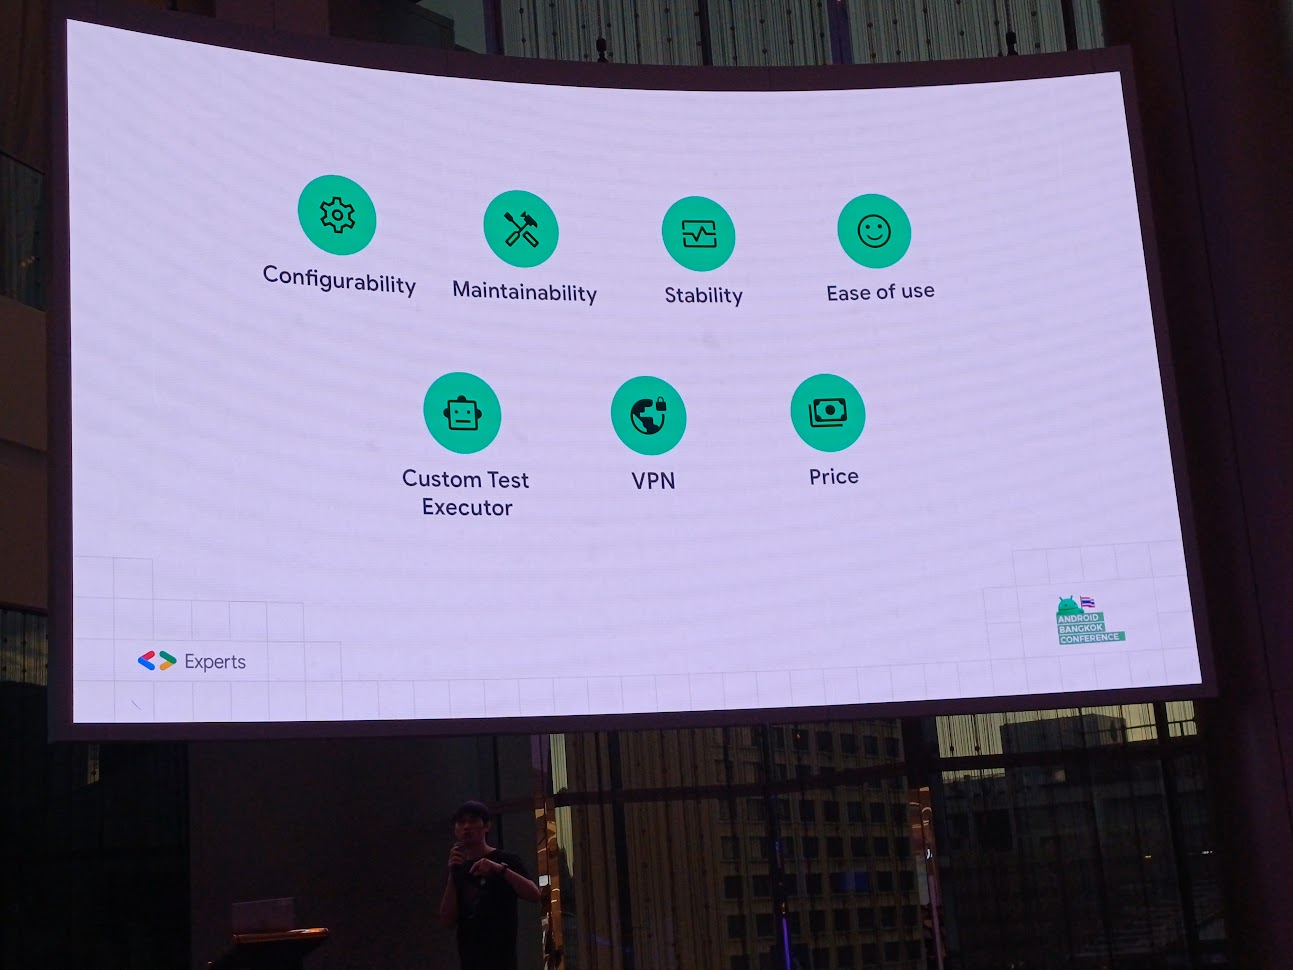
Criteria
- Configurability: สามารถ custom อะไรบางอย่างได้
- Maintainability: ถ้าคนในทีมลา หรือไม่อยู่ ก็สามารถรับช่วงต่อได้
- Stability: merge ของวันศุกร์แล้ว เจ้า CI ตุย พังแล้ว failed ได้ในเวลาไม่นาน
- Ease of use: ใช้งานได้ง่าย
- Custom Test Executor: สามารถ custom การ test ได้
- VPN: privacy VPN เพื่อความปลอดภัย
- Price: ราคาก็เรื่องสำคัญ
Benchmark
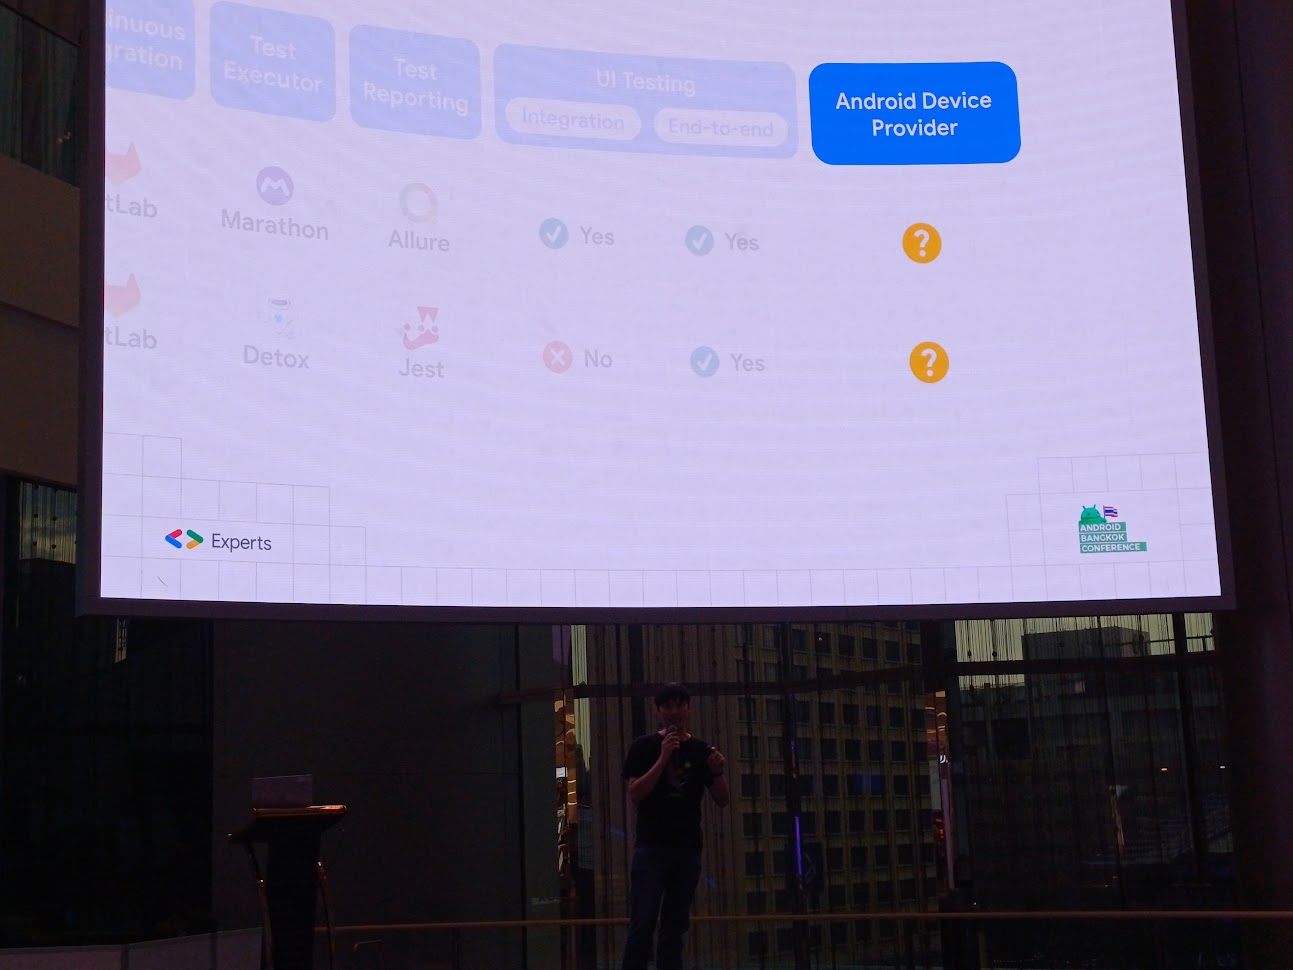
Firebase Test Lab ไม่สามารถ Custom Test Executor ได้ ไหนจะเรื่อง VPN เลยถูกปัดตกไป

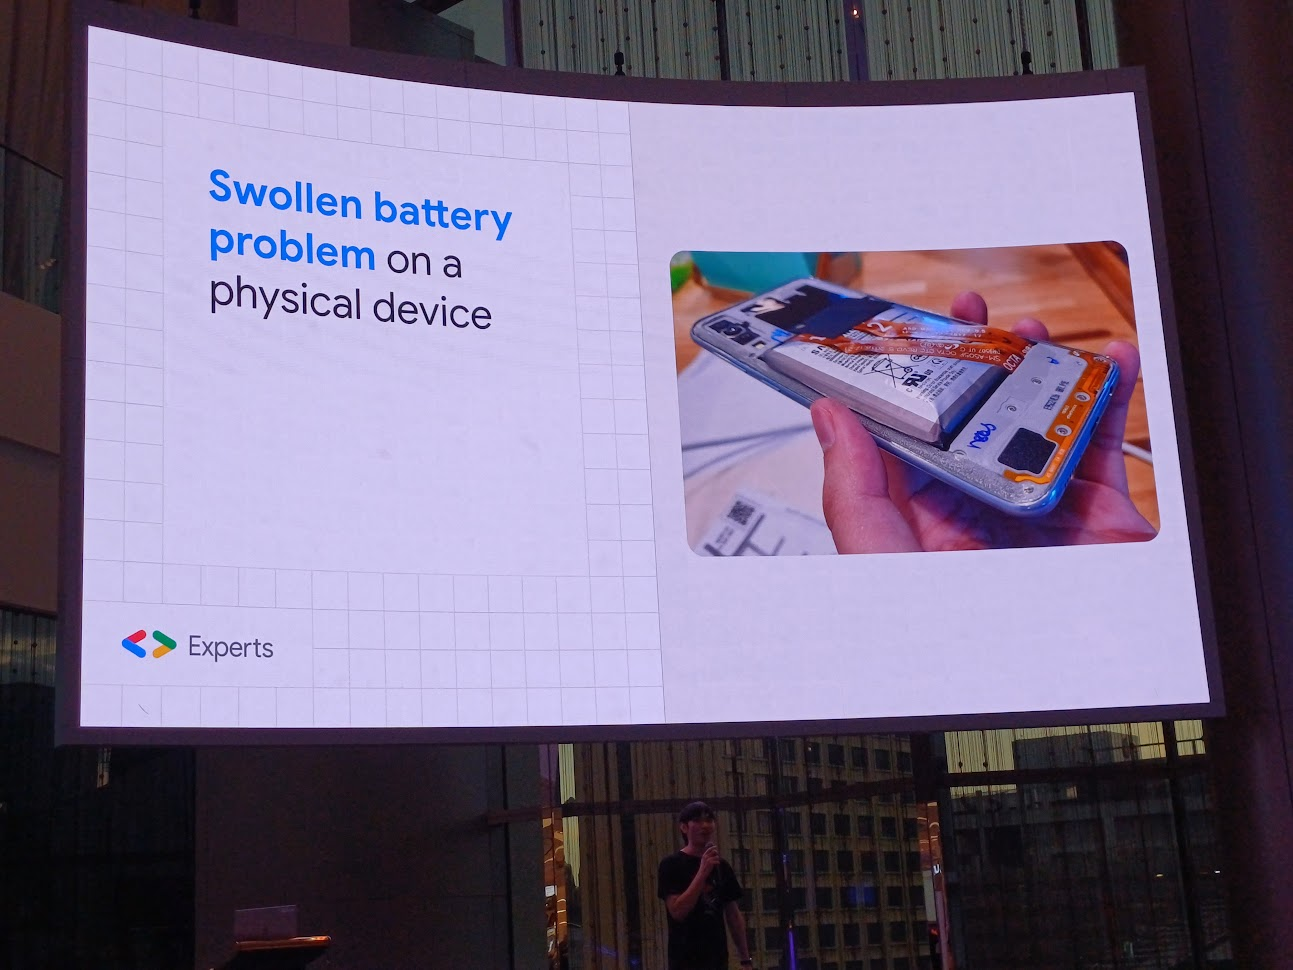
ส่วน Smartphone Test Farm คือการทำ farm device แล้วทำการ run automate 1 ปีผ่านไป แบตบวม เปลี่ยนแบตก็ยากอีก ถ้าสมมุติเราทำ farm device แล้วมันระเบิดขึ้นมาล่ะ? ก็เลยเลือกใช้ virsual device มากกว่า
และทั้งหมดเป็นเหตุผลที่ Genymotion Device Image ชนะจ้า
Job
และการทำงานใน process นี้ มี Build App → Run UI Test → Generate Test Report
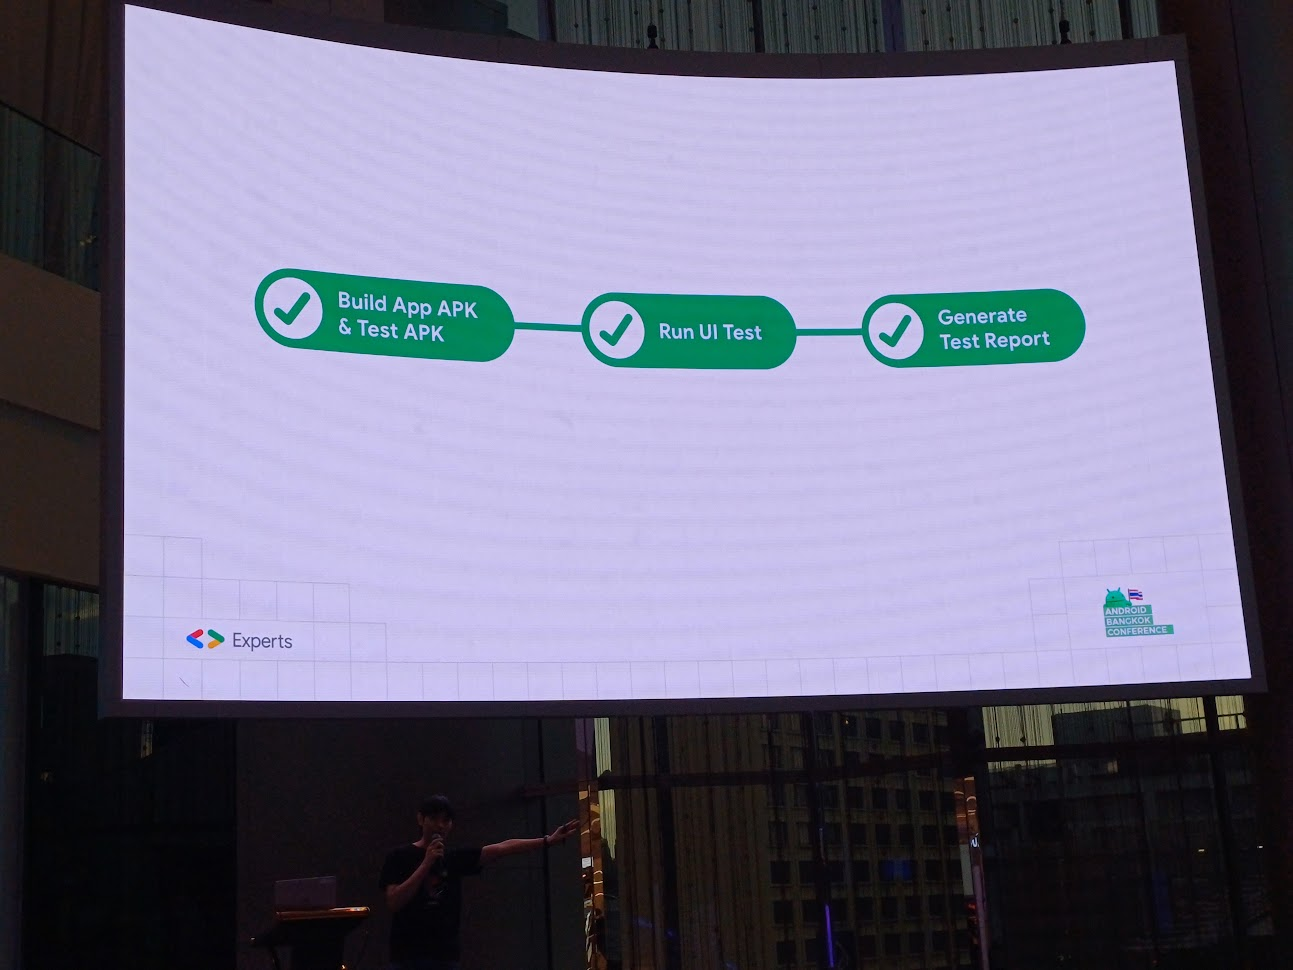
โดยเรา focus ไปที่ Run UI Test
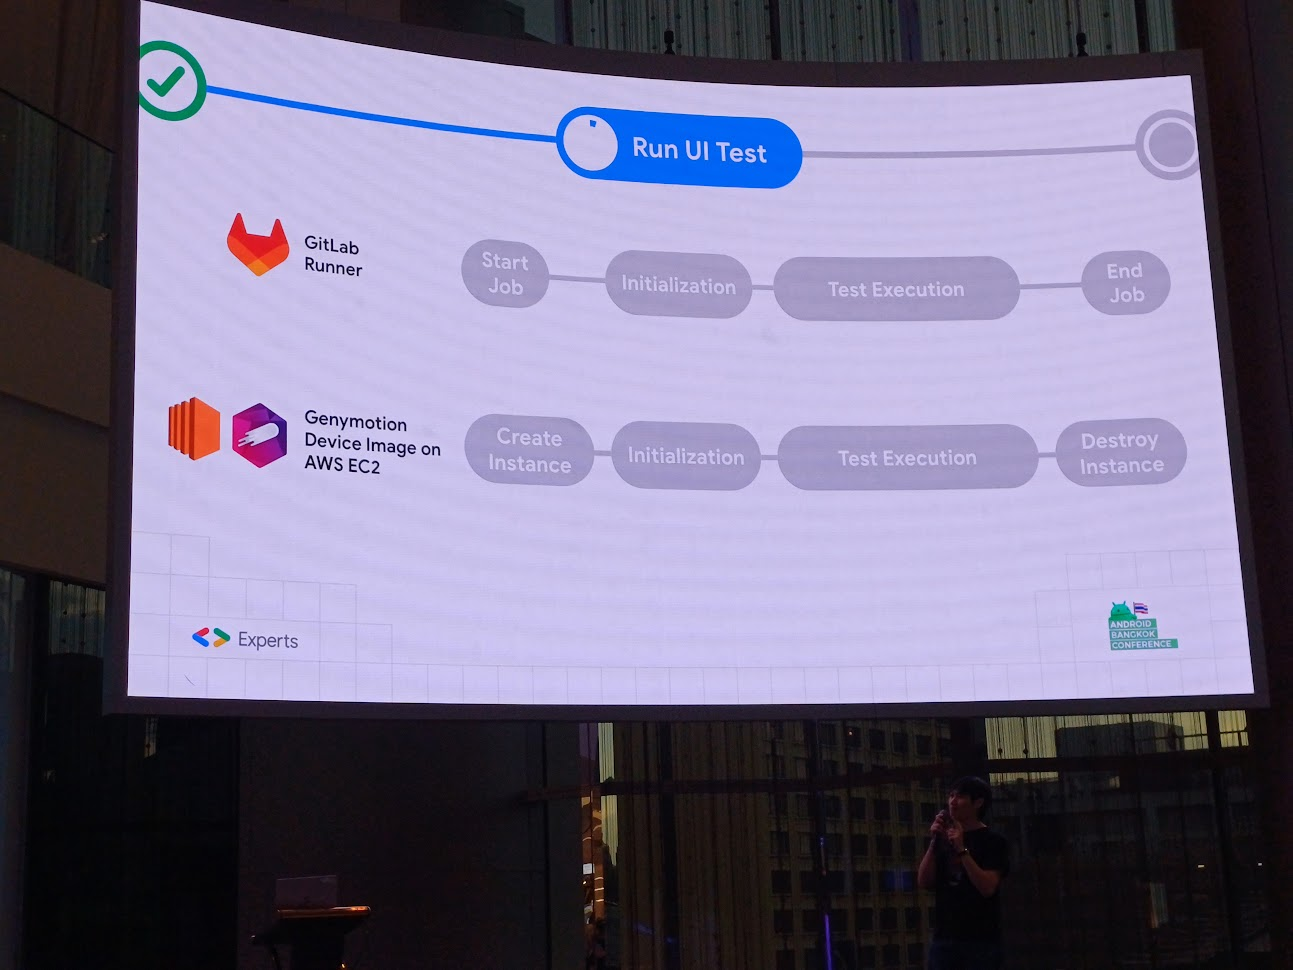
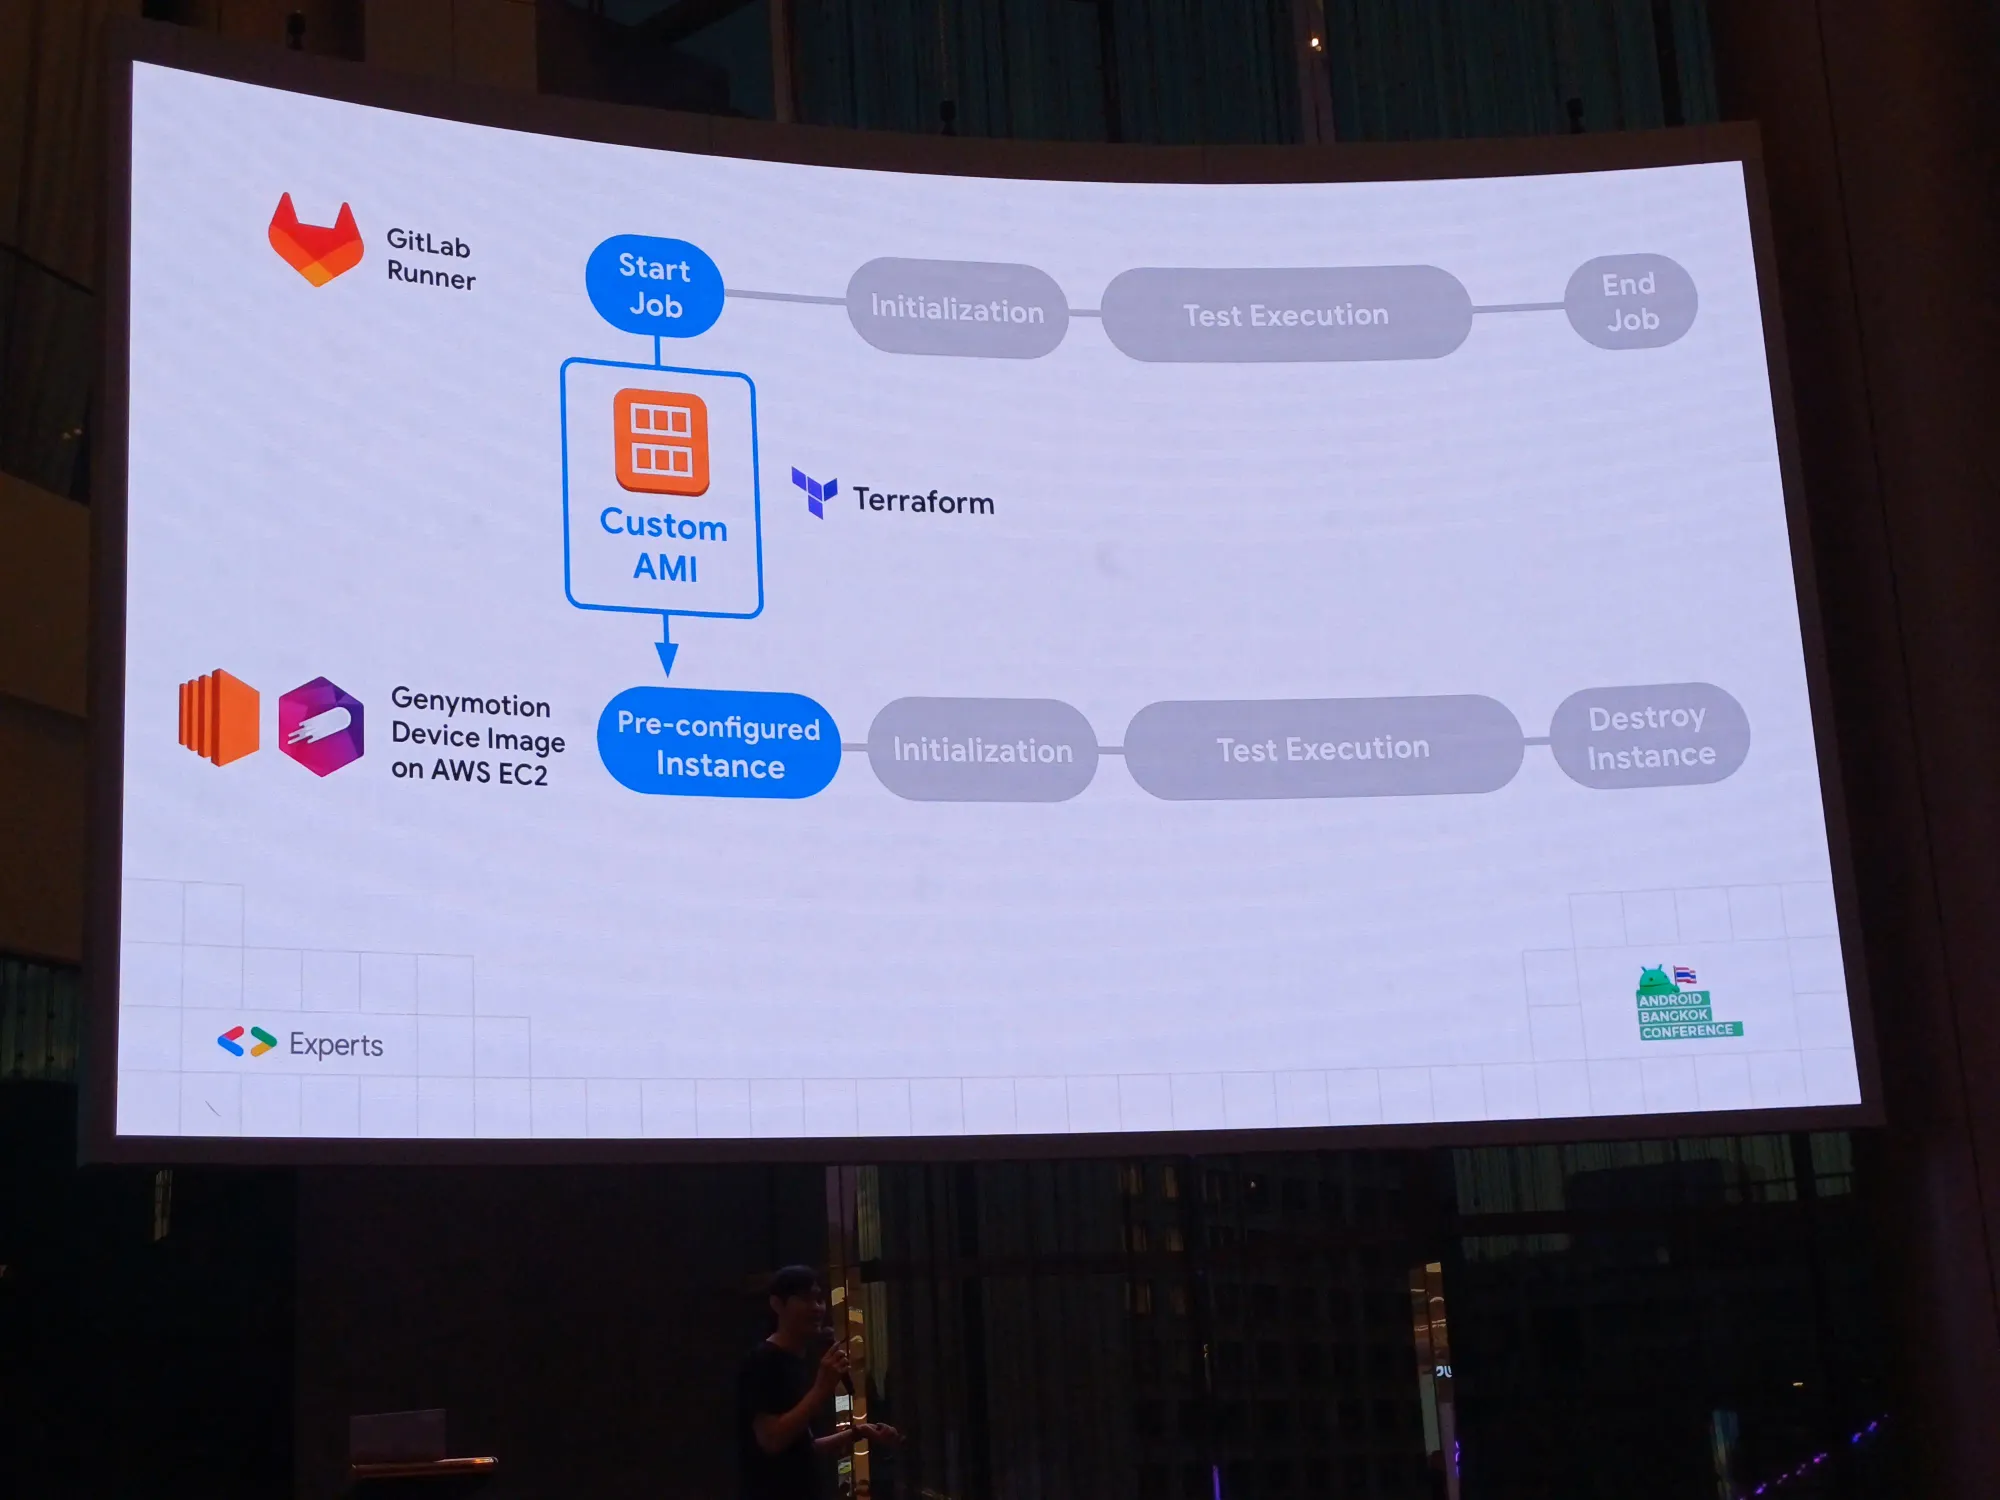
Gitlab Runner มีเครื่อง run ให้ start โดยการเปิด instance แล้วพอจบให้ทำลายทิ้ง
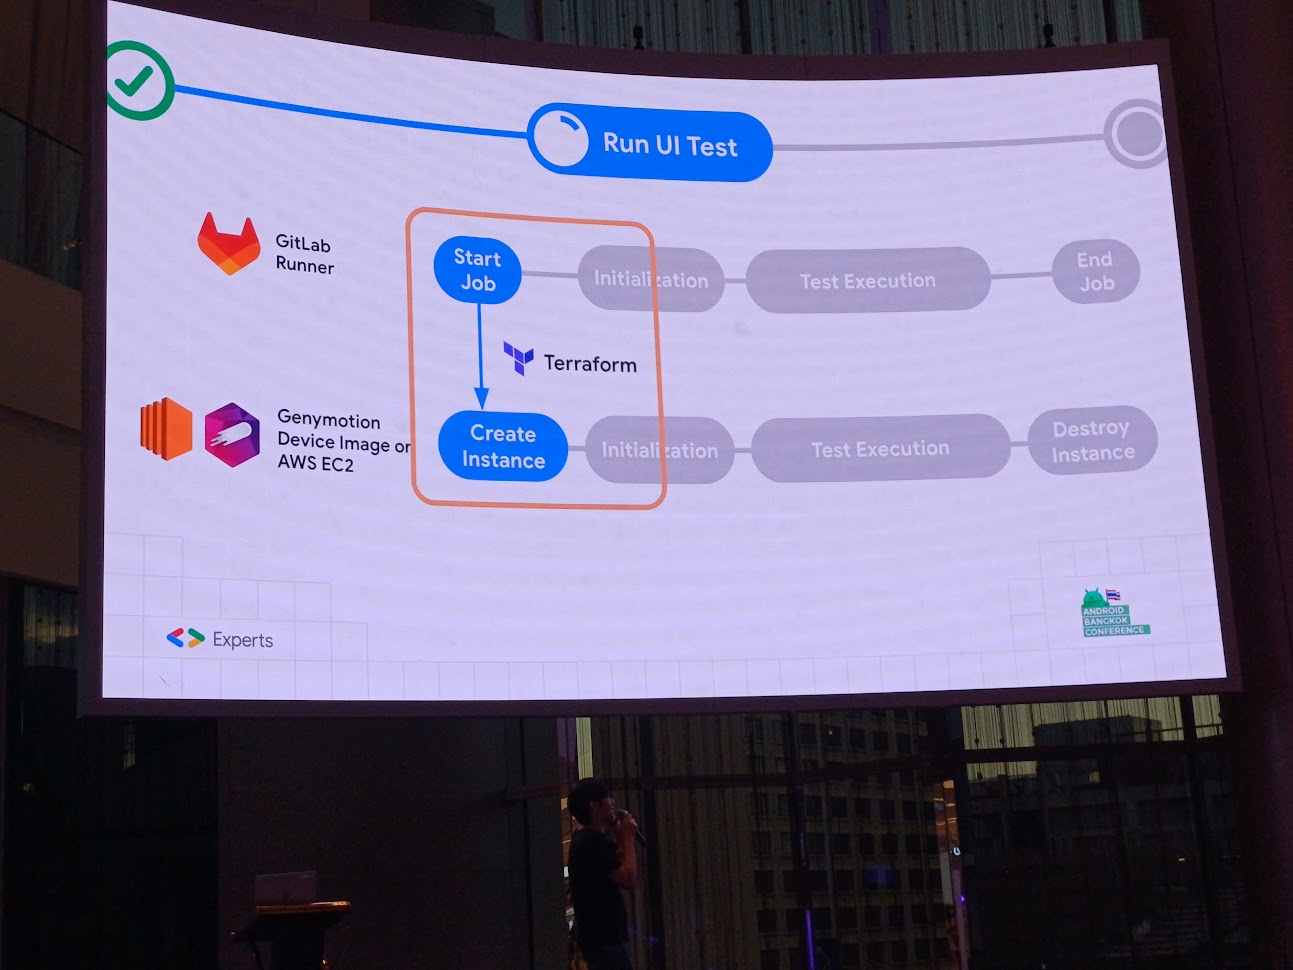
- Start Job → Create Instance: Terraform สร้าง instance บน cloud service ให้สร้าง image บน Genymotion บน EC2
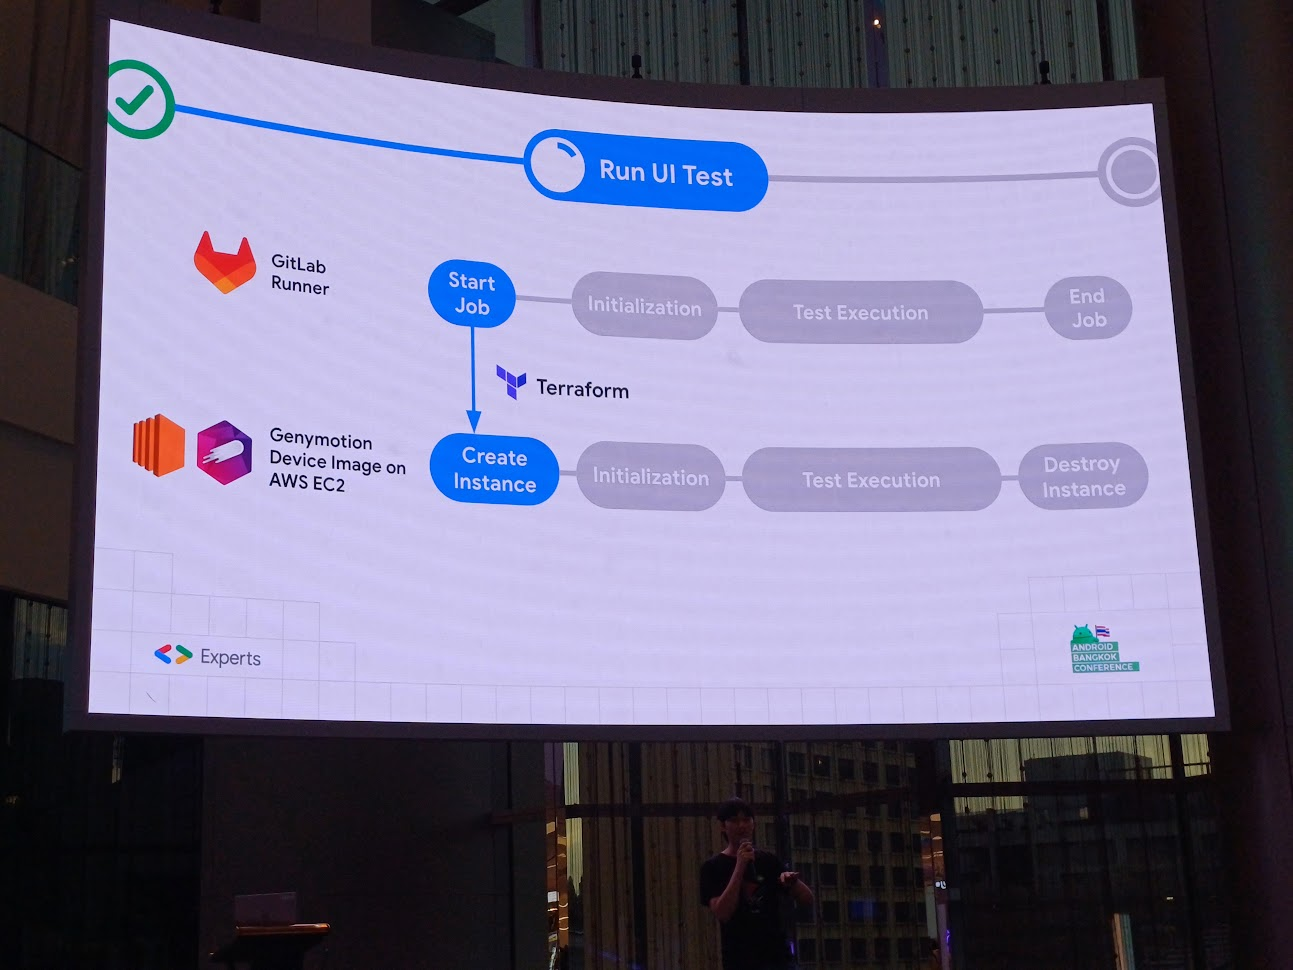
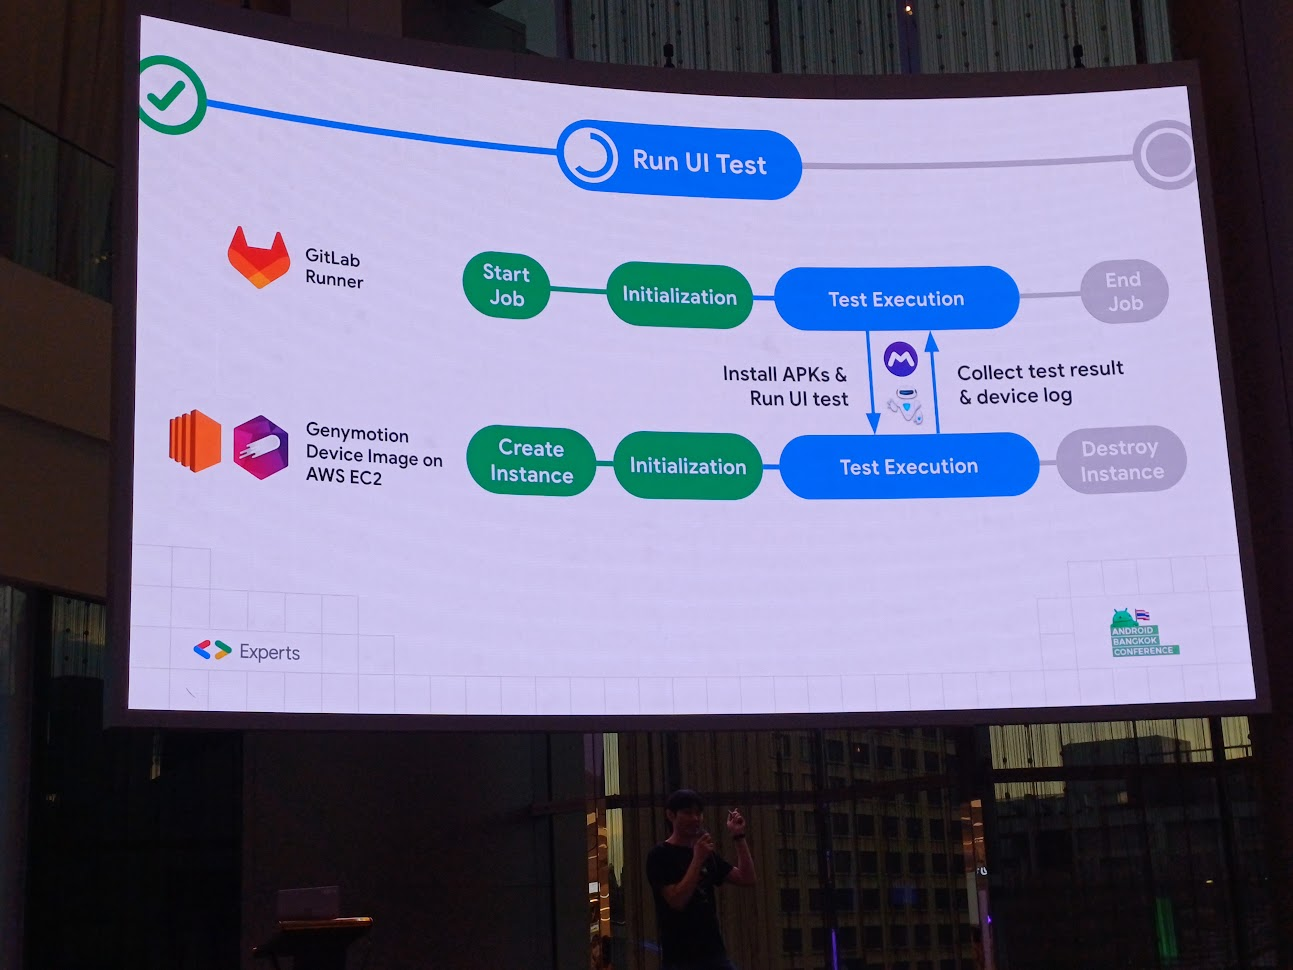
- Initialization: ใช้ Shell script ในการ connect ABD
- Test Execution: ตัว runner ทำการ install APK และทำ UI Test และบน Genymotion เก็บ test result และ device log ส่งกลับไปที่ Gitlab
- End Job → Destory Instance: Terraform สั่งให้ทำลาย instance
แต่ตัว Gitlab คิดว่ามันพังไม่ได้ ดังนั้นไม่ควรทำงานเกิน 1 ชั่วโมง จึงมี cron job มาครอบ
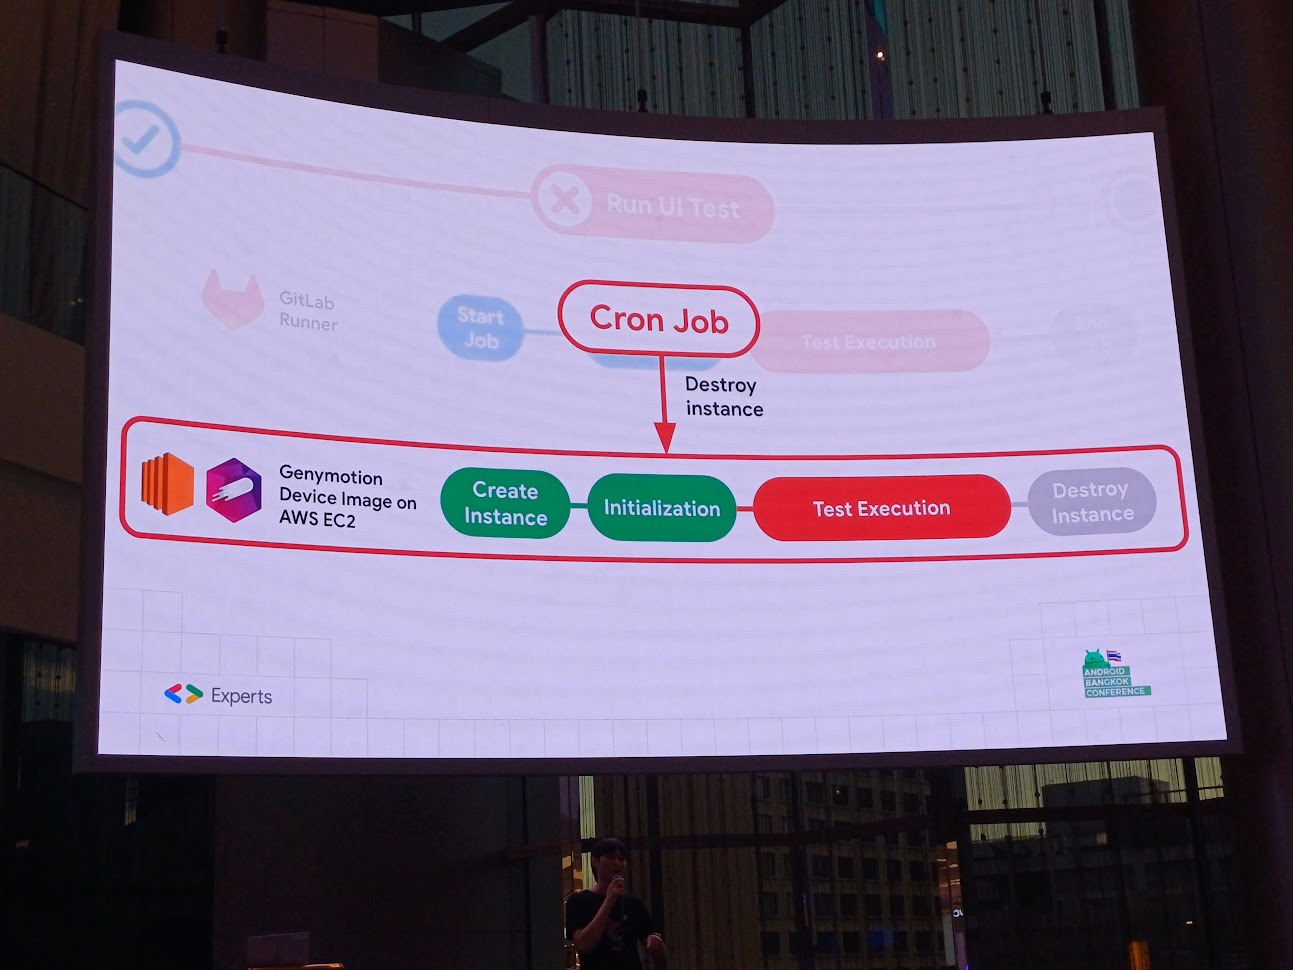
ใส่ instance แล้วเดี๋ยวตัว Terraform จะ check ว่าอันไหนยังรอดอยู่บ้าง และช่วยแจกจ่ายงาน
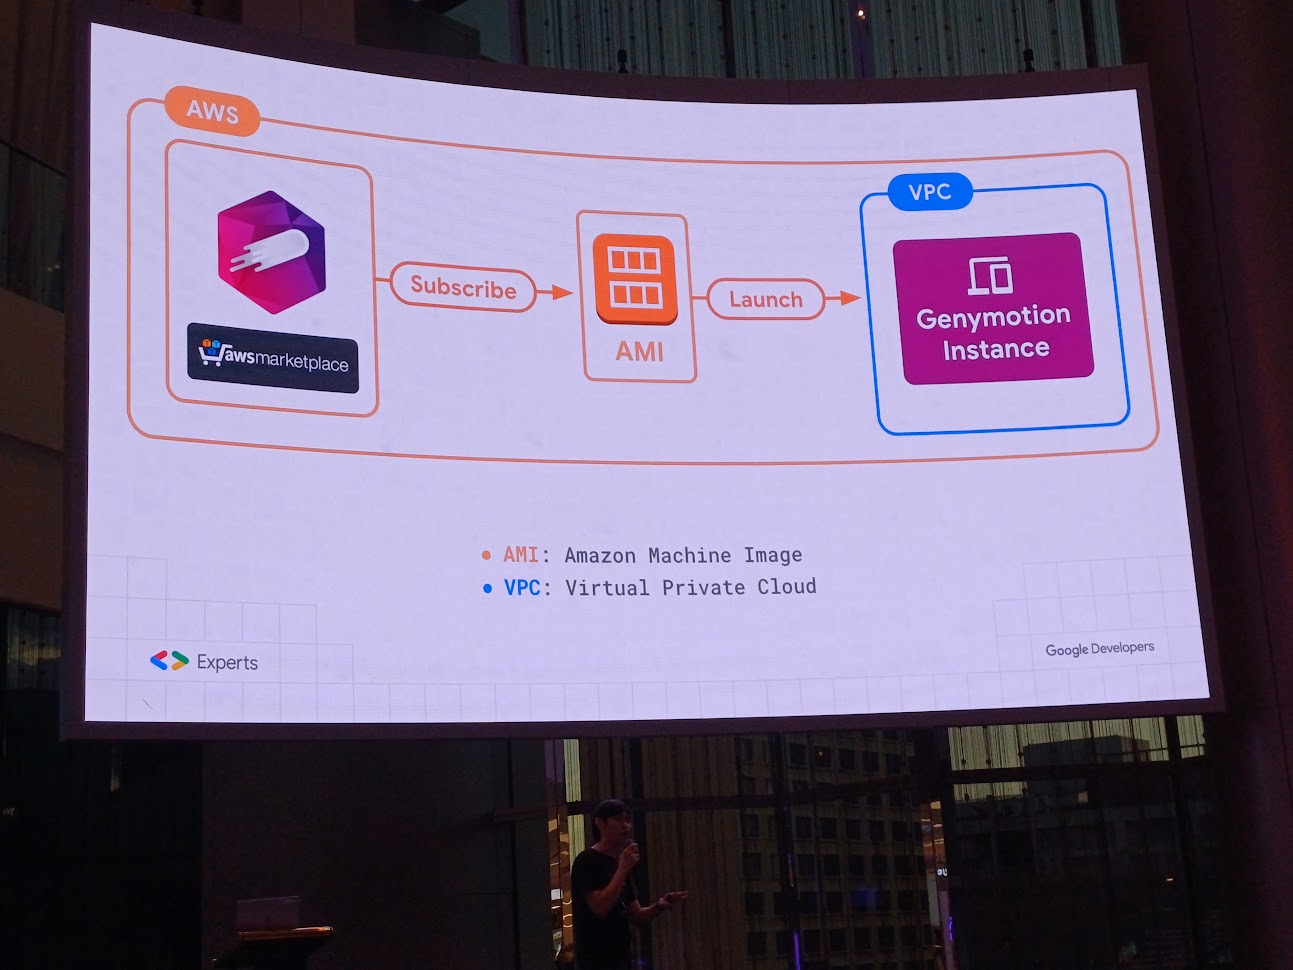
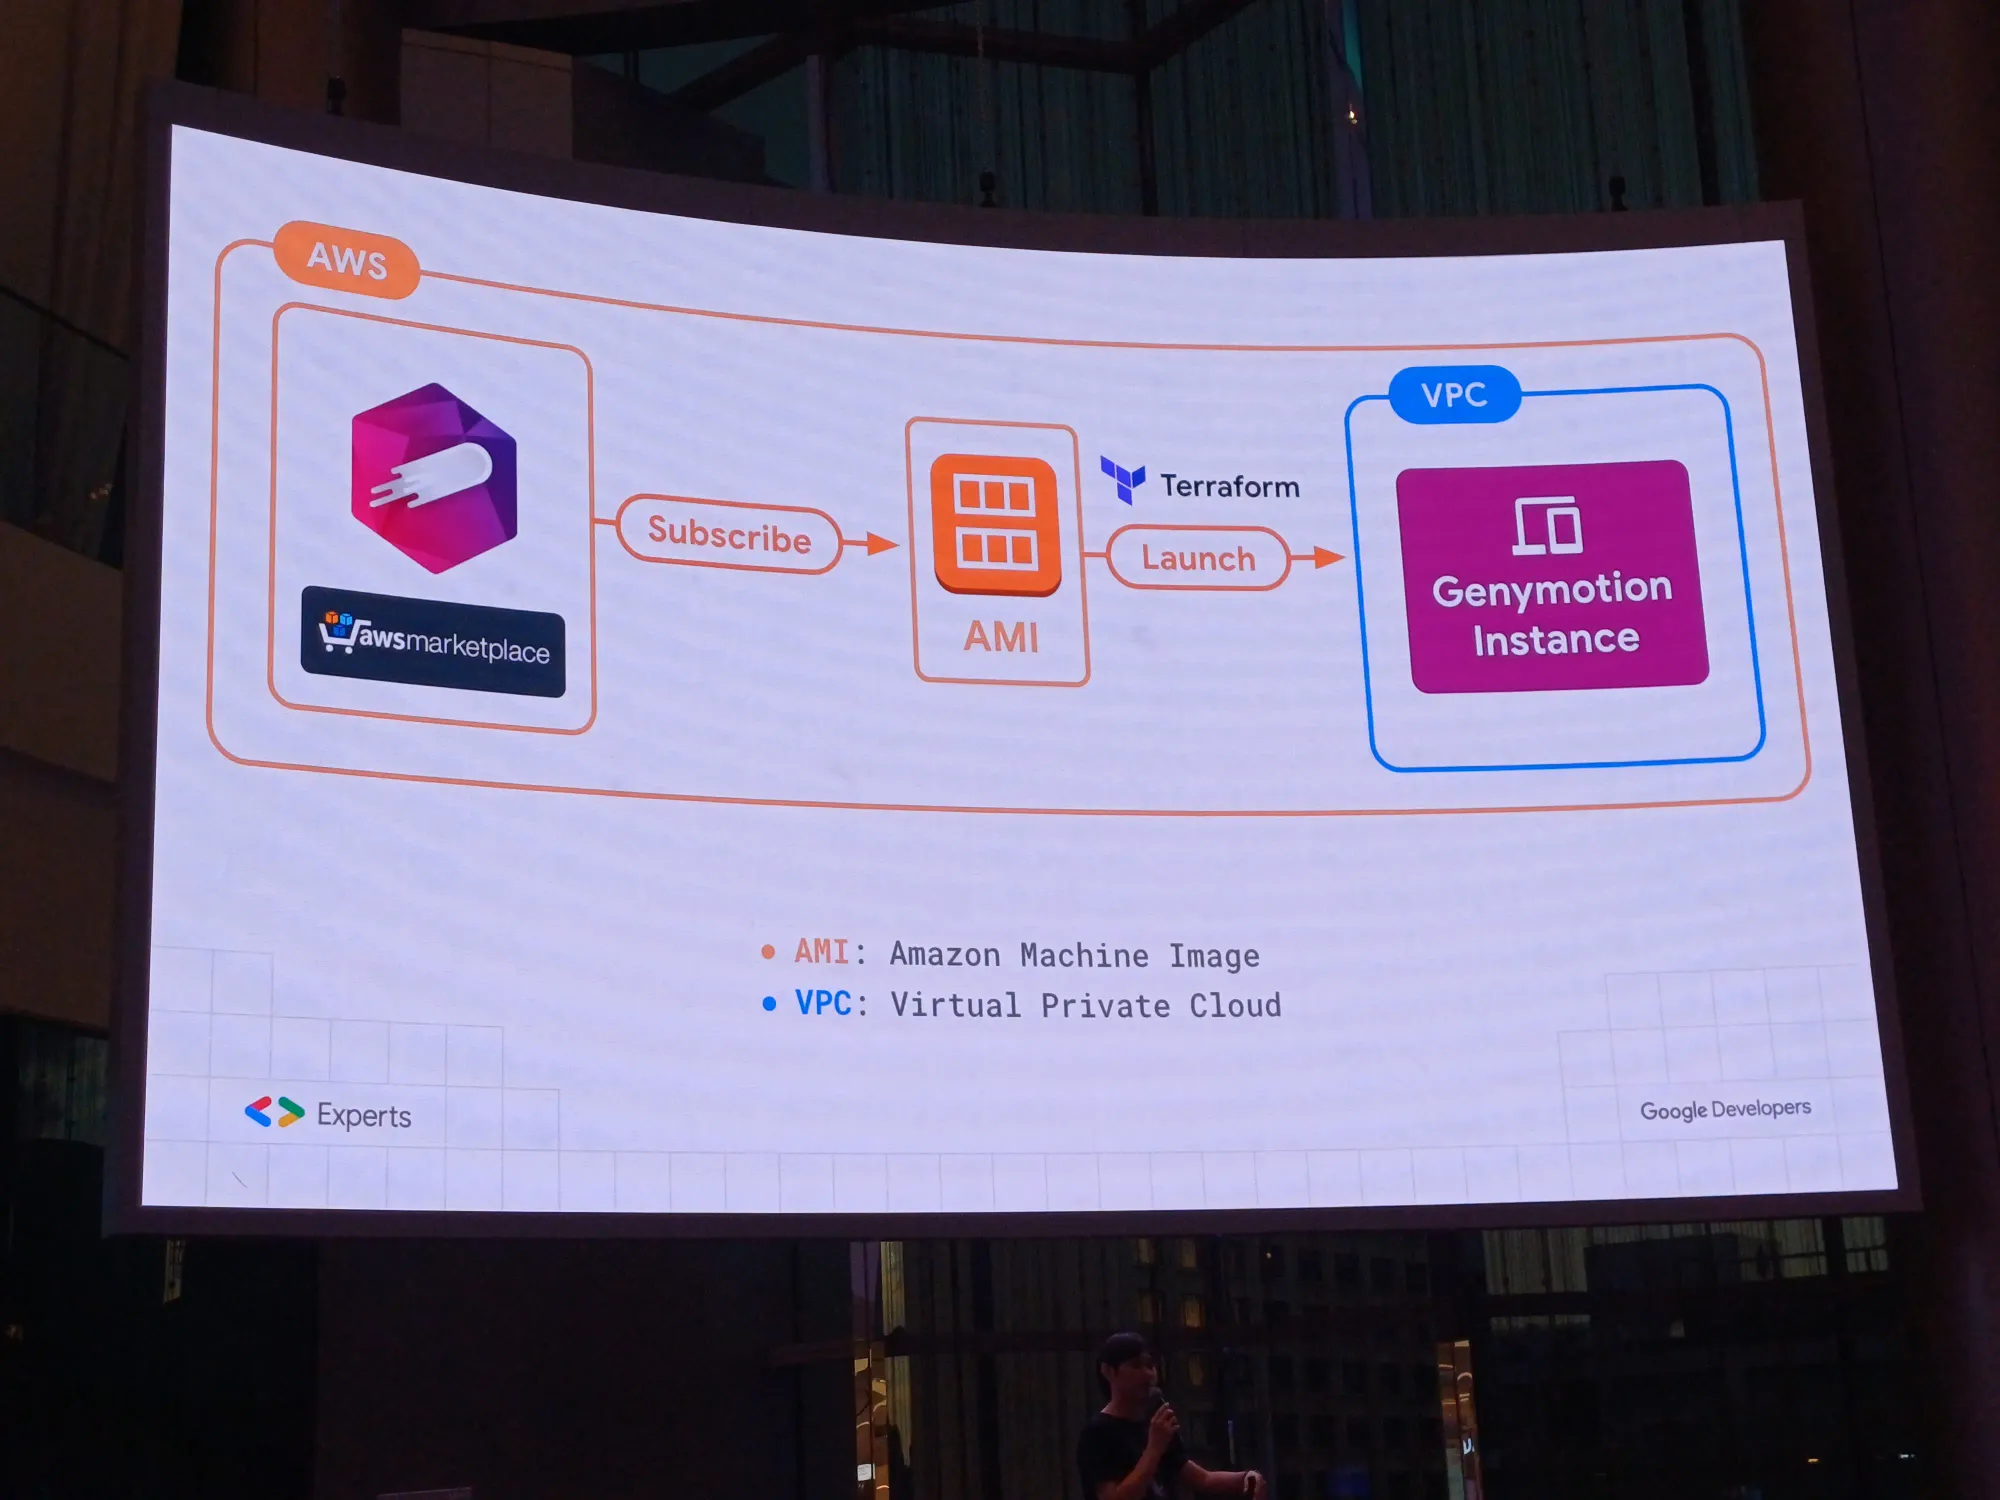
subscript บน marketplace ได้ AMI ที่เขาสร้างมาให้บน system แล้วเอา id มาสร้าง instance เพื่อ run บน Android device
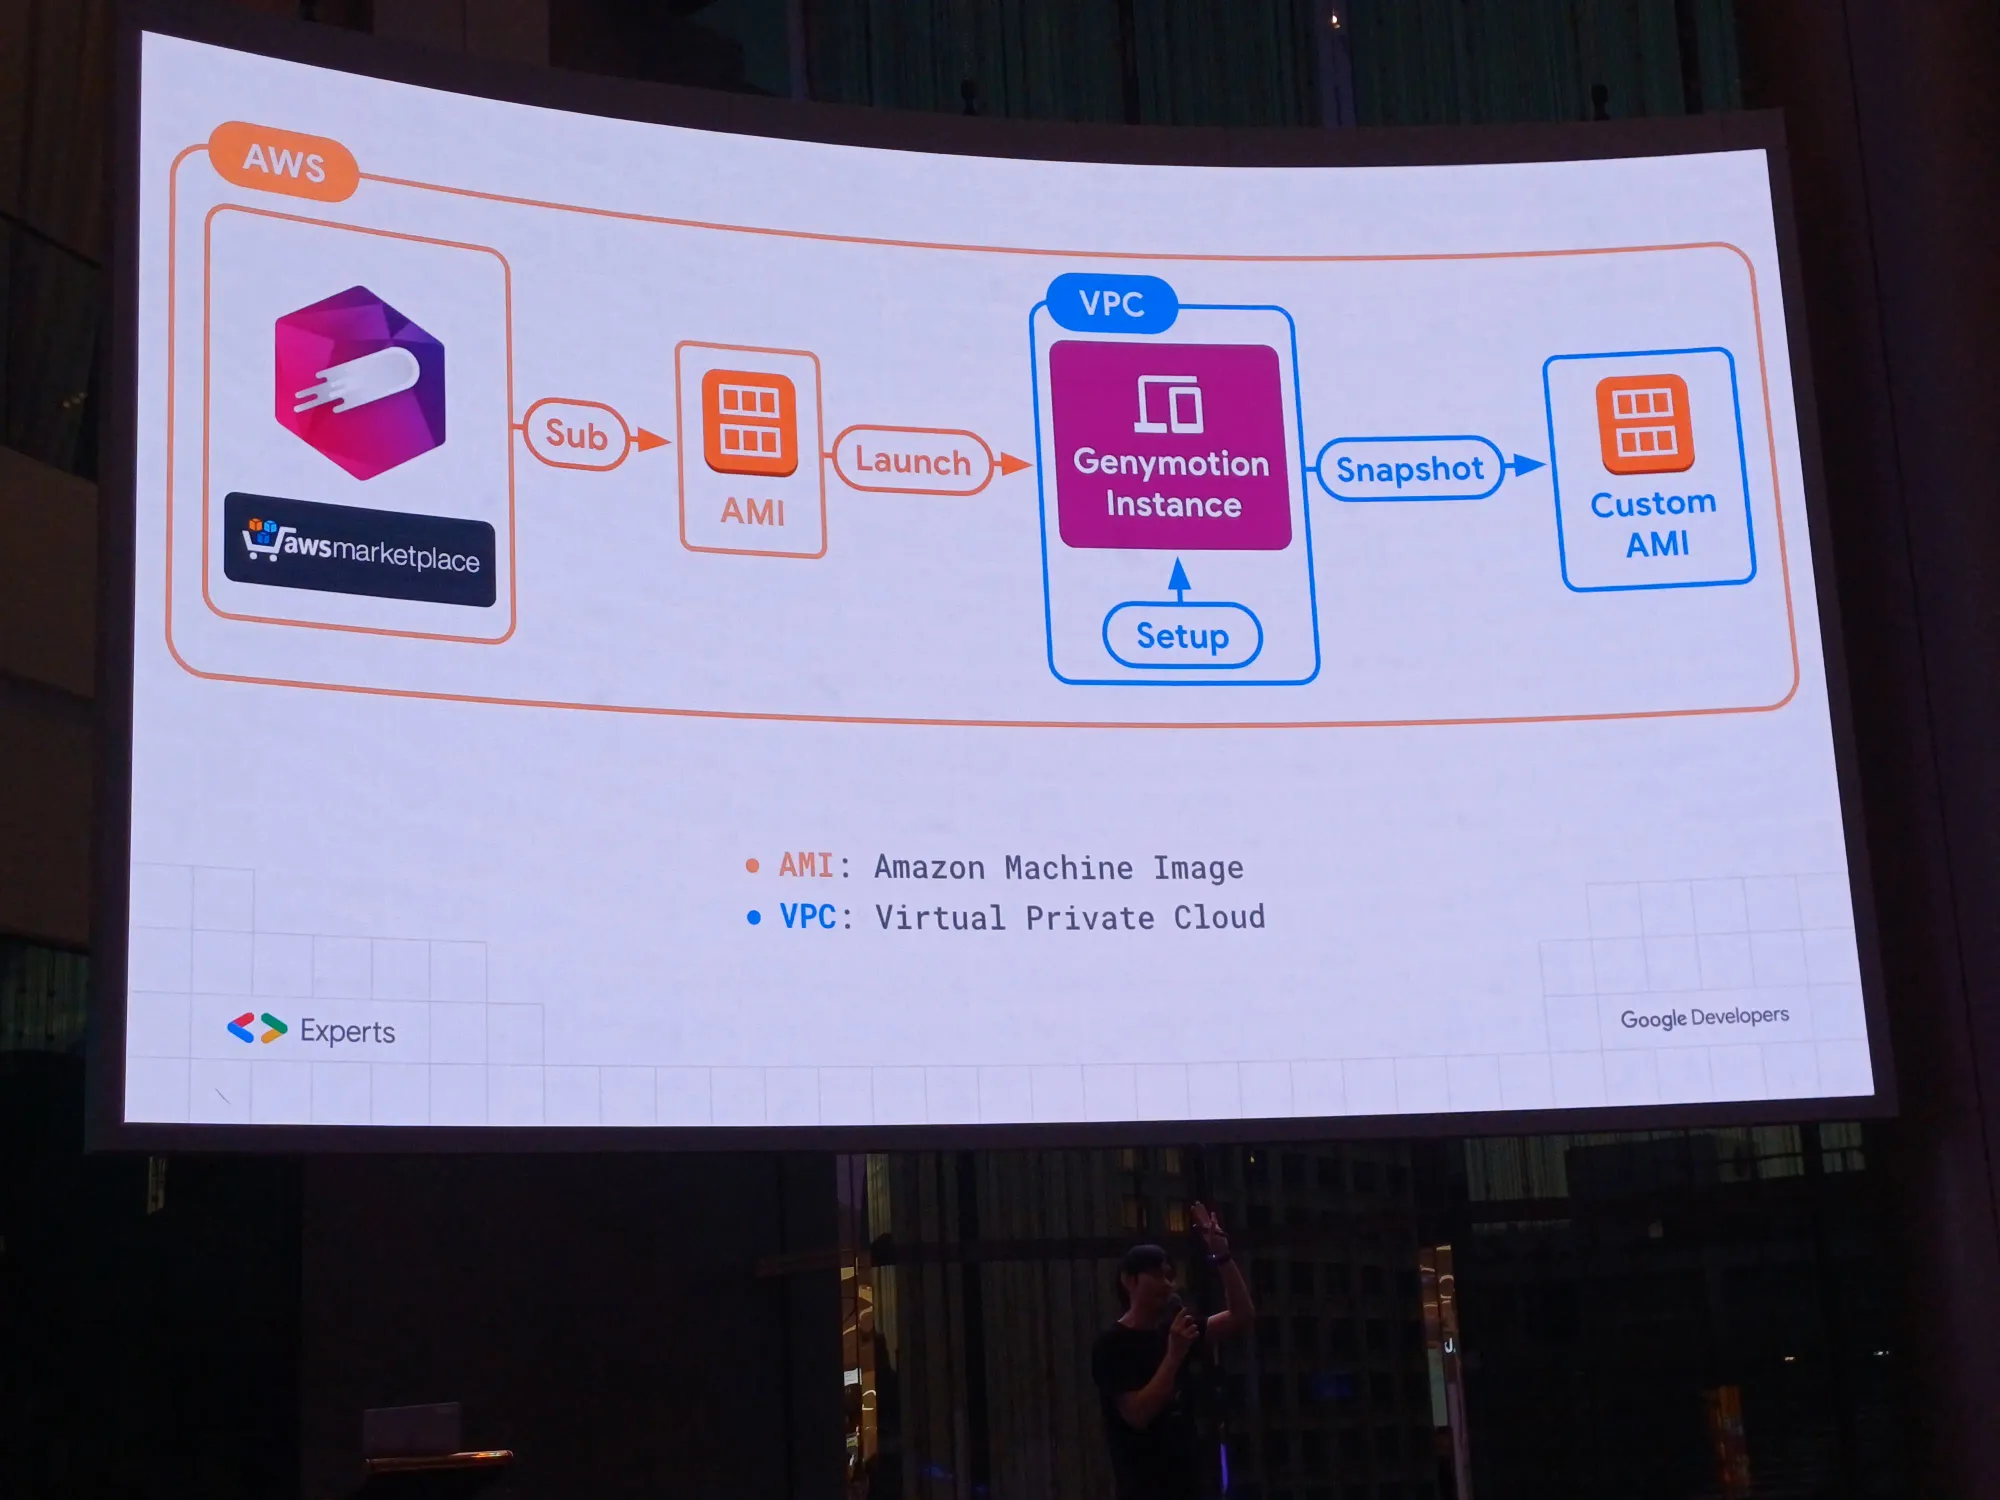
แล้วบน Genymotion ต้องทำอะไรเพิ่มบ้างนะ? สิ่งที่มีในตอนนี้
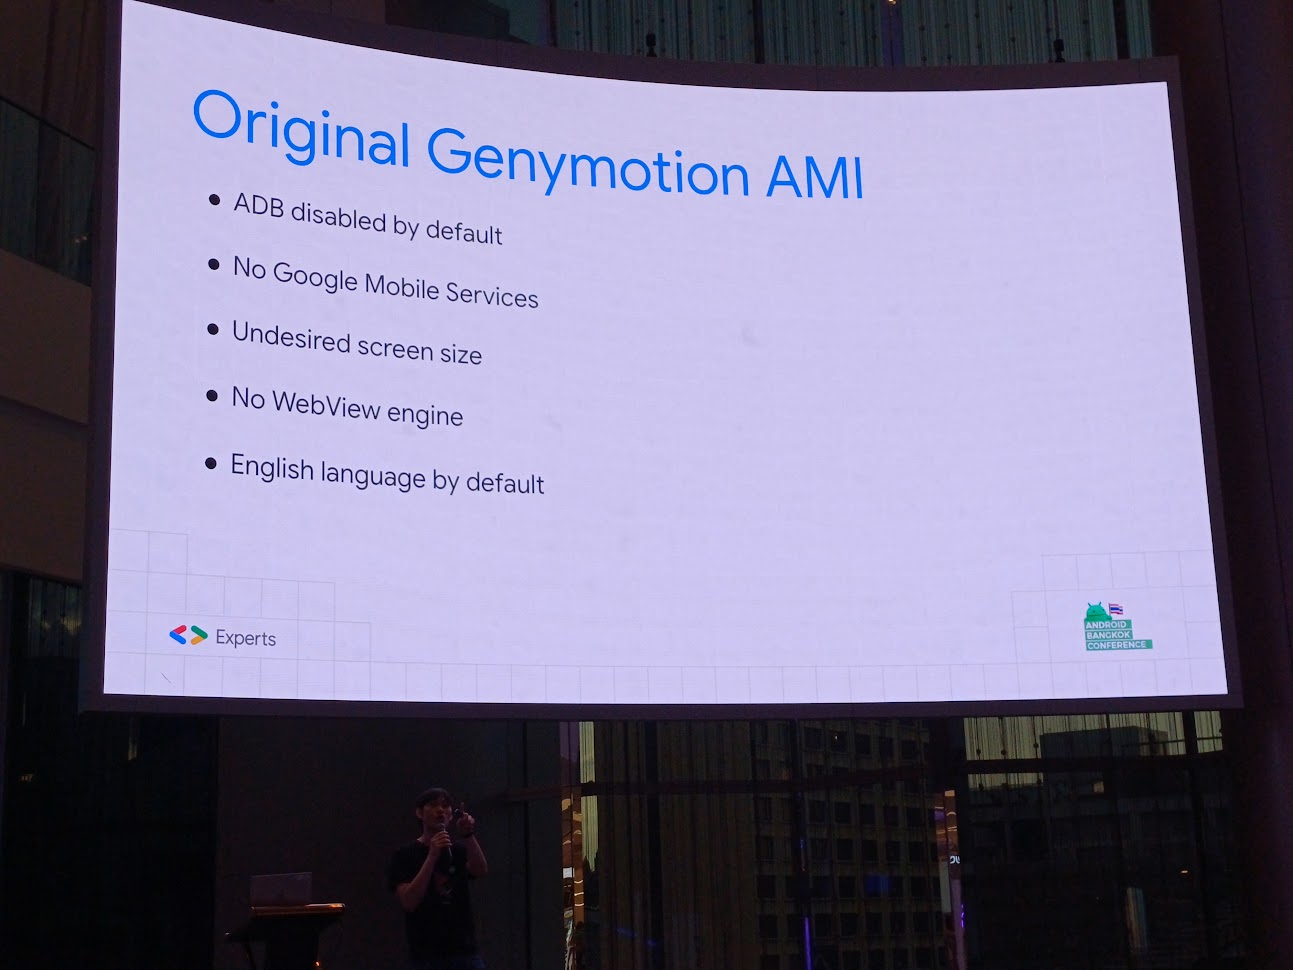
- ADB ถูกปิดโดย default
- ไม่มี Google Play service
- หน้าจอขนาดที่เราไม่ต้องการ
- ไม่มี WebView engine มาให้
- ภาษาอังกฤษเป็นภาษาหลัก
เราสามารถทำชุด setup เองตามใจชอบ ด้วย HTTP API เพื่อสั่งงานบางอย่างได้ โดยมันจะอยู่บน swagger ต้องเปิด emulator ก่อนถึงจะใช้งานได้
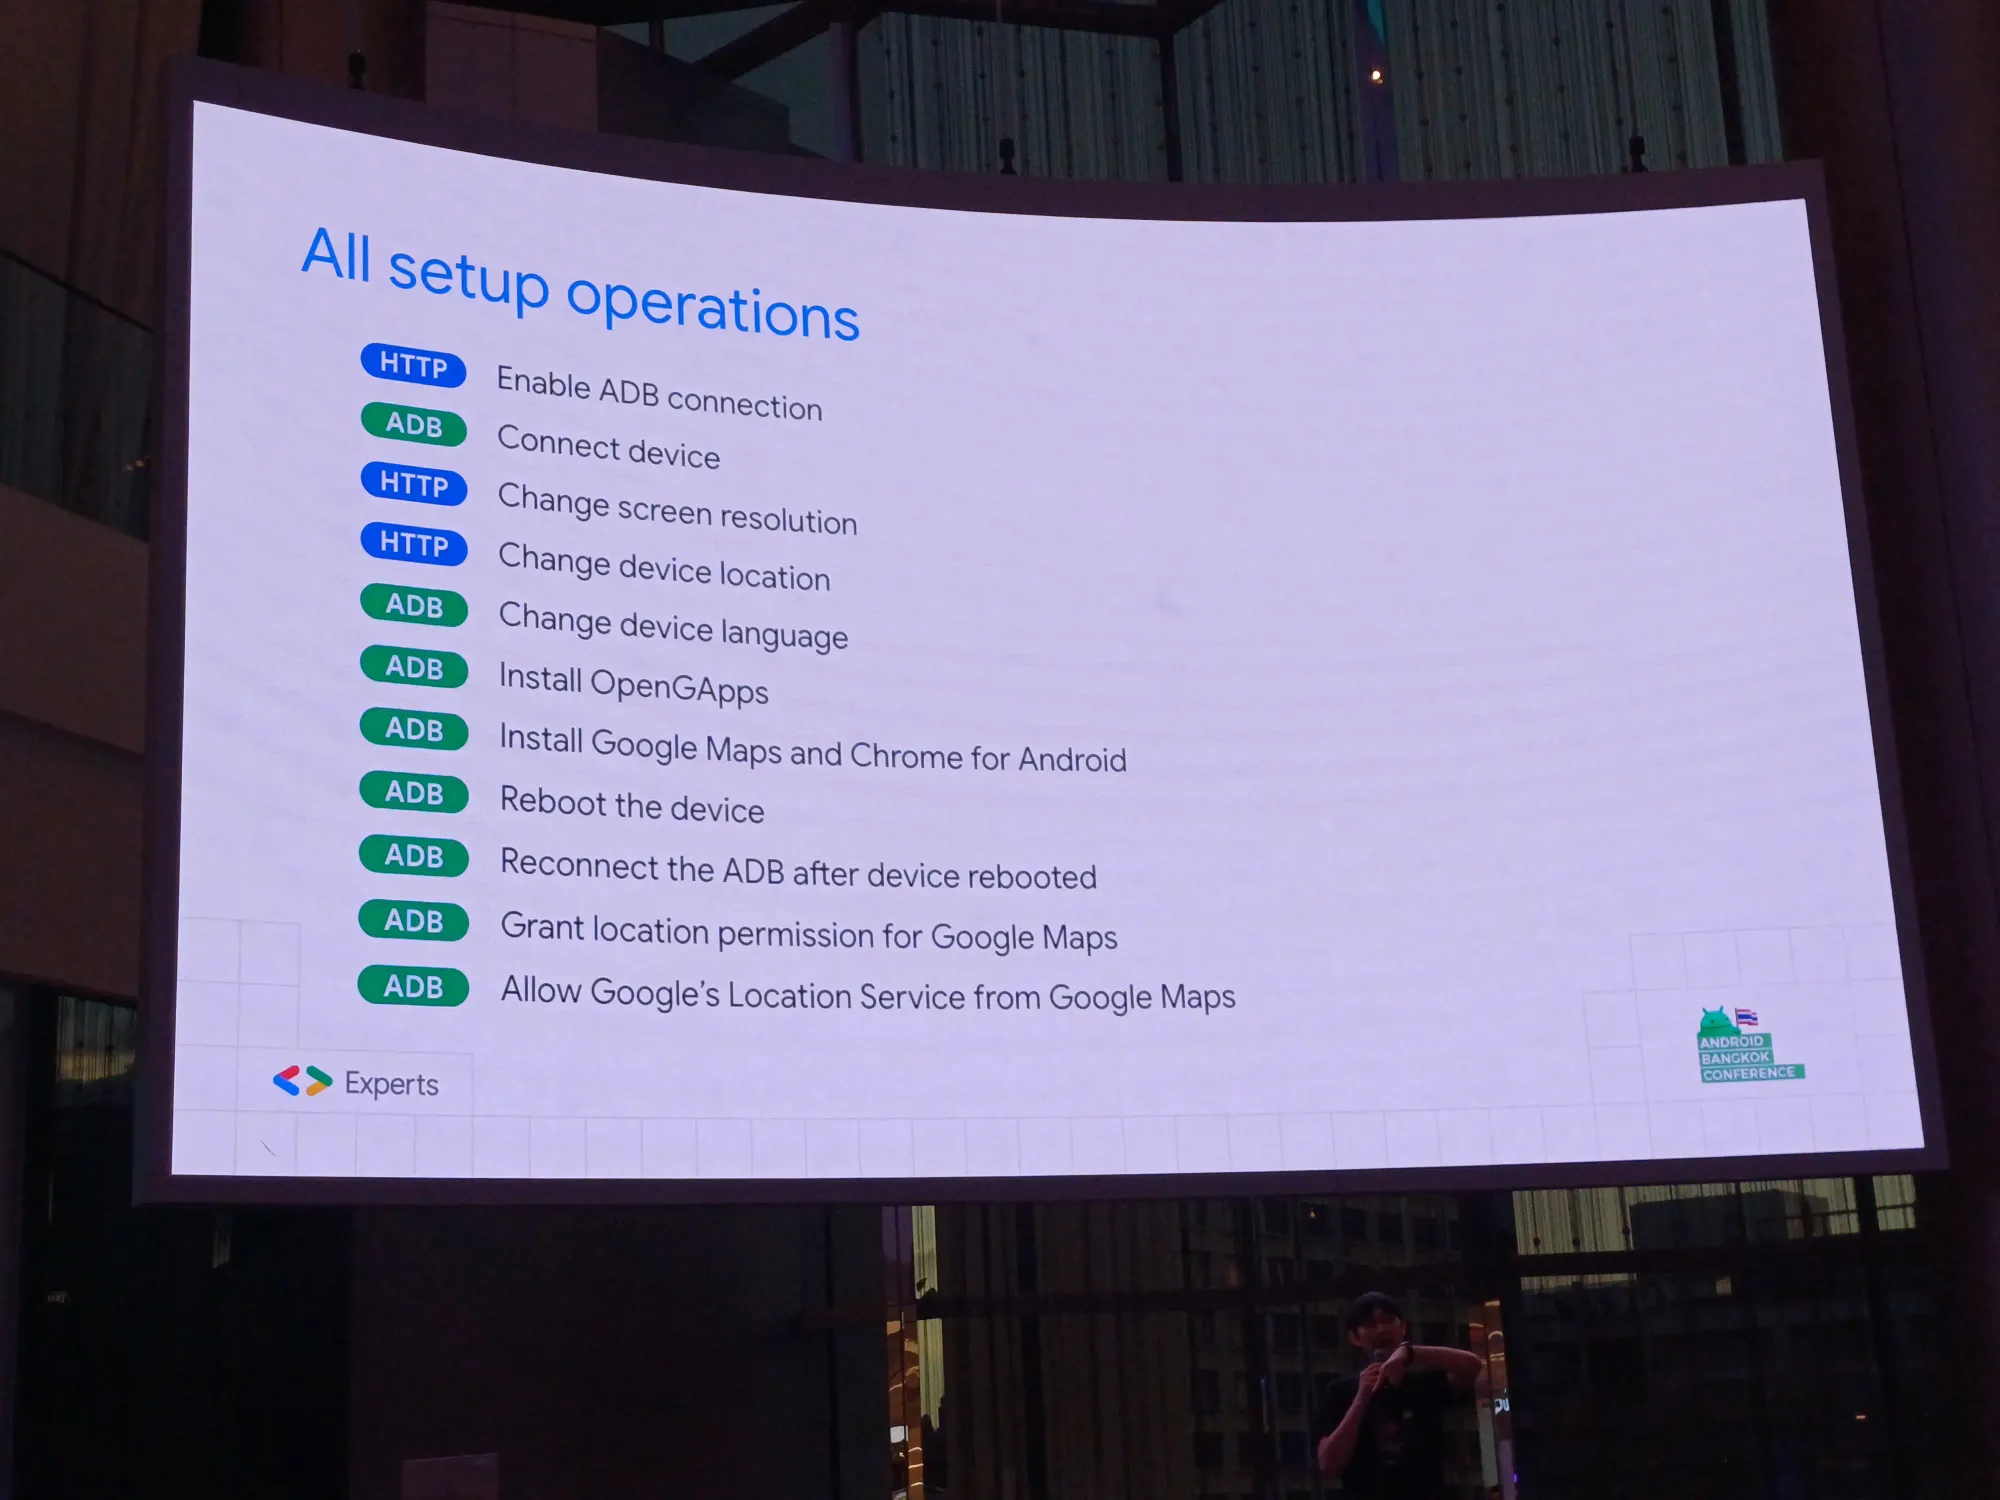

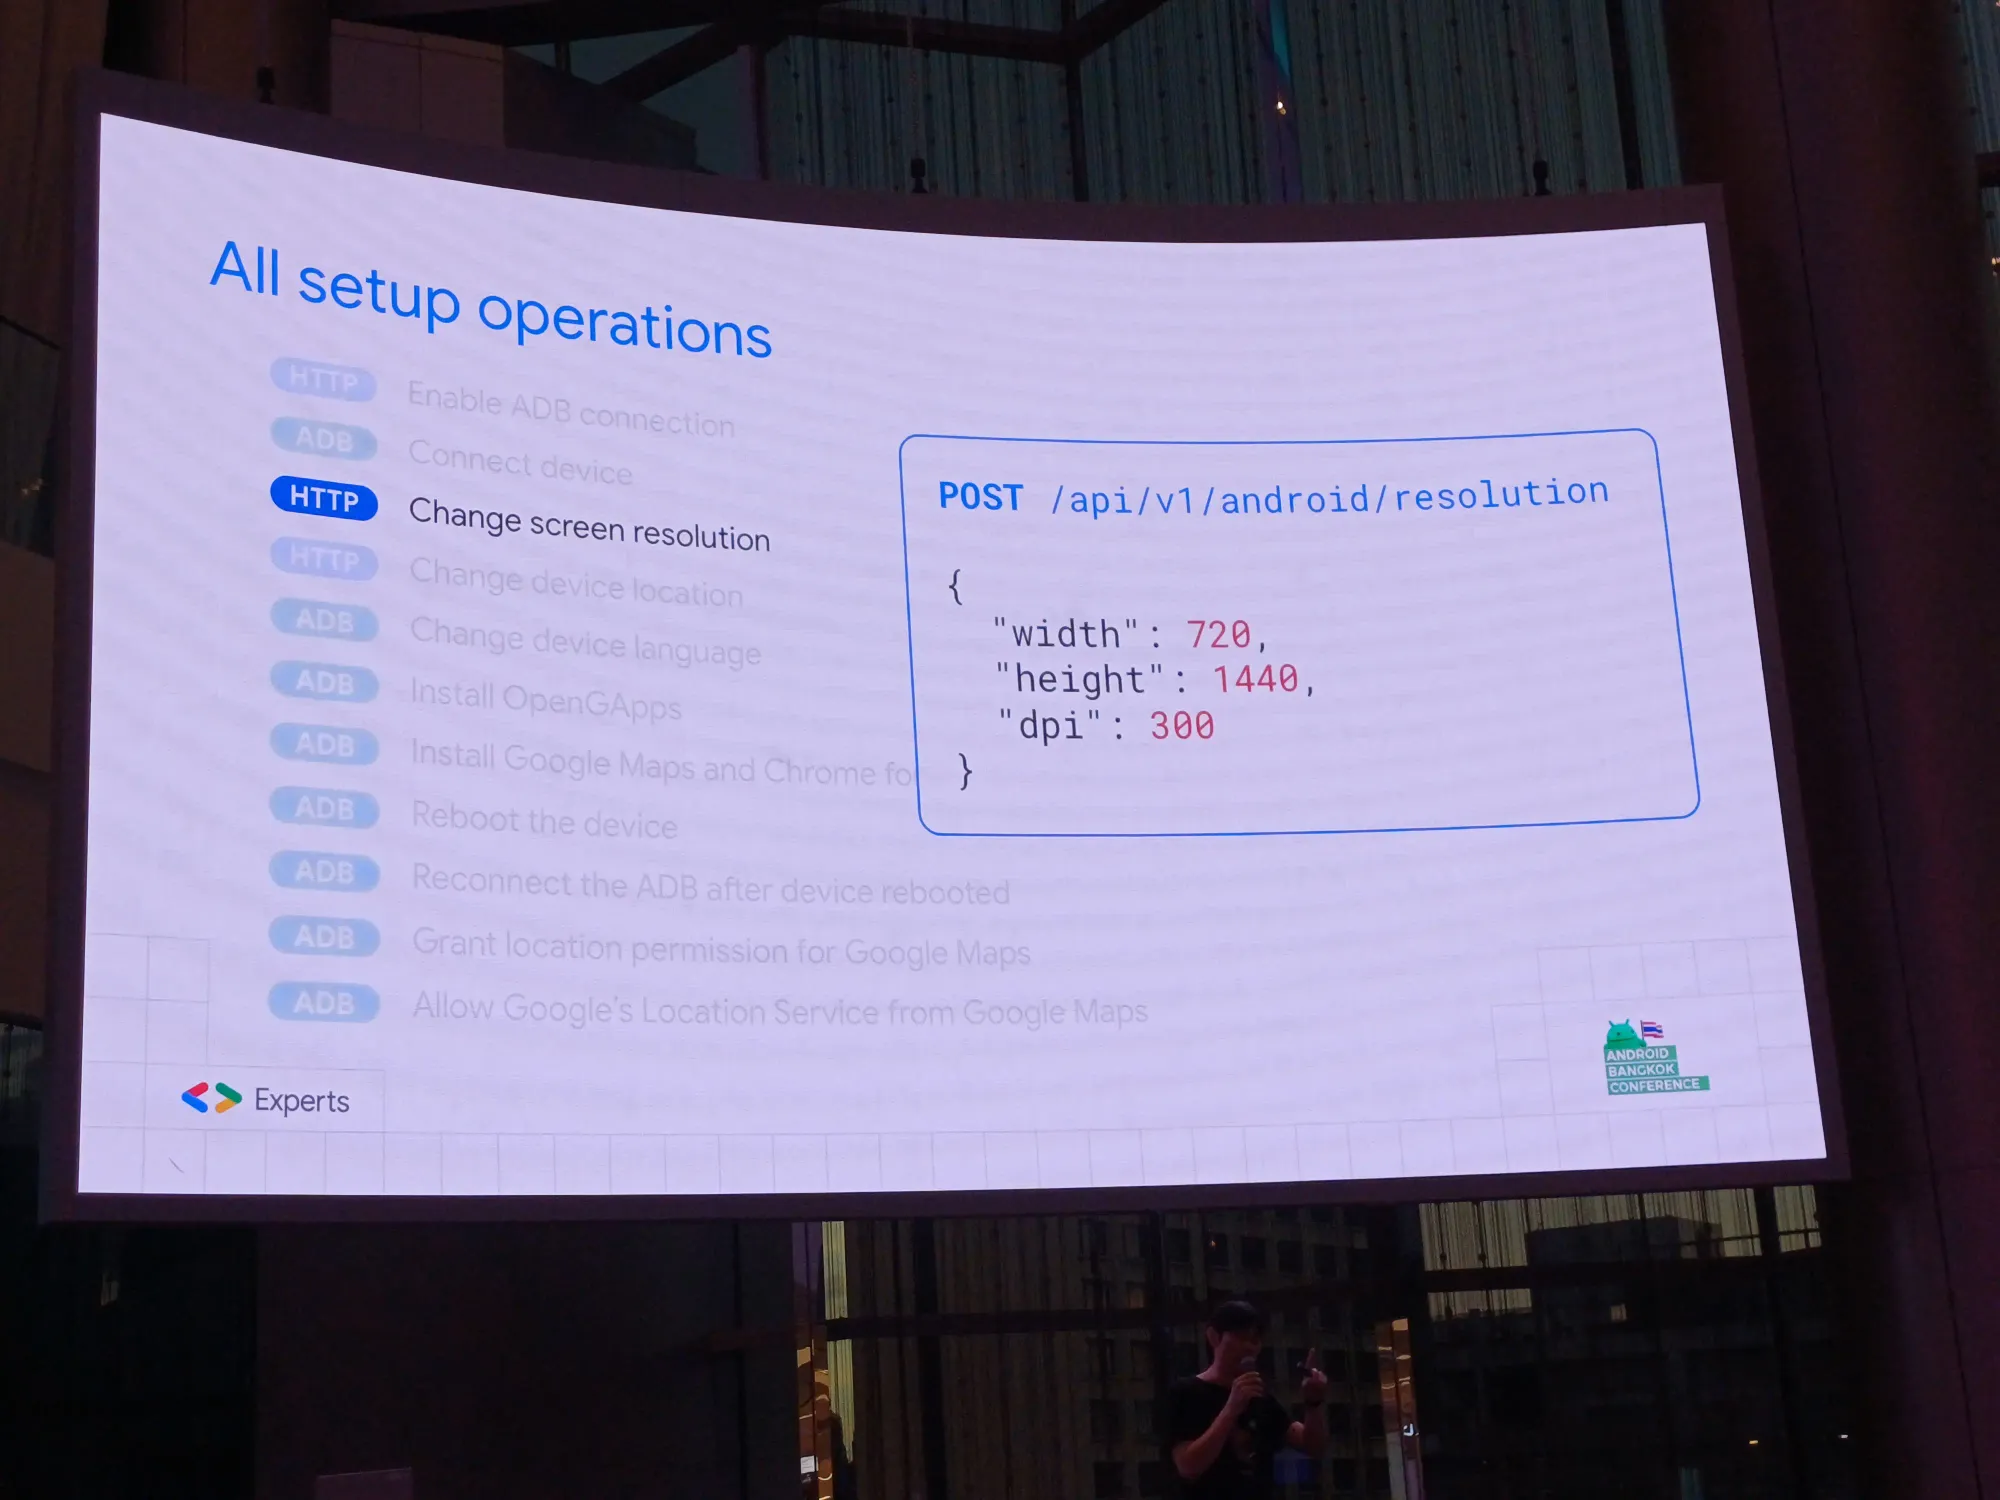
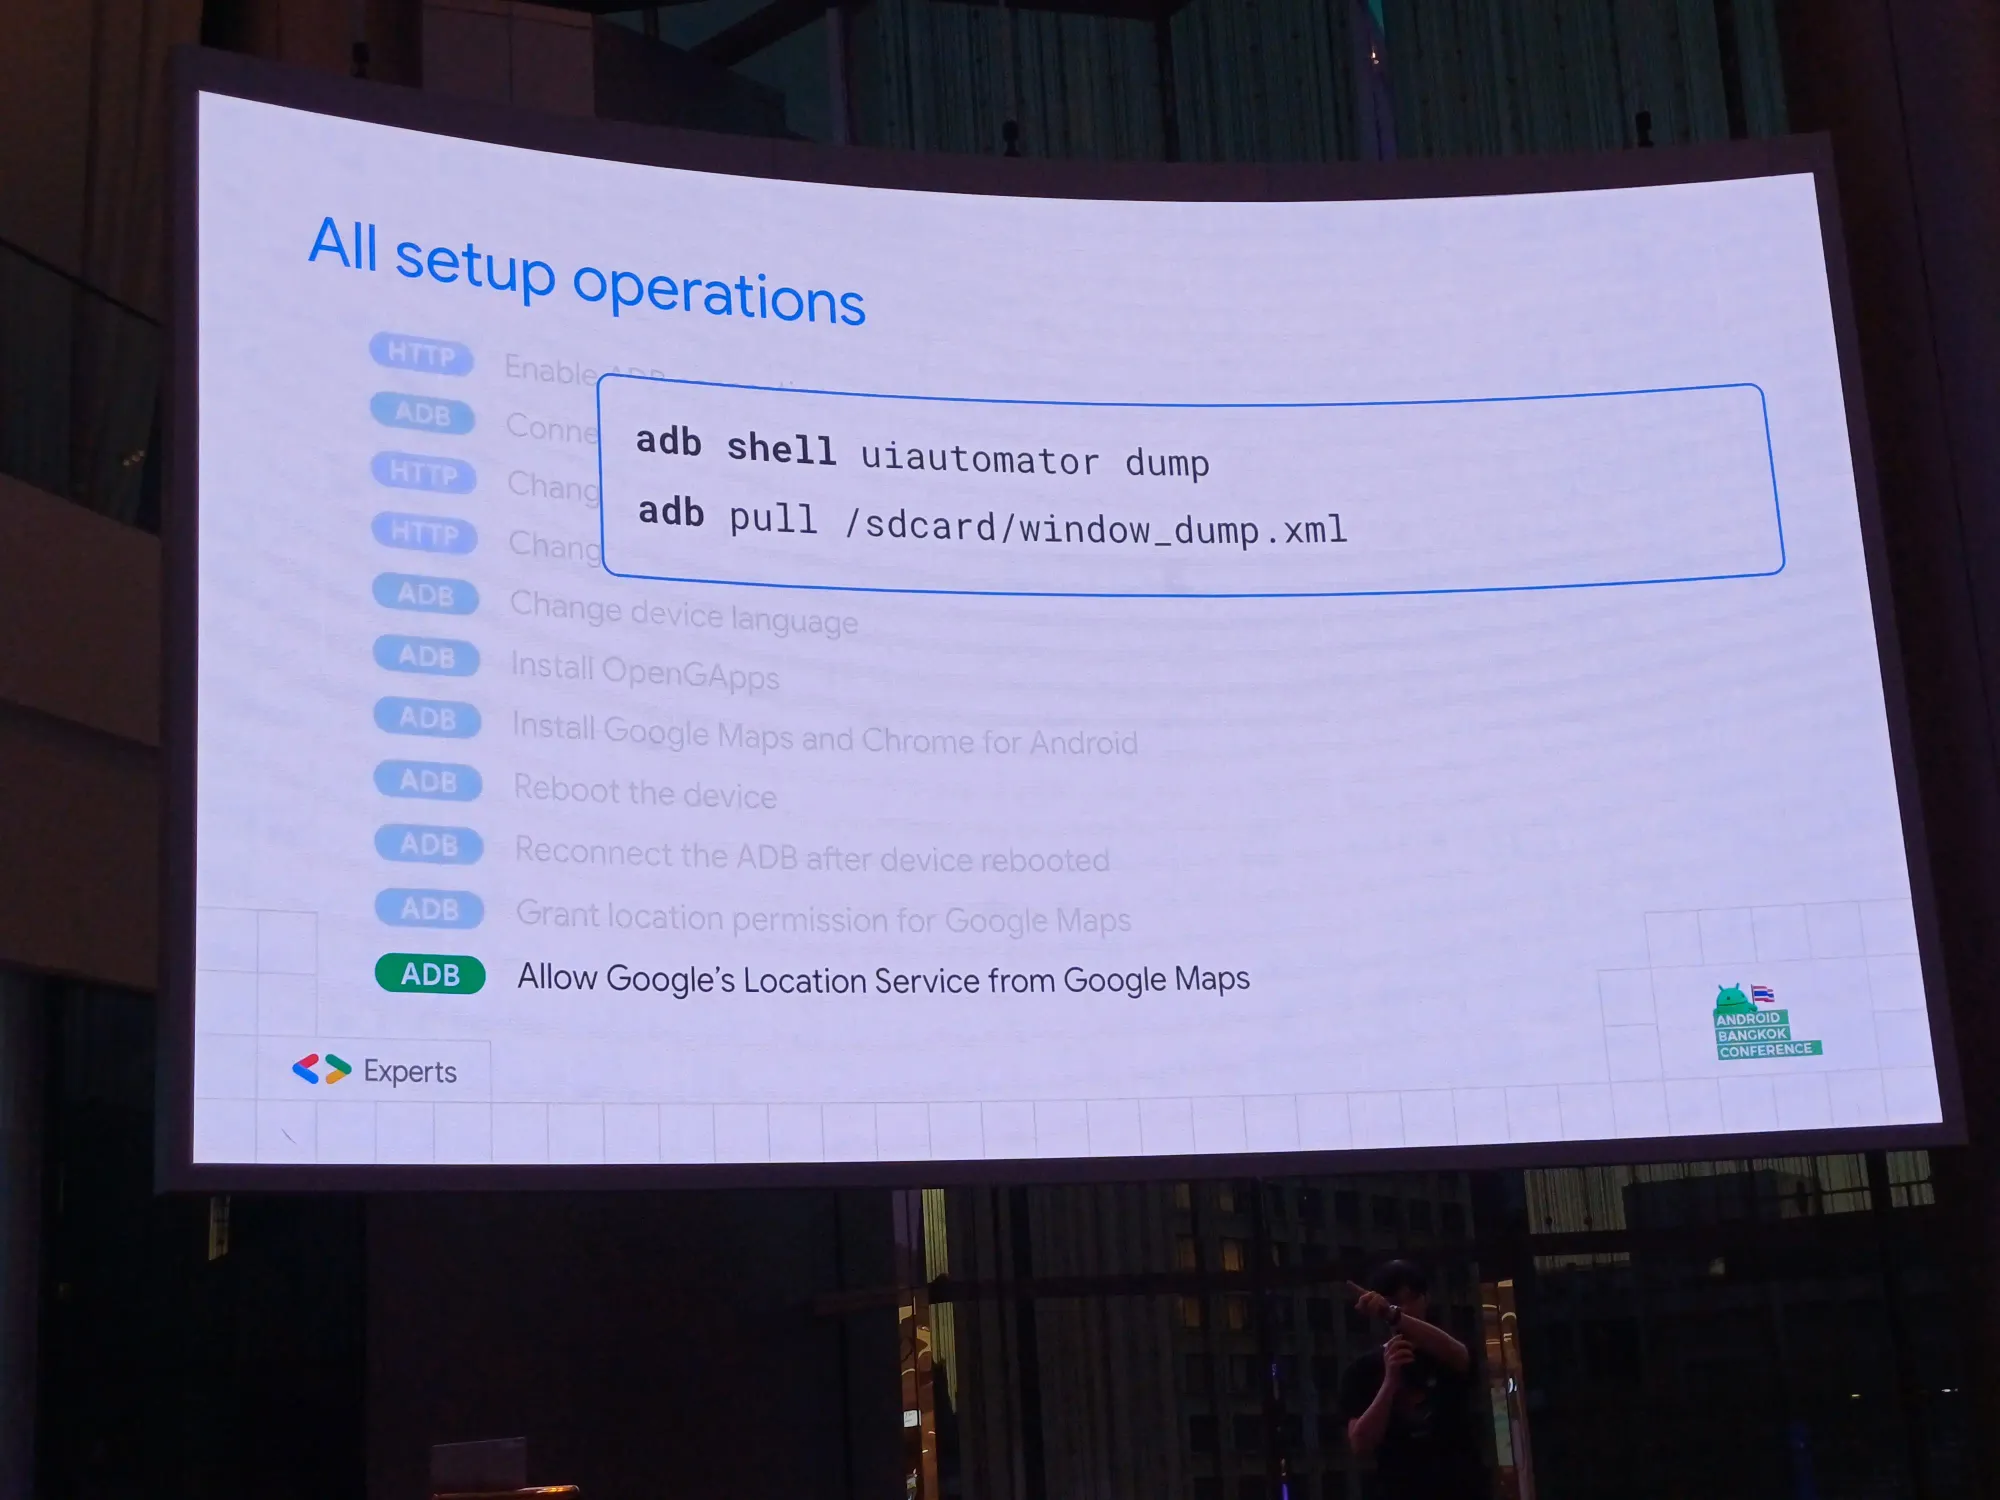
All setup operations
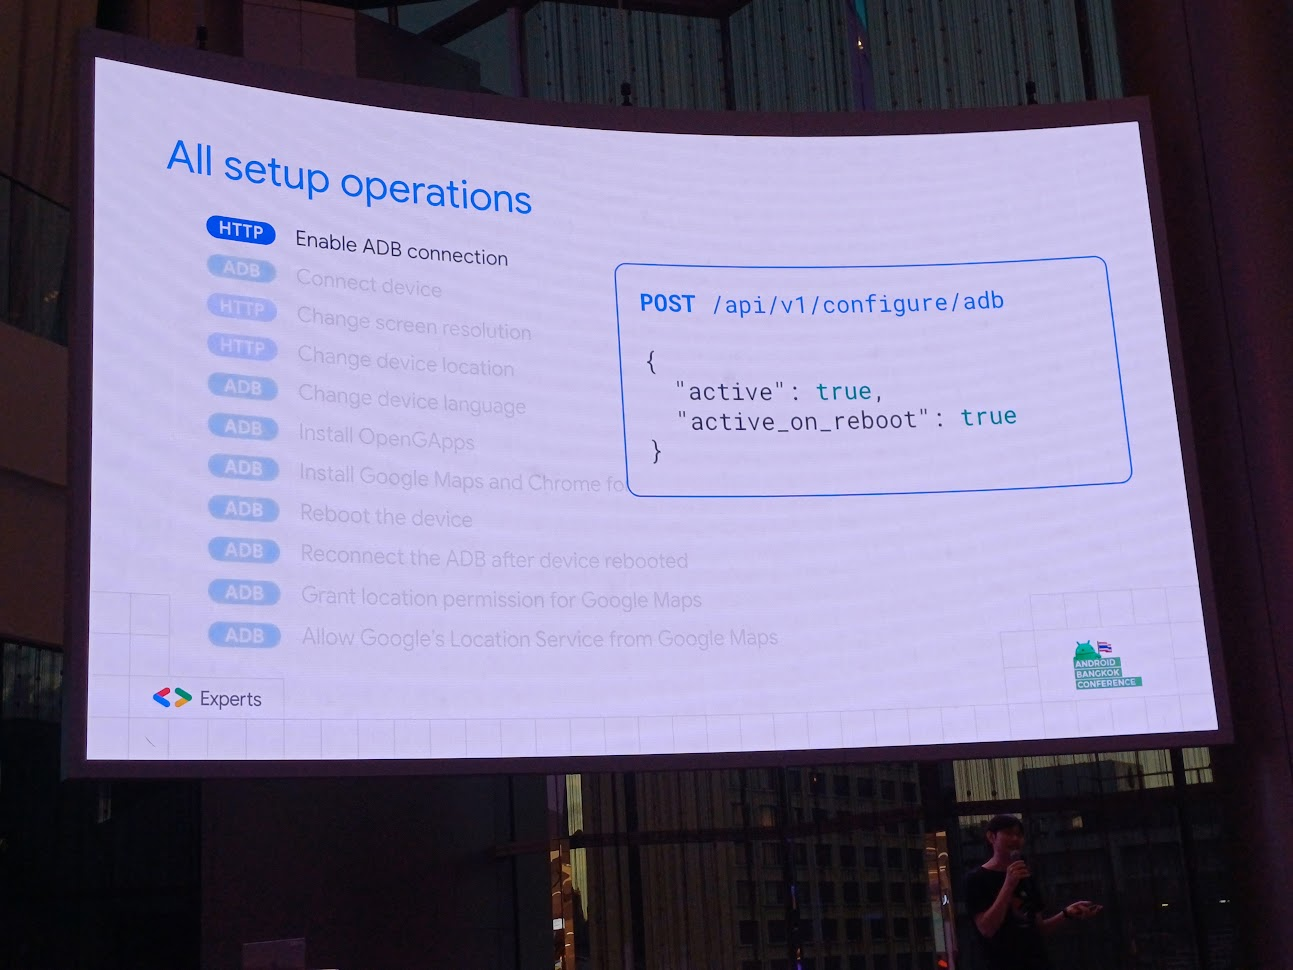
- [HTTP] Enable ADB connection: เปิด ADB มันจะอยู่บน swagger ต้องเปิด emulator ก่อนถึงจะใช้งานได้
- [ADB] Connect device: ใช้
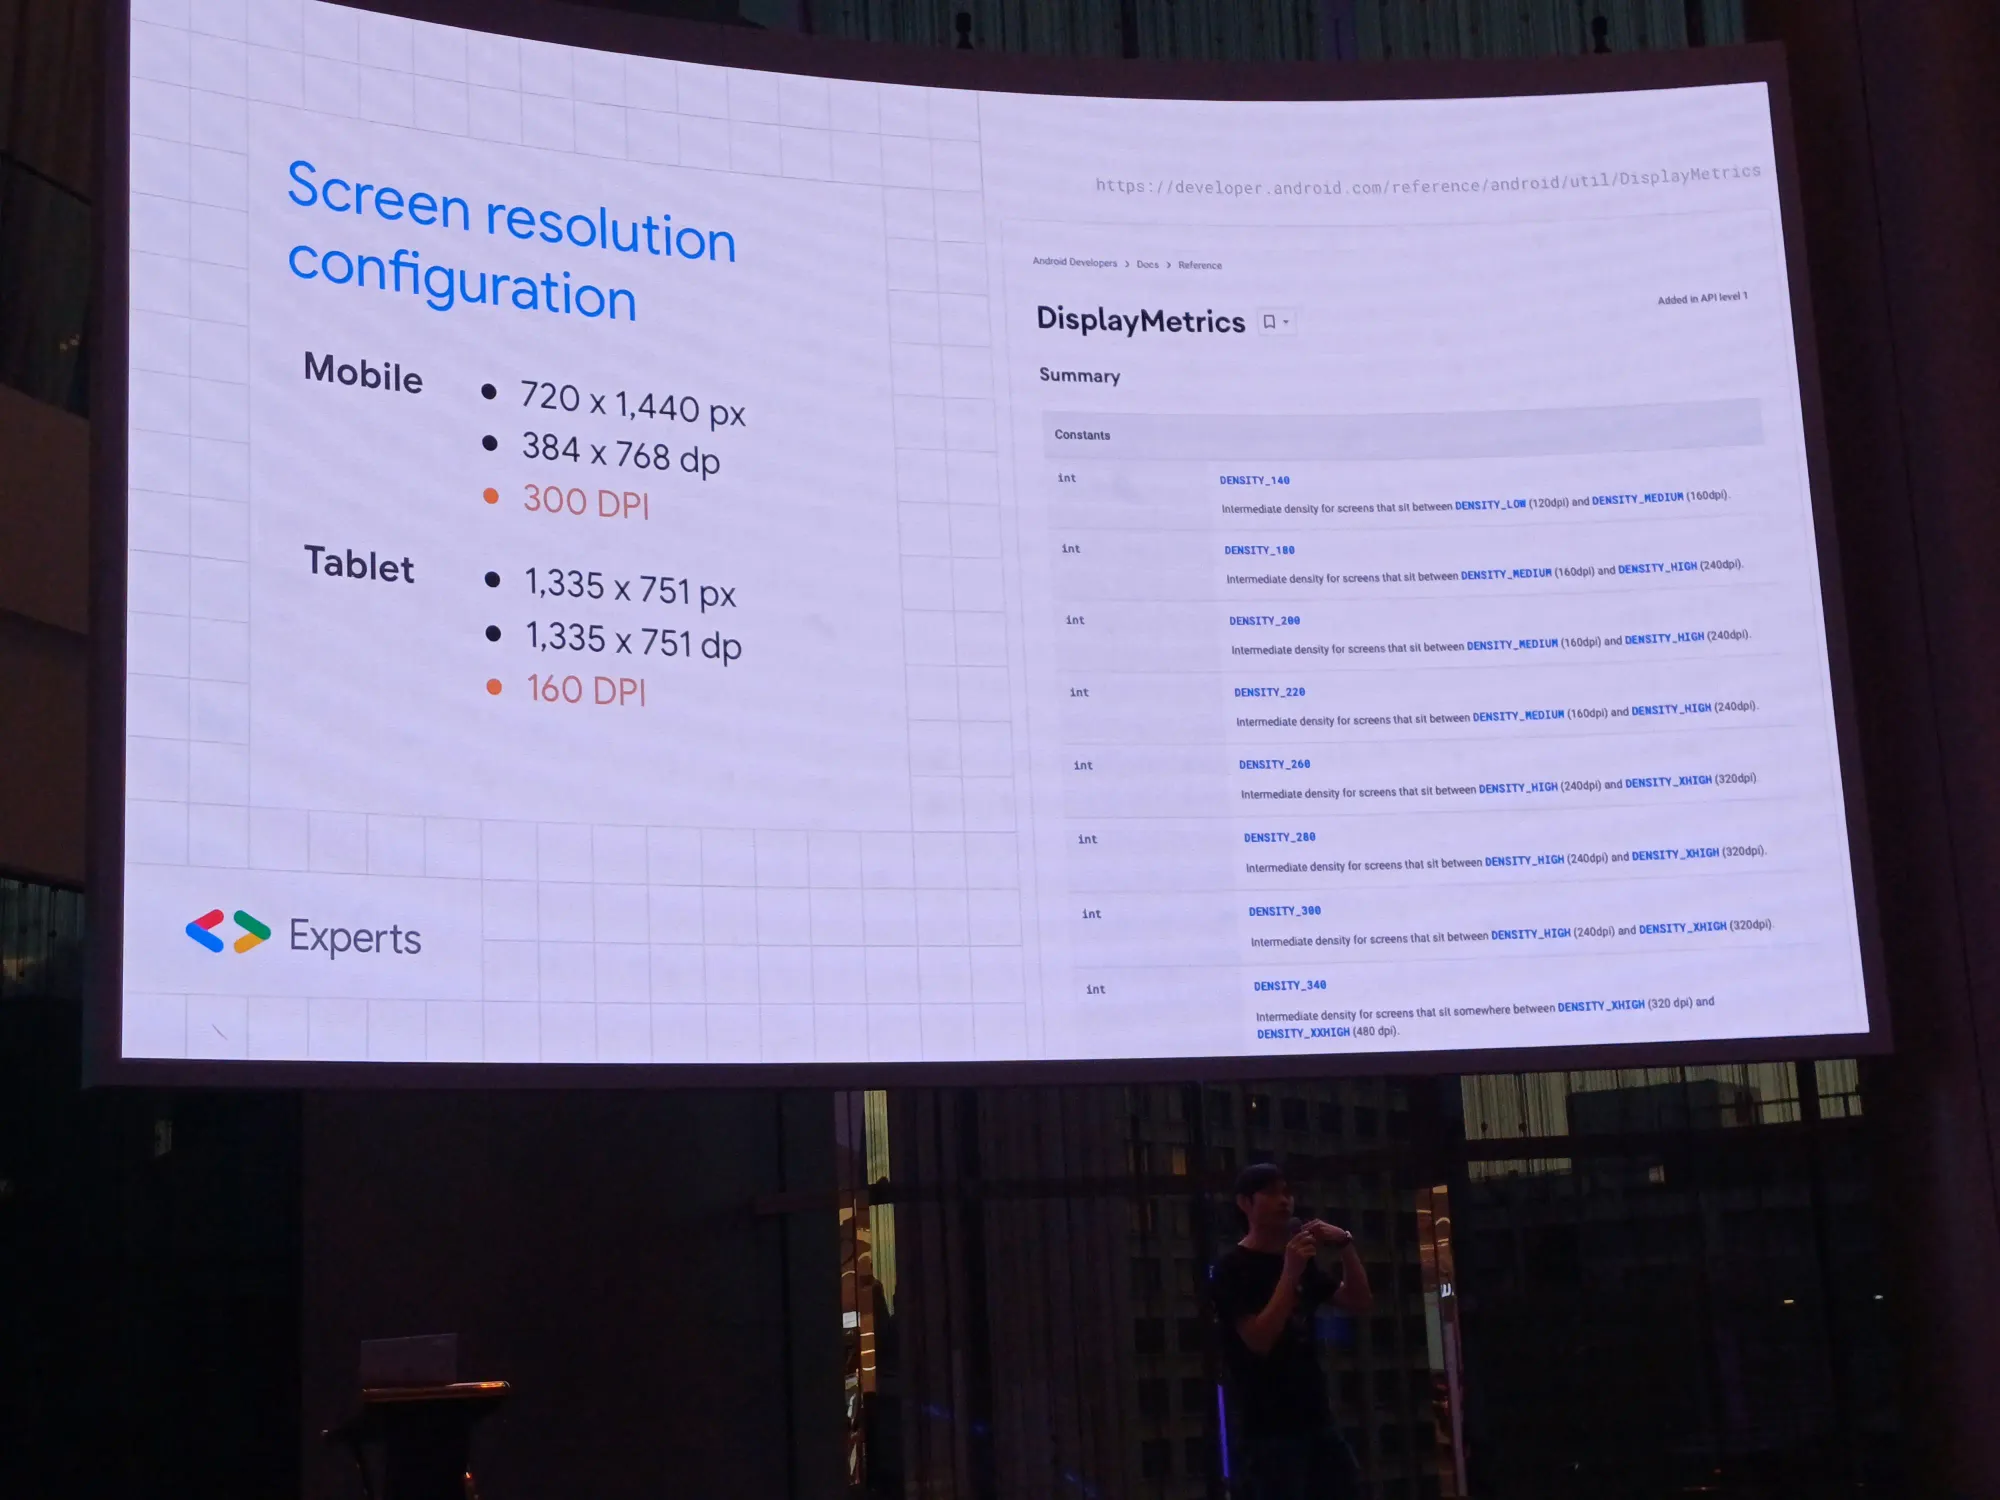
adb connect <ip_address>ปกติ - [HTTP] Change screen resolution: ทำให้ resolution ตํ่า ๆ เพื่อให้ทำงานได้ไวขึ้น สนใจแค่ dp เท่านั้น คำนวณให้ได้ dp เท่าเดิม โดยใช้สูตร
dp * (dpi / 160) = px
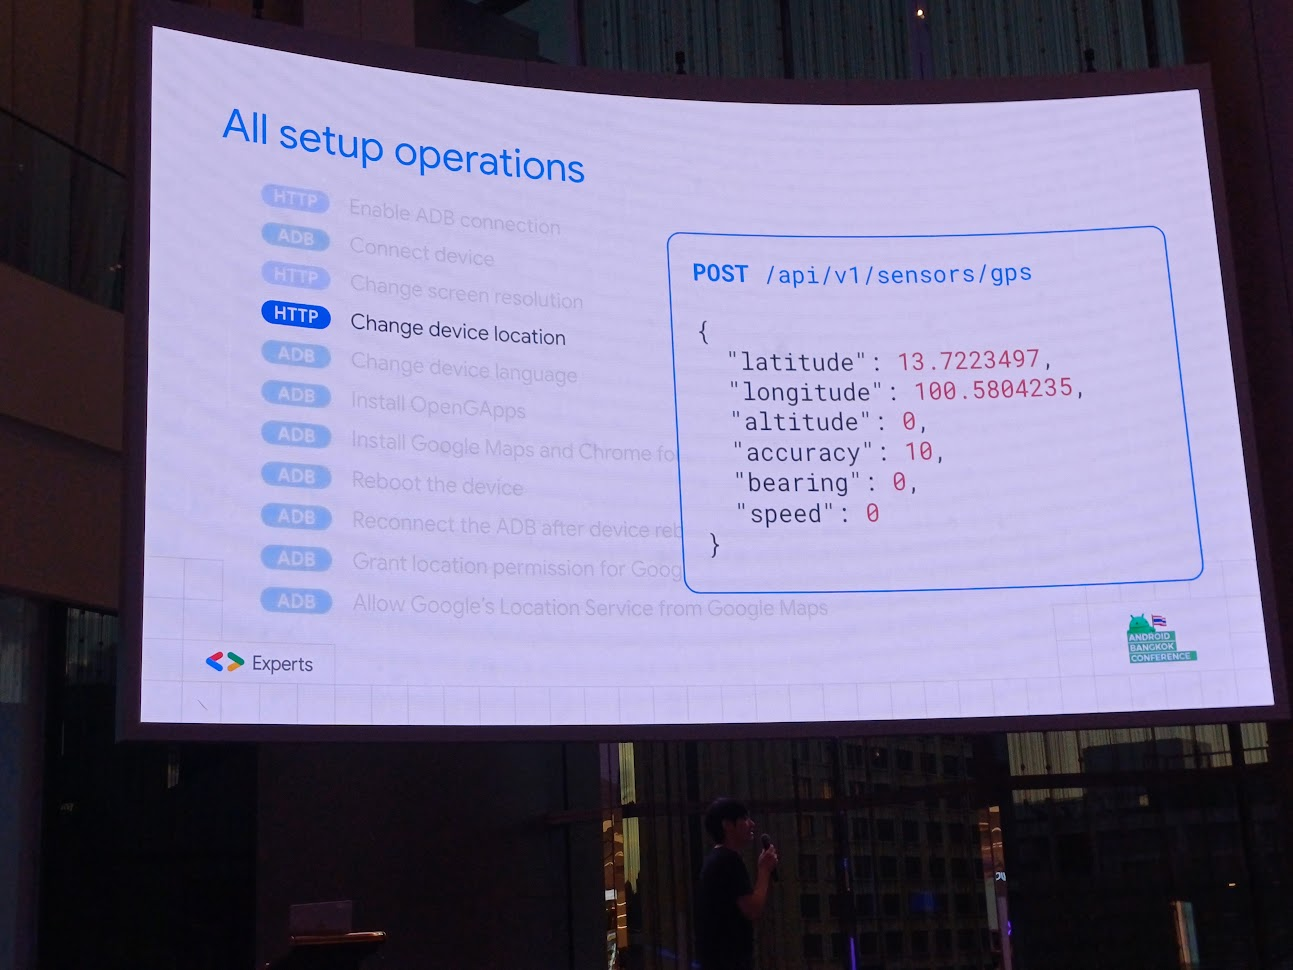
- [HTTP] Change device location: set location ที่เราต้องการ
- [ADB] Change device language: เปลี่ยนภาษาเป็นภาษาไทย
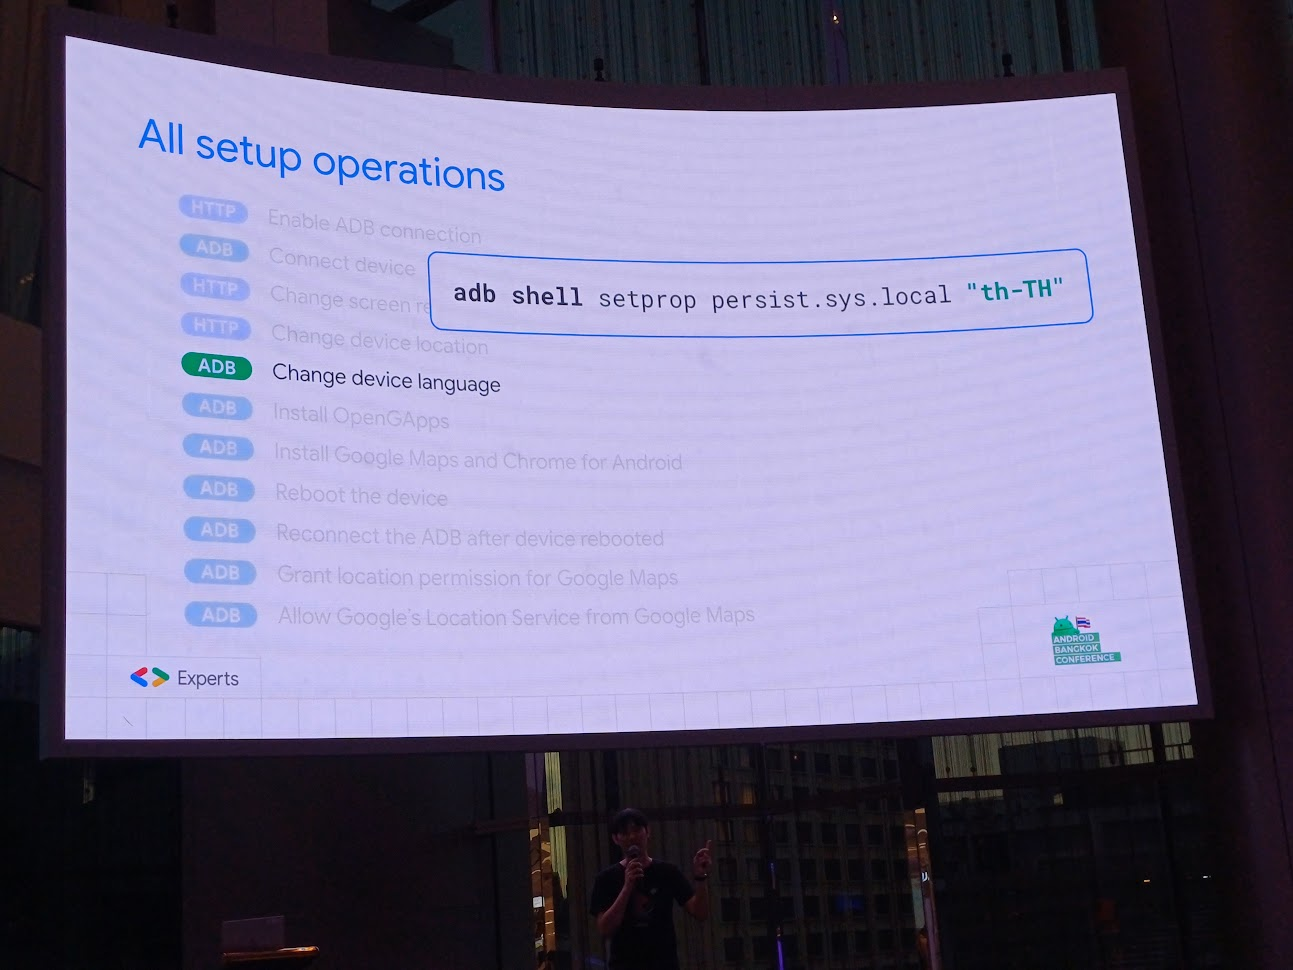
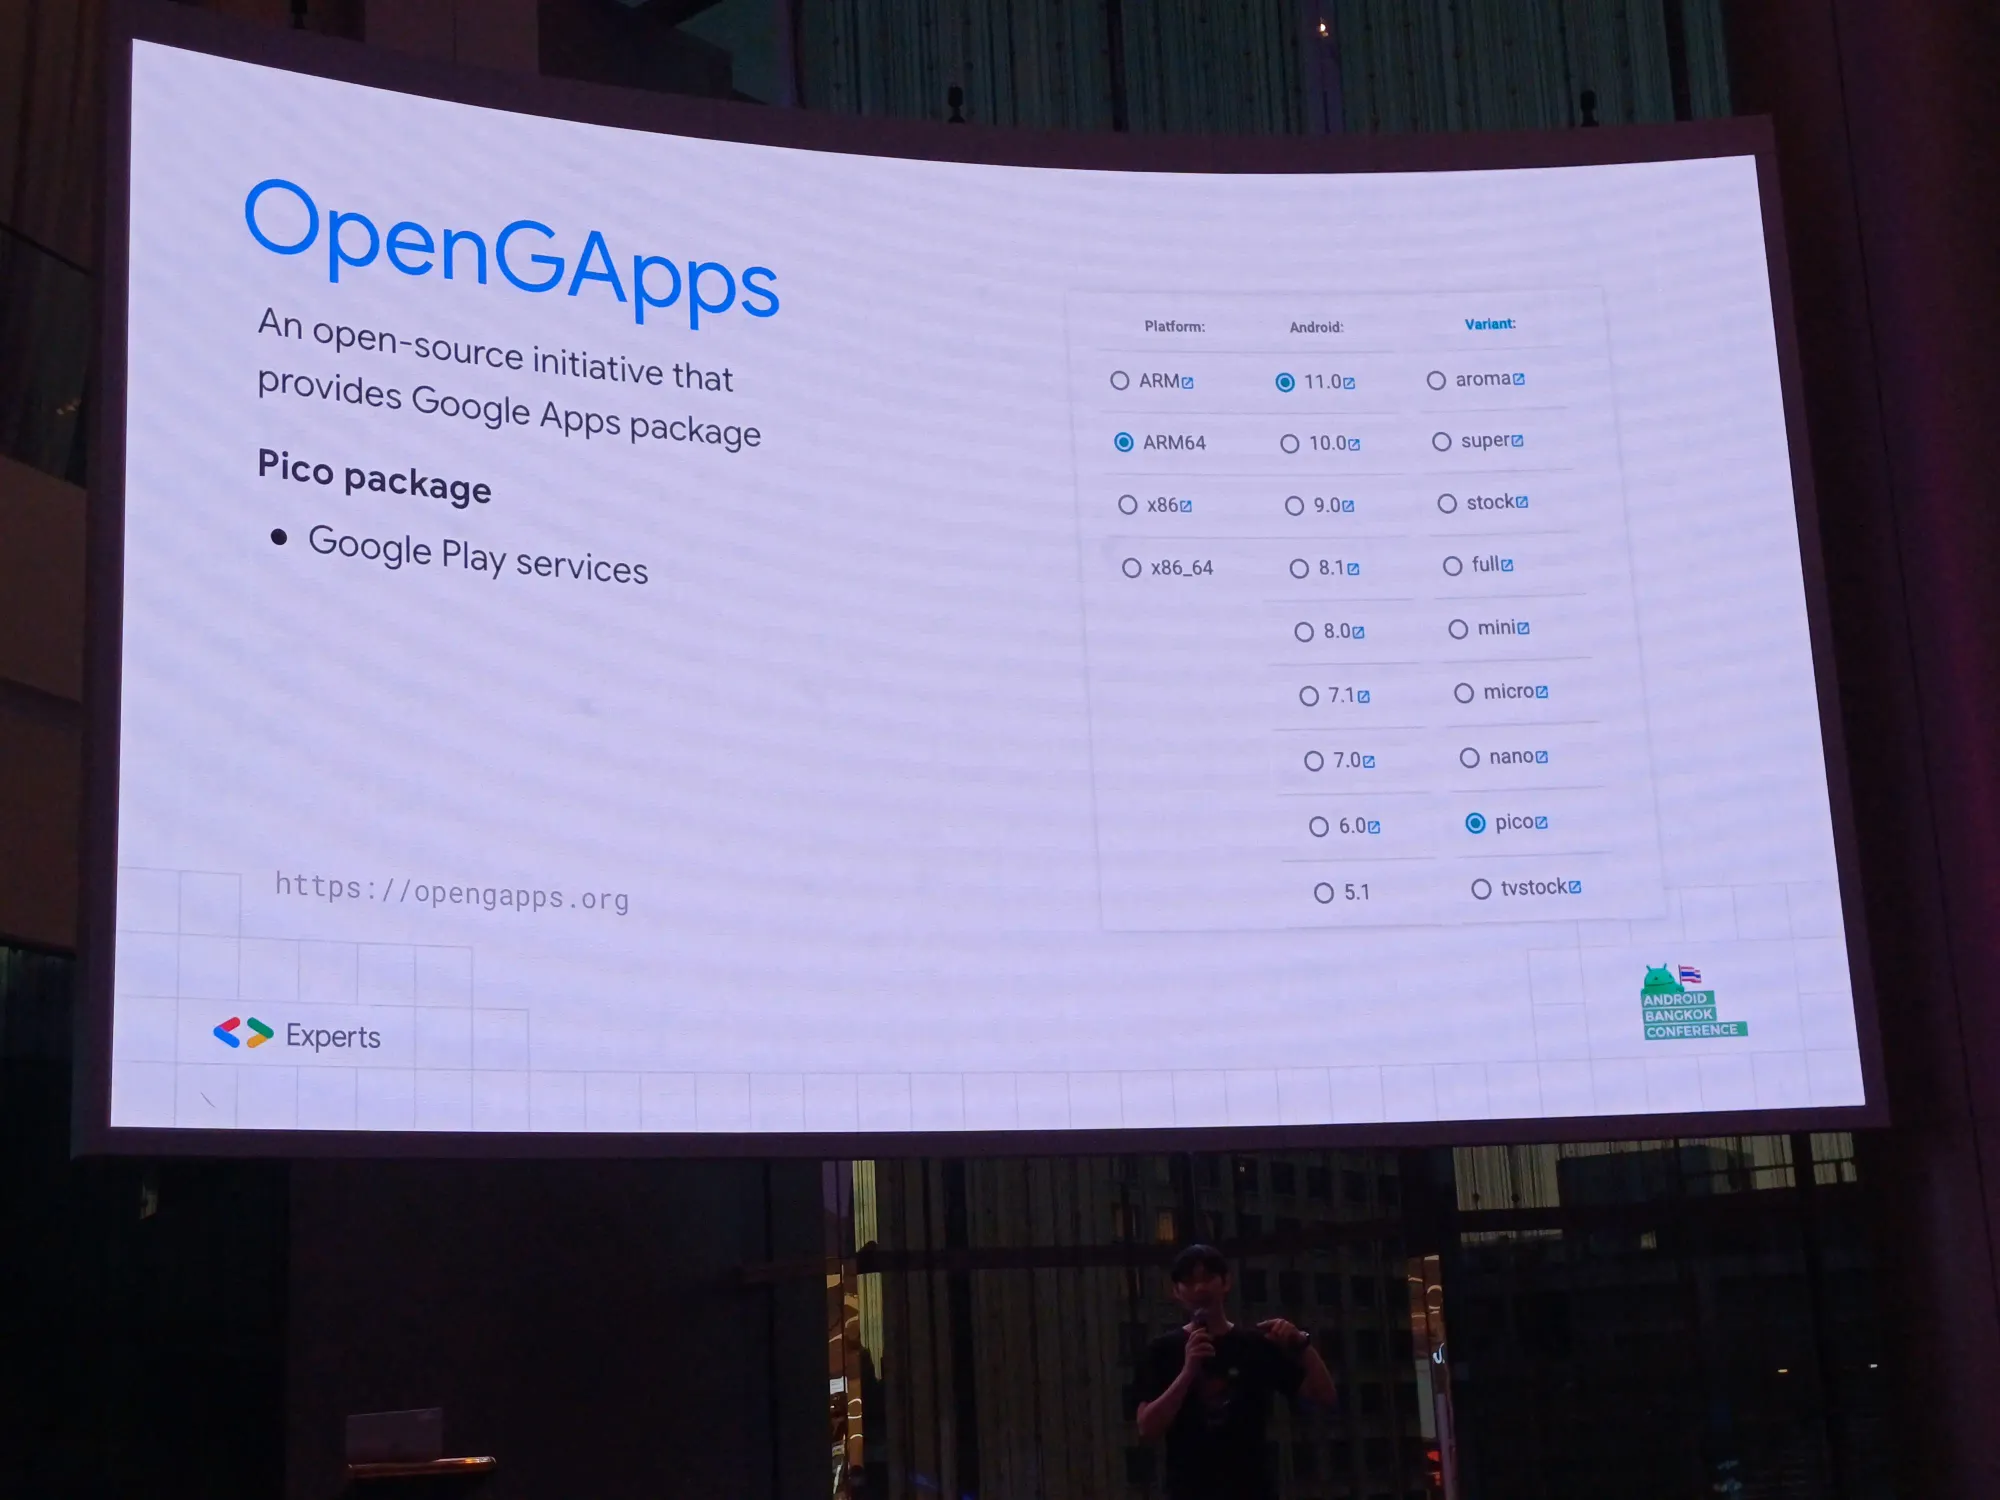
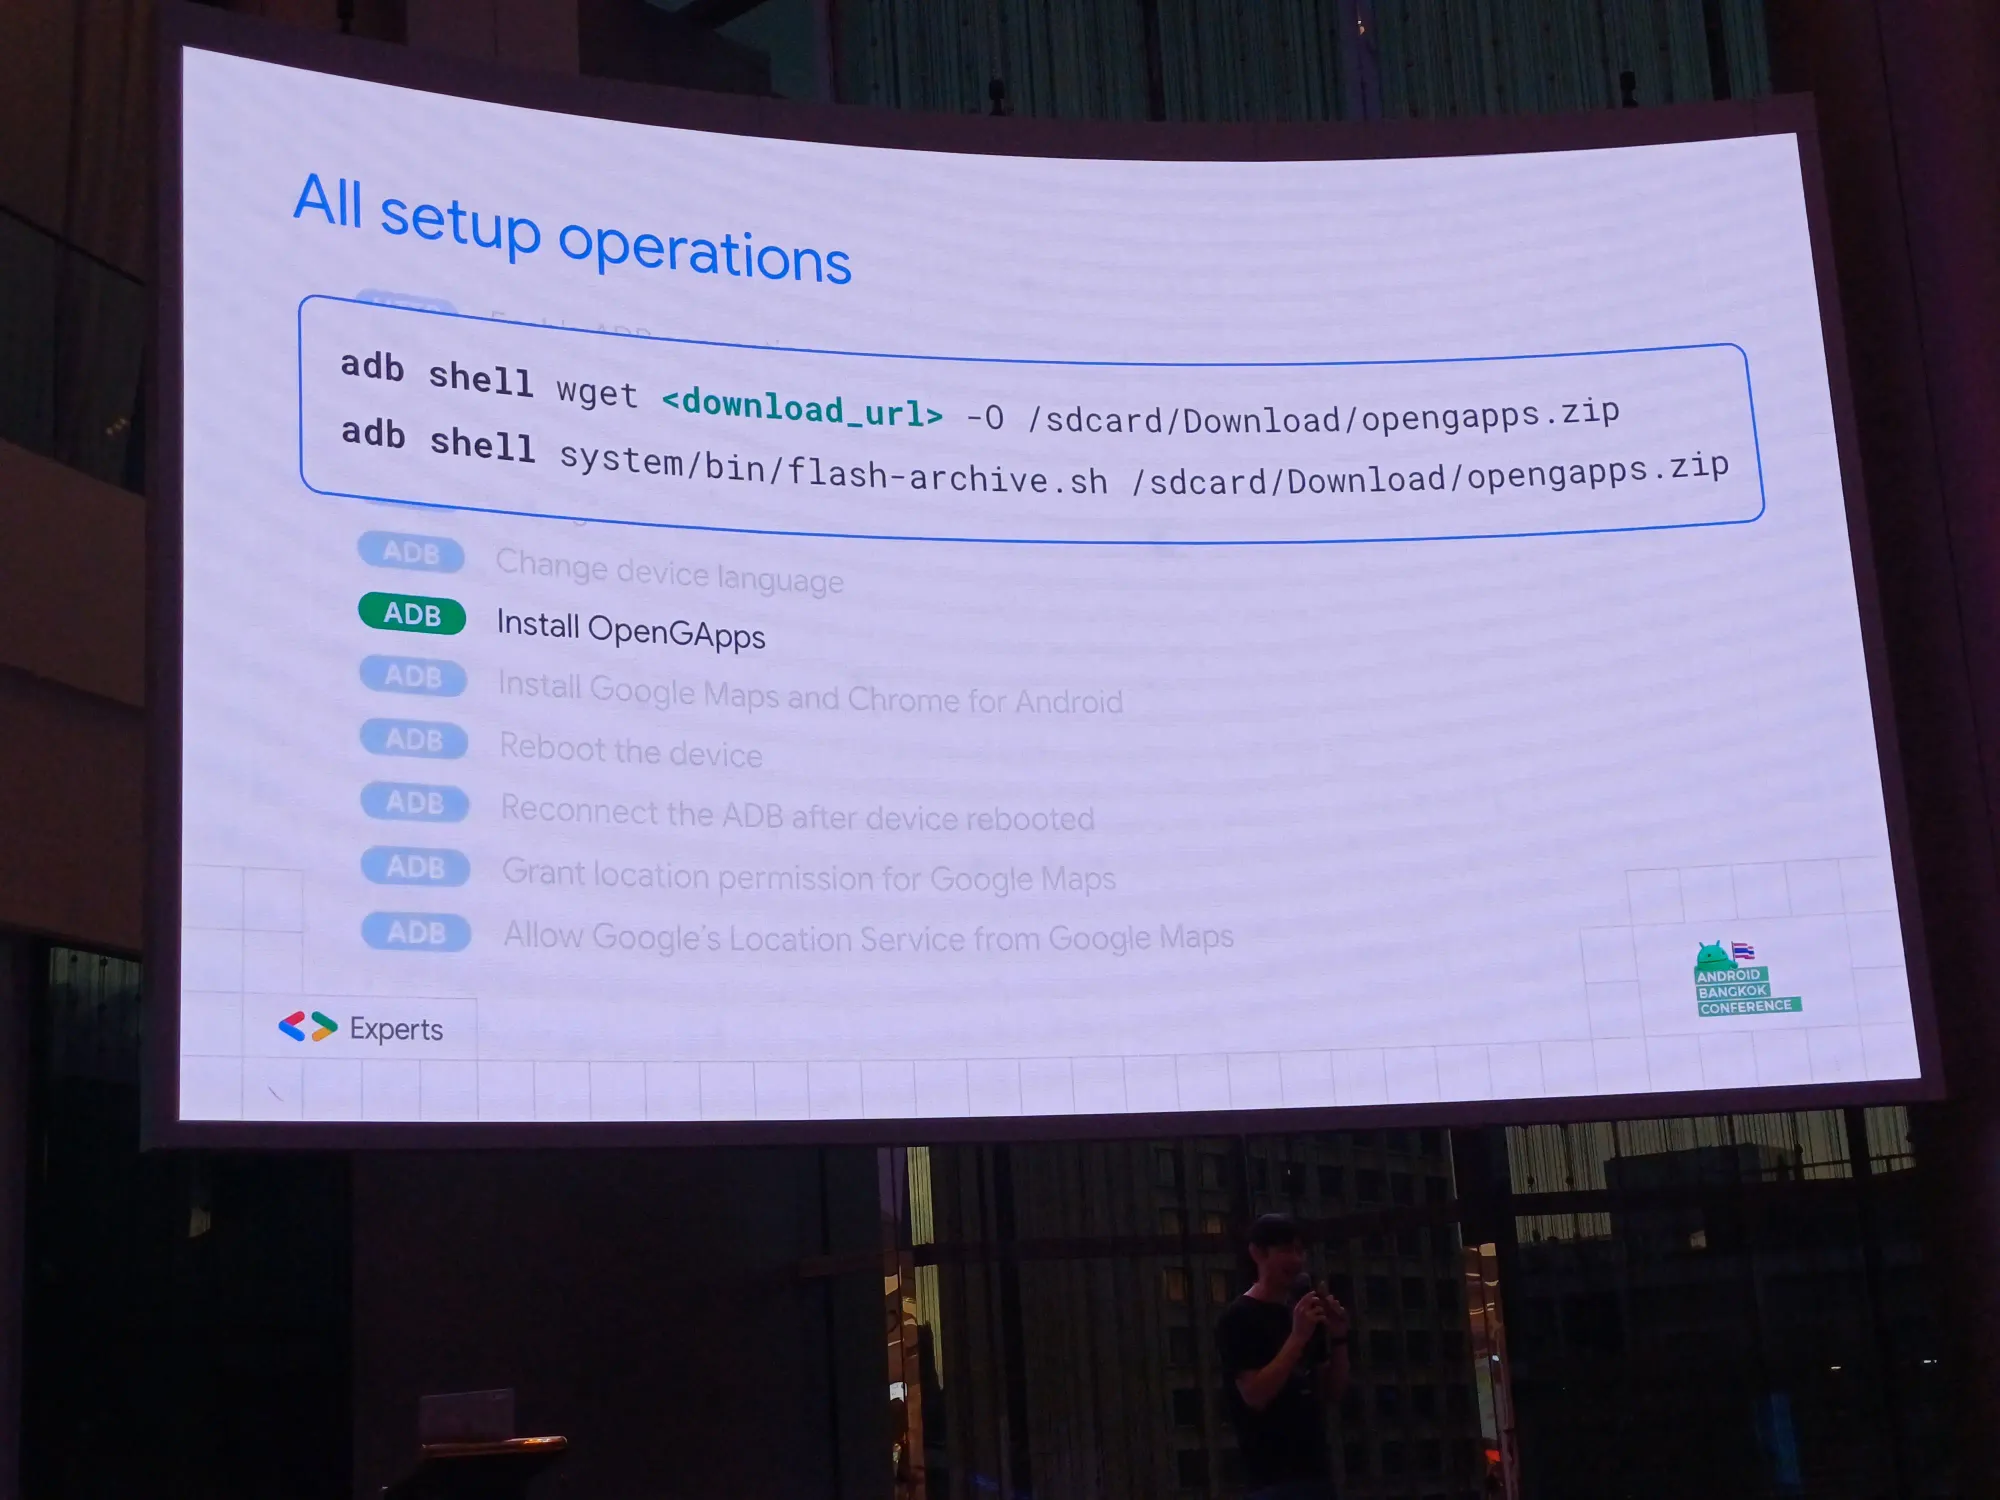
- [ADB] Install OpenGApps: ติดตั้ง OpenGApps แบบ unofficial เพื่อลงใน emulator ได้ ตัว version GPU package เอา Google Play service เลือก pico
- [ADB] Install Google Maps and Chrome for Android: ใช้แค่ Google Maps กับ Chrome
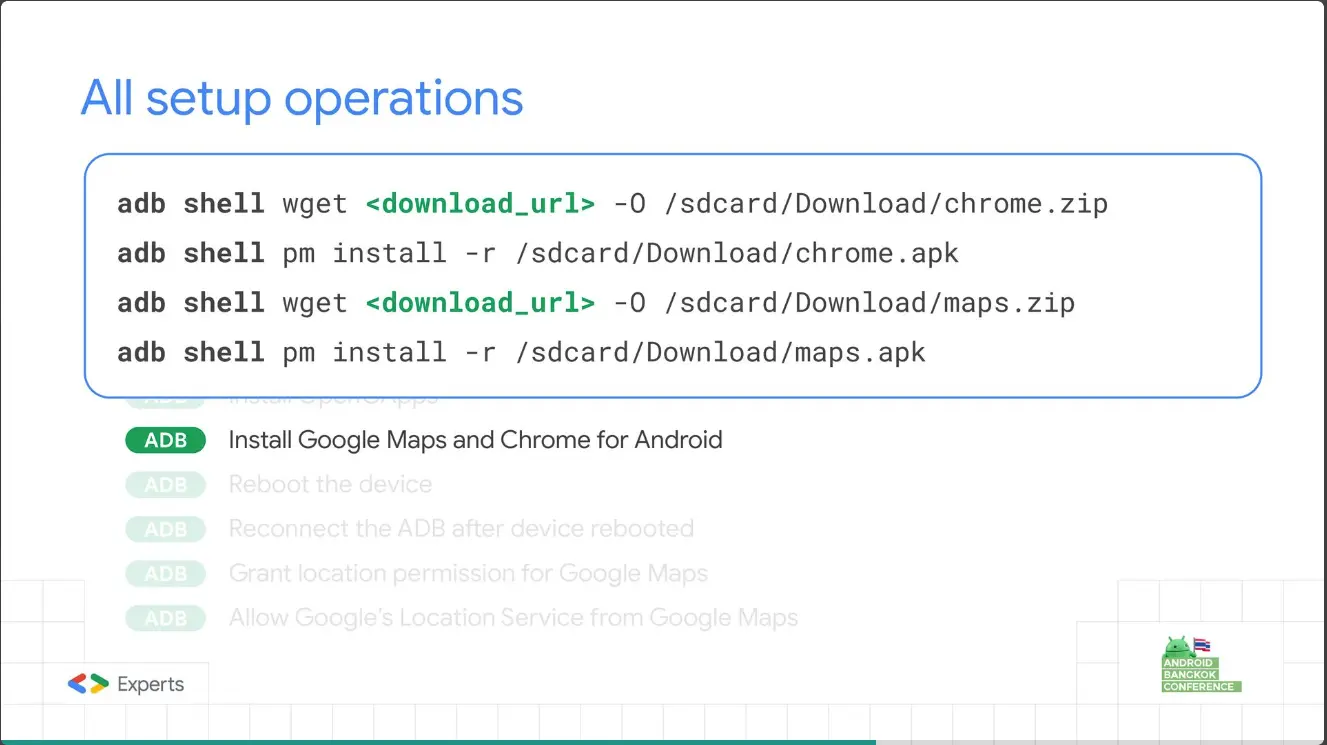
- [ADB] Reboot the device
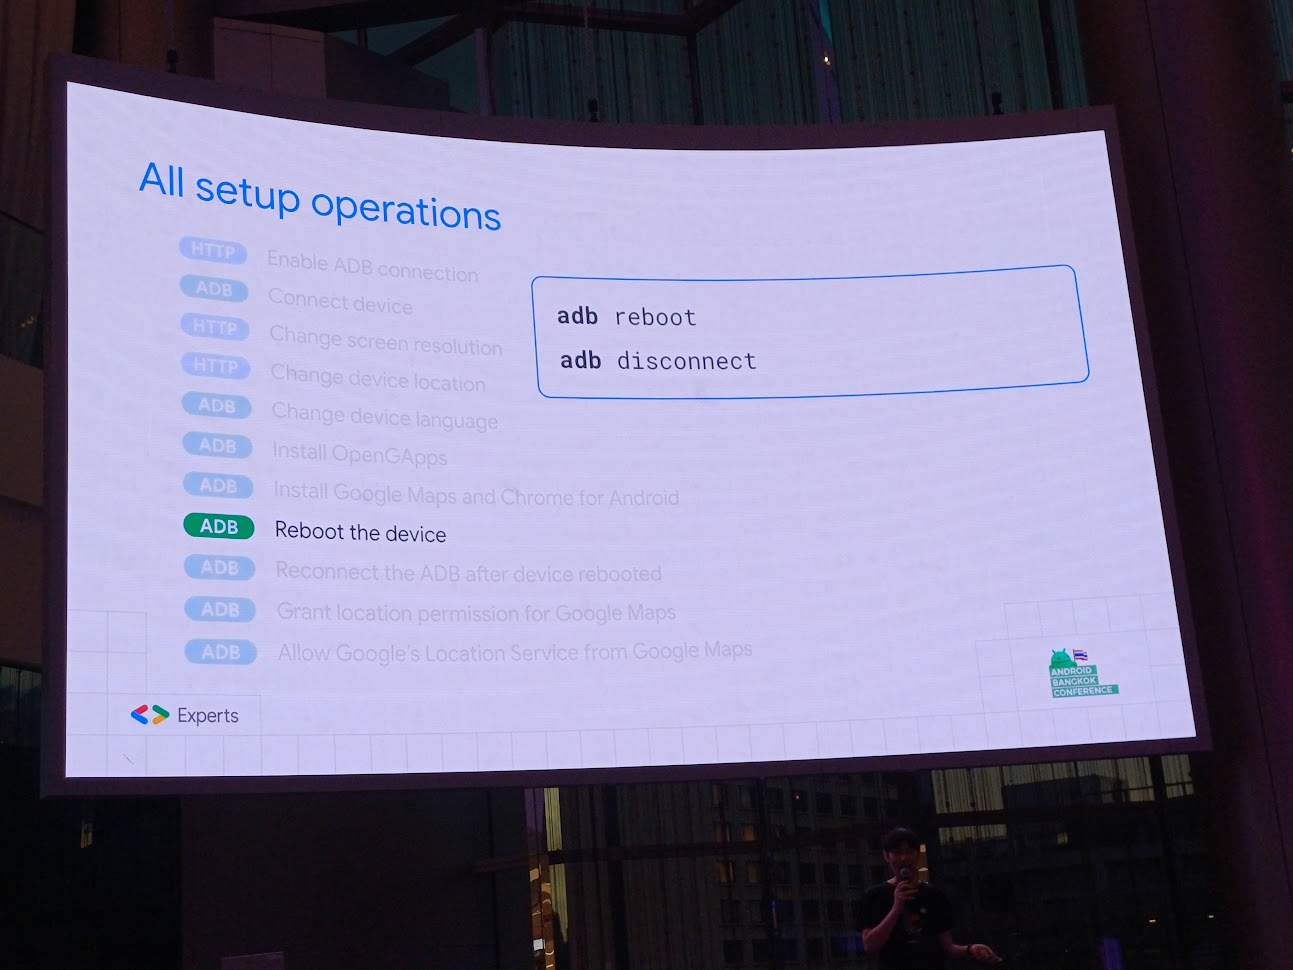
- [ADB] Reconnect the ADB after device rebooted
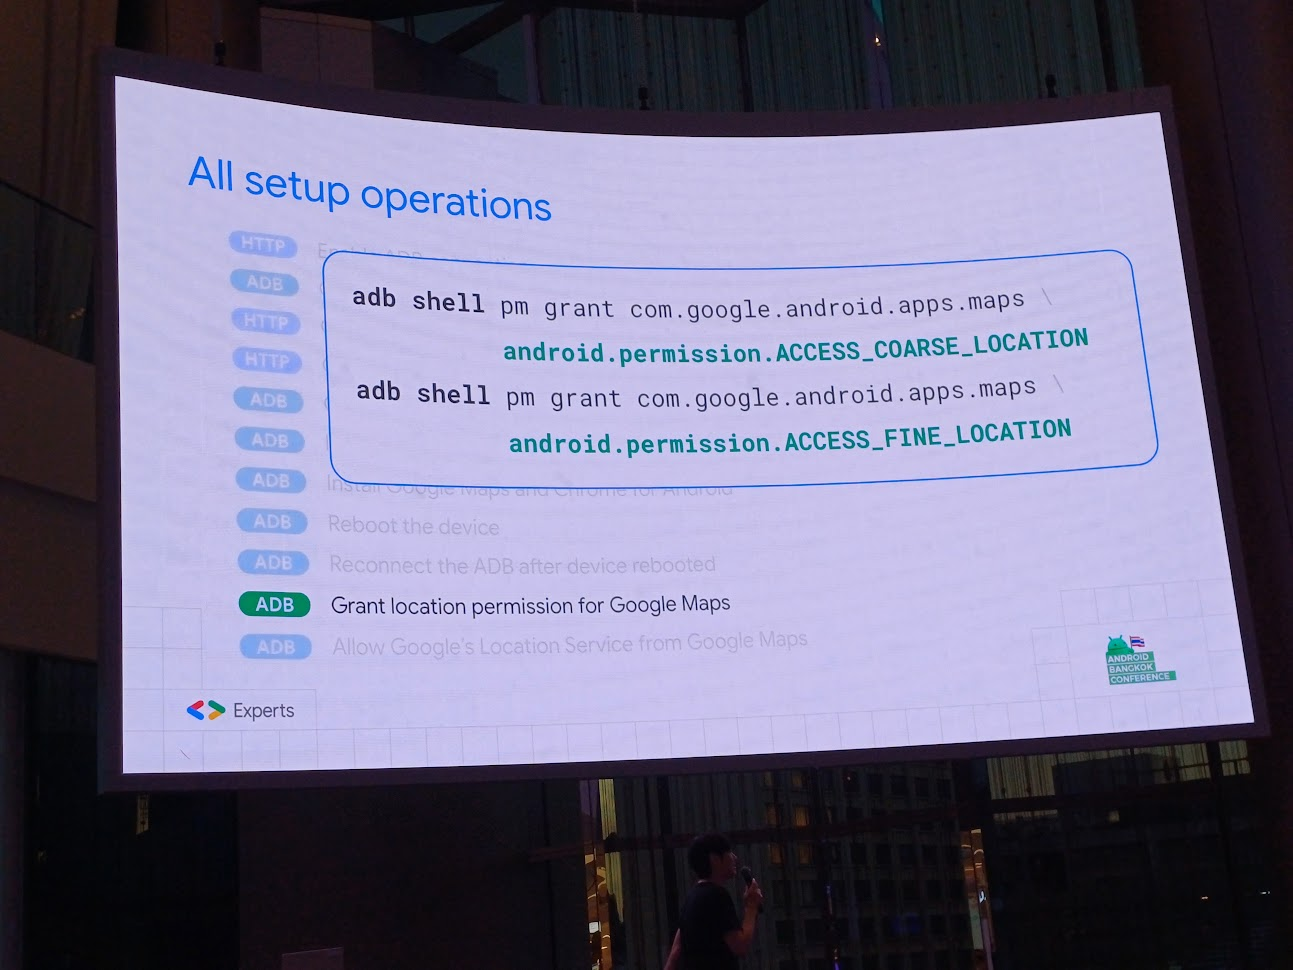
- [ADB] Grant location permission for Google Maps: ให้ permission location เพราะมันกดเองไม่เป็น
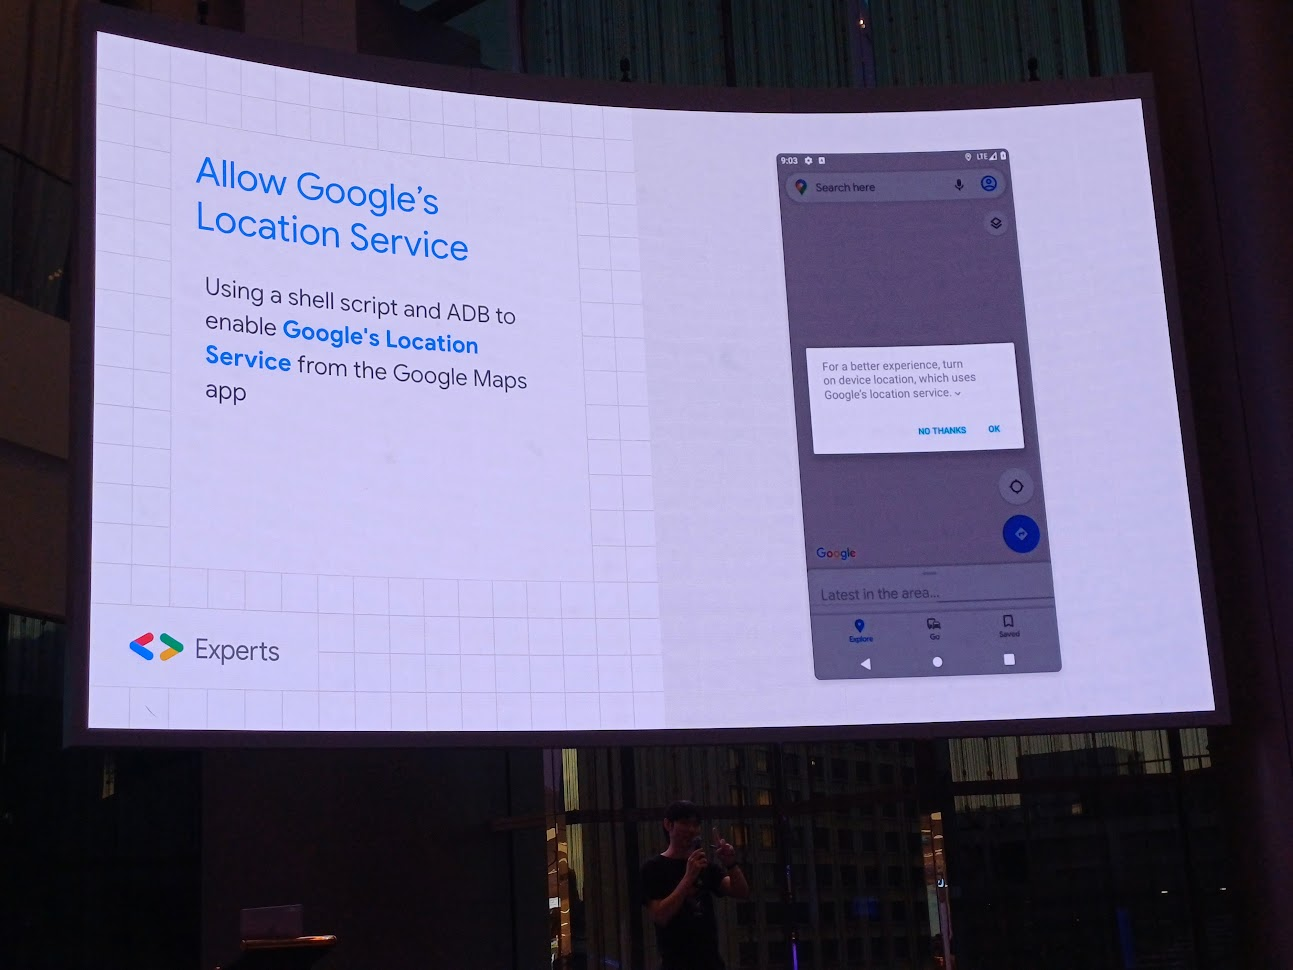
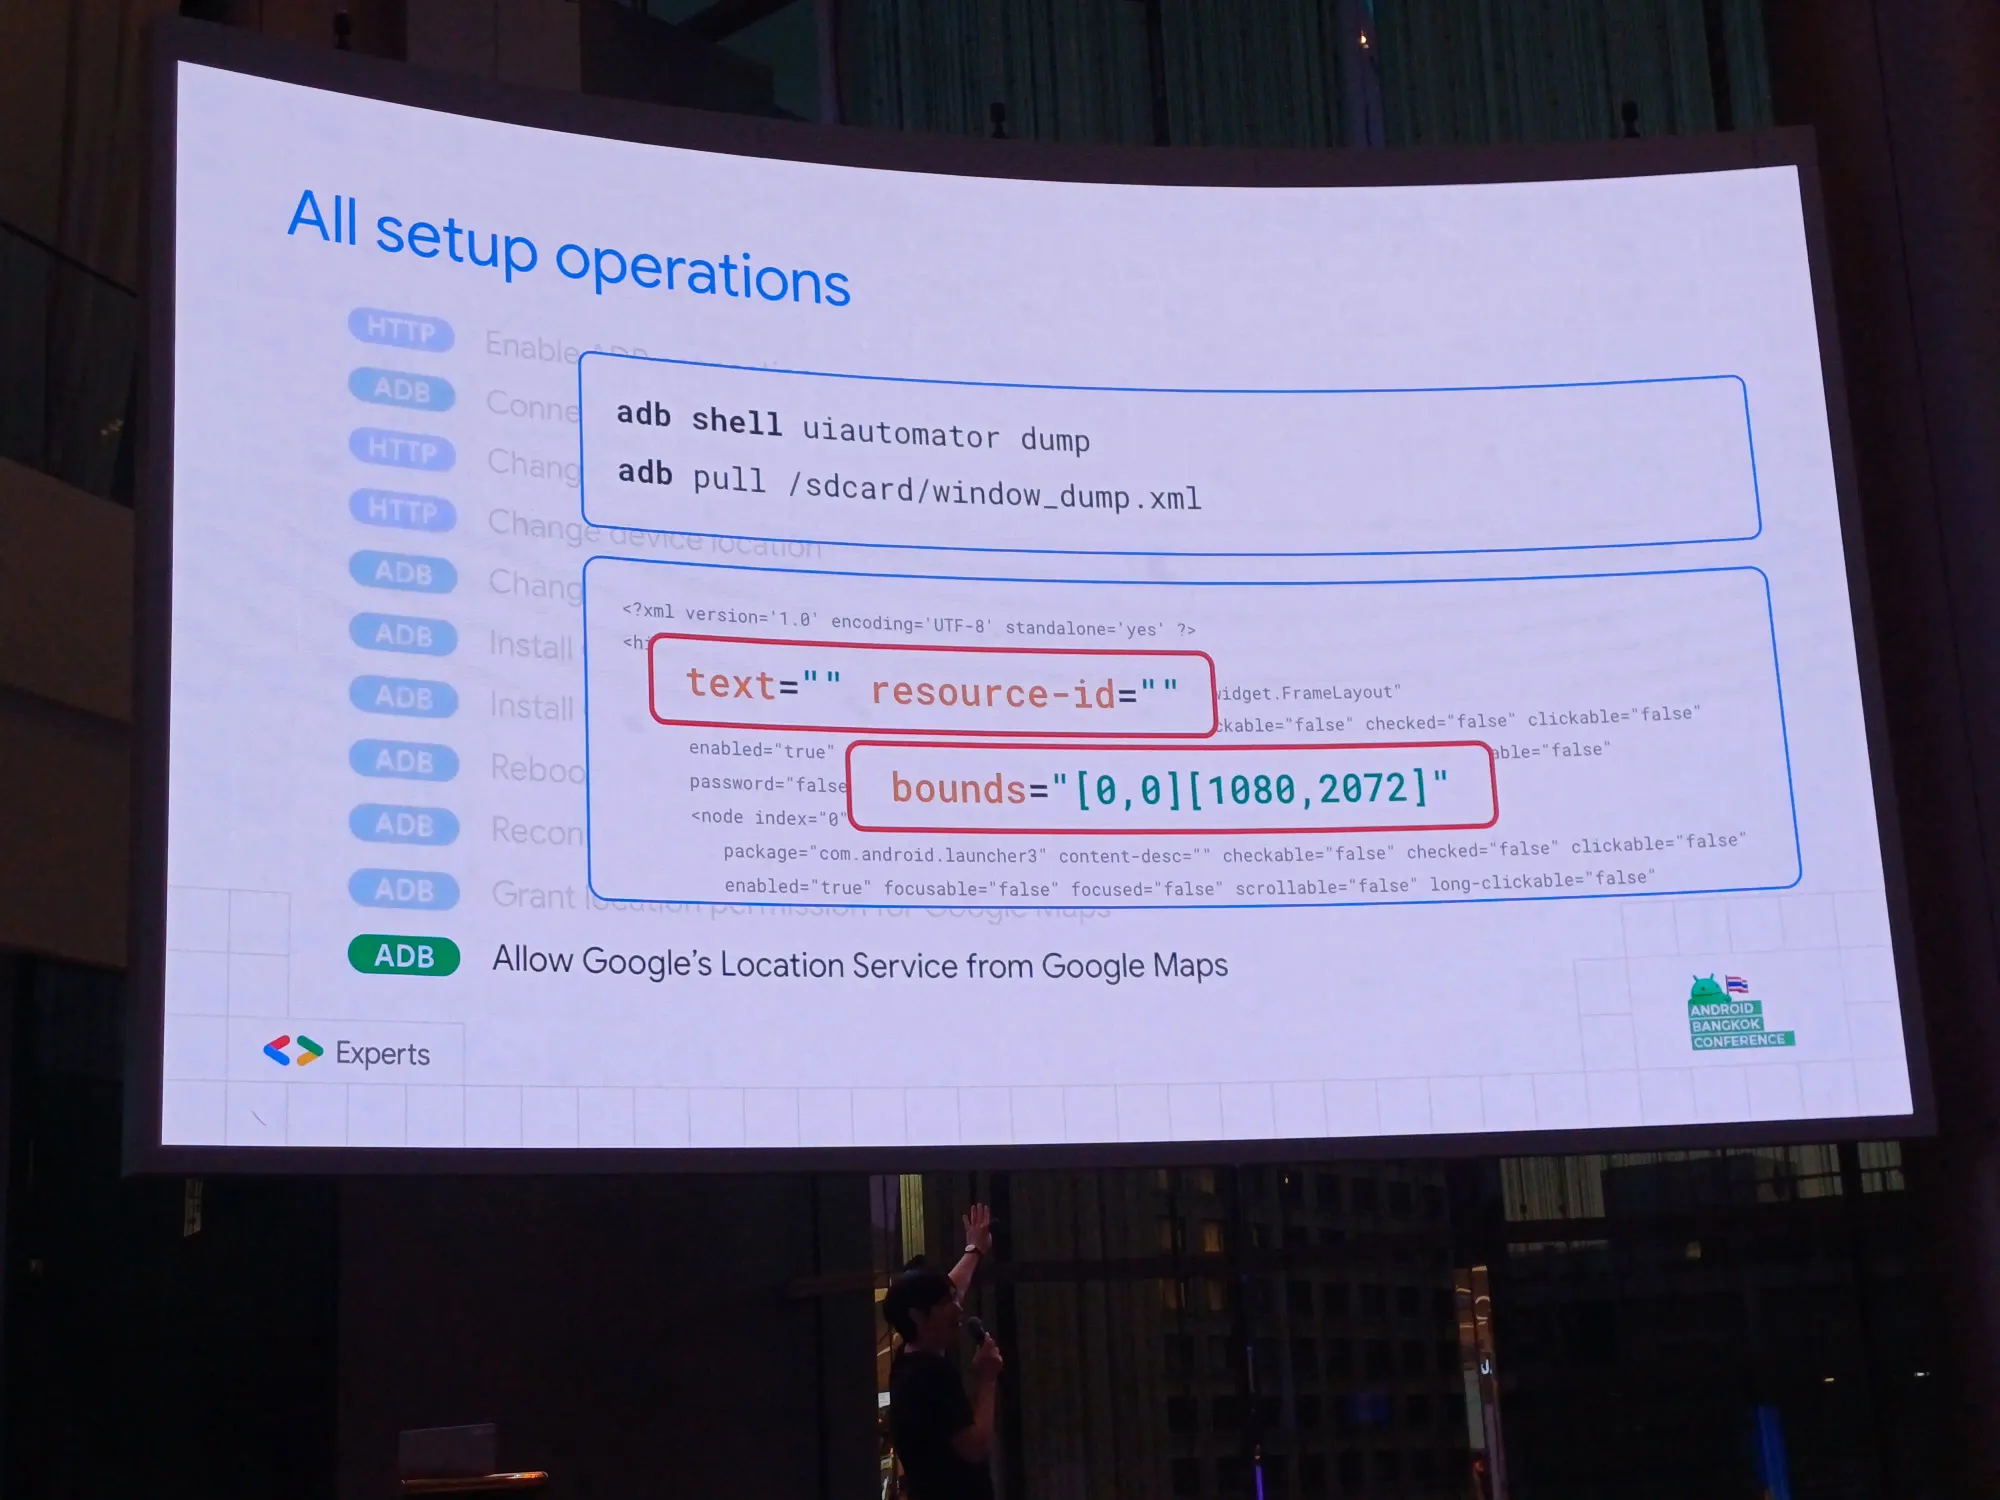
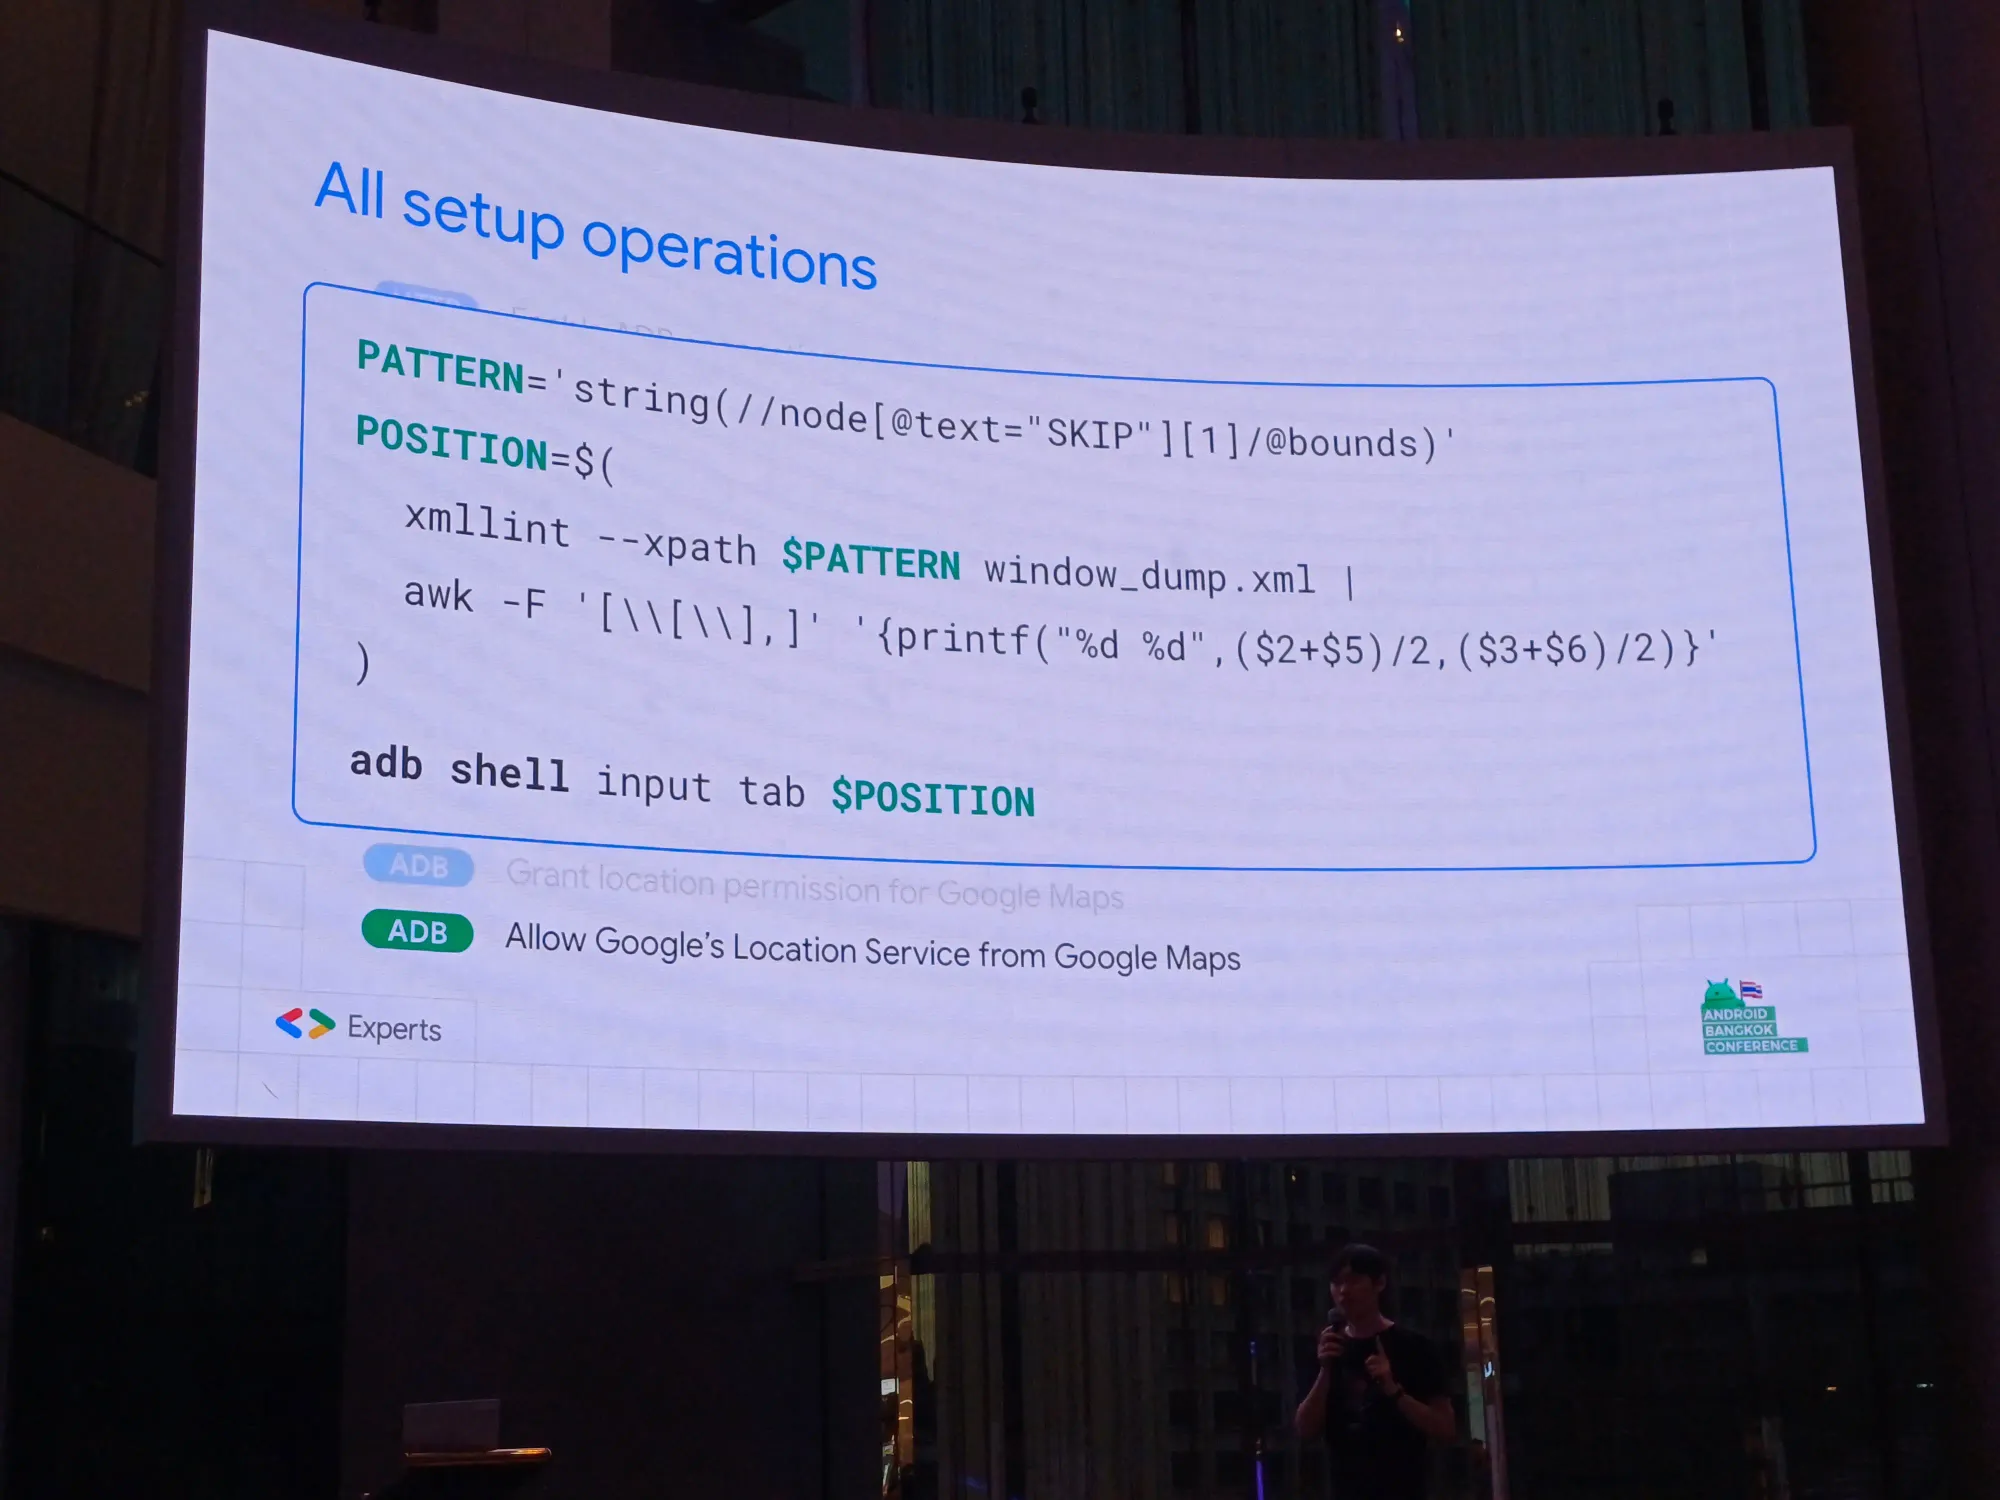
- [ADB] Allow Google's Location Service from Google Maps: สนใจ text (สามารถหาจาก resource id) กับ bounds ให้กดเปิด location service
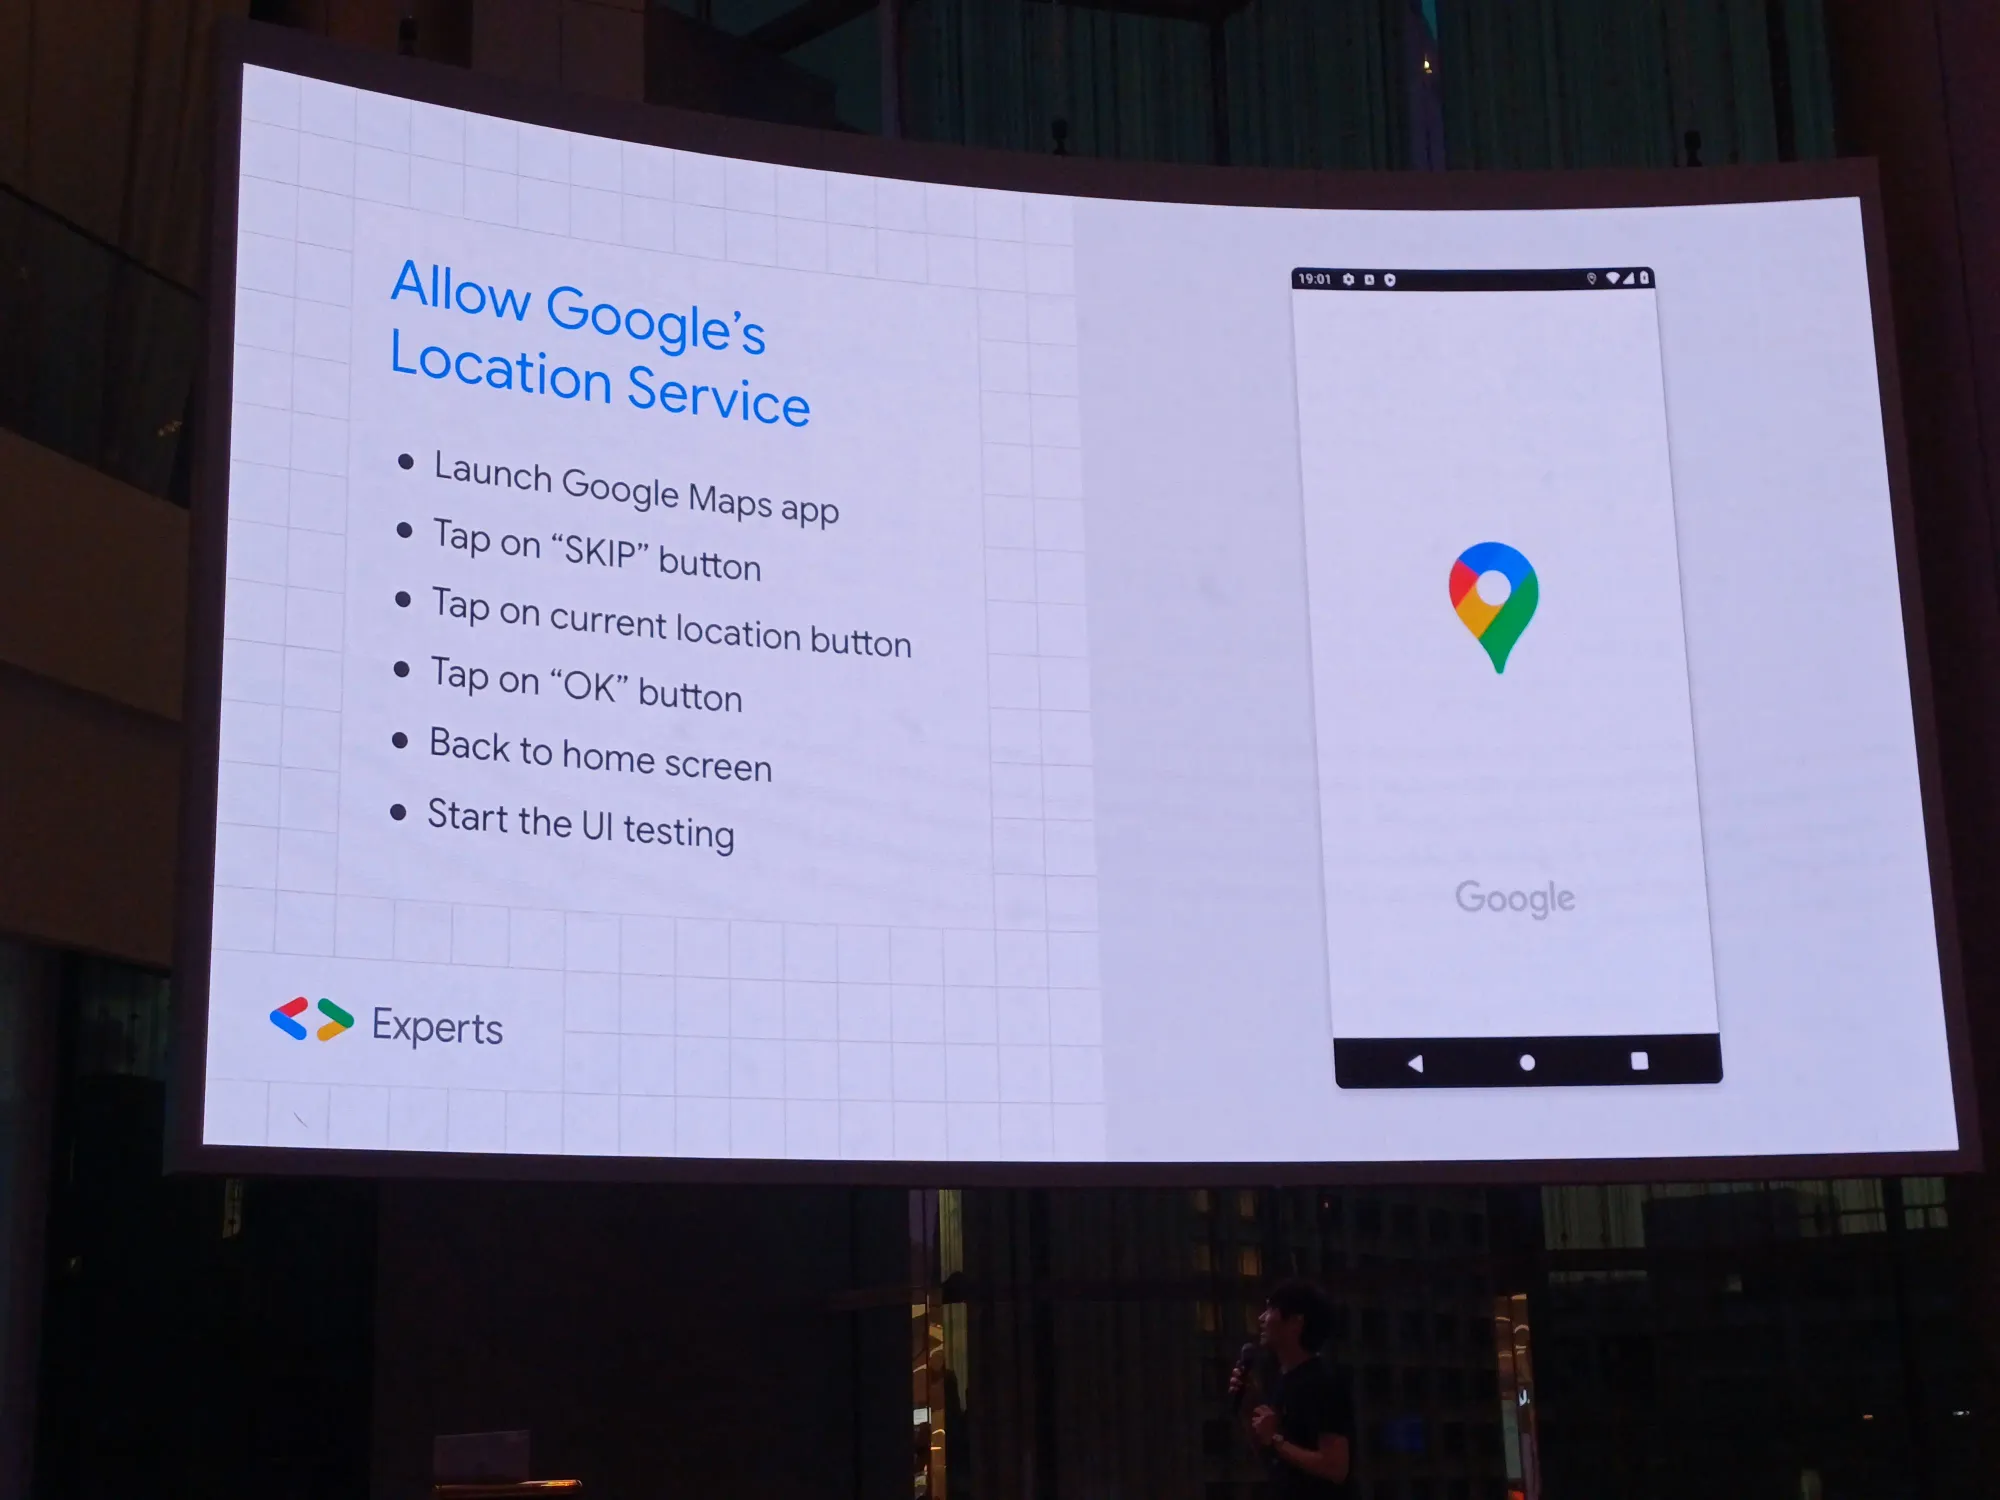
หน้าตามันประมาณนี้
โดยการ setup operation ทั้งหมดพี่เอกเอามาจากไหน มาจาก ChatGPT นะ
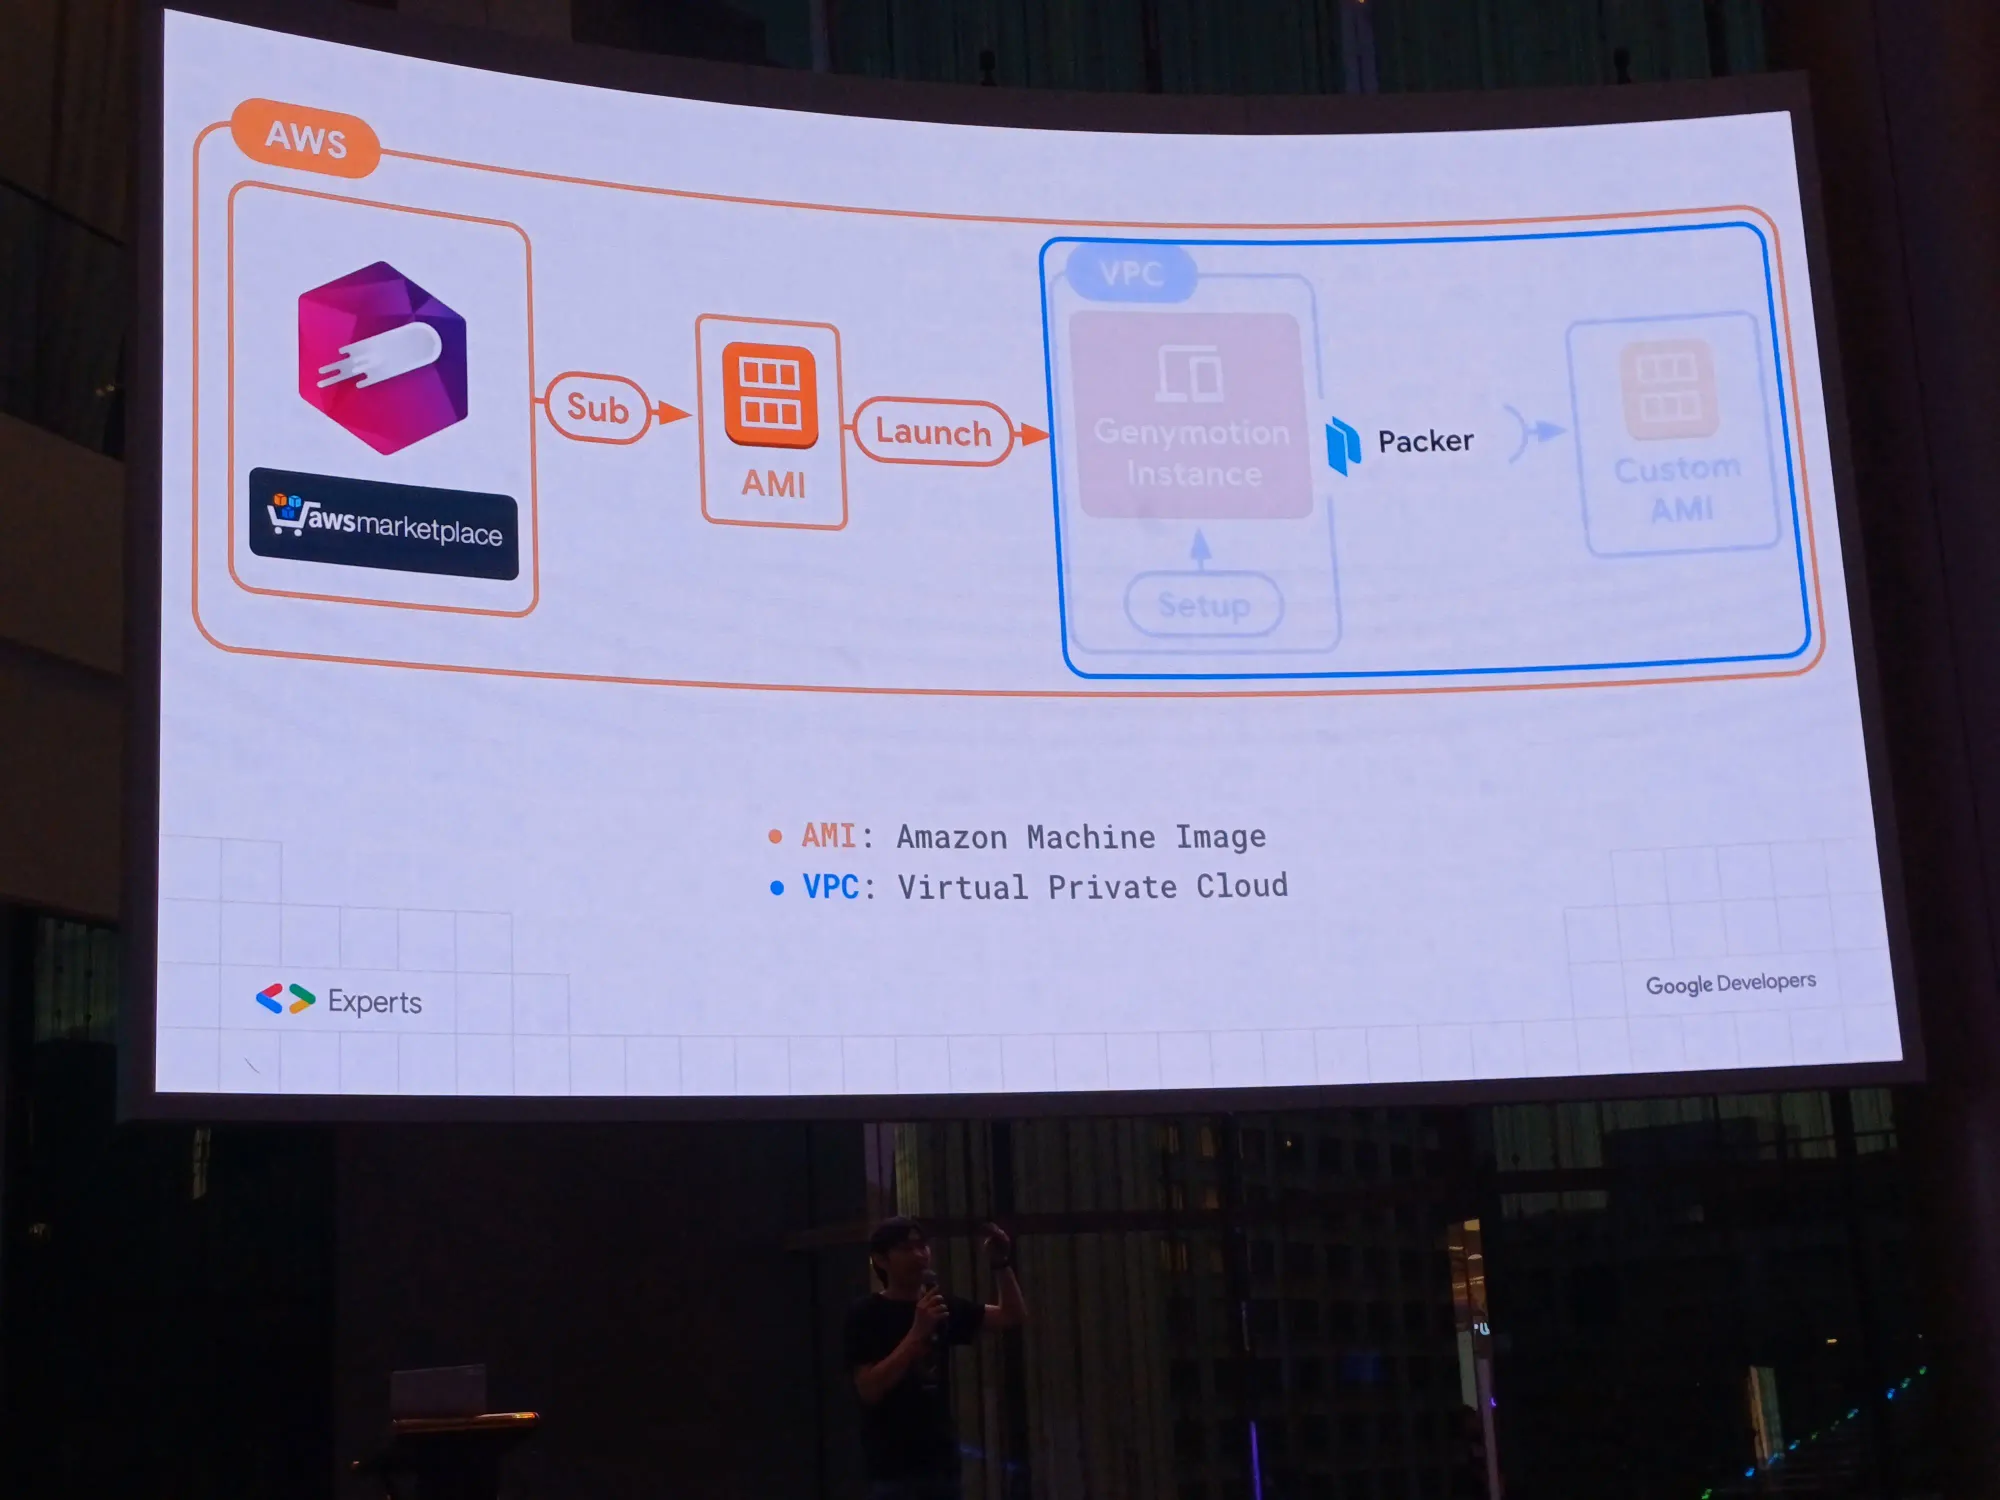
1 job ทำ 10 อย่าง setup จนเสร็จใน 5 นาที ให้ทำ pre-config ให้เรียบร้อย ได้ custom AMI เหมือนเราสร้างตัว visual machine หรือ docker อะไรงี้ สร้าง image-as-a-code
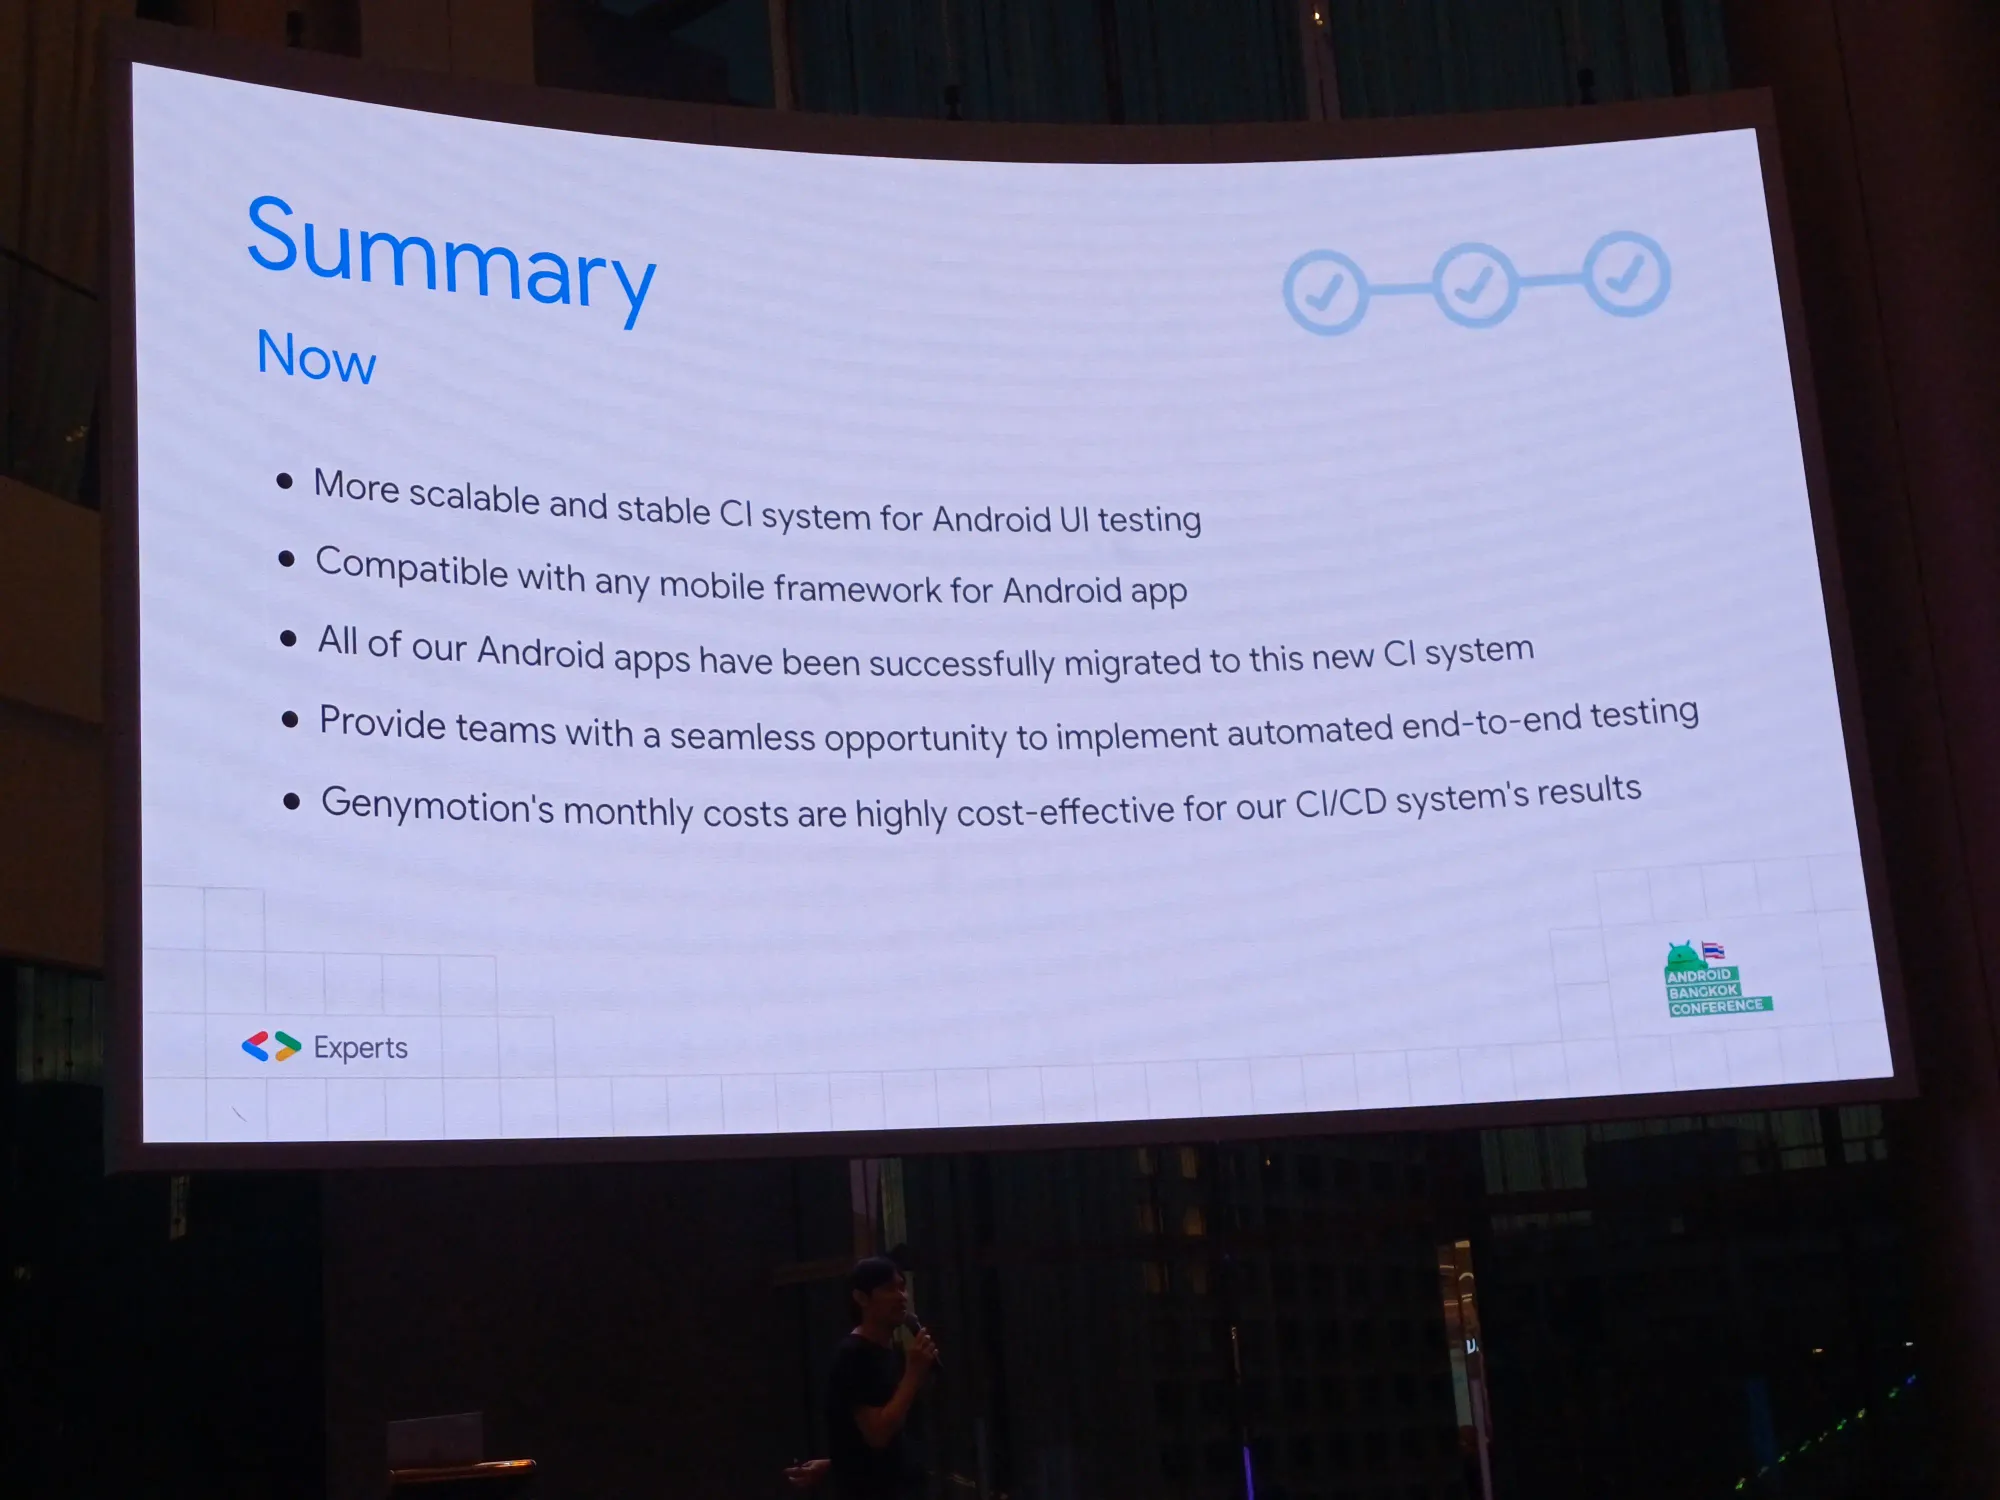
Summary
- เปิด PR → แยก instance บน cloud, stable กว่าของเดิม, ใช้ได้หมดทุก platform
- แต่ละที่มี CI เป็นของตัวเอง เพราะแต่ละ project มีความแตกต่างกัน มองสิ่งที่อยู่ใน session เป็น idea ได้
- ในส่วน spawn ถ้าทีมไม่ได้เรียกอะไร ไม่ต้องเสียเงินในช่วงนั้น
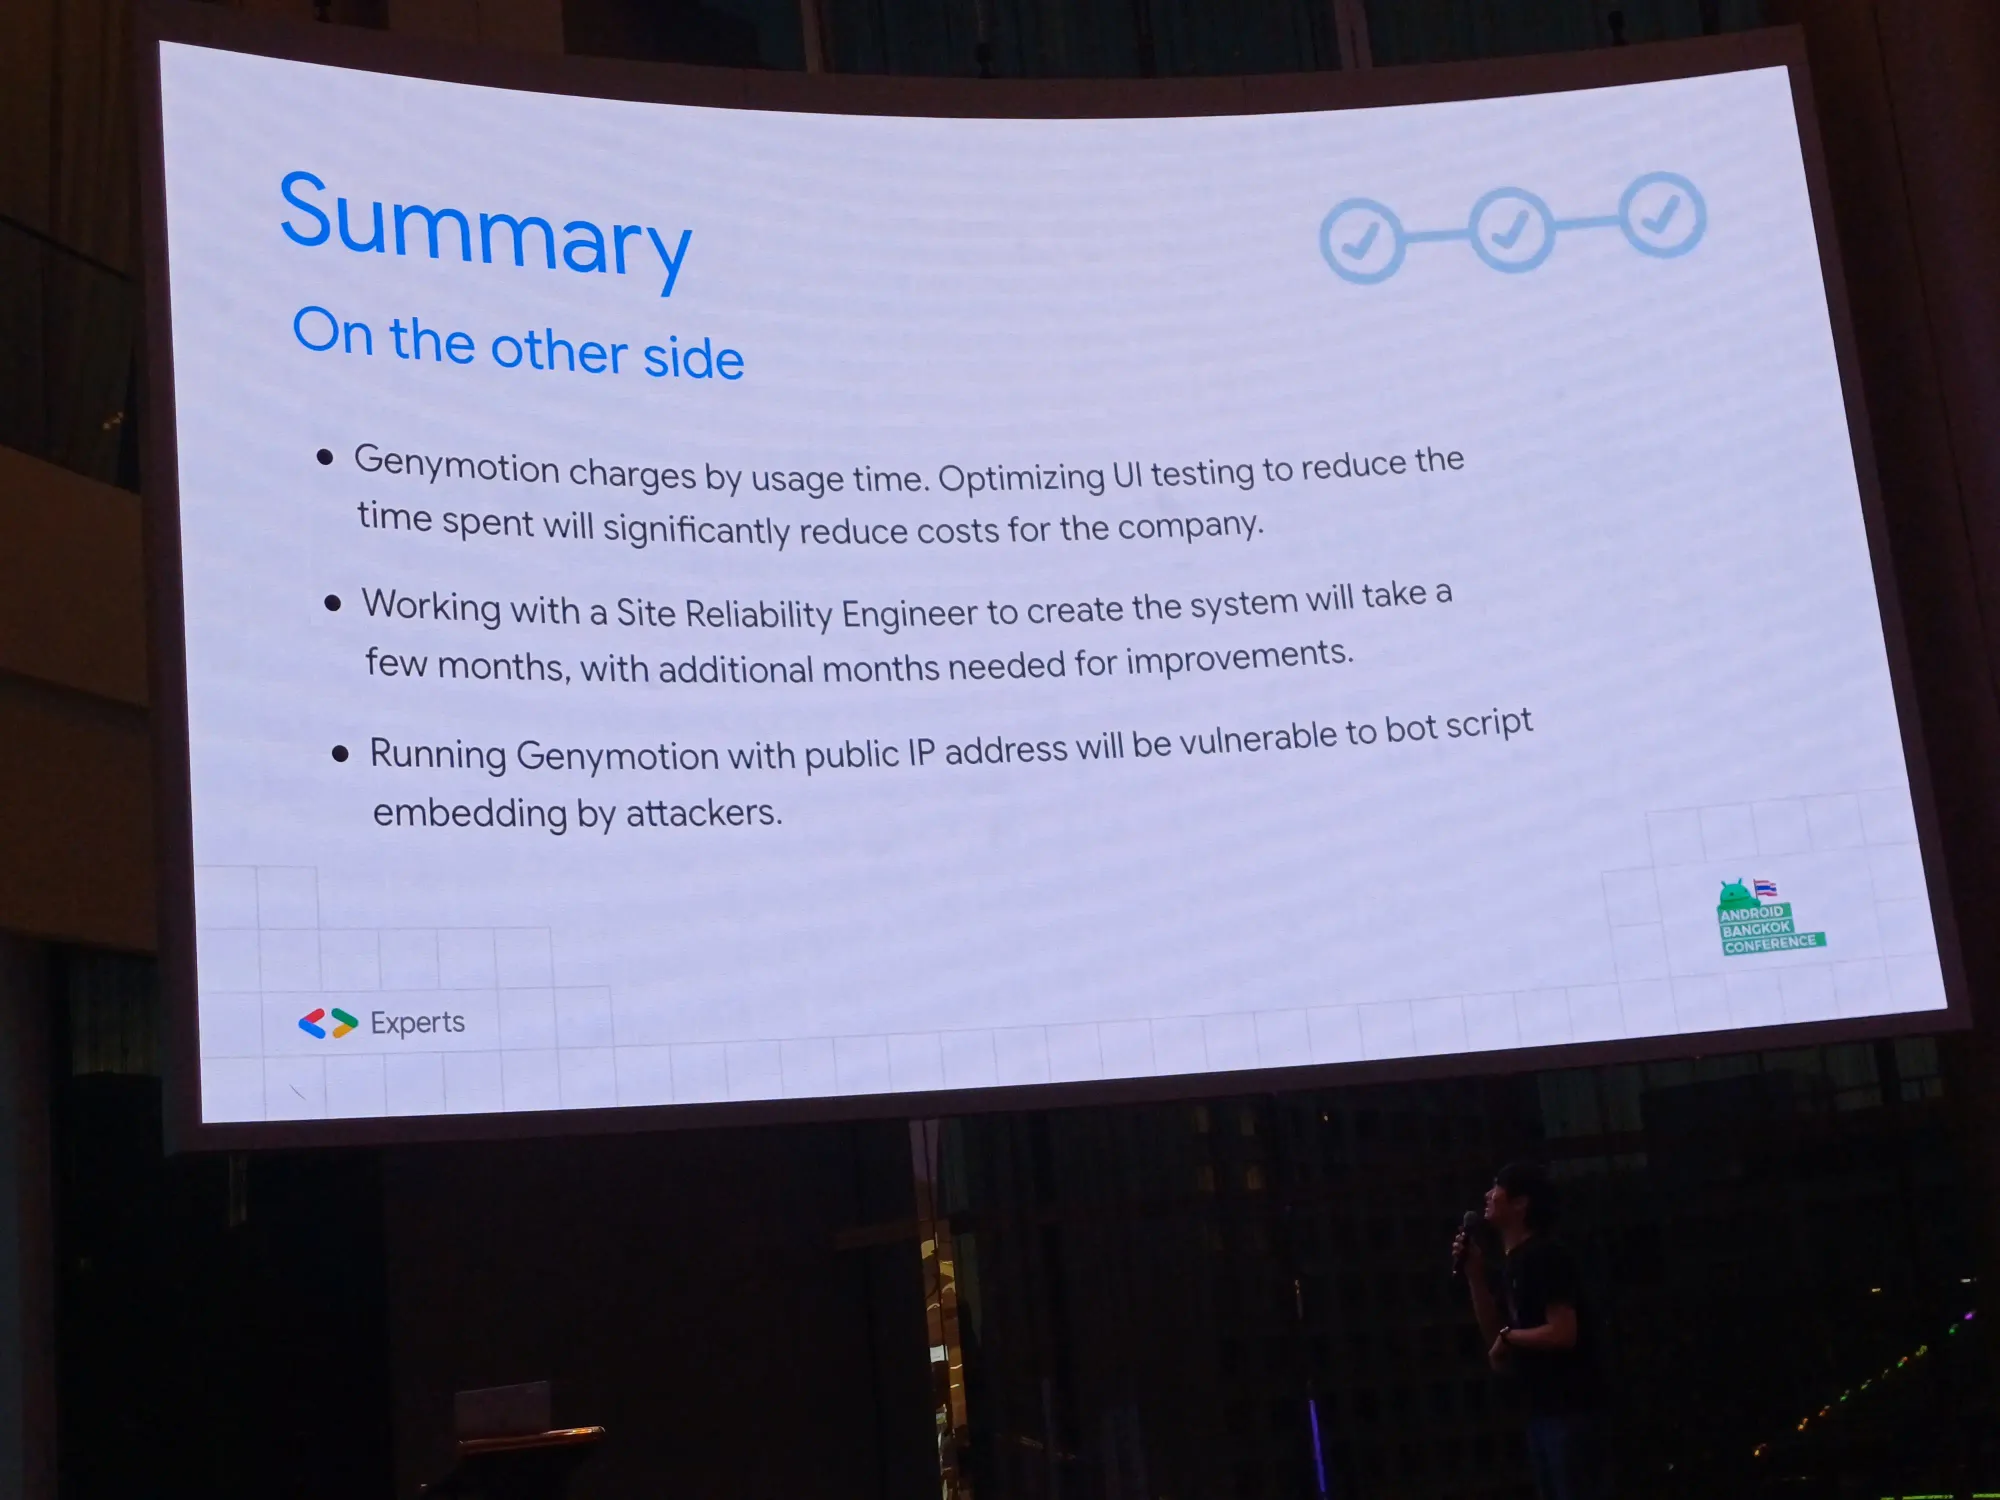
- ส่วนนี้ทำงานกับทีม Site Reliability Engineer ใช้เวลาหลัก quarter กว่าจะเสร็จใน phase แรก include ไปเรื่อย ๆ เป็นปี ให้คำนึงถึง effort ด้วย
- POC ไม่ควรเปิด public IP มี AWS scan แล้วเตือนมาว่ามีคนแอบฝัง bot บนเครื่อง ดังนั้นเลยให้เข้าได้โดยการต่อ VPN เท่านั้น
อันนี้สไลด์ ของ speakerdeck สามารถจิ้มดูแต่ละหน้าได้เลย
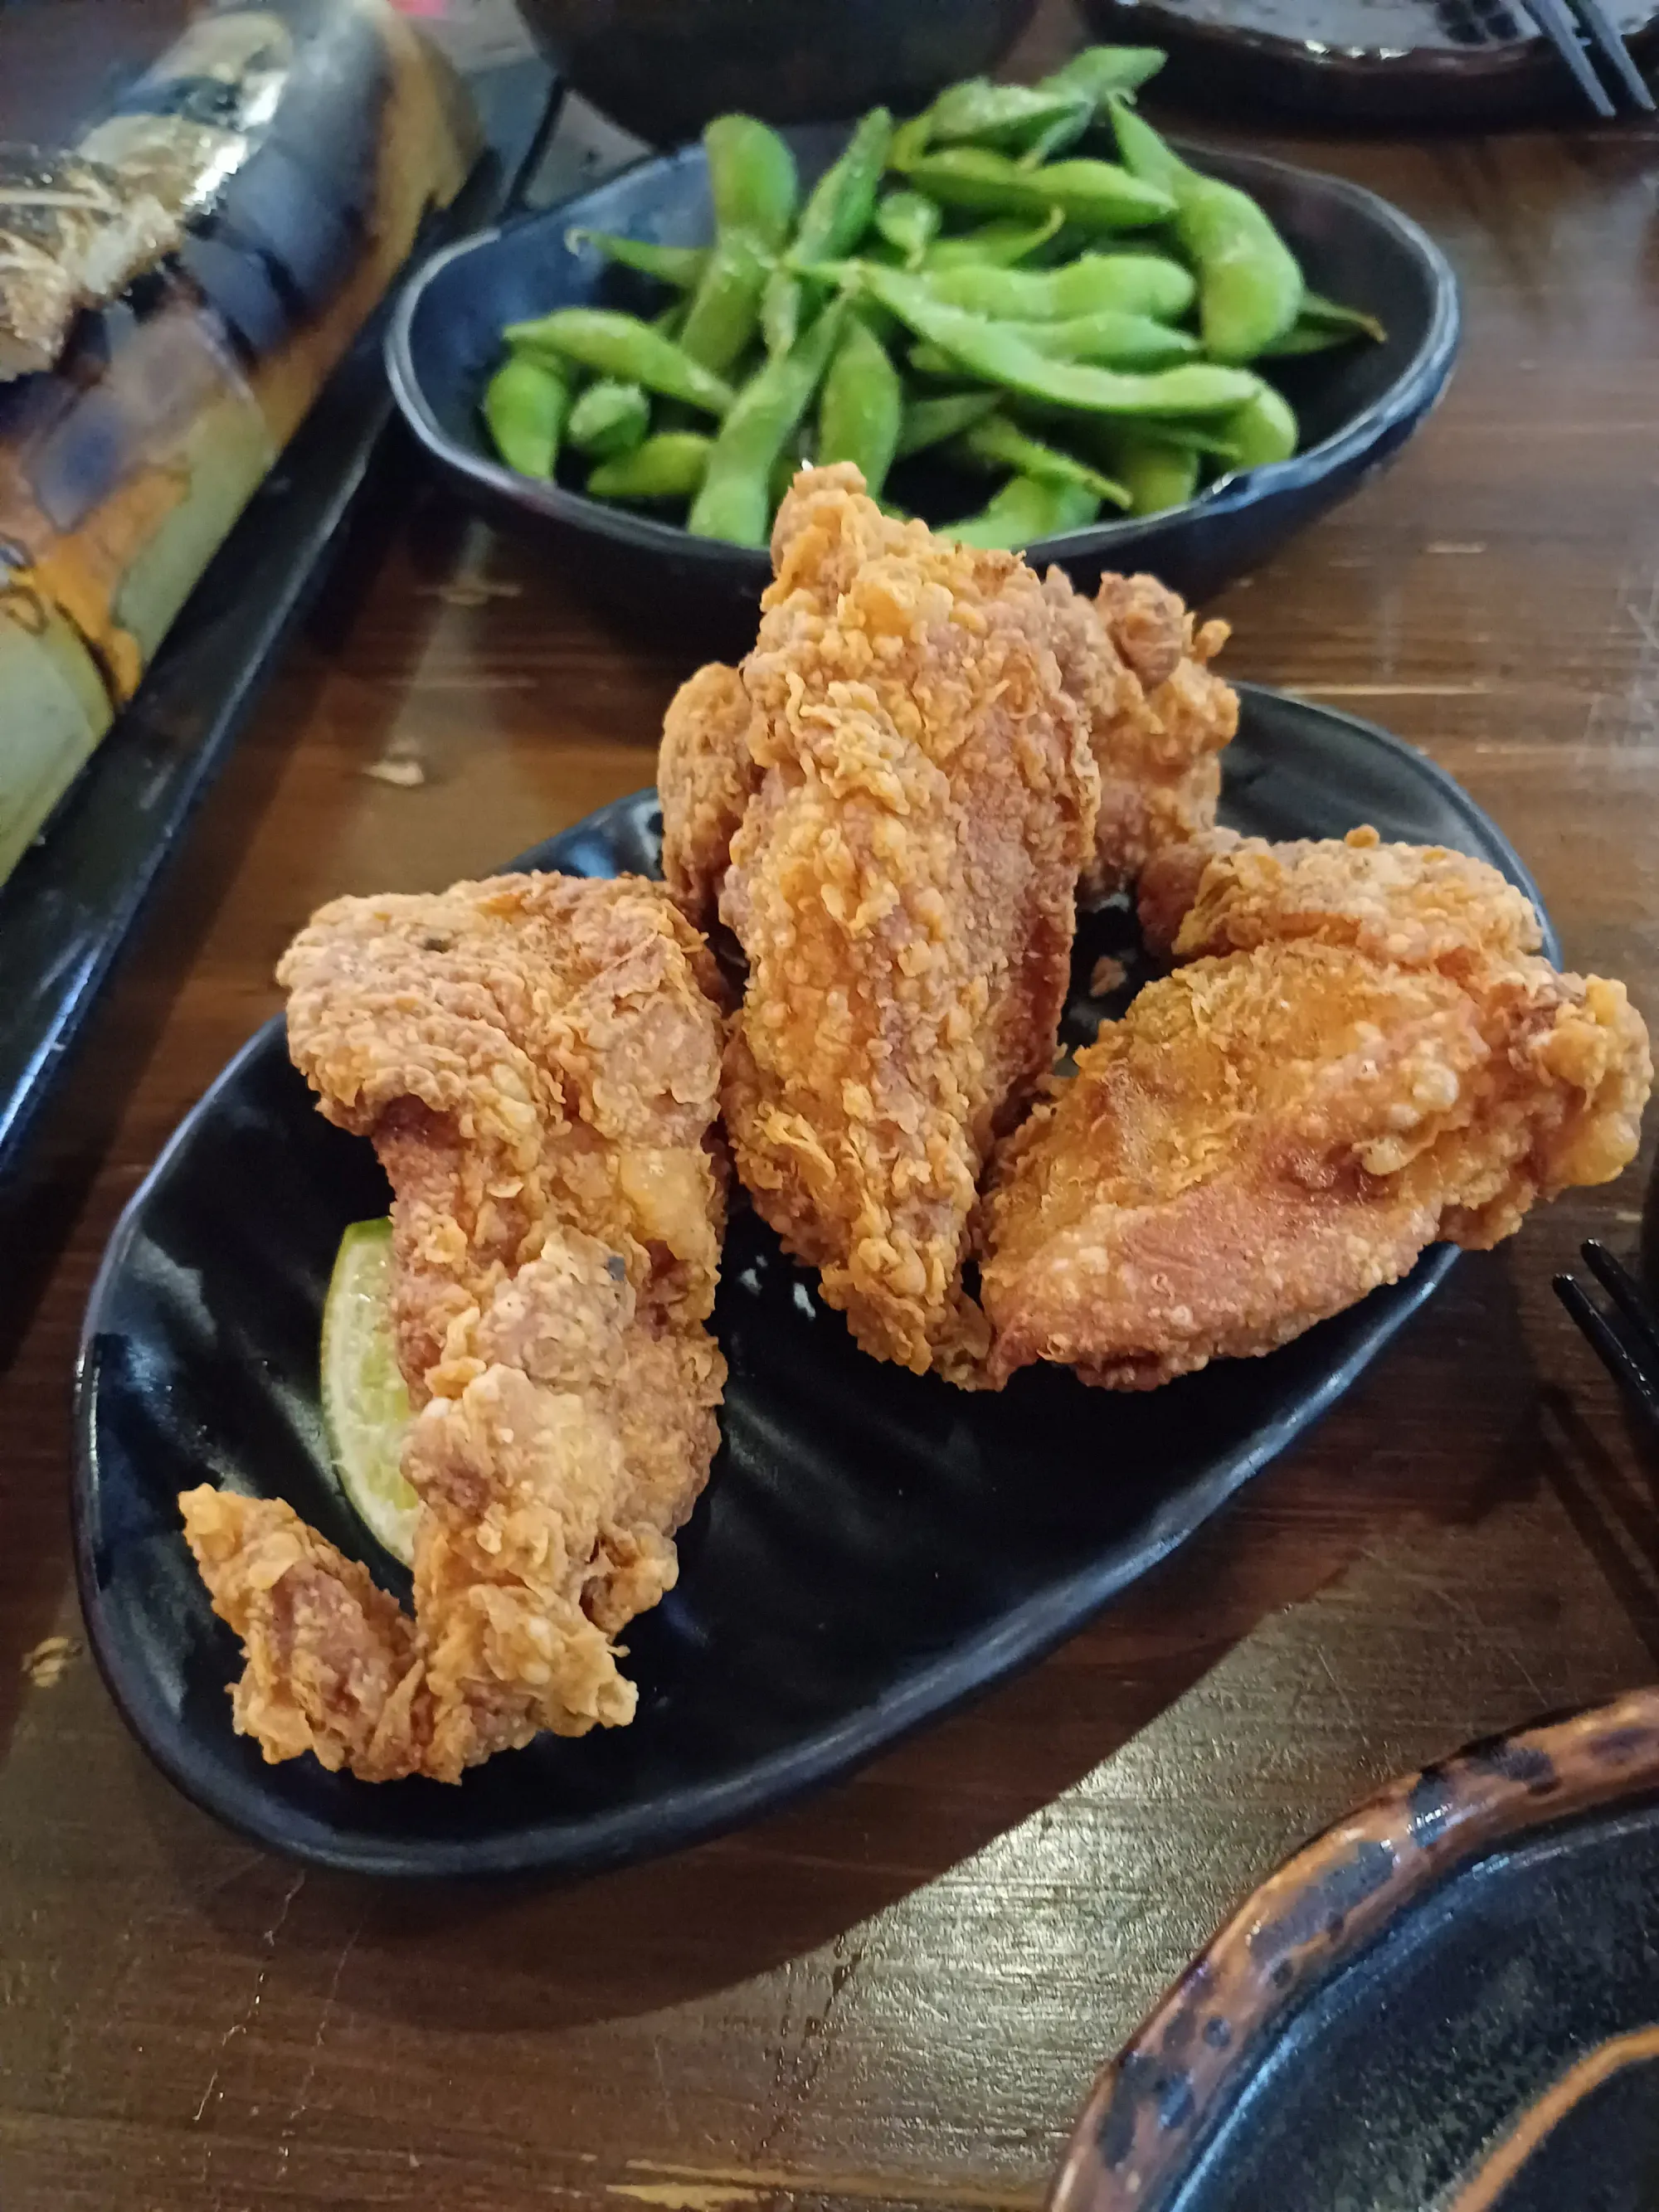
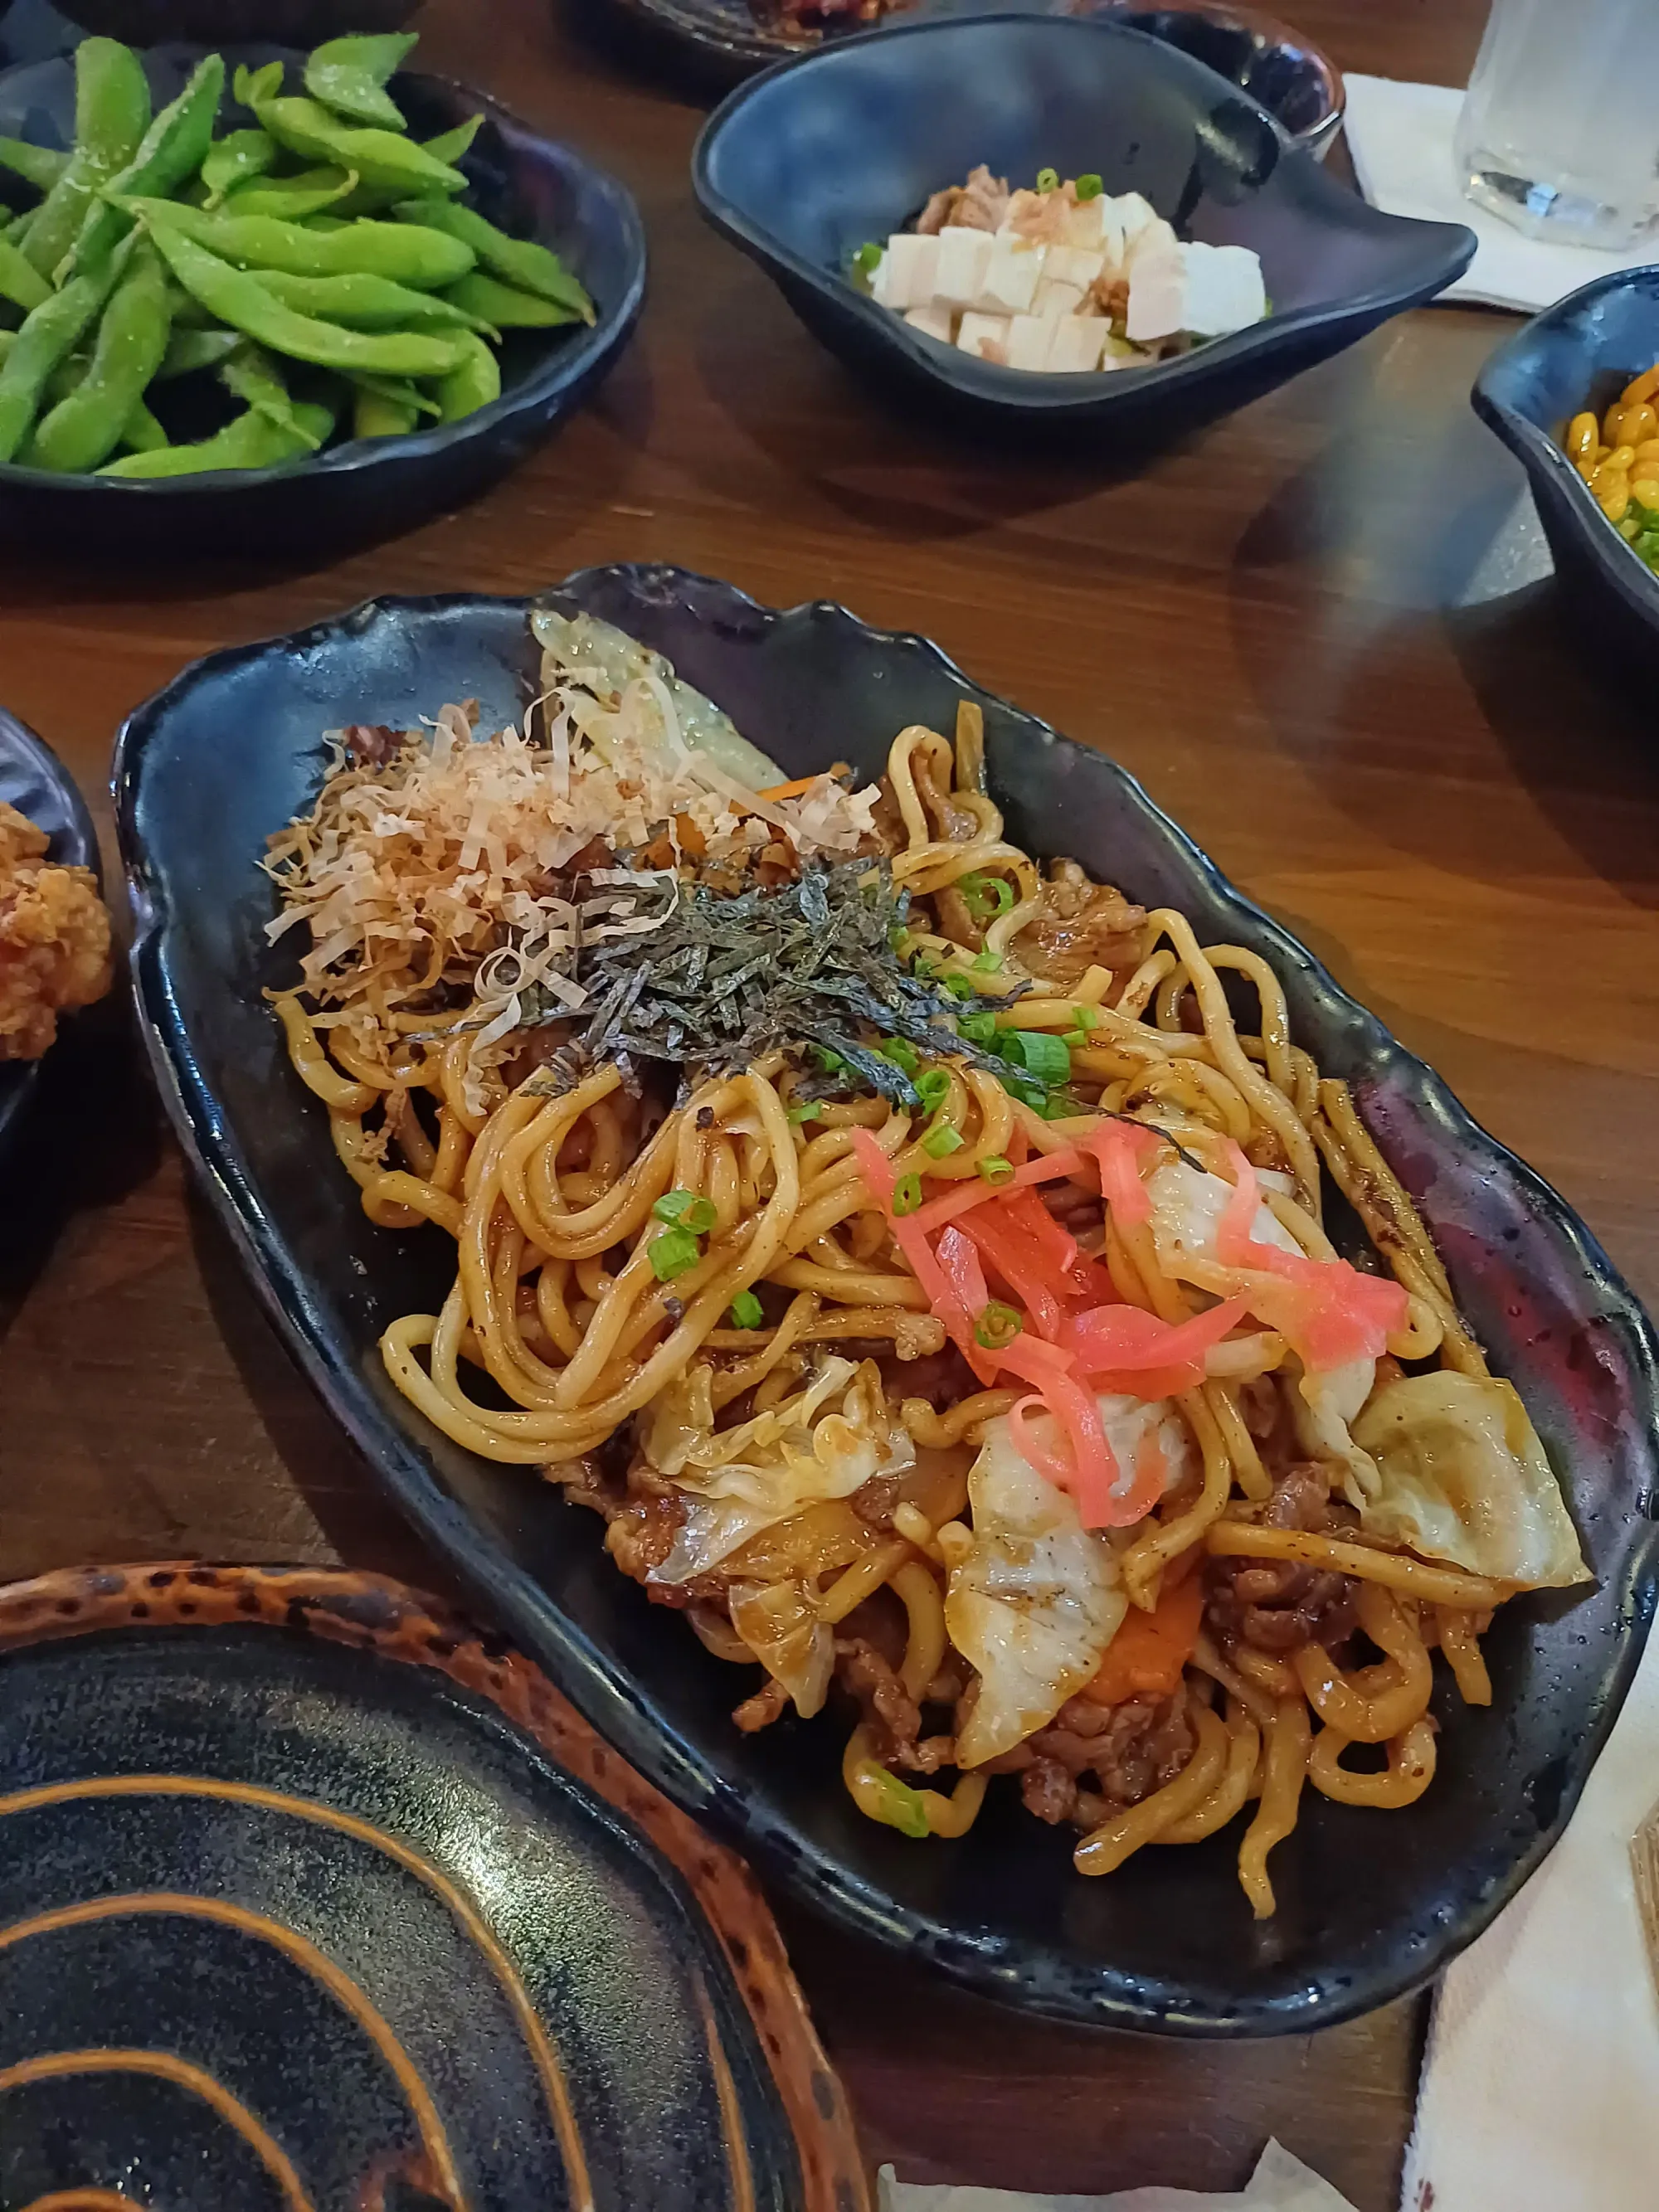
หลังจากงานก็รับประทานอาหารกันกับชาว Android Developer (ที่เราขอเนียนนับ iOS Developer ไปในนี้ 1 คน ฮี่ฮี้) ที่ร้านเคนชิน อิซากะยะ ที่สาขา MBK บอกเลยว่าทุลักทุเลสุด ๆ เริ่มตั้งแต่ไม่สามารถใช้ทางหน้าพาร์คพารากอนได้ เนื่องจากวันนั้นฝนตกหนักตั้งแต่ตอนเรามาแล้ว นํ้าเจิ่งนองสุด ๆ เลยต้องลงไปข้ามทางม้าลายด้านล่าง เพื่อไป siam center และ siam discovery ตามลำดับ บอกเลยว่าอาจจะมีพา speaker ชาวต่างชาติหลงไปบ้างนิด ๆ หน่อย ๆ จนในที่สุด ถึงร้านเรียบร้อย เย้ ๆ ก็รับประทานอาหาร พร้อมเม้ามอยกันทั้งภาษาไทยและภาษาอังกฤษกันไป
เอาจริงร้านเคนชินเนี่ย ร้านประจำชาวเดฟเลยนะ เอ๊ะอะมาร้านนี้กันตลอด แล้วแต่แถวนั้นจะมีสาขาอะไร 5555555 ทางเราได้ทานปลาซาบะดองย่าง signature ของทางร้าน 5555 ไก่ทอดที่กรอบนอก ฉํ่าใน ยากิโซบะเขาทำเข้มข้นมาก แต่หลัง ๆ แอบเลี่ยนไปนิดนึง
บล็อกนี้แน่นอนว่าช้ากว่ากำหนดเนอะ เนื่องจากก็มีเรื่องอื่น ๆ ที่ต้องทำ ไหนจะเหนื่อยจากงานแบบหมดพลัง ไหนจะเฝ้าบูธ Pudgy Thailand ที่งาน Blockchain Genesis 2023 ไหนจะซ้อม RoV เพื่อไปแข่งอีก แหะ ๆ
หวังว่าบล็อกนี้จะได้ประโยชน์กับชาว Android Developer ทุกคนน้า ปีนี้ยอมรับว่ากระแส Jetpack Compose มาแรงมาก ๆ จริง ๆ นึกถึงปีนั้นที่ป้าย Kotlin กันกระจายเลย 5555555
เอ้อปีนี้ได้เสื้อจากการซื้อบัตร มีให้เลือกเป็นสีดำ ที่มี logo Android 14 และเสื้อขาว ที่มีน้อง Android version มีขนด้วย พร้อม sticker เหมือนงาน DevFest Bangkok 2023 ด้วยล่ะ
ติดตามข่าวสารตามช่องทางต่าง ๆ และทุกช่องทางโดเนทกันไว้ที่นี่เลย แนะนำให้ใช้ tipme เน้อ ผ่าน promptpay ได้เต็มไม่หักจ้า
ติดตามข่าวสารแบบไว ๆ มาที่ Twitter เลย บางอย่างไม่มีในบล็อก และหน้าเพจนะ
สวัสดีจ้า ฝากเนื้อฝากตัวกับชาวทวิตเตอร์ด้วยน้าา
— Minseo | Stocker DAO (@mikkipastel) August 24, 2020